Chuango Security Technology DBL Smart Video Doorbell User Manual
Chuango Security Technology Corporation Smart Video Doorbell
UserManual.wiki
>
Chuango Security Technology
>
DBL User Manual
User Manual
Navigation menu
Upload a User Manual
Namespaces
Wiki Guide
HTML
PDF
Info
Views
User Manual
Discussion / Help
Navigation

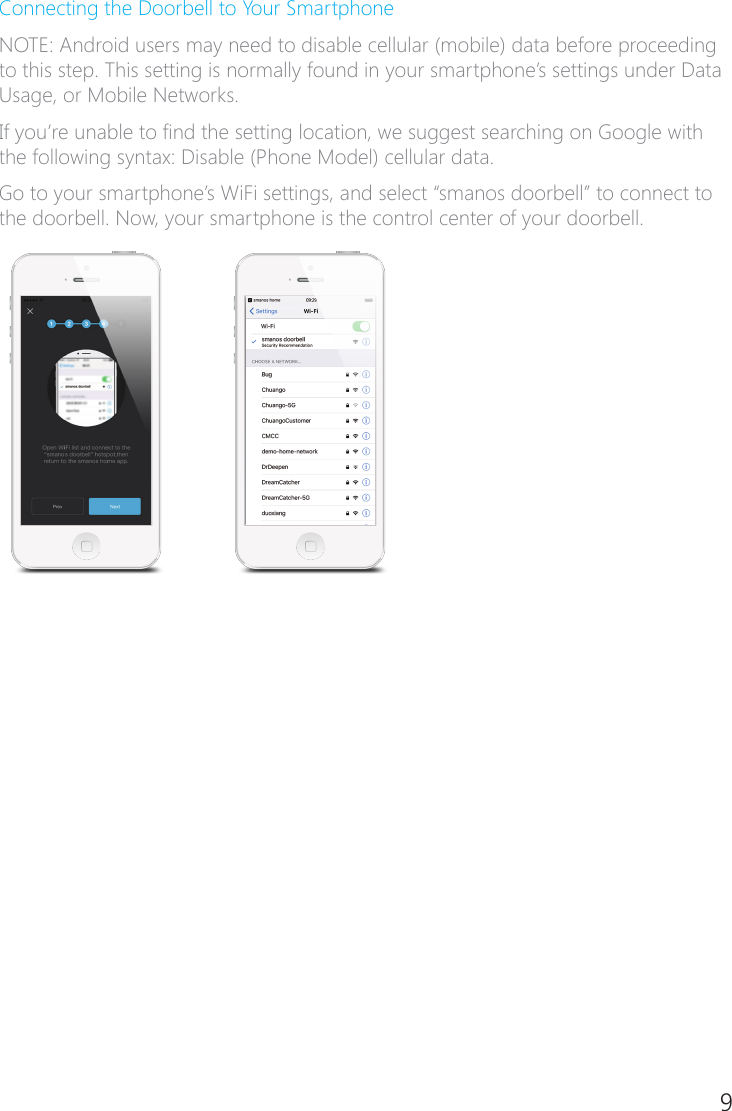
![6 7Signing Up/InIf you have not registered an account with us, please press “Sign up” just below the “Sign in” icon on the App, and follow the instructions to create your account rst.* If you do not receive an account verication code in your email inbox during the registration process, please remember to check your spam/junk folder and make sure the notice has not been blocked by your service provider.Once you have an account with us, please select the “Sign in” icon and enter your email address and password to log in.Once you have an account with us, please select the “Sign In” icon and enter your email address and password to log in.InstallationThe voltage of the doorbell is 8�24 VAC. To see how to connect the power, please scan the QR code below to watch the video.Adding DevicePress the [+] button on the Device List page. Tap on [Smart Video Doorbell], and then follow the conguration steps to set up your doorbell with your home WiFi.](https://usermanual.wiki/Chuango-Security-Technology/DBL/User-Guide-3838262-Page-10.png)

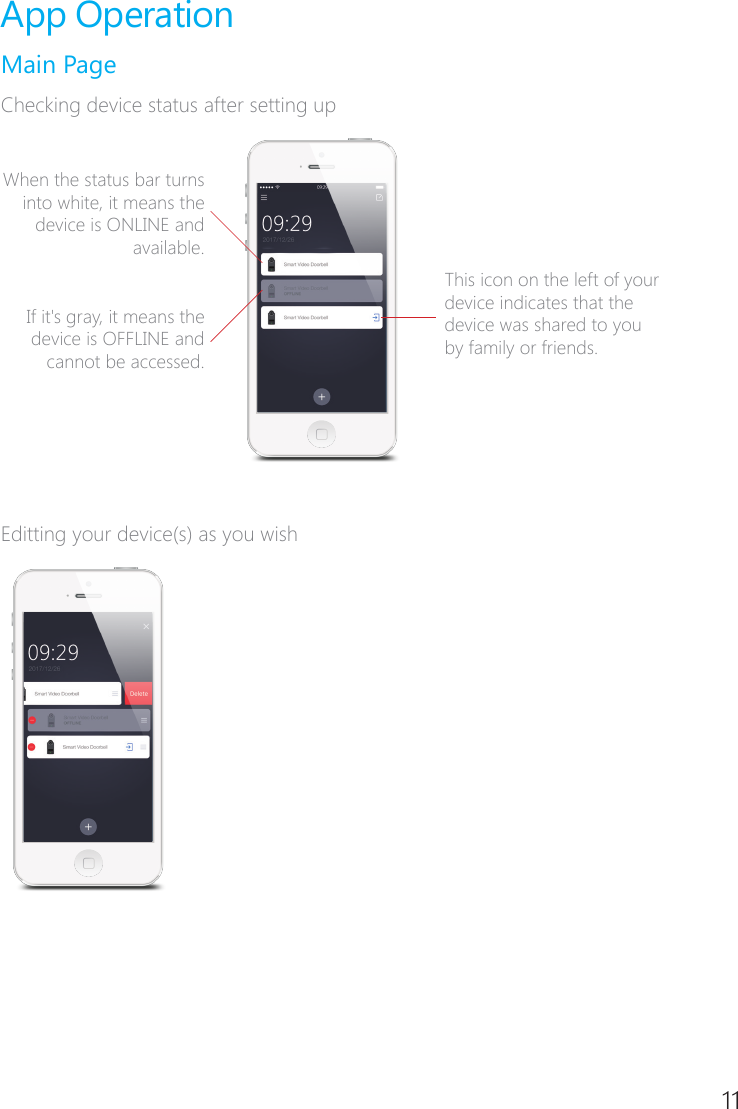
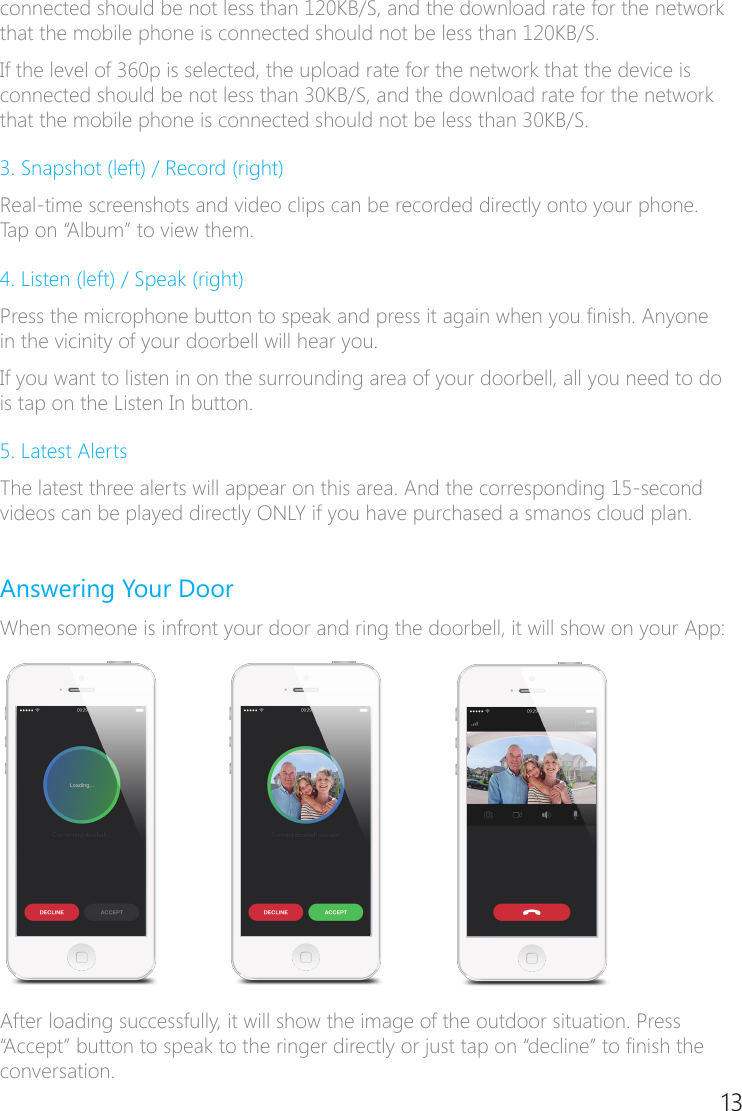
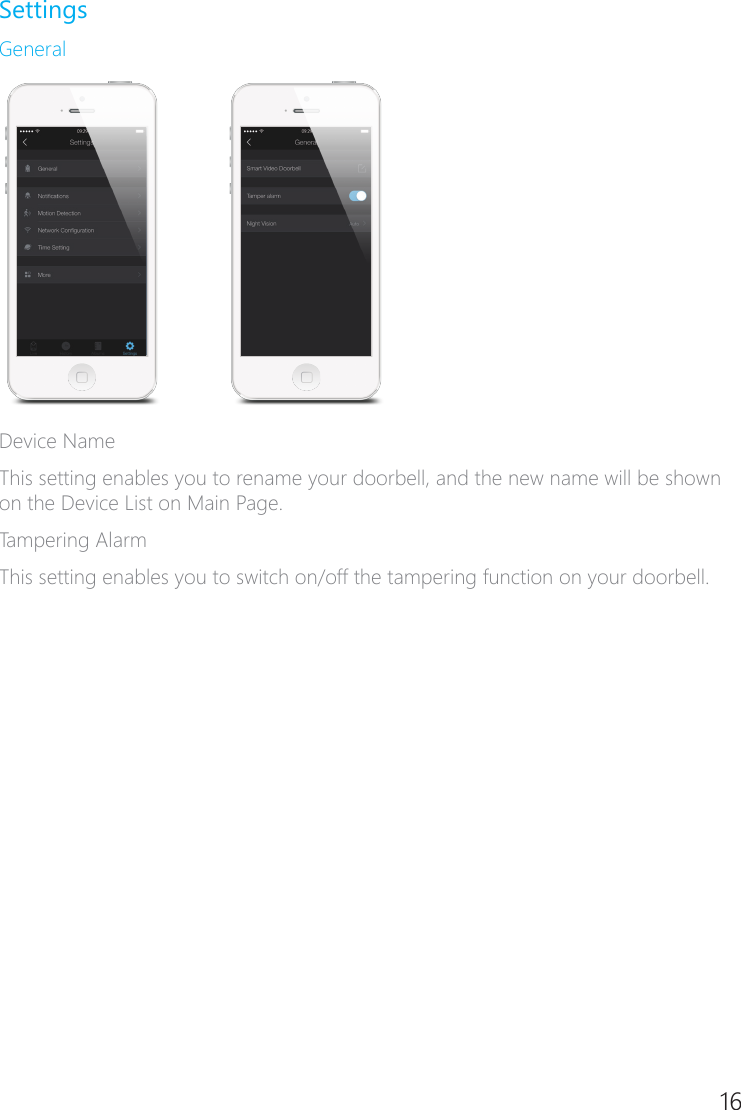
![12Deleting DeviceTap on the Edit Button [ ], and press the Delete Button [ ]. SortingTap on the Edit Button [ ], press and hold the Sort Button [ ], drag it up or down to the position where you want it to be located.Live VideoPlease tap on the “Smart Video Doorbell” icon from the main page and enter the live video page.1. Signal StrengthIndicate the signal strength between the WiFi network and the connected devices.Note: Another critical factor affecting video quality is the upload speed of your selected home WiFi network.2. Video QualityTap on the video quality icon at the top right of the Live Page, there are 3 different levels of video quality you can choose: 1080p, 720p, 360p; please choose video quality according to your need and network situation.If the level of 1080p is selected, the upload rate for the network that the device is connected should be not less than 200KB/S, and the download rate for the network that the mobile phone is connected should not be less than 200KB/S.If the level of 720p is selected, the upload rate for the network that the device is](https://usermanual.wiki/Chuango-Security-Technology/DBL/User-Guide-3838262-Page-15.png)
![14HistoryIf you already have had our smanos cloud service, motion�triggered alerts, accepted or missed ring logs can be reviewed from this History page directly and the corresponding 15�second videos can be played.Tap on [ ] to pick a specic day and search for an alert.Tap on the edit icon [ ] and then press the shown [ ] to delete the selected 15�second videoes.Tap on the edit icon [ ], and then press the shown [ ] to share the selected 15�second videoes.](https://usermanual.wiki/Chuango-Security-Technology/DBL/User-Guide-3838262-Page-17.png)
![14 15AlbumYou can nd all your manually saved video clips and snapshots on this page. Any video or snapshot found here is stored on your phone and can be edited and shared as you wish.Deleting Video(s) or Snapshot(s)Tap on edit icon [ ] and then press the shown [ ] to delete video clip(s) or snapshot(s).Sharing Video(s) or Snapshot(s)Tap on edit icon [ ], and then press the shown [ ] to share the video clips or snapshots of interest.](https://usermanual.wiki/Chuango-Security-Technology/DBL/User-Guide-3838262-Page-18.png)
![20Time SettingSynchronize TimeThis setting enables you to choose the time zone for your doorbell, to make sure the time stamp on the recorded video is correct.When motion is detected, you will receive a push notication: (for example) Activity detected by [Smart Video Doorbell name] at 08:20:00 GMT+2 Or Activity detected by [Smart Video Doorbell name] at 07:20:00 GMT+1 DST during Daylight Saving Time. Date FormatThis setting enables you to change the format of the date shown on your app.](https://usermanual.wiki/Chuango-Security-Technology/DBL/User-Guide-3838262-Page-23.png)
![22Account ManagementEditting AccountTap on [ ] on the main page to enter the account management.Tap on the picture, and you can add or replace your account image by taking a picture or choosing a picture from your phone’s album.If you want to change your account name, just tap on the [ ] button and enter a new name.Changing your password can also be done on this page.](https://usermanual.wiki/Chuango-Security-Technology/DBL/User-Guide-3838262-Page-25.png)
![22 23My SharesSharing device(s) with family or friendsBy choosing “My shares” on the menu and pressing the [+] Add Button, you can share access to your device(s) with other registered accounts.Enter the email address and nickname of the account you want to share with, and then select the device(s) after setting access limit.](https://usermanual.wiki/Chuango-Security-Technology/DBL/User-Guide-3838262-Page-26.png)