Chunghsin Technology Group 3216 32inch HD DLED TV User Manual
Chunghsin Technology Group CO.,LTD 32inch HD DLED TV
User Manual

WD32HBB101
USB
32
33
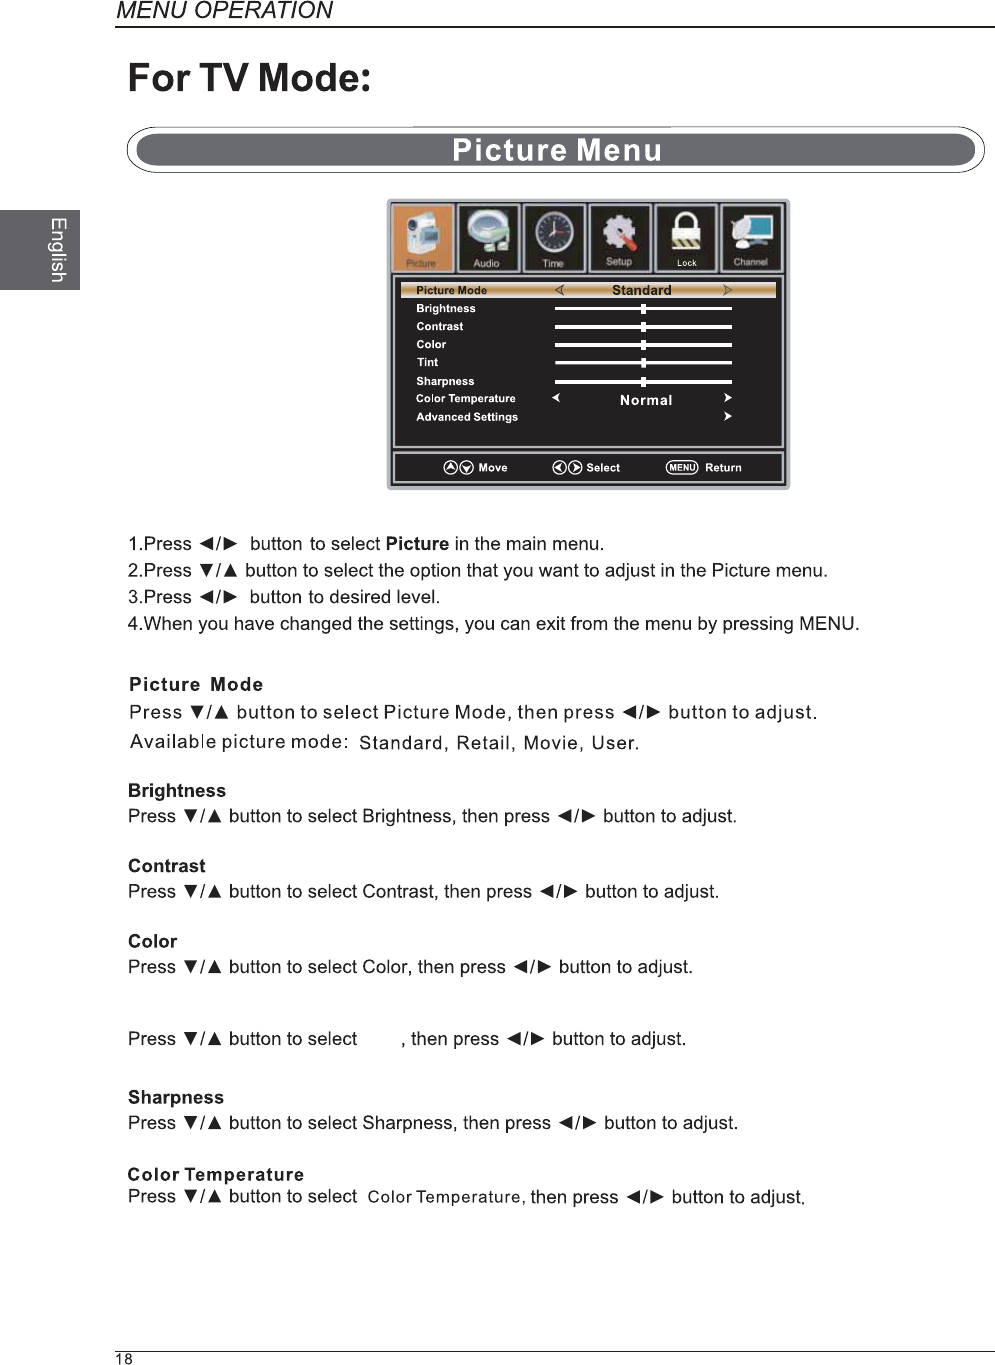
Menu
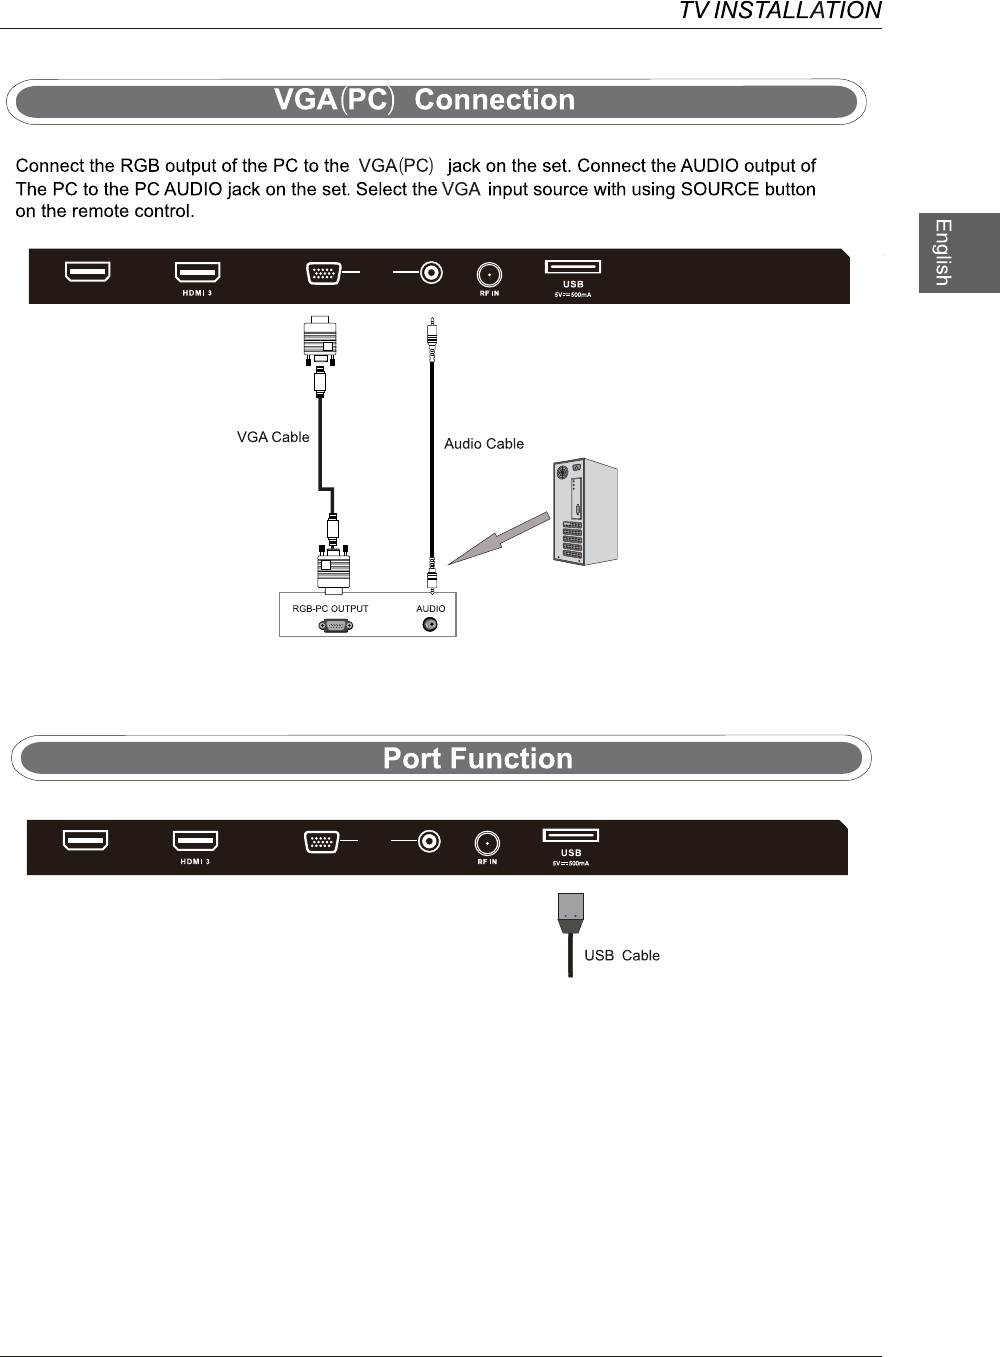
VGA PC Connection
USB Port Function
1
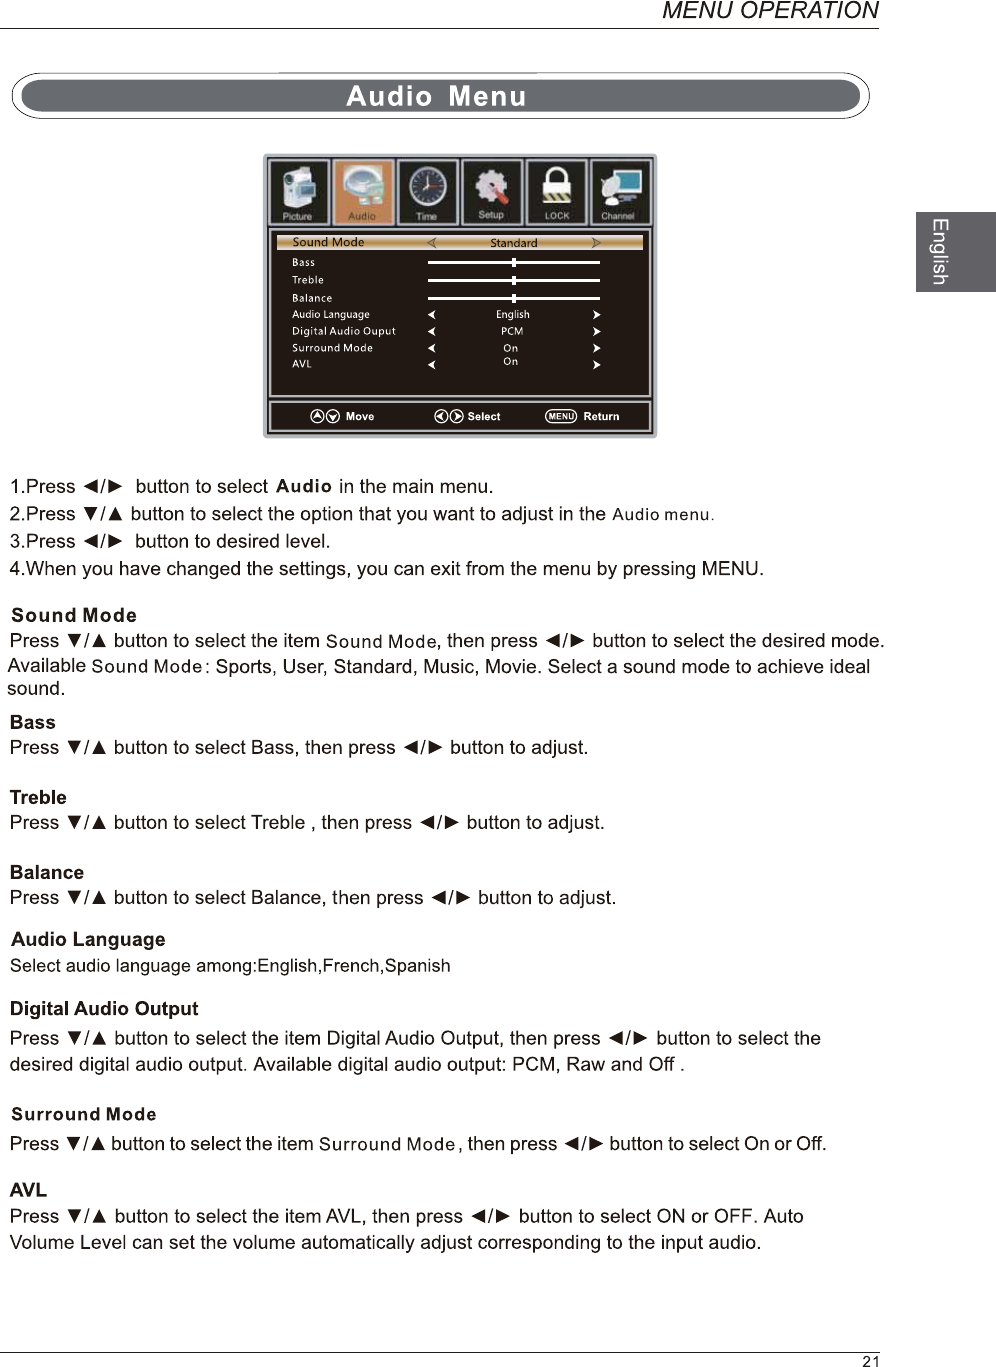
Audio
40 W
3
49
B4x18F
B4x18F
Wall-Mounting Screws
Mount the VESA bracket using 4*M6*10 isometric threaded screws (not included).
WARNING:
with the installation instruction.
WARNING:
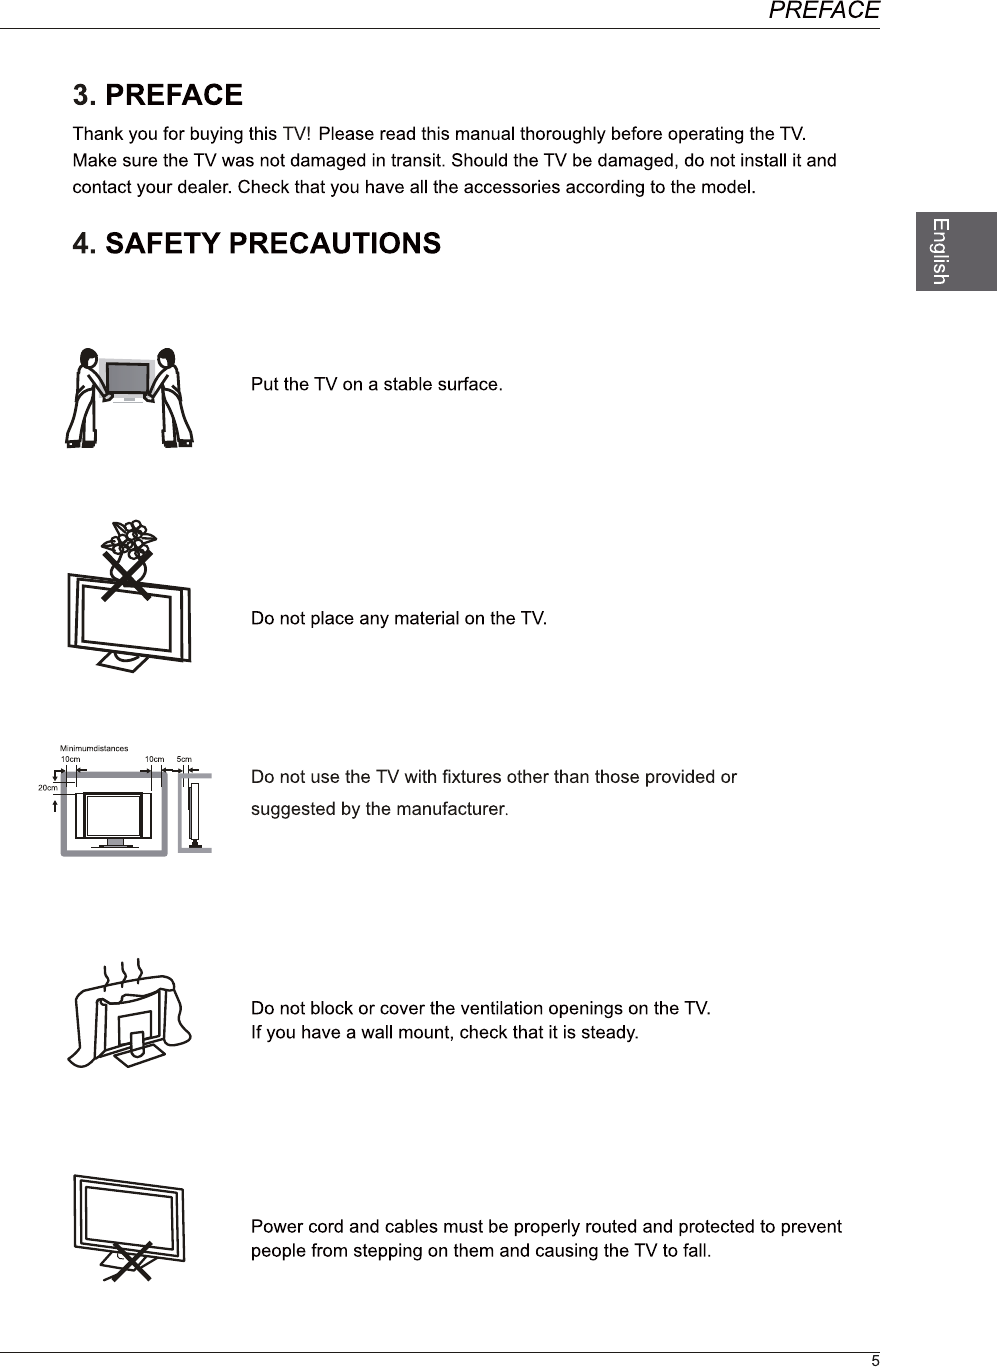
Never place a television set in an unstable location. A television set may fall, causing serious personal injury
or death. Many injuries, particularly to children, can be acoided by taking simple precautions such as:
-Using cabinets or stands recommended by the manufacturer of the television set.
-Only using furniture that can safely support the television set.
-Ensuring the television set is not overhanging the edge of the supporting furniture.
-Not placing the television set on tall furniture(for example, cupboards or bookcases) without anchoring
both the furniture and the television set to a suitable support.
-Not placing the television set on cloth or other materials that may be located between the television
set and supporting furniture.
-Educating children about the dangers of climbing on furniture to reach the television set or its controls.
If your existing television set is being retained and relocated, the same considerations as above should be
applied.
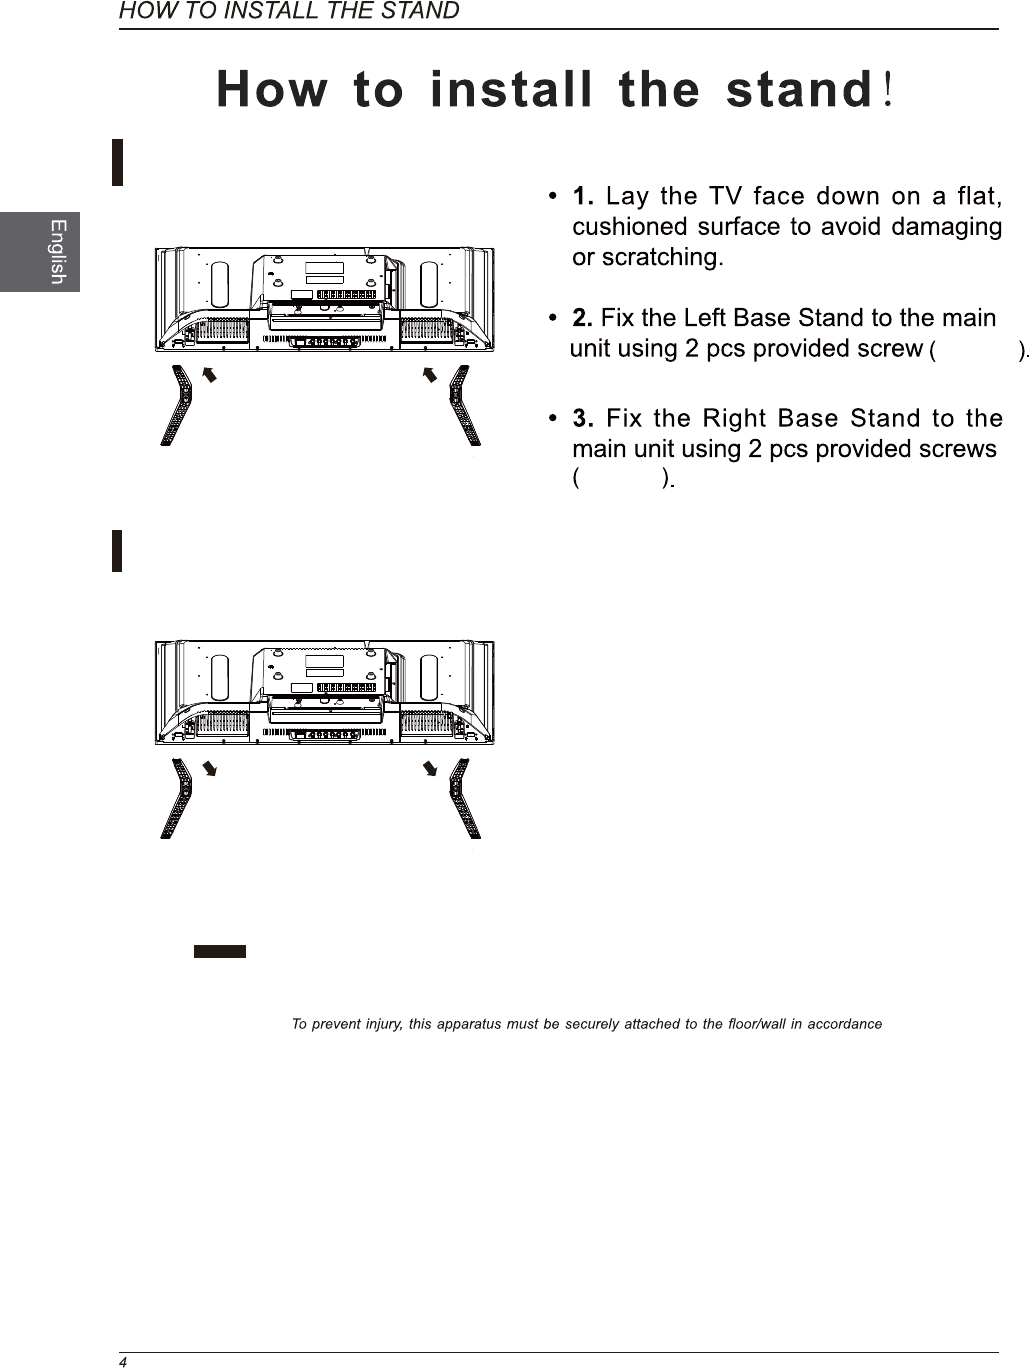
1.Lay the TV face down on a flat,
cushioned surface to avoid damaging
or scratching.
2. gnidloh swercs scp 4 eht nethgitnU
the stand assembly and remove them.
3.Attach the wall-mount bracket to
the TV using the mounting holes on
the back of the TV. Mount this TV
according to the instructions included
in the wall-mount bracket.
Installing the Stand
Removing the Stand for Wall-Mounting
7
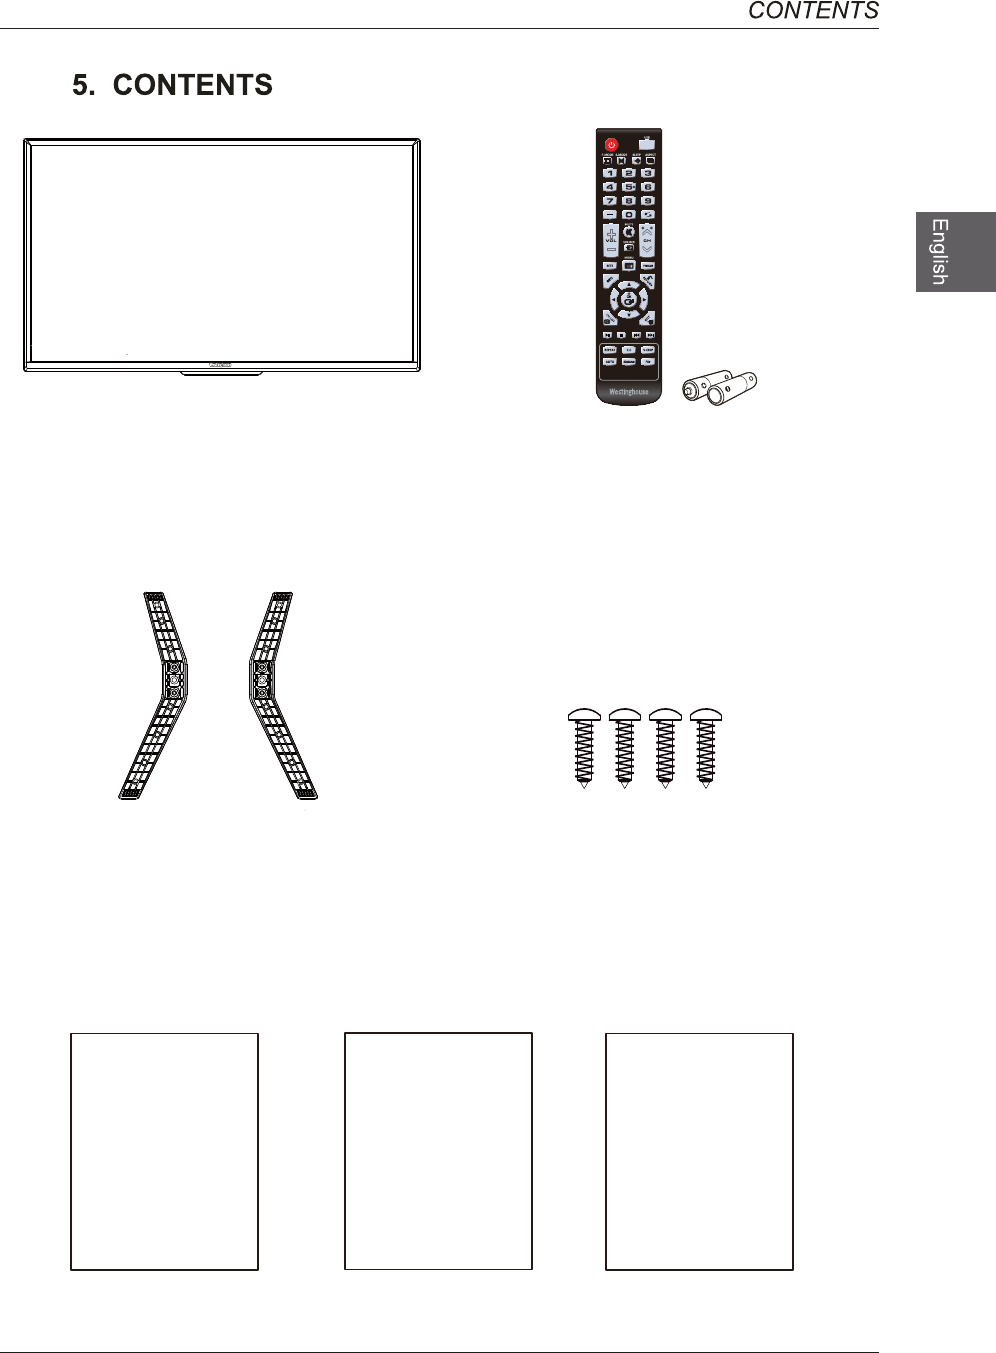
Quick Connect Guide
Quick
Connect
Guide
User Manual
User Manual
Remote Control with Batteries
Warranty Card
Warranty
Card
TV Set
TV Stand Four Screws(B4x18F).

and Audio
and Audio
Headphone: Connect a stereo headphone for private listening.
HDMI3 HDMI2 USB
5V 500mA
8
Optical Output: Connect a digital sound system to this jack.
POWER
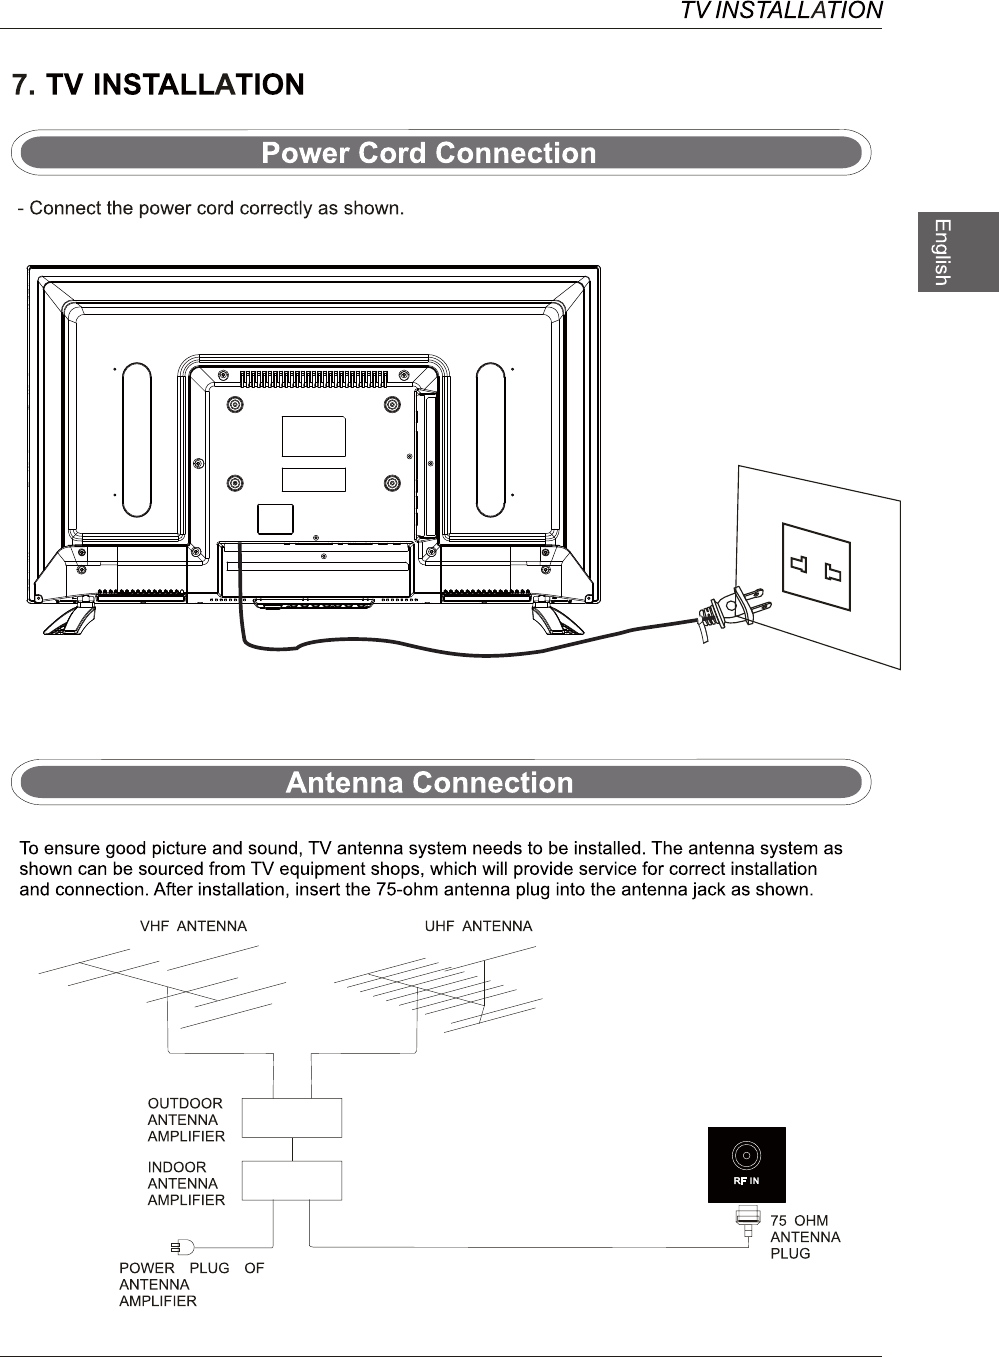
HDMI 1 HDMI 2 VGA PC AUDIO
PC IN
1. VOL -/+
Press to adjust the volume.
2. CH -/+
Press to select a channel.
3. MENU / SOURCE
Display the OSD (on screen display) menu.
Press to select among different input signal sources.
4. POWER
Switch the TV between On / Standby mode.
5. IR (Infrared Receiver)
Receive IR signals from the remote control.
POWER Indicator
Illuminate blue when the TV is turned on.
Illuminate red when the TV is in standby mode.
9
10
HDMI 1
HDMI 1
USB
11
HDMI 2 VGA PC AUDIO
PC IN
HDMI 2 VGA PC AUDIO
PC IN
12
HDMI 1 HDMI 2 VGA PC AUDIO
PC IN
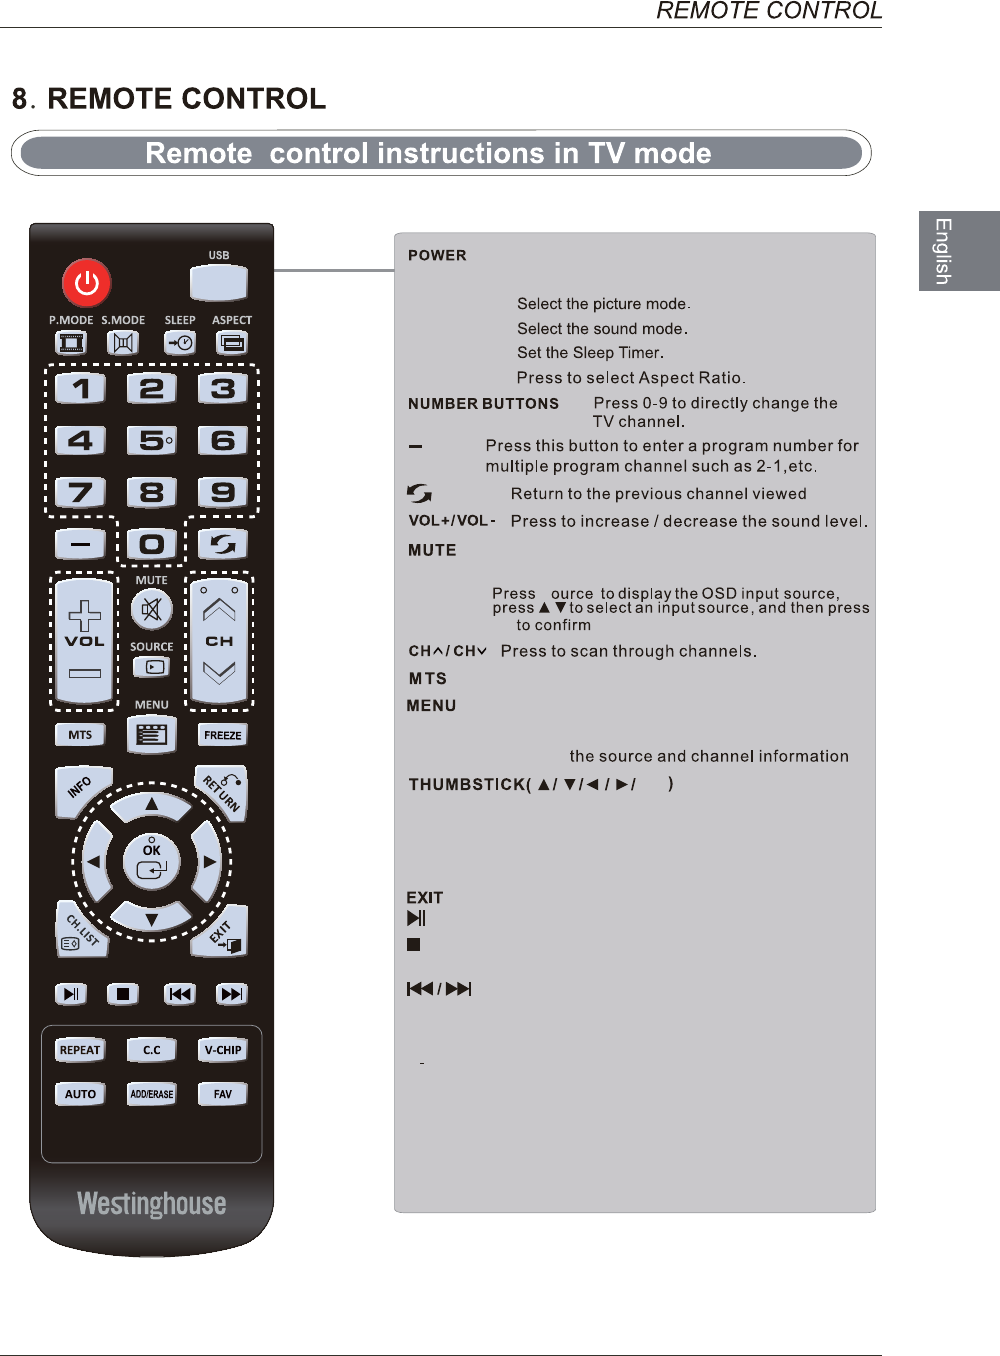
Turn the LED TV on or off.
Press once to disable the audio and press again to
enable the audio.
P.MODE
S.MODE
SLEEP
Press to adjust between available audio channel.
SOURCE
OK
S
INFO .syalpsiD
RETURN Return to previous menu.
Press to set the closed caption.
VCHIP Switch to V-CHIP input.
CH
C.C
.LIST Press to display TV program list.
ASPECT
Displays the main TV menu.
Exit the main TV menu.
FAV Press to display the favourite program list.
Add/Erase channel to favourite program list.
ADD/ERASE
Allows you to navigate the on -screen menus and adjust the
system settings to your preference.
ok
13
USB Access into the USB directly.
FREEZE Freeze the picture.
AUTO Automatically adjust the Horizontal/Vertical
position in PC (VGA) mode.
Press to pause or resume the playback.
Press to stop the playback and clear the existing
memory.
Press to skip between chapters.
REPEAT Press repeatedly to select the repeat mode.
14
'<
OK
?6H6X
HDMI1
HDMI2
HDMI3
VGA
USB
YPbPr/AV
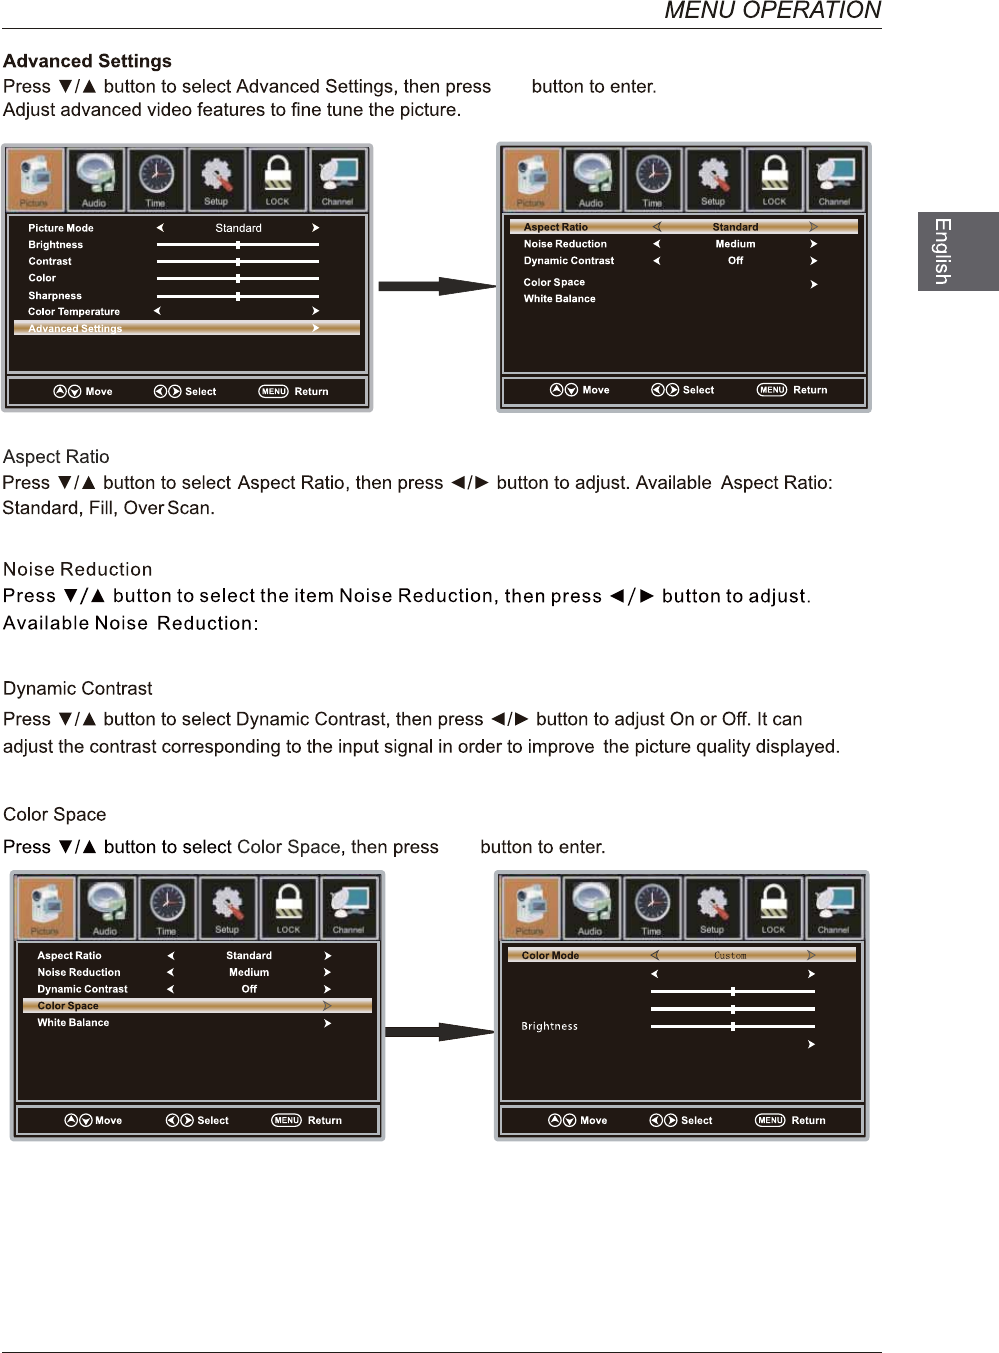
Tint
Tint
ok
Normal
Off,Weak,Medium,Strong.
ok
ok
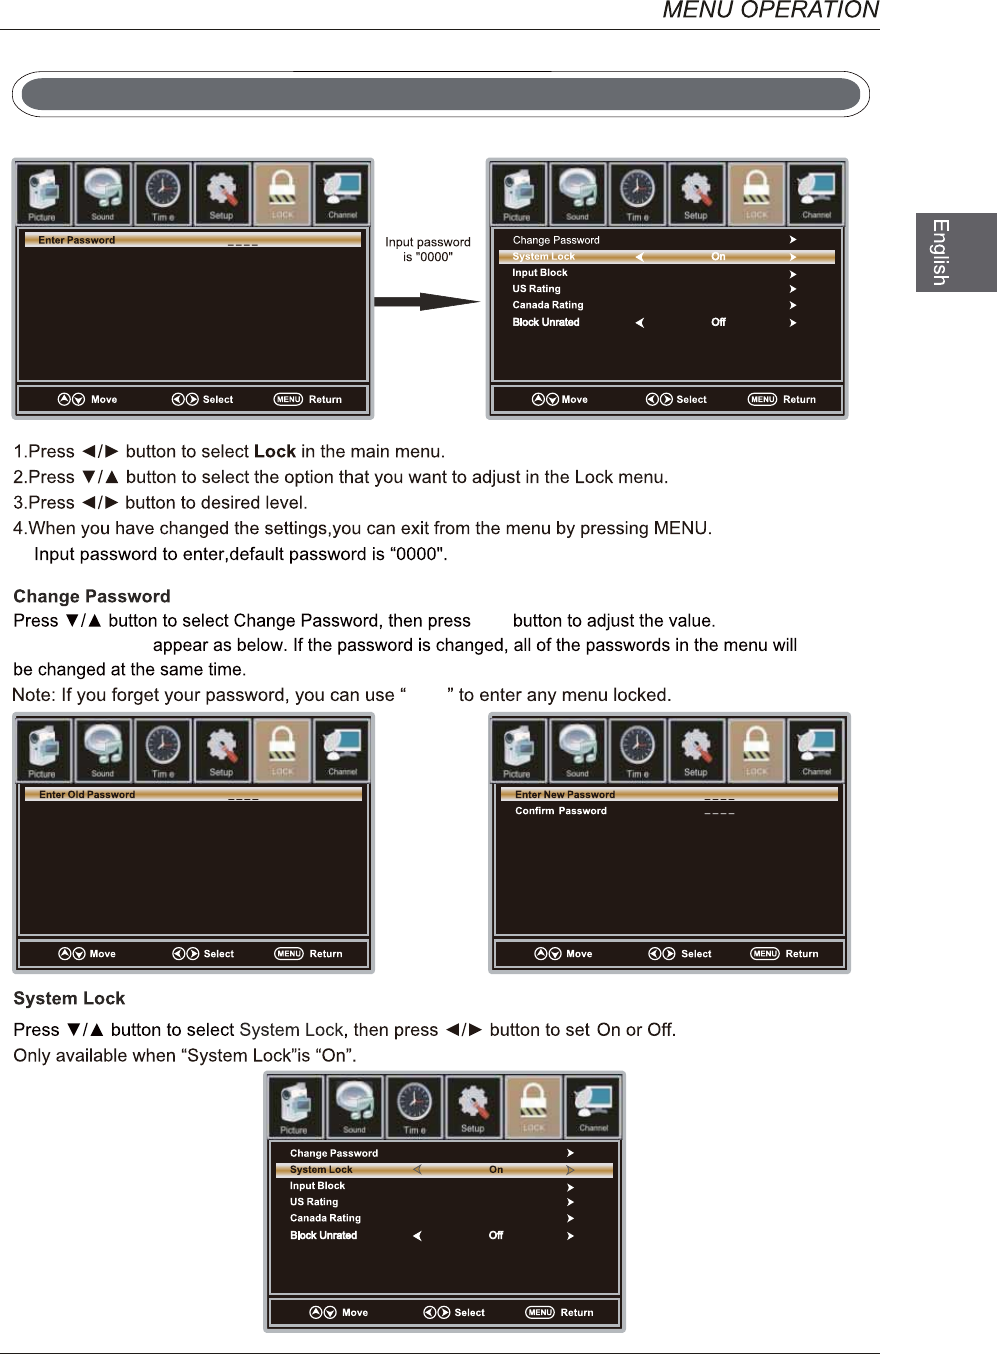
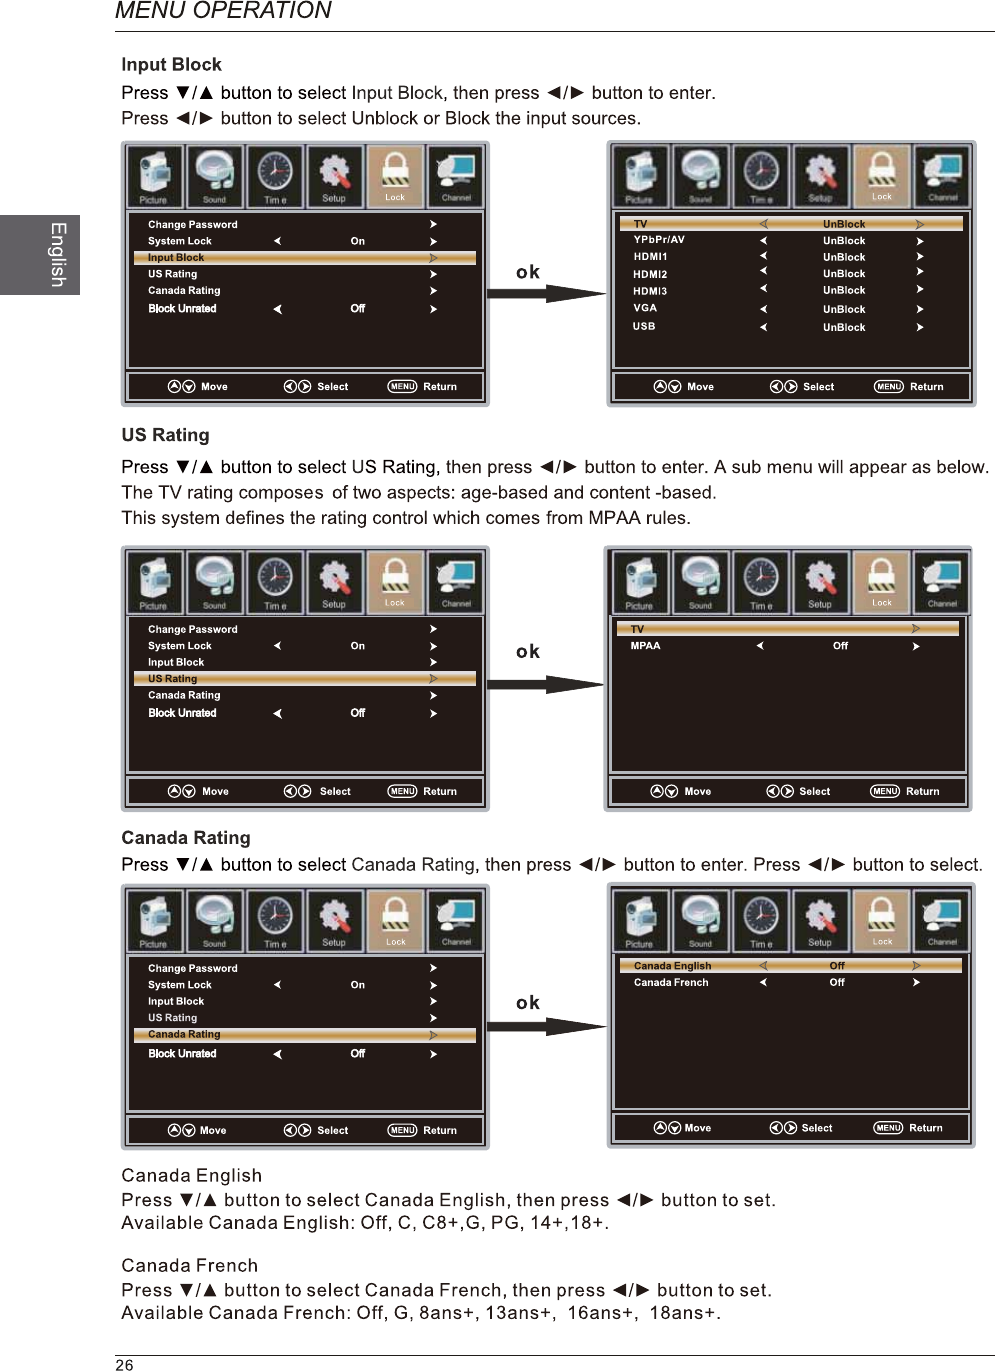
Lock
ok
LockLock
Color
Hue
Saturation
Reset
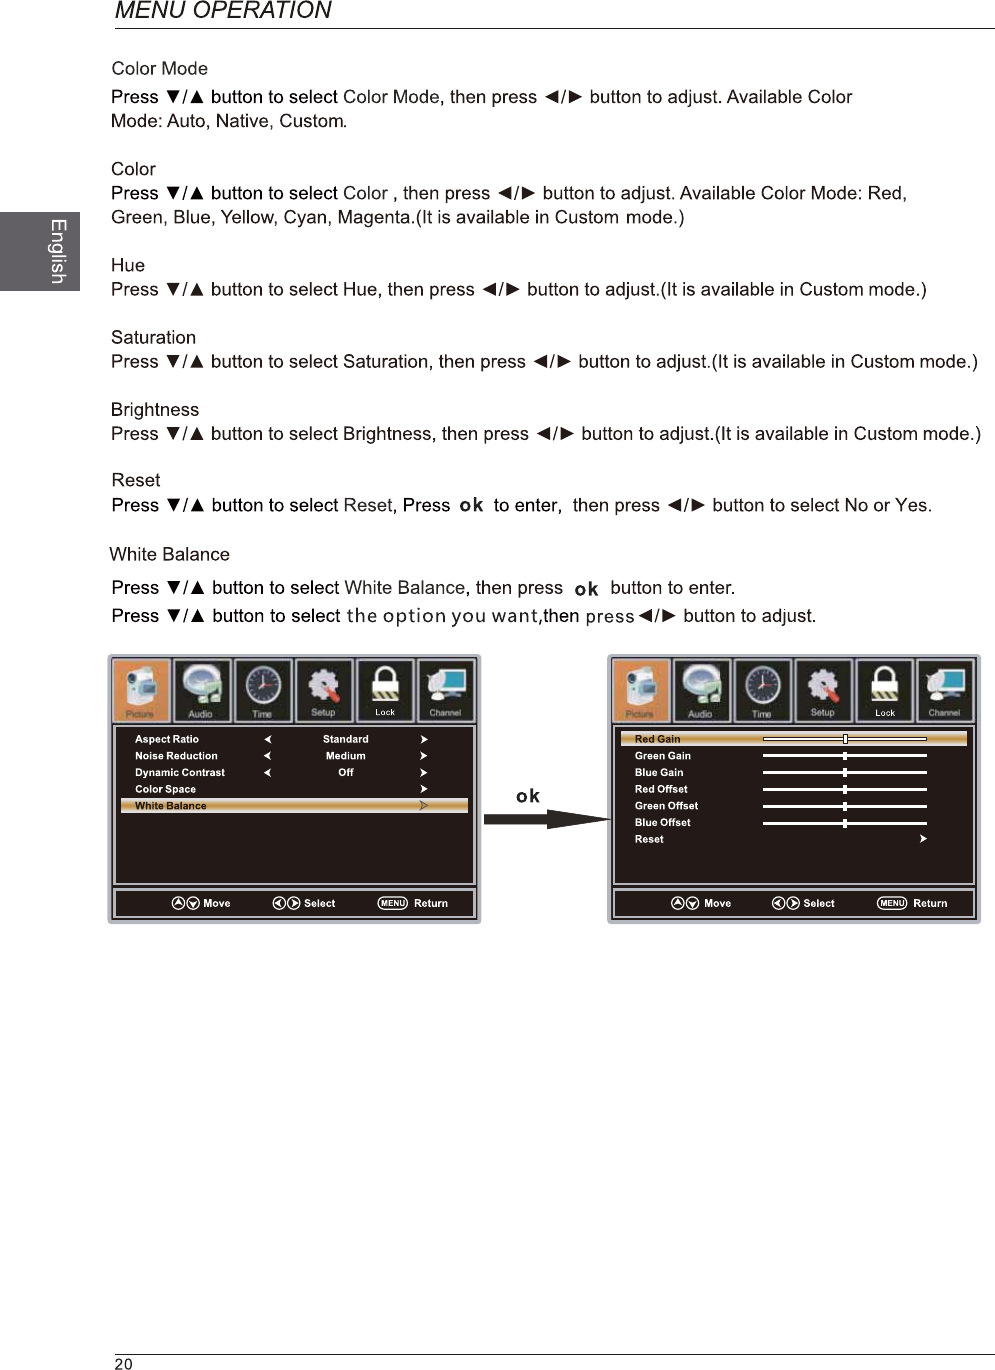
Red
Lock
19
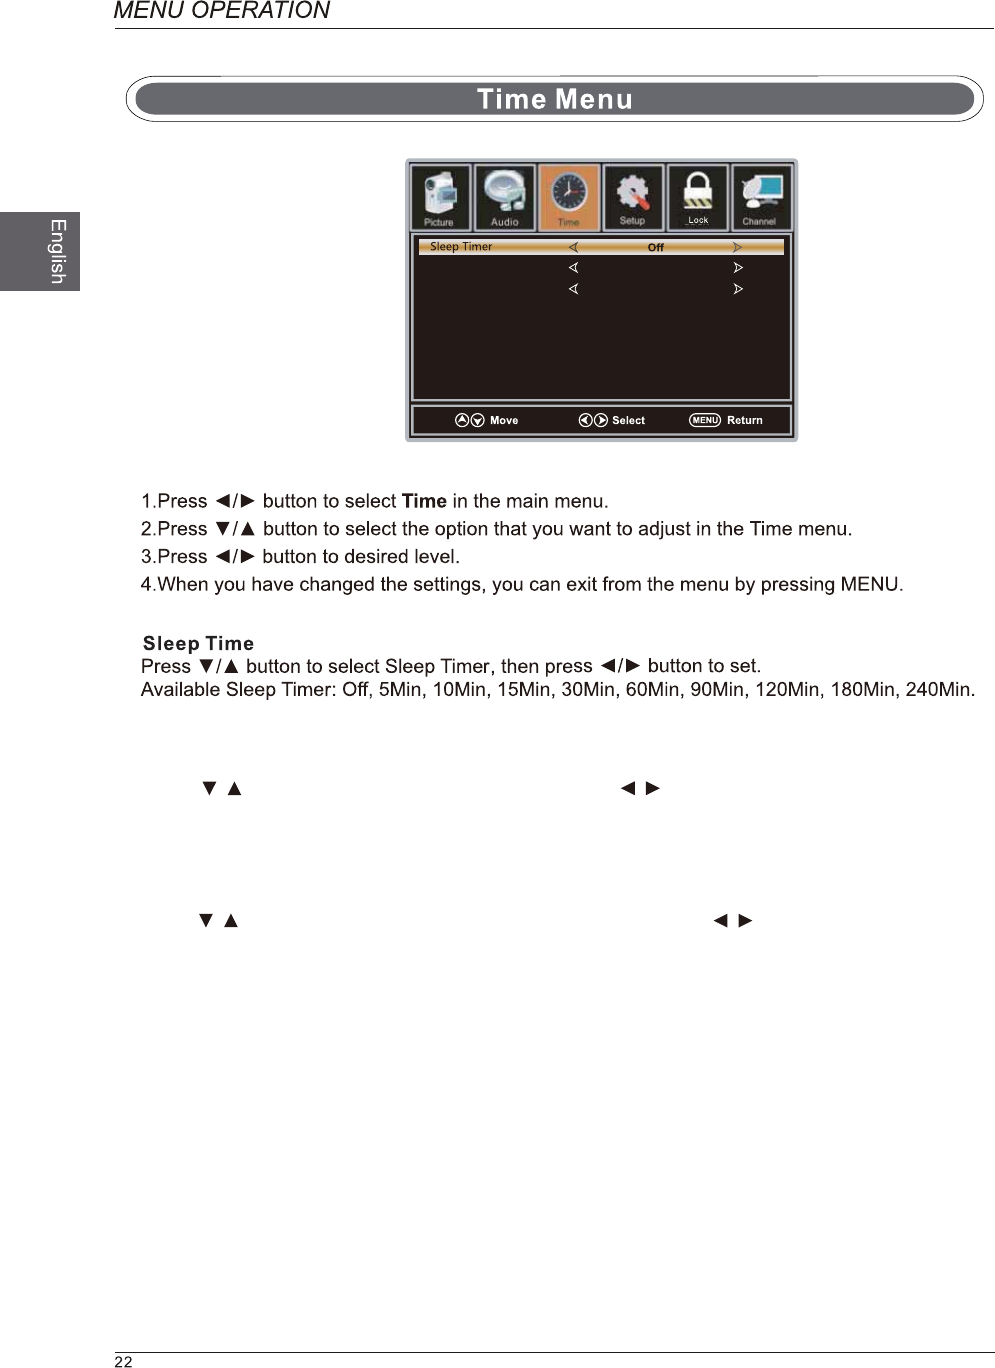
Press / botton to select Time Zone and press the / button to enter time zone
adjustment menu to select the local time zone.
Time Zone Pacific
OffDaylight Saving Time
Time Zone
Daylight Saving Time
Press / botton to select Daylight Saving Time and press the / button
to select On or Off.
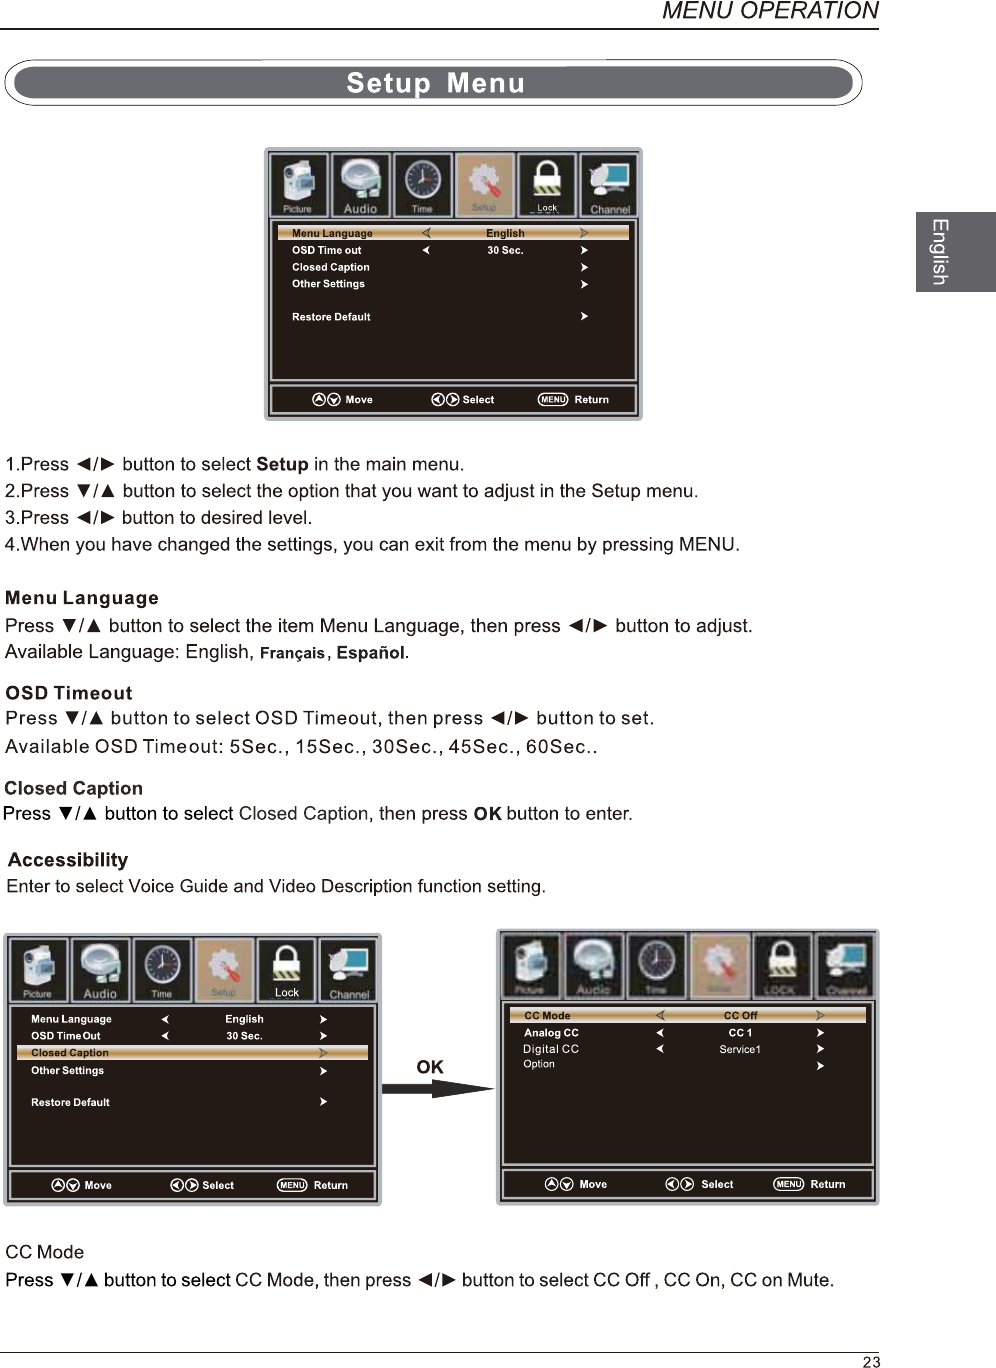
Accesibility
Accesibility
Accesibility
Accesibility
ok
ok
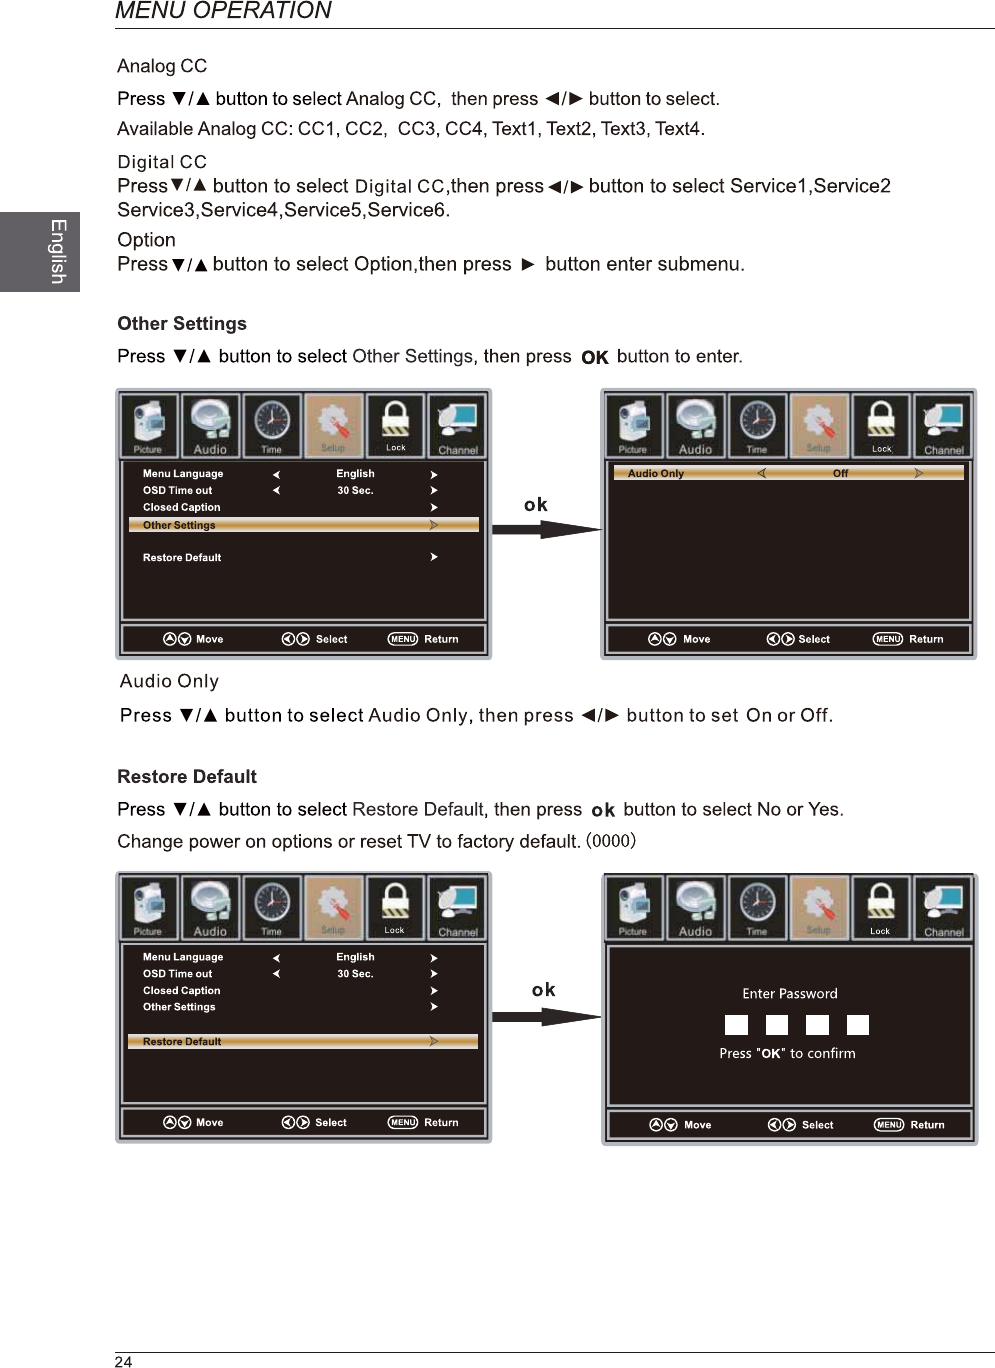
a sub menu will
8899
Lock Lock
Lock Lock
Lock
25
Lock Menu
ok
ok
ok
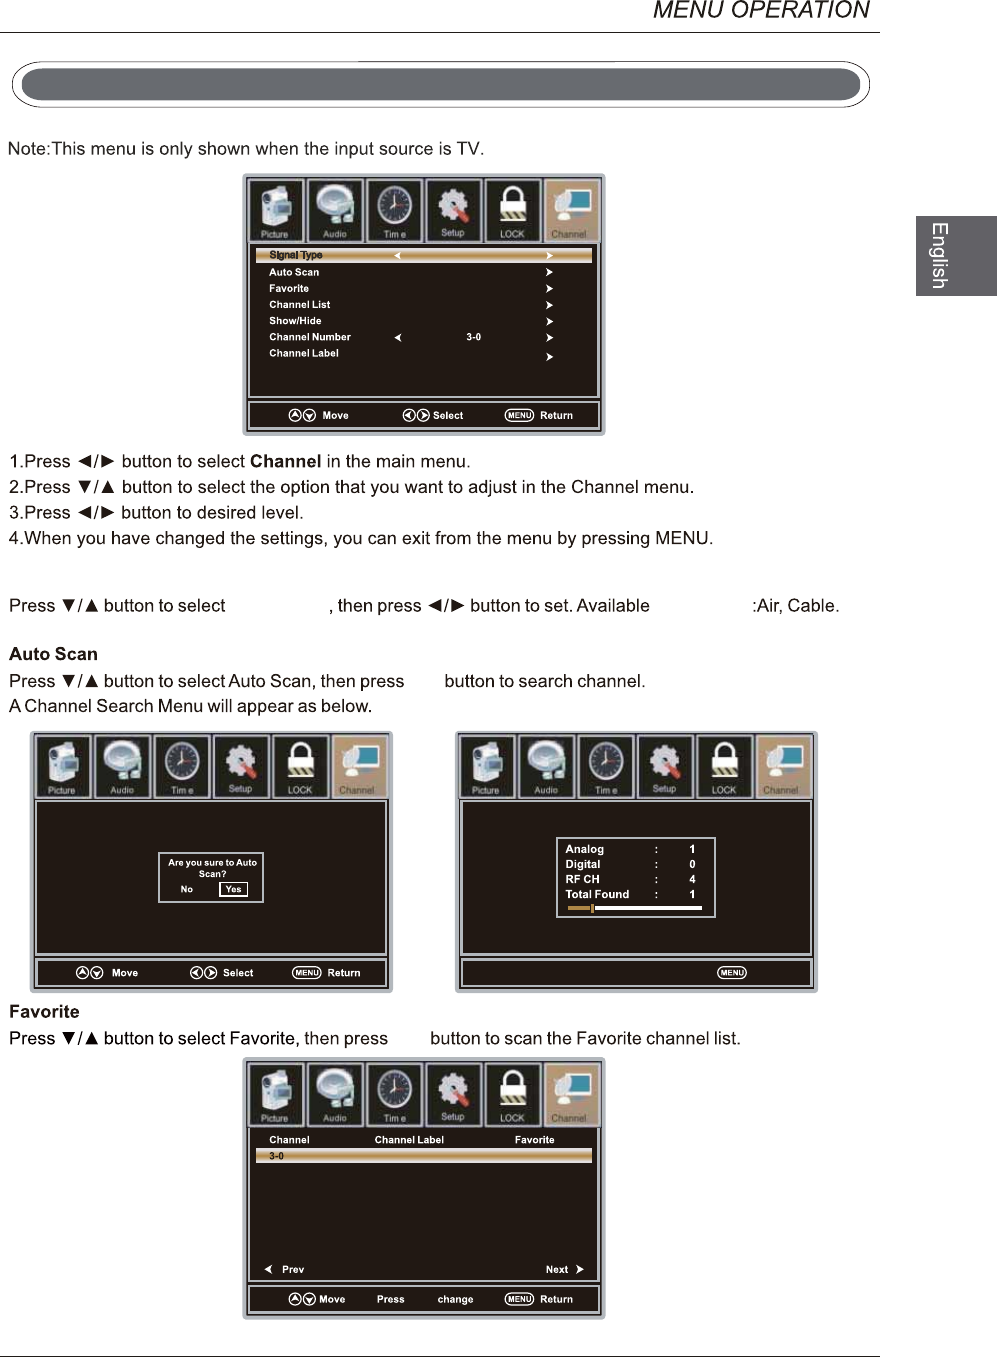
Signal Type
Signal Type Signal Type
Lock
Lock Lock
Lock
27
Channel Menu
Air
Skip DTV
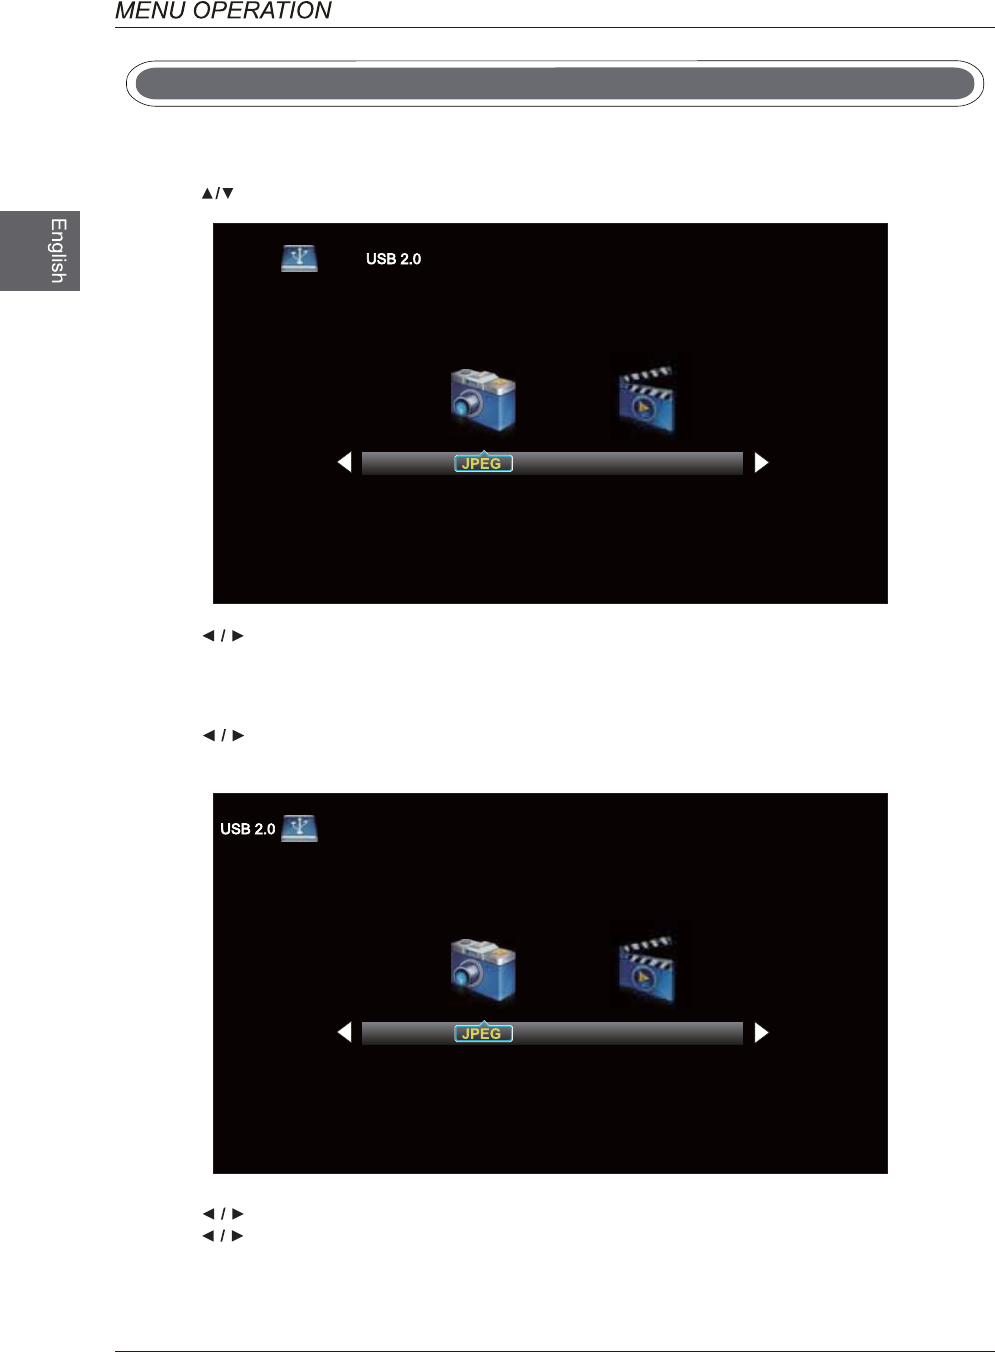
Source to USB.
Press button to select USB in the Source menu,then press OK button to enter.
Press button to select the option you want to adjust in the main Media menu, then press
OK button to enter.
Press button to select JPE i
G or M-JPEG n the main menu,then press OK button to enter.
Press Exit button to return back to the previous menu.
Press button to select drive disk you want to watch, then press OK button to enter.
Press button to select Return option to go back to the previous menu.
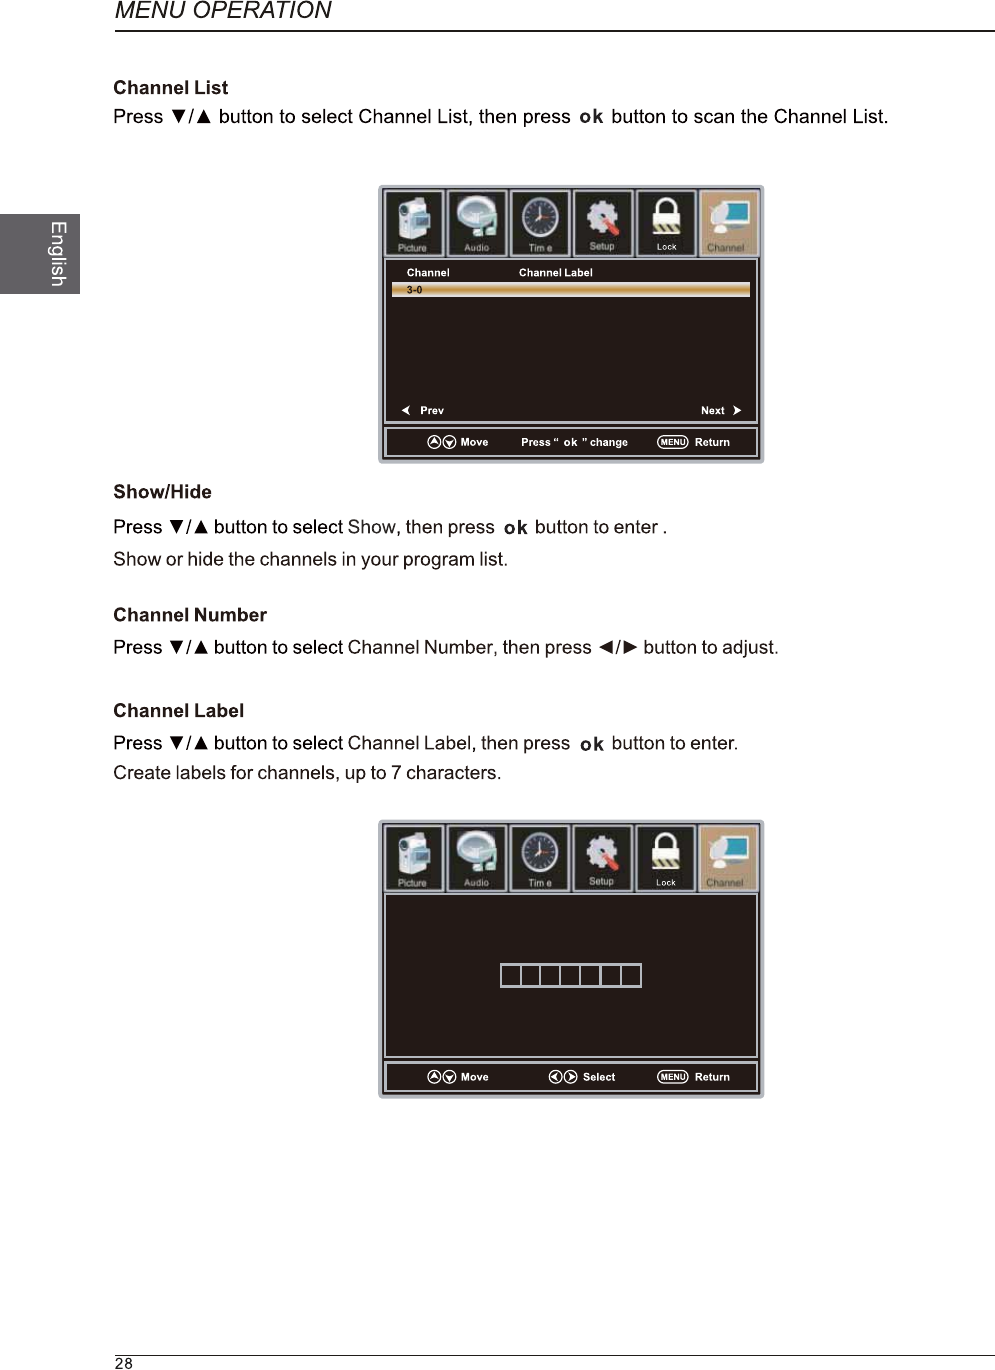
USB Menu
Note:Before operating Media menu,Plug in USB device,then press SOURCE button to set
the Input
30
M-JPEG
M-JPEG
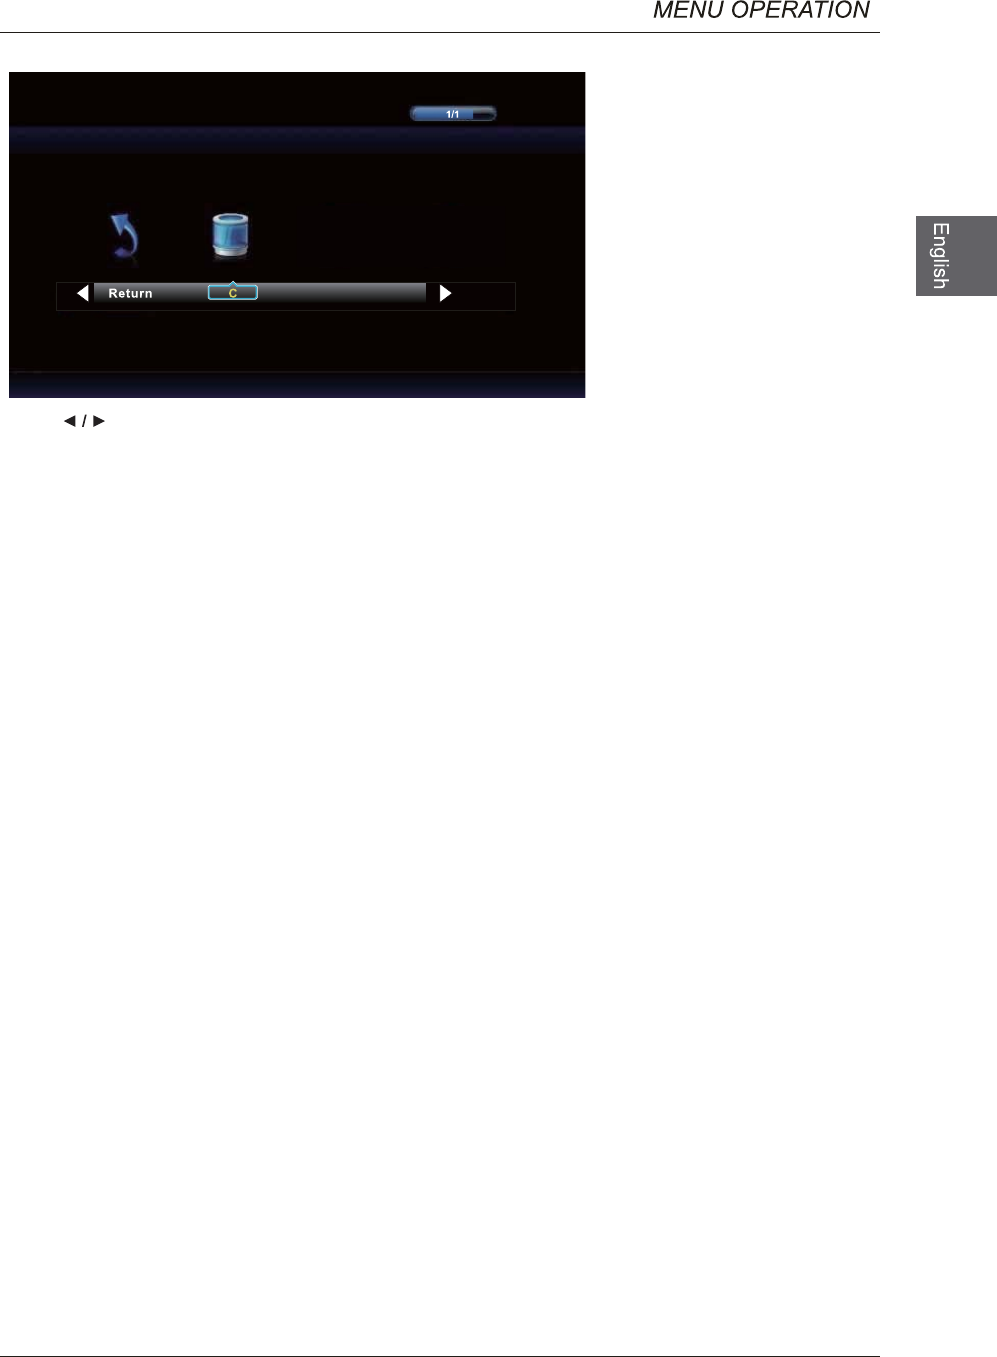
Press button to select the file you want to watch in the file selecting menu, then press OK
button to display picture.
When highlighting the option you select, the file information will appear on the right and picture or video
will be previewed in the center.
31
32
The FCC Wants You to Know
FCC STATEMENT
This device complies with Part 15 of the FCC Rules. Operation is subject to the following two
conditions:
(1)This device may not cause harmful interference, and
(2)This device must accept any interference received, including interference that may cause
undesired operation.
Changes or modifications not expressly approved by the party responsible for compliance
could void the user's authority to operate the equipment.
NOTE: This equipment has been tested and found to comply with the limits for a Class B
digital device, pursuant to Part 15 of the FCC Rules. These limits are designed to provide
reasonable protection against harmful interference in a residential installation.
This equipment generates uses and can radiate radio frequency energy and, if not installed
and used in accordance with the instructions, may cause harmful interference to radio
communications. However, there is no guarantee that interference will not occur in a particular
installation. If this equipment does cause harmful interference to radio or television reception,
which can be determined by turning the equipment off and on, the user is encouraged to try to
correct the interference by one or more of the following measures:
Reorient or relocate the receiving antenna.
Increase the separation between the equipment and receiver.
Connect the equipment into an outlet on a circuit different from that to which the receiver is
connected.
Consult the dealer or an experienced radio/TV technician for help.
FCC Radiation Exposure Statement
This equipment complies with FCC radiation exposure limits set forth for an uncontrolled
environment. This equipment should be installed and operated with minimum distance 20cm
between the radiator & your body.
33
yllanogaid hcni 5.13eziS lenaP
DELDepyT yalpsiD
TFT ygolonhceT lenaP
zH 06zH 021 .sV zH 06 lenaP
P027 no
ituloseR yalpsiD
P0801 ot pUtroppuS IMDH
867 x 6631 noituloseR lenaP
9:61oitaR tcepsA
Dynamic Contrast Ratio-Panel 1200:1
sm8)G oT G( emiT esnopseR
sruoh 000,03)sruoH .pyT( efiL pmaL
Horizontal Viewing Angle (At CR>10) 178
Vertical Viewing Angle (At CR>10) 178
)mm(ASEV 001*002)mm-WxL(tnuom-llaW
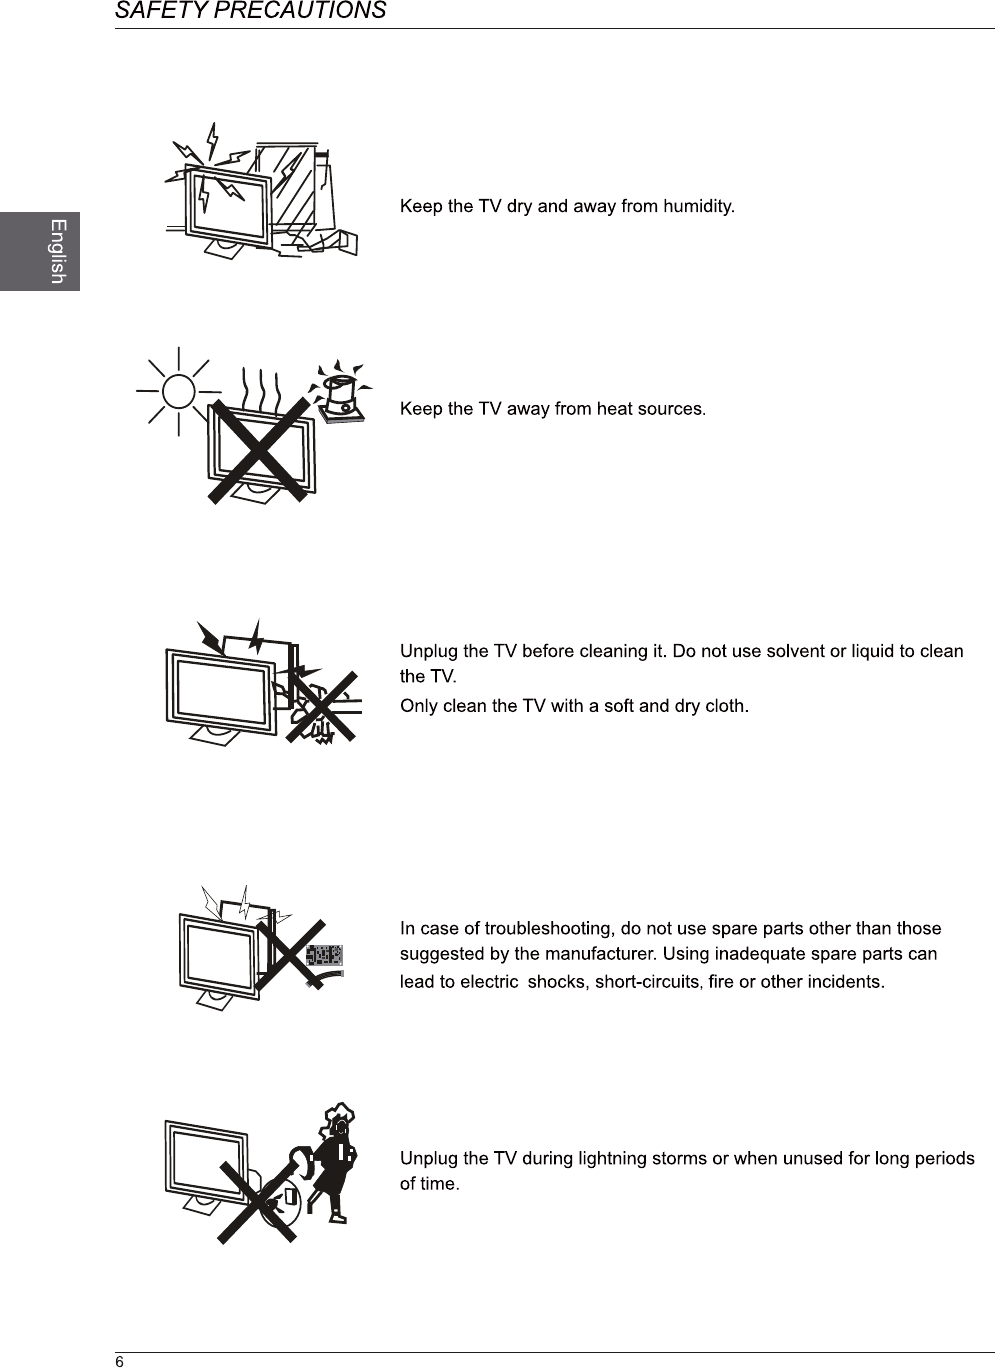
warp or the screen may malfunction. Your TV works best in temperatures that are
comfortable to you.
- the ventilation should not be impeded by covering the ventilation openings with
items, such as newspapers, table-cloths, curtains, etc.;
apparatus;
- attention should be drawn to the environmental aspects of battery disposal.