CipherLab 11662 Barcode Scanner User Manual Scanner Configuration
CipherLab Co., Ltd. Barcode Scanner Scanner Configuration
UserManual.wiki
>
CipherLab
>
11662 User Manual
User manual
Navigation menu
Upload a User Manual
Namespaces
Wiki Guide
HTML
PDF
Info
Views
User Manual
Discussion / Help
Navigation

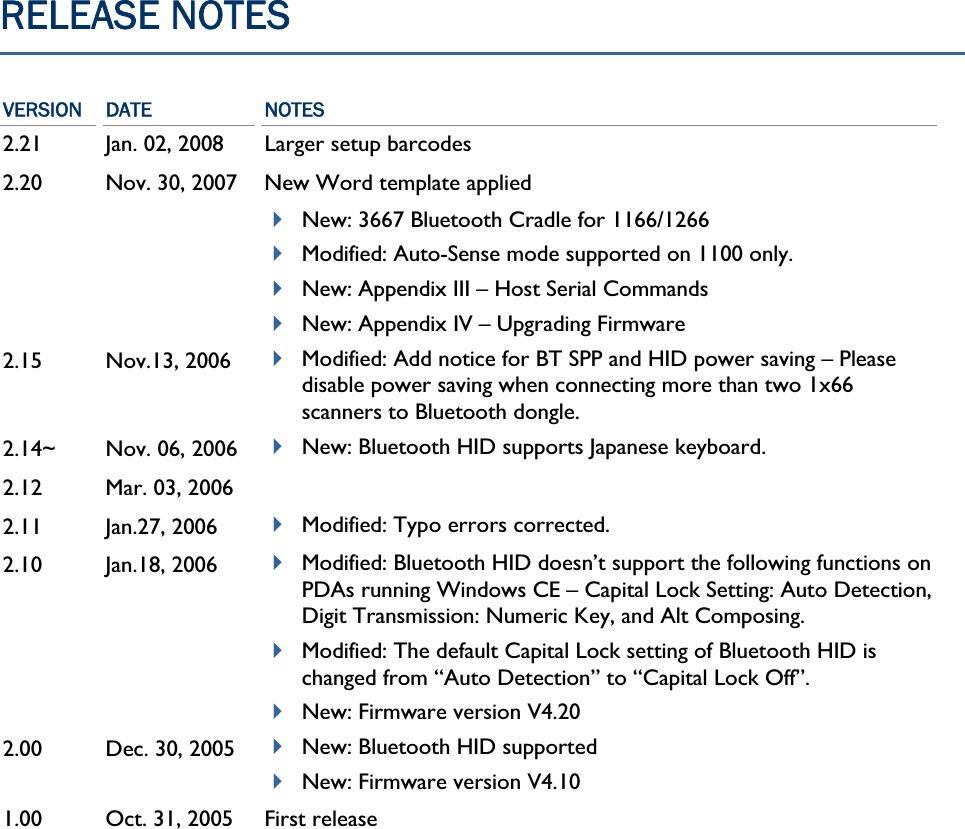
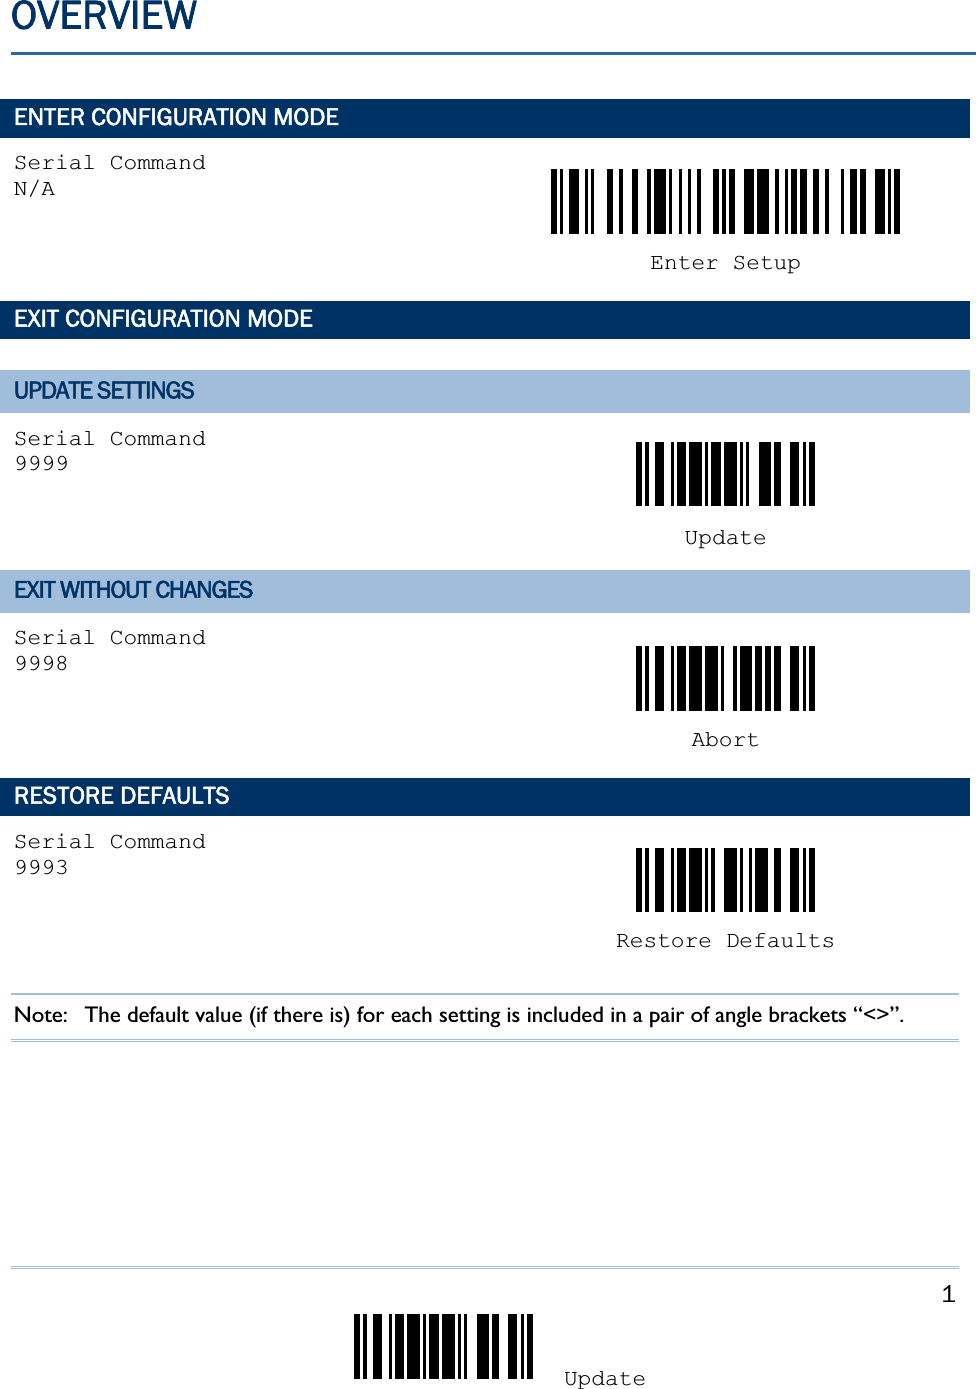

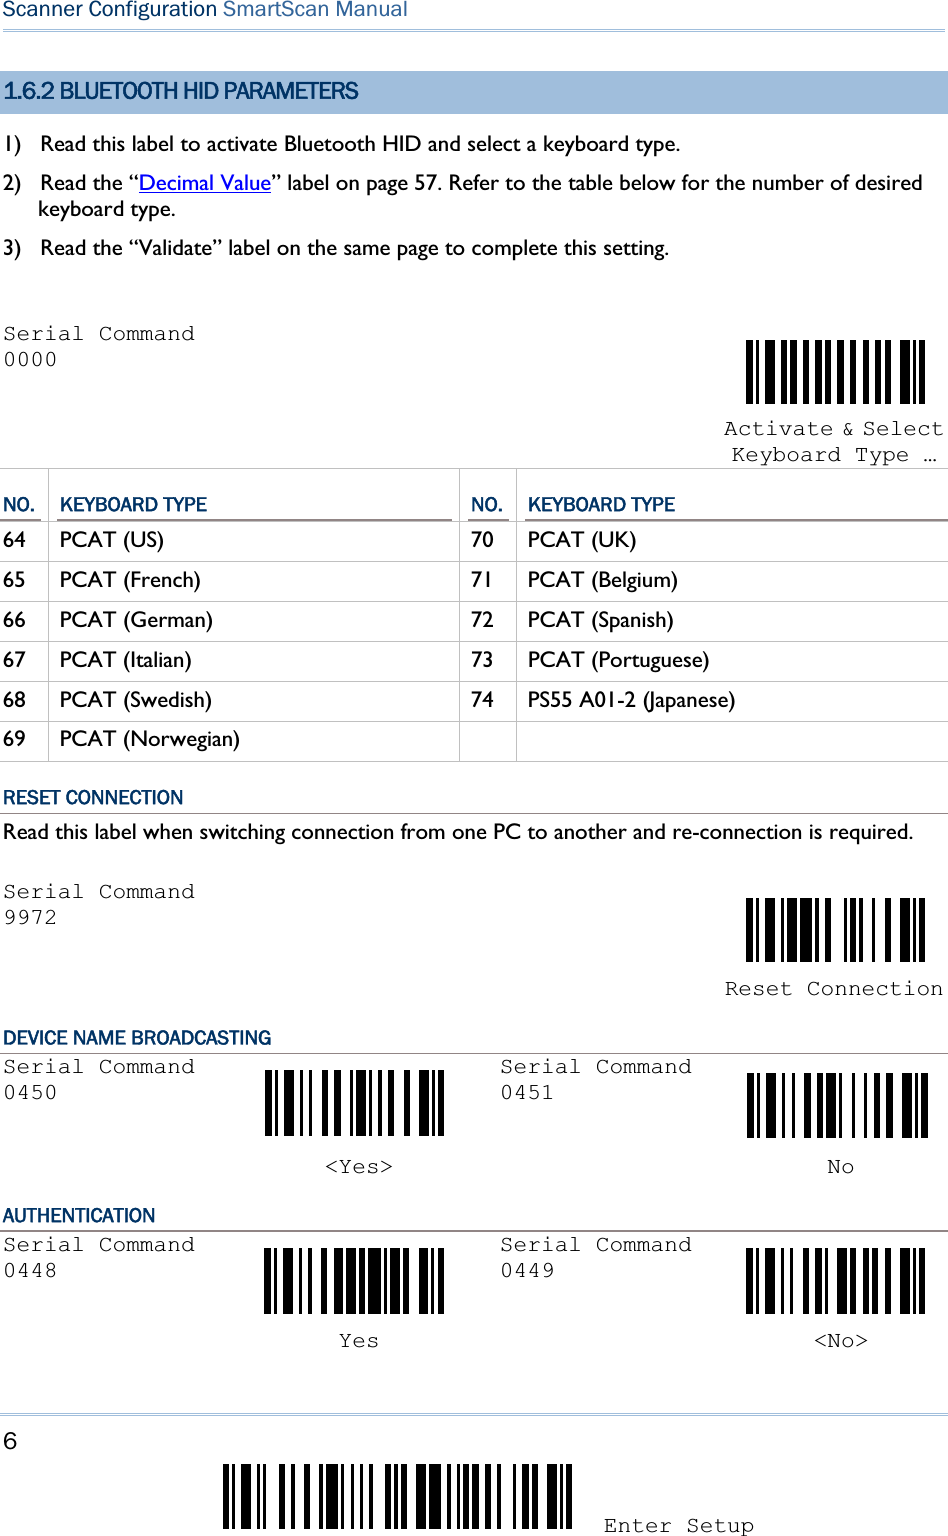
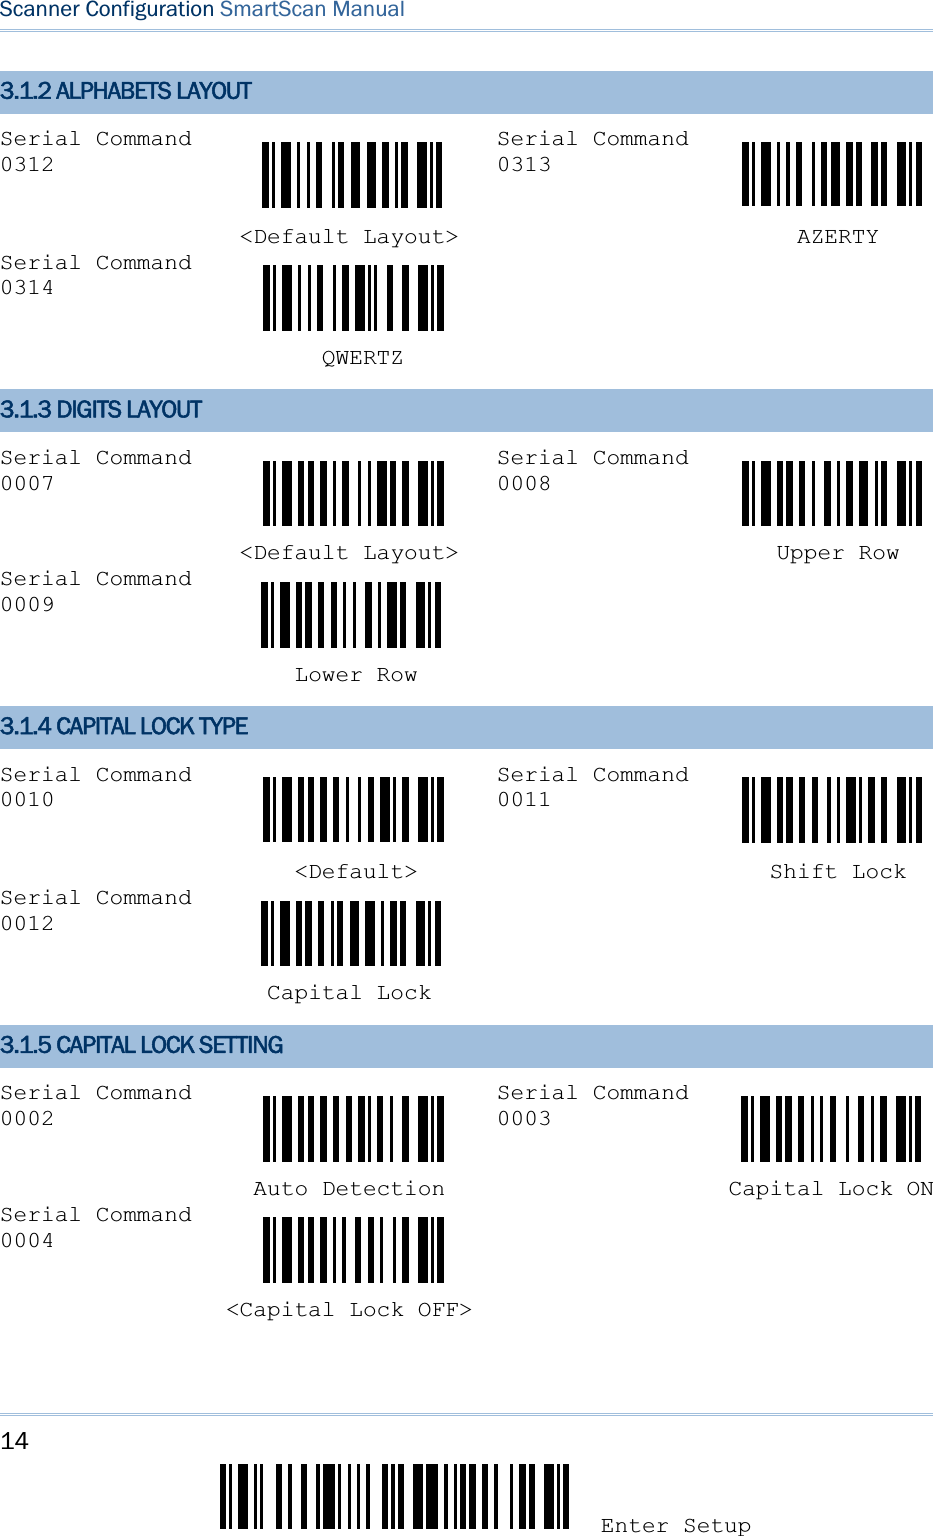

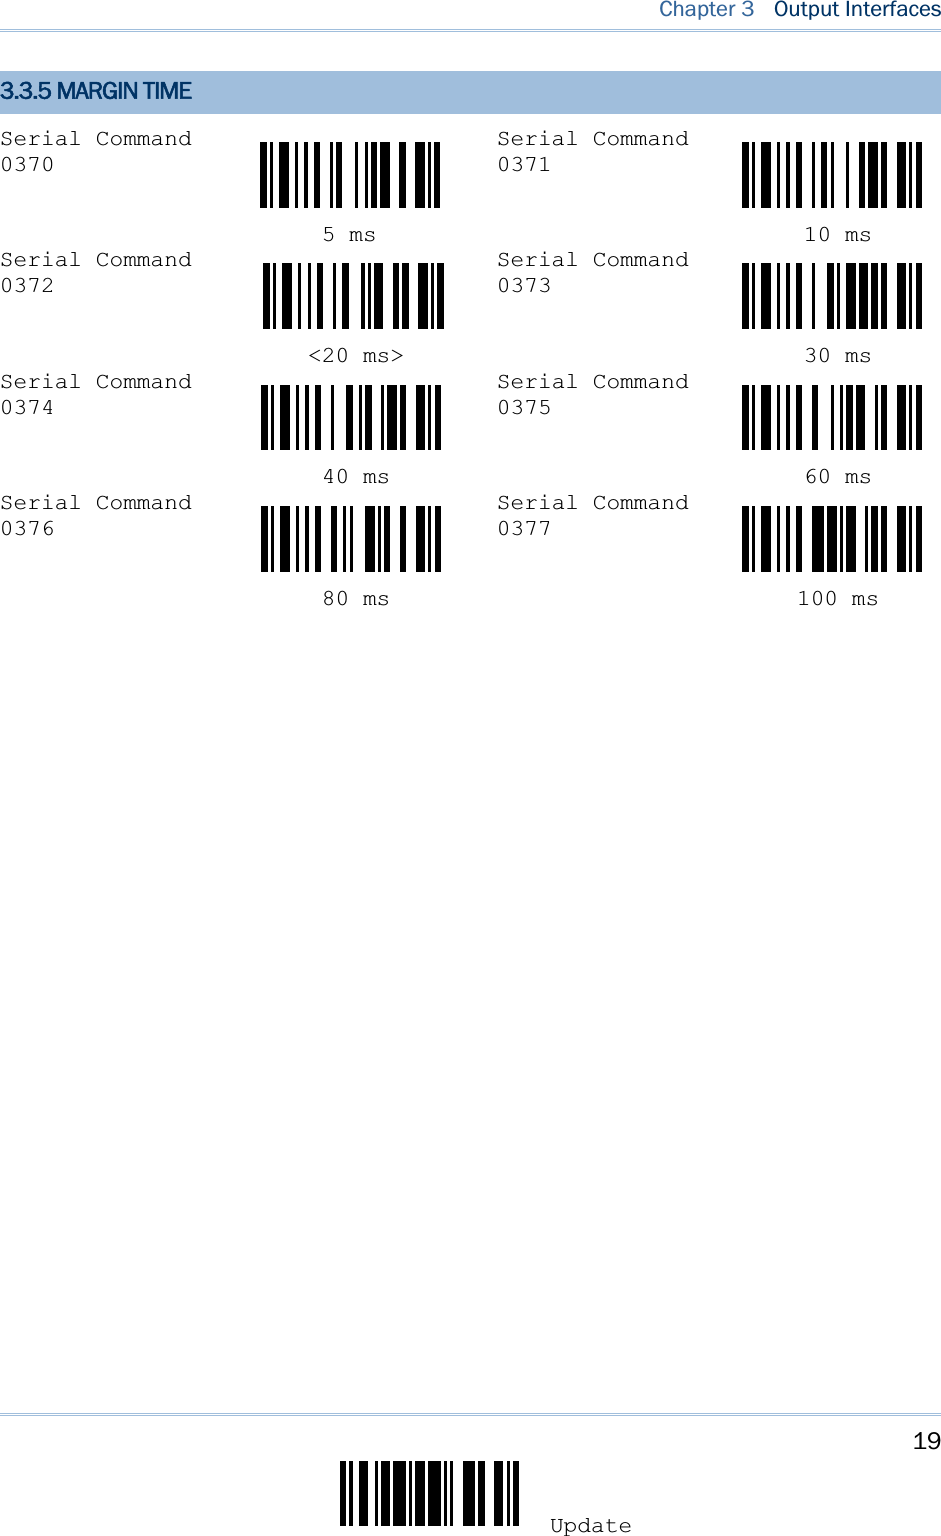

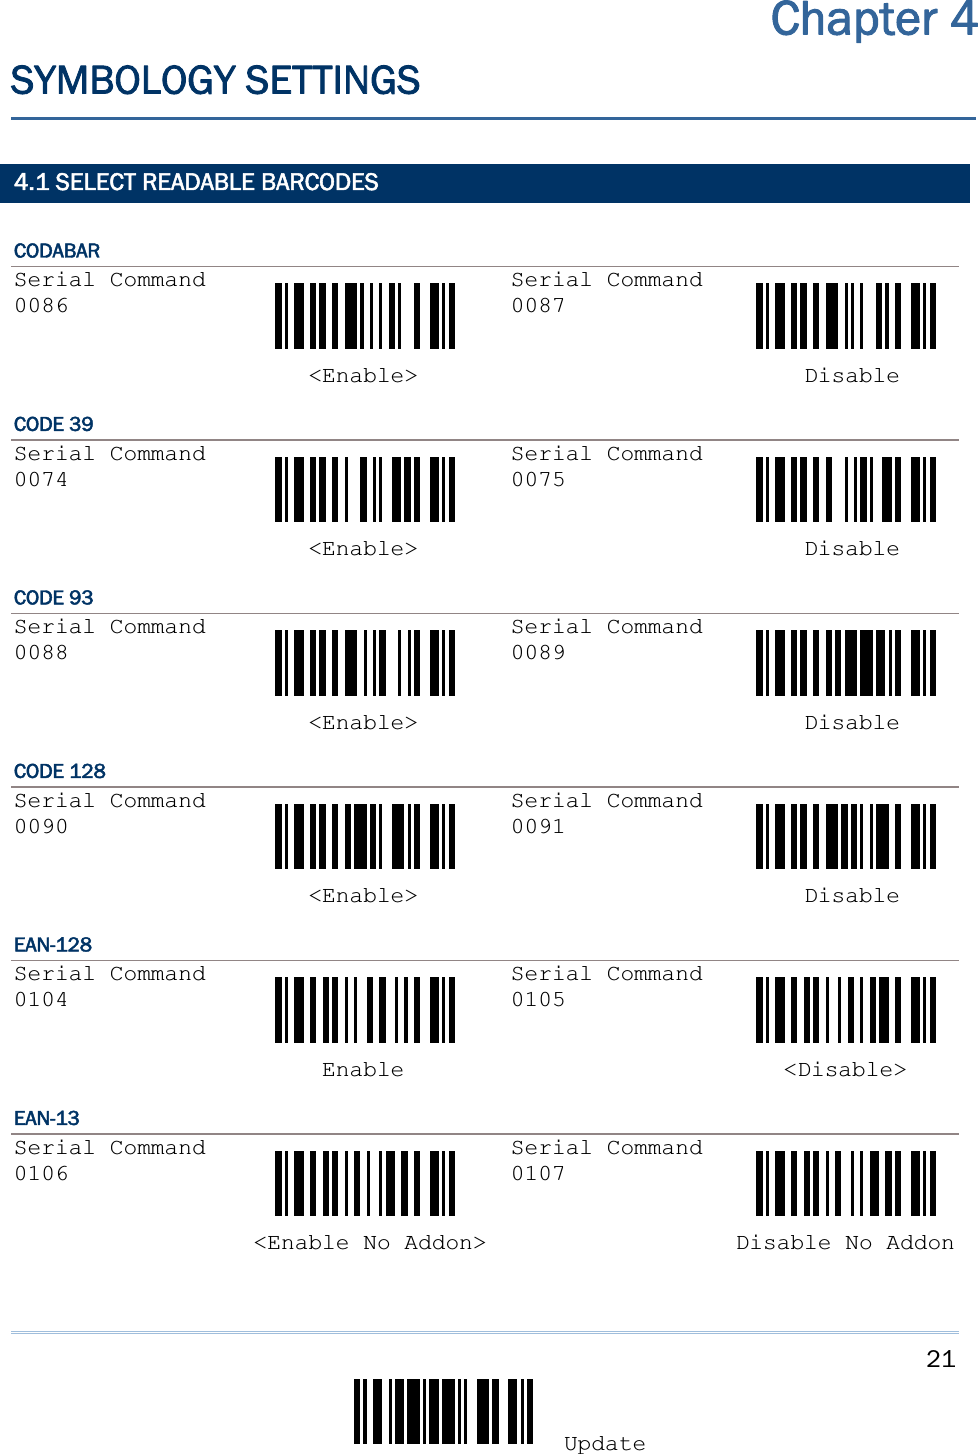
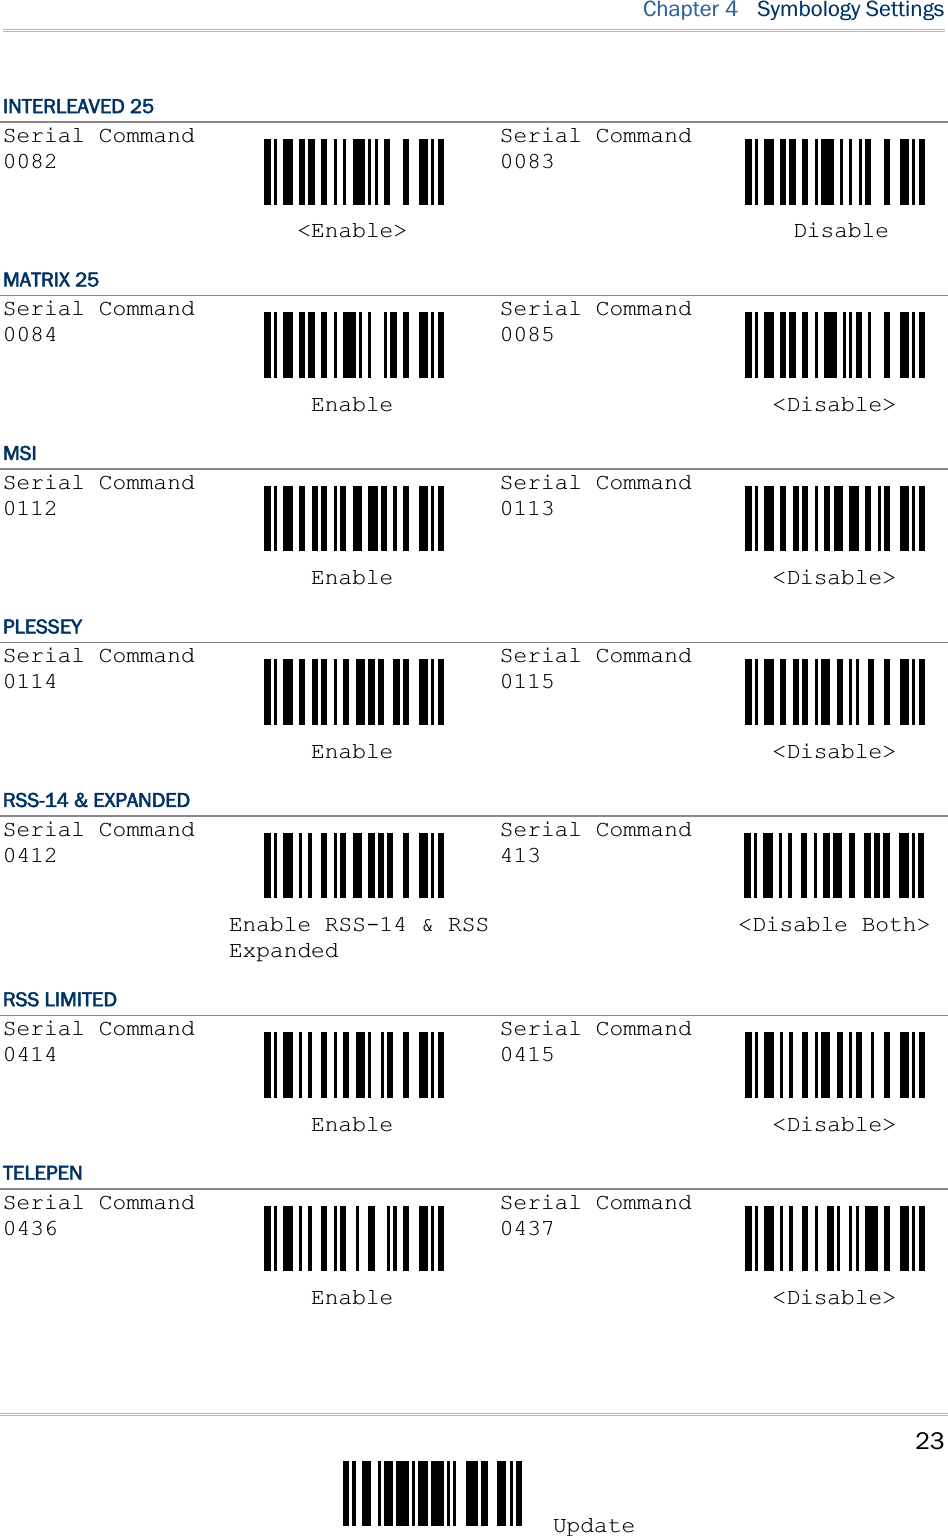

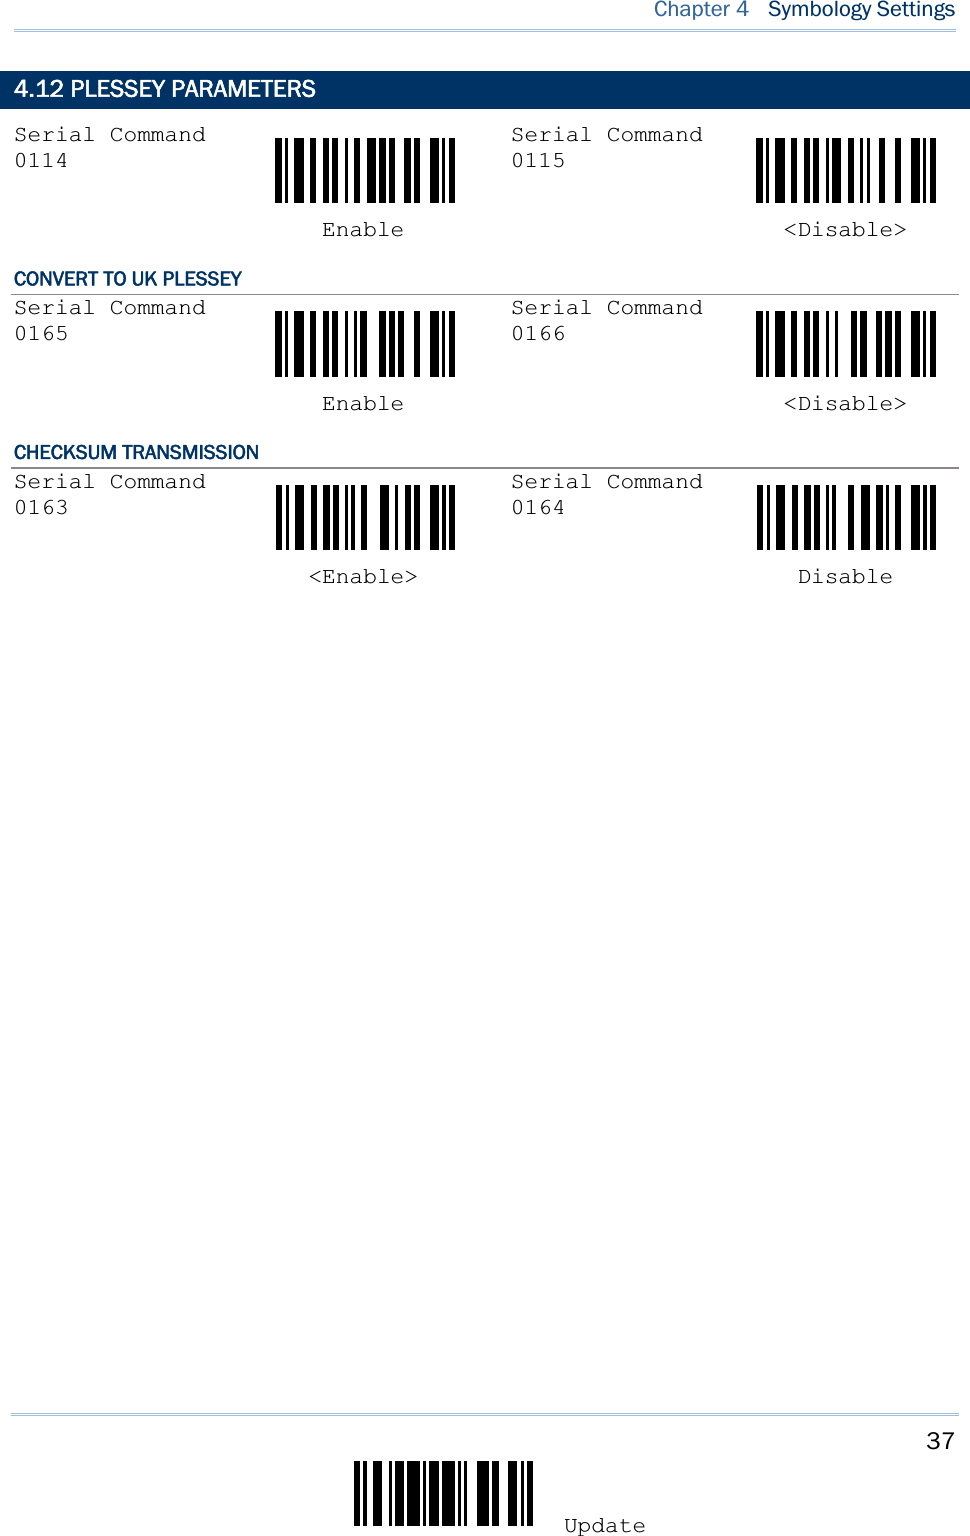
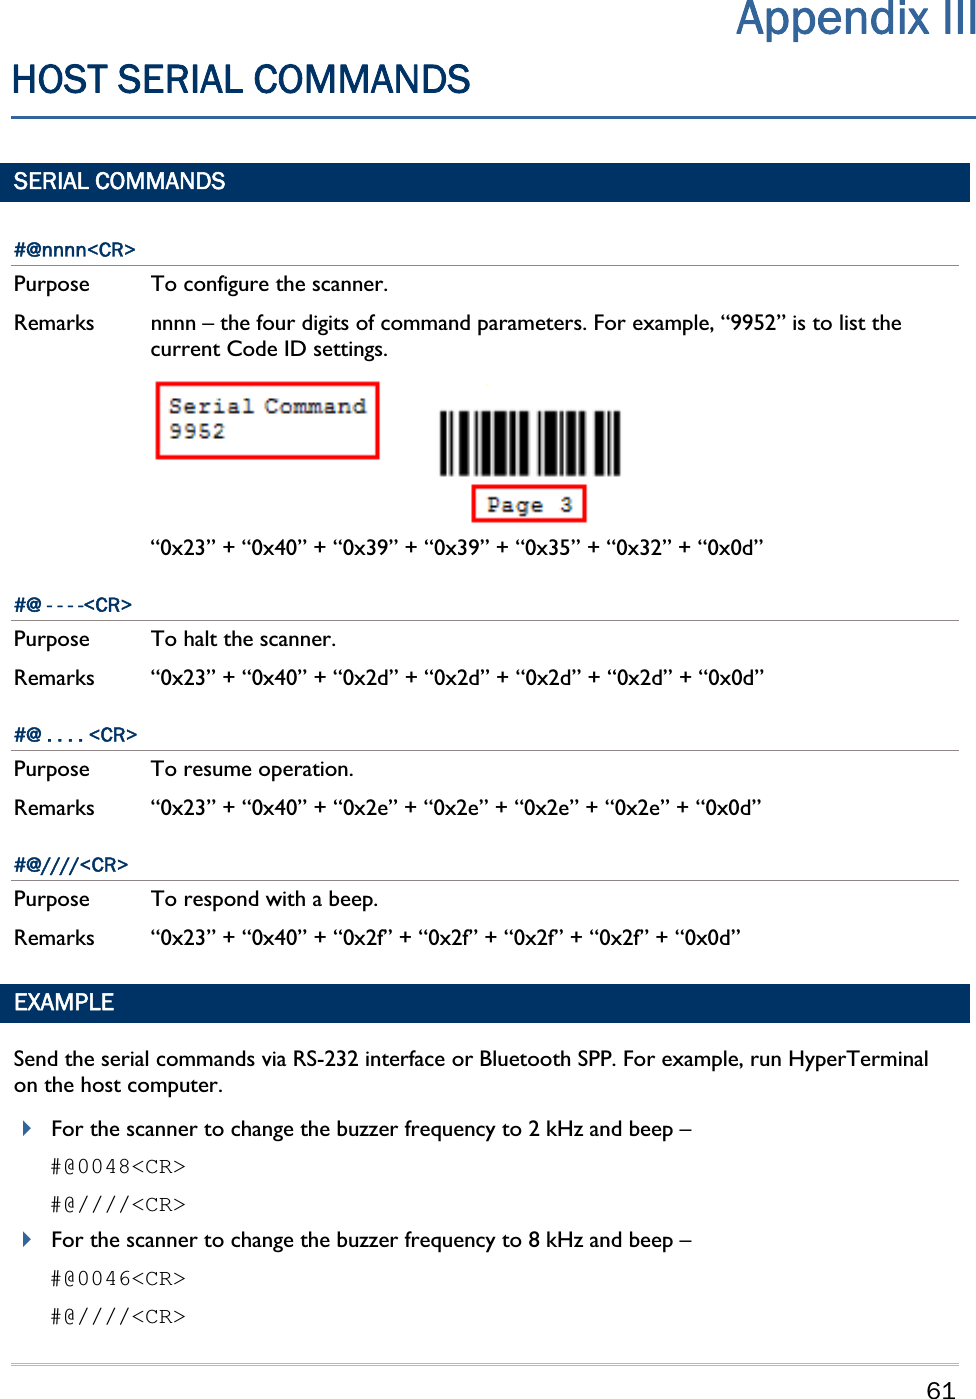
![38Enter Setup Scanner Configuration SmartScan Manual4.13 RSS FAMILY PARAMETERS CODE ID SELECTION Serial Command0432Serial Command 0433 ]C1 <]e0> 4.13.1 RSS-14 Serial Command0412Serial Command 413 Enable RSS-14 & RSS Expanded <Disable Both> CODE ID TRANSMISSION Serial Command0418Serial Command 0419 <Enable> Disable APPLICATION ID TRANSMISSION Serial Command0424Serial Command 0425 <Enable> Disable CHECKSUM TRANSMISSION Serial Command0428Serial Command 0429 <Enable> Disable 4.13.2 RSS LIMITED Serial Command0414Serial Command 0415 Enable <Disable>](https://usermanual.wiki/CipherLab/11662/User-Guide-1040804-Page-46.png)
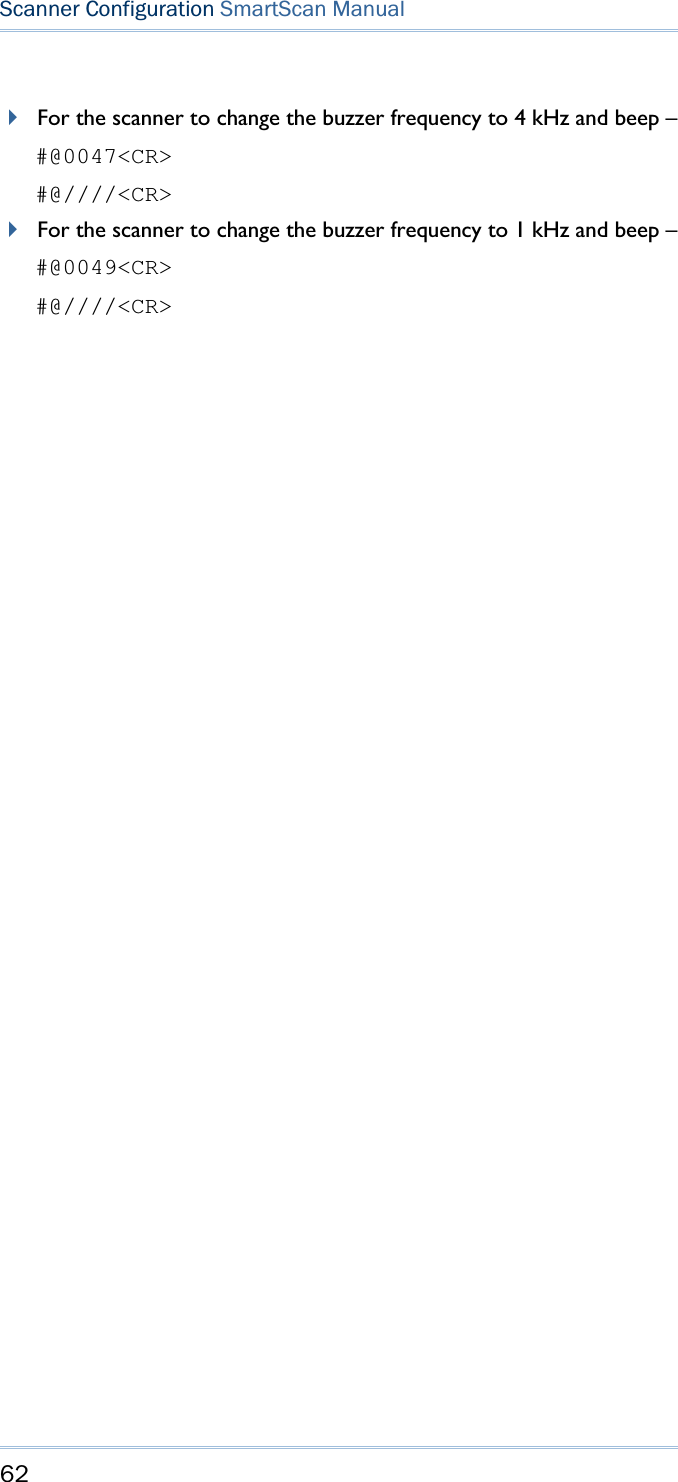
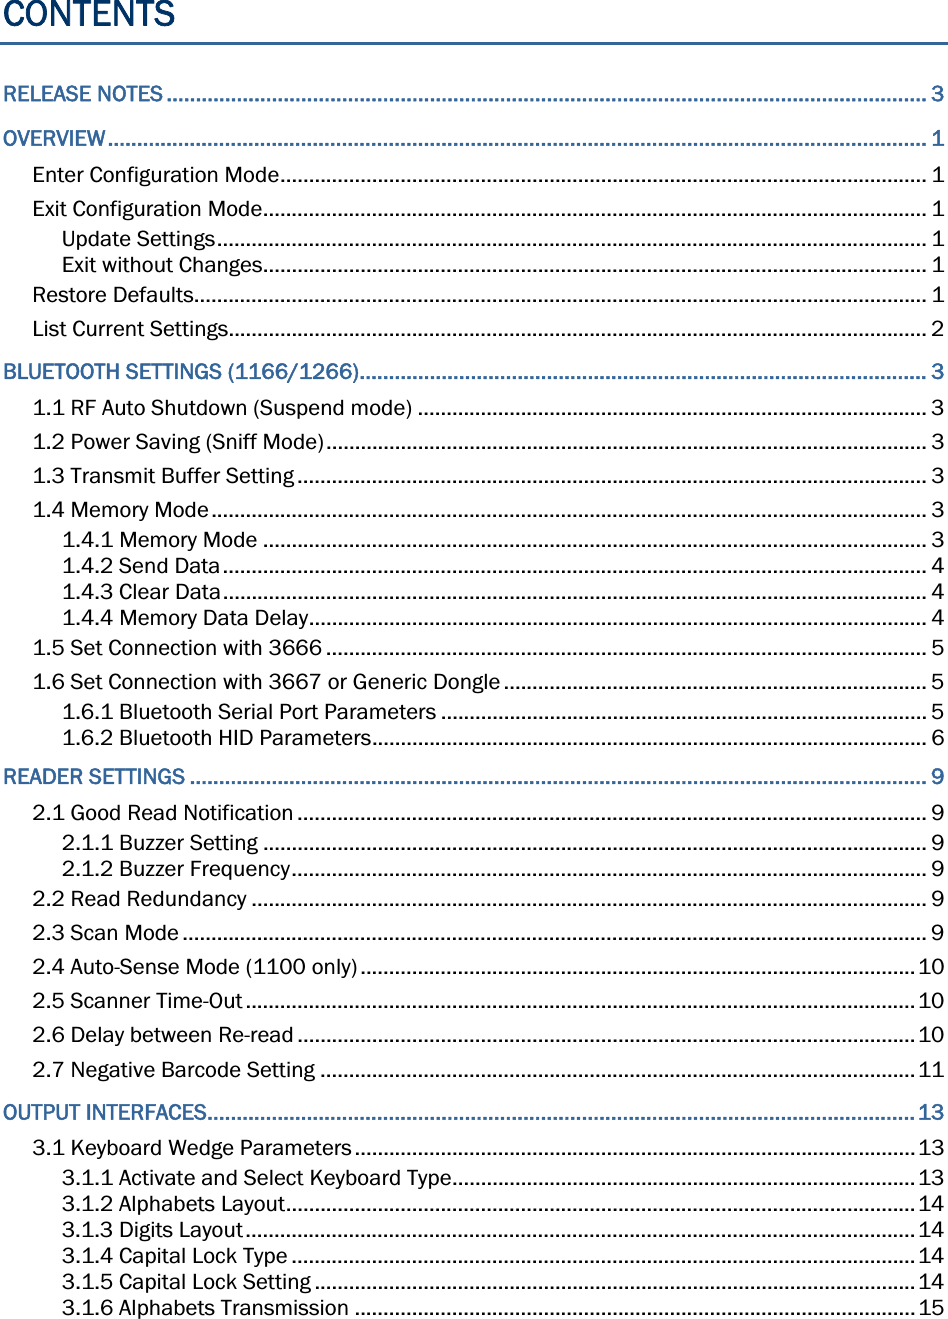
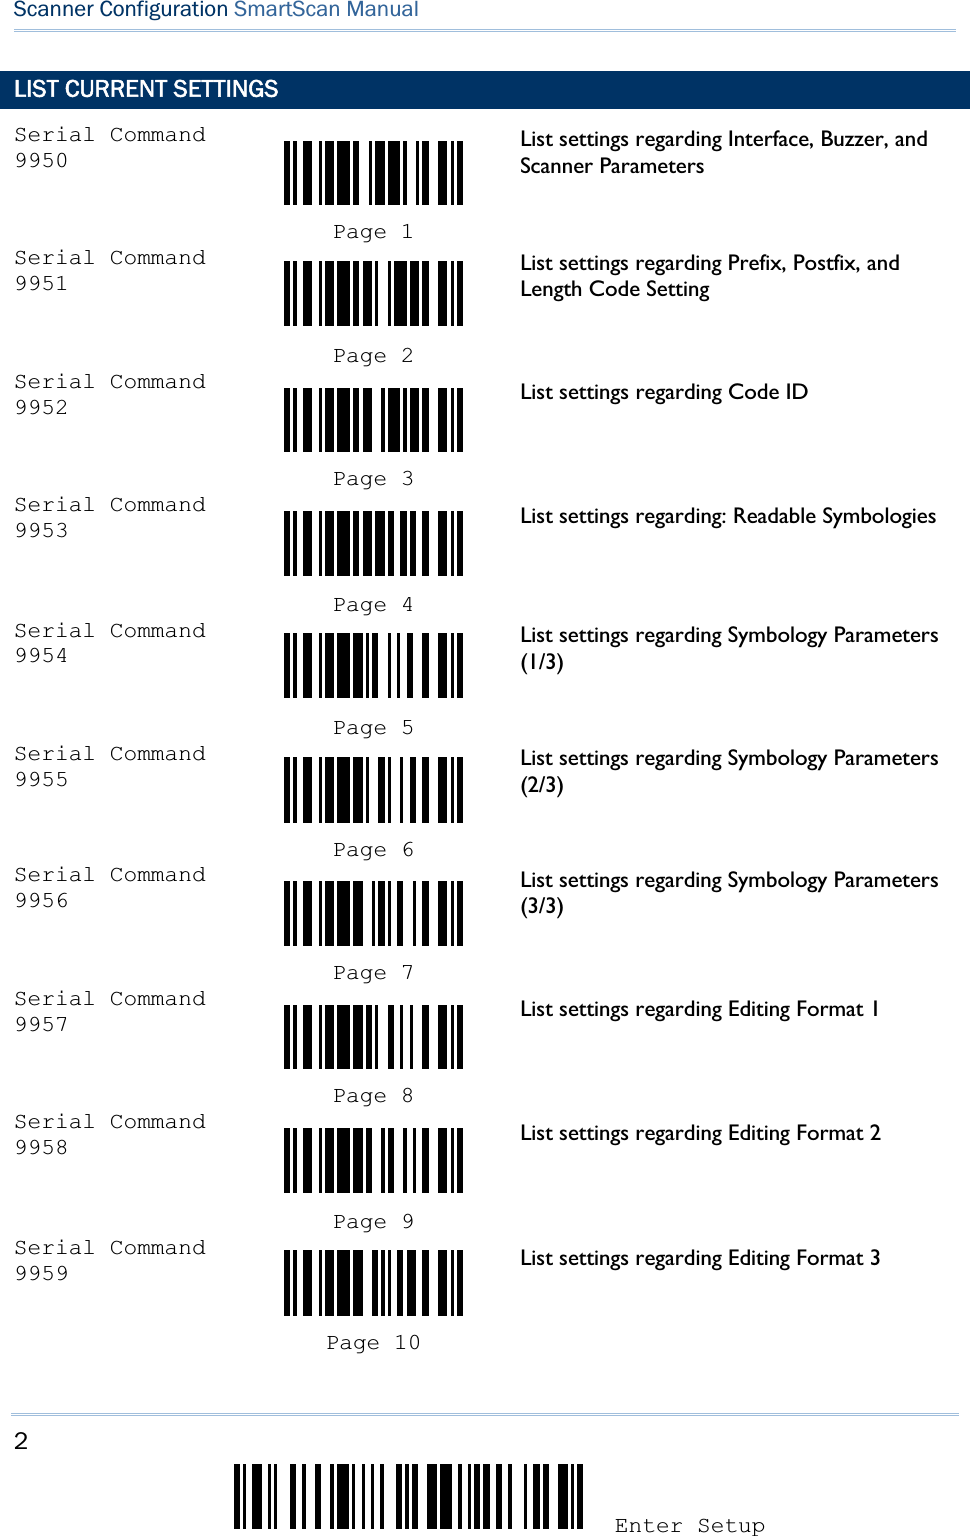
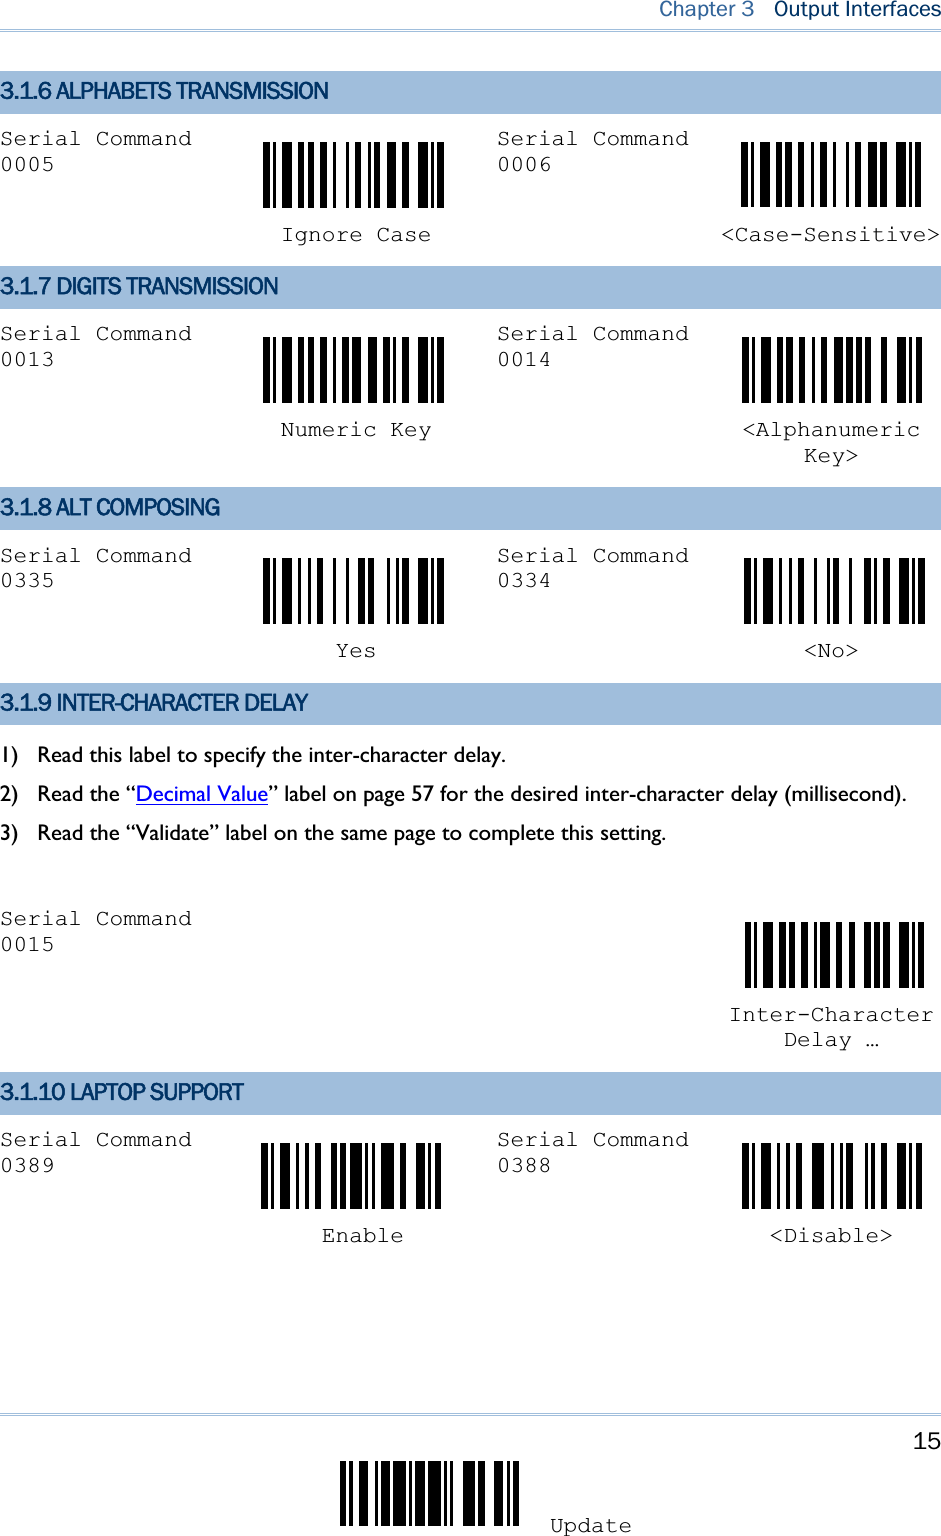
![43Update5.1 CHARACTER SUBSTITUTION 1) Read the label to enable either character substitution by set. 2) Read the “Hexadecimal Value” label on page 58 for the desired character string. For example, read “3”, “0”, “2” and “D” for the scanner to replace the character [0] with a dash [-]. 3) Read the “Validate” label on the same page to complete this setting. Serial Command0309Serial Command 0310 Set 1 Set 2 Serial Command0311 Set 3 5.2 PREFIX/SUFFIX SETTING 1) Read the label to apply prefix code or suffix code separately. 2) Read the “Hexadecimal Value” label on page 58 for the desired character string. For example, read “2” and “B” for the scanner to prefix or suffix the character [+]. 3) Read the “Validate” label on the same page to complete this setting. Serial Command0273Serial Command 0274 Prefix Code Suffix Code 5.3 CODE ID SETTING 5.3.1 CLEAR CODE ID SETTINGS Serial Command9960 Clear All Code ID SettingsChapter 5DATA OUTPUT FORMAT](https://usermanual.wiki/CipherLab/11662/User-Guide-1040804-Page-51.png)
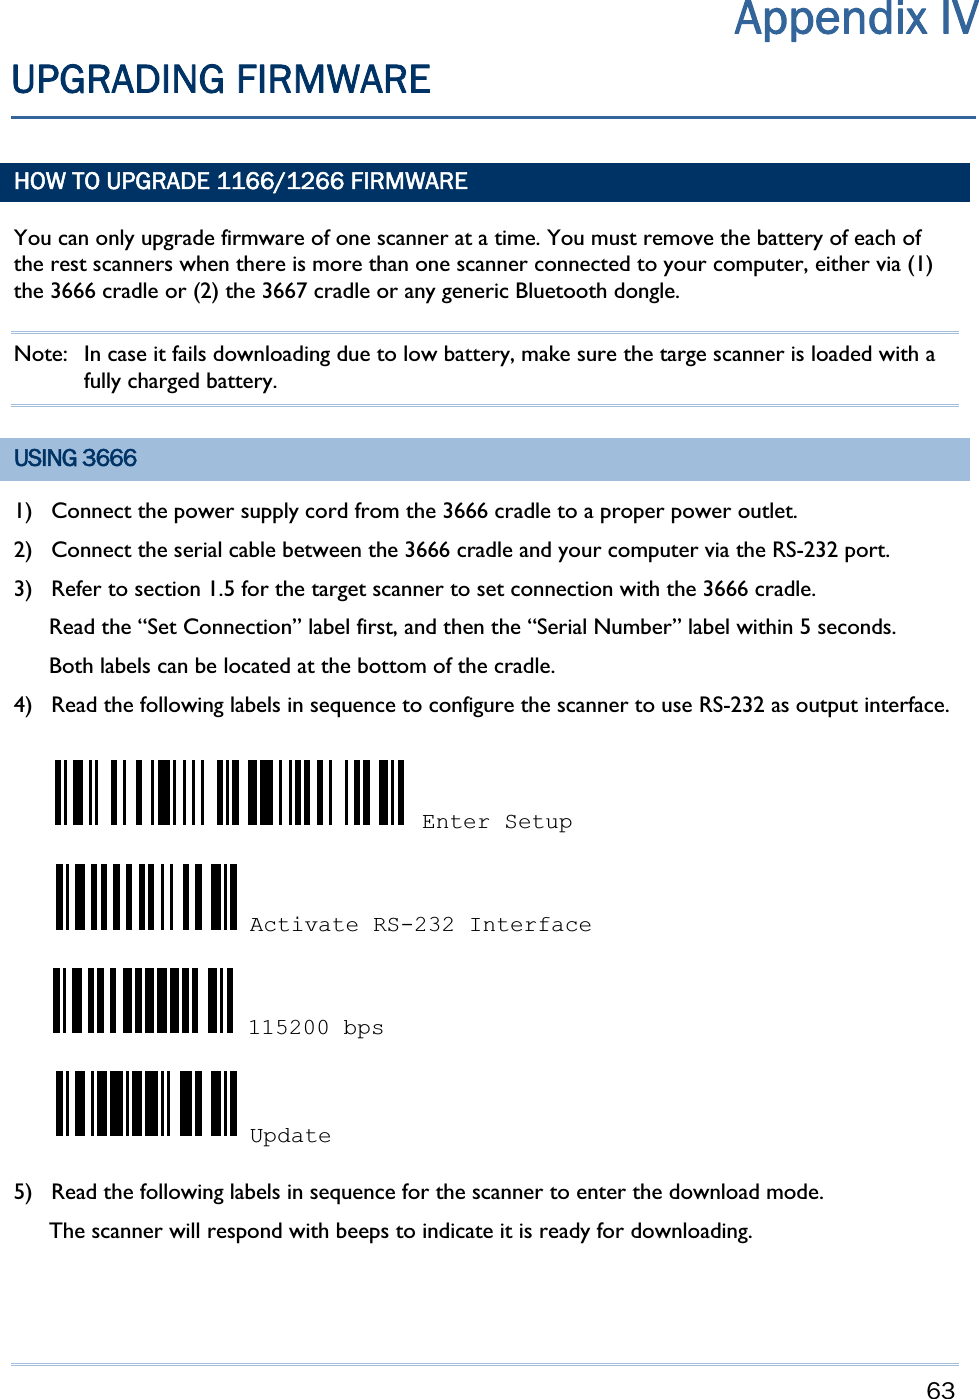
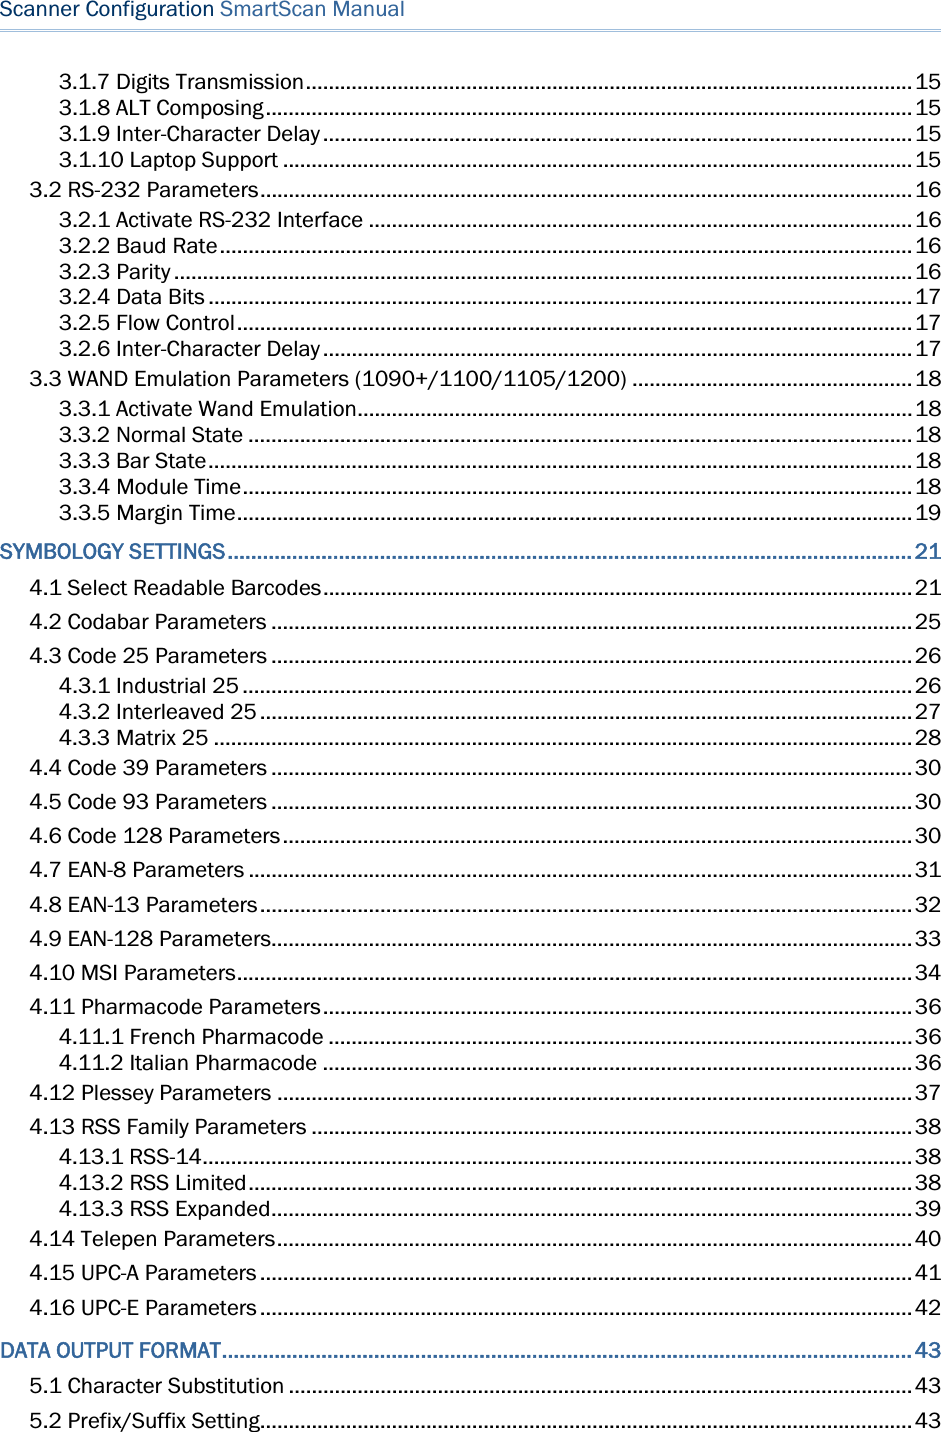
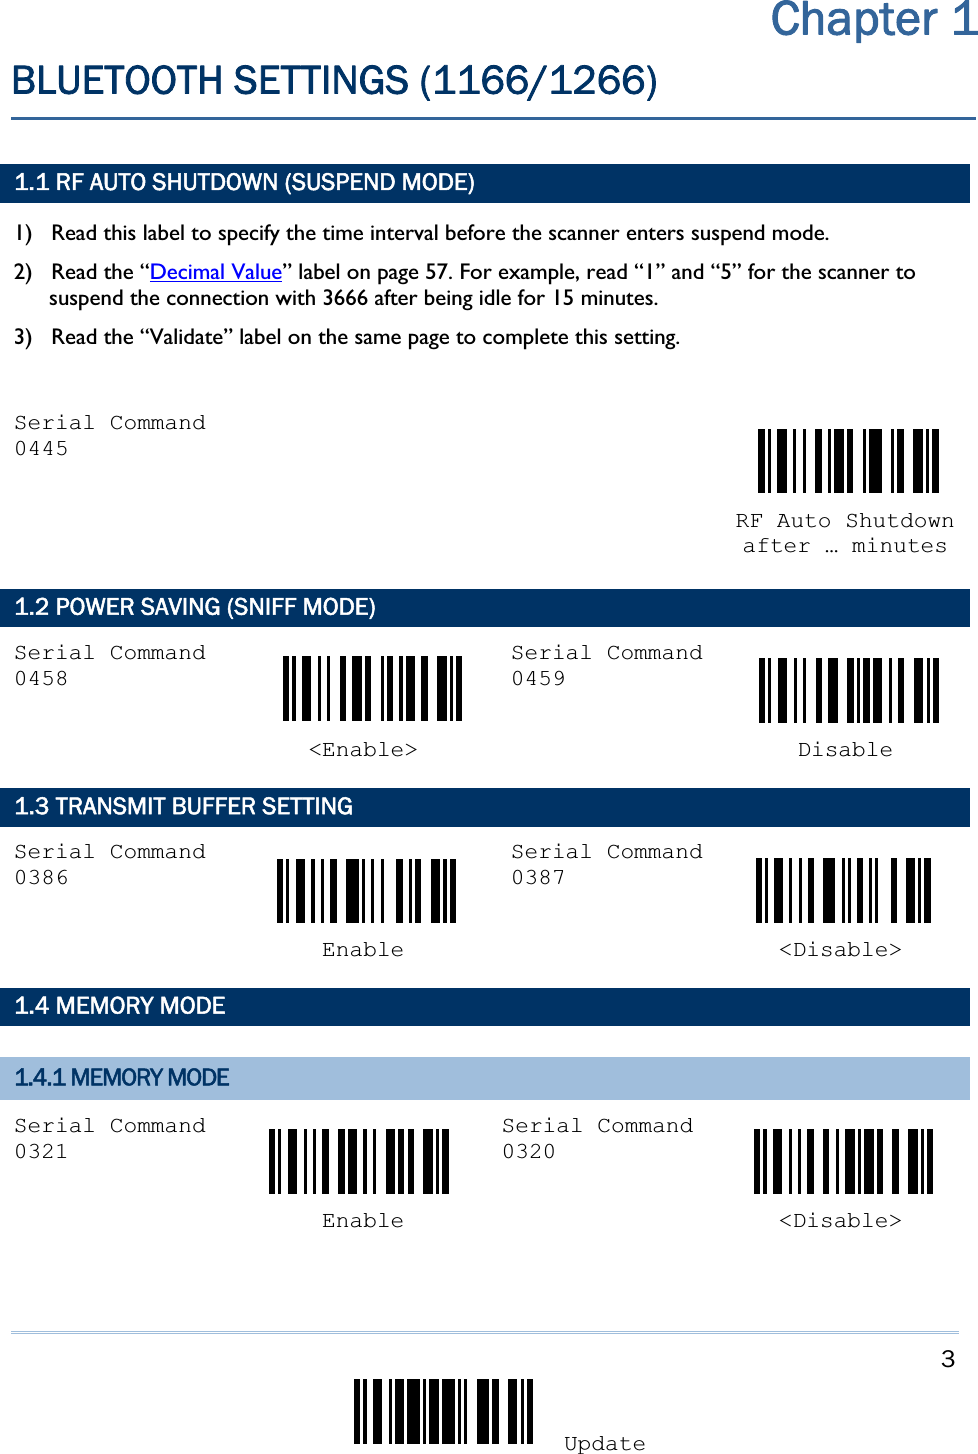
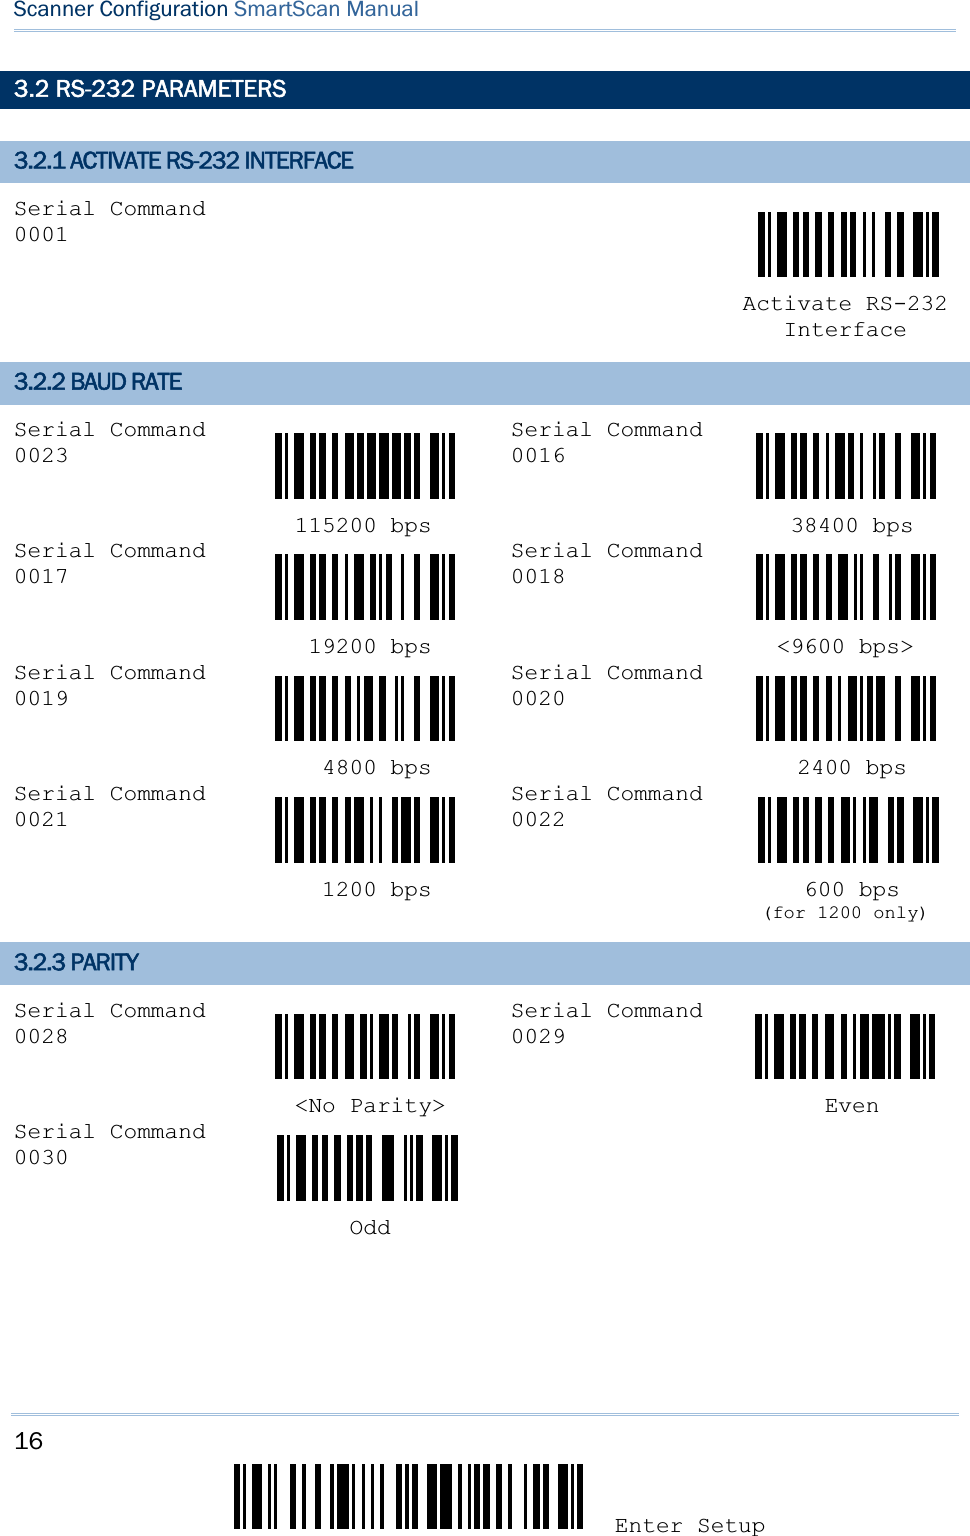
![44Enter Setup Scanner Configuration SmartScan Manual5.3.2 SELECT PRE-DEFINED CODE ID Serial Command9961Serial Command 9962 Code ID Set 1 Code ID Set 2 Serial Command9963Serial Command 9964 Code ID Set 3 Code ID Set 4 Serial Command9965 Code ID Set 5 5.3.3 CHANGE CODE ID 1) Read the label of a specific symbology to change its code ID. 2) Read the “Hexadecimal Value” label on page 58 for the desired character string. For example, read “4” and “4” for applying the character [D] for Code ID. 3) Read the “Validate” label on the same page to complete this setting. Serial Command0262Serial Command 0256 Codabar Code 39 Serial Command0263Serial Command 0264 Code 93 Code 128 Serial Command0266Serial Command 0267 EAN-8 EAN-13 Serial Command0258Serial Command 0257 French Pharmacode Italian PharmacodeSerial Command0259Serial Command 0260 Industrial 25 Interleaved 25](https://usermanual.wiki/CipherLab/11662/User-Guide-1040804-Page-52.png)


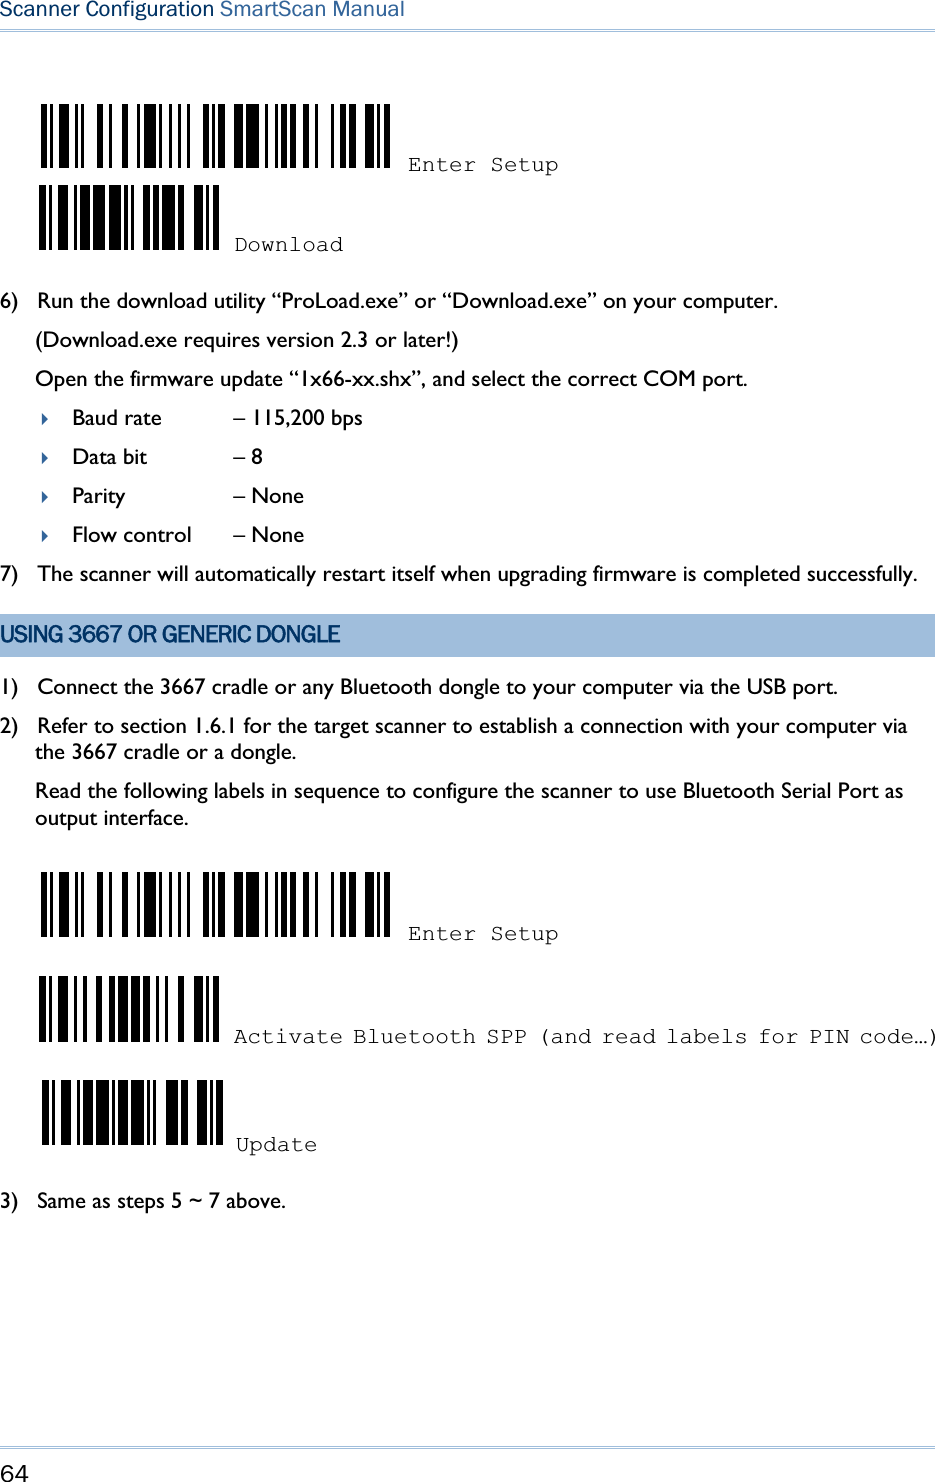
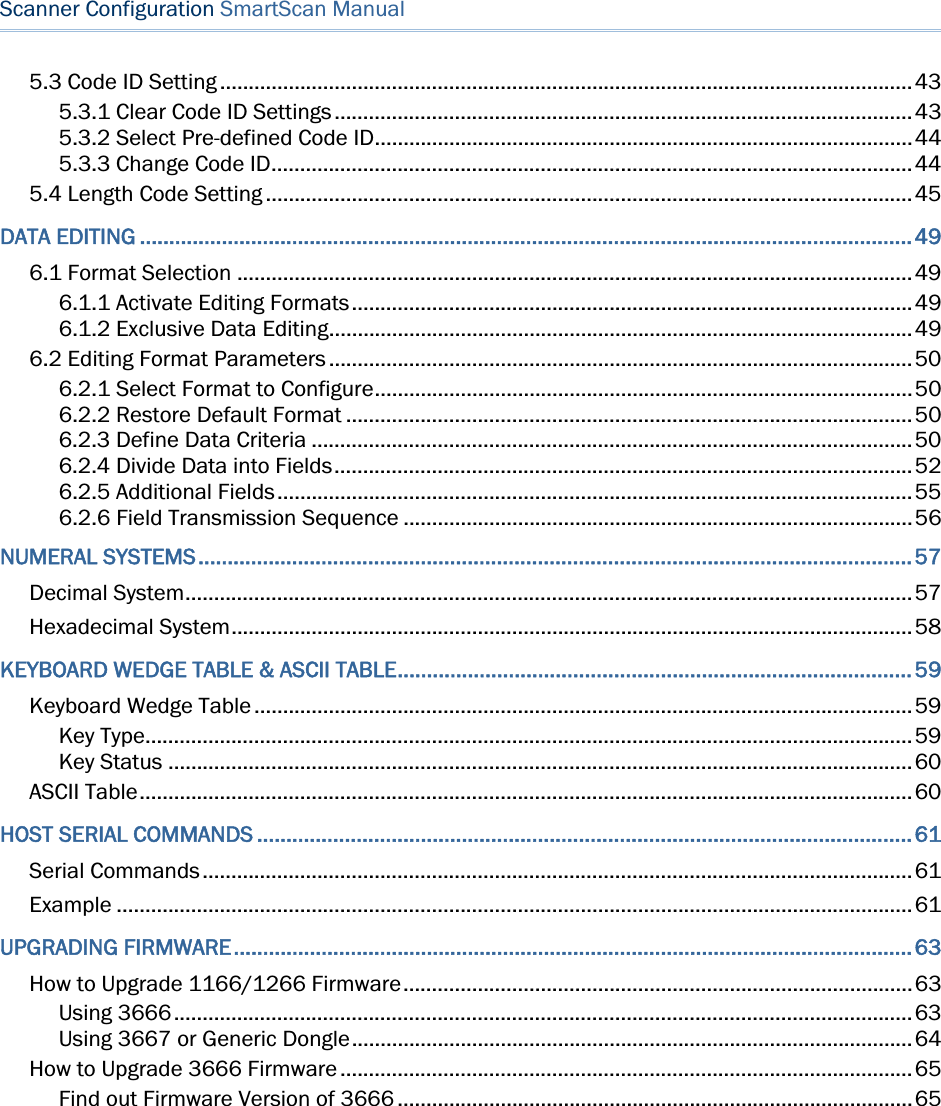
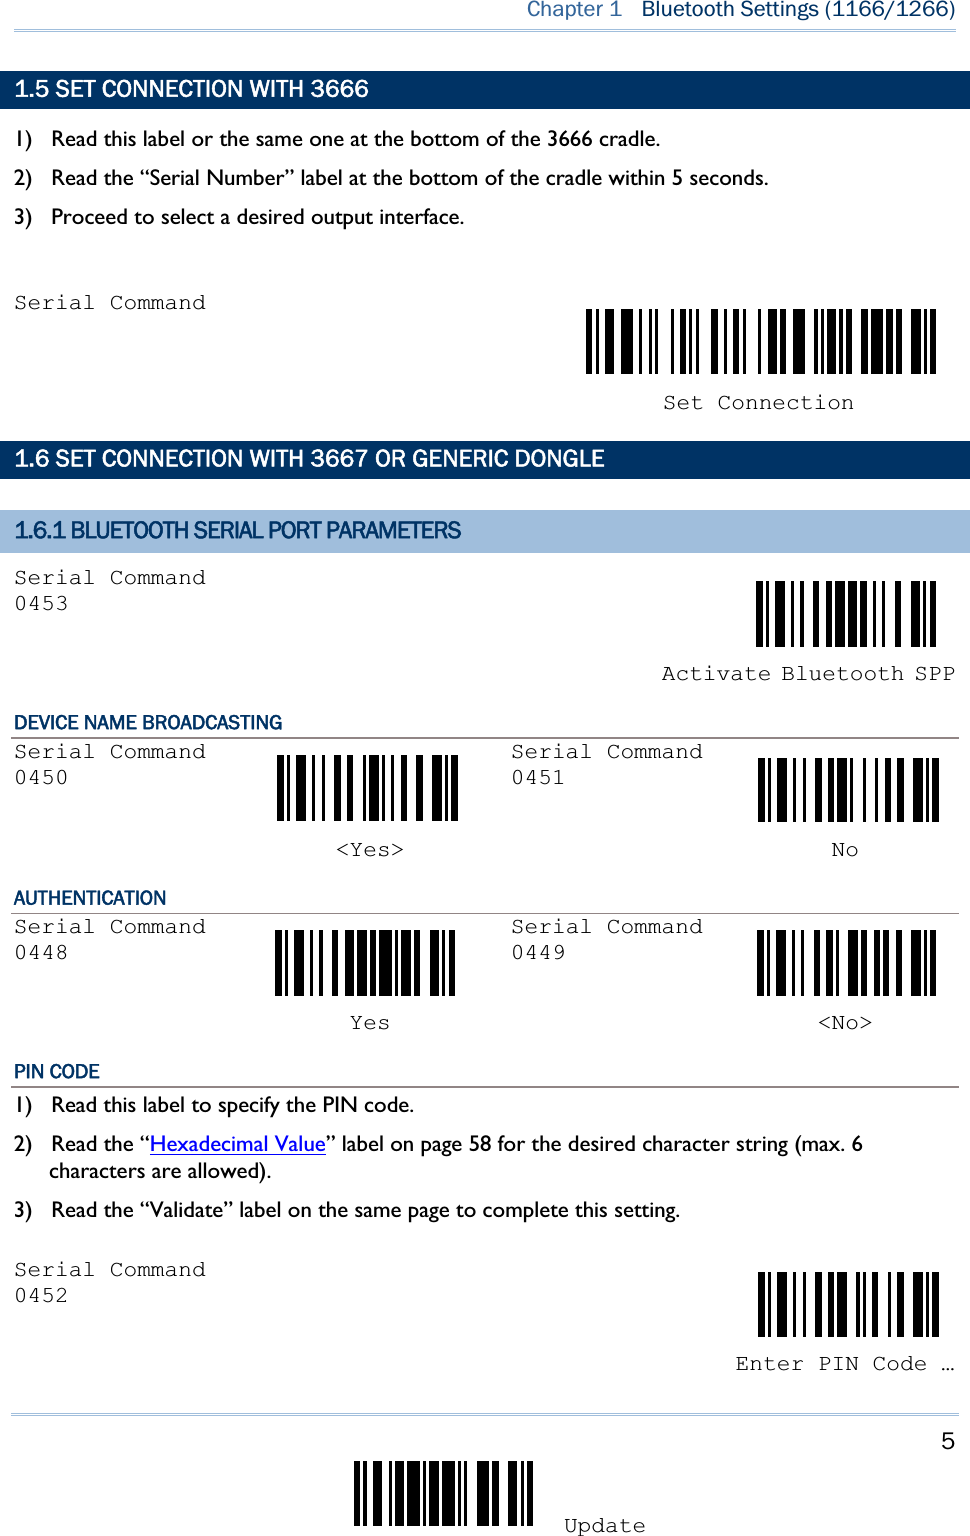
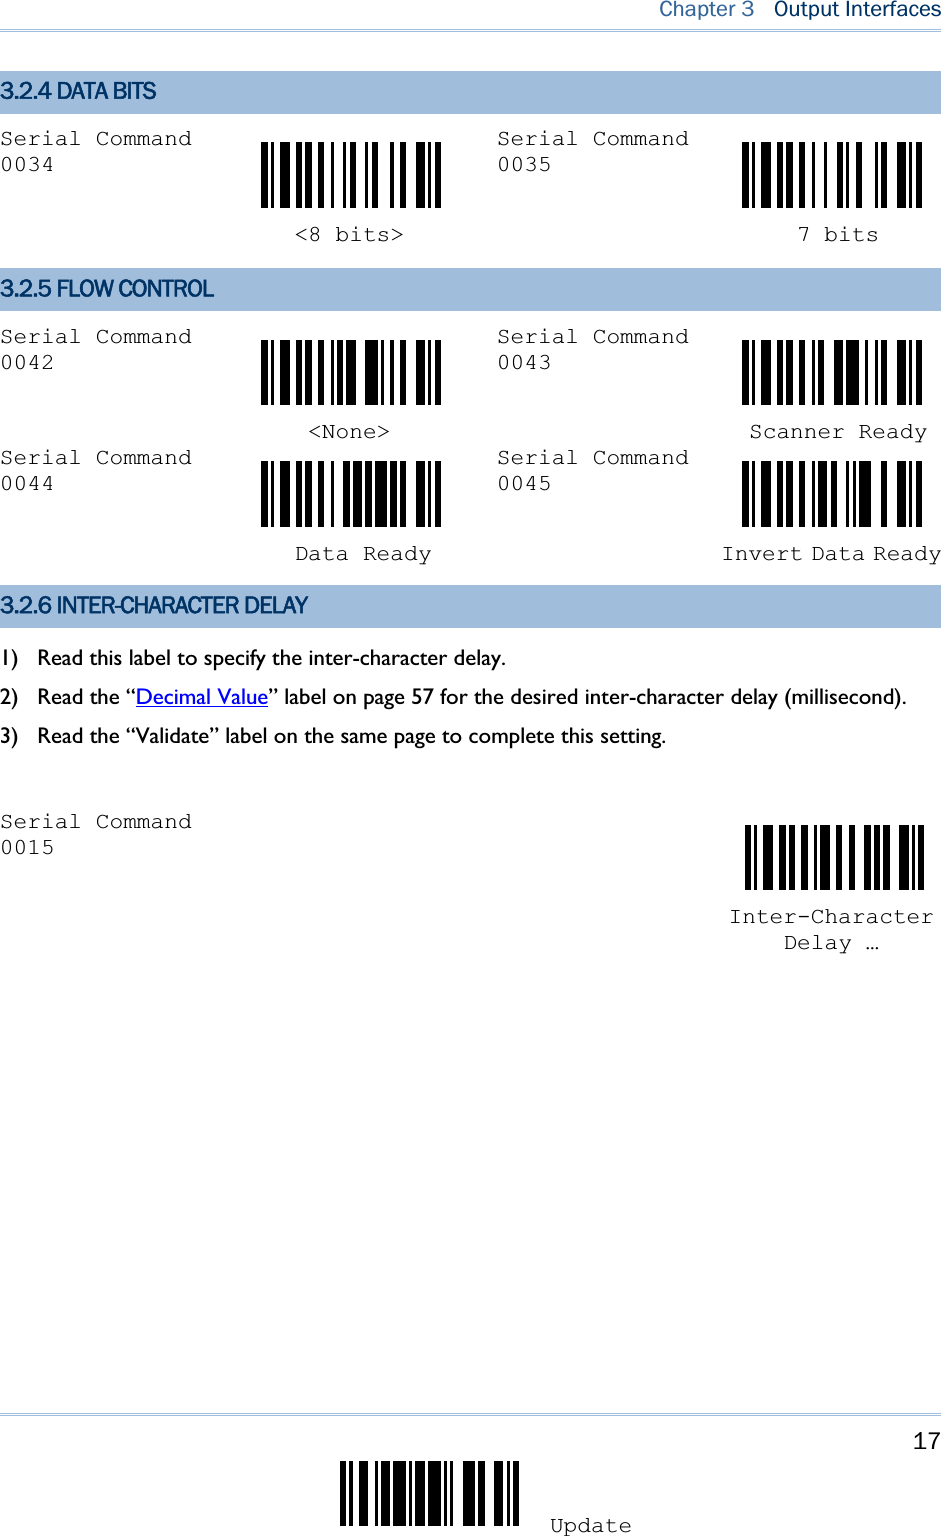
![59KEYBOARD WEDGE TABLE 0 123456780F2 SP 0 @ P ` p b1INS F3 ! 1 A Q a q c2DLT F4 " 2 B R b r d3Home F5 # 3 C S c s e4End F6 $ 4 D T d t f5Up F7 % 5 E U e u g6Down F8 & 6 F V f v h7Left F9 ' 7 G W g w i8BS F10 ( 8 H X h x j9HT F11 ) 9 I Y i y kALF F12 * : J Z j z BRight ESC + ; K [ k { CPgUp Exec , < L \ l | DCR CR* - = M ] m } EPgDn . > N ^ n ~ FF1 / ? O _ o Dly ENTER*Note: (1) b~k: Digits of numeric keypad. (2) CR*/Send/ENTER*: ENTER key on the numeric keypad. KEY TYPE Serial Command9926Serial Command 9936 <Normal> Scan Code Note: If "Keyboard Wedge" is configured for interface, Key Type and Key Status will then become applicable.Appendix IIKEYBOARD WEDGE TABLE & ASCII TABLE](https://usermanual.wiki/CipherLab/11662/User-Guide-1040804-Page-67.png)
![60Scanner Configuration SmartScan ManualKEY STATUS Serial Command9930Serial Command 9931 Add Shift Add Left Ctrl Serial Command9932Serial Command 9933 Add Left Alt Add Right CtrlSerial Command9934 Add Right Alt Note: Decide whether or not to apply Key Status when “Normal Key” is selected for Key Type. ASCII TABLE 0 12345670 DLE SP 0 @ P ` p 1 SOH DC1 ! 1 A Q a q 2 STX DC2 " 2 B R b r 3 ETX DC3 # 3 C S c s 4 EOT DC4 $ 4 D T d t 5 ENQ NAK % 5 E U e u 6 ACK SYN & 6 F V f v 7 BEL ETB ' 7 G W g w 8 BS CAN ( 8 H X h x 9 HT EM ) 9 I Y i y A LF SUB * : J Z j z B VT ESC + ; K [ k { C FF FS , < L \ l | D CR GS - = M ] m } E SO RS . > N ^ n ~ F SI US / ? O _ o DEL](https://usermanual.wiki/CipherLab/11662/User-Guide-1040804-Page-68.png)