CipherLab 9500 Terminal User Manual 9500
CipherLab Co., Ltd. Terminal 9500
UserManual.wiki
>
CipherLab
>
9500 User Manual
>
Users Manual 1
Contents
1.
Users Manual 1
2.
Users Manual 2
3.
Users Manual 1 of 2
4.
Users Manual 2 of 2
Users Manual 1
Navigation menu
Upload a User Manual
Namespaces
Wiki Guide
HTML
PDF
Info
Views
User Manual
Discussion / Help
Navigation

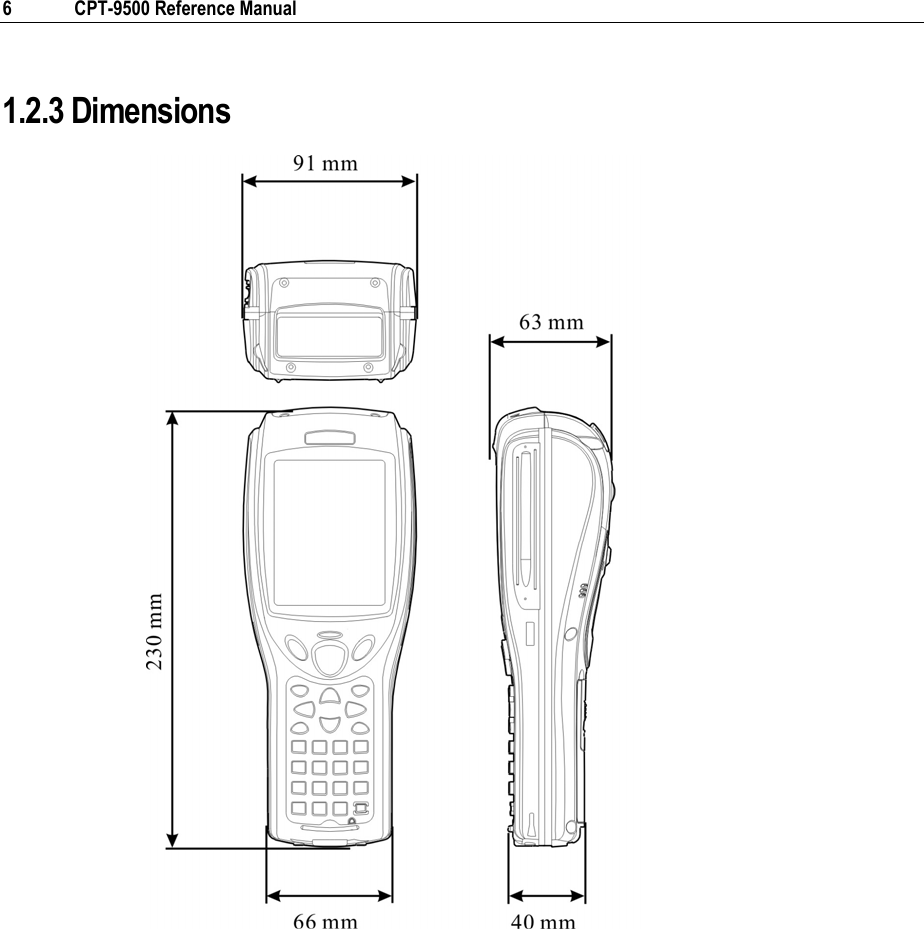
![1The 9500 Portable Data Terminal is the first in the line of Syntech's Windows Mobile-based products that runs on Windows Mobile 2003 and integrates powerful utilities for data collection, processing, and transmission. Its large color transflective TFT display guarantees ease in reading in all lighting conditions. Built-in with a wireless combo module for Bluetooth and 802.11b technologies, the 9500 terminal delivers wireless connectivity seamlessly. The 9500 terminal is robust in construction to meet industry grade requirements, and has been found durable and resistant to shock, water, and dust. It is specifically designed for all-day, everyday use as well as for data-intensive applications in harsh environments. This manual serves to guide you through how to install, configure, and operate the terminal. The Care & Maintenance section is specifically prepared for those who are in charge of taking care of the terminal. We recommend you to keep one copy of the manual at hand for quick reference or maintenance purposes. To avoid any improper disposal or operation, please read the manual thoroughly before use. Thank you for choosing the CipherLab products! Revision History Version Release Date Notes 1.01 May 23, 2006 Company name changed to CIPHERLAB CO., LTD. since April 2006 Modified: section 1.2.3 Dimensions & Specifications Modified: sections 1.3.4 & 1.3.5 – usage of [Func] 1.00 Mar. 22, 2006 Official release Preface](https://usermanual.wiki/CipherLab/9500.Users-Manual-1/User-Guide-678011-Page-11.png)
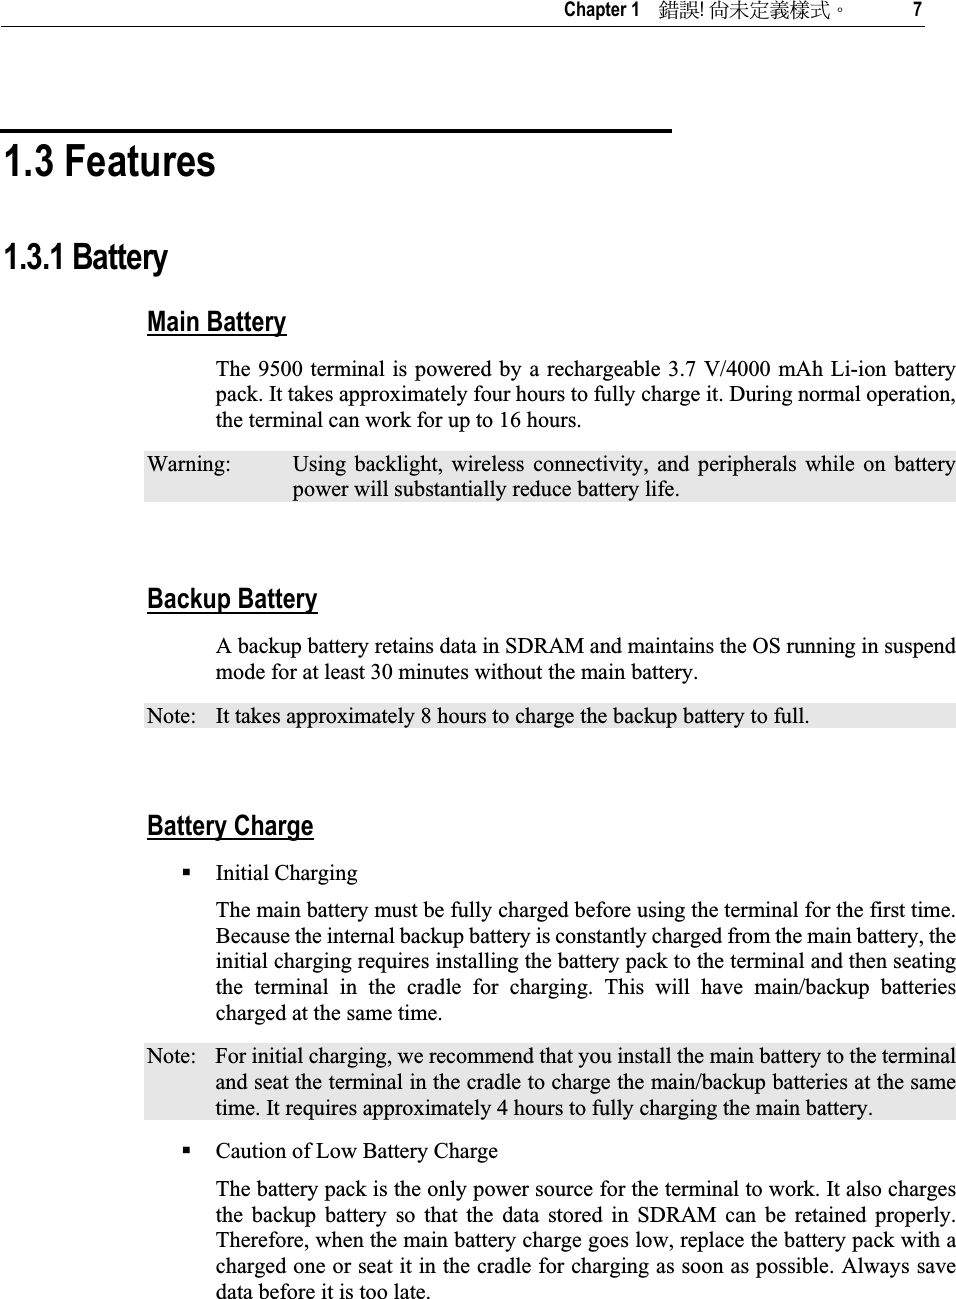
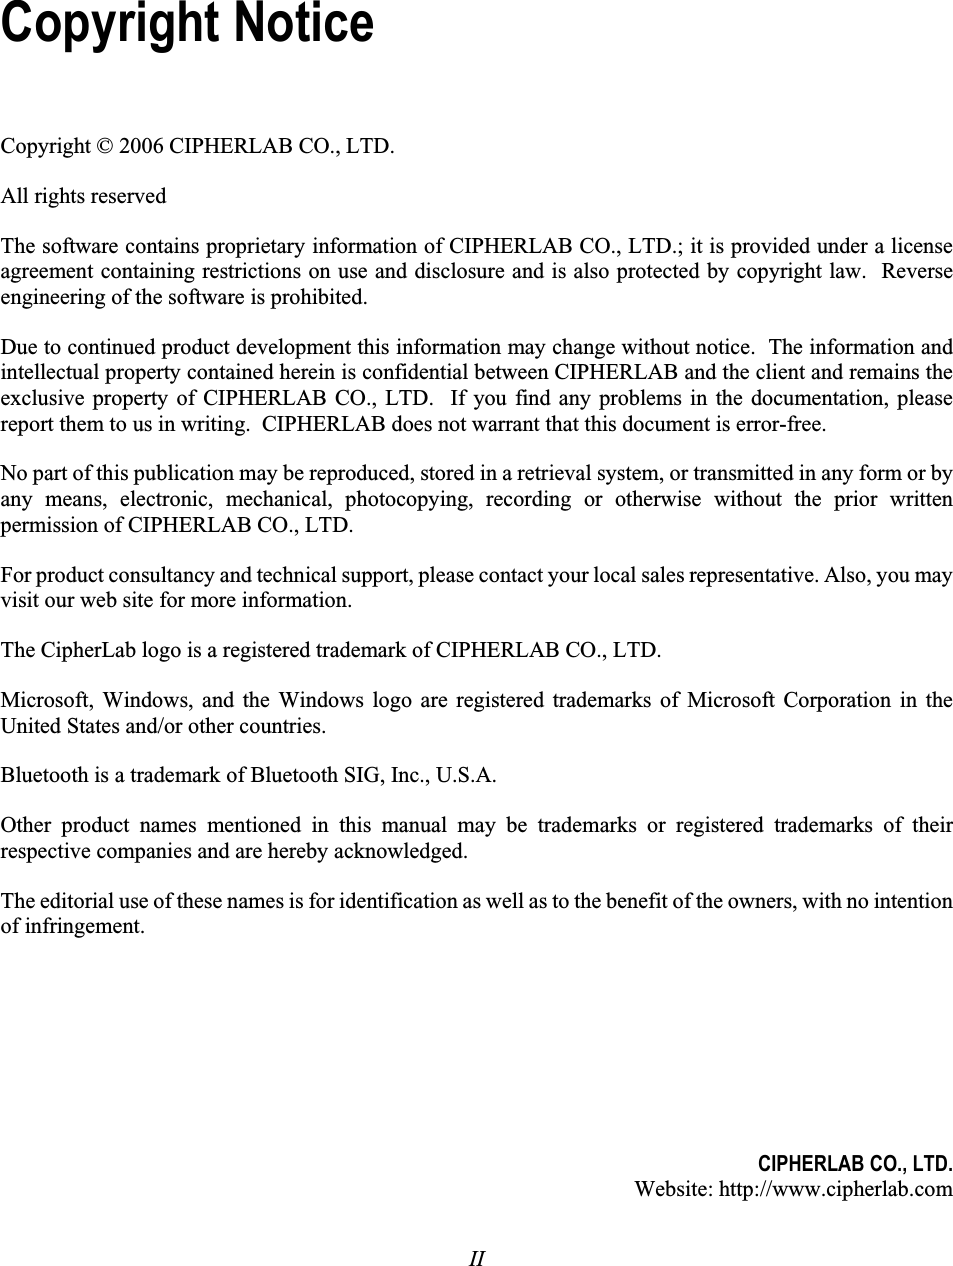
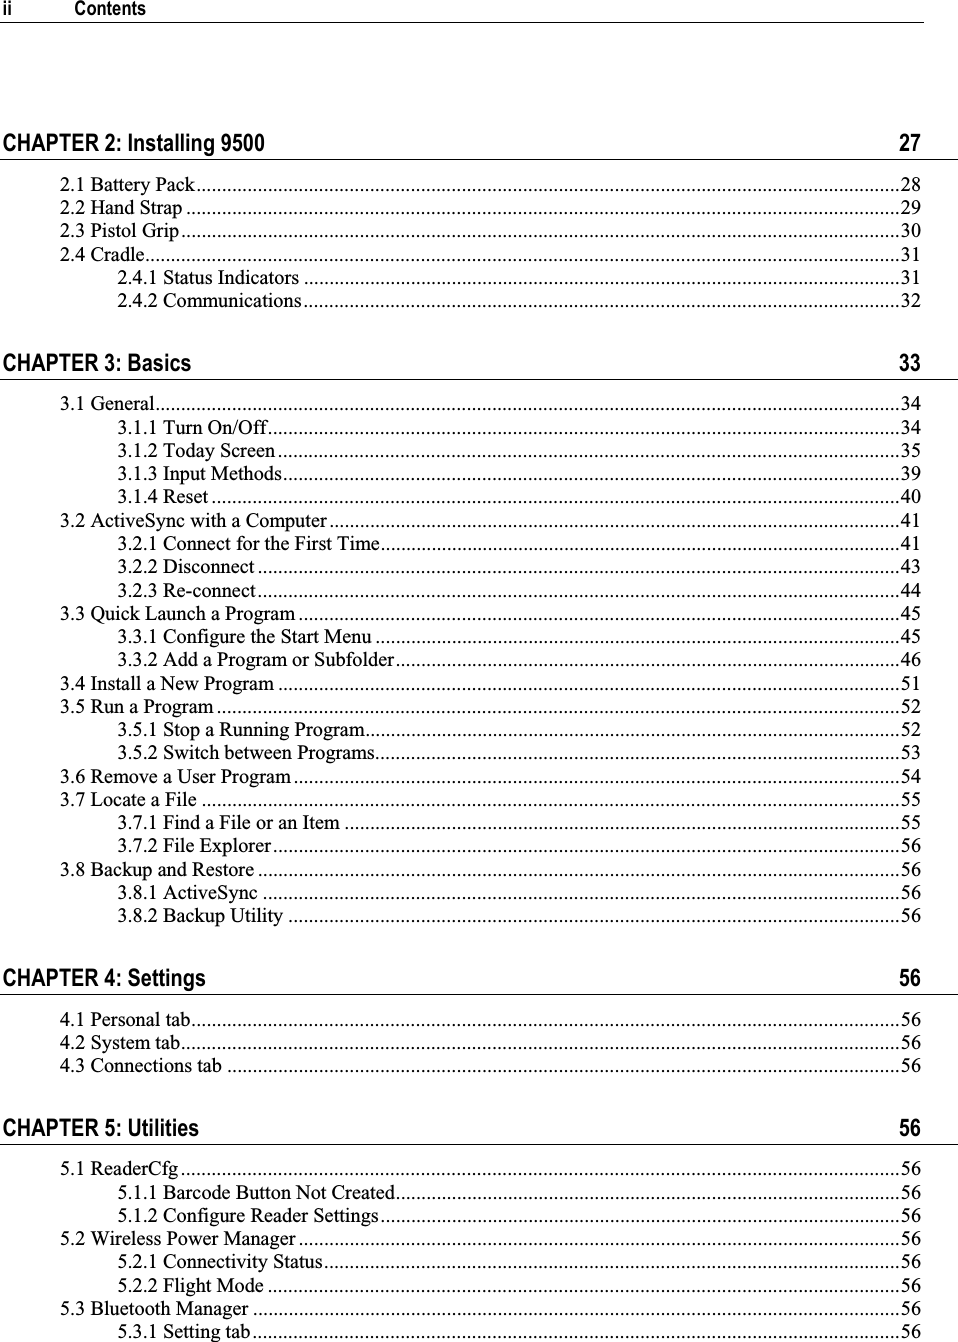
![Chapter 1 ᙑᎄ!ࡸآࡳᆠᑌڤΖ 13 Task KeyThe [Task] key (indicated as Button 1) on the keypad can be configured as a shortcut key for a specific program or action. It is set to trigger File Explorer by default. To launch File Explorer, press on the keypad. 1. Tap Start > Settings > Personal tab, and then select Buttons > Program Buttons tab. 2. You may select Button 1 and then assign it to trigger a different program, action, or <None>. Î](https://usermanual.wiki/CipherLab/9500.Users-Manual-1/User-Guide-678011-Page-23.png)
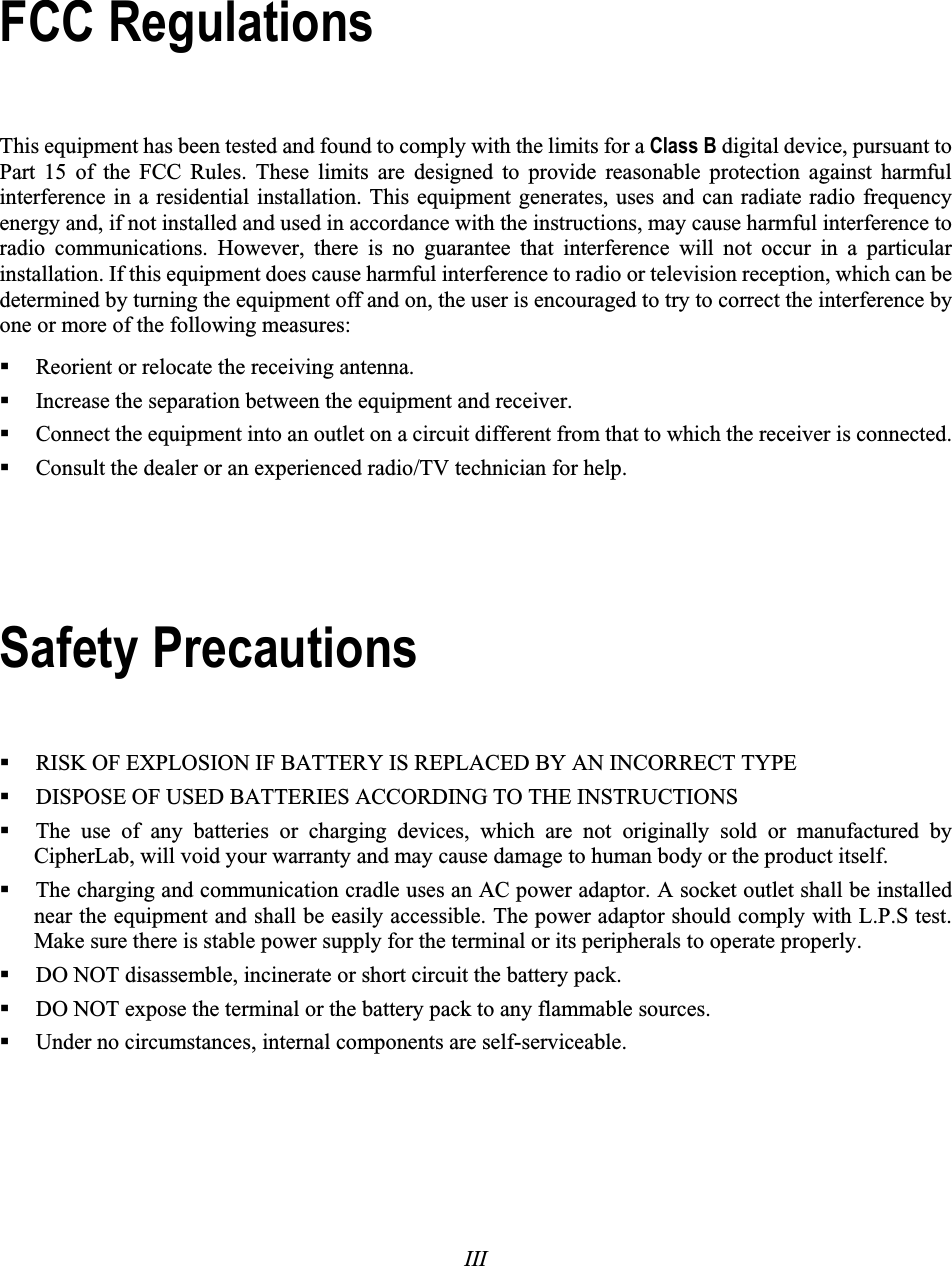
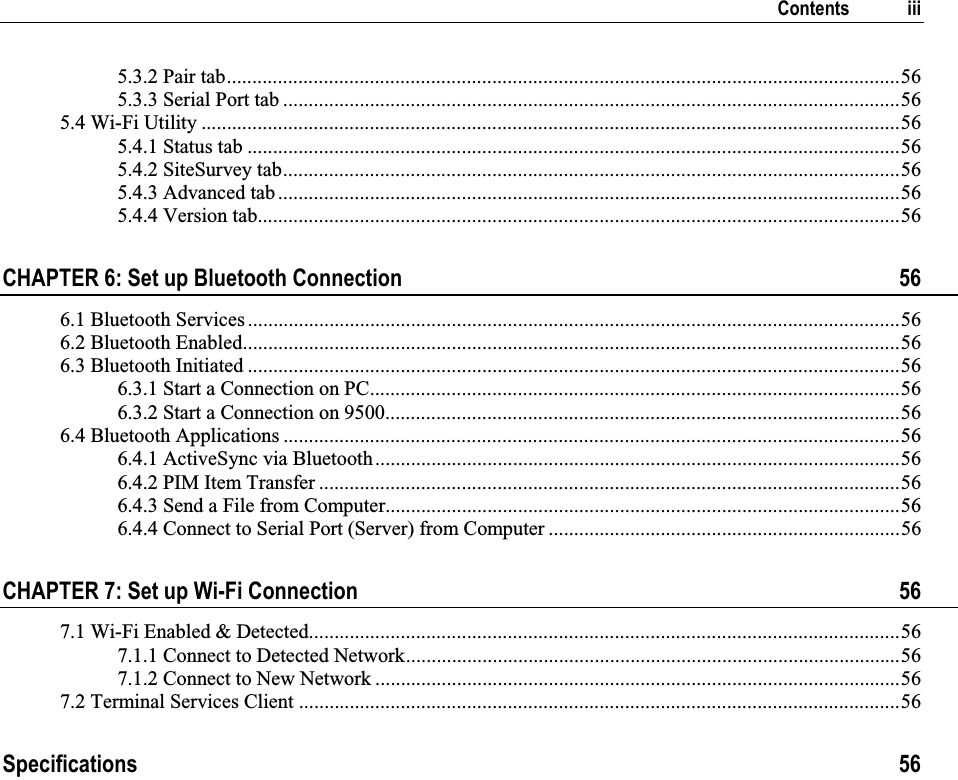
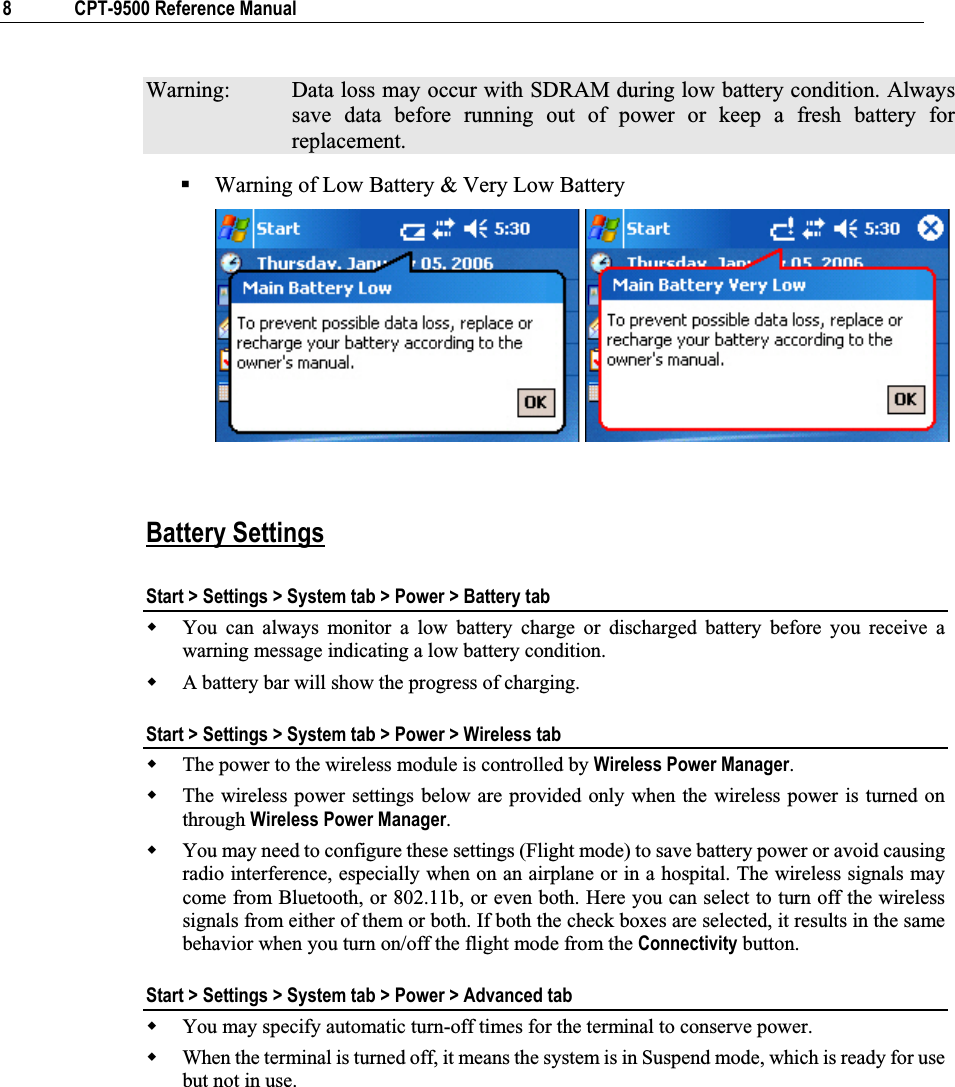
![14 CPT-9500 Reference Manual Func KeyThe [Func] (function) key serves as a modifier key. 1. To enable this modifier key, press on the keypad. A yellow icon of the letter "F" will appear on the navigation bar. This modifier key is hold down as long as the icon is displayed. 2. Now press another key to get the value of key combination (say, press [1] to get the value of F1). The icon will go off now. 3. To get the value of another key combination modified by the [Func] key, repeat the above steps. 4. To abort the key modification, press again, and the icon will go off. Note: It is not necessary to hold down the [Func] key. The functionality of each key combination is application-dependent. Here is a list of the factory setting for a variety of key combinations. Key Combination Action + PgUp (red-coded): move text up one screenful + PgDn (red-coded): move text down one screenful + Home (red-coded): move to the beginning of screen or document + End (red-coded): move to the end of screen or document + Toggle ON/OFF the backlight of LCD and keypad + Toggle ON/OFF the backlight of keypad only + Turn ON the backlight of LCD and decrease intensity + Turn ON the backlight of LCD and increase intensity + Increase volume](https://usermanual.wiki/CipherLab/9500.Users-Manual-1/User-Guide-678011-Page-24.png)

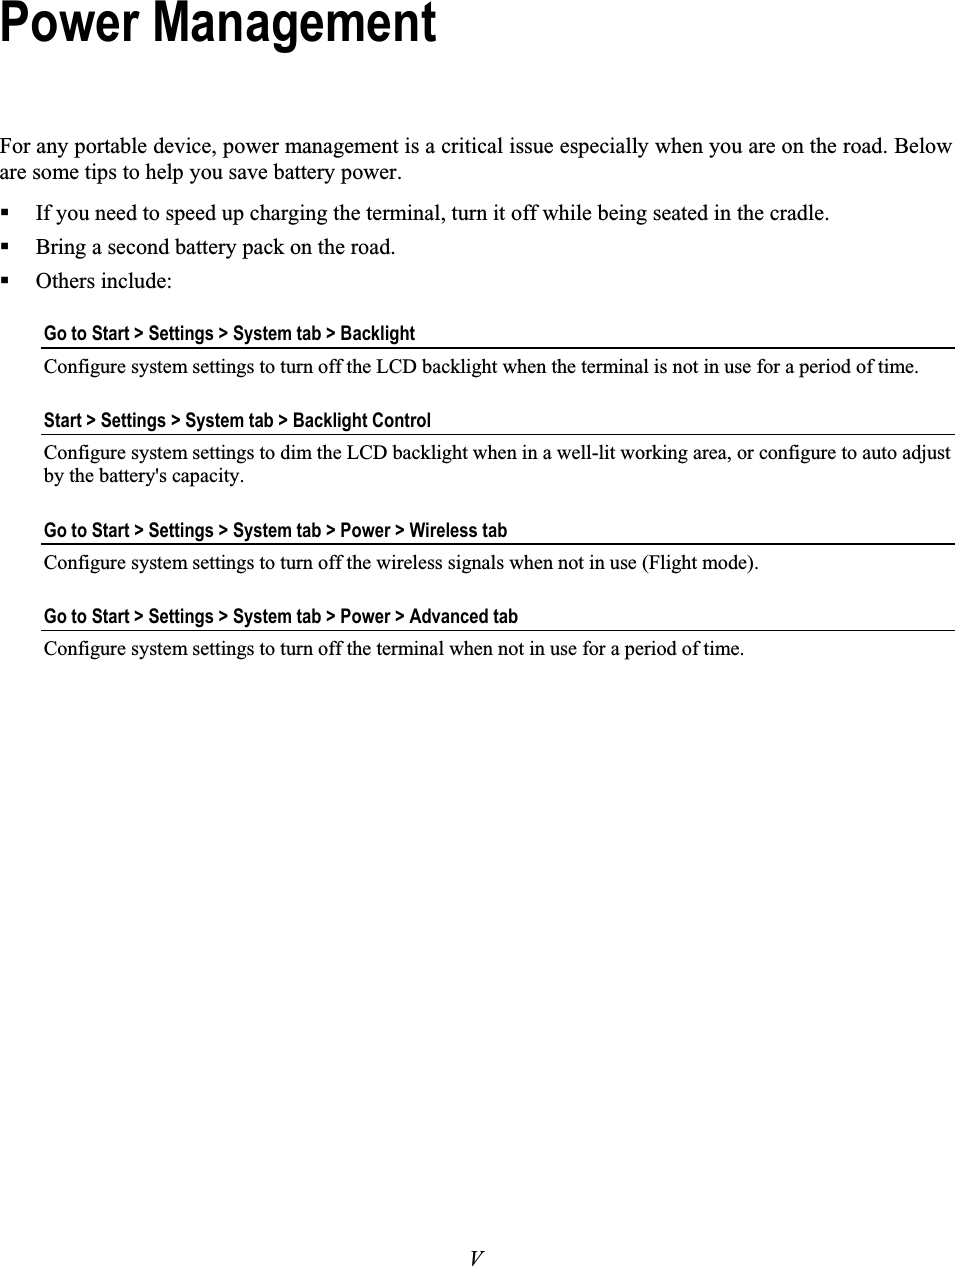
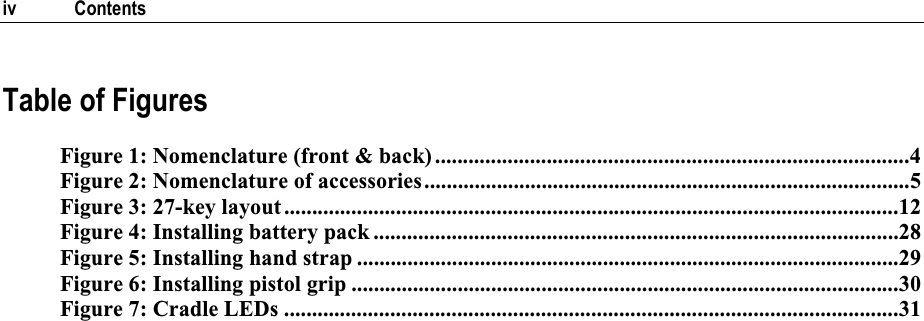
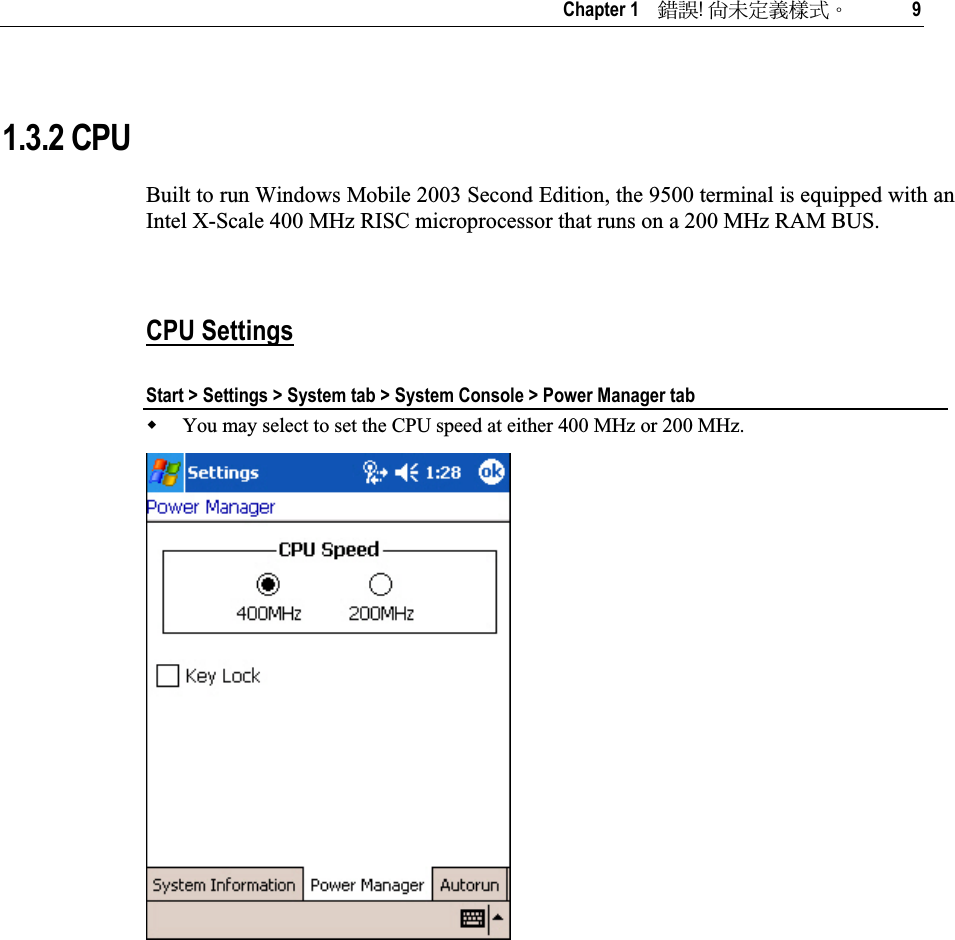
![16 CPT-9500 Reference Manual Alpha KeyThis alphanumeric keypad is set to numeric mode by default. The Alpha key serves as a toggle among numeric, alpha (lower case alphabetic), and ALPHA (upper case alphabetic) modes. The alpha icon will appear on the navigation bar in a sequence as shown below. Alpha Key Input Mode Result N/A Numeric mode Press one time Lower alpha mode Press two times Upper alpha mode Note: It is not necessary to hold down the [Alpha] key. However, the Alpha mode may not behave normally if the Caps lock of the software keypad is enabled. Hardware Keypad Software keypad Example of resulted input mode Alpha mode (A) CAP on abc Alpha mode (a) CAP on ABC Alpha mode (A) CAP off ABC Alpha mode (a) CAP off abc Note: Only when the Caps lock of the software keypad is disabled, the Alpha mode of hardware keypad will behave normally.](https://usermanual.wiki/CipherLab/9500.Users-Manual-1/User-Guide-678011-Page-26.png)
![Chapter 1 ᙑᎄ!ࡸآࡳᆠᑌڤΖ 17 Keypad Settings + The LED backlight of keypad is turned off by default. It can be controlled by using the key combination: [Func] + [0]. Start > Settings > Personal tab > Sounds & Notifications > Sound tab To configure the key click, go to Start > Settings > Personal tab > Sounds & Notifications > Sound tab, and select the Hardware buttons option. Warning: Using backlight while on battery power will substantially reduce battery life. It is suggested to turn on the keypad backlight while working in a dark area.](https://usermanual.wiki/CipherLab/9500.Users-Manual-1/User-Guide-678011-Page-27.png)
![18 CPT-9500 Reference Manual 1.3.5 LCD The terminal comes with a 3.5” TFT graphic LCD, 240 by 320 pixels resolutions. The LED backlight of screen, which helps ease reading under dim environments, can be controlled manually and automatically. Warning: Using backlight while on battery power will substantially reduce battery life. It is suggested to dim the backlight while working in a well-lit area or automatically turn off the terminal when not in use. This LCD is also a touch screen that can be calibrated through screen alignment. Warning: DO NOT use any pointed or sharp objects to move against the surface of the screen. LCD Settings + The LED backlight of screen is turned on by default. It can be manually controlled by using the key combination: [Func] + [TAB]. Start > Settings > System tab > Backlight Configure the LED backlight of screen. The backlight can be toggled on and off automatically, either on battery or AC power. To conserve more power, you may go to Start > Settings > System tab > Power to configure the auto turn-off setting. Start > Settings > System tab > Backlight Control To configure the luminosity of backlight, tap, hold, and drag the slider. You may select to auto adjust backlight by the battery's capacity. Start > Settings > System tab > Screen > Alignment tab Tap [Align Screen] to start with screen alignment if necessary. Start > Settings > System tab > Screen > Clear Type tab You may select Clear Type for fonts. Start > Settings > System tab > Screen > Text Size tab Tap, hold, and drag the slider to configure text size.](https://usermanual.wiki/CipherLab/9500.Users-Manual-1/User-Guide-678011-Page-28.png)
![Chapter 1 ᙑᎄ!ࡸآࡳᆠᑌڤΖ 19 1.3.6 Status LED The dual-color LED on top of the [Scan] button is used to provide information on status of wireless signal search or battery charging. Tasks Green LED Red LED Green & Red Low battery --- Flashing --- Charging --- On --- Charge Done On --- --- Charging Error --- --- Flashing Wireless Signal Search Flashing --- --- 1.3.7 Speaker The speaker, a low power transducer type, can be used for playing audio files (WAV or MP3) or programmed for status feedback. 1.3.8 Vibrator Like a modern mobile phone, the terminal is integrated with a vibrator. It is software programmable and especially useful when working in a noisy environment.](https://usermanual.wiki/CipherLab/9500.Users-Manual-1/User-Guide-678011-Page-29.png)

![34 CPT-9500 Reference Manual 3.1 General When the 9500 terminal is fully charged, you may remove it from the cradle. Then turn on the terminal and wait for the Today screen to come up. However, if you are using the terminal for the first time, there are a couple of things to do before the Today screen comes up. To select your time zone and set the local time To align the touch screen Note: With a focus on delivering data collection and industrial requirements on a portable device, the 9500 terminal is currently not equipped with an internal microphone and the IrDA port. Therefore, voice recording and file transfer via infrared (Start > Settings > Connections tab > Beam) are not supported. 3.1.1 Turn On/Off Like your PDA, Pocket PC and most handheld devices, the 9500 terminal functions when it is turned on. This is because the Windows Mobile operating system eliminates the booting process and runs continuously. Turn OnTo turn on the terminal, simply press the [Power] key. Turn OffTo turn off the terminal, press and hold the [Power] key for approximately 2 seconds. The system is now ready for use but not in use. This is referred to as Suspend mode or Standby mode. It means the system is in power-saving status and waiting for user interference. Warning: To save battery power, it is suggested that the terminal is set to automatically turn off when not in use.](https://usermanual.wiki/CipherLab/9500.Users-Manual-1/User-Guide-678011-Page-44.png)
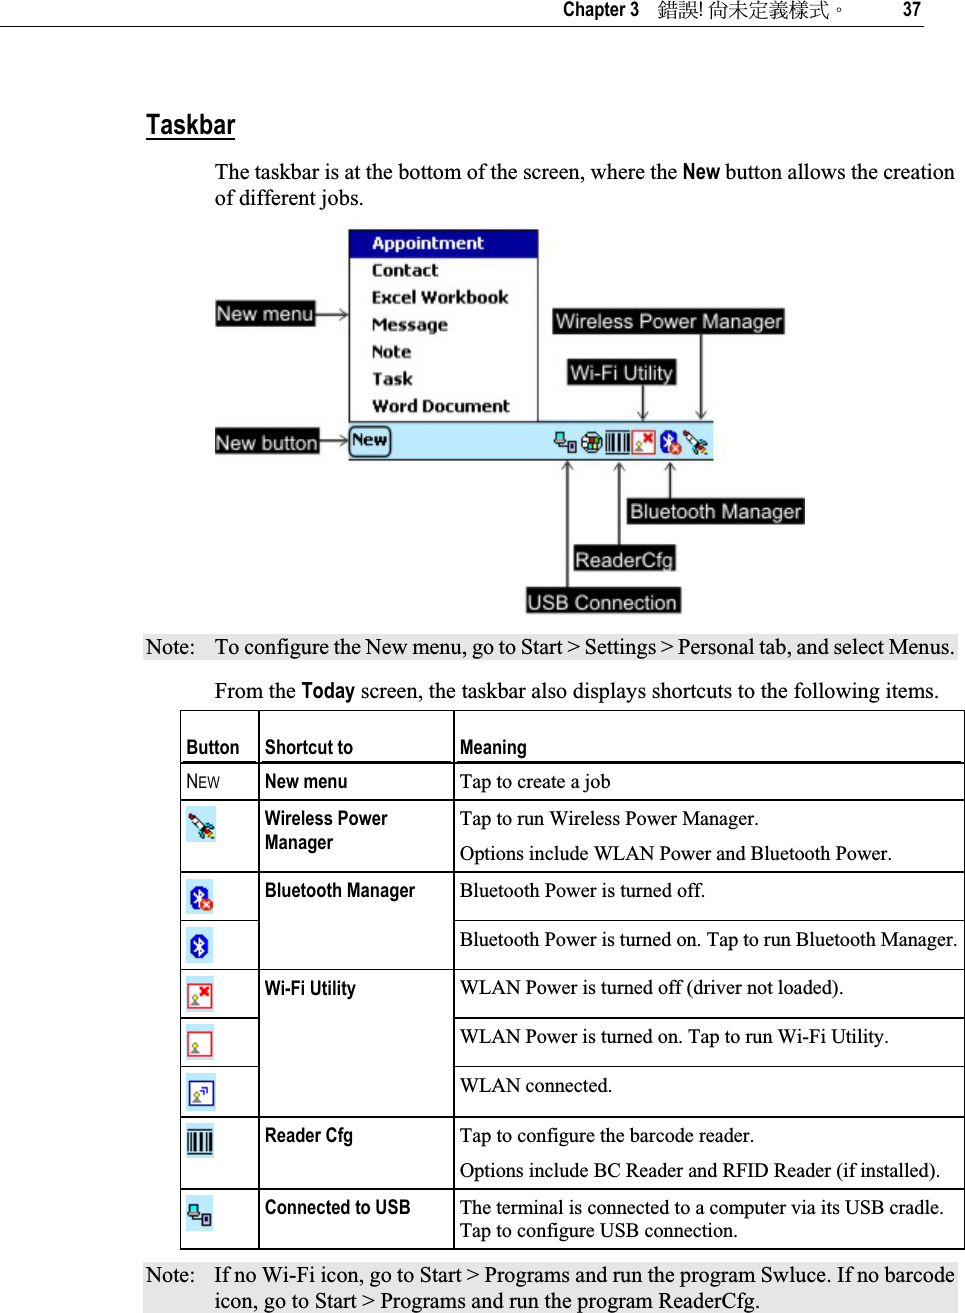
![Chapter 3 ᙑᎄ!ࡸآࡳᆠᑌڤΖ 35 3.1.2 Today Screen This Today screen appears when the terminal is turned on. Alternatively, you may tap on the Windows logo or the Start button on the top-left corner of the screen, and then select Today.Note: To customize the Today screen, go to Start > Settings > Personal tab > Today. In the Items tab, [Today timeout] refers to the amount of hours of inactivity for the Today screen to show up automatically.](https://usermanual.wiki/CipherLab/9500.Users-Manual-1/User-Guide-678011-Page-45.png)

![40 CPT-9500 Reference Manual 3.1.4 Reset Reset the 9500 terminal when it stops responding to input. Soft reset: Simply press the [Reset] button. Hard reset: Press the [Reset] button and the [Power] key at the same time. Warning: Never perform a hard reset unless a soft reset cannot solve your problems. Soft ResetA soft reset, also known as a warm boot, will restart the terminal and keep all the saved files. To perform a soft reset, use the stylus to press the [Reset] button. During operation, the removal of battery pack will start a soft reset too. Warning: Data loss may occur when files are not properly closed before a soft reset. Hard ResetA hard reset, also known as a cold boot, will restart the terminal too. However, it performs a full restore of the terminal to its factory settings and initializes SDRAM. To perform a hard reset, press the [Power] key and [Reset] button at the same time. Data and program files stored in SDRAM will be erased after a hard reset. But you can restore data that is previously synchronized with your computer by performing an ActiveSync operation. Alternatively, you can restore data using the program Backup Utility if a backup job is carried out periodically. Warning: Only the files stored in the Flash File System are retained during a hard reset.](https://usermanual.wiki/CipherLab/9500.Users-Manual-1/User-Guide-678011-Page-50.png)
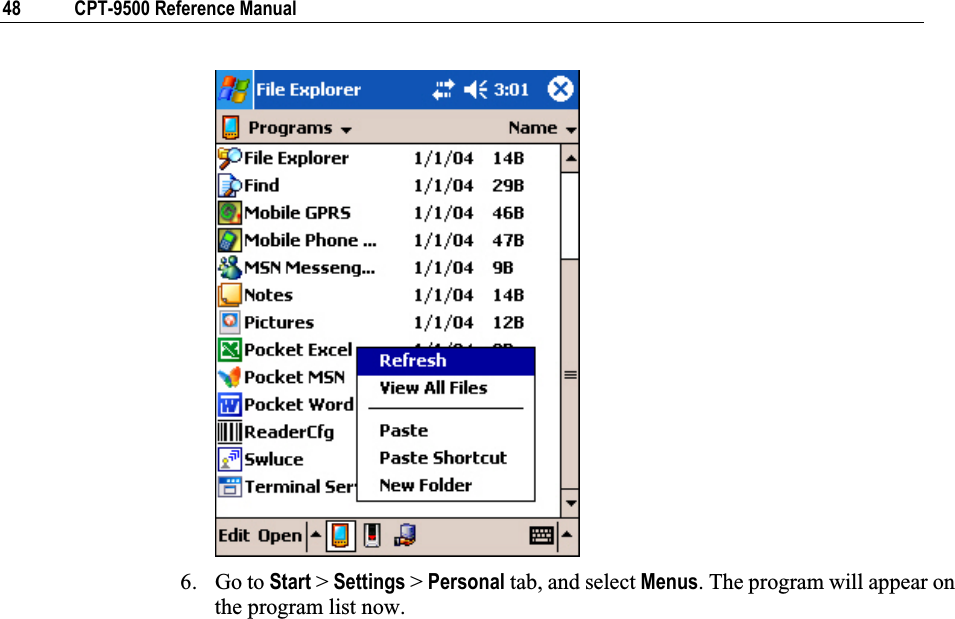
![46 CPT-9500 Reference Manual 3.3.2 Add a Program or Subfolder If your program is not on the program list, you can either use File Explorer or ActiveSync to add new program. File Explorer: to move the program by Copy and Paste Shortcut. ActiveSync on the desktop computer: to create a shortcut to the program, and place the shortcut in the Programs folder. Warning: To avoid making any changes to the program configurations by accident, we recommend you to use Copy and Paste Shortcut rather than Cut and Paste. Using File Explorer1. Go to Start > Programs, and select File Explorer.Alternatively, you can press the Task key on the keypad to quick launch File Explorer. 2. Navigate through file folders to find the program you desire. To create subfolders under the Programs folder (or the Start menu): - Navigate to the target folder, e.g. My Pocket PC\Windows\Start Menu\Programs (or My Pocket PC\Windows\Start Menu). - Then right-click anywhere blank on the window, and select [New Folder] from the pop-up menu. A subfolder will be created.](https://usermanual.wiki/CipherLab/9500.Users-Manual-1/User-Guide-678011-Page-56.png)
![Chapter 3 ᙑᎄ!ࡸآࡳᆠᑌڤΖ 47 - Go to Start > Programs (or simply tap the Start button). The new subfolder will appear. 3. Tap and hold the program, and then tap Copy on the pop-up menu. 4. Navigate to the Programs folder (My Device > Windows > Start Menu > Programs).5. Tap and hold anywhere blank on the screen. Then tap [Paste Shortcut] on the pop-up menu. The new program will be added to the Programs folder.](https://usermanual.wiki/CipherLab/9500.Users-Manual-1/User-Guide-678011-Page-57.png)
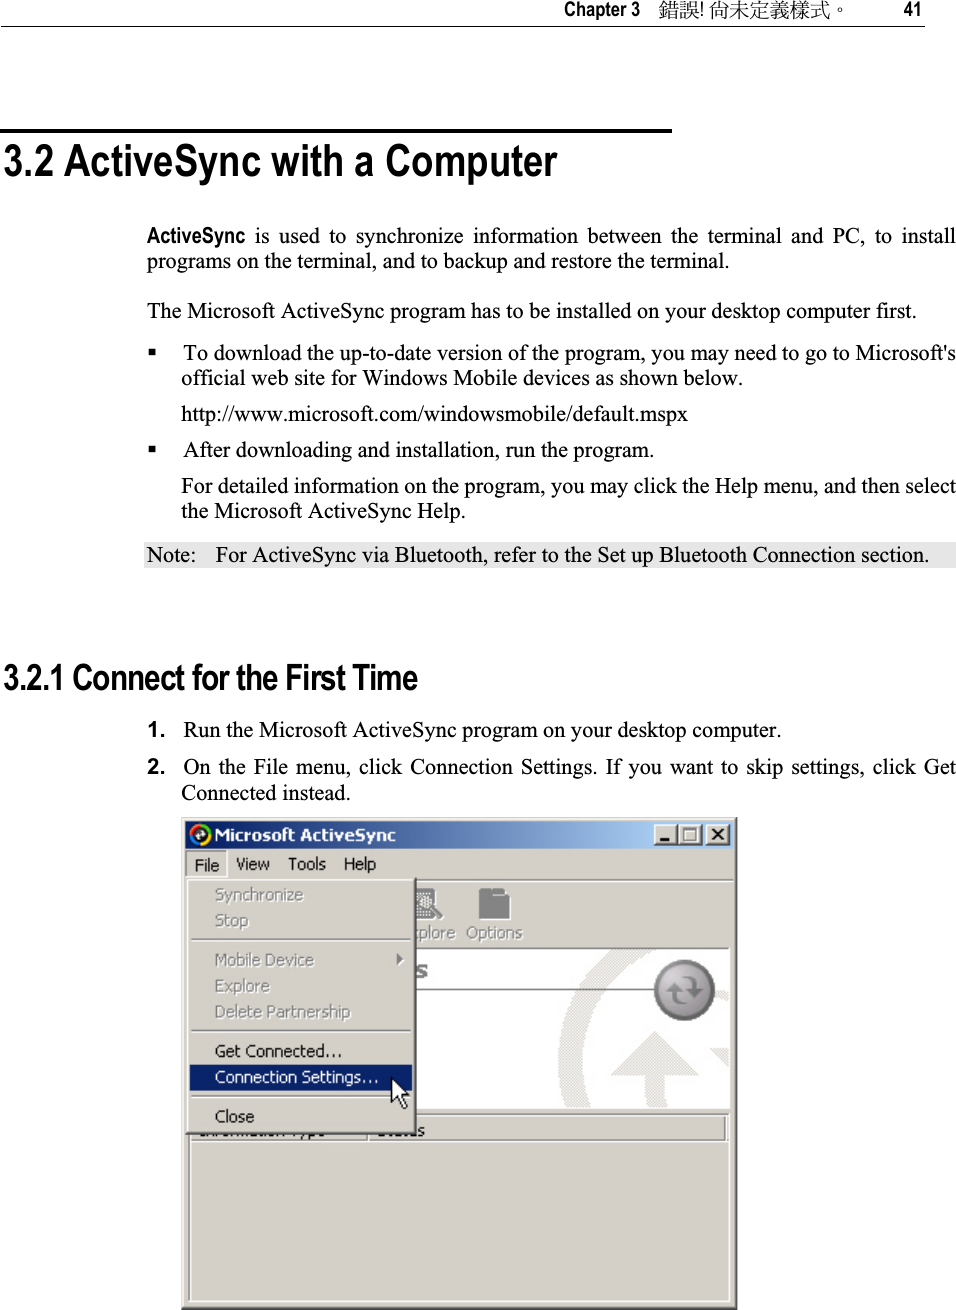
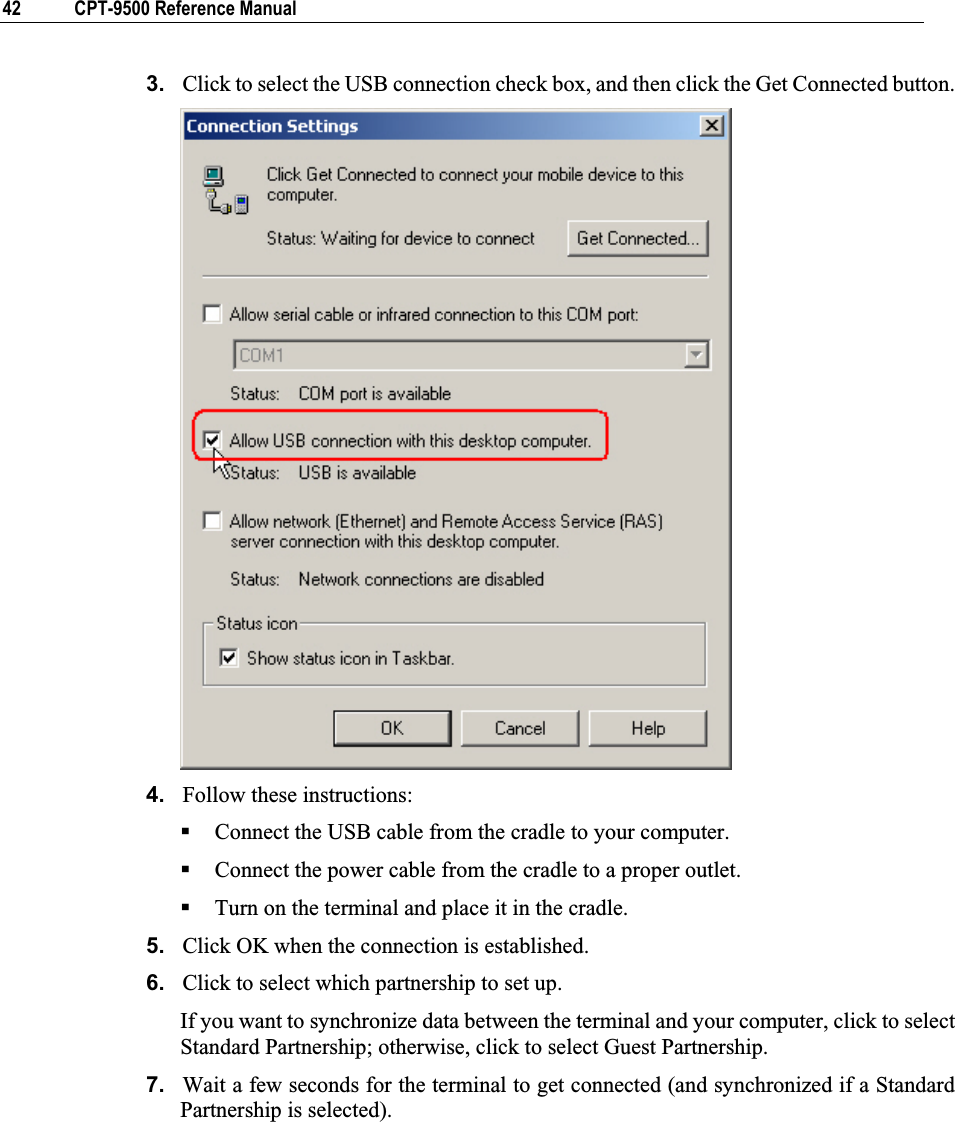
![Chapter 3 ᙑᎄ!ࡸآࡳᆠᑌڤΖ 49 Using ActiveSync on PC1. When connected, open the Microsoft ActiveSync window on your desktop computer. 2. Click the Explorer button from the toolbar. 3. Navigate through file folders to find the program you desire. To create subfolders under the Programs folder (or the Start menu): - Navigate to the target folder, e.g. My Pocket PC\Windows\Start Menu\Programs (or My Pocket PC\Windows\Start Menu). - Then right-click anywhere blank on the window, and select [New Folder] from the pop-up menu. A subfolder will be created. - On the terminal, go to Start > Programs (or simply tap the Start button). The new subfolder will appear. 4. Right-click to select the program, and then select [Create Shortcut] on the pop-up menu. 5. Right-click to select the shortcut, and then select [Cut] on the pop-up menu. 6. Navigate to the Programs folder (My Pocket PC\Windows\Start Menu\Programs).7. Right-click anywhere blank on the window. Then select [Paste] on the pop-up menu. The new program will be added to the Programs folder.](https://usermanual.wiki/CipherLab/9500.Users-Manual-1/User-Guide-678011-Page-59.png)
![50 CPT-9500 Reference Manual 8. On the terminal, go to Start > Settings > Personal tab, and select Menus. The program will appear on the program list now. Note: [Create Shortcut], [Cut], and [Paste]: The same result can be performed by [Copy] and [Paste Shortcut].](https://usermanual.wiki/CipherLab/9500.Users-Manual-1/User-Guide-678011-Page-60.png)