CipherLab RS30 Mobile Computer User Manual rev
CipherLab Co., Ltd. Mobile Computer rev
UserManual.wiki
>
CipherLab
>
RS30 User Manual
>
User Manual_rev.pdf
Contents
1.
User Manual.pdf
2.
User Manual_rev.pdf
User Manual_rev.pdf
Navigation menu
Upload a User Manual
Namespaces
Wiki Guide
HTML
PDF
Info
Views
User Manual
Discussion / Help
Navigation


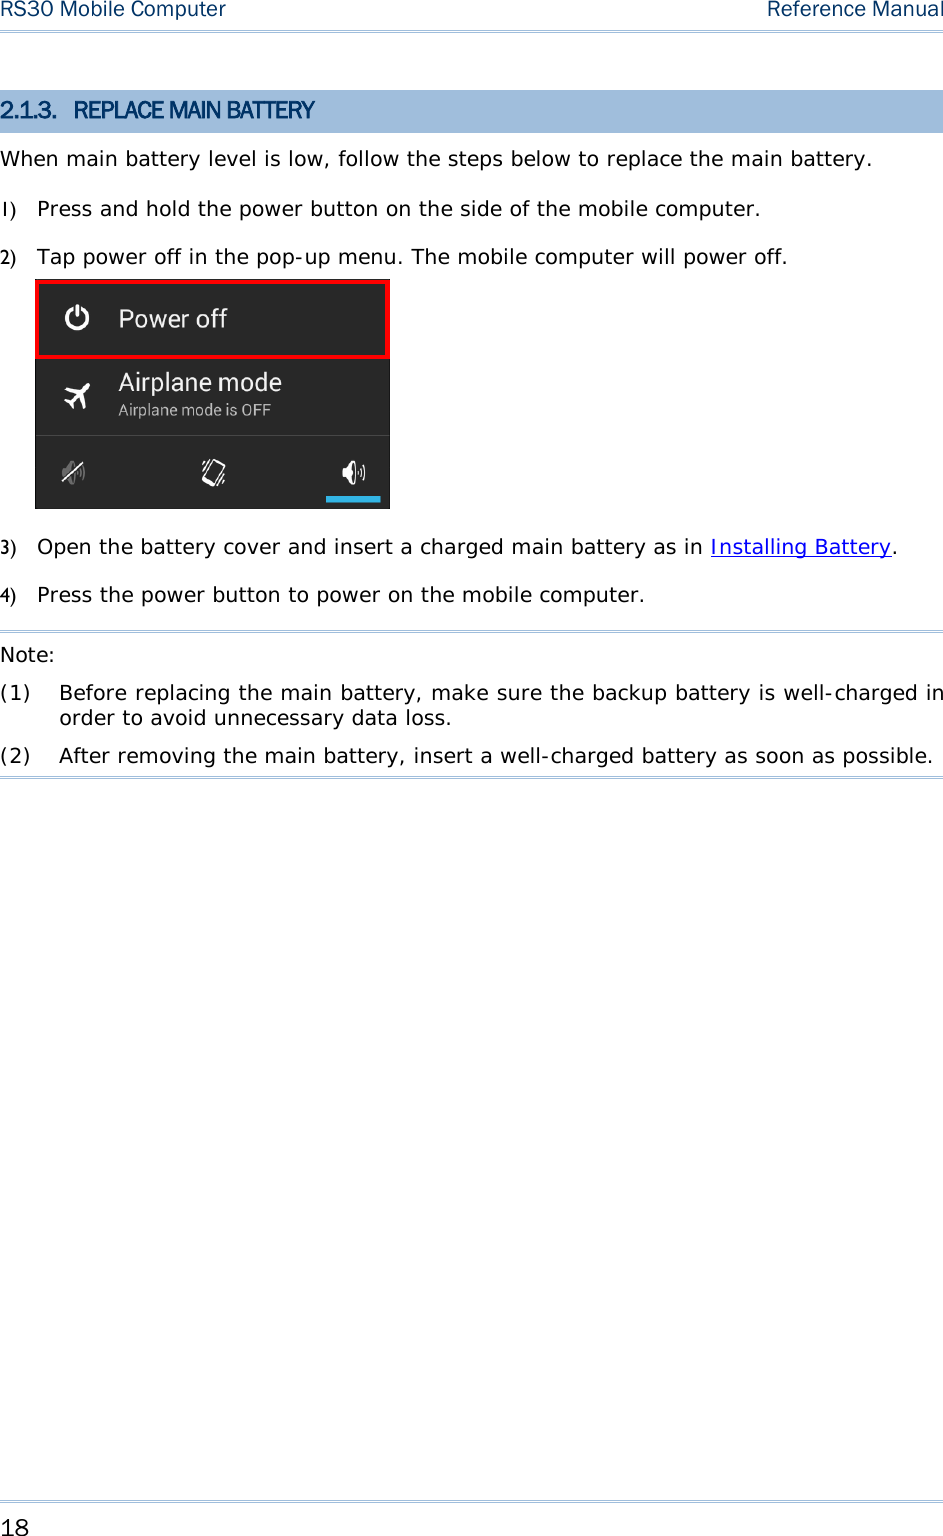

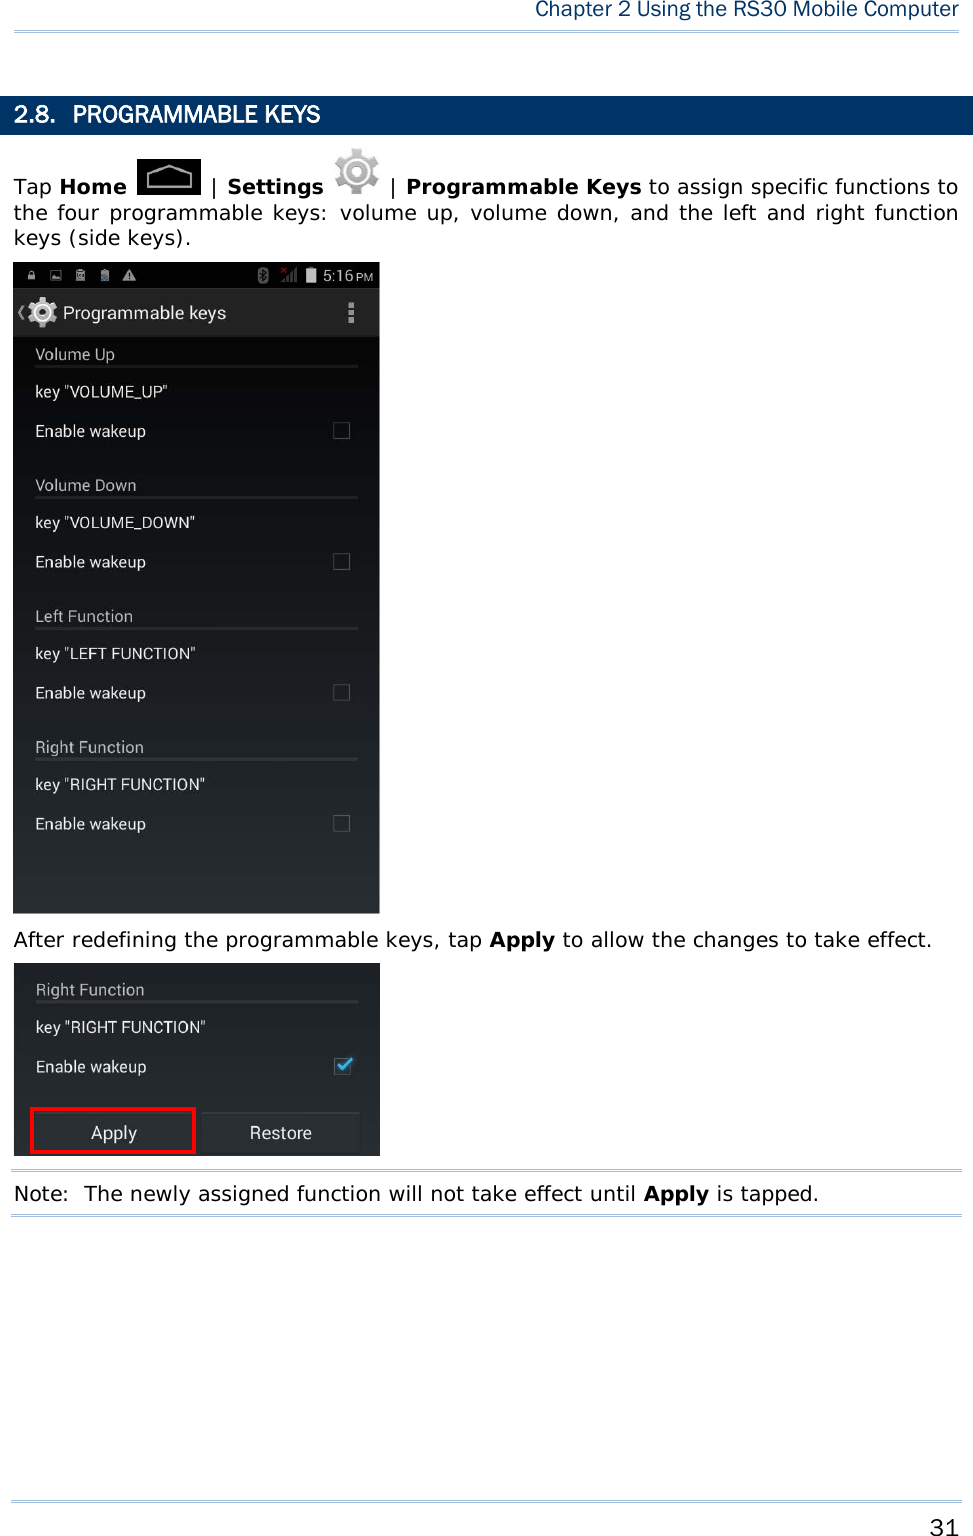

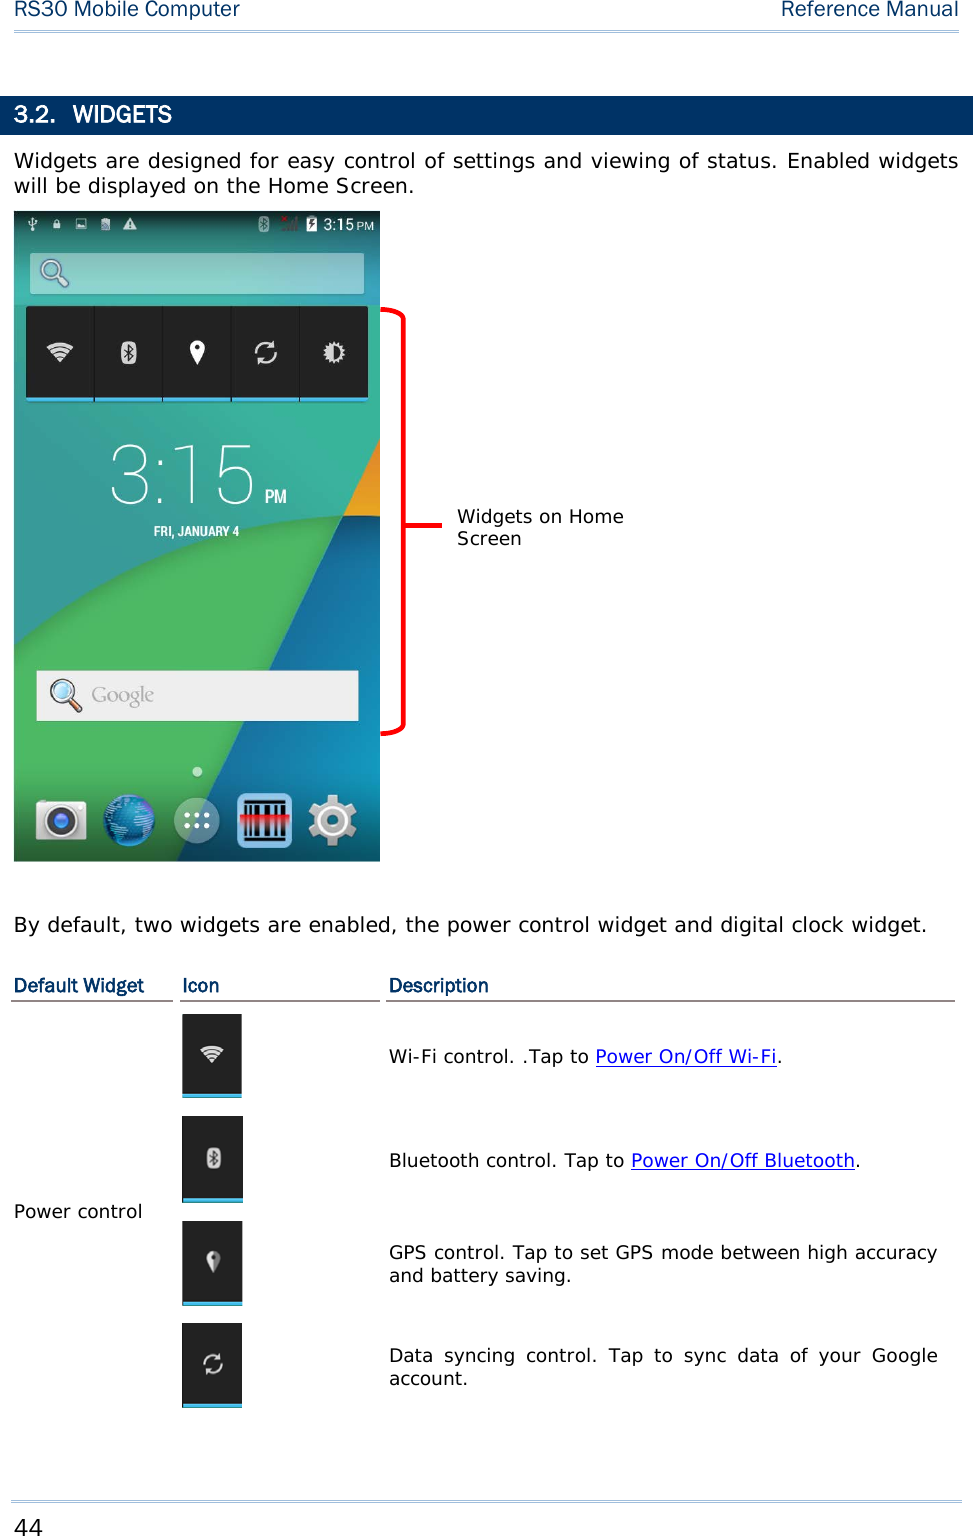
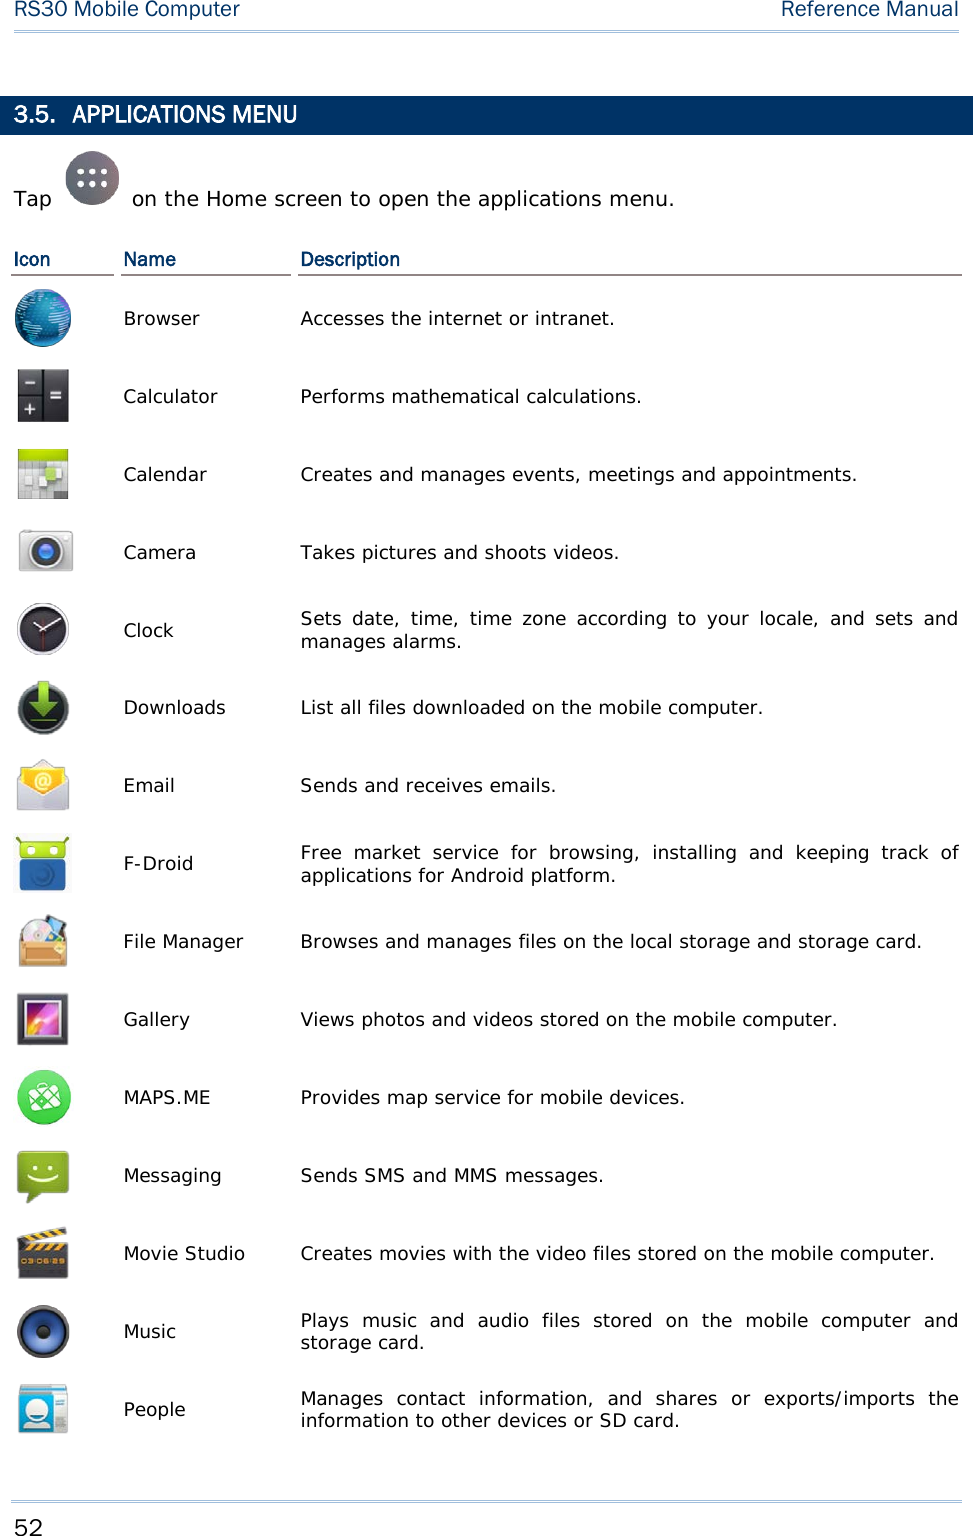


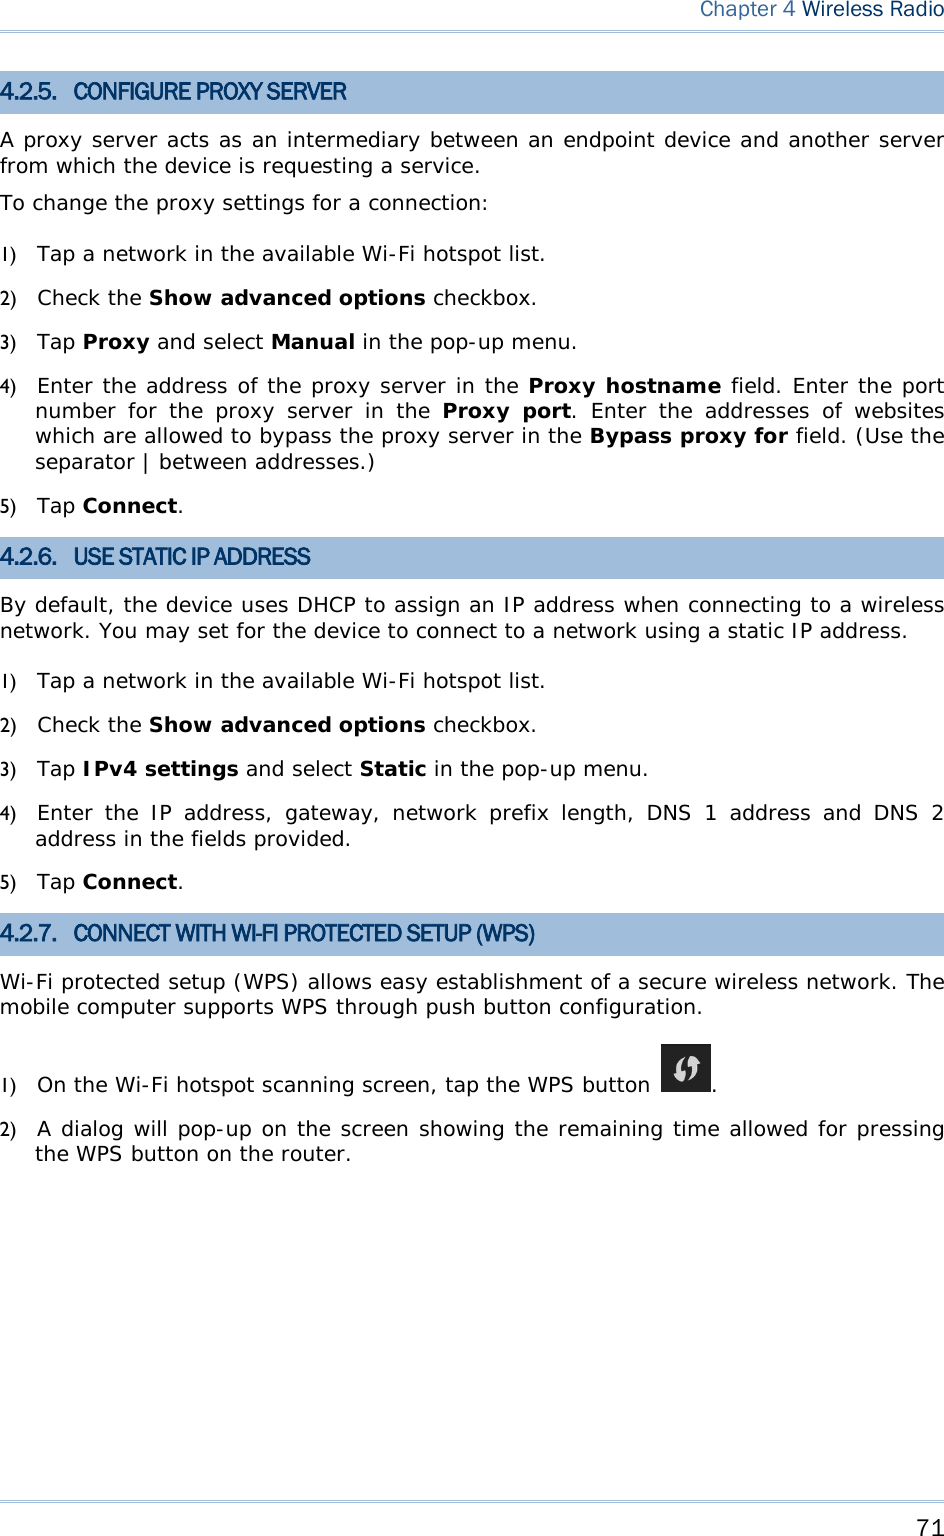


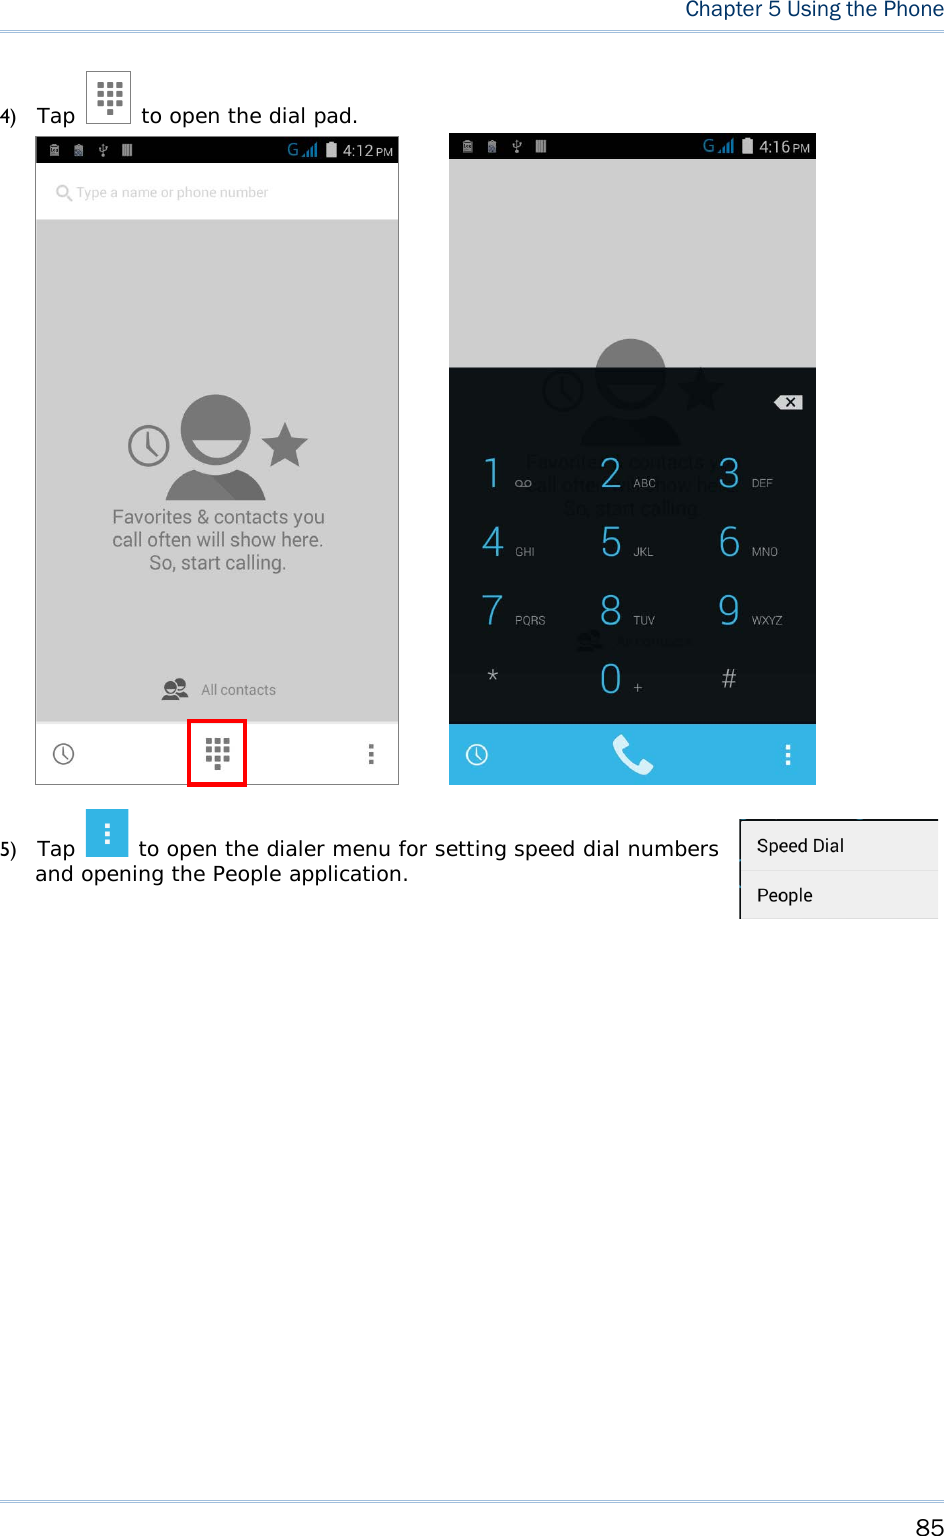
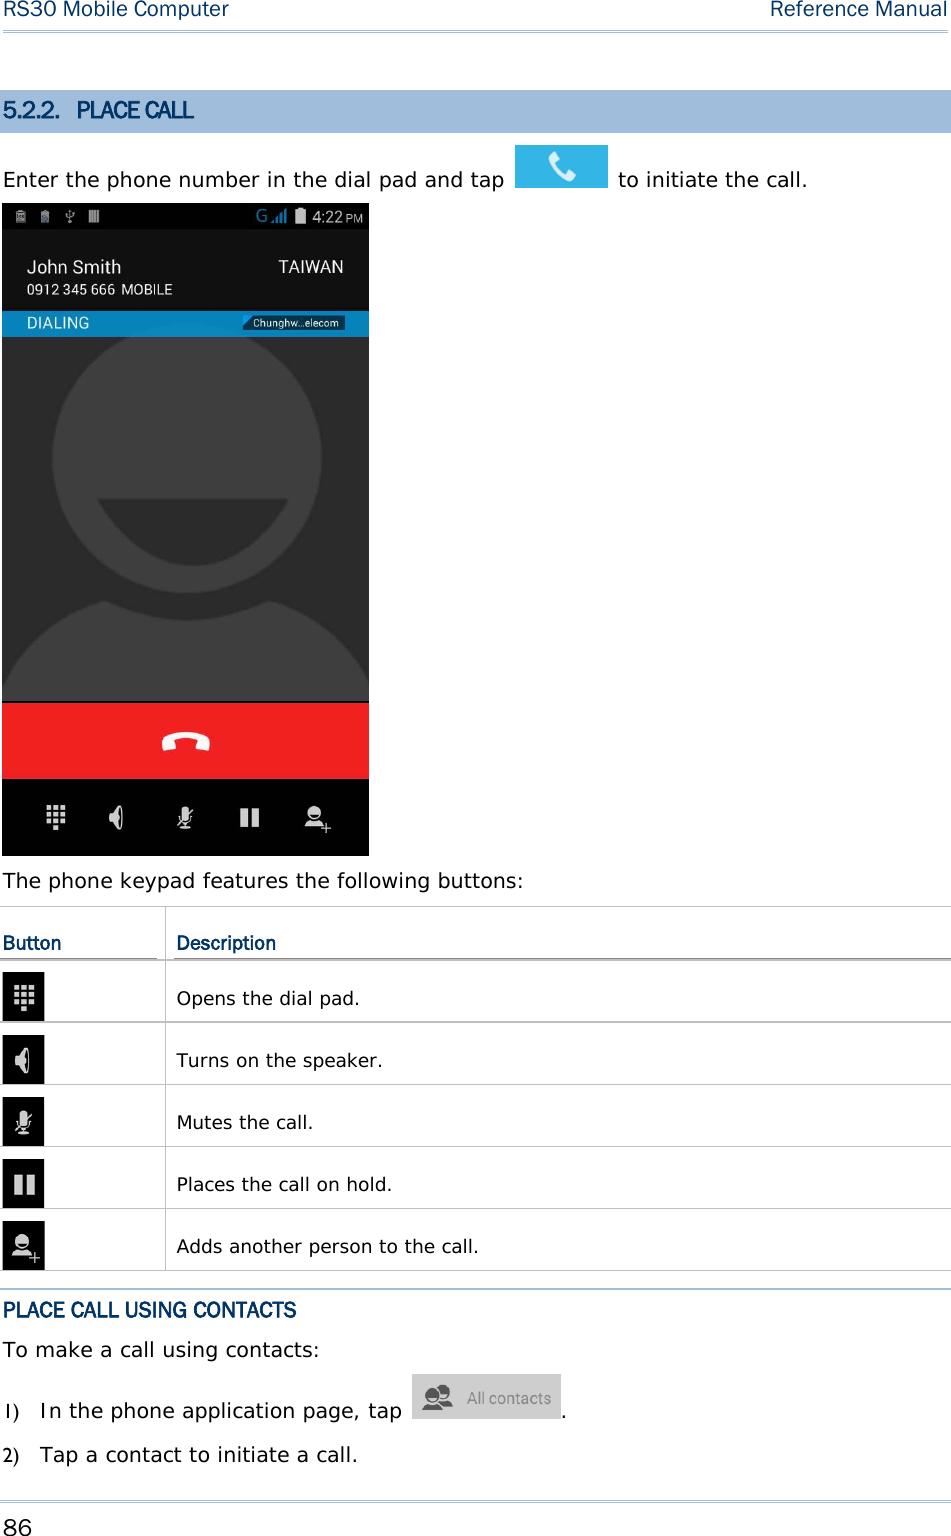
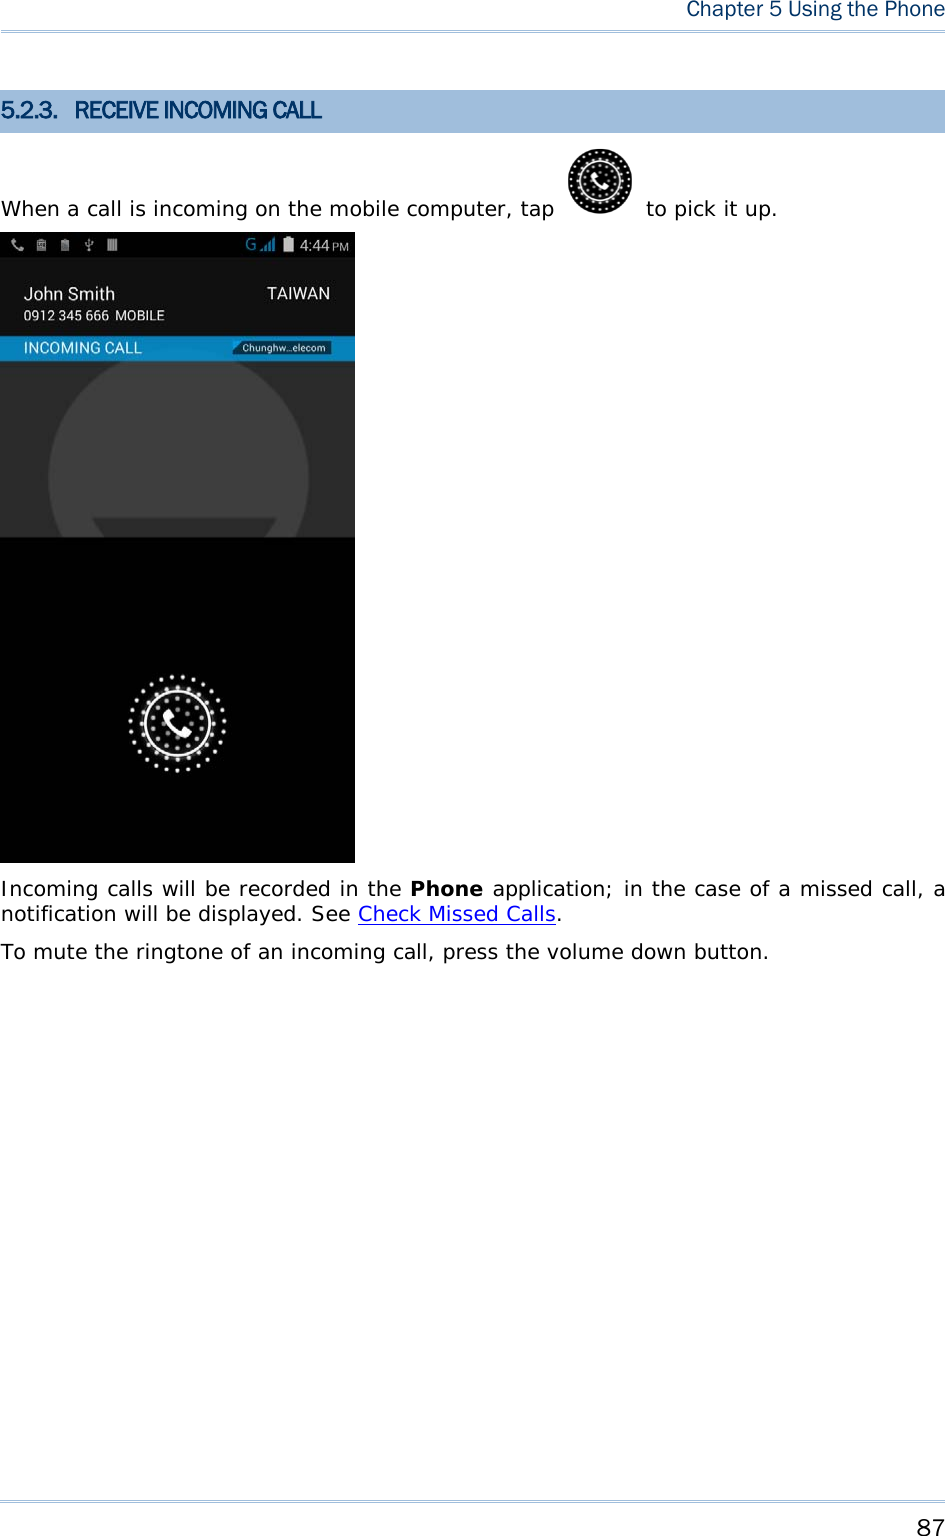
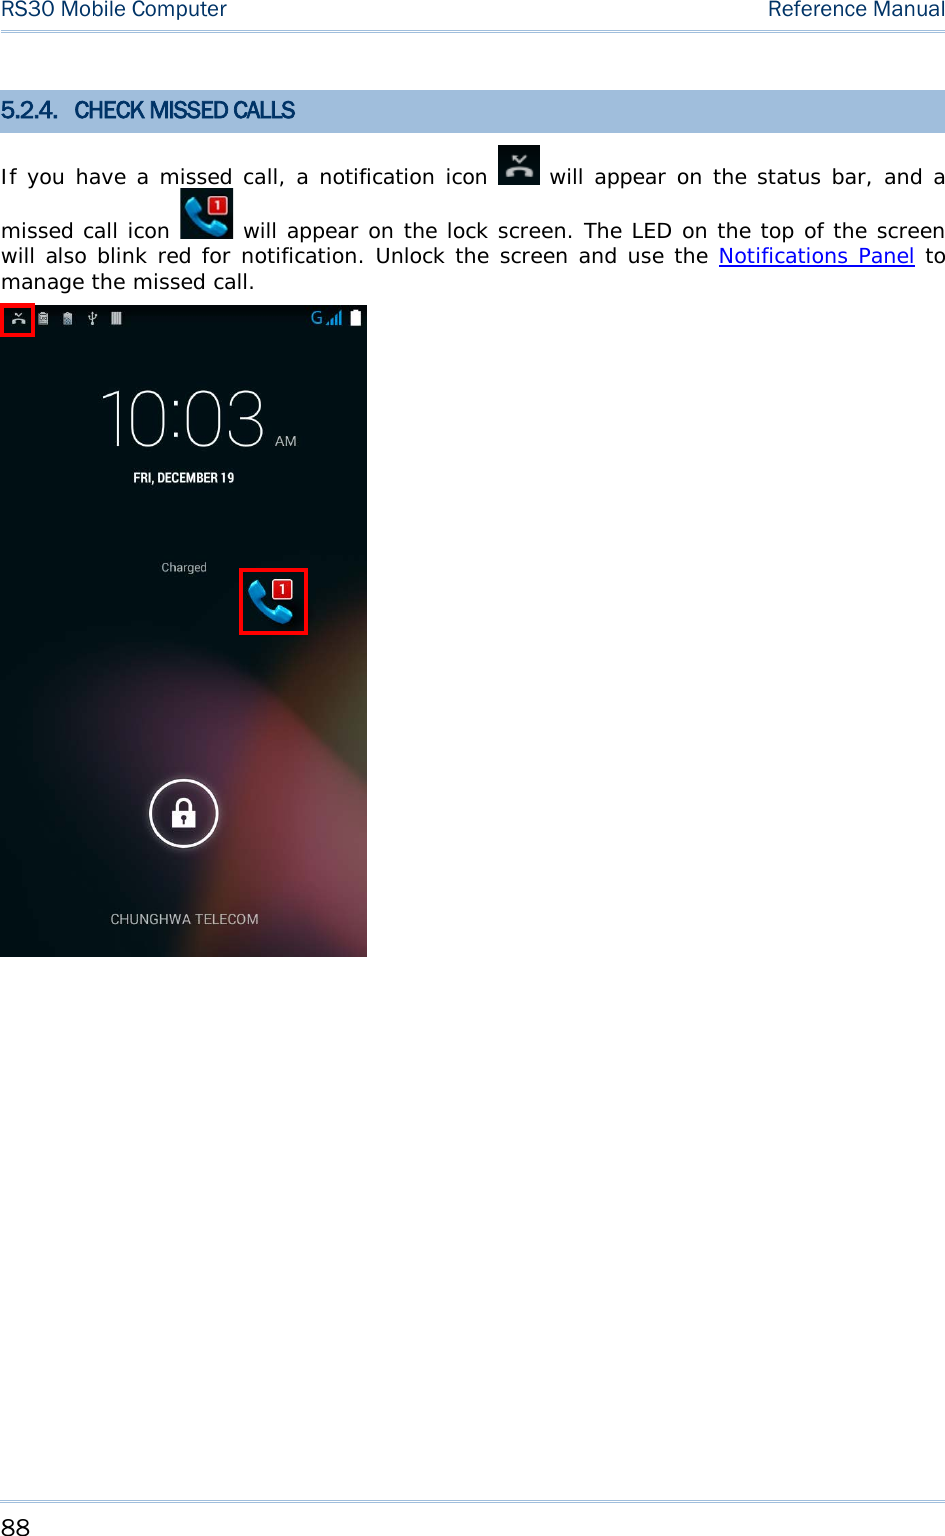


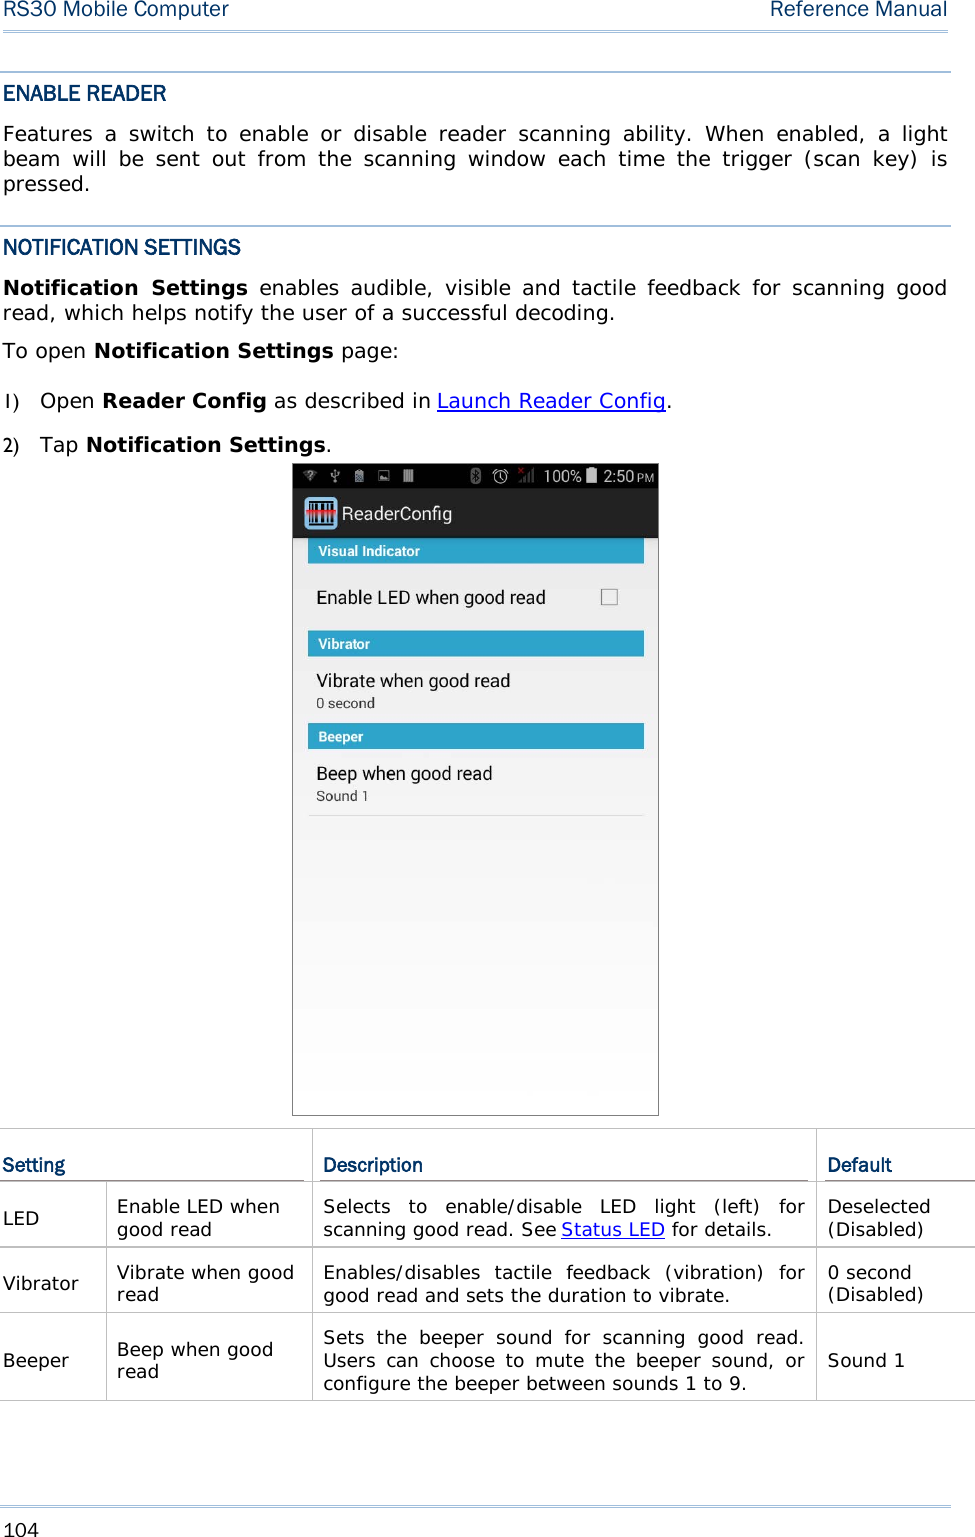
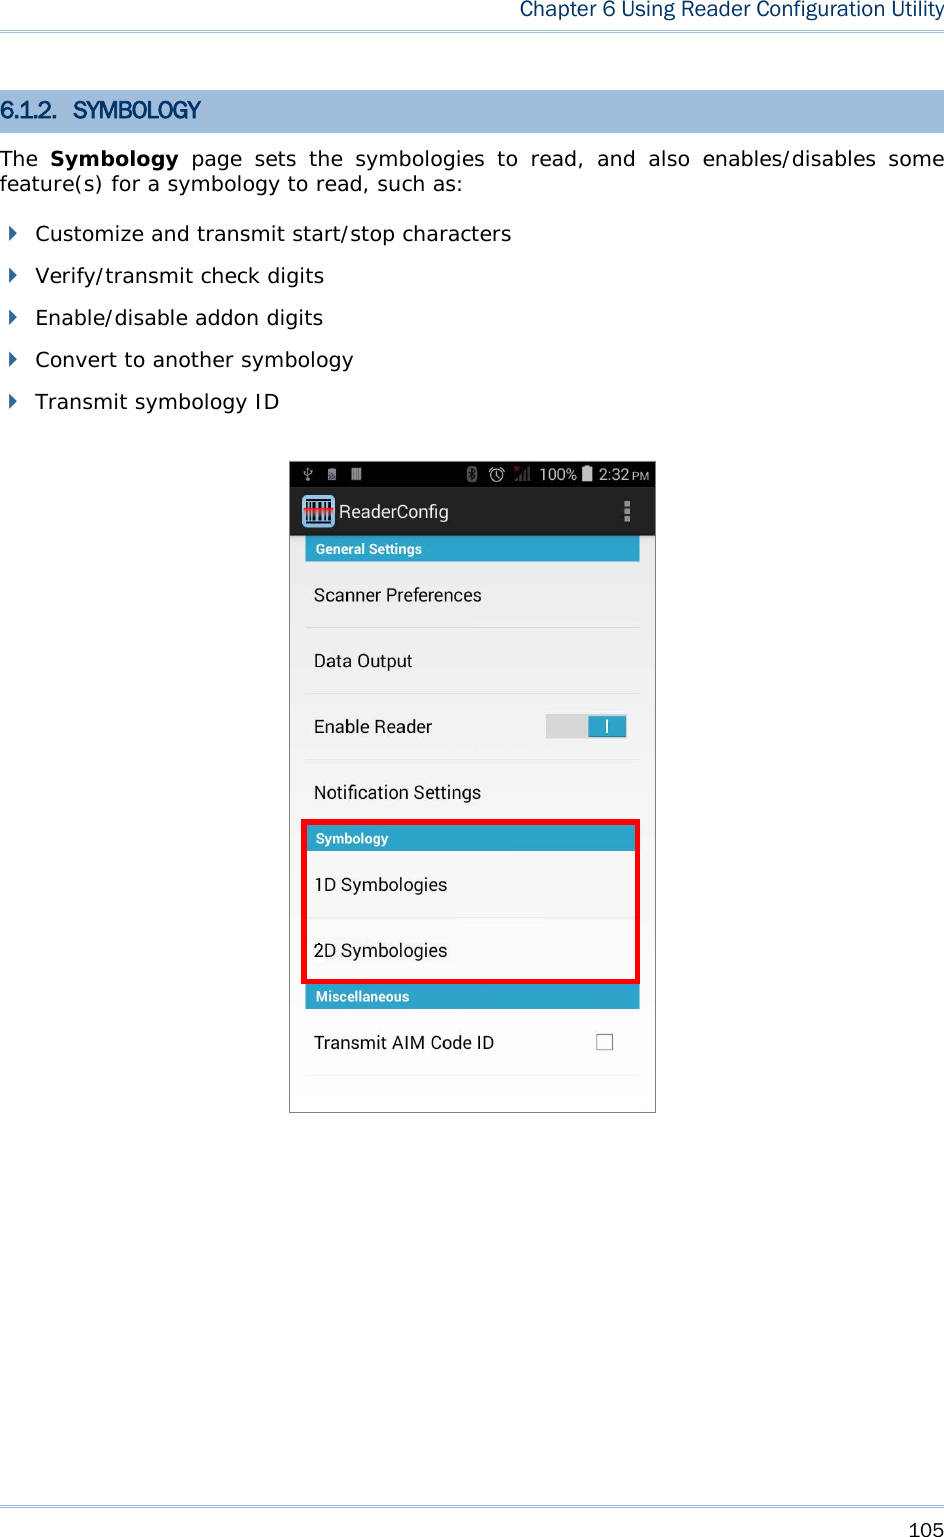
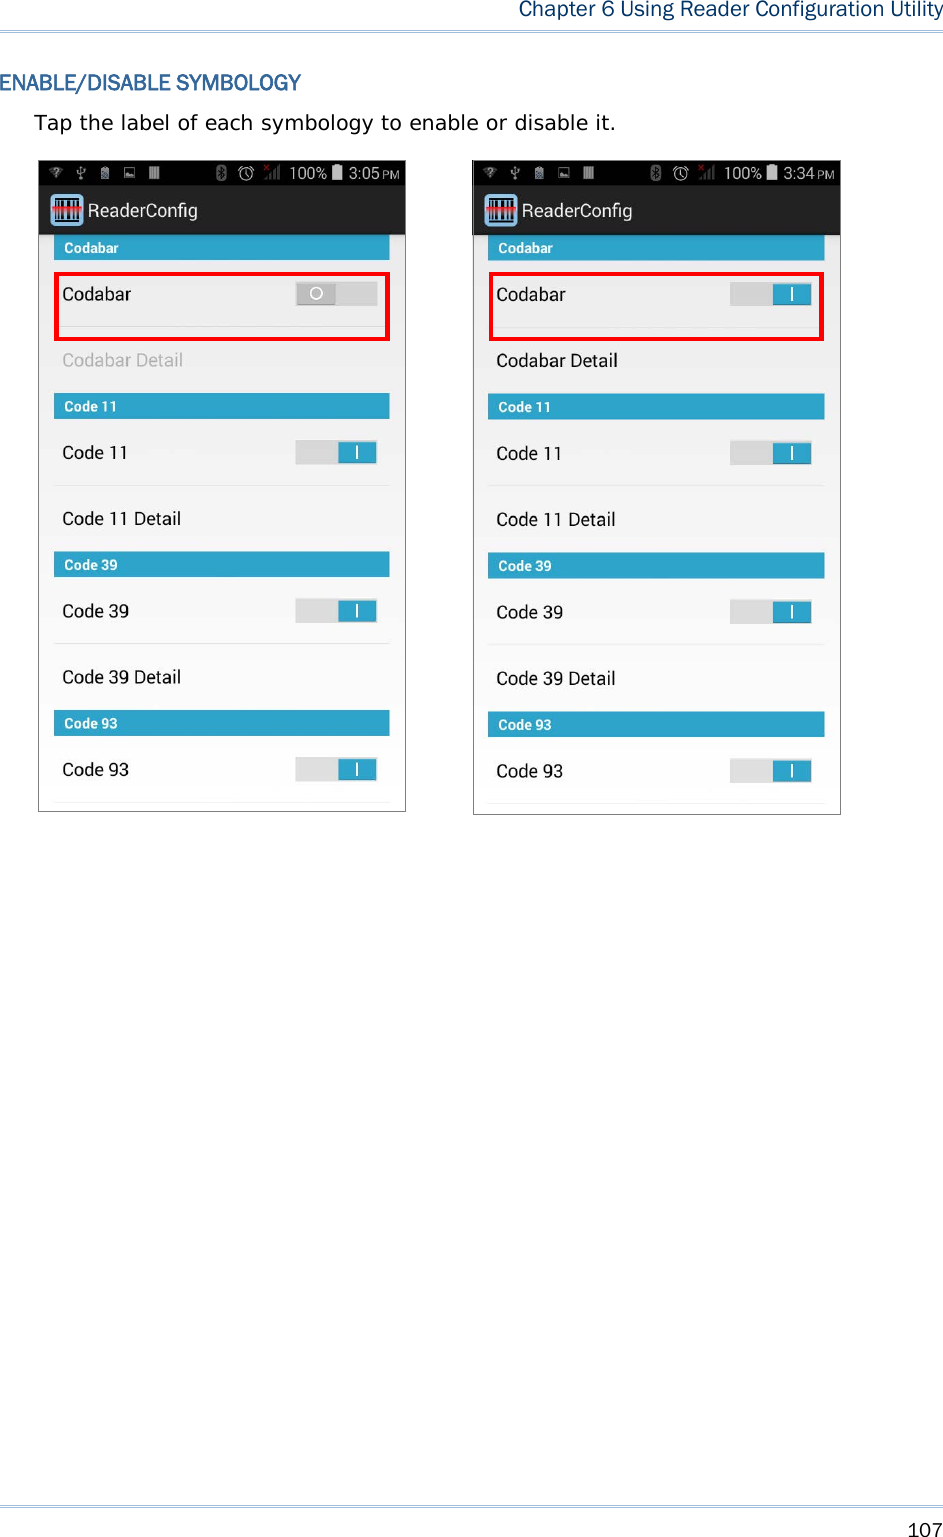
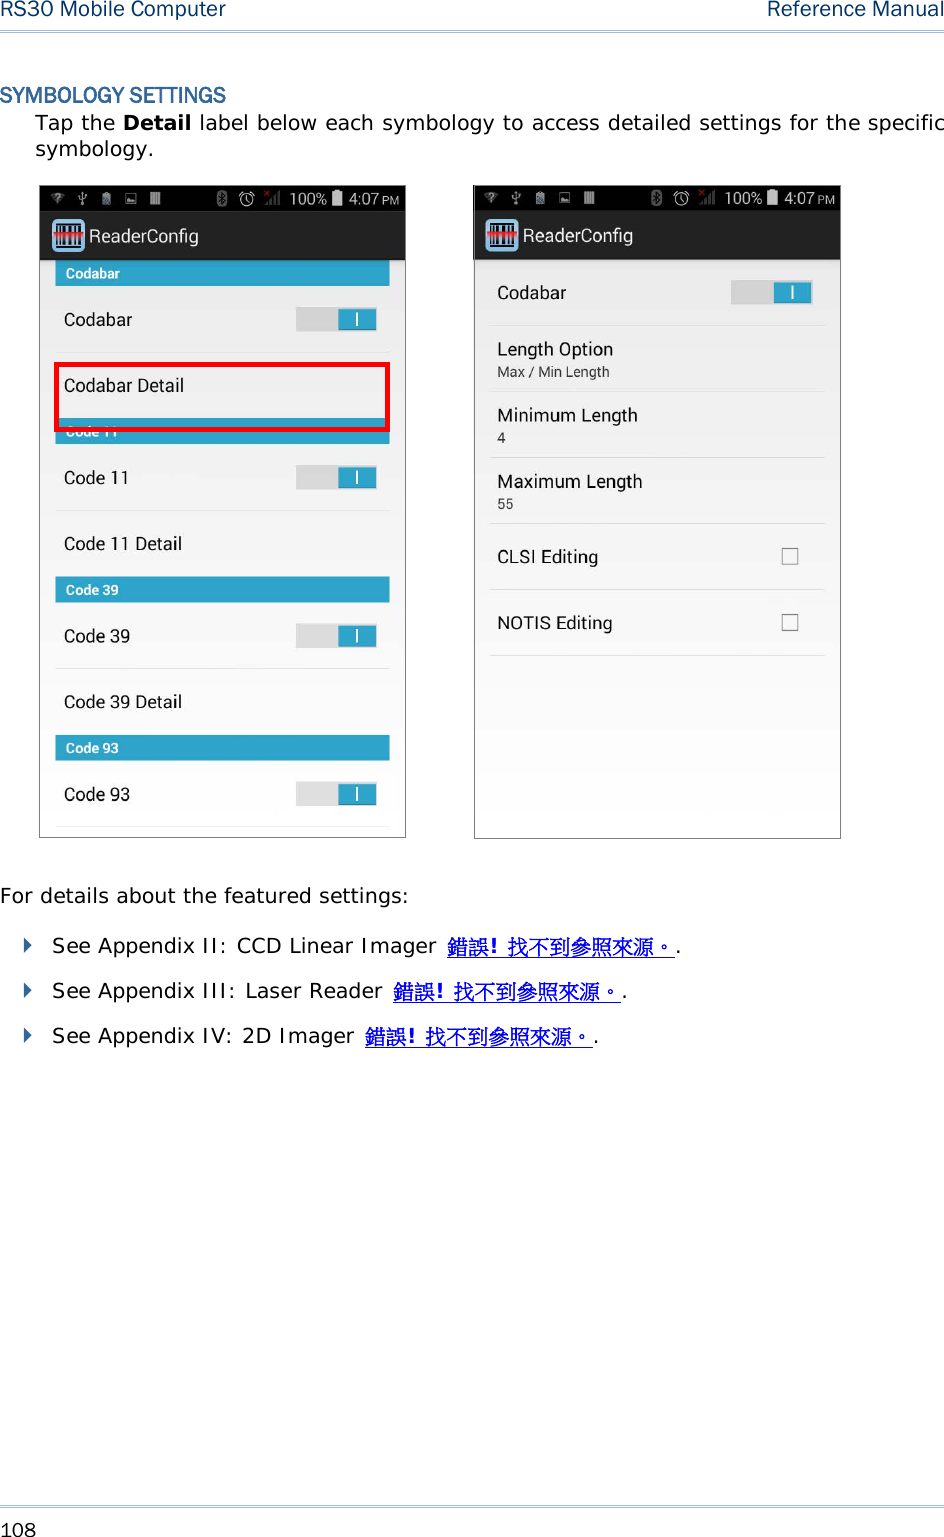
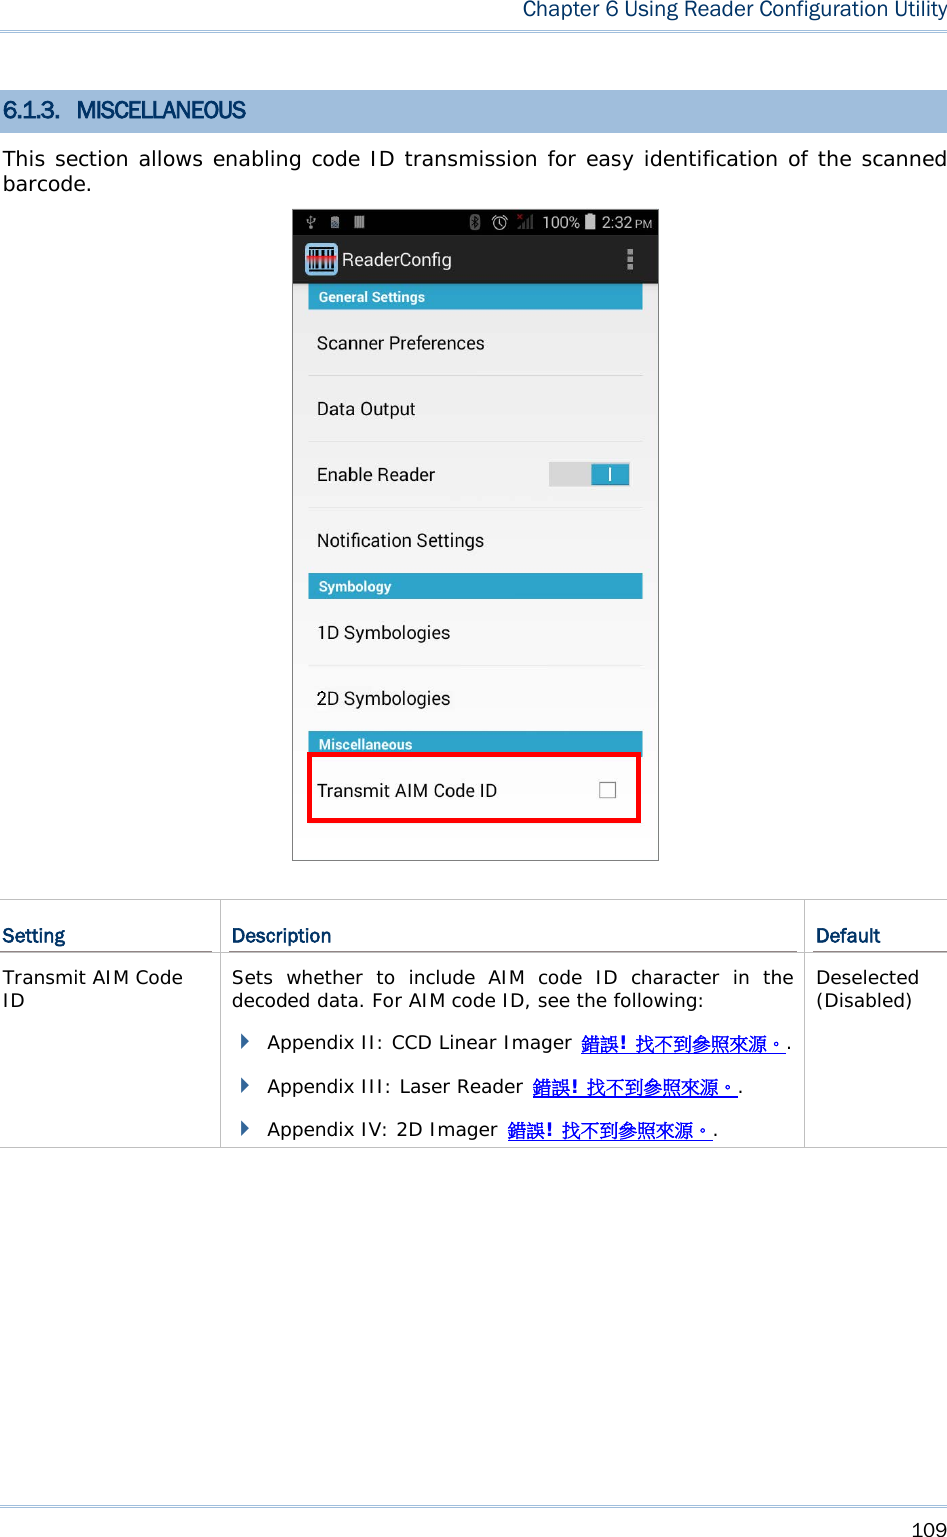
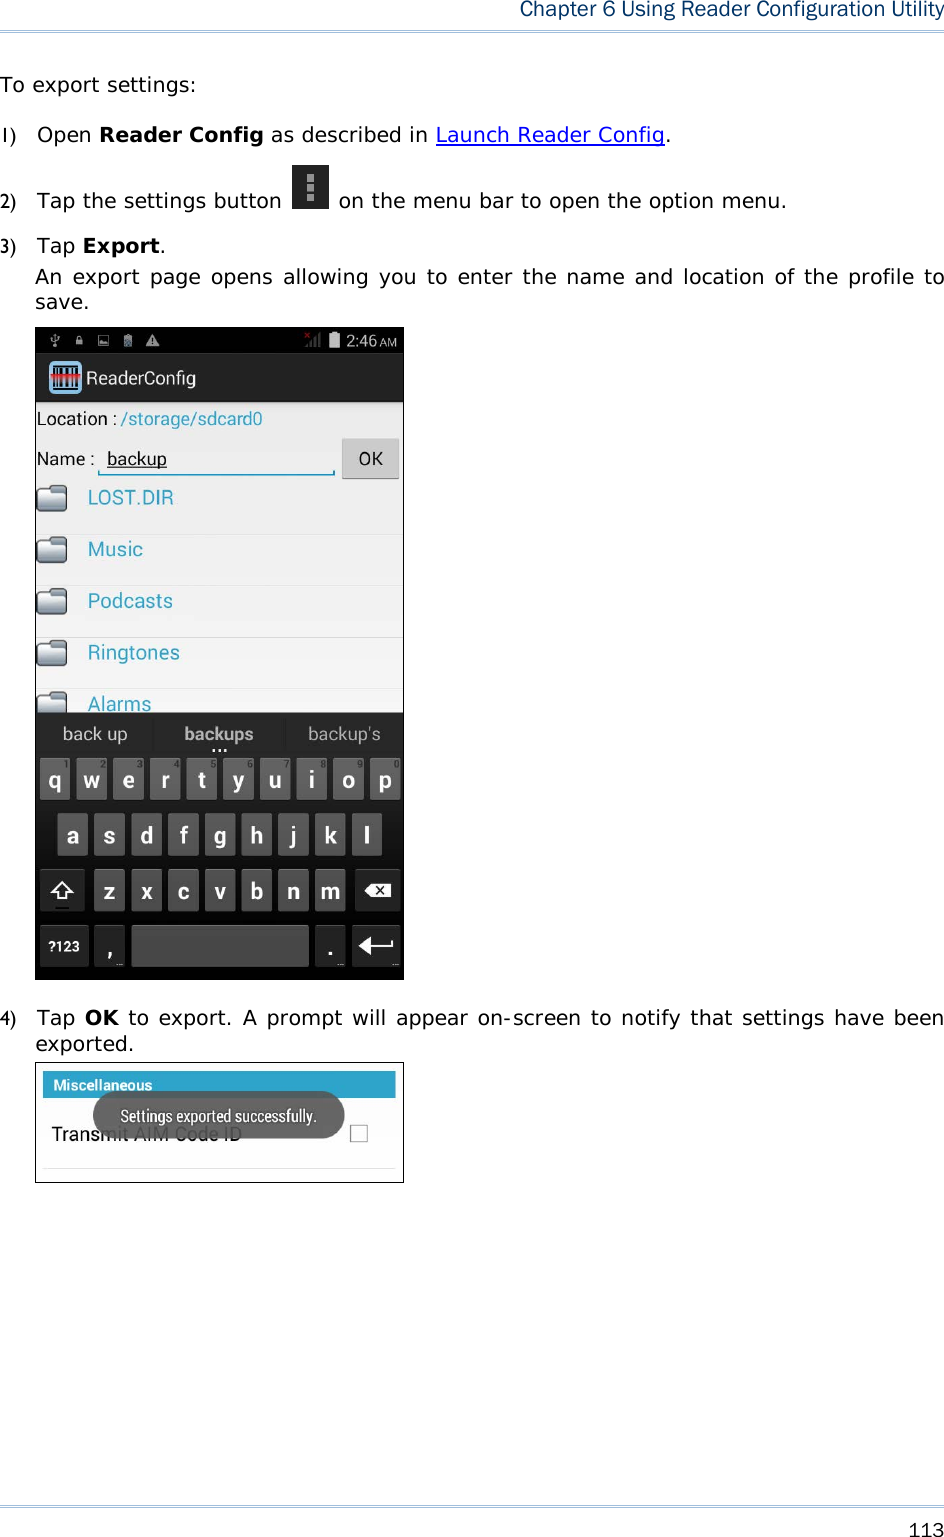
![Chapter 6 Using Reader Configuration Utility HOW TO OUTPUT After the output destination is set, configure how to output decoded data, i.e. the “format” to present decoded data. Setting Description Default Auto Enter Adds an ENTER character before or after each string of decoded data. The ENTER character can be defined in the “Auto Enter character” field below. This function saves the trouble of pressing a confirmation key to accept each string of decoded data. Options are: Disable Decoded data + Enter char Enter char + Decoded data Decoded data + Enter char Auto Enter character Adds a key code before or after the decoded data. If [Auto Enter] is enabled, select the ENTER character to send. Options are: None Carriage Return Tab Space Comma Semicolon Carriage Return Display Code Type Prefixes the output data with code type information. Deselected (Disabled) Show Code Length Suffixes the output data with code length information. Deselected (Disabled) Prefix Affixes 0 to 10 characters to the left of the output data. Tap the label to open a character table for entering the prefix. Prefixes containing invisible characters are supported. -- Suffix Affixes 0 to 10 characters to the right of the output data. Tap the label to open a character table for entering the suffix. Suffixes containing invisible characters are supported. -- Field Delimiter Sets the delimiter to separate the output barcode data to the following pieces: code type, decoded barcode data, and code length (if applicable). Options are: None Comma Semicolon Full stop None 103](https://usermanual.wiki/CipherLab/RS30.User-Manual-rev-pdf/User-Guide-2634689-Page-118.png)