Climax Technology Co MOBILE Mobile-Lite User Manual
Climax Technology Co Ltd Mobile-Lite Users Manual
UserManual.wiki
>
Climax Technology Co
>
MOBILE User Manual
Users Manual
Navigation menu
Upload a User Manual
Namespaces
Wiki Guide
HTML
PDF
Info
Views
User Manual
Discussion / Help
Navigation


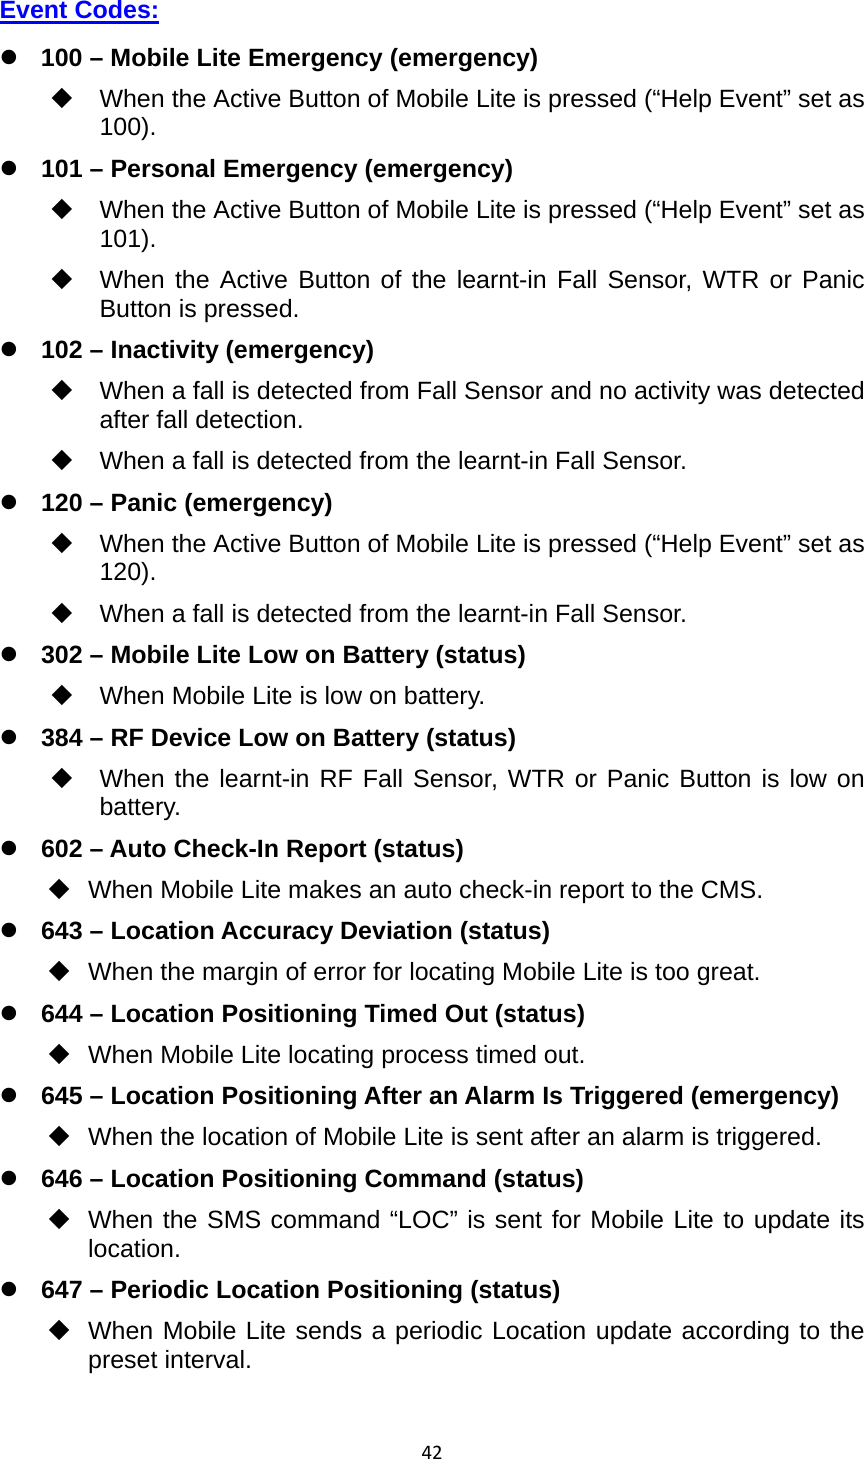
![43 648 – Location Scream (status) When a user requests Mobile Lite to scream. 7.3. SIA Digital Communication Standard Please refer to the document SIA Digital Communication Standard – Internet Protocol Event Reporting (ANSI/SIA DC-09-2012A) published by the Security Industry Association for details. An example of an event reported in the SIA/CID format is as follows: <0A><61><A4>004D"ADM-CID"0033L0#9999[#9999|1100 00 000][X121E35.057831][Y25N03.900375][P2772]<0D> Where: “ADM-CID” means that the content of this message is in the CID format. 0033 for <seq> L0 for <Lpref> #9999[#9999|1100 00 000] 9999 = account number 1100 00 000 = CID data (QXYZ GG CCC) [X...] and [Y...] are location data. [P...] stands for the margin of error of cell location. 7.4. MPTP Protocol Please refer to Benefon Corporation’s “MPTP specification description for all Benefon GSM/GPS products” for details. 7.5. CSV IP The message composition for CSV IP reporting includes username and password before the message. The form of the message is similar to CID reporting: ACCT,MT,QXYZ,GG,CCC Where: ACCT = 4 Digit Account number (0-9, B-F) MT = Message Type. This 2-digit sequence is used to identify the Contact ID message to the receiver. It may be transmitted as either 18 (preferred) or 98 (optional). New receiver implementations shall accept either an 18 or a 98. Note that some older receivers may not accept 98.](https://usermanual.wiki/Climax-Technology-Co/MOBILE/User-Guide-2486907-Page-45.png)