Cobra Electronics 29BT2K17 BLUE TOOTH MODULE User Manual Part 2
Cobra Electronics Corporation BLUE TOOTH MODULE Users Manual Part 2
UserManual.wiki
>
Cobra Electronics
>
29BT2K17 User Manual
>
Users Manual Part 2
Contents
1.
Users Manual Part 1
2.
Users Manual Part 2
Users Manual Part 2
Navigation menu
Upload a User Manual
Namespaces
Wiki Guide
HTML
PDF
Info
Views
User Manual
Discussion / Help
Navigation
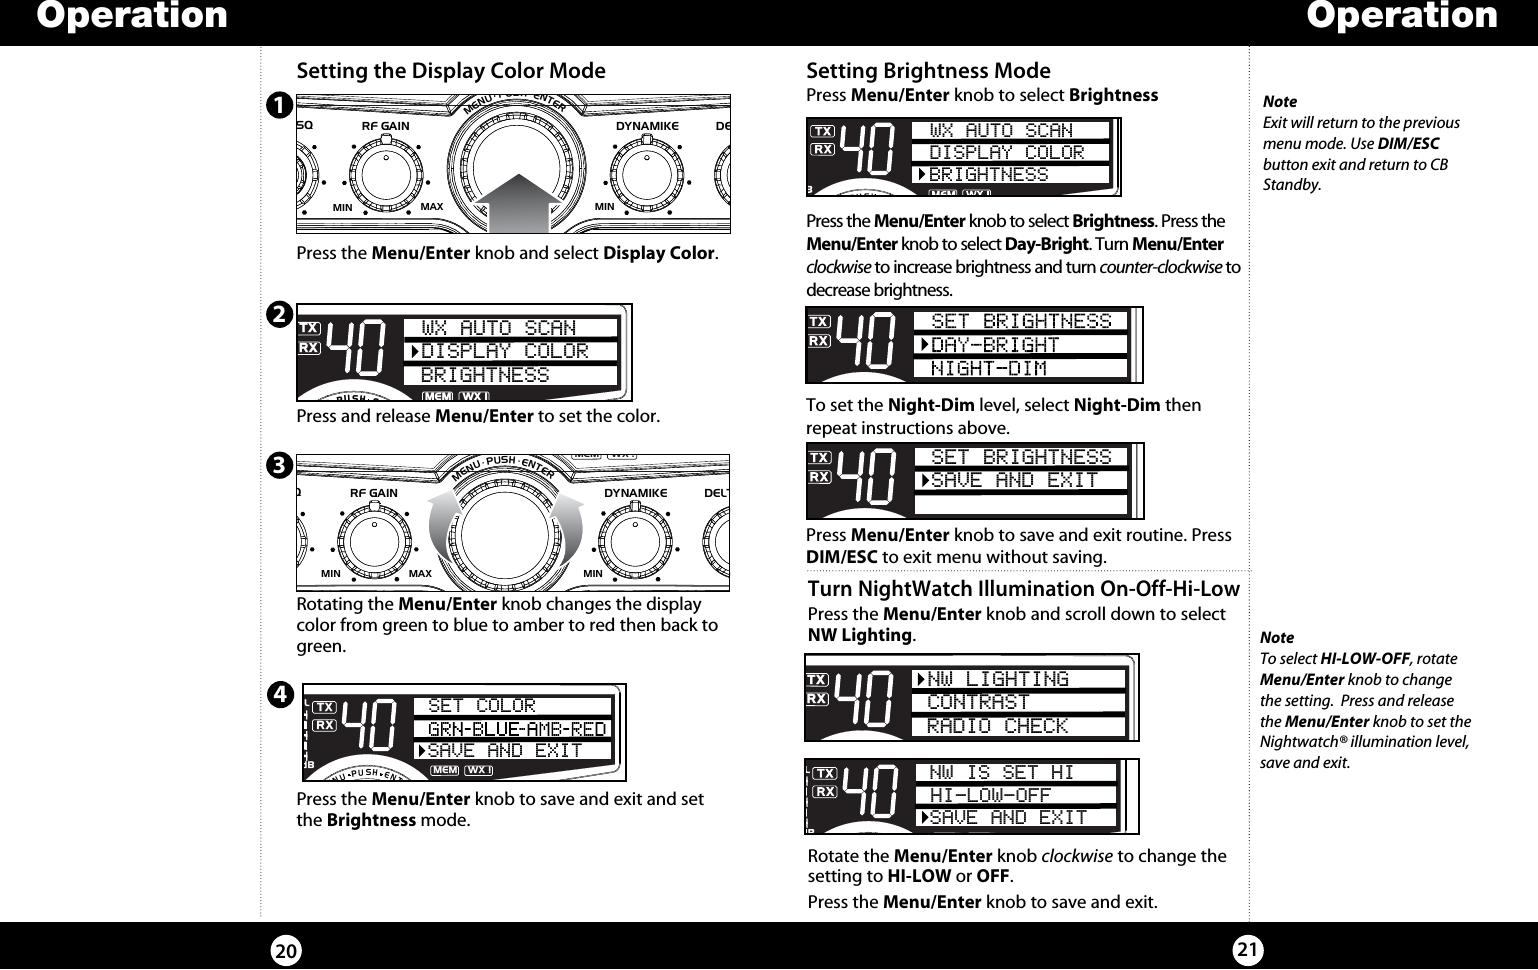
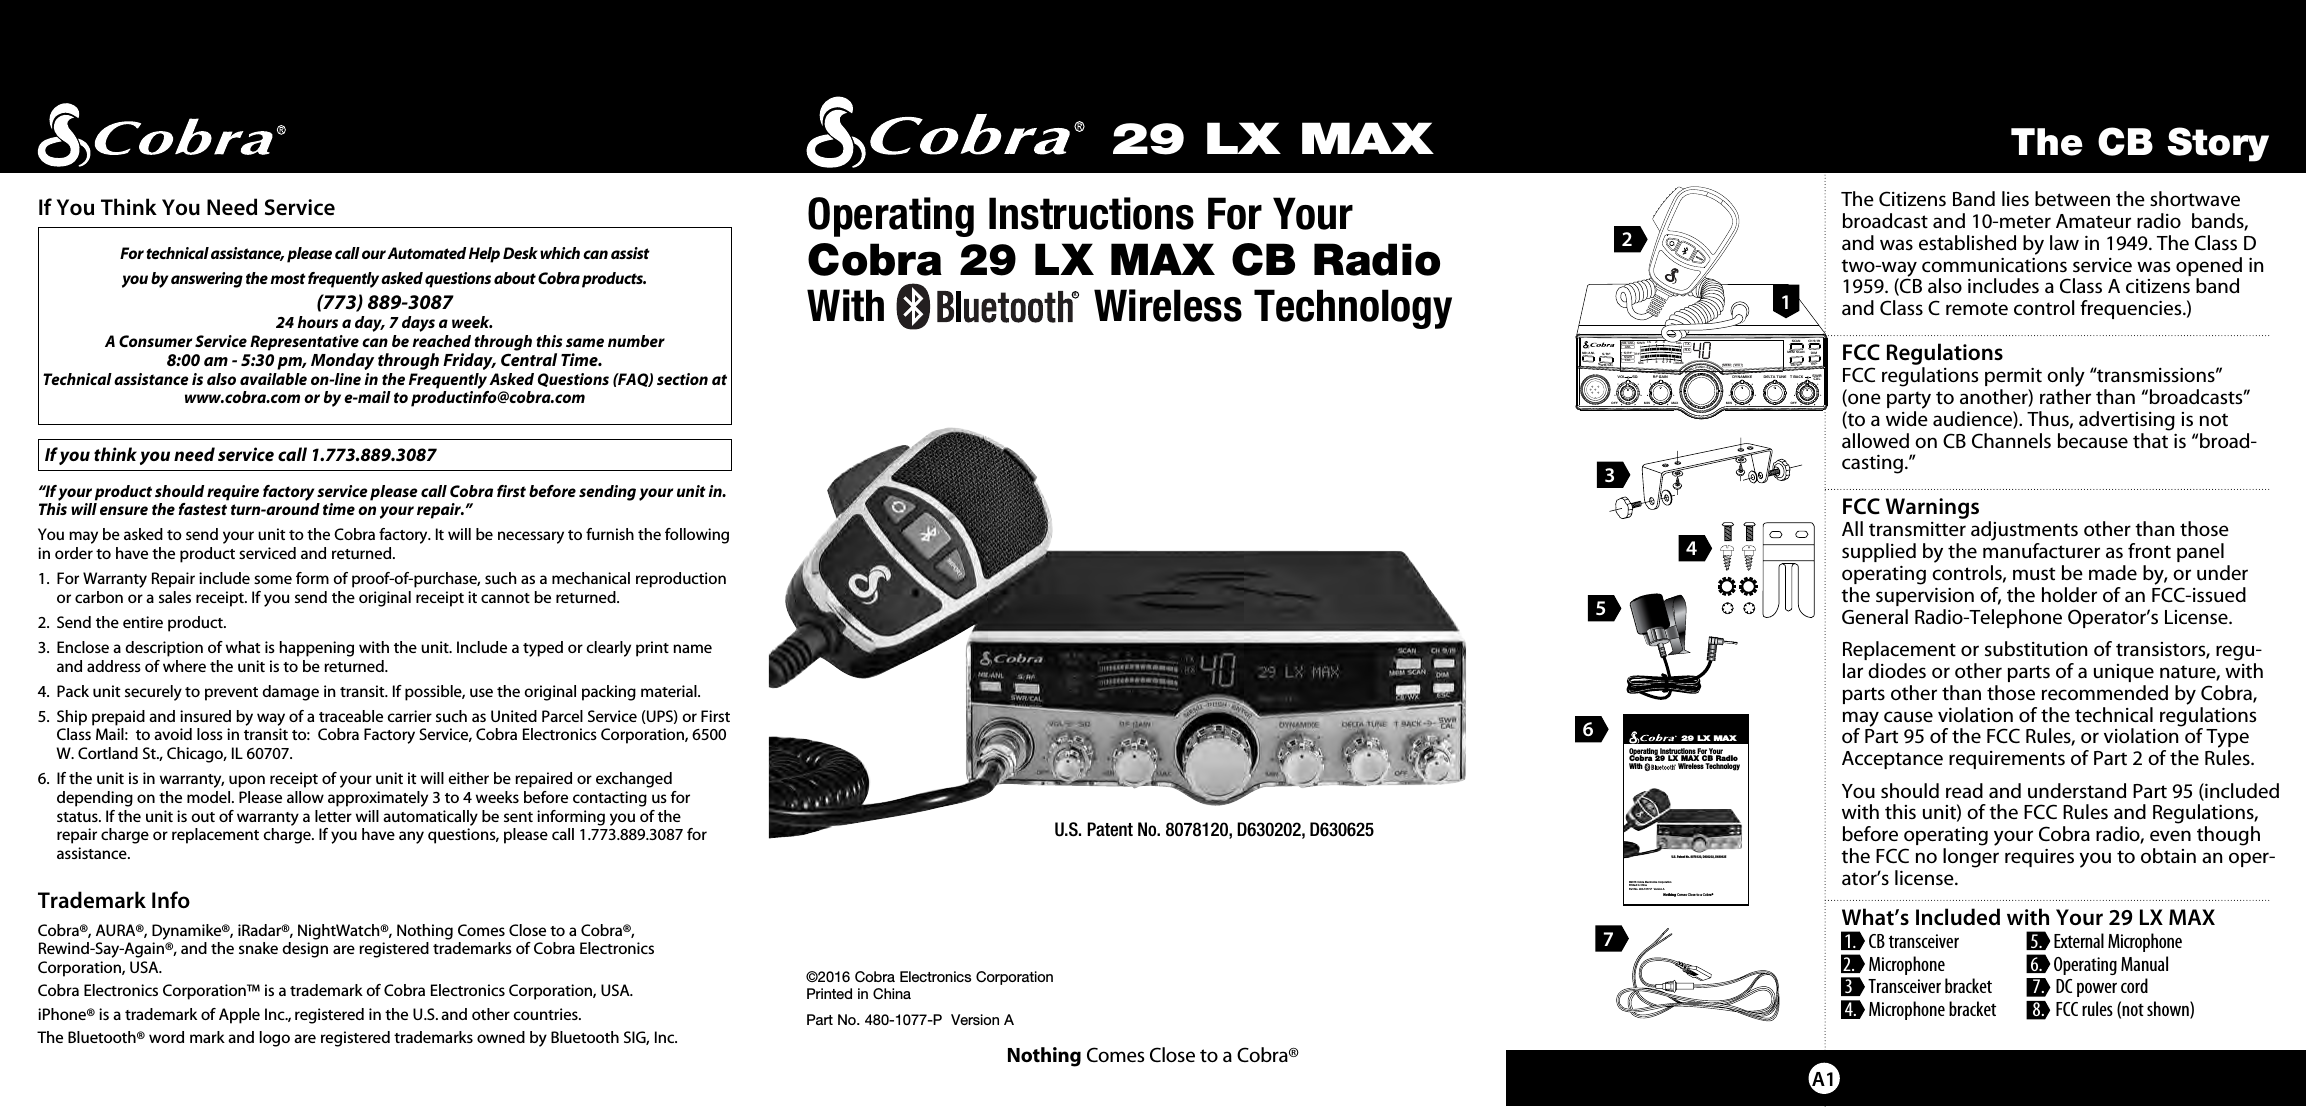
![SIGRF+30dB11.5 23CAL3579SWR TXRXNB/ANLMEM WX !ANLS/RFSWRCALNB/ANL S/RFSWR/CALESCMEM SCANSCAN CH 9/19DIMCB/WXMENU PUSH ENTERVOL DYNAMIKERF GAIN DELTA TUNE T BACK SWRCALOFF MIN MIN OFFMAXSQThank you for purchasing the Cobra 29 LX MAX CB Radio with Bluetooth® wireless technology. Properly used, this Cobra product will give you many years of reliable service.Customer SupportShould you encounter any problems with the product or not understand its many features, please refer to this owner’s manual. If, after referring to the manual, you still need help, call Cobra Customer Service at 773.889.3087.Controls and IndicatorsCobra Customer ServiceLive operators are available M-F 8:00 am - 5:30 pm Central Time at: 773-889-3087 Automated Technical Assistance available 24 hours a day, seven days a week. E-mail questions to: productinfo@cobra.comCobra on the World Wide Web:Frequently Asked Questions (FAQ) can be found on-line at:www.cobra.comOur Thanks to YouA3A21. 6-Pin Microphone Connector2. Power On/Off, Volume3. Squelch4. RF Gain5. Menu/Enter/Channel Selector6. Dynamike7. Delta Tune8. Talk Back Control9. SWR Calibration10. Dim/Escape Button11. Channel 9/Channel 19 Button12. Scan/Memory Scan13. CB/WX Weather Button14. LCD Display15. RX (Receive)/TX (Transmit), Indicators16. Signal Strength Meter17. S/RF SWR CAL Button 18. NB/ANL Button19. MicrophoneOn Microphone20. Push-To-Talk (PTT) Button21. Rewind-Say-Again™ Button22. Bluetooth® Button23. Report ButtonBack Side23. External Microphone Jack24. External Push-To-Talk Jack25. External Speaker Jack26. Antenna Connector27. Power Jack23478101214151619ANT EXT MIC EXT. PTT EXT.SP. +POWER–65111131820212726950Optional AccessoriesOrdering From U.S.A.Call 773-889-3087 for pricing or visit www.cobra.com.For Credit Card Orders Call 773-889-3087 [Press one from the main menu] 8:00 a.m. to 5:30 p.m. Central Time, Monday through Friday.Make Check or Money Order Payable To Cobra Electronics, Attn: Accessories Dept., 6500 West Cortland Street, Chicago, IL 60707 U.S.A.To Order Online Please visit our website: www.cobra.comFront Side24External Push-to-Talk AssemblyFor in vehicle useCA MS4 PTT 1722252323](https://usermanual.wiki/Cobra-Electronics/29BT2K17.Users-Manual-Part-2/User-Guide-3198058-Page-17.png)