Cobra Electronics 8500PRO Navigation Device User Manual
Cobra Electronics Corporation Navigation Device
UserManual.wiki
>
Cobra Electronics
>
8500PRO User Manual
user manual
Navigation menu
Upload a User Manual
Namespaces
Wiki Guide
HTML
PDF
Info
Views
User Manual
Discussion / Help
Navigation


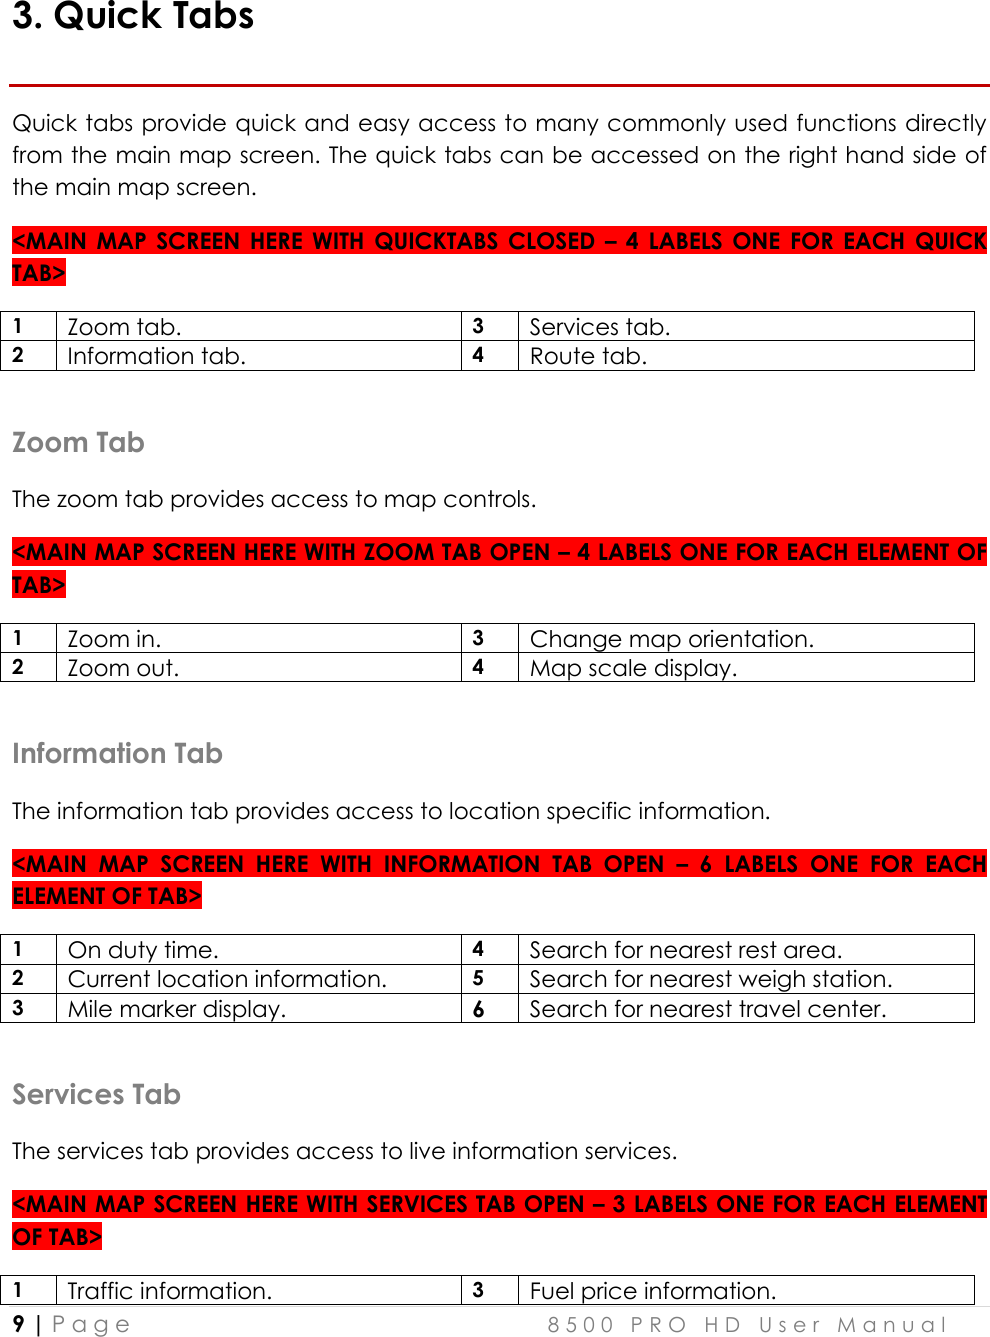
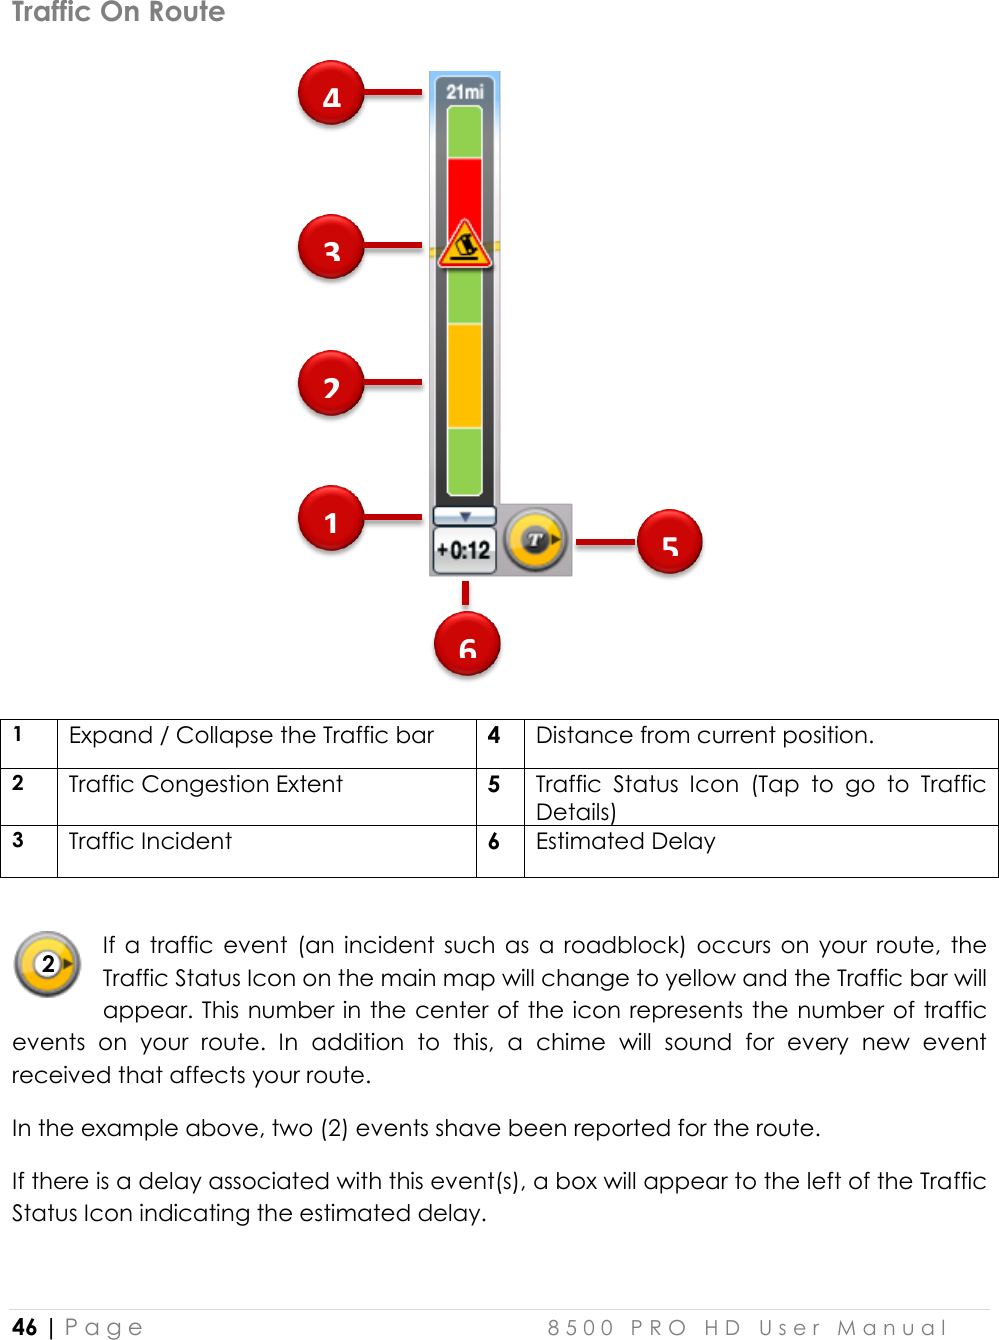
![7 | P a g e 8 5 0 0 P R O H D U s e r M a n u a l Map screen features – Driving Guidance Mode <MAIN MAP SCREENSHOT WITH LABELS FOR ELEMENTS (1-17) HERE> 1 Current time 10 Alert Display 2 GPS (Tap to go to GPS screen). 11 Zoom tab (tap to open zoom tab) 3 Mute voice guidance 12 Information tab (tap to open information tab) 4 Second Turn-by-Turn instruction, indicates the turn direction that comes after the next turn direction 13 Services tab (tap to open services tab) 5 First Turn-by-Turn instruction: Indicates the next turn direction 14 Route tab (tap to open route tab) 6 Current street name / Destination 15 Name of next street in route 7 Distance To Go and Total Distance 16 Lane guidance 8 Estimated Time of Arrival (ETA) and Time To Go 17 Menu 9 Traffic Bar Route Preview The route preview screen will appear each time you set a new destination or enter a new route. The route preview screen may also be accessed from the map screen via the route tab. <ROUTE PREVIEW SCREENSHOT WITH LABELS FOR ELEMENTS (1-8) HERE> 1 Destination address. 5 When the route type has been selected, tap the [NEXT] button to begin guidance using this route type. 2 Route Preferences. 6 Route distance. 3 Sunrise/Sunset times at destination. 7 Route time. 4 Toggle between faster time and shorter distance route. 8 Route cost.](https://usermanual.wiki/Cobra-Electronics/8500PRO/User-Guide-2111108-Page-7.png)
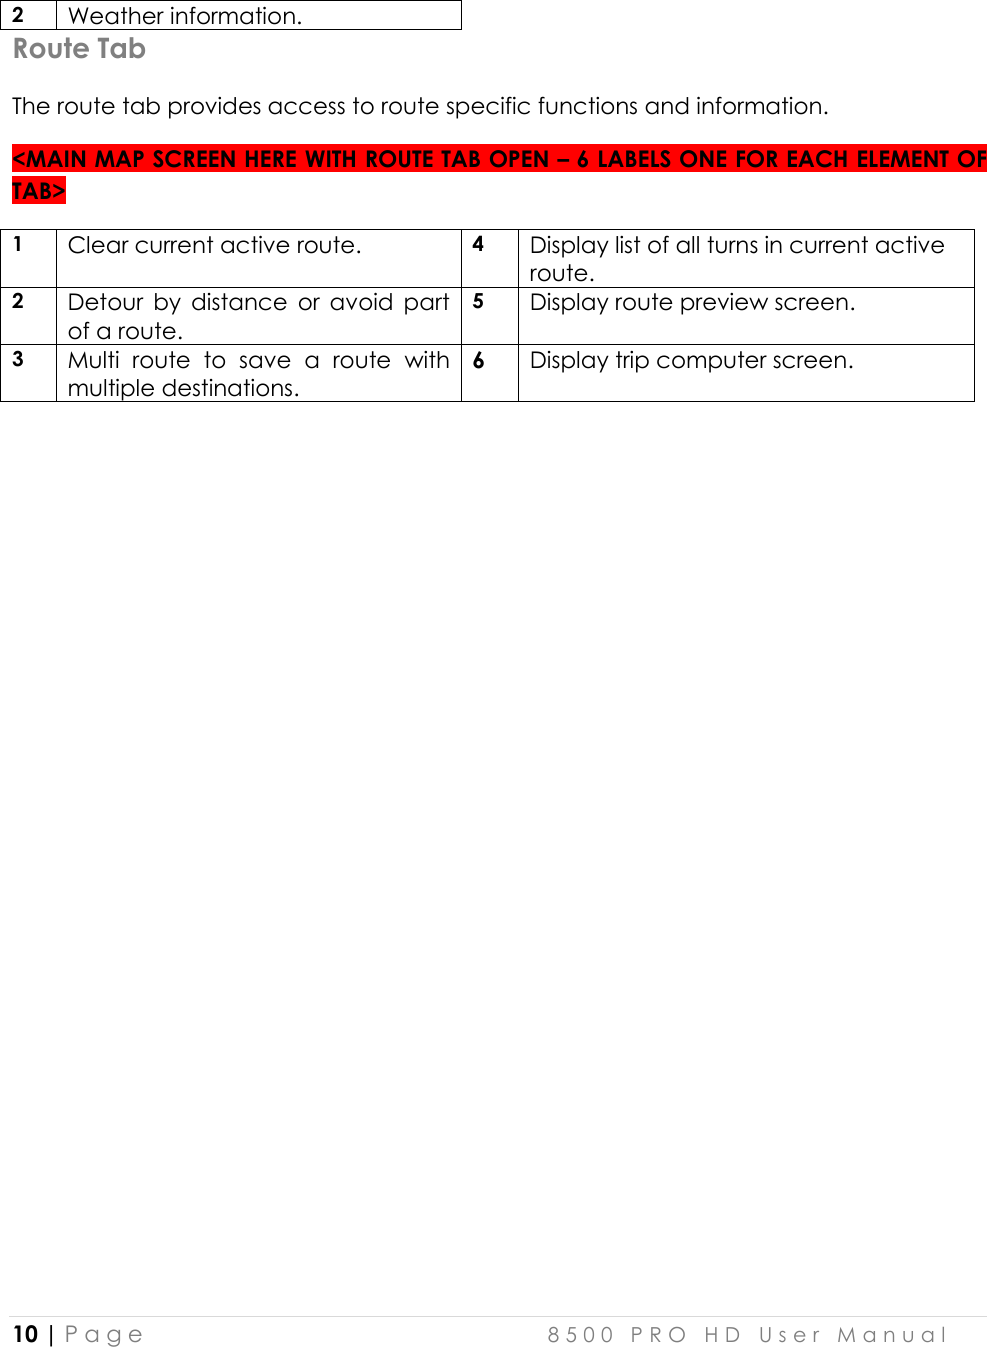
![8 | P a g e 8 5 0 0 P R O H D U s e r M a n u a l Please note that the information provided for route distance, time and cost are approximations and may be incorrect. 2. Menu The main menu can be accessed by tapping the [MENU] button on the map screen. <MAIN MENU SCREEN HERE> The main menu allows access to all search options as well as route management, live services (traffic, weather, fuel prices), trucker tools and settings.](https://usermanual.wiki/Cobra-Electronics/8500PRO/User-Guide-2111108-Page-8.png)

![13 | P a g e 8 5 0 0 P R O H D U s e r M a n u a l Multi Route <ICON HERE> Multi Route Save and restore commonly used routes. The Multi Route interface allows you to save and restore routes that you commonly use. When Multi Route is opened you will see a list of any saved routes that you currently have (the first time you use the device this list will be empty). <MULTI ROUTE LIST SCREENSHOT HERE> To load a route simply select it from the list and tap [NEXT] the route will now be calculated and you will be guided to your destination (or first waypoint in route). To save a route to the Multi Route list tap [CREATE ROUTE] and then tap [ADD], you can then add locations to your route as required. Once you have added all the required locations to your route, tap [NEXT] and you will be prompted to enter a name for your route, tap [NEXT] when you have entered the name for your route, your route will then be saved to the Multi Route list, the route preview screen will then be displayed to provide an overview of your route details.](https://usermanual.wiki/Cobra-Electronics/8500PRO/User-Guide-2111108-Page-13.png)
![14 | P a g e 8 5 0 0 P R O H D U s e r M a n u a l Note: If you would like to save your current active route to Multi Route you can use the [SAVE] function in [My Route] > [Edit Route]. MULTI ROUTE Save and restore commonly used routes. Address Address Tap the [ADDRESS] button on Main Menu to plan a route by entering an address. 1. Select ‘Address’ on Menu screen. <MAIN MENU SCREENSHOT HERE> 2. Select State or province. The default state/province is based on your current location. For subsequent searches, the last used state/province name and city name are shown. If you would like to change state/province, tap the State Name button. For State/Province search, you can search by either the full name (e.g. New York), or the abbreviation (e.g. NY). <ADDRESS ENTRY (STATE/PROVINCE) SCREENSHOT HERE>](https://usermanual.wiki/Cobra-Electronics/8500PRO/User-Guide-2111108-Page-14.png)
![15 | P a g e 8 5 0 0 P R O H D U s e r M a n u a l 3. Search for a City name or Zip Code by typing letters. Then choose it on the result list. <ADDRESS ENTRY (CITY) SCREENSHOT HERE> 4. Search for a street name by typing letters then choose it on the result list. <ADDRESS ENTRY (STREET) SCREENSHOT> 5. Type the House number, and tap [NEXT] button. See below for information on hiding or showing the keyboard. <ADDRESS ENTRY (HOUSE NUMBER) SCREENSHOT HERE> 6. Confirm the state/province, city, and street choices on the top of the screen and refer to map of the location. Tap [Go] if you wish to route to this location directly. <ADDRESS ENTRY (MAP VIEW) SCREENSHT HERE>](https://usermanual.wiki/Cobra-Electronics/8500PRO/User-Guide-2111108-Page-15.png)
![17 | P a g e 8 5 0 0 P R O H D U s e r M a n u a l Intersections <ICON HERE> Intersections Tap the [INTERSECTIONS] button on Main Menu to plan a route by entering an intersection. As per the address search above, enter the State/Province, followed by the City and then the Street. <INTERSECTION ADDRESS ENTRY SCREENSHOT HERE> After the street name is entered, a list of the intersections for your chosen street is presented. You may scroll this list using the control button on the right. <INTERSECTION LIST SCREENSHOT HERE>](https://usermanual.wiki/Cobra-Electronics/8500PRO/User-Guide-2111108-Page-17.png)
![18 | P a g e 8 5 0 0 P R O H D U s e r M a n u a l POI POI Tap the [POI] icon on the Main Menu to search by POI (Point of Interest) When you select POI from the main menu you will first need to select between Normal POIs (e.g. Hotels, Airports, Restaurants, Banks, etc.) and Truck Specific POIs (e.g. Truck Repairs, Truck Stops, State Weigh Scales, etc.). When you have selected either Normal or Truck POIs, you may search for a POI using a variety of different search methods. By Category <POI CATEGORY SCREENSHOT HERE> Tap the [POI CATEGORY] button By POI Name <POI NAME SCREENSHOT HERE> Tap the [POI NAME] button By City <POI IN CITY SCREENSHOT HERE> Tap the [POI IN CITY] Button Along Route <ALONG ROUTE SCREENSHOT HERE> Tap the [ALONG ROUTE] Button](https://usermanual.wiki/Cobra-Electronics/8500PRO/User-Guide-2111108-Page-18.png)
![19 | P a g e 8 5 0 0 P R O H D U s e r M a n u a l Search by Category: Tap the [CATEGORY] button. You can search for POIs near your current location using the POI category search. First, simply select the category you wish to use; for example ‘Fuel & Auto’, then select a POI from the result list. The distance and direction to the POI is displayed on the left. You may sort the results by distance or in alphabetical order. <POI CATEGORY SCREENSHOT HERE> <POI LIST SCREENSHOT HERE> POI categories have sub categories to help focus your search better. Simply tap the sub category you wish to search, or, alternatively choose the ‘ALL…’ option at the top of the list to search within all the listed subcategories.](https://usermanual.wiki/Cobra-Electronics/8500PRO/User-Guide-2111108-Page-19.png)
![20 | P a g e 8 5 0 0 P R O H D U s e r M a n u a l Search by POI Name: Tap the [NAME] button. The previously searched state/province name and city name are initially selected. If you want to change state/province or city, tap the State or City button. Type the POI Name you wish to search for then tap the [NEXT] button. It will list POI names corresponding to the letters you’ve typed. Select one of the POI names that you are searching for then you will see a list POIs. Choose one, and then tap [NEXT] button. <POI NAME SCREENSHOT HERE> Note: The system will search for the text you entered where it forms any part of the POI name; for example, if you search for the word ‘Park’, you can find all POIs with the word ‘Park’ in their name; Park Run Cafe, Mall Parking, CafePark etc.](https://usermanual.wiki/Cobra-Electronics/8500PRO/User-Guide-2111108-Page-20.png)
![21 | P a g e 8 5 0 0 P R O H D U s e r M a n u a l Search for POI by City Tap the [IN CITY] button. The previously searched state/province name is initially selected. If you want to change state/province, tap the State button. Type the city name then select for the list of categories. The distance and direction to the POI is displayed on the left. You may sort the results by distance or in alphabetical order. <POI IN CITY SCREENSHOT HERE> <POI IN CITY (CATEGORY) SCREENSHOT HERE>](https://usermanual.wiki/Cobra-Electronics/8500PRO/User-Guide-2111108-Page-21.png)
![22 | P a g e 8 5 0 0 P R O H D U s e r M a n u a l Search for POI Along Route Tap the [ALONG ROUTE] button. You can search for POIs of a selected category that are situated on, or close by to, your current route. When you select a POI category to search within a list of all POIs from that category that are on your route will be displayed. The distance and direction to each POI from your current location is displayed on the left. <POI ALONG ROUTE SCREENSHOT HERE> Amenity Filter When searching for truck stops you may filter your results based on the amenities available. Tap the [POI] button on the main menu and select [TRUCK POI], tap [TRUCK STOPS]. You may now filter the list of truck stops based on 16 different amenity categories. Simply tap [AMENITIES] and select the categories that you would like, when you have selected all the desired categories, tap [APPLY]. The list of truck stops will now be filtered to display only the truck stops that have the amenities you desire. <AMENITIES FILTER LIST SCREENSHOT HERE>](https://usermanual.wiki/Cobra-Electronics/8500PRO/User-Guide-2111108-Page-22.png)
![23 | P a g e 8 5 0 0 P R O H D U s e r M a n u a l Favorites Favorites Tap the [FAVORITES] button to select or add a Favorite as your destination. The favorites option allows you to save and route to commonly visited destinations, including home and office locations. Sort: You can sort existing favorites by distance, alphabetical order or date created Add: Tap the [ADD] button to add a favorite to the app. When saving a new favorite, you can give it a name by which to remember it. <FAVORITES SCREENSHOT HERE> To set an address for your Home and/or Office from the favorites menu, simply tap the plus sign on the right of the screen. When the addresses have been programmed, you can then plan a route to your home or office simply by tapping the respective icon on the favorites list.](https://usermanual.wiki/Cobra-Electronics/8500PRO/User-Guide-2111108-Page-23.png)
![24 | P a g e 8 5 0 0 P R O H D U s e r M a n u a l Recent List Recent List Tap the [RECENT LIST] button to view a list of previously searched locations. 1. Tap the [RECENT LIST] on the Menu. 2. You will see a list Recent Destinations and Recent Searches. 3. Select one of locations on the list then tap the [GO] button to route directly to the location. <RECENT LIST SCREENSHOT HERE> Sort: You can sort the list by the date created or in alphabetical order.](https://usermanual.wiki/Cobra-Electronics/8500PRO/User-Guide-2111108-Page-24.png)
![27 | P a g e 8 5 0 0 P R O H D U s e r M a n u a l Multi Route <ICON HERE> Multi Route Save and restore commonly used routes. The Multi Route interface allows you to save and restore routes that you commonly use. When Multi Route is opened you will see a list of any saved routes that you currently have (the first time you use the device this list will be empty). <MULTI ROUTE LIST SCREENSHOT HERE> To load a route simply select it from the list and tap [NEXT] the route will now be calculated and you will be guided to your destination (or first waypoint in route). To save a route to the Multi Route list tap [CREATE ROUTE] and then tap [ADD], you can then add locations to your route as required. Once you have added all the required locations to your route, tap [NEXT] and you will be prompted to enter a name for your route, tap [NEXT] when you have entered the name for your route, your route will then be saved to the Multi Route list, the route preview screen will then be displayed to provide an overview of your route details. Note: If you would like to save your current active route to Multi Route you can use the [SAVE] function in [My Route] > [Edit Route].](https://usermanual.wiki/Cobra-Electronics/8500PRO/User-Guide-2111108-Page-27.png)
![28 | P a g e 8 5 0 0 P R O H D U s e r M a n u a l Map view Tap a point on the map to choose a location as your destination. The address of the point you choose is displayed in a grey information box directly above the point you chose. <MAP VIEW SCREENSHOT HERE> Route: Choose to add the location as a Start point, Waypoint, or destination. More: Tap the [MORE] button to: Save the location as a Favorite, or Search for a POI nearby this location.](https://usermanual.wiki/Cobra-Electronics/8500PRO/User-Guide-2111108-Page-28.png)
![30 | P a g e 8 5 0 0 P R O H D U s e r M a n u a l Lane Guidance Lane Guidance helps you safely prepare for your next maneuver by displaying the correct lane(s) to stay in. Lane Guidance appears below the Next Street Name box. The highlighted white arrow indicates the correct lane(s) to be in. In the example below, there is one highlighted lane turning right; this is the correct lane to stay in for the upcoming maneuver. The other three grey lanes are going straight. <LANE GUIDANCE SCREENSHOT HERE> Signposts Signposts provide a realistic representation of actual signposts at complex highway junctions. As you approach a highway junction, the signpost displays route shields, route directions, locality, exit, and lane information. <SIGNOST SCREENSHOT HERE> The Signpost replaces the normal Next street name box at some junctions. The highlighted shield with white arrows indicates the correct lane(s) to be in. In the example above, there are three lanes with white arrows indicating that you should keep left; these are the correct lanes to stay in for the upcoming maneuver. The other two grey lanes on the greyed-out sign (on right) are exiting the highway. Please be aware that Signposts are available for some, but not all highway junctions. Junction View Junction View, like Signposts, provides a realistic representation of the highway as you approach the junction. The Junction View displays the highway lanes, shields, directions, and lane information in a split mode view. <JUNCTION VIEW SCREENSHOT HERE> Junction View may be turned on or off in the Display Settings. [Settings] > [Display Settings] > [View Mode]. See DISPLAY SETTINGS for more information.](https://usermanual.wiki/Cobra-Electronics/8500PRO/User-Guide-2111108-Page-30.png)
![34 | P a g e 8 5 0 0 P R O H D U s e r M a n u a l Turn by Turn (TBT) The Turn by Turn screen offers a more simplified guidance mode. To access this screen, tap [Menu] > [My Route] > [Turn by Turn]. <TBT SCREENSHOT HERE> The Turn By Turn screen presents an enlarged maneuver image and text to indicate the next turn. The distance remaining to the next maneuver is indicated by the distance bar on the left. The second maneuver is displayed at the top of the screen with a smaller image and text. List of Turns The List of Turns presents a full list of all maneuvers for the journey. To access this screen tap [Menu] > [My Route] > [List of Turns], or from the main map tap [Route Tab] > [List of Turns]. <LIST OF TURNS SCREENSHOT HERE> Each graphic shows ‘Distance from position’ and the ‘next street’ name. Turning off the device before journey is complete. In the case turning off the device before the journey is complete, the navigation application will remind you of the last destination when restarted. If you would like to restore your previous route, select the [YES] button, otherwise select the [NO] button. <LAST DESTINATION SCREENSHOT HERE>](https://usermanual.wiki/Cobra-Electronics/8500PRO/User-Guide-2111108-Page-34.png)
![35 | P a g e 8 5 0 0 P R O H D U s e r M a n u a l In addition to this, any waypoint that was unreached in the journey will be remembered. By going to [Menu] > [My Route], you can check waypoints and destination points.](https://usermanual.wiki/Cobra-Electronics/8500PRO/User-Guide-2111108-Page-35.png)
![36 | P a g e 8 5 0 0 P R O H D U s e r M a n u a l 6. Manage your Route Routing Options may be used to create a new route or to edit an existing route. Create Route / Edit Route buttons will change depending on situation. [Menu] > [My Route] <MY ROUTE SCREENSHOT HERE> Create Route / Edit Route: [Create Route] is available if a route has not been set. [Edit Route] is available if a route has already been set. Use this option to edit your existing route. Detour: Allows you to avoid part of the route or avoid by distance. Simulation Mode: Starts a driving simulation of the route. Route Summary: Go to the route summary screen. View Route Map: Displays an overview map of your complete route. Turn by Turn: Displays a simplified guidance mode with no map. List of Turns: Displays a full list of all maneuvers on the route. Clear Route: Deletes the current route.](https://usermanual.wiki/Cobra-Electronics/8500PRO/User-Guide-2111108-Page-36.png)
![37 | P a g e 8 5 0 0 P R O H D U s e r M a n u a l Create Route This option is available if no route has been set. <MY ROUTE (CREATE ROUTE) SCREENSHOT HERE> • Add a Location to your route Tap the [ADD] button to add a location to your route. For short routes, you may add up to 5 waypoints. • Position the location within the route The first location you set automatically becomes the destination. You may add another location to this route by tapping the [ADD] button. When you add a second location, this becomes the destination and the previous location moves to the start position. Any subsequent locations added become the destination, and previously added locations become waypoints. <EDIT ROUTE SCREENSHOT HERE> <EDIT OPTION SCREENSHOT HERE> • Calculate Route When finished, tap the [NEXT] button to calculate the route.](https://usermanual.wiki/Cobra-Electronics/8500PRO/User-Guide-2111108-Page-37.png)
![38 | P a g e 8 5 0 0 P R O H D U s e r M a n u a l Edit Route This option is available only if a route already exists. <MY ROUTE (EDIT ROUTE) SCREENSHOT HERE> • Add a Location to your route Tap the [ADD] button to add another location to your route. • Position the location within the route The first location you set automatically becomes the destination. You may add another location to this route by tapping the [ADD] button. When you add a second location, this becomes the destination and the previous location moves to the start position. Any subsequent locations added become the destination, and previously added locations become waypoints. • Find POI nearby any location Simply select the location and choose [Show on Map] > [More] > [Find Nearby POI]. After selecting the POI, it will be added to your route. Save Route Tap [Save] and enter a name for your route, tap [Next], the route information will now be available for later use in the Multi Route menu. • Calculate Route When finished modifying the route, tap the [NEXT] button to calculate.](https://usermanual.wiki/Cobra-Electronics/8500PRO/User-Guide-2111108-Page-38.png)
![40 | P a g e 8 5 0 0 P R O H D U s e r M a n u a l Route Summary Route Summary is available on the ‘My Route’ screen. In this screen, you can check route information such as total distance, time, etc. <ROUTE SUMMARY SCREENSHOT HERE> Route Preferences: Recalculate your route with different preferences, e.g. avoid toll roads, user STAA roads, etc. Fuel cost represents an estimated cost for your trip. Fuel prices may be adjusted by going to [Menu] > [Settings] > [Guidance Settings] > [Fuel Cost]](https://usermanual.wiki/Cobra-Electronics/8500PRO/User-Guide-2111108-Page-40.png)
![41 | P a g e 8 5 0 0 P R O H D U s e r M a n u a l 7. Trucker Tools The Trucker tools menu provides a range of different functions that are particularly helpful to truck drivers, to access the trucker tools menu, simply tap [TRUCKER TOOLS] at the bottom of the main menu. Mileage Log <MILEAGE LOG SCREENSHOT HERE> The mileage log automatically records the number of miles that you drive. These records can then be organised by state or by year. Additionally, you can save these records to a SD card for your own records. Trip Computer <TRIP COMPUTER SCREENSHOT HERE> The trip computer provides an overview of totals for your current trip. The display includes an odometer, average speed for your trip and total trip time. Additionally, current altitude and cumulative mileage are provided. Backup/Restore <BACKUP/RESTORE SCREENSHOT HERE> The backup/restore function allows you to save your favorites and/or mileage log entries to a SD card. For this function to work you must have a SD card inserted into your device. In order to restore favorites/mileage log you will need to have a SD card inserted that has the required files saved onto the root directory of the SD card. In order to backup favorites/mileage log, you will need to have sufficient space on the SD card to allow the files to be saved. On Duty Timer The On Duty Timer is a set of timers that will assist you in filling out your hours of service log book. When the On Duty Timer is set to manual, your work time will be calculated depending on the setting you make in the information tab on the main map (e.g. On Duty, On Duty](https://usermanual.wiki/Cobra-Electronics/8500PRO/User-Guide-2111108-Page-41.png)
![42 | P a g e 8 5 0 0 P R O H D U s e r M a n u a l Driving or Off Duty). When the On Duty Timer is set to Auto, the timer will automatically change to On Duty Driving after your vehicle has been in motion for 5 minutes, once the vehicle is stationary for 5 minutes the timer will change to On Duty. You can view and change the settings for the On Duty Timer, reset totals, change between auto and manual or manually alter the maximum time allowed and time remaining in the On Duty Timer menu. <ON DUTY TIMER SCREENSHOT HERE> <ON DUTY TIMER SCREENSHOT HERE (Time remaining/Maximum time edit screen)> The default totals for maximum time are: On Duty Driving Day 11hrs; On Duty Day 14hrs; On Duty Week 60hrs. To manually alter the maximum time allowed for these totals, simply tap the total you would like to edit and you will be able to enter both the Time Remaining and the Maximum Time. When you have finished making any alterations to On Duty Timer, tap [APPLY] and your changes will be saved. My Truck The My Truck interface allows you to save several vehicle profiles for any different truck types that you may be driving. Truck Information <TRUCK INFORMATION SCREENSHOT HERE> When opening My Truck, you will see a screen that displays the vehicle information of your currently selected vehicle, this includes the truck name, truck type and all important truck parameters (e.g. length, height, load type, etc.). The vehicle information displayed on this screen relates to the vehicle that is currently being used in navigation. To change the currently selected vehicle, tap [CHANGE] in the bottom left corner of the screen. My Vehicle <MY VEHICLE SCREENSHOT HERE> The My Vehicle screen displays all the vehicles that you have available for use. When using your device for the first time, you will have two default vehicle profiles, one truck (Truck 1) and one car (Car).](https://usermanual.wiki/Cobra-Electronics/8500PRO/User-Guide-2111108-Page-42.png)
![43 | P a g e 8 5 0 0 P R O H D U s e r M a n u a l To add a new truck to your list of vehicles, simply tap [ADD] at the bottom of the screen. <TRUCK TYPE SCREENSHOT HERE> You will be provided with a list of different truck type axle configurations, to switch between the different lists for USA and Canada, simply select the appropriate country name at the top of the list. When you have selected the desired truck type from the list, tap [APPLY] and the vehicle will automatically be added to the end of your My Vehicle list. From the My Vehicle list you can then manually enter the parameters of your truck, simply select the vehicle you wish to edit the parameters for and tap [EDIT] at the bottom of the screen. <ENTER TRUCK INFORMATION SCREENSHOT HERE> From the Enter Truck Information menu you can give the truck a meaningful name, edit all truck parameters and set your choice of vehicle icon to be displayed on the map. To edit any of the truck parameters, simply tap the <ICON HERE> icon to the right of the parameter field. A sub menu will then be displayed where you can individually enter each sub category for that truck parameter. When travelling from the US to Canada or vice versa, routing in the other country will be based on our closest match to your truck type. For best results, use US truck types in the US and then switch to a Canada truck type when driving in Canada. Vehicle Icon The Vehicle Icon sub menu allows you to set your preferred vehicle icon for your truck. You can select from five different icon styles with five different colour schemes for each icon style. <VEHICLE ICON SCREENSHOT HERE> Calculator The Calculator interface provides an easy and convenient means of carrying out basic calculations using your device. <CALCULATOR SCREENSHOT HERE>](https://usermanual.wiki/Cobra-Electronics/8500PRO/User-Guide-2111108-Page-43.png)
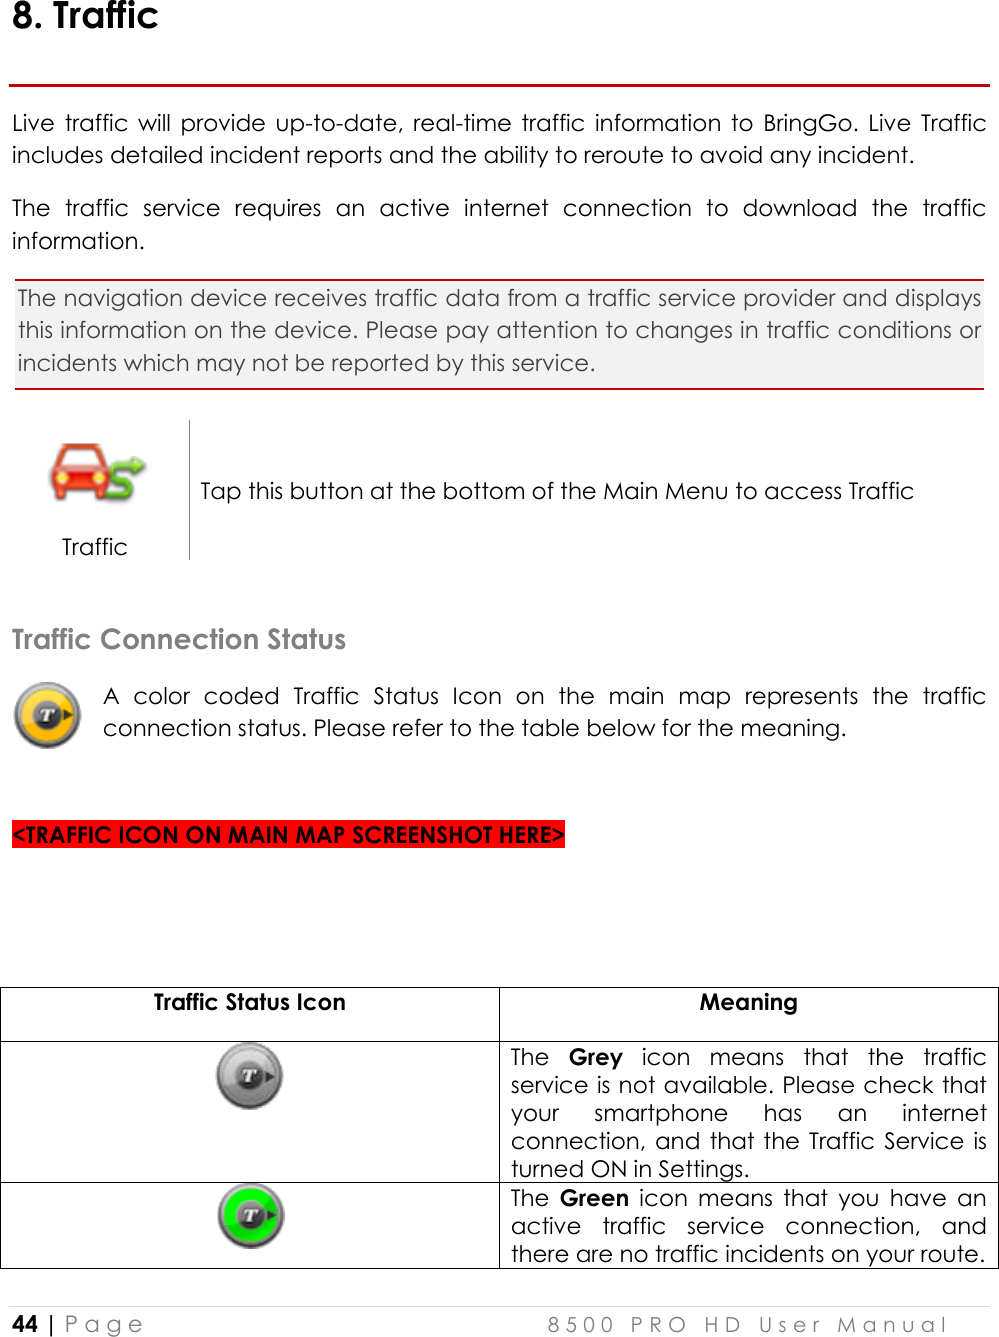
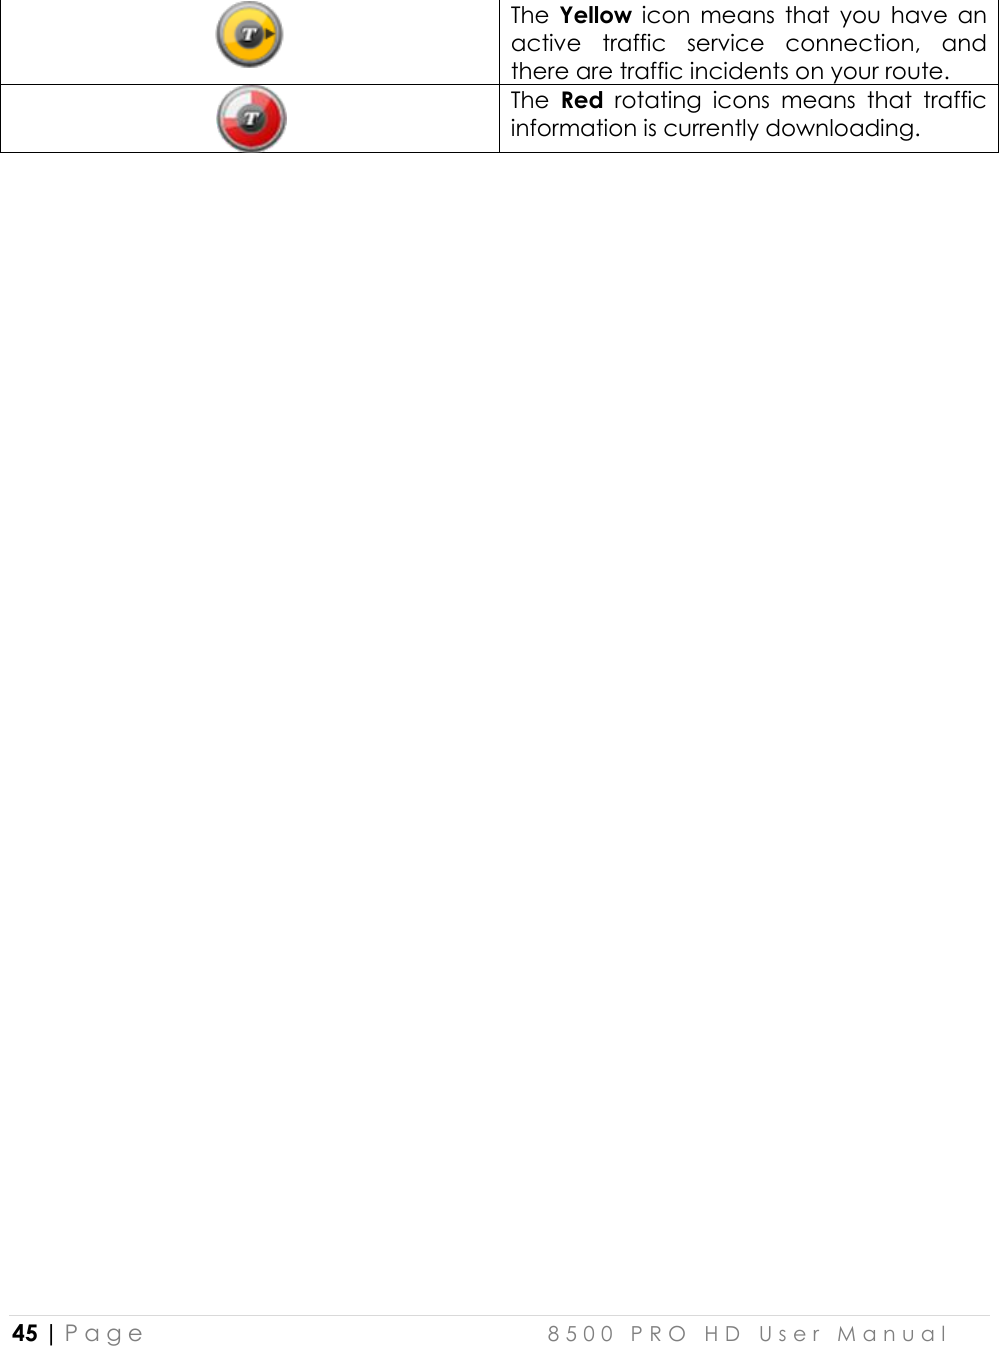
![49 | P a g e 8 5 0 0 P R O H D U s e r M a n u a l Traffic Details At times, you may need to get more information on a specific traffic event. When in the Traffic map or Traffic List screen, simply tap any event for more details. <TRAFFIC DETAILS SCREENSHOT HERE> 1 Traffic Event Icon. The icon is placed at the start of the incident. 6 Traffic Event Icon. In this example, the icon means ‘Lane Reduction’. 2 Next and Previous. You can scroll through the list of traffic events. 7 Detailed description of the traffic event. 3 Avoid / Cancel. Tap [AVOID] to reroute around the traffic event. You may only avoid ‘On Route’ traffic events. The [CANCEL] button will only appear for events that you have asked BringGo to avoid. Tap [CANCEL] to remove the avoidance condition for this event. This means that BringGo will no longer try to avoid this event. 8 Road, Direction, Start and End Junctions of the event. 4 Time the traffic message was received or updated. 9 The magenta line indicates the ‘extent’ of the traffic event. The arrow head is placed at the end of the incident and indicates the traffic travel direction. 5 Distance to the traffic event](https://usermanual.wiki/Cobra-Electronics/8500PRO/User-Guide-2111108-Page-49.png)

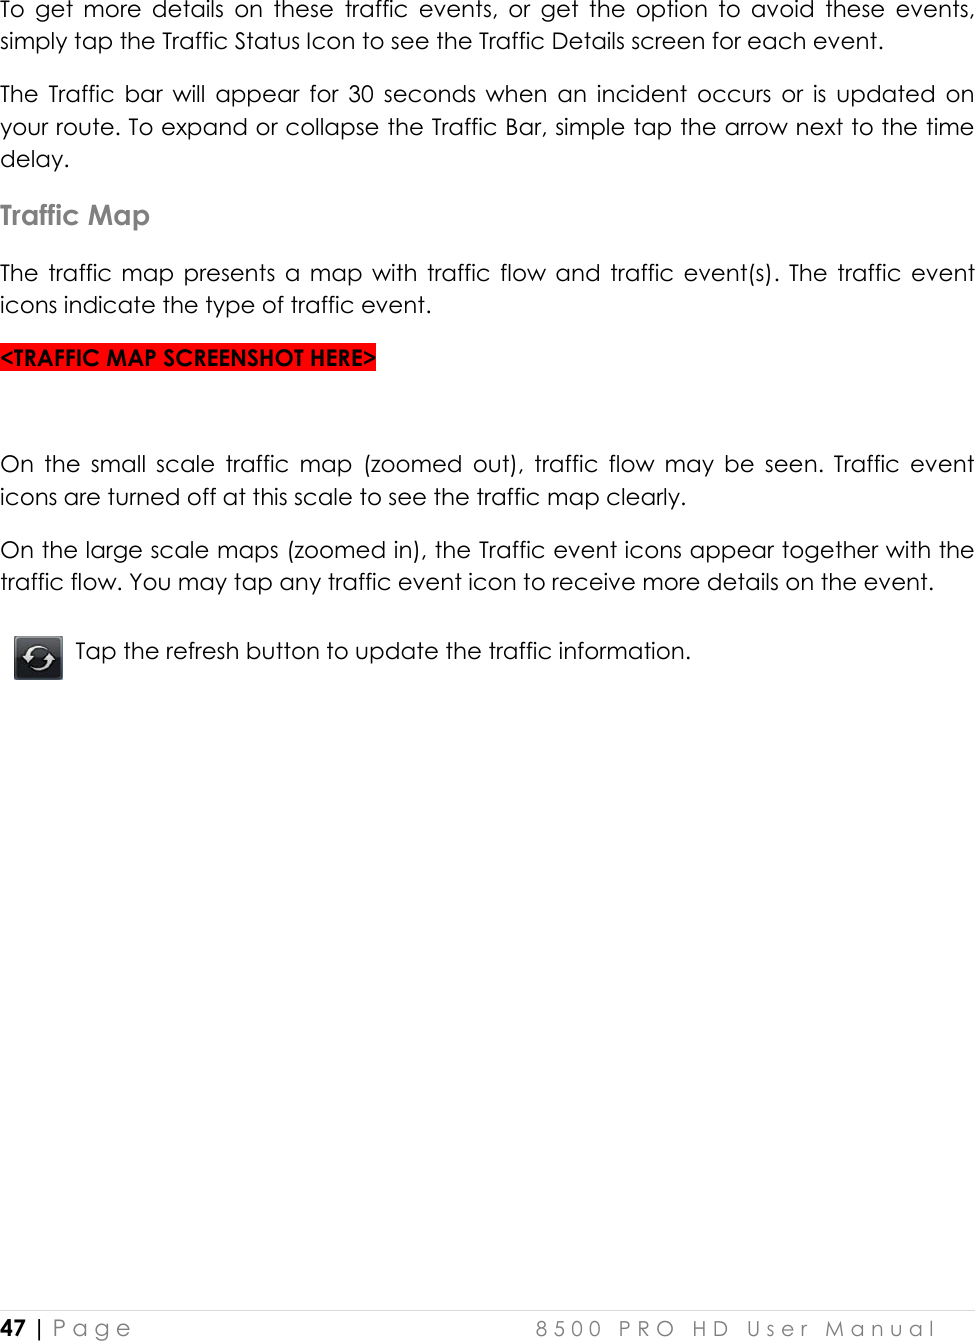
![53 | P a g e 8 5 0 0 P R O H D U s e r M a n u a l 9. Weather Your device allows you to view live weather information in a number of different ways; different weather overlays may be viewed on map, or a summary of current weather conditions may be viewed for your current location or for your destination. On Map To view weather conditions on a map, tap [SERVICES] and then tap [WEATHER], you can then select from 9 different weather overlays to display on the map. These overlays portray different weather conditions. <LIST OF OVERLAY SCREENSHOT HERE> When you have selected the desired weather overlay option, tap [APPLY] and the weather overlay will be displayed on a map. The weather map features a legend to help you understand the meaning of the different colors and an opacity control to increase or decrease the transparency of the weather overlay display. <WEATHER MAP SCREENSHOT HERE – LABELS FOR 6 ELEMENTS> 1 Zoom in 4 Change weather overlay display 2 Zoom out 5 Weather overlay legend 3 Map scale 6 Opacity control At Your Location To view a summary of weather conditions at your location, tap [AT YOUR LOCATION] at the bottom of the weather map screen. The At Your Location screen provides an overview of the current and upcoming weather conditions. <WEATHER AT YOUR LOCATION SCREENSHOT HERE – LABELS FOR 8 ELEMENTS> 1 Current weather conditions 5 Sunset/sunrise times for today 2 Current temperature 6 Weather conditions for upcoming days 3 Current wind speed 7 Temperature for upcoming days 4 Location information 8 Temperature for upcoming nights](https://usermanual.wiki/Cobra-Electronics/8500PRO/User-Guide-2111108-Page-53.png)
![54 | P a g e 8 5 0 0 P R O H D U s e r M a n u a l At Destination If you have an active route in navigation then you can also view a summary of weather conditions for your destination location. To access this summary, simply tap [AT DESTINATION] on the bottom of weather map. <WEATHER AT DESTINATION SCREENSHOT HERE>](https://usermanual.wiki/Cobra-Electronics/8500PRO/User-Guide-2111108-Page-54.png)
![55 | P a g e 8 5 0 0 P R O H D U s e r M a n u a l 10. Fuel Prices The fuel price interface allows you to search for live fuel price information for gas stations. At Your Location <FUEL PRICE AT YOUR LOCATION SCREENSHOT HERE> To view a list of fuel prices at gas stations near your current location, simply tap [SERVICES] on the main menu. A list of gas stations and their respective fuel prices is displayed, this list is sorted by distance from your current location. Along Route <FUEL PRICE ALONG ROUTE SCREENSHOT HERE> If you have an active route entered in navigation, you can search for gas stations that are on, or situated close to, your route. Simply tap [ALONG ROUTE] at the bottom of the fuel price screen and a list of gas stations and their respective fuel prices will be displayed (sorted by distance from your current location). At Other Location <FUEL PRICE AT OTHER LOCATION SCREENSHOT HERE> If you would like to view fuel prices at a different location, tap [AT OTHER LOCATION] at the bottom of the fuel prices screen, then enter the State/Province and City name of the location for which you would like to view fuel prices. A list of gas stations and their respective fuel prices will be displayed (sorted by distance from your current location).](https://usermanual.wiki/Cobra-Electronics/8500PRO/User-Guide-2111108-Page-55.png)

![58 | P a g e 8 5 0 0 P R O H D U s e r M a n u a l Day/Night Change the color scheme of the map as ‘Daytime’, ‘Nighttime’, or ‘Auto’ mode. <DAY/NIGHT SCREENSHOT HERE> Daytime: Daytime color scheme. Nighttime: Nighttime color scheme. Auto: Automatically change the map scheme. Map Colors You can change the map color.By touching the map images, change day or night color of map screen according to your preference. Then tap the [APPLY] button. <MAP COLORS SCREENSHOT HERE> Day Color: Select day color of map screen. Night Color: Select night color of map screen. A darker map color is used to reduce glare and eye strain while driving. Map Mode You can change the view mode of map as ‘Track up’, ‘North up’, or ‘3D View’ mode. <MAP MODE SCREENSHOT HERE> Track up: The direction of car is facing upwards. North up: The map screen is fixed to north direction up. 3D View: 3-dimensional ‘Track up Mode’.](https://usermanual.wiki/Cobra-Electronics/8500PRO/User-Guide-2111108-Page-58.png)
![59 | P a g e 8 5 0 0 P R O H D U s e r M a n u a l View Options You can turn select which Aura points are displayed on the main map and turn Junction View on or off. <VIEW OPTIONS SCREENSHOT HERE> Map Overlay You can turn on/off displaying some labels on map.Select options that you wish to be displayed on the map screen, then tap the [APPLY] button to apply these settings on the map screen. <MAP OVERLAY SCREENSHOT HERE> Street Name: Show or hide the street name on the map. Favorites Symbol & Name: symbols and names of registered place as your favorite. POI Symbol & Name: Tapping this button will allow you to hide or display POIs based on category type. You can choose to only display your favorite POI types, for example restaurants, fuel stations etc Guidance Settings Guidance Setting Control the settings for guidance information. <GUIDANCE SETTINGS SCREENSHOT HERE> Auto Zoom: You can set the automatic zooming at intersection or on speed. Fuel Cost: Set fuel pricing, and vehicle fuel consumption. Guidance Volume: Control the volume of voice guidance instructions.](https://usermanual.wiki/Cobra-Electronics/8500PRO/User-Guide-2111108-Page-59.png)
![61 | P a g e 8 5 0 0 P R O H D U s e r M a n u a l • Highway: represents driving on a mixture of rural and interstate highway driving, typical of longer trips in free-flowing traffic. Please be aware that the actual fuel cost may vary according to other factors which affect the fuel consumption; for example, driver behavior, driving conditions, vehicle maintenance, fuel characteristics, and weather. The cost estimate is an approximation of fuel costs only. Other costs, such as Toll charges are not included in the calculation. Guidance Volume This setting allows you to control the volume level of voice guidance. <GUIDANCE VOLUME SCREENSHOT HERE> Increase Volume: press the [+] button to increase the volume of the guidance announcements. Decrease Volume: press the [-] button to decrease the volume of the guidance announcements.](https://usermanual.wiki/Cobra-Electronics/8500PRO/User-Guide-2111108-Page-61.png)
![62 | P a g e 8 5 0 0 P R O H D U s e r M a n u a l Language Settings <ICON HERE> Language Settings Set the language used for voice guidance and for displayed text. <LANGUAGE SETTINGS SCREENSHOT HERE> You may select from three languages for voice guidance and displayed text: English (USA), French (Canada) and Spanish (USA). Simply tap [Voice] and/or [Text] and select the language that you want to use. When you have finished, tap [APPLY] and any changes will be saved.](https://usermanual.wiki/Cobra-Electronics/8500PRO/User-Guide-2111108-Page-62.png)
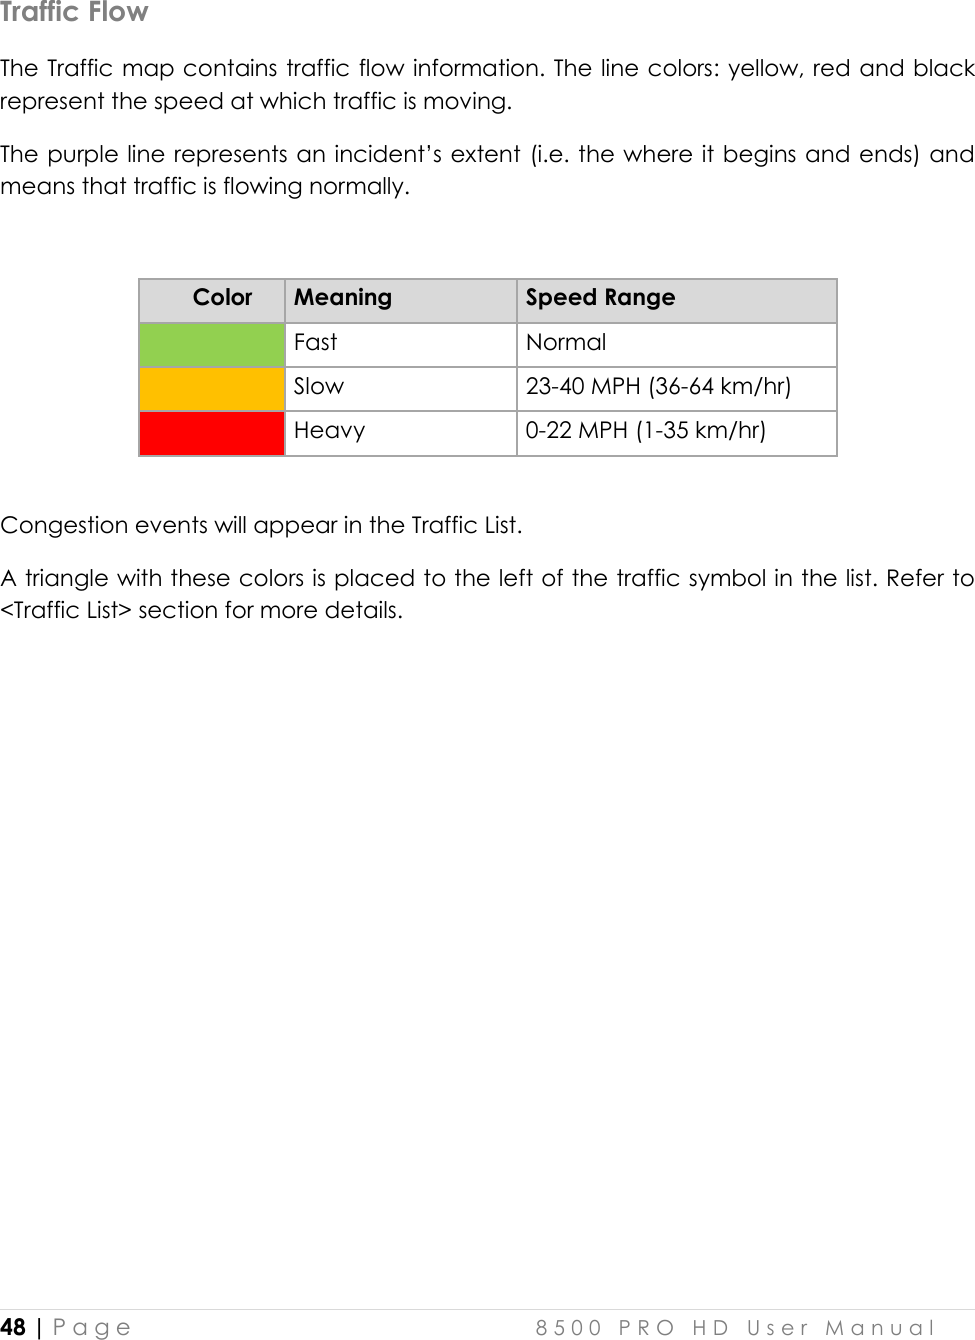
![63 | P a g e 8 5 0 0 P R O H D U s e r M a n u a l Routing Options Routing Options Change routing options for the system. <ROUTING OPTIONS SCREENSHOT HERE> Routing Selection: To calculate a route for faster time, select ‘Faster Time’ option. To calculate a route for shorter distance, select ‘Shorter Distance’ option. Route Preferences: Tap the [Route Preferences] button if you wish to avoid or prefer certain features or road types (e.g. avoid U-turns, avoid ferries, use STAA roads, etc.). When you have finished making changes to routing options tap [APPLY] and your changes will be saved for all future routes.](https://usermanual.wiki/Cobra-Electronics/8500PRO/User-Guide-2111108-Page-63.png)
![65 | P a g e 8 5 0 0 P R O H D U s e r M a n u a l 12. Trucker Tools The Trucker tools menu provides a range of different functions that are particularly helpful to truck drivers, to access the trucker tools menu, simply tap [TRUCKER TOOLS] at the bottom of the main menu. Mileage Log <MILEAGE LOG SCREENSHOT HERE> The mileage log automatically records the number of miles that you drive. These records can then be organised by state or by year. Additionally, you can save these records to a SD card for your own records. Trip Computer <TRIP COMPUTER SCREENSHOT HERE> The trip computer provides an overview of totals for your current trip. The display includes an odometer, average speed for your trip and total trip time. Additionally, current altitude and cumulative mileage are provided. Backup/Restore <BACKUP/RESTORE SCREENSHOT HERE> The backup/restore function allows you to save your favorites and/or mileage log entries to a SD card. For this function to work you must have a SD card inserted into your device. In order to restore favorites/mileage log you will need to have a SD card inserted that has the required files saved onto the root directory of the SD card. In order to backup favorites/mileage log, you will need to have sufficient space on the SD card to allow the files to be saved. On Duty Timer The On Duty Timer is a set of timers that will assist you in filling out your hours of service log book.](https://usermanual.wiki/Cobra-Electronics/8500PRO/User-Guide-2111108-Page-65.png)
![66 | P a g e 8 5 0 0 P R O H D U s e r M a n u a l When the On Duty Timer is set to manual, your work time will be calculated depending on the setting you make in the information tab on the main map (e.g. On Duty, On Duty Driving or Off Duty). When the On Duty Timer is set to Auto, the timer will automatically change to On Duty Driving after your vehicle has been in motion for 5 minutes, once the vehicle is stationary for 5 minutes the timer will change to On Duty. You can view and change the settings for the On Duty Timer, reset totals, change between auto and manual or manually alter the maximum time allowed and time remaining in the On Duty Timer menu. <ON DUTY TIMER SCREENSHOT HERE> <ON DUTY TIMER SCREENSHOT HERE (Time remaining/Maximum time edit screen)> The default totals for maximum time are: On Duty Driving Day 11hrs; On Duty Day 14hrs; On Duty Week 60hrs. To manually alter the maximum time allowed for these totals, simply tap the total you would like to edit and you will be able to enter both the Time Remaining and the Maximum Time. When you have finished making any alterations to On Duty Timer, tap [APPLY] and your changes will be saved. My Truck The My Truck interface allows you to save several vehicle profiles for any different truck types that you may be driving. Truck Information <TRUCK INFORMATION SCREENSHOT HERE> When opening My Truck, you will see a screen that displays the vehicle information of your currently selected vehicle, this includes the truck name, truck type and all important truck parameters (e.g. length, height, load type, etc.). The vehicle information displayed on this screen relates to the vehicle that is currently being used in navigation. To change the currently selected vehicle, tap [CHANGE] in the bottom left corner of the screen. My Vehicle <MY VEHICLE SCREENSHOT HERE>](https://usermanual.wiki/Cobra-Electronics/8500PRO/User-Guide-2111108-Page-66.png)
![67 | P a g e 8 5 0 0 P R O H D U s e r M a n u a l The My Vehicle screen displays all the vehicles that you have available for use. When using your device for the first time, you will have two default vehicle profiles, one truck (Truck 1) and one car (Car). To add a new truck to your list of vehicles, simply tap [ADD] at the bottom of the screen. <TRUCK TYPE SCREENSHOT HERE> You will be provided with a list of different truck type axle configurations, to switch between the different lists for USA and Canada, simply select the appropriate country name at the top of the list. When you have selected the desired truck type from the list, tap [APPLY] and the vehicle will automatically be added to the end of your My Vehicle list. From the My Vehicle list you can then manually enter the parameters of your truck, simply select the vehicle you wish to edit the parameters for and tap [EDIT] at the bottom of the screen. <ENTER TRUCK INFORMATION SCREENSHOT HERE> From the Enter Truck Information menu you can give the truck a meaningful name, edit all truck parameters and set your choice of vehicle icon to be displayed on the map. To edit any of the truck parameters, simply tap the <ICON HERE> icon to the right of the parameter field. A sub menu will then be displayed where you can individually enter each sub category for that truck parameter. When travelling from the US to Canada or vice versa, routing in the other country will be based on our closest match to your truck type. For best results, use US truck types in the US and then switch to a Canada truck type when driving in Canada. Vehicle Icon The Vehicle Icon sub menu allows you to set your preferred vehicle icon for your truck. You can select from five different icon styles with five different colour schemes for each icon style. <VEHICLE ICON SCREENSHOT HERE> Calculator The Calculator interface provides an easy and convenient means of carrying out basic calculations using your device.](https://usermanual.wiki/Cobra-Electronics/8500PRO/User-Guide-2111108-Page-67.png)

![3.After paired sucessfully, the bluetooth icon on the display will be on.1.When the bluetooth icon on the display flashes, means the device is searching the previous paired device. 5.If it still doesn't work, please reset the Bluetooth and follow above step again.4.Search "HKN" and pair it, input the password "0000" if necessary. 3.Press play/pause button and hold for 10 seconds, after a beep tone, the device is prepaired to be paired again. 1.Power on the unit and press "MODE" button to change to bluetooth mode or press “BT” button on the remote,2.The previous paired device will connect to the device automatically when each time changing to bluetooth mode. 69 | P a g e 8 5 0 0 P R O H D U s e r M a n u a l Traffic section for more information. Exit navigation Exit Exit the navigation application. Tap the [Exit] button to completely close the navigation application. BluetoothWIFIThis device supports “Wi-Fi 802.11 b/g/n”. You can access to the local network through WiFi. About WiFi settings and operations, please refer to the WiFi section in System Settings.Notes: the LED display will display “bt”. 2.Press play/pause button and hold for 10 seconds, the bluetooth icon on the display will flash fast, which means the device is ready for being paired.](https://usermanual.wiki/Cobra-Electronics/8500PRO/User-Guide-2111108-Page-69.png)