Cobra Electronics MRHH450 HANDHELD MARINE/GMRS RADIO User Manual MRHH330 ENG Body
Cobra Electronics Corporation HANDHELD MARINE/GMRS RADIO MRHH330 ENG Body
Contents
- 1. User Manual 1
- 2. User Manual 2
- 3. User Manual 3
User Manual 2

VHF Marine Radio Protocols
Operating Your Radio
25
Nothing Comes Close to a Cobra®
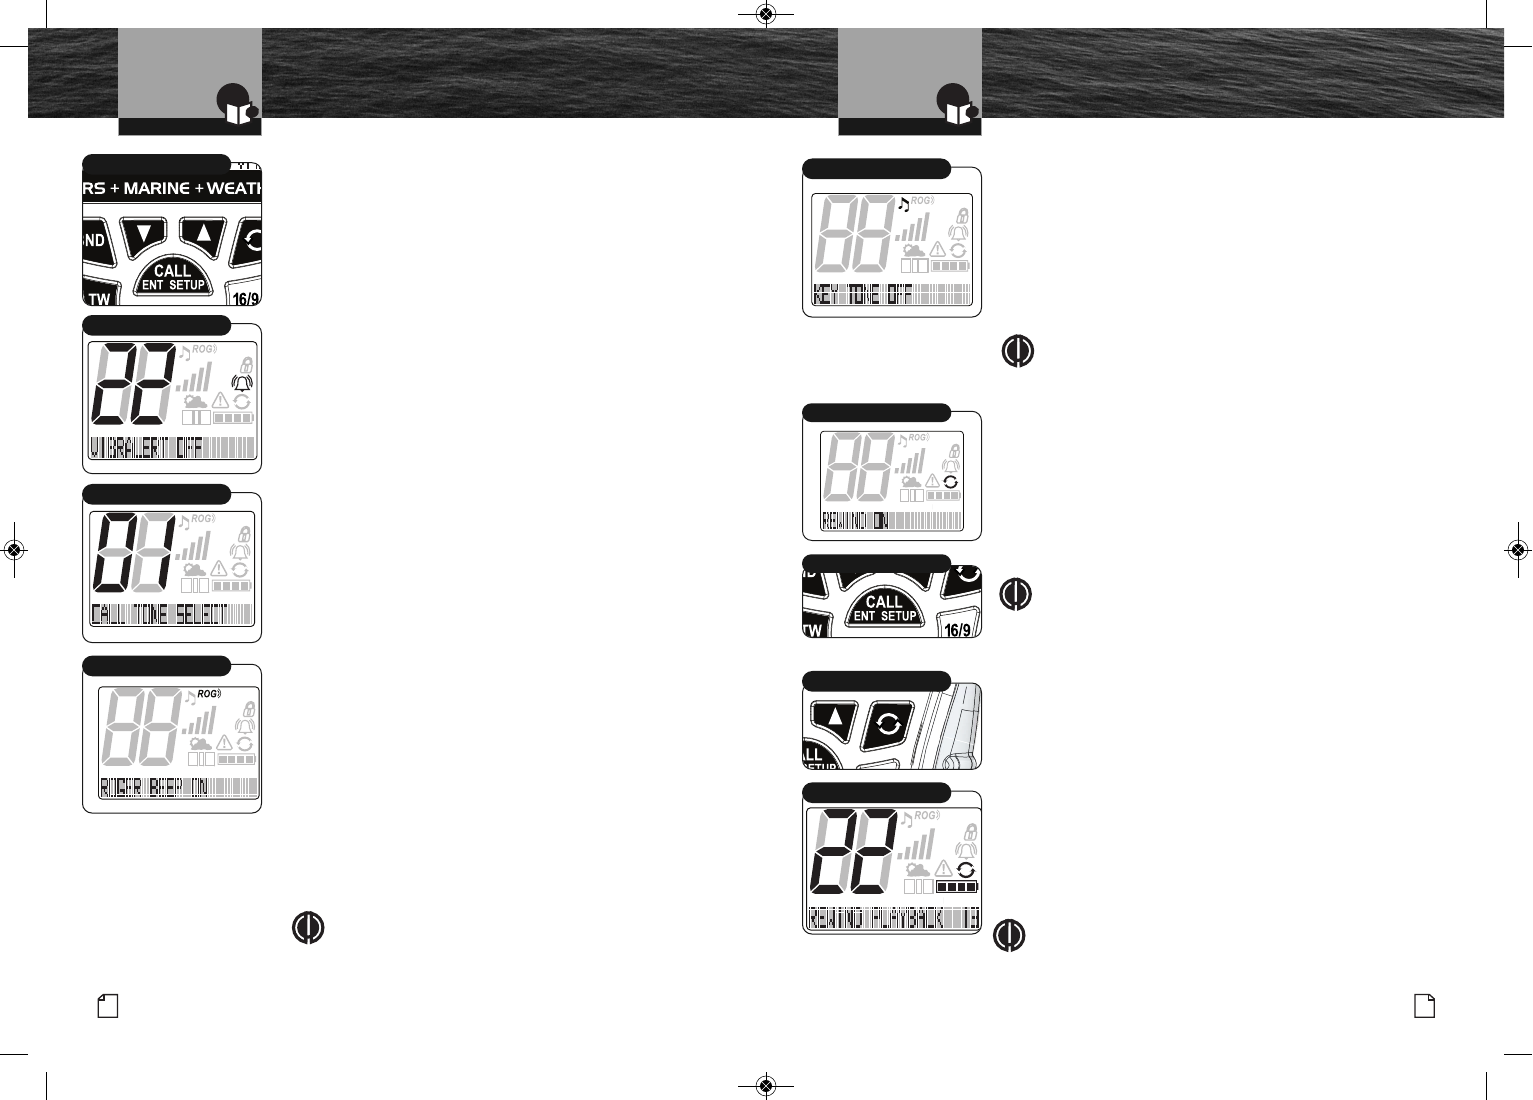
Getting Started
Channel Up/Down Buttons
Your radio will Receive (Rx) and Transmit (Tx) VHF/GMRS signals
on the channel indicated on the LCD display. You can change the
channel at any time using the Channel Up/Down buttons.
To Change Channels:
Press the Channel Up/Down button.
If you are on Channel 88, pressing the Channel Up button will
advance to Channel 01. If you are on Channel 01, pressing the
Channel Down button will advance to Channel 88. (GMRS
highest channel is 22, then will advance to channel 1.
Weather highest channel is 10, then advances to channel 1).
You can press and hold the Channel Up/Down button for fast
advance. The beep sound will occur only at the first press of
the button and not during fast advance.
If the new channel selected is restricted to low power, the
radio will automatically switch to Low Power mode and the
Low Power icon will appear on the LCD.
If the radio is in the Key Lock mode, the channel will not
change and the three (3) beep error signal will sound.
SCAN Button
Press and release the SCAN button to enter all scanning
modes - Marine, GMRS and memory. See the Advanced
Operation section has more details on using the Scan
modes. The SCAN icon will display on the LCD display.
Scanning begins at lower channels, and scans to higher
channels. Press the Channel Up/Down button to change the
scan direction.
HI
R
SCAN Button
HI
R
Channel Up/Down Buttons
SAMATIS VOX LOMEDHI
T
R
A
B
X
CIU
Currently On Channel 88
VHF Marine Radio Protocols
Operating Your Radio
24 English
Getting Started
Radio Speaker and Microphone
The internal Radio Speaker and Microphone are located on the
bottom front face of the radio below the lower control buttons.
An optional Speaker/Microphone port is located at the top
of the radio between the antenna and the Power/Volume
control. Unthread the Speaker/Microphone port cover to access
and install an optional Cobra speaker or microphone into this port.
Talk Button
Press and hold the Talk button to transmit messages.
Release the Talk button to stop transmitting.
Backlight/Key Lock Button
To Display the Backlight Momentarily:
Press the Backlight/Key Lock button. The backlight will
remain On for 10 seconds. If the backlight is already
On, another press of the Backlight/Key Lock button
will turn it Off.
Key Lock
To prevent accidental changes to your settings, you can
lock all of the following buttons:
■Channel Up Button
■Channel Down Button
■Band Button
■REWIND Button
■SCAN Button
■MEM/ESC Button
■WX/H-M-L Button
■16/9 Button
■TRI-WATCH Button
■Call/Enter/Setup Button
To Lock or Unlock the Buttons:
Press and hold the Backlight/Key Lock button for two
(2) seconds. The Key Lock icon will appear or disappear
in the LCD. When Key Lock is On, pressing any of the
listed buttons on the front of the radio will result in a
three (3) beep error message.
Both the Backlight/Key Lock button and the Talk button
are active — you can Receive (Rx) or Transmit (Tx)
a message with Key Lock On, but you cannot change
the channel.
Backlight/Key Lock Button
MEMSAMEATIS VOX HI
ROG
VHF
T
R
A
B
GMRS
X
CIU
Key Locked Buttons
VHF
GMRS
Key Lock Icon
Speaker/Mic Port
Talk Button
MRHH450DUAL_BODY_MRHH330_ENG_Body 12/5/13 5:57 PM Page 24
VHF Marine Radio Protocols
27
Nothing Comes Close to a Cobra®
VHF Mode Programming
Setup Mode Programming •
The following series of procedures is designed to allow you
to set the programmable features of your radio. Correctly
following these steps results in a minimal amount of radio
setup programming time.
During setup programming, the matrix display will show text
describing the programming action you are now performing.
NOTE
When in any of the Setup modes (Marine (VHF), GMRS
or Weather), if you stop programming for longer than
15 seconds, your entry will be saved and the radio will
go back to Standby mode. While in the Setup mode,
you will not receive any signal reception except when
setting squelch.
Programming these features will allow you to customize
certain features of this radio to enhance your “On-Water”
radio use.
Start from Marine Standby mode to begin Marine (VHF)
Setup programming. Press and hold the Call/Enter/Setup
button for two (2) seconds to enter the programming mode.
The mode programming follows this sequence:
■Squelch Level Set
■UIC Channel Map
■VOX On/Off
■Vox Sensitivity Level Set (this menu setting will be
present when VOX is set to ON)
■Call Alert Tone/Vibrate Set
■Call Alert Tone Set
■Roger Beep On/Off
■Key Tone On/Off
■Rewind On/Off
■Priority 16 On/Off
Marine (VHF) Mode Programming
VHF Marine Radio Protocols
26 English
Getting Started
High/Medium/Low (H-M-L) Power Button
Your radio can transmit selectively at 1, 3 or 6 (or highest
allowed ERP setting in GMRS mode) watts of power. Cobra
suggests you maintain the low power setting for short-range
communications. You will conserve battery life and avoid
overpowering nearby stations with a low power setting signal.
Use the high power setting for long-range communications or
when you do not receive a response to a signal sent at 1 watt.
To Toggle Between H-M-L Power Modes:
Press and release the H-M-L Power button. The LCD
will show which mode is in effect. Some channels are
restricted for a maximum use of 1 watt. Your radio will
automatically set the power to Low Power mode
when you select those channels.
NOTE
Some channels, frequency bands and countries of use
might not be able to operate in High Power mode and
some channels are receive only.
Call/Enter/Setup Button
The Call/Enter/Setup button has multiple functions. It is
generally used in the following ways:
■Press and release to transmit your unique Call Tone signal
to another radio.
■Press and hold to enter any Setup menu.
■Functions as an Enter button when making a selection
in any Setup menu.
H-M-L Power Button
Call/Enter/Setup Button
Operating Your Radio
Operating Your Radio
MEMSAME
ATIS VOXLOMEDHI
VHF
T
R
A
B
GMRS
X
CIU
Marine Standby Mode
Channel 16/9 Button •
Channel 16/9 mode gives you quick access to calling
Channel 16 and Channel 9 from any operational mode.
To Switch to Channel 16 or Channel 9:
1. Press the Channel 16/9 button to change to
Channel 16.
2. Press the Channel 16/9 button again to change to
Channel 9.
3. Press the Channel 16/9 button a third time and
return to the last used channel.
SAMATIS VOX LO MEDHI
T
R
A
B
X
CIU
SAMATIS VOX LO MEDHI
T
R
A
B
X
CIU
Channel 16 or Channel 9
MRHH450DUAL_BODY_MRHH330_ENG_Body 12/5/13 5:57 PM Page 26
VHF Marine Radio Protocols
Operating Your Radio
29
Nothing Comes Close to a Cobra®
VHF Mode Programming
USA/International/Canada Channel Maps
Three (3) sets of VHF Channel Maps have been established
for marine use in the USA, Canada, and the rest of the world
(International). Most of the channels are the same for all
three (3) maps, but there are definite differences (see table in
the Appendix on page 62). Your radio has all three (3) maps
built into it and will operate correctly in whichever area
you choose.
To Set Channel Map Operating Area:
1. The Channel Map mode is the second mode on
the Marine (VHF) Setup programming.
2. U, I and Cwill display, with the current setting
(the Uicon is the default) flashing.
3. Press Channel Up/Down button to select the
U, I or Cicon.
4. Press Call/Enter/Setup button to save this entry
and move to the next Setup mode programming.
VHF Marine Radio Protocols
Operating Your Radio
28 English
VHF Mode Programming
SAMEDHI
A
B
CIU
Active Channel Map Icon
HI
R
Channel Up/Down Buttons
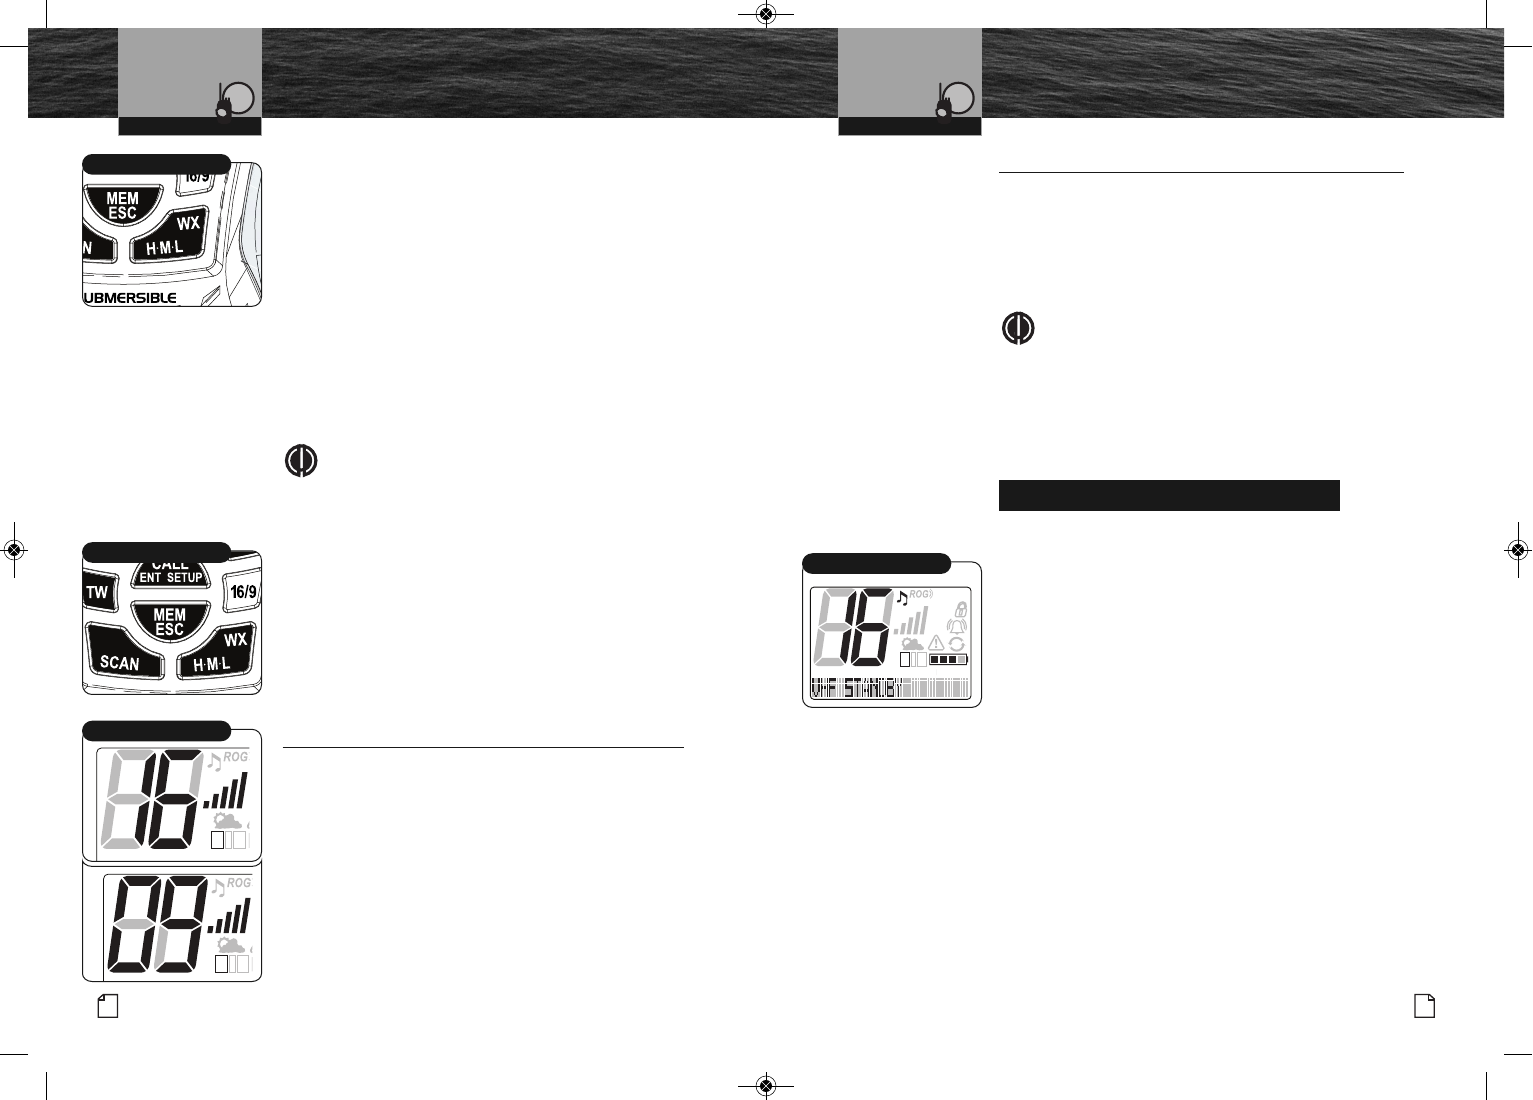
Squelch Control
Squelch Control filters weak signals and radio frequency (RF)
noise so that you will clearly hear the signals you want.
The Squelch Control on this radio is set through the following
keypad operation.
To Set Squelch Control:
1. With the power On, push and hold Call/Enter/Setup
button to access the Setup menu.
2. Squelch control will be the first menu item to appear.
Press the Channel Up and Channel Down buttons to
set level. The signal level bar graph shows squelch
level while you are in Setup mode on the squelch
adjust function.
3. To adjust your squelch, press the Channel Down
button until you hear a hissing sound, then press
and release the Channel Up button until the hissing
stops. This will establish a “Baseline” squelch.
4. By pressing the Channel Up button further, you will
filter weak and medium strength signals. By pressing
Channel Down button, you will receive weaker signals.
5. Press the Call/Enter/Setup button to save this entry
and move to the next Setup mode programming.
NOTE
If the Squelch is set so that you can hear a continuous
hissing sound, the Memory Scan and Tri-Watch
functions will be blocked.
MEMSAMEATIS VOX LOMEDHI
VHF
T
R
A
B
GMRS
X
CIU
Squelch Control
Channel Up/Down Buttons
MRHH450DUAL_BODY_MRHH330_ENG_Body 12/5/13 5:58 PM Page 28
30
Operating Your Radio
31
Nothing Comes Close to a Cobra®
VHF Mode Programming
English
VHF Mode Programming
Operating Your Radio
Voice Activated Transmit (VOX) Mode
In VOX mode, your radio can be used “hands-free,”
automatically transmitting when you speak. You can also set
the VOX sensitivity level to fit the volume of your voice and
avoid transmissions triggered by background noise.
To turn VOX Mode On or Off:
1. Display will show VOX icon and ON or OFF flashing.
2. Press Channel Up/Down button to select ON or OFF.
3. Press Call/Enter/Setup button to save this entry and
move to the next setup programming mode.
NOTE
Once set, this is a global setting when in all radio
modes.
To set VOX Sensitivity Level:
NOTE
VOX sensitivity level is only visible when VOX is On.
1. The display will show VOX LEVEL and the current
level will be flashing.
2. Press Channel Up/Down button to change the Vox
level of your choice. Remember, this selection is
your voice sensitivity level during hands-free
operation.
05 - indicates a Low (quiet) voice setting.
03 - indicates a Medium voice setting.
01 - indicates a High (loud) voice setting.
3. Press Call/Enter/Setup button to save this entry and
move to the next setup programming mode.
NOTE
VOX will be turned Off automatically when the radio is
turned Off. This will avoid accidental transmissions.
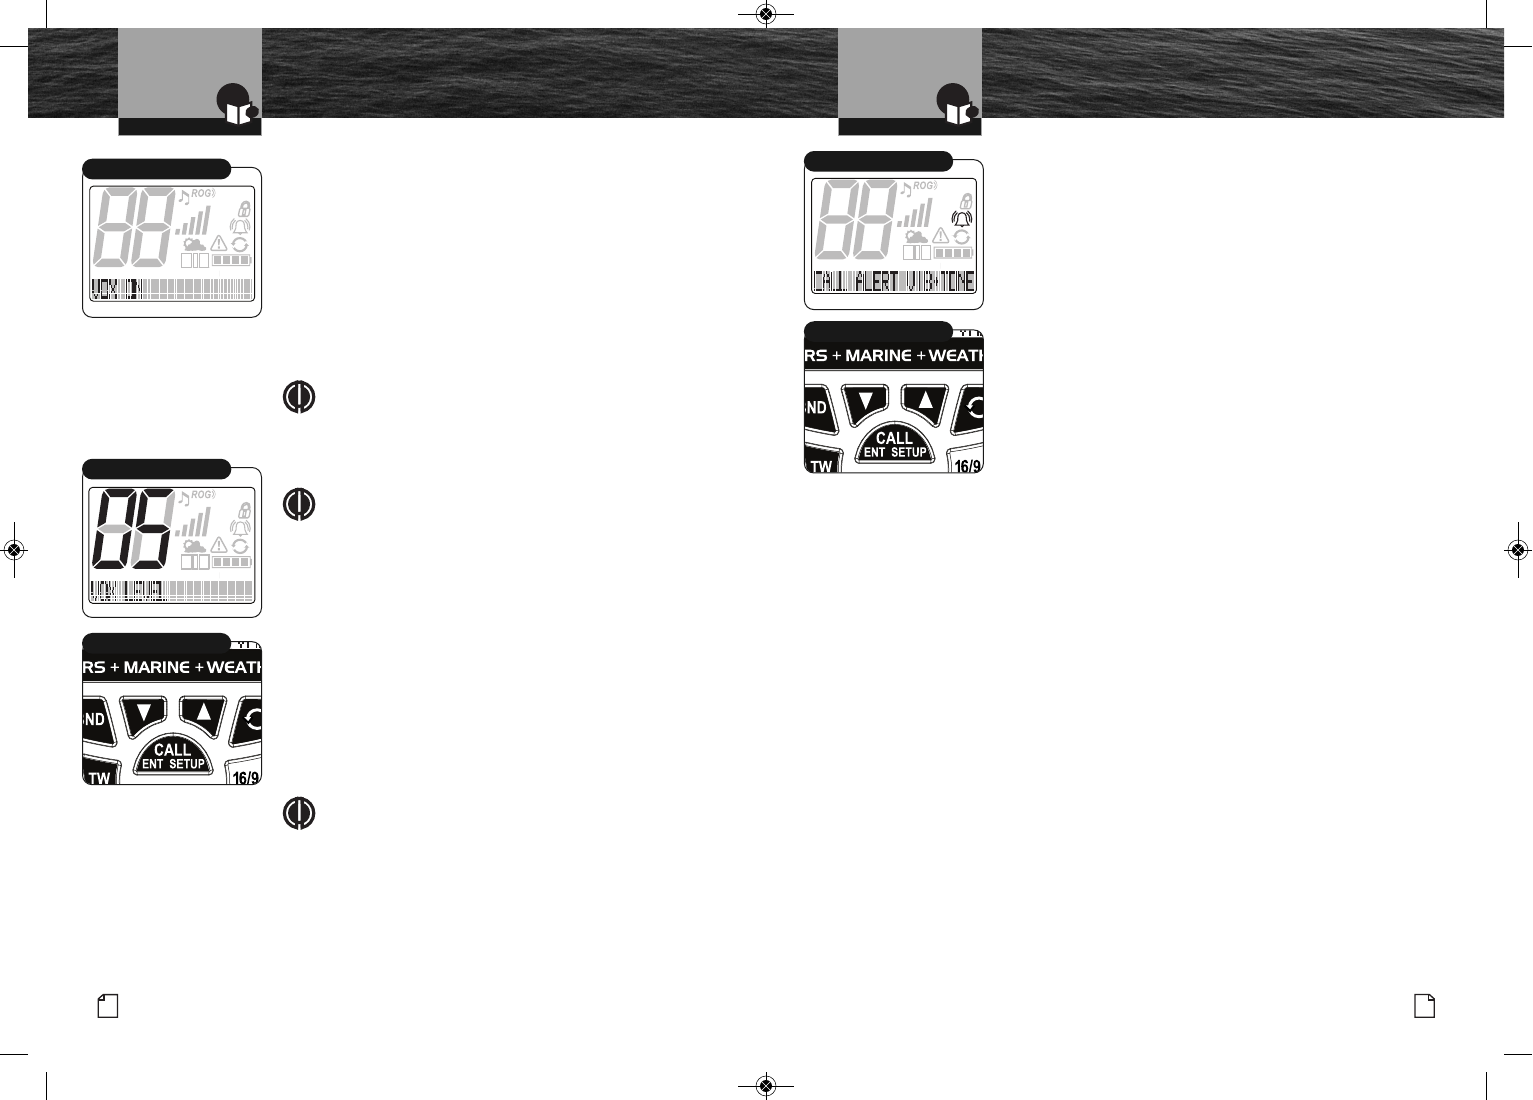
Call Alert
If Call Alert is set to On, the radio will alert you to a call from a
compatible Cobra radio with a Call Alert.
Select the type of radio alert:
1. The display will show CALL ALERT and will be flashing
OFF, TONE, VIBRATE, or VIB+TONE.
2. If TONE, VIBRATE, or VIB+TONE option is shown on the
display then the appropriate BELL, VIBRATE, shake
bars or combination VibrAlert icon will be displayed.
3. Press Channel Up/Down button to select the alert mode
of your choice.
4. Press Call/Enter/Setup button to save this entry and
move to the next setup programming mode.
MEMSAMEATIS VOX LOMEDHI
VHF
T
R
A
B
GMRS
X
CIU
VOX Mode
MEMSAMEATIS VOX LOMEDHI
VHF
T
R
A
B
GMRS
X
CIU
VOX Level
HI
R
Channel Up/Down Buttons
Channel Up/Down Buttons
MEMSAMEATIS VOX LOMEDHI
VHF
T
R
A
B
GMRS
X
CIU
Call Tone Alert
MRHH450DUAL_BODY_MRHH330_ENG_Body 12/5/13 5:58 PM Page 30
33
Nothing Comes Close to a Cobra®
VHF Mode Programming
MEMSAMEATIS VOX LOMEDHI
VHF
T
R
A
B
GMRS
X
CIU
Roger Beep Mode
MEMSAMEATIS VOX LOMEDHI
VHF
T
R
A
B
GMRS
X
CIU
Call Tone Select
VHF Marine Radio Protocols
Operating Your Radio
32 English
VHF Mode Programming
Call Tone Select
This setting will allow you to transmit a unique
Call Tone alert to identify your radio when you transmit
messages. You can select from one of 10 different
Call Tone signals.
To Set Call Tone:
1. From the previous press of the Call/Enter/Setup
button, the matrix will display CALL TONE SELECT
and the display will flash the current Call Tone
number (01 through 10).
2. Press the Channel Up/Down button to select a
different Call Tone. An example of each call tone will
sound for 1.5 seconds.
3. Press Call/Enter/Setup button to save this entry and
move to the next Setup mode programming.
NOTE
Call Tones are not usually used for Marine VHF
communications. We allow you to turn it On for your
unique communication needs. It is only compatible
with other Cobra VHF radios.
Roger Beep Mode
In Roger Beep mode, your listener will hear an audible tone
when you release the Talk button. This alerts your listener
that you are finished talking and it is OK for them to speak.
To Set Roger Beep On or Off:
1. Display will show ROG icon flashing and the matrix
will display ROGER BEEP ON or OFF.
2. Press Channel Up/Down button to select ON or OFF.
ROG will be displayed when On.
3. Press Call/Enter/Setup button to save this entry and
move to the next Setup mode programming.
Key Tone Mode
In Key Tone mode, an audible tone will sound each time a
button is pressed or you change a setting.
To Set Key Tone On or Off:
1. Display will show Key Tone icon flashing and matrix
will display KEY TONE ON or OFF.
2. Press Channel Up/Down button to select ON or OFF.
3. Press Call/Enter/Setup button to save entry.
NOTE
Once set, this is a global setting when in all
radio modes.
MEMSAMEATIS VOX LOMEDHI
VHF
T
R
A
B
GMRS
X
CIU
Key Tone Mode
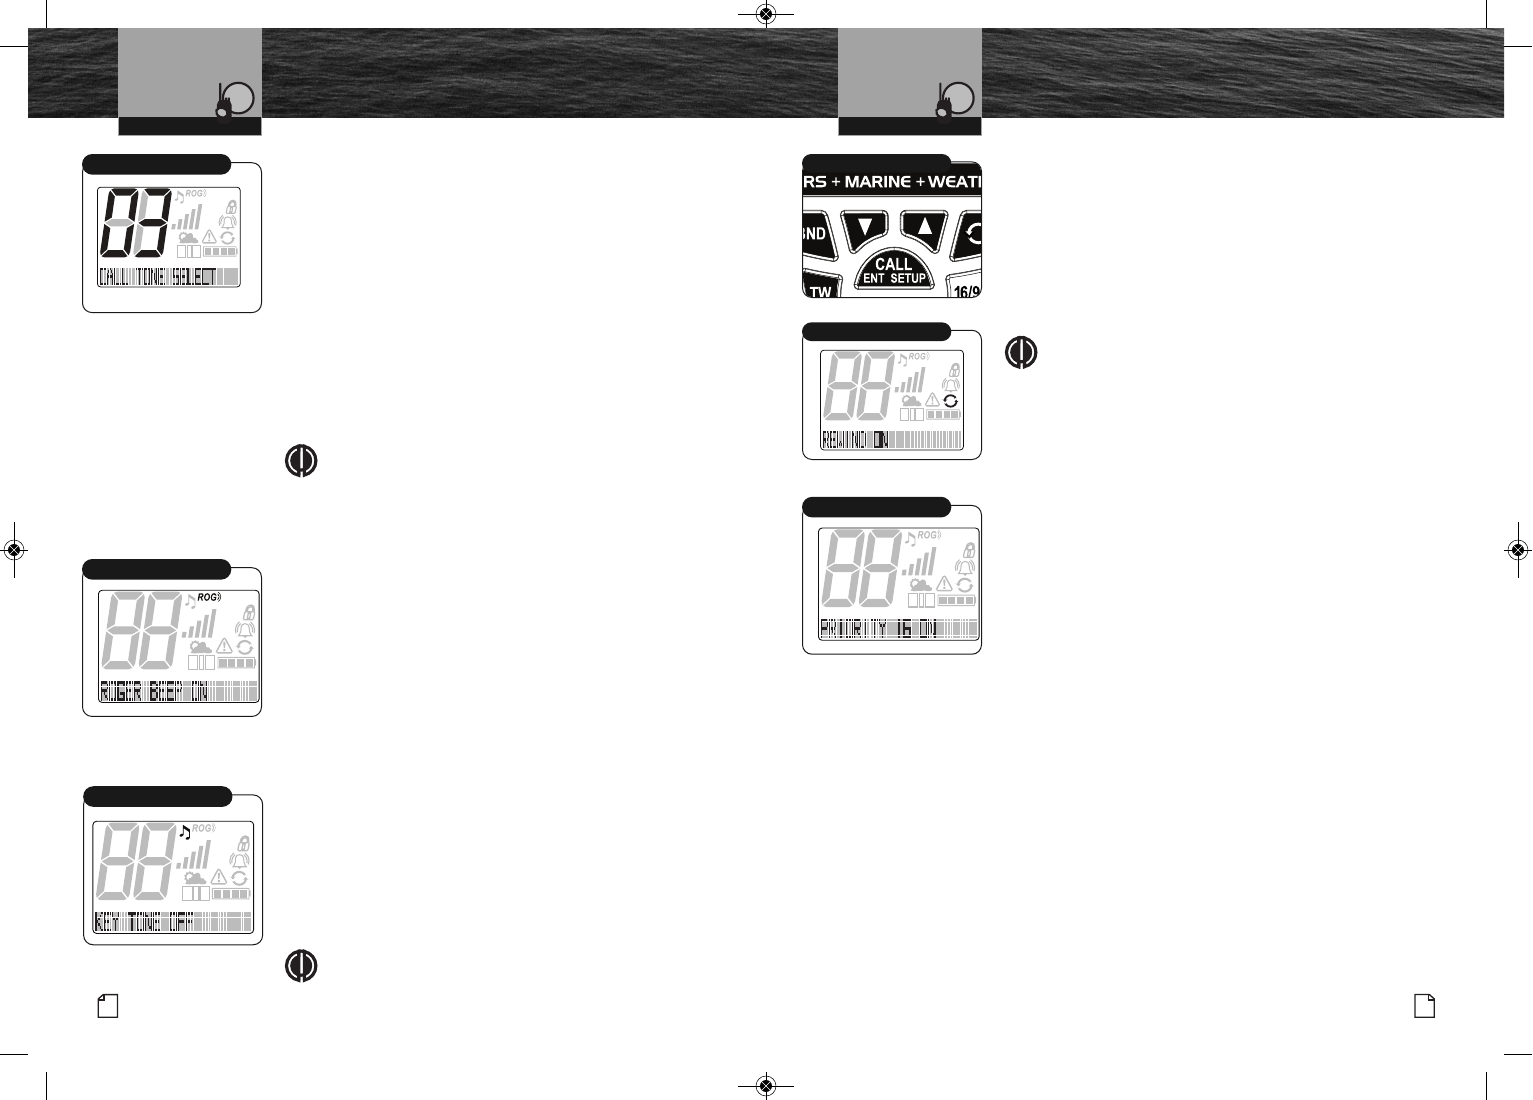
Rewind On/Off
If Rewind is enabled, the last 20 seconds of incoming
audio is recorded and you can play back missed VHF calls
by pressing the Rewind button.
1. Display will show the Rewind icon and the matrix
will display REWIND ON or OFF.
2. Press Channel Up/Down button to select ON
or OFF.
3. Press Call/Ent/Setup button to save entry.
NOTE
Once set, this is a global setting when in all
radio modes.
Channel 16 Priority Mode
If Priority 16 is turned on, during channel scan the radio
will frequently check the Channel 16 Safety and Distress
channel for calls.
To Set Priority 16 On or Off:
1. The display matrix will show PRIORITY 16 ON
or OFF.
2. Press the UP or DOWN button to select On or Off.
3. Press Call/Ent/Setup button to save entry.
HI
R
Channel Up/Down Button
MEMSAMEATIS VOX LOMEDHI
VHF
T
R
A
B
GMRS
X
CIU
Rewind Enable
VHF Marine Radio Protocols
Operating Your Radio
MEMSAMEATIS VOX LOMEDHI
VHF
T
R
A
B
GMRS
X
CIU
Channel 16 Priority
MRHH450DUAL_BODY_MRHH330_ENG_Body 12/5/13 5:58 PM Page 32
Operating Your Radio
35
Nothing Comes Close to a Cobra®
34 English
Operating Your Radio
Programming these features will allow your radio to listen to
all NOAA Hazard Alert radio channels. In this process, you
will be programming the channel settings for the “Specific
Area Message Encoding (SAME)” and “Emergency Alert
Messages” sent by NOAA. See channels and frequencies
listed on page 31.
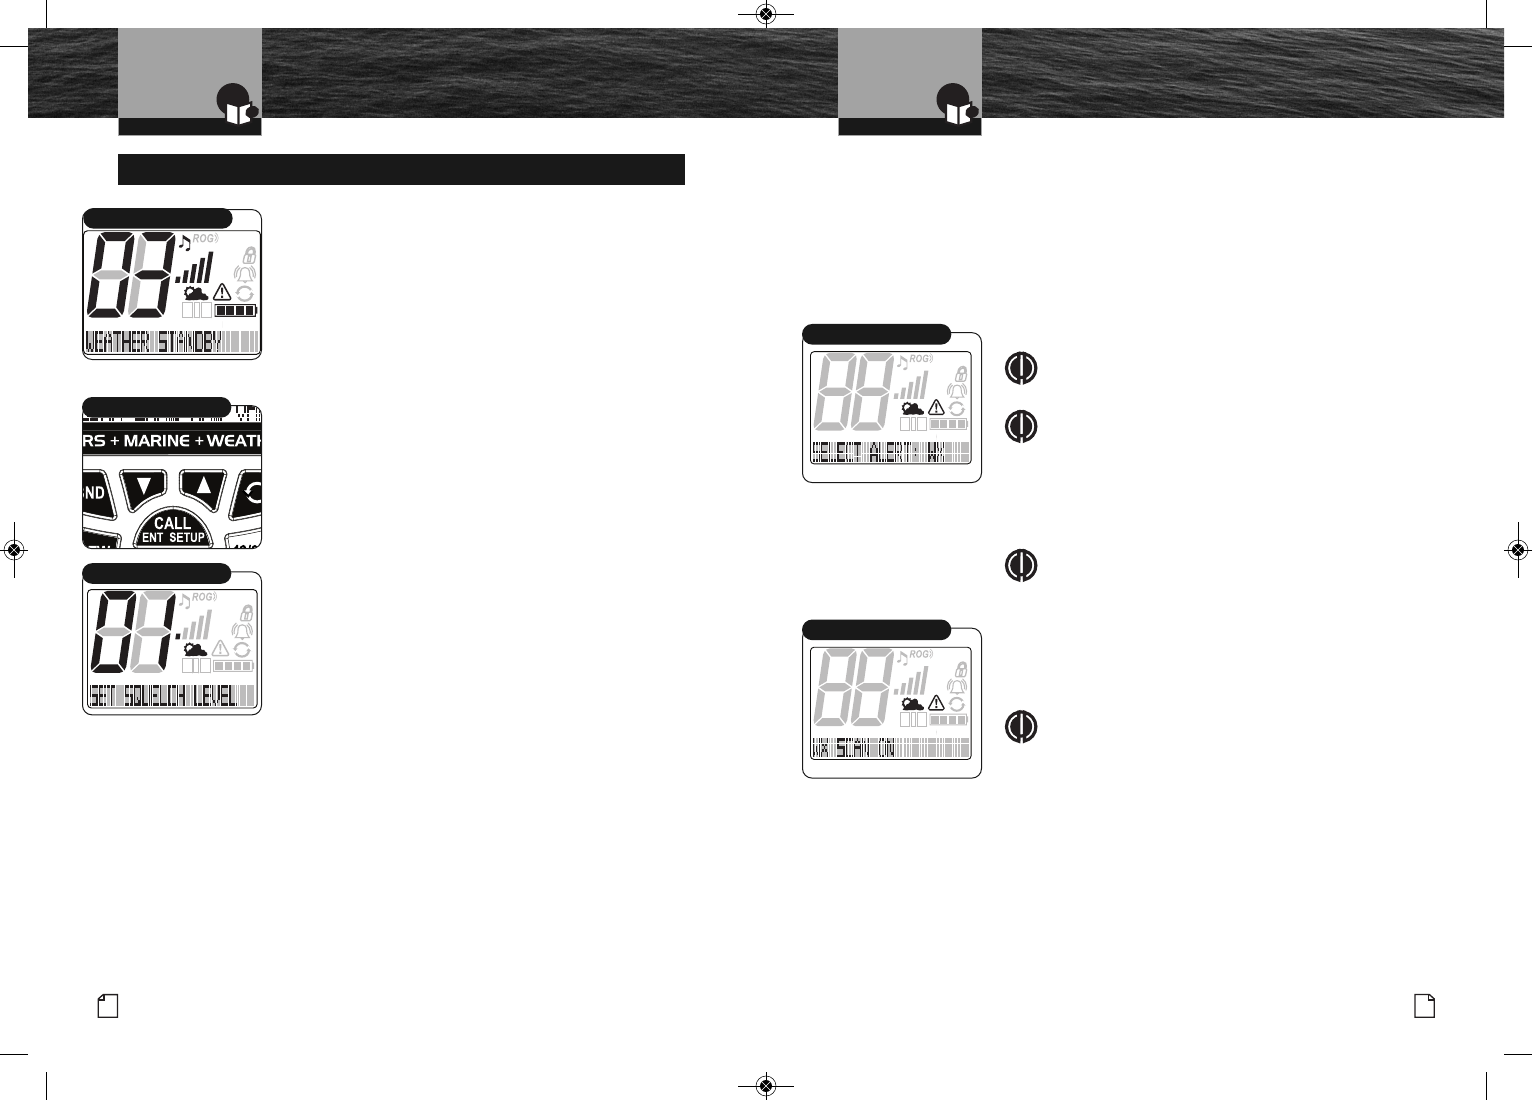
Start from Weather Standby mode to begin
Weather Alert Setup programming. Momentarily Press the
Call/Enter/Setup button to enter the programming mode.
Weather (WX) Mode Programming
MEMSAMEATIS VOX LOMEDHI
VHF
T
R
A
B
GMRS
X
CIU
Weather Alert Standby
Alert Functions
SAME is an advanced weather alert feature. Leave this set to
OFF if you are not sure about your understanding of its operation.
The weather mode can be set to respond to NOAA alerts in three ways:
•OFF - radio alerts are disabled.
•WX - radio will sound a max volume tone alert for 8 seconds when
NOAA sends a 1050 Hz warning alert tone.
•SAME -radio will display the NOAA SAME alert message.
1. Select Alert and either OFF, WX or SAME will flash in the display.
NOTE
If WX Alert is turned on, the radio will receive NOAA
voice alerts from a wide geographic area around you.
NOTE
If SAME Alert is turned on, the radio will receive detailed
NOAA alerts from a geographic area immediately around you.
2. Press Channel Up/Down button to select OFF, WX or SAME.
3. Press the Call/Enter/Setup button to save entry and move to
the next programming mode.
NOTE
Proceed to SAME programming section if SAME has
been selected.
To Set WX Auto Search (SCAN) On or Off:
1. Display will show WX Alert icon and SCAN, ON or OFF is flashing.
2. Press Channel Up/Down button to select SCAN, ON or OFF.
3. Press the Call/Enter/Setup button to save entry.
NOTE
When WX Auto Search (SCAN) is set to On, weather
channel scanning will start automatically and scan all
available weather channels. When the user-selected
weather channel falls below the preset squelch level,
the weather channel will change to a new weather
channel under the following conditions:
■ WX Alert is engaged.
■ WX received signal level falls below a preset
squelch on the user-selected weather channel and
– radio is in WX Standby OR
– radio is in VHF or GMRS Standby and
there is no channel activity.
MEMSAMEATIS VOX LOMEDHI
VHF
T
R
A
B
GMRS
X
CIU
Select Weather Alert
Squelch Control
Squelch Control filters weak signals and radio frequency (RF)
noise so that you will clearly hear the signals you want.
The Squelch Control on this radio is set through the following
keypad operation.
To Set Squelch Control:
1. With the power On, momentarily press the
Call/Enter/Setup button to enter the Setup mode
programming.
2. Squelch control will be the first menu item to appear.
Press the Channel Up and Channel Down buttons to
set level. The signal level bar graph shows squelch
level while you are in Setup mode on the squelch
adjust function.
3. To adjust your squelch, press the Channel Down
button until you hear a hissing sound, then press
and release the Channel Up button until the hissing
stops.
4. Press the Call/Enter/Setup button to save this entry
and move to the next Setup mode programming.
MEMSAMEATIS VOX LOMEDHI
VHF
T
R
A
B
GMRS
X
CIU
Squelch Control
Channel Up/Down Buttons
Weather Mode ProgrammingWeather Mode Programming
MEMSAMEATIS VOX LOMEDHI
VHF
T
R
A
B
GMRS
X
CIU
WX Auto Search (SCAN)
MRHH450DUAL_BODY_MRHH330_ENG_Body 12/5/13 5:58 PM Page 34
Operating Your Radio
37
Nothing Comes Close to a Cobra®
36 English
Operating Your Radio
Weather Mode Programming
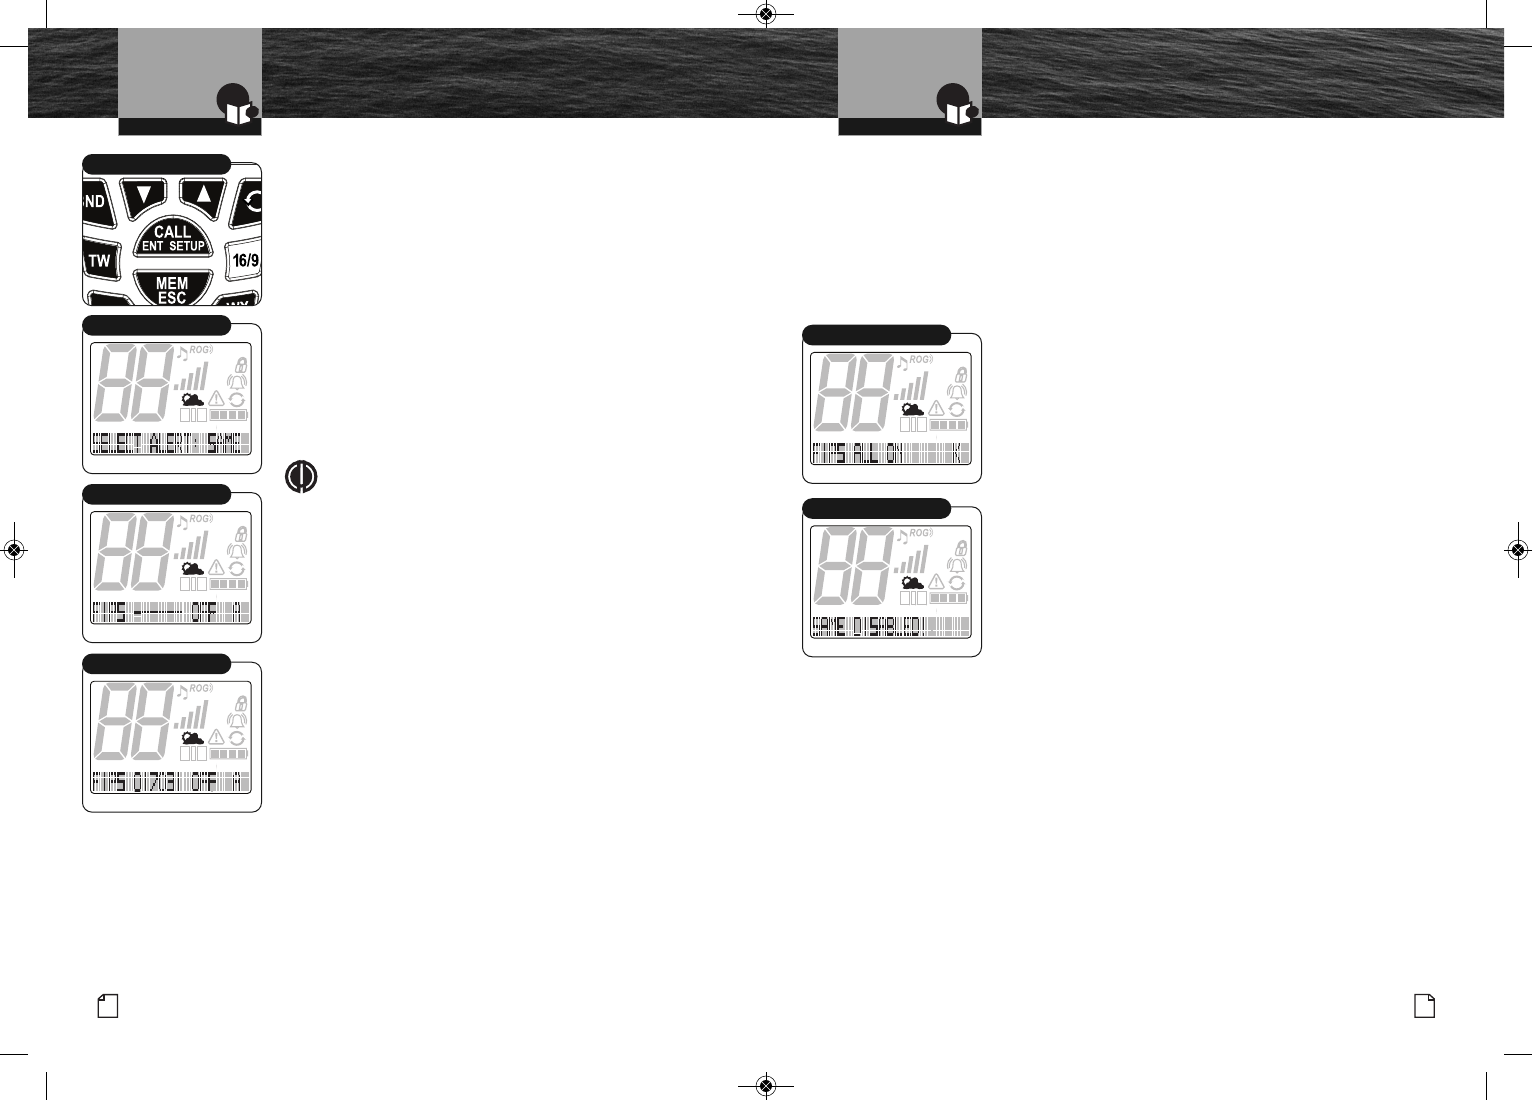
To Set SAME FIPS Code Programming:
1. From Weather Standby Mode, press CALL/ENT/SETUP key
until the display matrix shows SELECT ALERT: and WX,
SAME, or OFF will be flashing.
2. Press Channel Up/Down buttons to select SAME.
The first memory location "A" will be displayed. Up to 10
FIPS codes can be entered A - J.
3. Press and release the CALL/ENT/SETUP button and the first
FIPS memory A will be displayed. Use the Channel Up/Down
buttons to select the FIPS memory location A-J.
4. Press the Call/Enter/Setup button to enter geographic
weather locations as identified by FIPS (Federal Information
Processing System) area in the United States.
NOTE
FIPS codes identify geographic areas in the United
States as shown on the Internet website:
http://www.nws.noaa.gov/nwr/indexnw.htm.
5. The display will show “ ------,” or last entered FIPS
code. One (1) digit in display will be flashing.
6. Press Channel Up/Down button to select first digit.
7. Press and release Call/Enter/Setup button to advance to
next digit code. Press and release MEM/ESC button to
back up. Repeating, press and release of the MEM/ESC
button, will back up to the top level.
8. Continue steps 5 to 7 until all six (6) digits are entered.
9. Press the Call/Enter/Setup button to save the entered digits.
Weather Mode Programming
Call/Enter/Setup Button
MEMSAMEATIS VOX LOMEDHI
VHF
T
R
A
B
GMRS
X
CIU
Select Weather Alert
To Set SAME FIPS Code Programming continued:
10. Use the Channel Up/Down buttons to select:
•OFF - entered FIPS code is not active or,
• ON - entered FIPS code is active.
11. Press the Call/Enter/Setup button to save the memory.
12. Repeat steps 3 through 10 to enter up to 10 FIPS codes
in memory.
13. When all of the codes are entered, use the Channel
Up/Down buttons to move to memory K.
14. Press the Call/Enter/Setup button and select:
•ON - all entered FIPS codes are set active,
• OFF - all entered FIPS codes are set inactive, or
• OK - all entered FIPS codes are correctly entered,
some On and some Off.
15. At least one FIPS code must be entered and made active
(ON) or the SAME mode is disabled. The radio will warn
you if no FIPS codes are on.
16. Press the Call/Enter/Setup button to exit back to
weather standy.
MEMSAMEATIS VOX LOMEDHI
VHF
T
R
A
B
GMRS
X
CIU
Enter FIPS Code
MEMSAMEATIS VOX LOMEDHI
VHF
T
R
A
B
GMRS
X
CIU
Code Entered
MEMSAMEATIS VOX LOMEDHI
VHF
T
R
A
B
GMRS
X
CIU
All On
MEMSAMEATIS VOX LOMEDHI
VHF
T
R
A
B
GMRS
X
CIU
SAME Disabled
MRHH450DUAL_BODY_MRHH330_ENG_Body 12/5/13 5:58 PM Page 36
Operating Your Radio
39
Nothing Comes Close to a Cobra®
38 English
Operating Your Radio
GMRS Mode Programming
MEMSAMEATIS VOX LOMEDHI
VHF
T
R
A
B
GMRS
X
CIU
GMRS Standby
GMRS Mode Programming
GMRS Mode Programming
The GMRS (General Mobile Radio Service) feature is a
landmobile service available for short-distance, two-way
communications in the USA. You must have a valid FCC license
to communicate on these channels (see page 28).
Start from GMRS Standby mode to begin GMRS Setup
programming. Press and hold the Call/Enter/Setup button for
two (2) seconds to enter the programming mode.
Squelch Control
Squelch Control filters weak signals and radio frequency (RF)
noise so that you will clearly hear the signals you want. The
Squelch Control on this radio is set through the following
keypad operation.
To Set Squelch Control:
1. With the power On, push and hold Call/Enter/Setup
button to access the Setup menu.
2. Squelch control will be the first menu item to appear.
Press the Channel Up and Channel Down buttons to
set level. The signal level bar graph shows squelch
level while you are in Setup mode on the squelch
adjust function.
3. To adjust your squelch, press the Channel Down
button until you hear a hissing sound, then press
and release the Channel Up button until the hissing
stops. This will establish a “Baseline” squelch.
4. By pressing the Channel Up button further, you will
filter weak and medium strength signals. By pressing
Channel Down button, you will receive weaker signals.
5. Press the Call/Enter/Setup button to save this entry
and move to the next Setup mode programming.
NOTE
If the Squelch is set so that you can hear a continuous
hissing sound, the Memory Scan and Tri-Watch
functions will be blocked.
Call/Enter/Setup
CTCSS and DCS Coding Mode
Continuous Tone Controlled Squelch System (CTCSS) and
Digital Coded Squelch (DCS) coding are used in two-way radio
systems. These are sub-audible frequencies or digital tones that
are sent continuously with speech to engage other radios with
this feature. This feature is generally used between talk groups
on shared channels. Radios with the same subcode set will
hear your transmission. Radios with both DCS and CTCSS set to
Off or 00 will be able to hear your transmissions.
To Set CTCSS Code Entry:
1. Display will show CTCSS icon and OFF icon flashing.
NOTE
If CTCSS was previously set to a Code number,
display will show the current GMRS channel
and flash the CTCSS icon and Code number.
2. Codes begin at 00 (OFF) and go to 38, followed by 00,
and return back to 01 again. The last used GMRS
channel will be shown in the large digit display.
NOTE
If CTCSS is On, then DCS will be Off. If
DCS is On, then CTCSS will be Off. The radio
does does this automatically.
3. Press Channel Up/Down button to change code
number, or press and hold Channel Up/Down button
to rapid advance (scroll).
4. Press Call/Enter/Setup button to save entry and
move to the next setup programming mode.
HI
R
Channel Up/Down Buttons
HI
R
Call/Enter/Setup
MEMSAMEATIS VOX LOMEDHI
VHF
T
R
A
B
GMRS
X
CIU
CTCSS Off
MRHH450DUAL_BODY_MRHH330_ENG_Body 12/5/13 5:58 PM Page 38
41
Nothing Comes Close to a Cobra®
40 English
VHF Marine Radio Protocols
Operating Your Radio
GMRS Mode Programming
VHF Marine Radio Protocols
Operating Your Radio
GMRS Mode Programming
To Set DCS Code Entry:
1. Display will show DCS icon and OFF icon flashing.
NOTE
If DCS was previously set to a Code number,
display will show the current GMRS channel
and flash the DCS icon and Code number.
2. Codes begin at 01 and go to 38, followed by OFF, and
return back to 01 again. The last used GMRS channel
will be shown in the large digit display.
NOTE
If CTCSS is On, then DCS will be Off. If
DCS is On, then CTCSS will be Off. The radio
does does this automatically.
3. Press Channel Up/Down button to change code
number, or press and hold Channel Up/Down button
to rapid advance (scroll).
4. Press Call/Enter/Setup button to save entry and
move to the next setup programming mode.
Channel Up/Down Buttons
Call/Enter/Setup
MEMSAMEATIS VOX LOMEDHI
VHF
T
R
A
B
GMRS
X
CIU
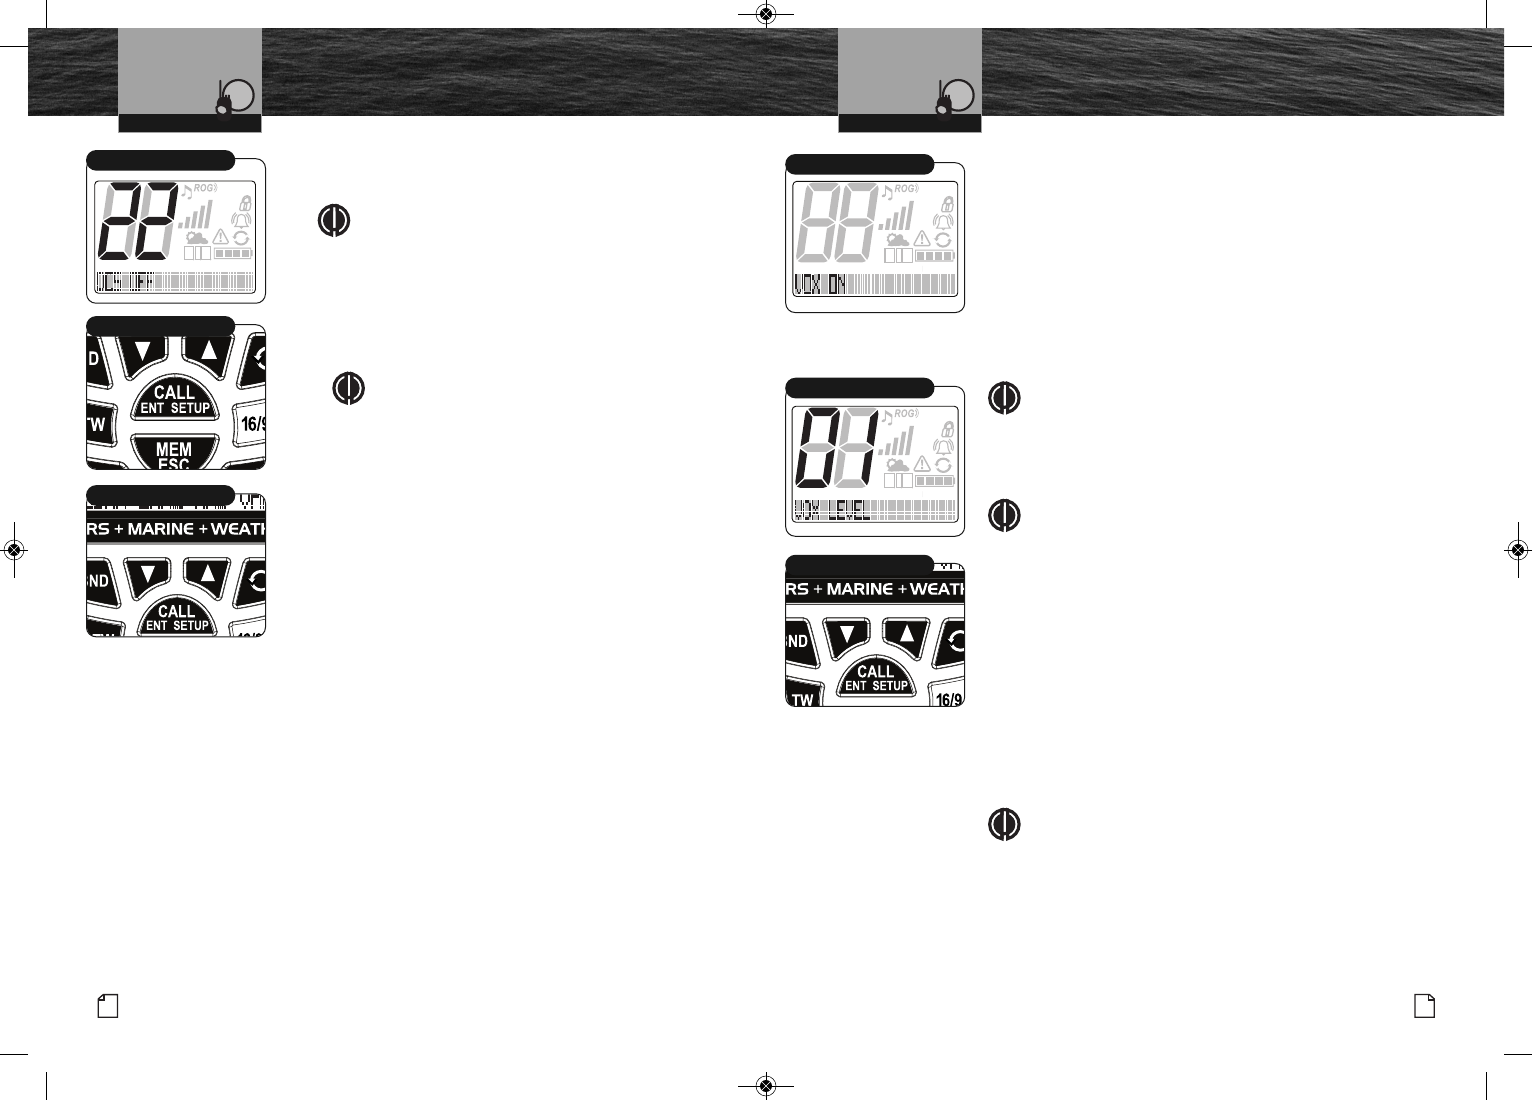
CTCSS Off Voice Activated Transmit (VOX) Mode
In VOX mode, your radio can be used “hands-free,”
automatically transmitting when you speak. You can also set
the VOX sensitivity level to fit the volume of your voice and
avoid transmissions triggered by background noise.
To turn VOX Mode On or Off:
1. Display will show VOX icon and ON or OFF flashing.
2. Press Channel Up/Down button to select ON or OFF.
3. Press Call/Enter/Setup button to save this entry and
move to the next setup programming mode.
NOTE
Once set, this is a global setting when in all
radio modes.
To set VOX Sensitivity Level:
NOTE
VOX sensitivity level is only visible when VOX is On.
1. The display will show VOX LEVEL and 01 will be
flashing.
2. Press Channel Up/Down button to change volume
level of your choice. Remember, this selection is
your voice sensitivity level during hands-free
operation.
05 - indicates a Low (quiet) voice setting.
03 - indicates a Medium voice setting.
01 - indicates a High (loud) voice setting.
3. Press Call/Enter/Setup button to save this entry and
move to the next setup programming mode.
NOTE
VOX will be turned Off automatically when the radio is
turned Off. This will avoid accidental transmissions.
MEMSAMEATIS VOX LOMEDHI
VHF
T
R
A
B
GMRS
X
CIU
VOX Mode
MEMSAMEATIS VOX LOMEDHI
VHF
T
R
A
B
GMRS
X
CIU
VOX Level
HI
R
Channel Up/Down Buttons
MRHH450DUAL_BODY_MRHH330_ENG_Body 12/5/13 5:58 PM Page 40
42
Operating Your Radio
43
Nothing Comes Close to a Cobra®
English
Operating Your Radio
Use the Cobra exclusive Rewind-Say-Again®feature to replay or
record the last 20 seconds of an incoming audio transmission.
Example 1:
When engine noise, music or conversation creates too much
noise to hear an inbound message clearly, press the REW
button to hear the message a second time.
Example 2:
When listening to an urgent distress message of an excited
caller with confusing background noise, press the REW button
to hear the message a second time and get life saving
information. Use this feature to record call details including
position coordinates, call signs, registration numbers and store
details that will help authorities locate the distressed vessel.
HI
R
Rewind Button
MEMSAMEATIS VOX LO MEDHI
VHF
T
R
A
B
GMRS
X
CIU
Playback Message
GMRS Mode ProgrammingGMRS Mode Programming
NOTE
Hold the Rewind button to lock the recording memory
(the Rewind icon flashing) and save the currently
recorded transmission.
Roger Beep Mode
In Roger Beep mode, your listener will hear an audible tone
when you release the Talk button. This alerts your listener that
you are finished talking and it is OK for them to speak.
To Set Roger Beep On and Off:
1. Display will show ROG icon flashing and the matrix will
display ROGER BEEP ON or OFF.
2. Press Channel Up/Down button to select ON or OFF. ROG
will be displayed when On.
3. Press Call/Enter/Setup button to save this entry and move
to the next Setup mode programming.
MEMSAMEATIS VOX LOMEDHI
VHF
T
R
A
B
GMRS
X
CIU
Roger Beep Mode
MEMSAMEATIS VOX LOMEDHI
VHF
T
R
A
B
GMRS
X
CIU
Key Tone Mode Key Tone Mode
In Key Tone mode, an audible tone will sound each time a
button is pressed or you change a setting.
To Set Key Tone On and Off:
1. Display will show Key Tone icon flashing and the matrix
will display KEY TONE ON or OFF.
2. Press Channel Up/Down button to select ON or OFF.
3. Press Call/Enter/Setup button to save this entry.
Call Tone Select
In Call Tone mode, you can select the tone the radio will use
when transmitting a Call.
1. The display will show Call Tone Select and the current
tone number will be flashing.
2. Press Channel Up/Down to select the tone you want
to use.
3. Press Call/Enter/Setup button to save this entry and
move to the next Setup mode programming.
MEMSAMEATIS VOX LOMEDHI
VHF
T
R
A
B
GMRS
X
CIU
VibrAlert Select
MEMSAMEATIS VOX LOMEDHI
VHF
T
R
A
B
GMRS
X
CIU
Call Tone Mode
VibrAlert Select
This setting will allow you to select whether your radio
activates the VibrAlert shake in addition to the incoming call
tone when receiving a call. Once the radio shakes, it will
delay 20 seconds before shaking again to eliminate
excessive VibrAlerts on a busy GMRS channel.
To Set VibrAlert:
1. From the previous press of the Call/Enter/Setup button,
the matrix will display VIBRALERT OFF.
2. Press the Channel Up/Down button to select VIBRALERT
ON. The VibrAlert icon will be activated on the display.
3. Press Call/Enter/Setup button to save this entry and
move to the next Setup mode programming.
Channel Up/Down Buttons
NOTE
Once set, this is a global setting when in all
radio modes.
NOTE
Once set, this is a global setting when in all
radio modes.
Rewind On/Off
If Rewind is enabled, the last 20 seconds of incoming audio
is recorded and you can play back missed VHF calls by
pressing the Rewind button.
1. Display will show the Rewind icon and the matrix will
display REWIND ON or OFF.
2. Press Channel Up/Down button to select ON or OFF.
3. Press Call/Ent/Setup button to save entry.
HI
R
Call/Ent/Setup Button
MEMSAMEATIS VOX LOMEDHI
VHF
T
R
A
B
GMRS
X
CIU
Rewind Enable
NOTE
Once set, this is a global setting when in all
radio modes.
MRHH450DUAL_BODY_MRHH330_ENG_Body 12/5/13 5:58 PM Page 42

45
Nothing Comes Close to a Cobra®
VHF Marine Radio Protocols
Operating Your Radio
44 English
VHF Marine Radio Protocols
Operating Your Radio
Tri-Watch Mode
Tri-Watch mode gives you one (1) button access to scan
a total of three (3) channels of most importance to you. Channel 16 is
preprogrammed and will always be one (1)
of the scanned locations. Two (2) other channels, either GMRS or VHF, of your
choice can be stored in the radio. These channels can be edited and/or recalled
during future engagements of Tri-Watch mode.
NOTE
The radio must be squelched for Tri-Watch mode to function. See page 18
for Squelch procedure.
HI
R
Tri-Watch Button
MEMSAMEATIS VOX LO MEDHI
VHF
T
R
A
B
GMRS
X
CIU
Memory Location Number
HI
R
Channel Up/Down Buttons
Using Tri-Watch
Tri-Watch Scan Mode:
1. From Marine or GMRS Standby mode, press the TRI-WATCH
button. The TW SCAN will display on the matrix along with the
three channels stored in the Tri-Watch memory.
2. The radio will scan through the three (3) Tri-Watch
memory channels.
3. A signal on any one (1) of the three (3) channels will stop
the scan for 10 seconds to allow you to listen to the traffic
on that location.
NOTE
After the Tri-Watch scan stops to monitor a channel, as
long as you do not press any buttons within 10 seconds,
your radio will automatically resume scanning the Tri-
Watch channels.
4. Press the Channel Up/Down button to resume scanning
the Tri-Watch channels or to change the scan direction.
5. To EXIT the Tri-Watch scan, press the TRI-WATCH button
again, and the radio will return to Marine or GMRS
Standby mode.
MEMSAMEATIS VOX LO MEDHI
VHF
T
R
A
B
GMRS
X
CIU
Tri-Watch Scan Mode
Advanced OperationAdvanced Operation
Tri-Watch Setup
To Program or Edit the Tri-Watch Channels:
1. Press and hold the TRI-WATCH button from Marine or
GMRS Standby mode for two (2) seconds to activate Tri-
Watch Setup mode. The MEM icon on the display will turn
On and the matrix will display TW MEM ENTER 01.
NOTE
The main channel number will flash to indicate channel position.
If there is no input activity for 15 seconds, the radio will sound
three (3) beeps and return to GMRS or Marine Standby mode.
2. Use the Band button to select Marine or GMRS channels.
3. Press Channel Up/Down button to select the desired
Tri-Watch channel.
4. Press and release TRI-WATCH button or Call/Enter/Setup
button to confirm entry.
5. Repeat steps 2 and 3 to program the remaining additional
Tri-Watch memory channel.
6. After programming both Tri-Watch memory channels the
radio will immediately engage Tri-Watch mode.
Using Rewind-Say-Again® to Record VOICE Audio Transmission:
NOTE
If the record memory is locked (rewind icon flashing),
press and hold the REW button to unlock.
1. Press and hold SCAN button for two (2) seconds to
enter Record mode. The matrix will display MIC
RECORDER.
2. Press and hold PTT button to begin recording
from radio microphone. The transmitter will turn off.
The matrix will display MIC RECORDER ON and the
seconds remaining will be shown in the lower right
corner. If PTT button is released, recording stops. While
recording, a 20-second countdown begins on display.
When 20-second countdown time has ended, recording
stops and two (2) beep tones will be heard.
3. Press and hold SCAN button again for two (2) seconds
or press MEM/ESC button to cancel recording and
return to last operation.
SCAN Button Enter Record
MEMSAMEATIS VOX LO MEDHI
VHF
T
R
A
B
GMRS
X
CIU
Mic Recorder
MEMSAMEATIS VOX LO MEDHI
VHF
T
R
A
B
GMRS
X
CIU
Mic Recorder ON
HI
R
Band Button
HI
R
Tri-Watch Button
MRHH450DUAL_BODY_MRHH330_ENG_Body 12/5/13 5:59 PM Page 44
47
Nothing Comes Close to a Cobra®
VHF Marine Radio Protocols
Operating Your Radio
46 English
IntroductionVHF Marine Radio Protocols
Operating Your Radio
Memory Location Mode
Your radio has unlimited memory locations for storing your
most frequently used channels. These memory locations can
be selected individually or can be scanned. (See page 49
under Memory Location Scan.)
To enter Memory mode, press MEM/ESC button. The display
will show the MEM icon and the Memory Channel bank will
be displayed on the matrix.
To Program Memory Locations:
1. Press and hold the MEM/ESC button for two (2)
seconds. The memory location number will be
displayed on the matrix and the MEM icon will be
turned On.
2. Use the Channel Up/Down button to advance to the
memory location (00-99) you want to program.
3. Press the MEM/ESC button to select the memory
location.
4. Use the Band button to select the GMRS or
marine band.
5. Use the Channel Up/Down button to change to the
channel you want to store into the selected memory
location.
6. Press the MEM/ESC button to program that channel.
The memory location will be displayed on the matrix
again.
Repeat steps 2 through 5 to program as many
additional memories as you want.
7. Press and hold the MEM/ESC button for two (2)
seconds. This will return the radio to Memory mode.
8. Press and release the MEM/ESC button again to
return to Marine or GMRS Standby mode.
MEM/ESC Button
MEMSAMEATIS VOX LO MEDHI
VHF
T
R
A
B
GMRS
X
CIU
Memory Location Number
Channel Up/Down Buttons
MEMSAMEATIS VOX LOMEDHI
VHF
T
R
A
B
GMRS
X
CIU
Channel Number
To Recall a Stored Memory Location:
1. Press the MEM/ESC button. The MEM icon will be
turned On.
2. Press the Channel Up/Down button to select the
memory location. If a memory location has been
programmed, its associated channel will display on
the LCD. Your radio is now in Marine or GMRS
Standby mode on the selected memory location.
To Exit Memory Location Mode:
Press the MEM/ESC button to return the radio to
Marine or GMRS Standby mode. The last channel used
in Marine or GMRS Standby mode will now be
displayed on the LCD and the MEM icon will disappear.
To Erase Stored Memory Locations:
1. Press and hold the MEM/ESC button for two (2)
seconds. The memory location number will be
displayed on the matrix and the MEM icon will be
turned On.
2. Use the Channel Up/Down button to advance to the
memory location you want to erase.
3. Press the MEM/ESC button to select the memory
location.
4. Use the Channel Up/Down button to change to the
channel to read “00” at the selected memory
location.
5. Press the MEM/ESC button to erase that channel.
Repeat steps 2 through 5 to erase as many additional
memories as you want.
6. Press and hold the MEM/ESC button for two (2)
seconds. This will return the radio to Memory mode.
7. Press and release the MEM/ESC button again to
return to Marine or GMRS Standby mode.
MEMSAMEATIS VOX LO MEDHI
VHF
T
R
A
B
GMRS
X
CIU
MEM Icon
Advanced OperationAdvanced Operation
Band Button
MRHH450DUAL_BODY_MRHH330_ENG_Body 12/5/13 5:59 PM Page 46
Operating Your Radio
49
Nothing Comes Close to a Cobra®
Advanced Operation
48 English
Advanced Operation
Operating Your Radio
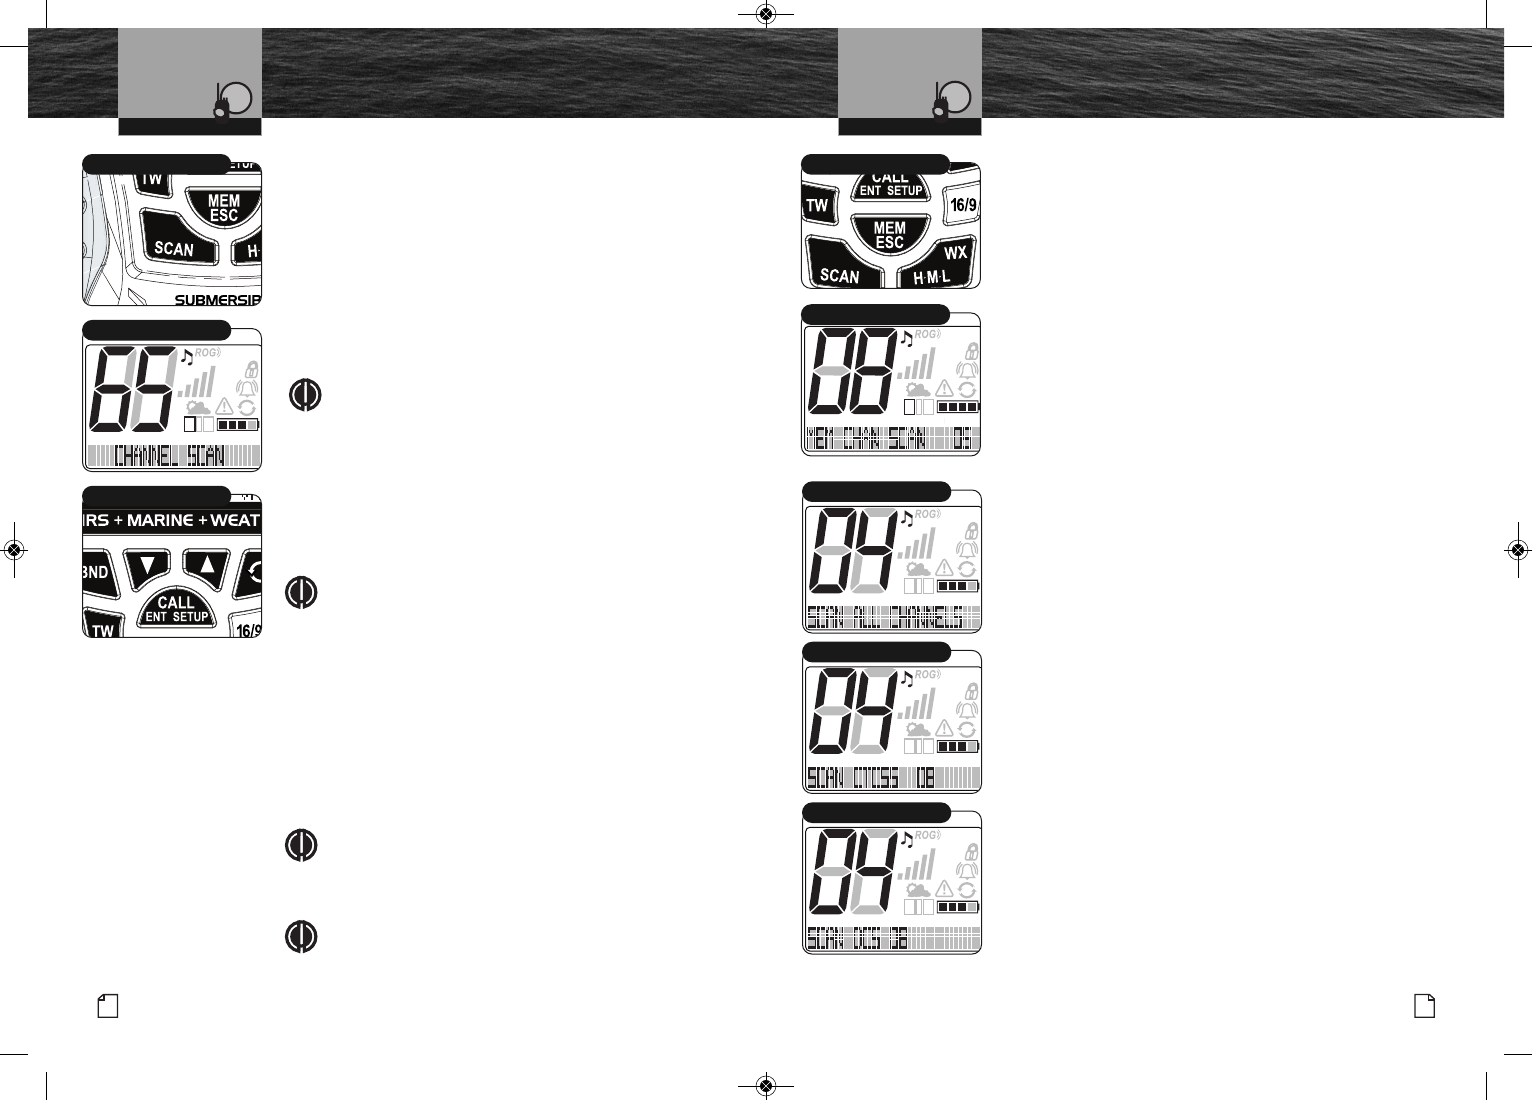
Scan Modes
A signal on any channel will stop the scan for 10 seconds to
allow you to listen to the traffic on that location. After 10
seconds, the radio will resume scanning.
Press the Channel Up/Down button to resume scanning
before the 10-second pause has completed or to change the
scan direction.
VHF Channel Scan
During Channel Scan mode, the radio will rapidly switch
from channel to channel through all the channels.
NOTE
The radio must be squelched for Channel Scan mode
to function. See page 28 for Squelch procedure.
To Enter Marine Scan:
1. From Marine or GMRS Standby mode, press the
SCAN button. The radio will immediately begin to
scan the entire channel map selected in the active
channel map.
CHANNEL SCAN will display on the matrix.
NOTE
If Priority 16 feature has been selected, channel 16
will checked frequently for activity to insure you will
not miss any calls.
2. To EXIT Channel Scan mode, press the SCAN or PTT
button again. The SCAN icon will disappear from the
LCD and the radio will return to Marine or GMRS
Standby mode.
SCAN Button
MEMSAMEATIS VOX LO MEDHI
VHF
T
R
A
B
GMRS
X
CIU
Scan Display
Channel Up/Down Buttons
To Enter Memory Location Scan:
1. From Marine or GMRS Standby mode, press the
MEM/ESC button.
2. Press the SCAN button. The radio will immediately
begin to scan all pre-assigned memory channels.
The MEM icon will show on the LCD, and MEM
CHAN SCAN will display on the matrix along with the
memory location.
3. To EXIT Memory Location Scan mode, press the
SCAN or PTT button again. The MEM icon will
disappear from the LCD and the radio will return to
Marine or GMRS Standby mode.
GMRS Scan
In GMRS mode, there are 3 types of scans - all GMRS
channels, CTCSS tones (on the selected channel) and DCS
codes (on the selected channel).
To Enter the GMRS Scans:
1. Successive press and release of the SCAN button
will toggle betwen all channel scan, CTCSS tone scan
and DCS code scan.
2. Press and hold the SCAN button to start the
selected scan.
3. To exit a GMRS scan, press the MEM/ESC button or
PTT.
HI
R
MEM/ESC Button
MEMSAMEVOX LOMEDHI
VHF
T
R
A
B
GMRS
X
CIU
Memory Channel Scan
Memory Location Scan
During Memory Location Scan mode, the radio will rapidly
scan through all pre-assigned memory channels.
NOTE
The radio must be squelched for Memory Location
Scan mode to function. See page 18 for Squelch
procedure.
NOTE
If there are fewer than two (2) memory locations
programmed in the radio, the Memory Location Scan
option will not be available. To program at least two
(2) memory locations, see page 34.
MEMSAMEATIS VOX LO MEDHI
VHF
T
R
A
B
GMRS
X
CIU
Scan All Schannels
MEMSAMEATIS VOX LO MEDHI
VHF
T
R
A
B
GMRS
X
CIU
Scan CTCSS
MEMSAMEATIS VOX LO MEDHI
VHF
T
R
A
B
GMRS
X
CIU
Scan DCS
MRHH450DUAL_BODY_MRHH330_ENG_Body 12/5/13 5:59 PM Page 48
VHF Marine Radio Protocols
Operating Your Radio
50 English
IntroductionVHF Marine Radio Protocols
Operating Your Radio
51
Nothing Comes Close to a Cobra®
Advanced Operation
HI
R
16 and Scan
MEMSAMEATIS VOX LOMEDHI
VHF
T
R
A
B
GMRS
X
CIU
Burp Feature
Burp Feature
Cobra’s Burp feature allows the operator to expel water from
inside the speaker grill. This is especially useful if the radio is
dropped overboard or during extreme foul weather
conditions. In these conditions, water can become trapped in
the speaker grill and muffle the audio.
To Activate Burp:
1. Press and release the 16/9 and SCAN keys at the
same time.
2. The Burp tone(s) at maximum level will sound
from the internal speaker for eight seconds.
3. During this time, the matrix will display BURP.
4. Hold the radio with the speaker grill down to help
the water drain out.
5. After an 8-second interval, the radio will return to
standby.
MEM
SAME
ATIS
VOX HI
ROG
VHF
T
R
A
B
GMRS
X
C
I
U
Floating Radio
Floating Radio
This radio is designed to float if dropped overboard. The
orange center makes it visible and easy to retrieve. This
rugged radio is also designed to meet JIS7 (IPX7)
specifications. This means it’s designed to operate properly
after being submerged in one meter deep water for 30
minutes.
NOTE
Do not leave the radio floating in water permanently.
This could cause premature corrosion of the battery
contacts and other damage.
The radio is only designed to float with its included
Lithium-ion battery. Using other approved batteries
might cause the radio to sink. This includes the optional
AA battery tray, depending on the weight of the AA
batteries used.
Operating Your Radio
Marine (VHF), GMRS and Weather Standby
Band Selections
The BAND button allows you to quickly toggle between the
Marine (VHF), GMRS and WX Alert Standby bands.
To Make a Band Selection:
Press BAND button to toggle between the Marine (VHF)
Standby, GMRS Standby or WX Standby.
Marine (VHF) Standby Mode
Marine Standby mode is the default mode for the radio
whenever it is turned On. From this mode, you can change
current settings by becoming familiar with the different key
functions. While in Marine Standby mode, the user will be
able to Transmit (Tx) by pressing the Push to Talk (Talk)
button. Signals in Receive (Rx) mode will be received on
the selected channel(s).
NOTE
Coast Guard alerts are broadcast on Channel 16 and
you need to have the WX Alert or SAME turned On to
receive NOAA weather alerts. While in Marine
Standby mode, you will receive any messages sent on
the channel to which you are tuned.
V
T
R
A
X
Transmit (Tx) Icon
V
T
R
A
X
Receive (Rx) Icon
MRHH450DUAL_BODY_MRHH330_ENG_Body 12/5/13 5:59 PM Page 50

53
Nothing Comes Close to a Cobra®
VHF Marine Radio Protocols
Operating Your RadioVHF Marine Radio Protocols
Operating Your Radio
Operating Your Radio
52 English
Operating Your Radio
SAME Alert Codes
Your HH450 radio has the ability to alert you when NOAA sends
out alerts from their Emergency Alert System (EAS). These
alerts cover any weather related watches, warnings or
statements. Using this system insures that you will always be
aware of you local Weather, Civil, and National emergency
events.
For a complete list of all the event codes your radio is capable
of displaying, please go to the following web address:
http://www.nws.noaa.gov/os/eas_codes.shtml#list
MEMSAMEATIS VOX LOMEDHI
VHF
T
R
A
B
GMRS
X
CIU
WX Auto Seatch (SCAN)
WX Auto Search (SCAN) Mode Function
The purpose of the WX Auto Search (SCAN) function is to enable the receiver to
automatically scan for an active WX channel under the following conditions:
1. WX Auto Search (SCAN) function is On.
2. WX Alert is On.
3.
The radio is tuned to a Marine or GMRS channel and has
entered Power Save mode (meaning there is no signal activity
or user input for 10 seconds).
4. The radio software has detected that the current WX
channel signal level has dropped below a preset minimum
level or is gone completely.
Once these conditions have been met, the software will then scan the Weather
channels looking for an active Weather channel. When an active Weather channel is
found it will stop the scan and use the new Weather channel to look for the standard
1050Hz alert tone.
MEMSAMEATIS VOX LOMEDHI
VHF
T
R
A
B
GMRS
X
CIU
Weather Alert Standby
WX/H-M-L Button Weather Standby Mode
To enter and exit the Weather Standby mode, press and hold
the WX/H-M-L button or press the BAND key.
Receiving a Weather Alert
NOAA broadcasts weather information as described in the
NOAA weather channels section on page 75 of this manual.
When NOAA broadcasts a weather alert signal and your radio is
in WX Alert Standby mode, the following items will be
displayed on the LCD display:
■The WX icon (cloud/sun) icon will be displayed.
■The last used weather channel will be displayed.
■
The bar graph will display received signal strength level.
■The WX Alert (triangle) or SAME Alert icon will be
displayed if either of these alerts are enabled.
■The matrix will display WEATHER STANDBY.
NOTE
Only one (1) or two (2) of the weather channels will be
operating in any given location [only in Receive (Rx)
mode]. You will need to select the channel with the
strongest signal in your location.
NOTE
When WX Alert is turned on, and NOAA sends the 1050
Hz alert tone, the radio will sound a series of loud beeps
regardless of the volume control setting.
NOTE
When SAME Alert is turned on, and NOAA sends a
SAME message, the radio will display the NOAA warning
message.
NOTE
When either WX or SAME is set on, then in Marine and
GMRS standby modes, the radio will display the selected
weather channel.
MEMSAMEATIS VOX LOMEDHI
VHF
T
R
A
B
GMRS
X
CIU
Weather Alert Standby
MEMSAMEATIS VOX LOMEDHI
VHF
T
R
A
B
GMRS
X
CIU
Weather Scan
MRHH450DUAL_BODY_MRHH330_ENG_Body 12/5/13 5:59 PM Page 52
55
Nothing Comes Close to a Cobra®
VHF Marine Radio Protocols
Specifications
54 English
VHF Marine Radio Protocols
Operating Your Radio
Transmit (Tx) and Receive (Rx) Modes
Transmit (Tx) and Receive (Rx) modes gives you the ability to
interact with other GMRS radios. When you use this capability, be
sure to follow the procedures and to observe the courtesies that
govern its use so everyone benefits. (See pages XX through XX) to
help you select the proper channels.
When a talk transmission occurs, the following icons will be
displayed.
■Transmit (Tx) Icon
■Bar Graph Icon
To Transmit a Message:
1. Check to see that your radio is set to a proper channel for the
type of message you plan to send.
2. Toggle to the Low Power setting.
3. With the microphone about 2 in. [51 mm] from your mouth,
press and hold the Talk button and speak into the microphone.
The Transmit icon will appear on the LCD.
4. Release the Talk button when you are finished speaking. Your
radio can only operate in either Transmit (Tx) or Receive (Rx)
mode at any given time. You will not hear the response to your
message unless the Talk button is released. Battery Power icon
is held at the level it was at during receive.
NOTE
If the Talk button is held down for five (5) minutes,
the radio will automatically sound a series of beeps
and cease transmitting to prevent unwanted signal
generation and battery drain. As soon as the Talk
button is released, it can be pressed again to
resume transmission.
GMRS Standby Mode
The GMRS (General Mobile Radio Service) Standby feature is a
land-mobile service available for short-distance, two-way
communications in the USA. You must have a valid FCC license
to communicate on these channels (see page XX).
While in GMRS Standby mode, the user will be able to Transmit
(Tx) by pressing the Push to Talk (Talk) button. Signals in
Receive (Rx) mode will be received on the selected channel(s).
When in GMRS Standby mode, the radio has the ability to
receive calls as well as transmit calls
NOTE
As GMRS channels are scrolled, you will see CTCSS or DCS
icons displayed on the LCD screen if the codes have been
previously programmed. You will only hear transmissions
from other radios with the equivalent subcodes programmed.
When a transmission is received, the following icons will
be displayed.
■Receive (Rx) Icon
■Bar Graph Icon
Operating Your Radio Operating Your Radio
MRHH450DUAL_BODY_MRHH330_ENG_Body 12/5/13 5:59 PM Page 54
Introduction
57
Nothing Comes Close to a Cobra®
56 English
Operating Your Radio
Maintenance and
Troubleshooting
No display on LCD when
radio is turned On
Batteries are exhausted
Batteries not installed
properly
Recharge or
replace batteries
Remove batteries and
reinstall according to
polarity markings
Batteries run
down quickly
Batteries are at the
end of their life
Replace with new
batteries
Will transmit at
one (1) or three (3) watts,
but not at
six (6)
watts
Batteries are low
Selected channel is limited
to one (1) watt
Recharge or
replace batteries
Switch to
another channel
Will not transmit Selected channel is
limited to receive only
Switch to
another channel
No sound from speaker Volume level is too low or
squelch level is too deep
Re-adjust volume
and squelch
No response to
button press
Button lock is On Press and hold Backlight/
Key Lock button
No answer to calls Out of range of
other station
Signal is blocked
by terrain
Switch to Medium or High
transmit power or move
closer.
Problem Possible Cause(s) Solution(s)
Maintenance •
Very little maintenance is required to keep your Cobra VHF/GMRS radio
in good operating condition:
■ Keep the radio and charger clean by wiping with a soft cloth and mild detergent.
Do not use solvents or harsh or abrasive cleaners, which could damage the case
or scratch the LCD screen.
■ If the radio is exposed to salt water, wipe with a soft, moist cloth at least once a
day to prevent buildup of salt deposits, which could interfere with button
operation.
■
If the radio will be stored for a long period, such as over the winter,
remove the batteries from the battery tray and store them in a separate
package. This is especially important if you are using alkaline batteries.
Troubleshooting •
Specifications
Specifications •
General
Number of Channels All U.S., Canadian, and International
NOAA Weather Channels, 15 GMRS
Channels
Channel Spacing VHF - 25 kHz Max., GMRS - 12.5 kHz
Modulation VHF - 5 kHz Max., GMRS - 2.5 kHz
Input Voltage 7.4 VDC
Battery Life: Lithium-ion: 8 hrs @ High Power,
5% TX, 5% RX, 90% Stand-by 14 hrs @ Low Power;
Current Drain:
Stand-by 45 mA
Receive 150 mA
Transmit 1.8 A @ High power 650 mA @ Low Power
Temperature Range -20˚C to 50˚C
Radio Dimensions 4.8 in. x 2.4 in. x 1.4 in.
(123 mm x 62 mm x 36 mm)
not including antenna
Radio Weight 0 lbs 8 oz. (228 g) without batteries
Receiver
Frequency Range VHF 156.050 to 163.275 MHz
GMRS 462.5500 to 467.7250 MHz
Receiver Type Marine VHF: Double Conversion Super-Heterodyne
GMRS & WX: Low if direct conversion.
Sensitivity (typical): Marine VHF: 12 dB Sinad: -121 dBm
Adjacent Channel Selectivity Marine: 70dB, GMRS: 50dB, WX: 55dB (typical)
Intermodulation and Rejection Marine: 70dB, GMRS: 65dB, WX: 55dB (typical)
Spurious and Image Rejection Marine: 70dB, GMRS: 50dB, WX: 65dB (typical)
AF Output 400 mW < 5% distortion @ 8 ohms
Transmitter
Frequency Range: TX VHF 156.025 to 157.425 MHz
GMRS 462.5500 to 462.7250 MHz
RF Output Power Marine:1, 3 & 6 Watts/GMRS: 1, 3 & 4.5 Watts
Spurious Emissions -60 dBc @ High Power, -55 dBc @ Low Power
Microphone Type Condenser
Frequency Stability +/-5 ppm
FM Hum and Noise 40 dB
MRHH450DUAL_BODY_MRHH330_ENG_Body 12/5/13 5:59 PM Page 56
58 English 59
Nothing Comes Close to a Cobra®
Introduction
Product Service
Limited 3-Year Warranty •
For Products Purchased In The U.S.A.
Cobra Electronics Corporation warrants that its Cobra VHF/GMRS radio, and the
component parts thereof, will be free of defects in workmanship and materials
for a period of three (3) years from the date of first consumer purchase. This warranty
may be enforced by the first consumer purchaser, provided that the product is utilized
within the U.S.A.
Cobra will, without charge, repair or replace, at its option, defective radios, products
or
component parts upon delivery to the Cobra Factory Service department, accompanied
by
proof of the date of first consumer purchase, such as a duplicated copy of a
sales receipt.
You must pay any initial shipping charges required to ship the product for warranty
service, but the return charges will be at Cobra’s expense, if the product is repaired or
replaced under warranty. This warranty gives you specific legal rights, and you may
also have other rights which may vary from state to state.
Exclusions: This limited warranty does not apply:
1. To any product damaged by accident.
2. In the event of misuse or abuse of the product, or as a result
of unauthorized alterations or repairs.
3. If the serial number has been altered, defaced, or removed.
4. If the owner of the product resides outside the U.S.A.
All implied warranties, including warranties of merchantability and fitness for a
particular purpose are limited in duration to the length of this warranty. Cobra
shall not be liable for any incidental, consequential or other damages; including,
without limitation, damages resulting from loss of use or cost of installation.
Some states do not allow limitations on how long an implied warranty lasts and/or
do not allow the exclusion or limitation of incidental or consequential damages,
so the above limitations may not apply to you.
For Products Purchased Outside The U.S.A.
Please contact your local dealer for warranty information.
Trademark Acknowledgement •
Cobra®, CobraMarine®, Nothing Comes Close to a Cobra®, and the snake design are
registered trademarks of Cobra Electronics Corporation, USA.
Cobra Electronics Corporation™ is a trademark of Cobra Electronics Corporation, USA.
Customer Service
Product Service •
If you have any questions about operation or installing your
new Cobra VHF/GMRS product or if you are missing parts…
Please call Cobra first! DO NOT RETURN THIS PRODUCT TO THE STORE!
See customer assistance on page A1.
If your product should require factory service, please call Cobra first before sending
your radio. This will ensure the fastest turn-around time on your repair. You may be
asked to send your radio to the Cobra factory. It will be necessary
to furnish the following to have the product serviced and returned:
1. For warranty repair, include some form of proof-of-purchase, such as a photocopy
of a sales receipt. If you send the original receipt, it cannot be returned.
2. Send the entire product.
3. Enclose a description of what is happening with the radio. Include a typed
or clearly printed name and address of where the radio is to be returned.
4. Pack radio securely to prevent damage in transit. If possible, use the
original packing material.
5. Ship prepaid and insured by way of a traceable carrier such as United Parcel
Service (UPS) or Priority Mail to avoid loss in transit to: Cobra Factory Service,
Cobra Electronics Corporation, 6500 West Cortland Street, Chicago, Illinois 60707
U.S.A.
6. If the radio is in warranty, upon receipt of your radio, it will either be repaired
or exchanged depending on the model. Please allow approximately three (3)
to four (4) weeks before contacting Cobra for status. If the radio is out of warranty,
a letter will automatically be sent informing you of the repair
charge or replacement charge.
7. If your radio is returned for factory repair, it will be returned to you with default
settings restored.
If you have any questions, please call 773-889-3087 for assistance.
Introduction
Warranty
Warranty and Trademark
Acknowledgement
MRHH450DUAL_BODY_MRHH330_ENG_Body 12/5/13 5:59 PM Page 58