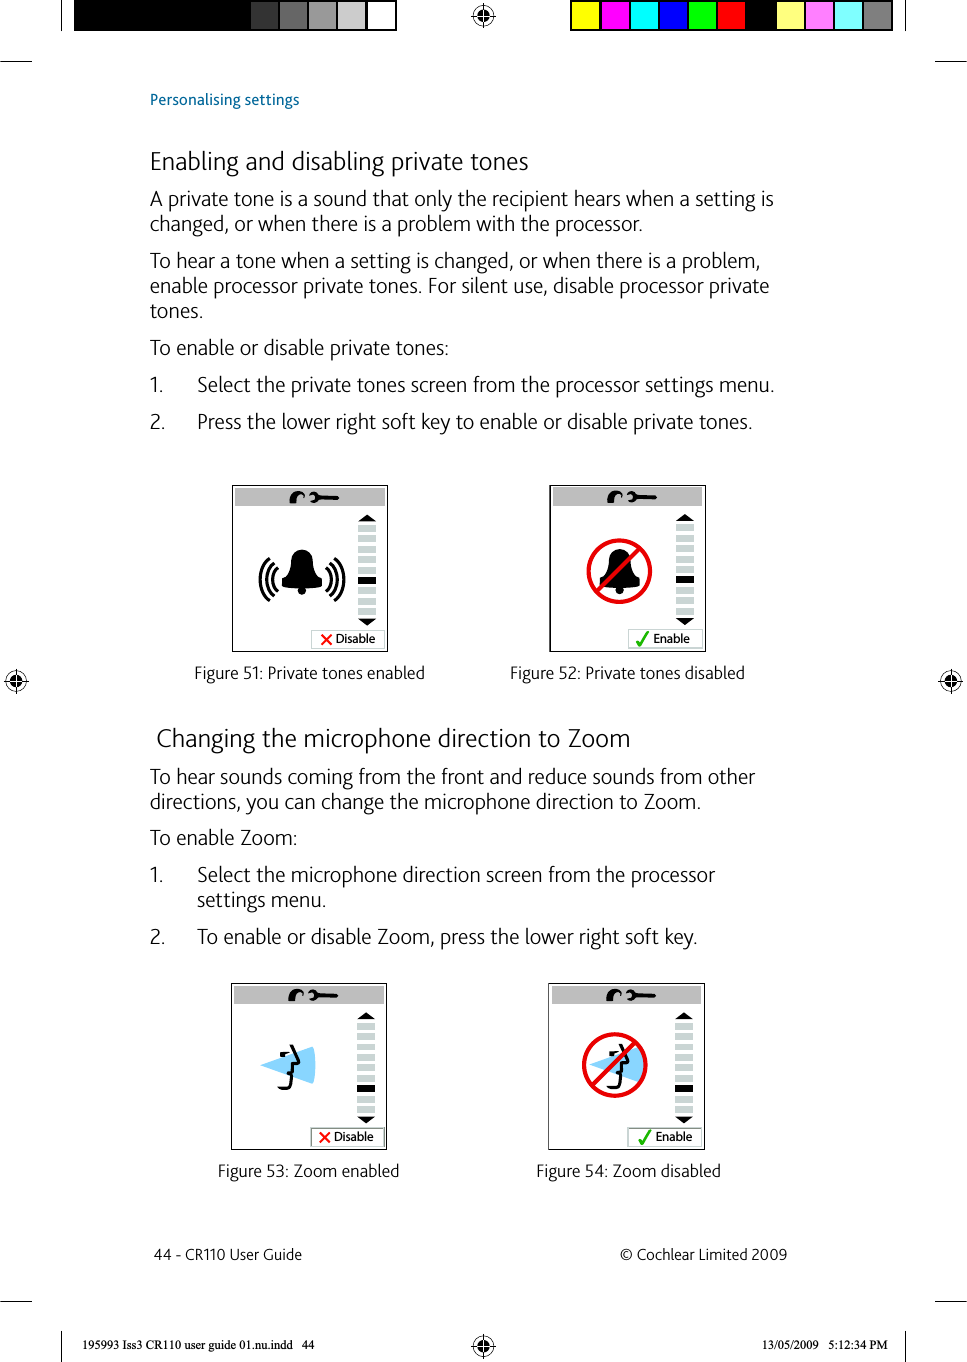
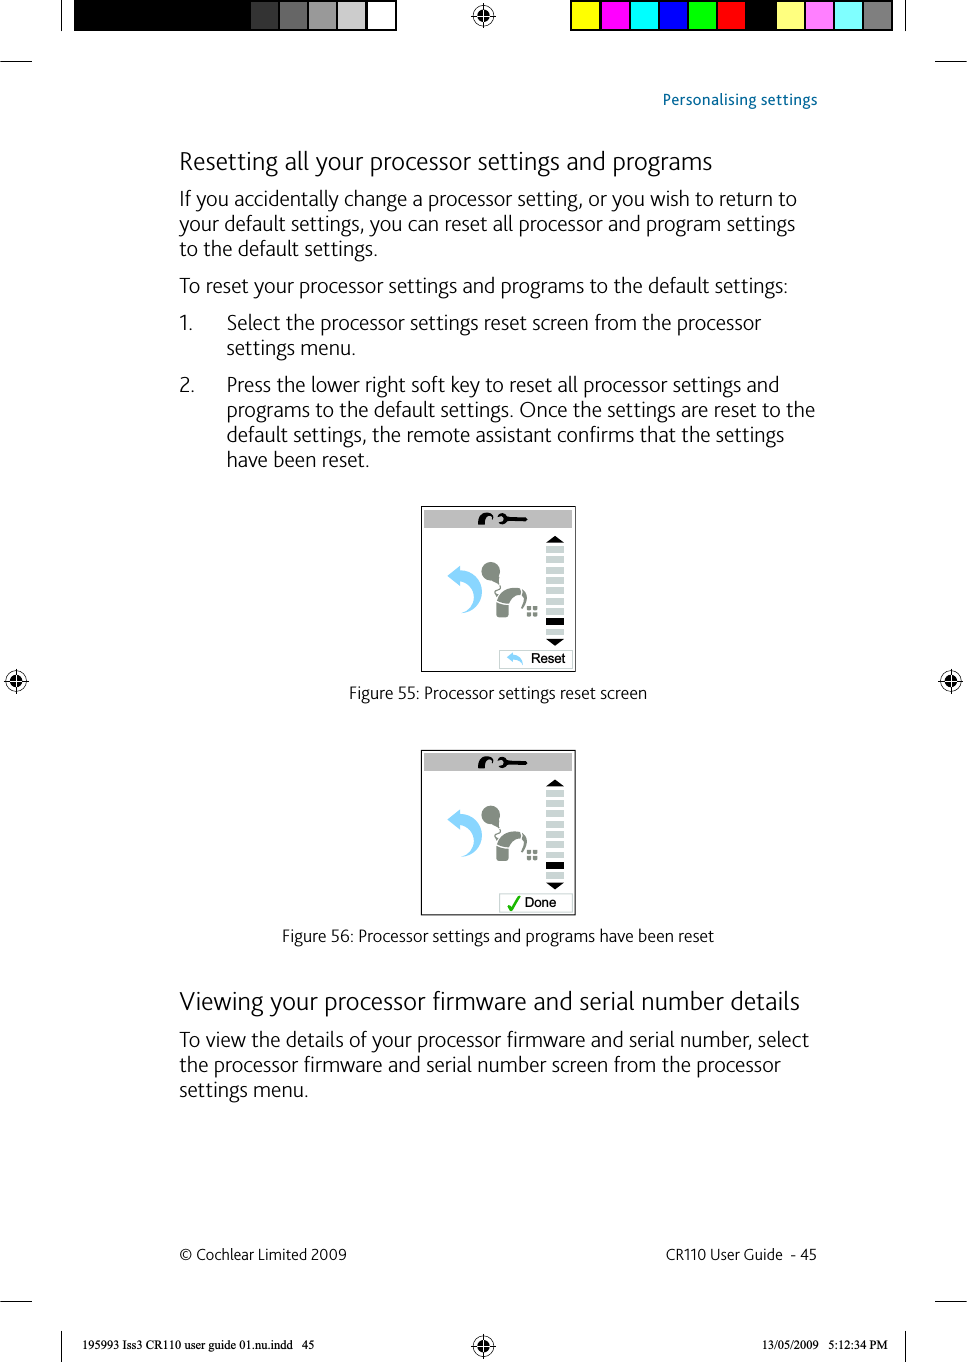
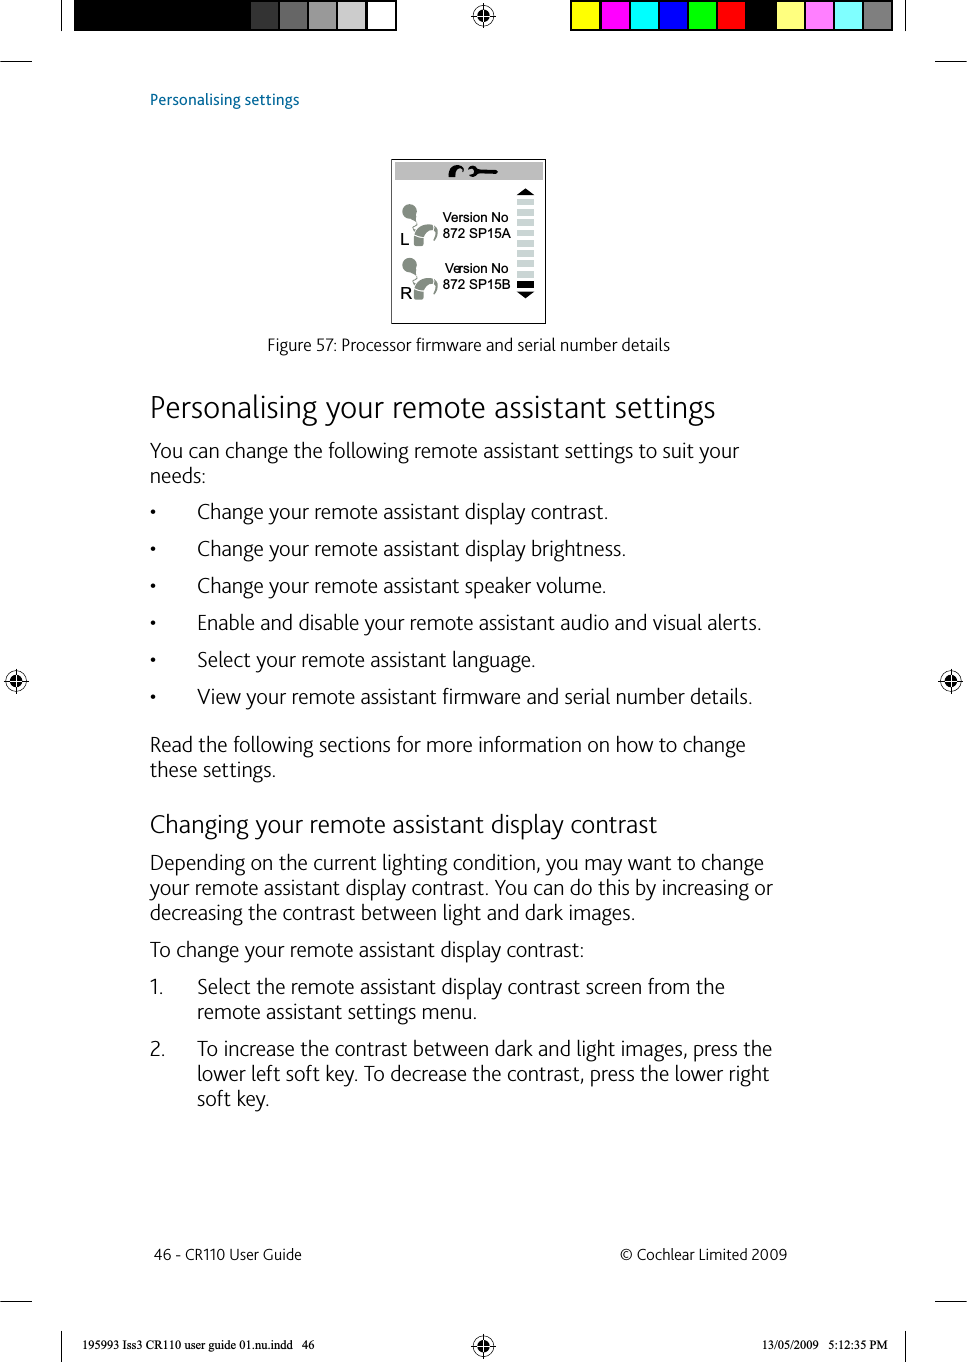
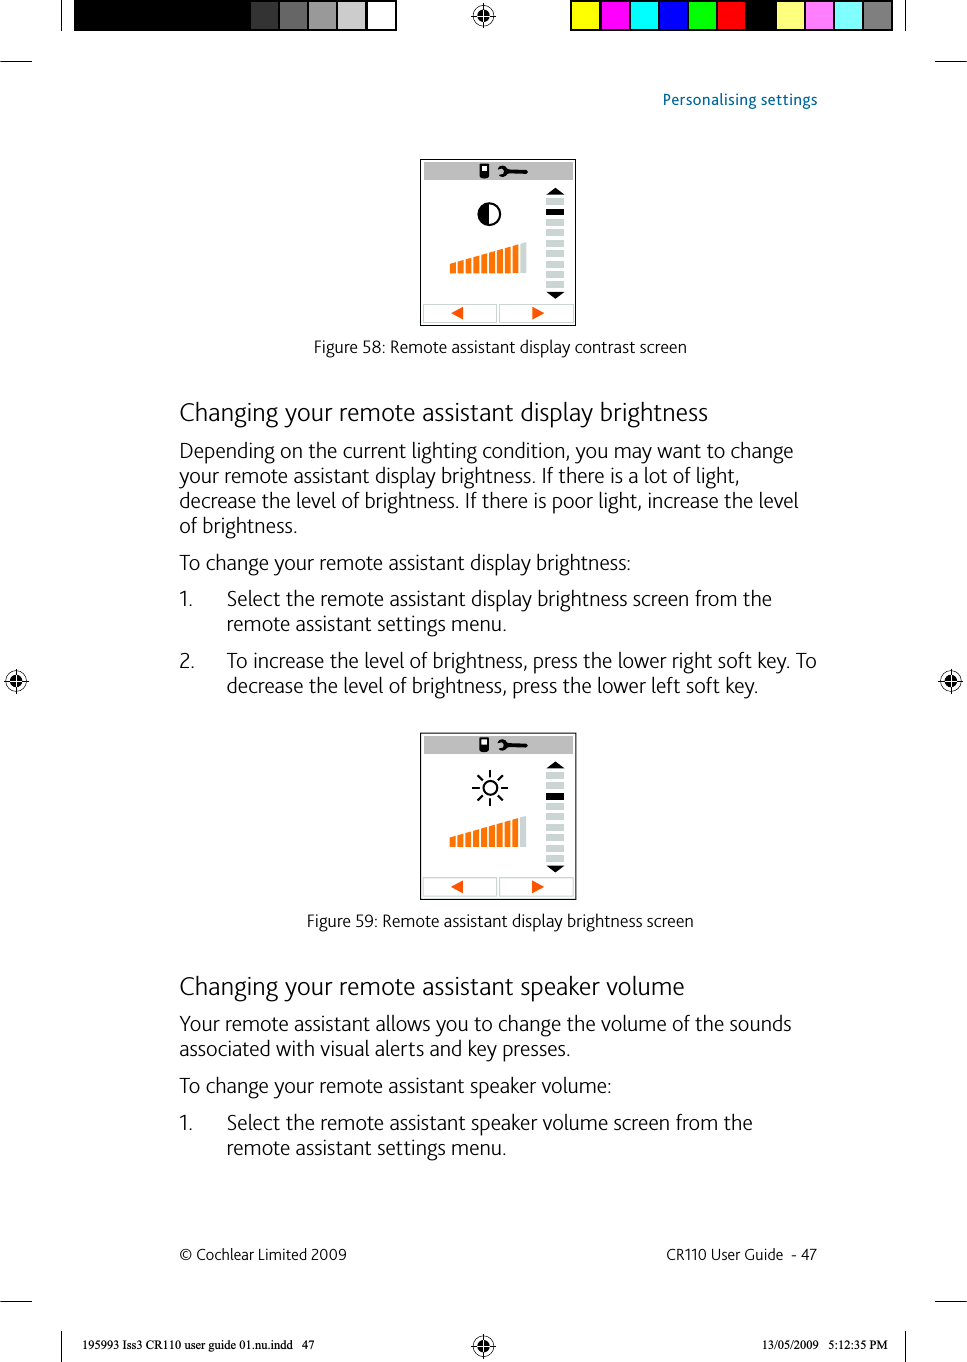
Cochlear CR11000 Remote Assistant 2.4GHz User Manual 195993 Iss3 CR110 user guide 01
Cochlear Limited Remote Assistant 2.4GHz 195993 Iss3 CR110 user guide 01
UserManual.wiki
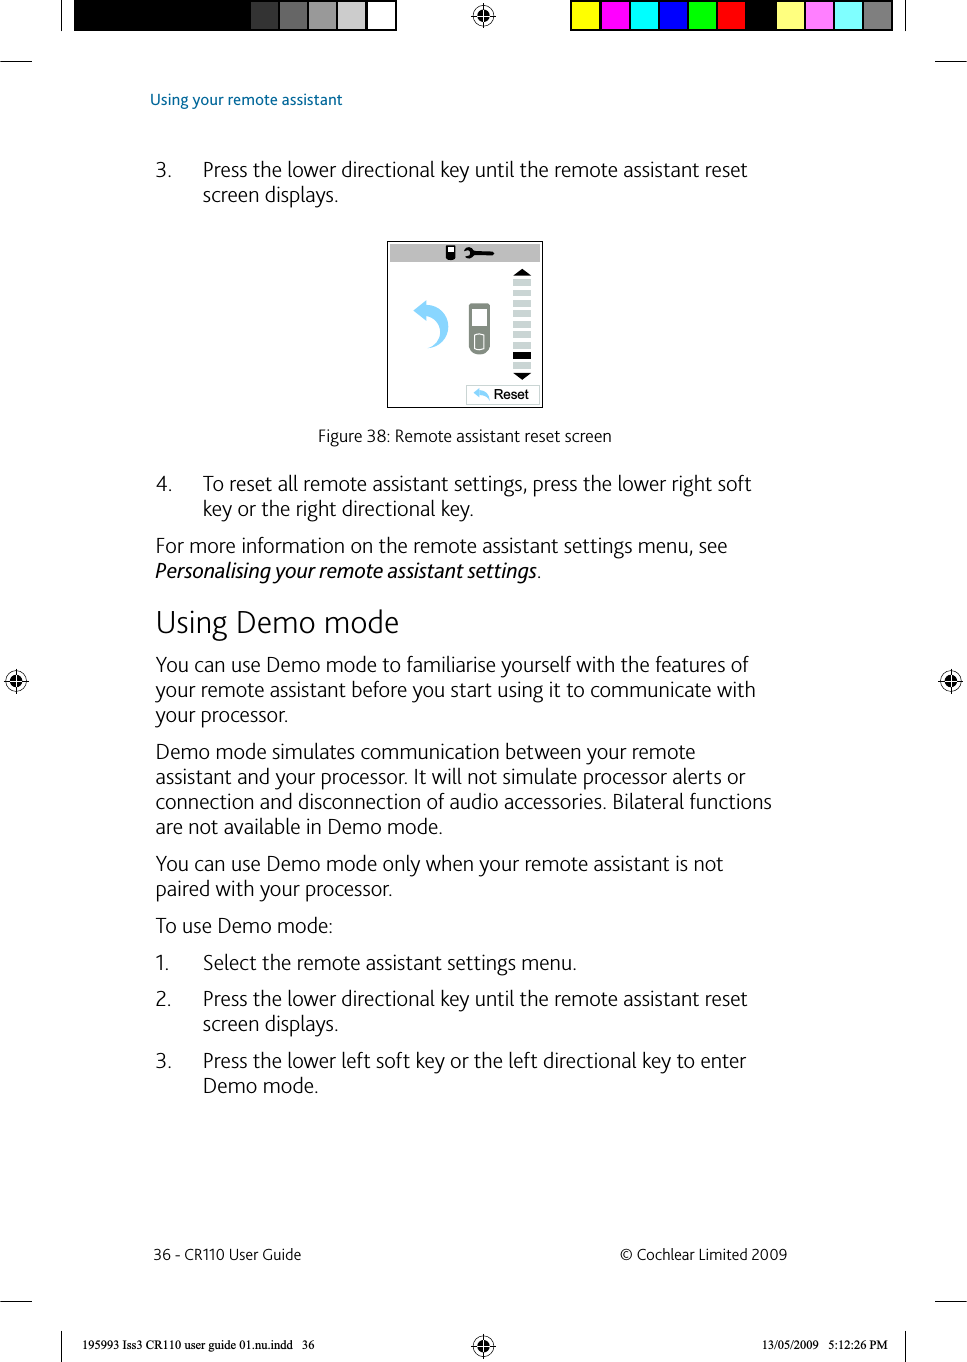
>
Cochlear
>
CR11000 User Manual
>
User Manual 2
Contents
1.
User Manual 1
2.
User Manual 2
User Manual 2
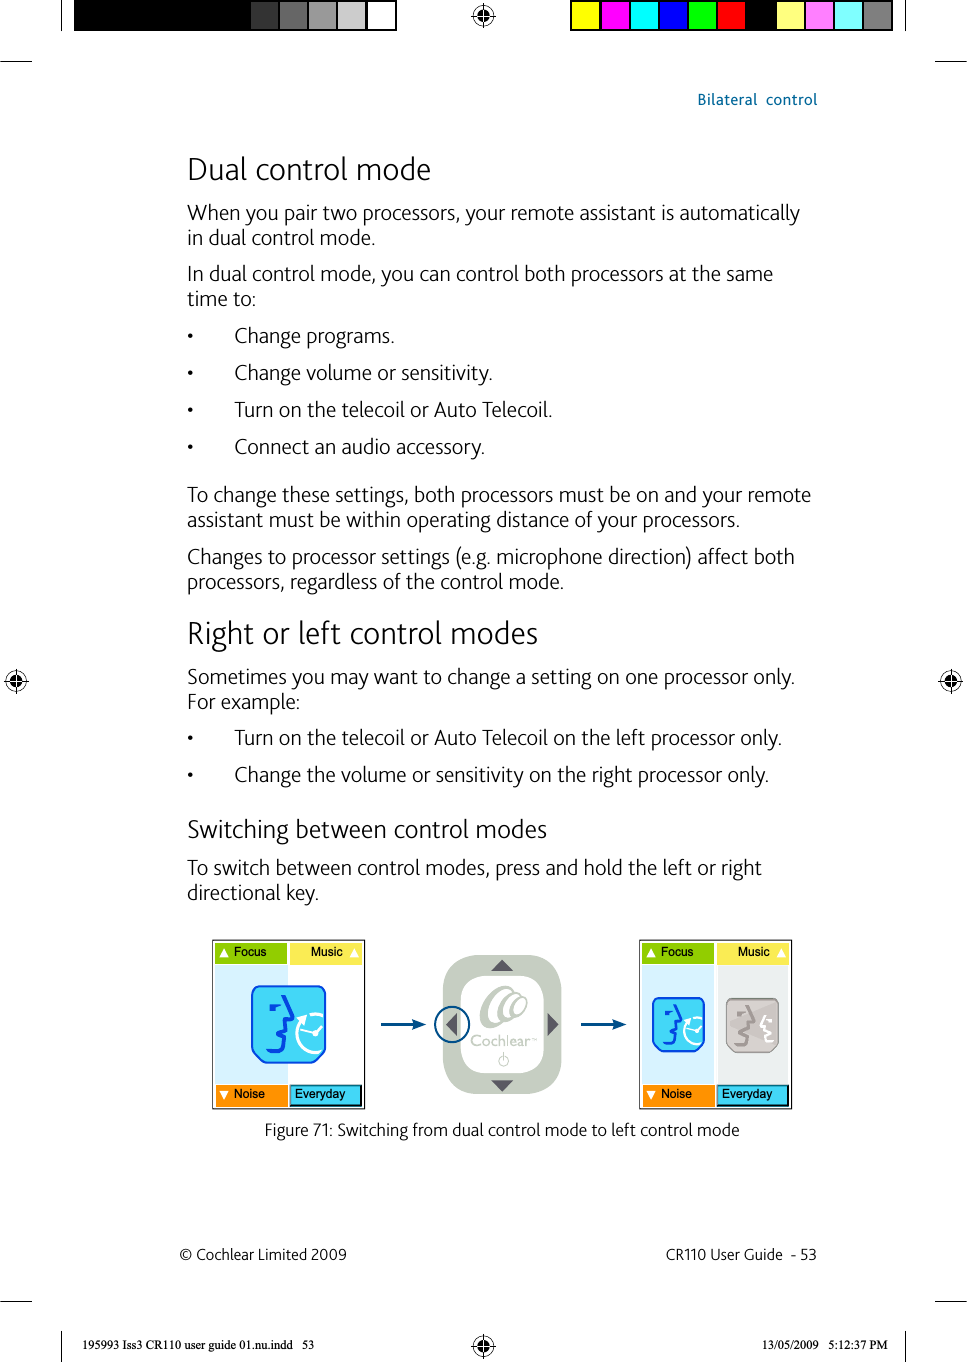
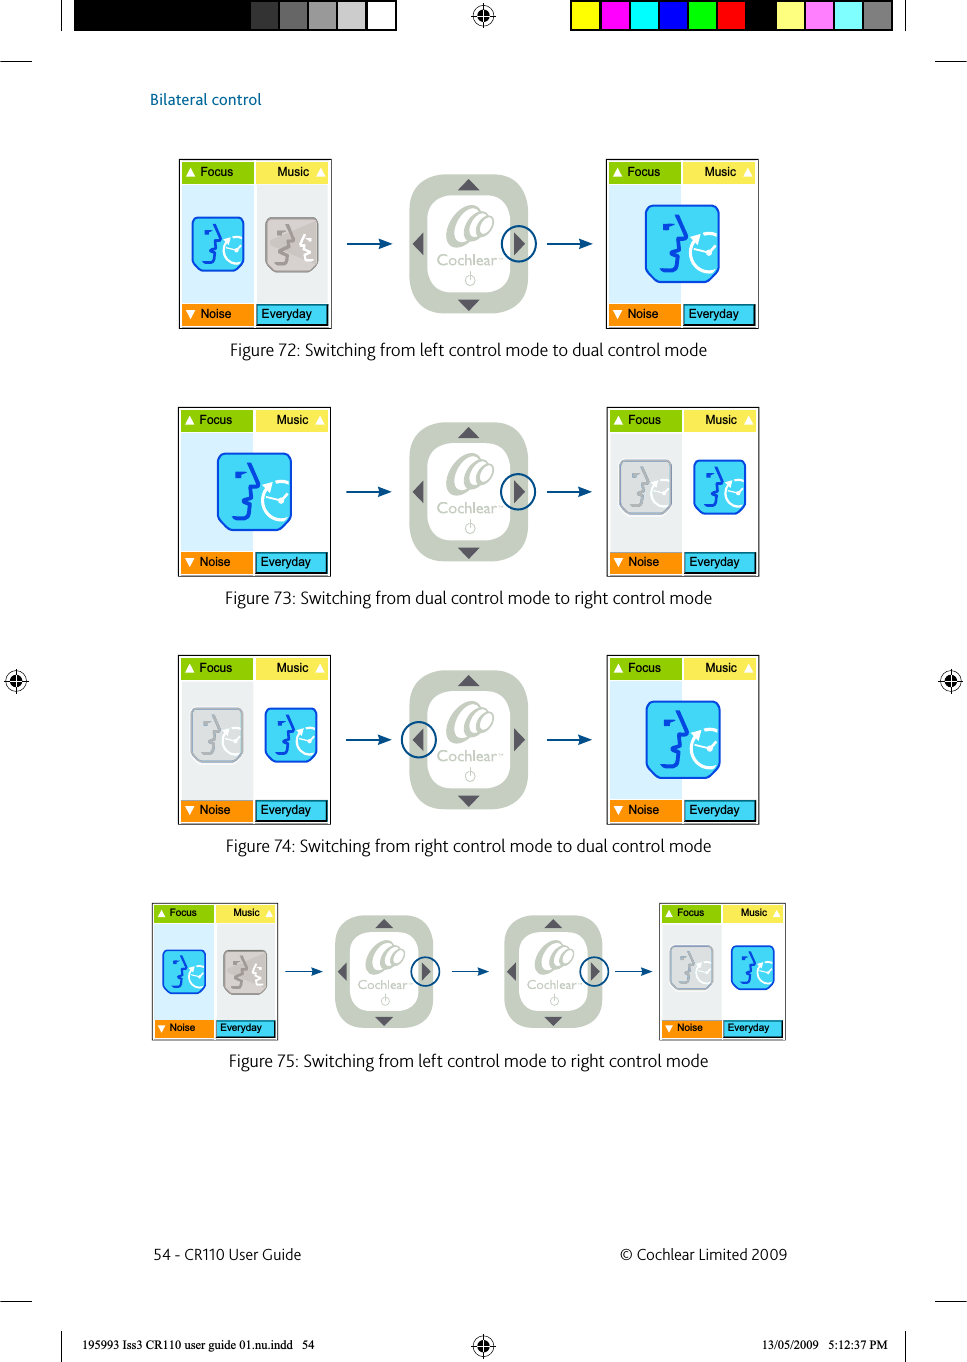
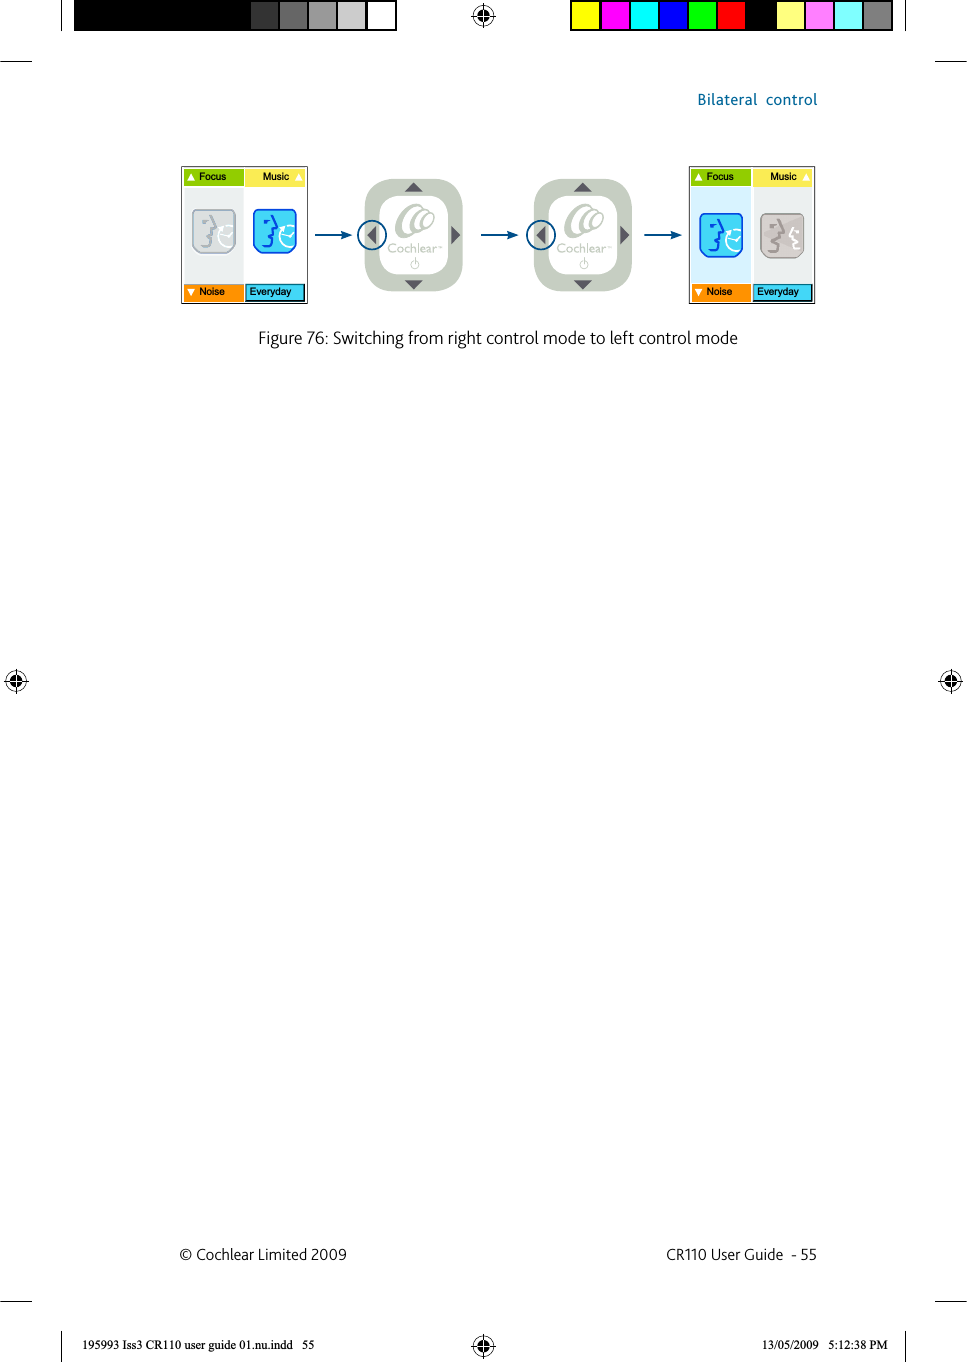
Navigation menu
Upload a User Manual
Namespaces
Wiki Guide
HTML
PDF
Info
Views
User Manual
Discussion / Help
Navigation