Codan 2110 2110 SSB Transceiver User Manual 15 04136 EN 1
Codan Limited 2110 SSB Transceiver 15 04136 EN 1
Codan >
Contents
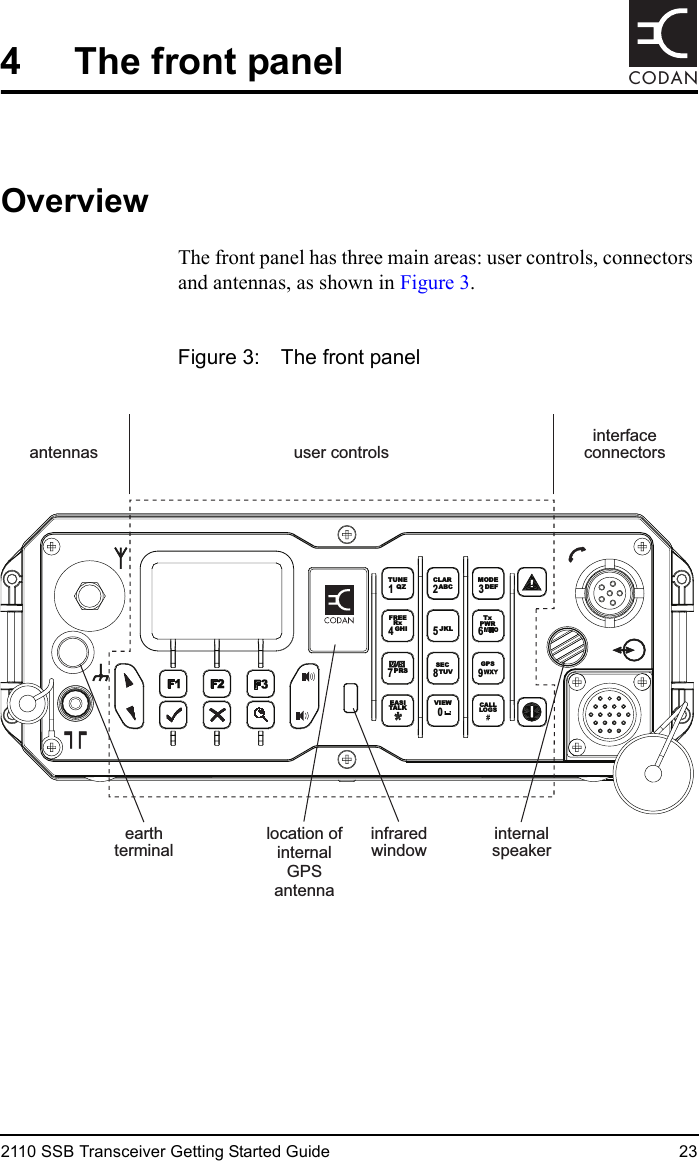
- 1. Getting started guide
- 2. Reference Manual a
- 3. Reference Manual b
- 4. Reference Manual c
- 5. Antenna reference card
Getting started guide