Codan NGT-3 TNB Licensed Non-Broadcast Station Transmitter User Manual 15 04137 EN 1
Codan Limited TNB Licensed Non-Broadcast Station Transmitter 15 04137 EN 1
UserManual.wiki
>
Codan
>
NGT 3 User Manual
User Manual
Navigation menu
Upload a User Manual
Namespaces
Wiki Guide
HTML
PDF
Info
Views
User Manual
Discussion / Help
Navigation

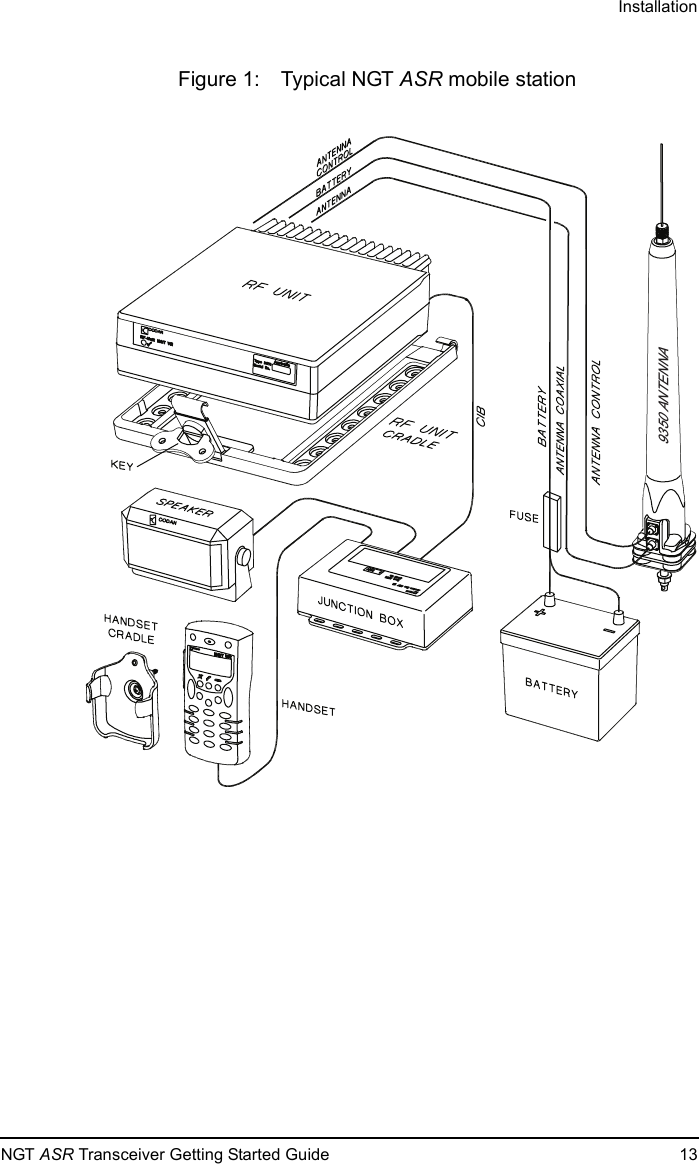
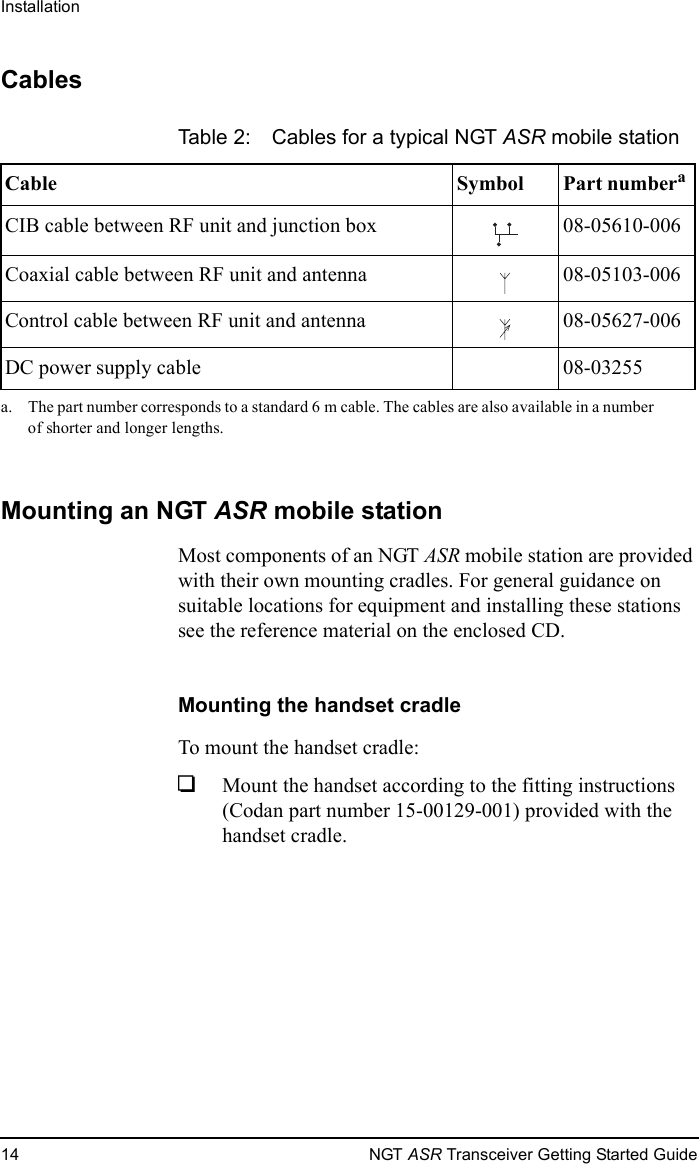
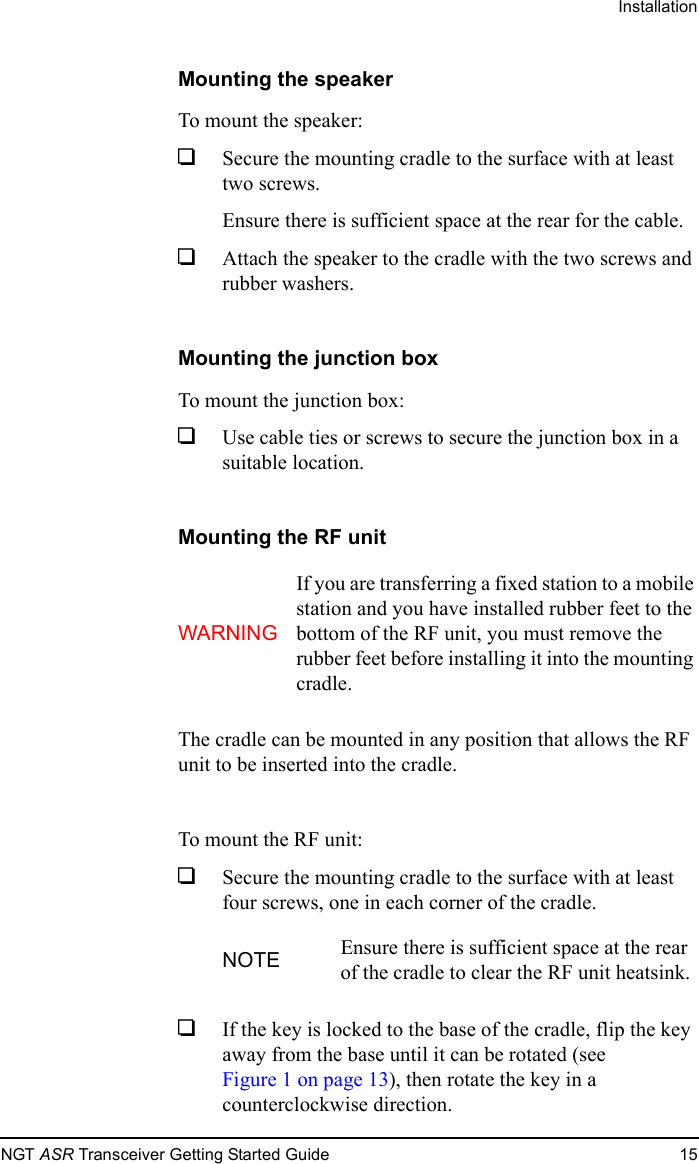
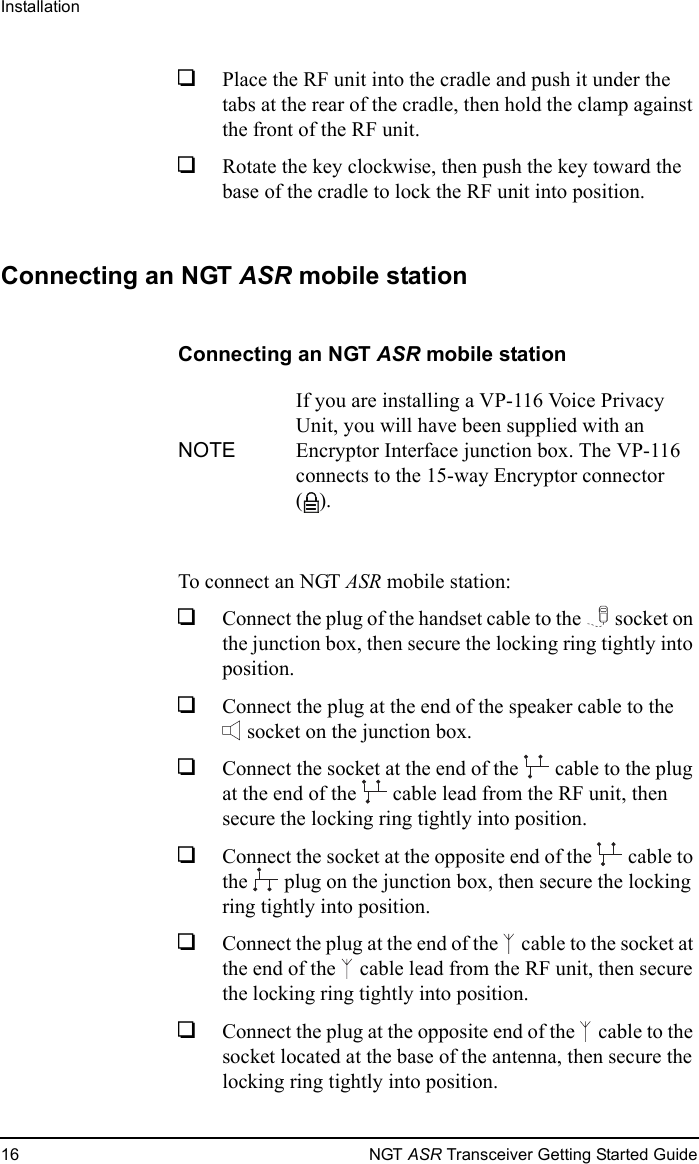
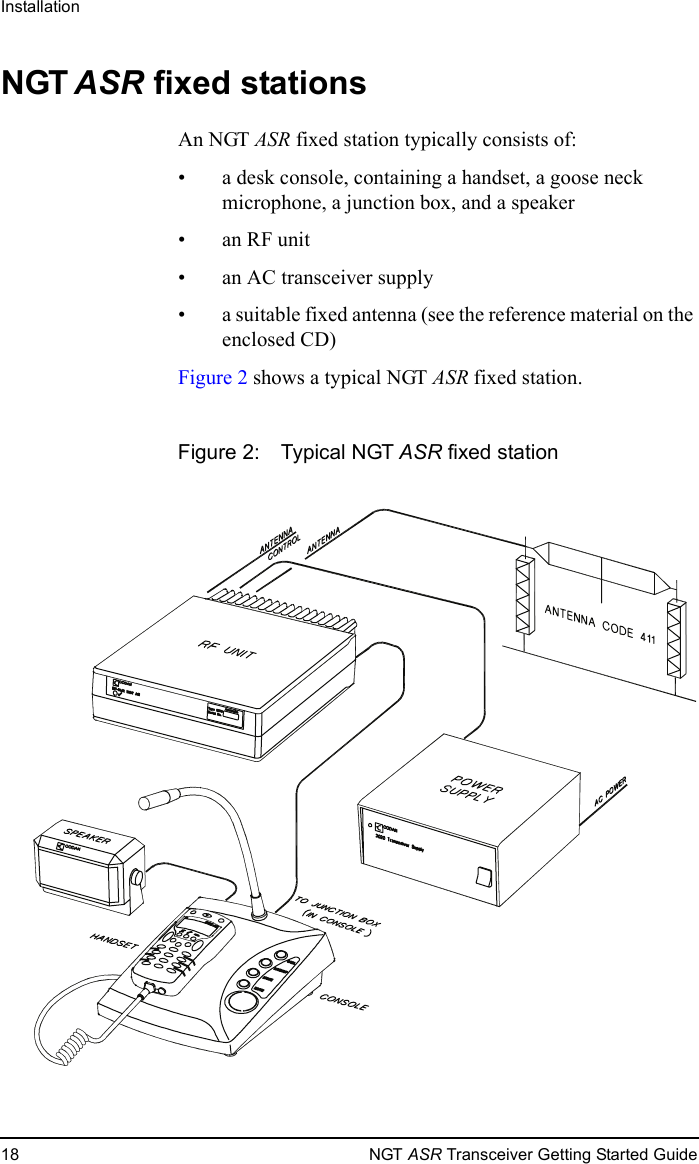

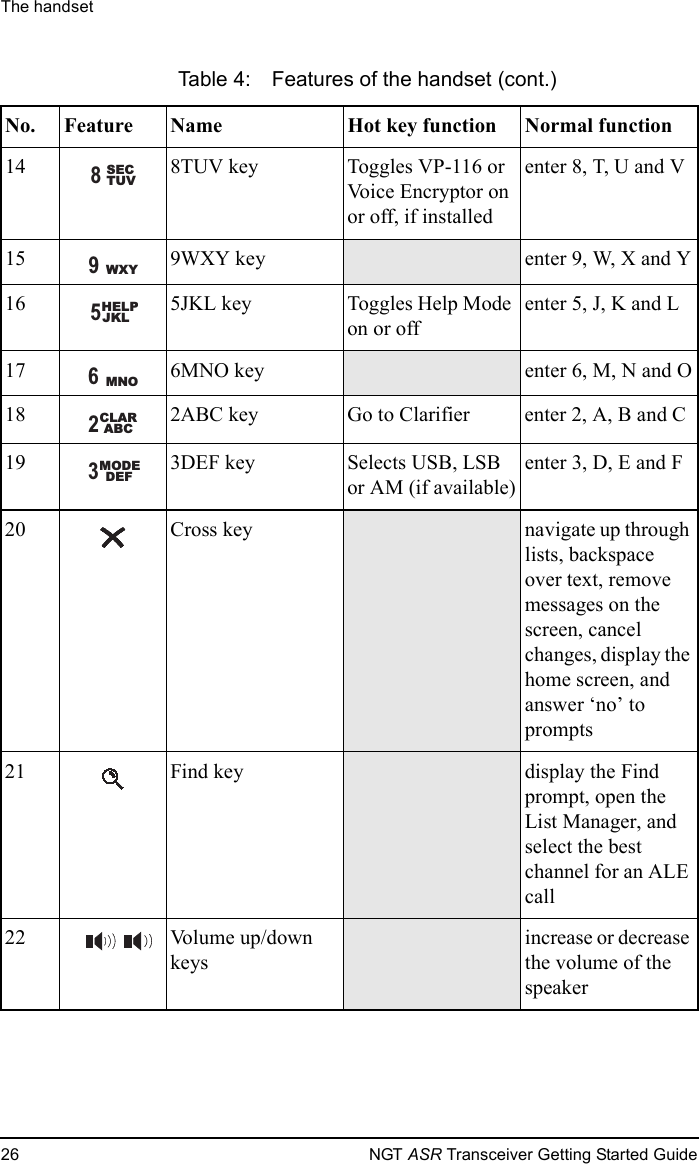
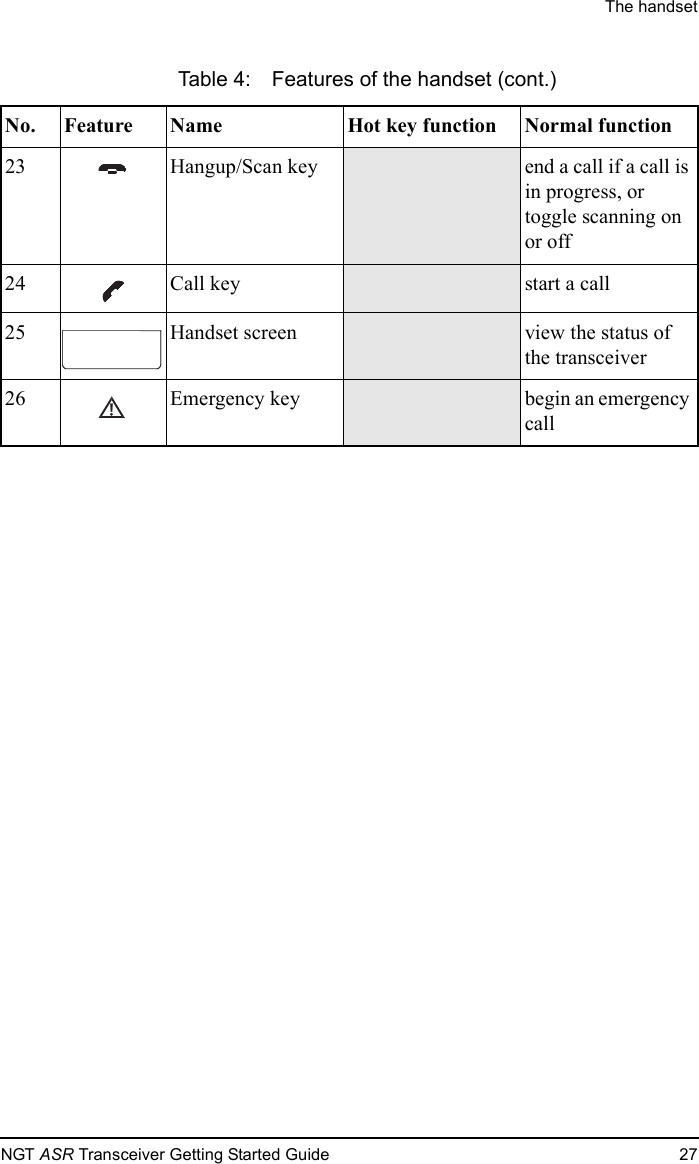
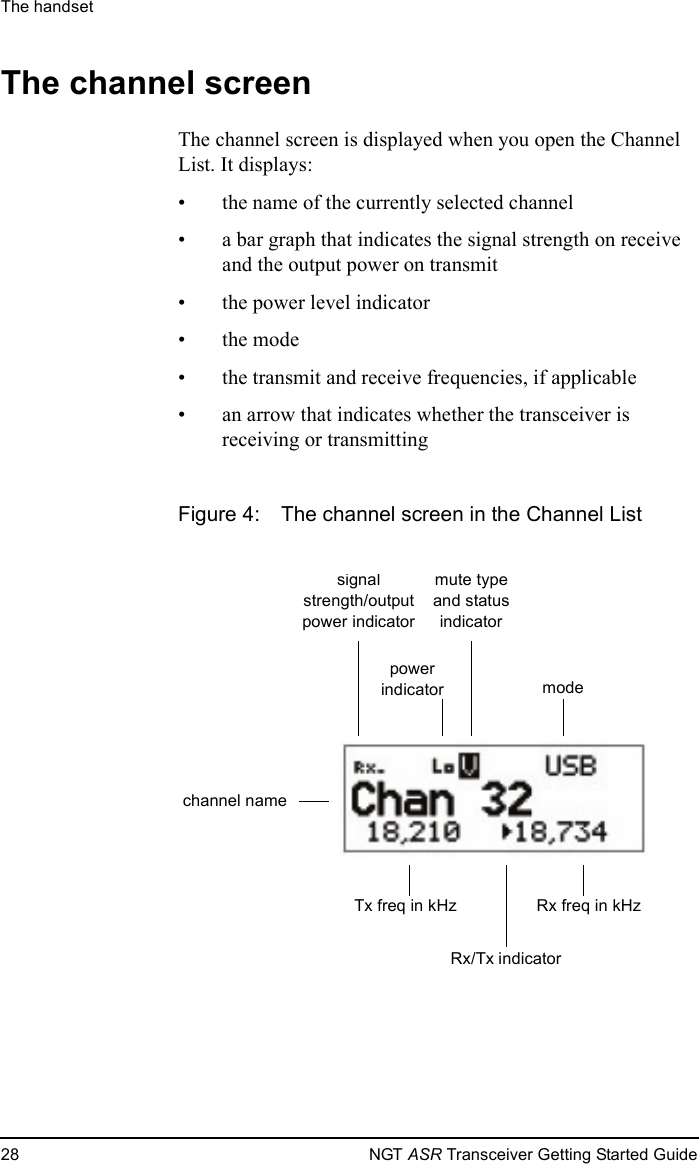
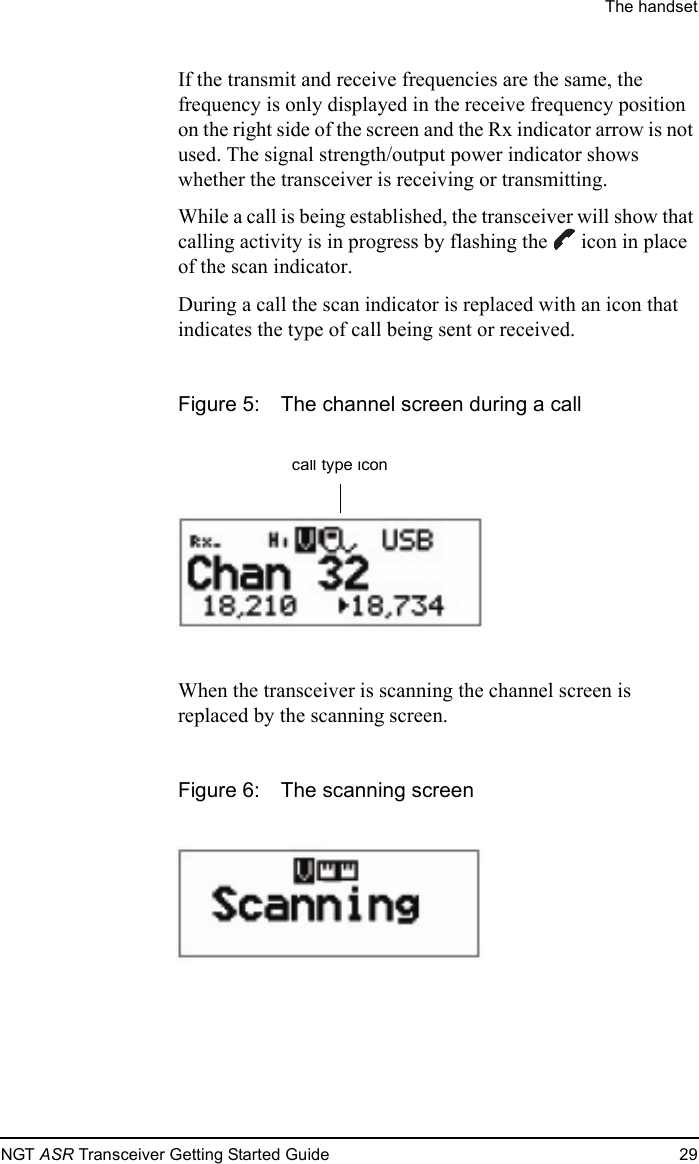


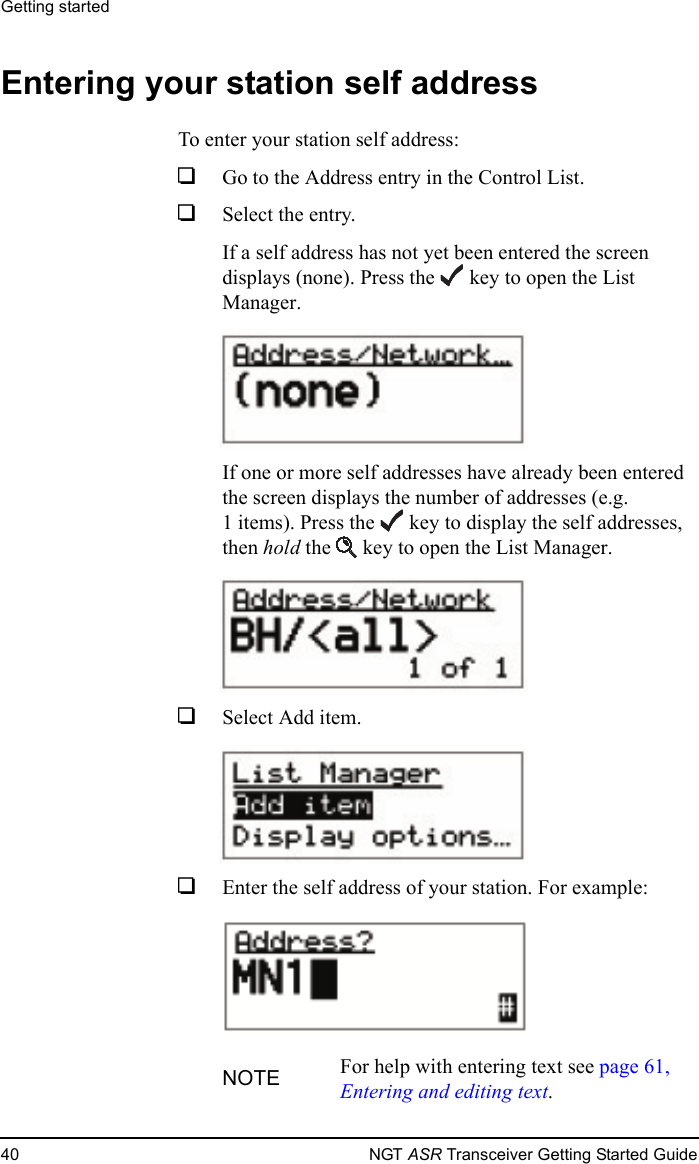
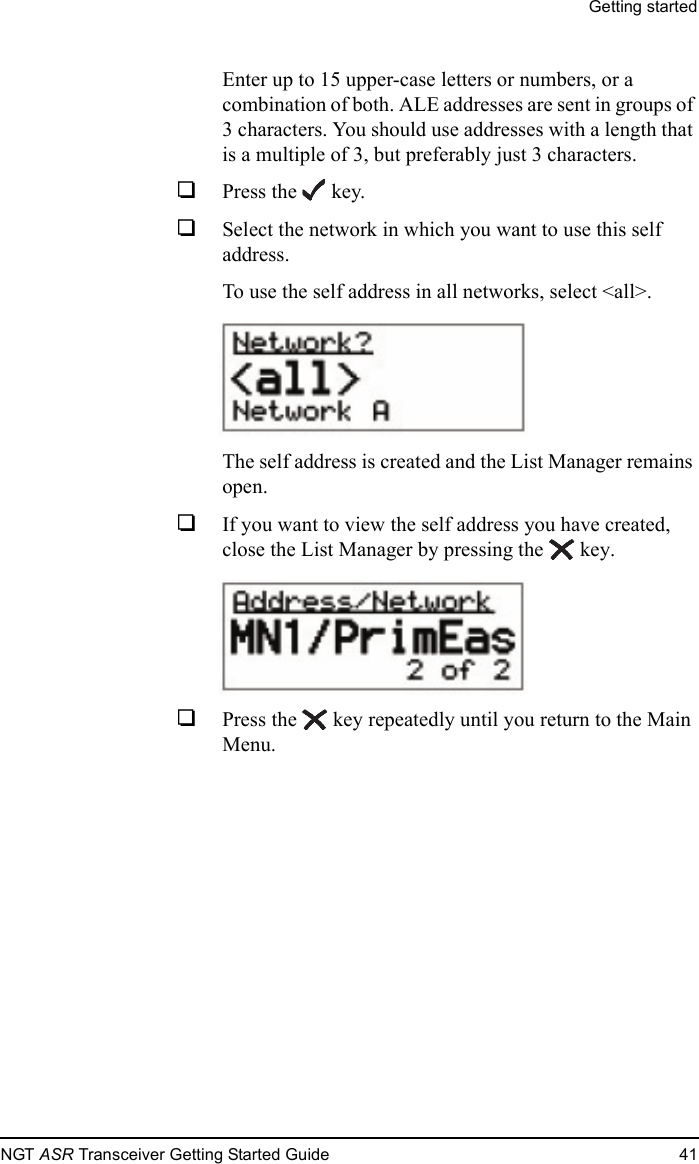
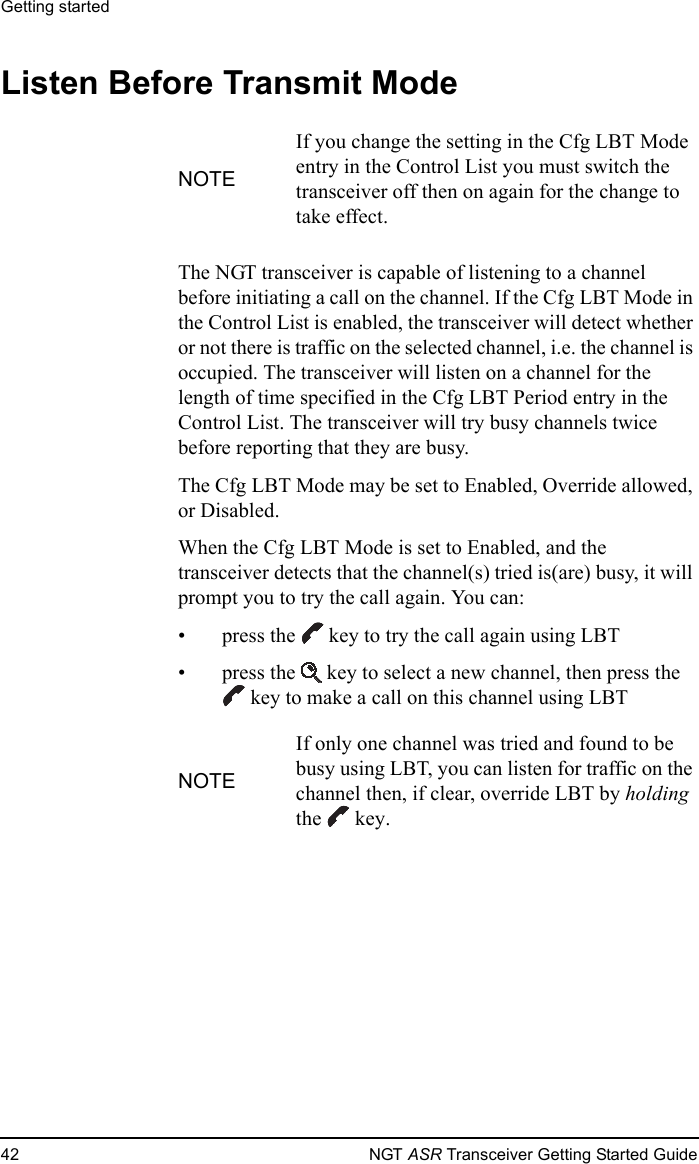
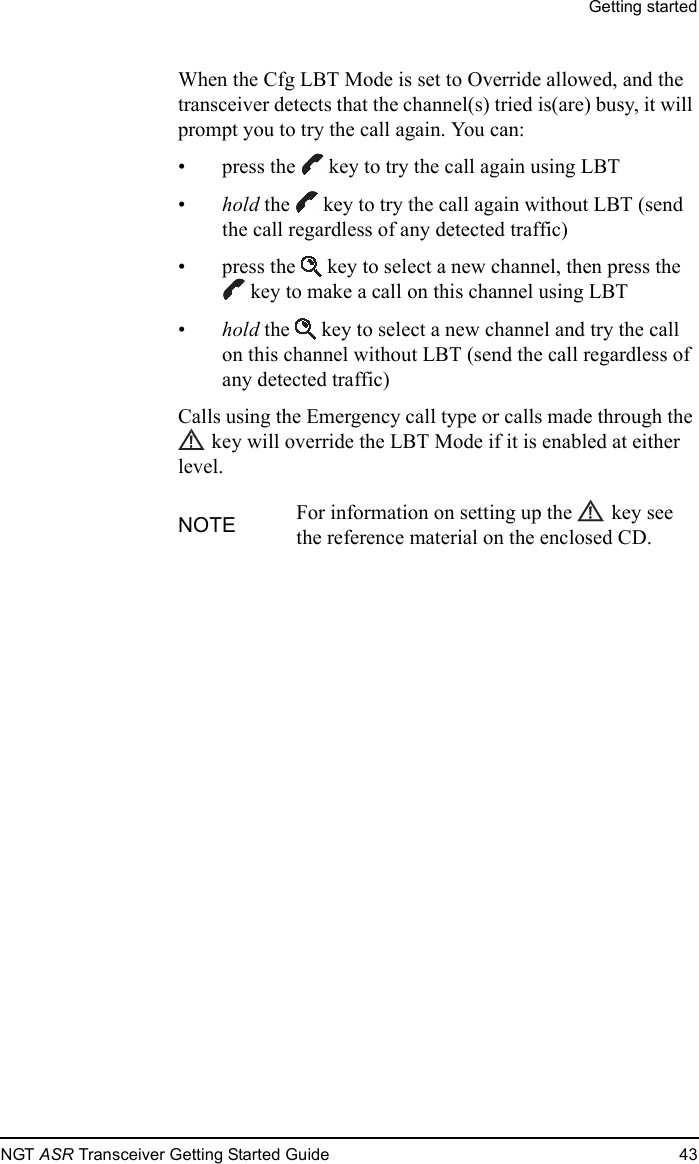


![Entering and editing text64 NGT ASR Transceiver Getting Started GuideEntering special characters in messages and namesTo enter special characters:1Use the and keys to move the cursor to the point where you want to insert a special character, then press the key repeatedly until the symbol you want is displayed.To enter one of an extended range of special characters:1Use the and keys to move the cursor to the character or space where you want to replace a character.1Press the key to place an underscore beneath the current character or space.1Use the and keys to scroll through the character choices.NOTE The special characters that are available are:. , ’ ? ! & # $ * ( ) - + / NOTEMake sure that ‘A’ or ‘a’ is displayed at the bottom right of the screen before you press the key otherwise you will enter a decimal point.NOTEThe characters that are available are:space , . ; ? : ¨ ‘ ’ / ! @ # $ % ^ & * ( ) _ - + = | \ ~ < > { } [ ] 0 1 2 3 4 5 6 7 8 9A B C D E F G H I J K L M N O P Q R S T U V W X Y Z a b c d e f g h i j k l m n o p q r s t u v w x y z NOTE If you want to add a new character, enter a space then move the cursor to this space.EASI*TALKEASI*TALK](https://usermanual.wiki/Codan/NGT-3/User-Guide-624807-Page-72.png)