CommScope Technologies S1000R LTE and Dual-Band Wi-Fi Indoor Relay Small Cell User Manual User Guide
CommScope Technologies LLC LTE and Dual-Band Wi-Fi Indoor Relay Small Cell User Guide
UserManual.wiki
>
CommScope Technologies
>
S1000R User Manual
User Guide
Navigation menu
Upload a User Manual
Namespaces
Wiki Guide
HTML
PDF
Info
Views
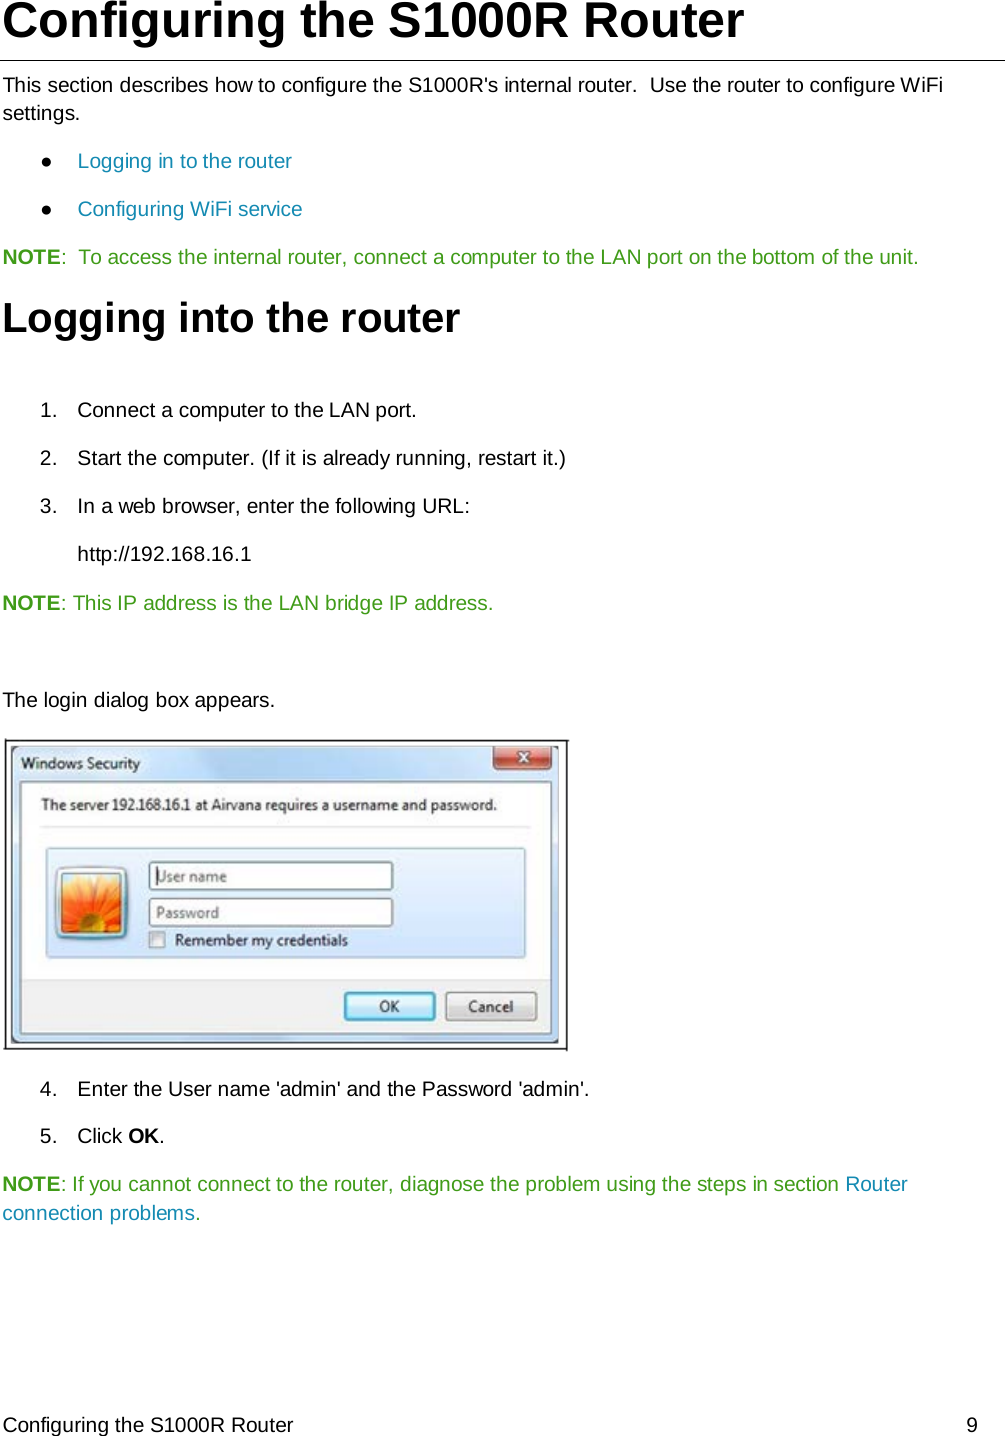
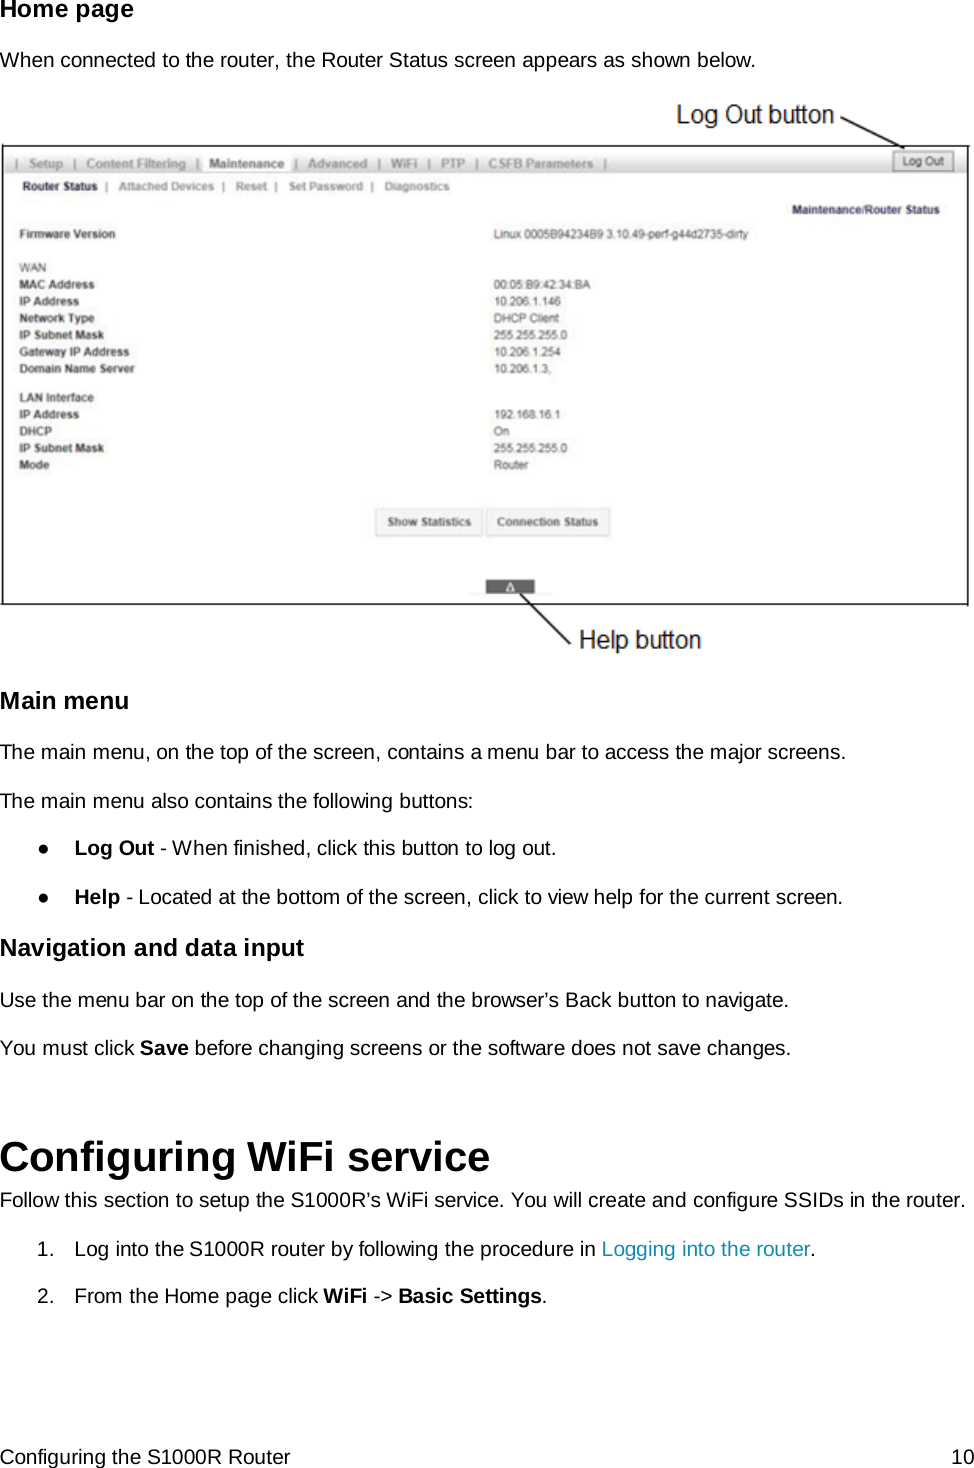
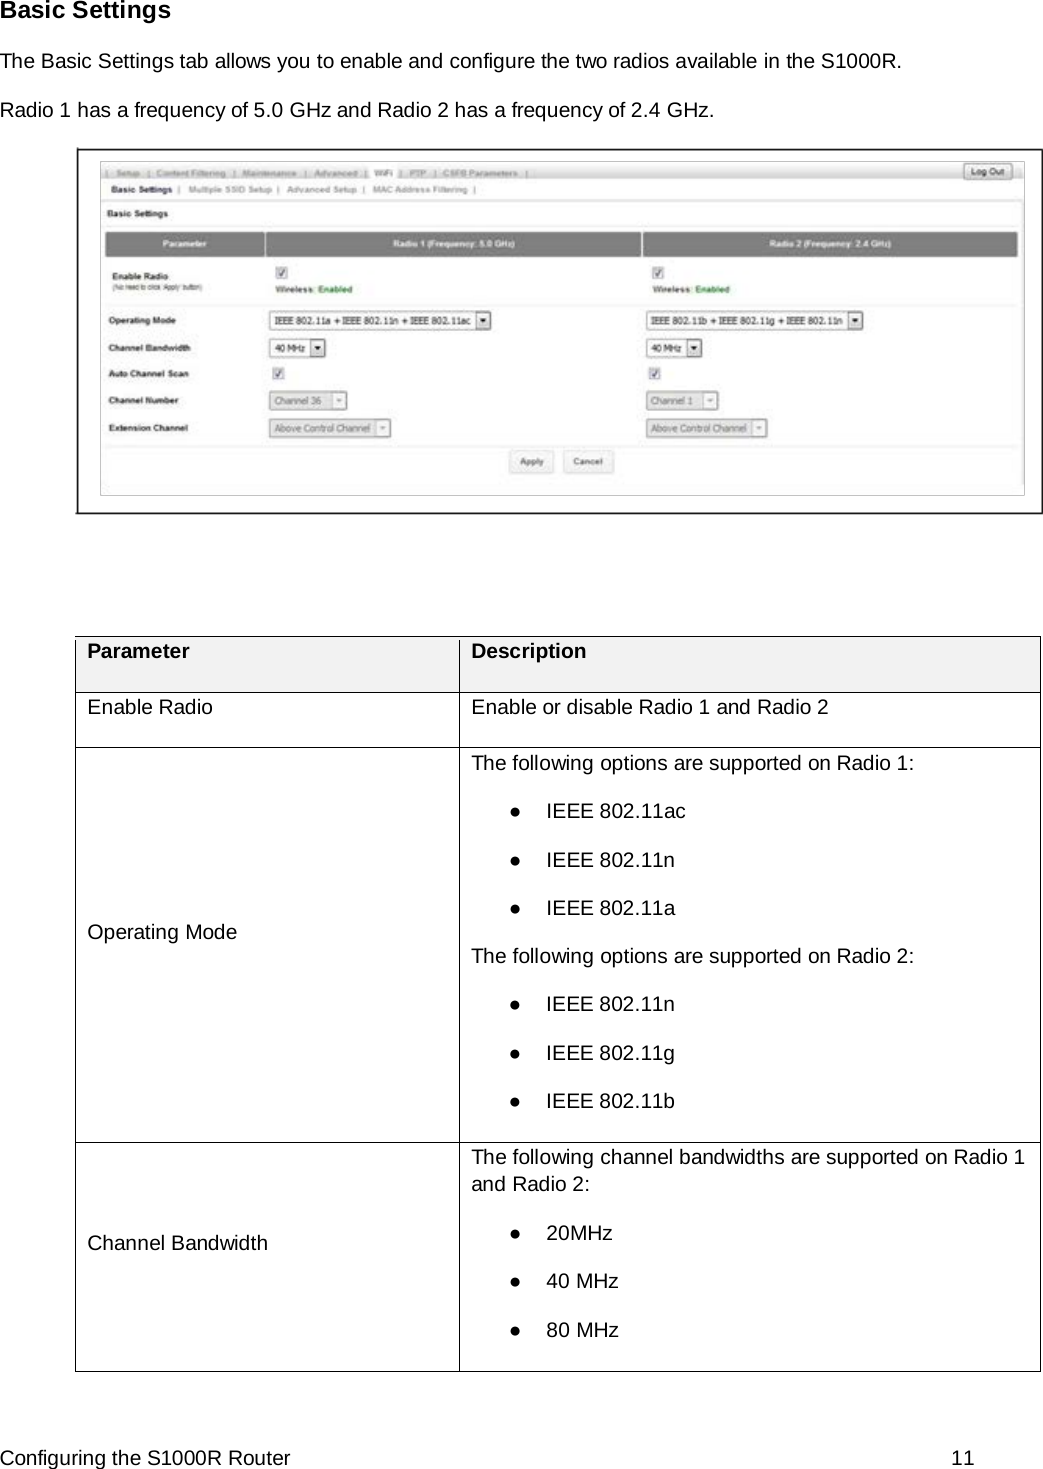
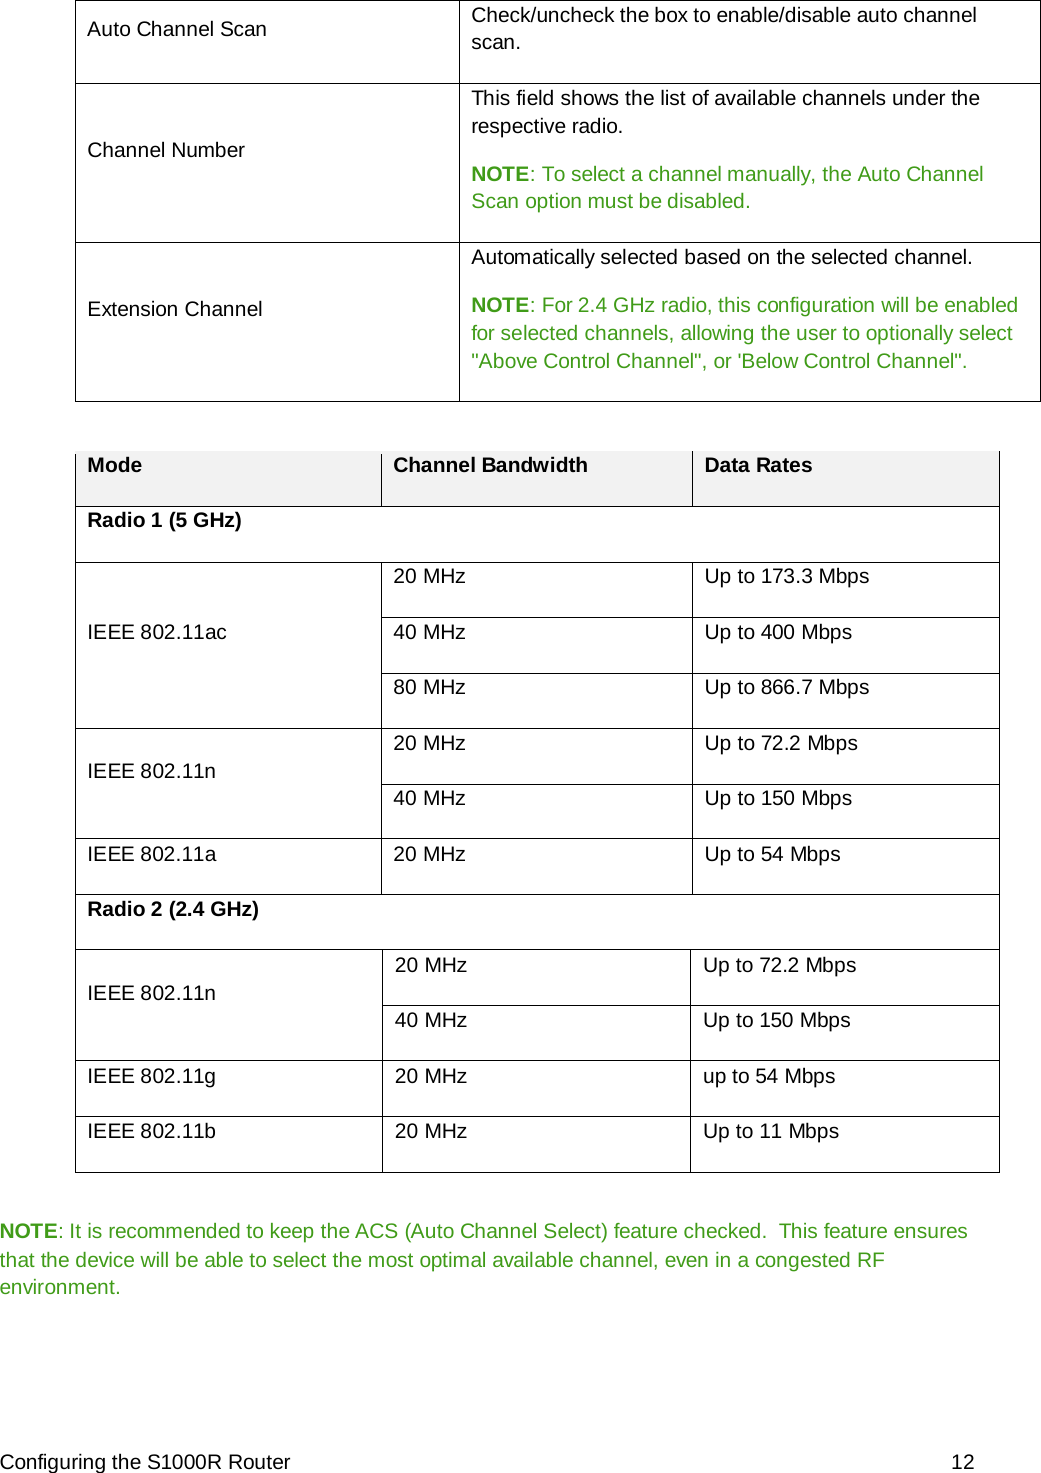
User Manual
Discussion / Help
Navigation
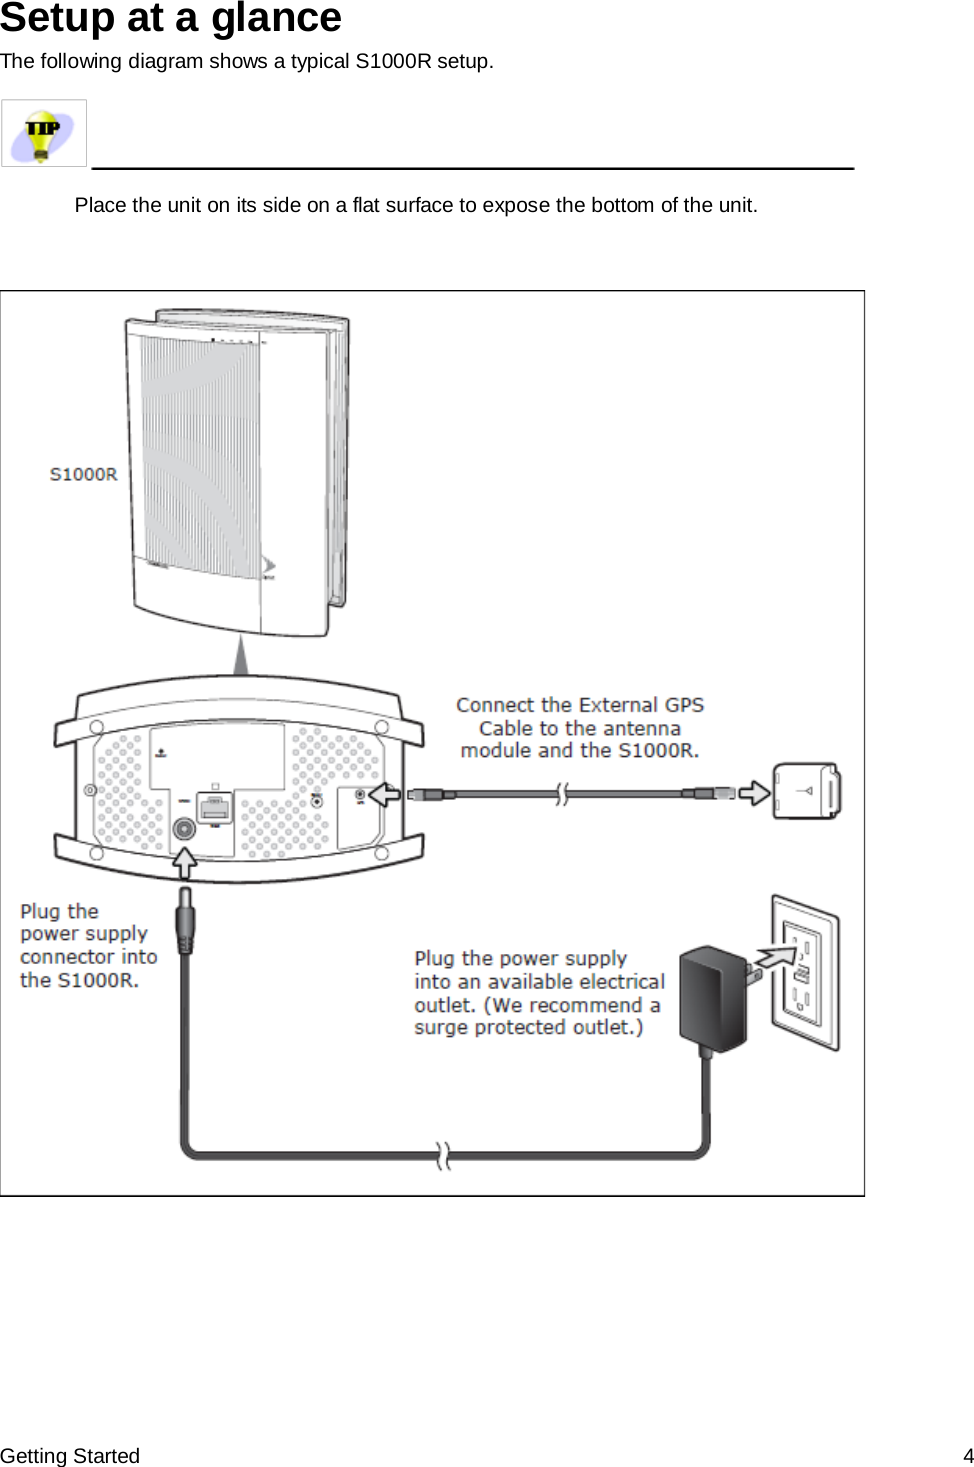
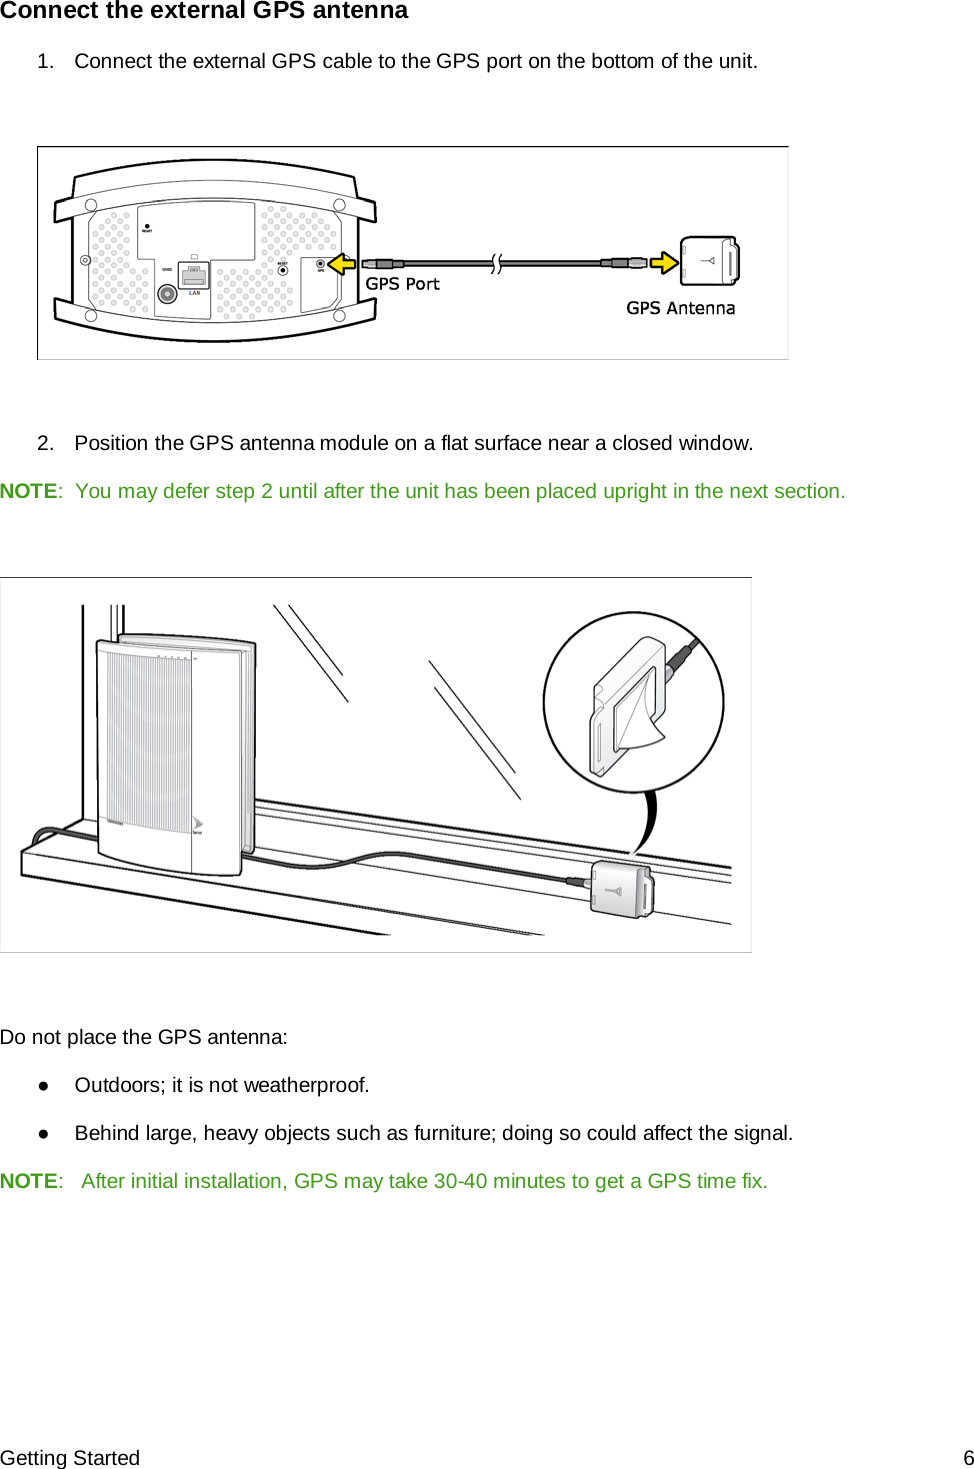
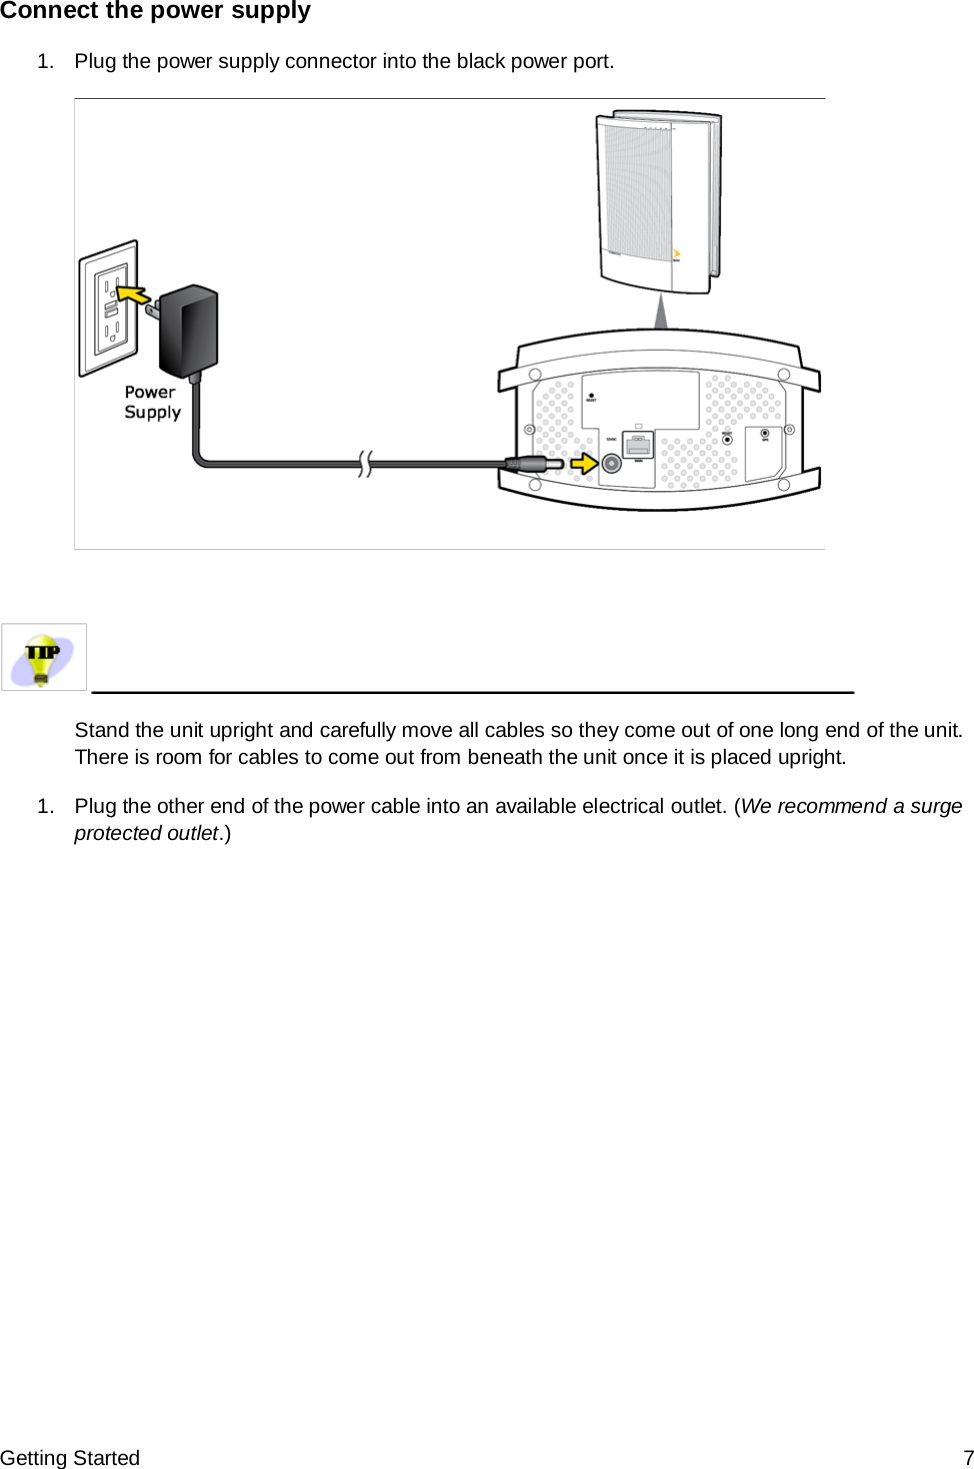
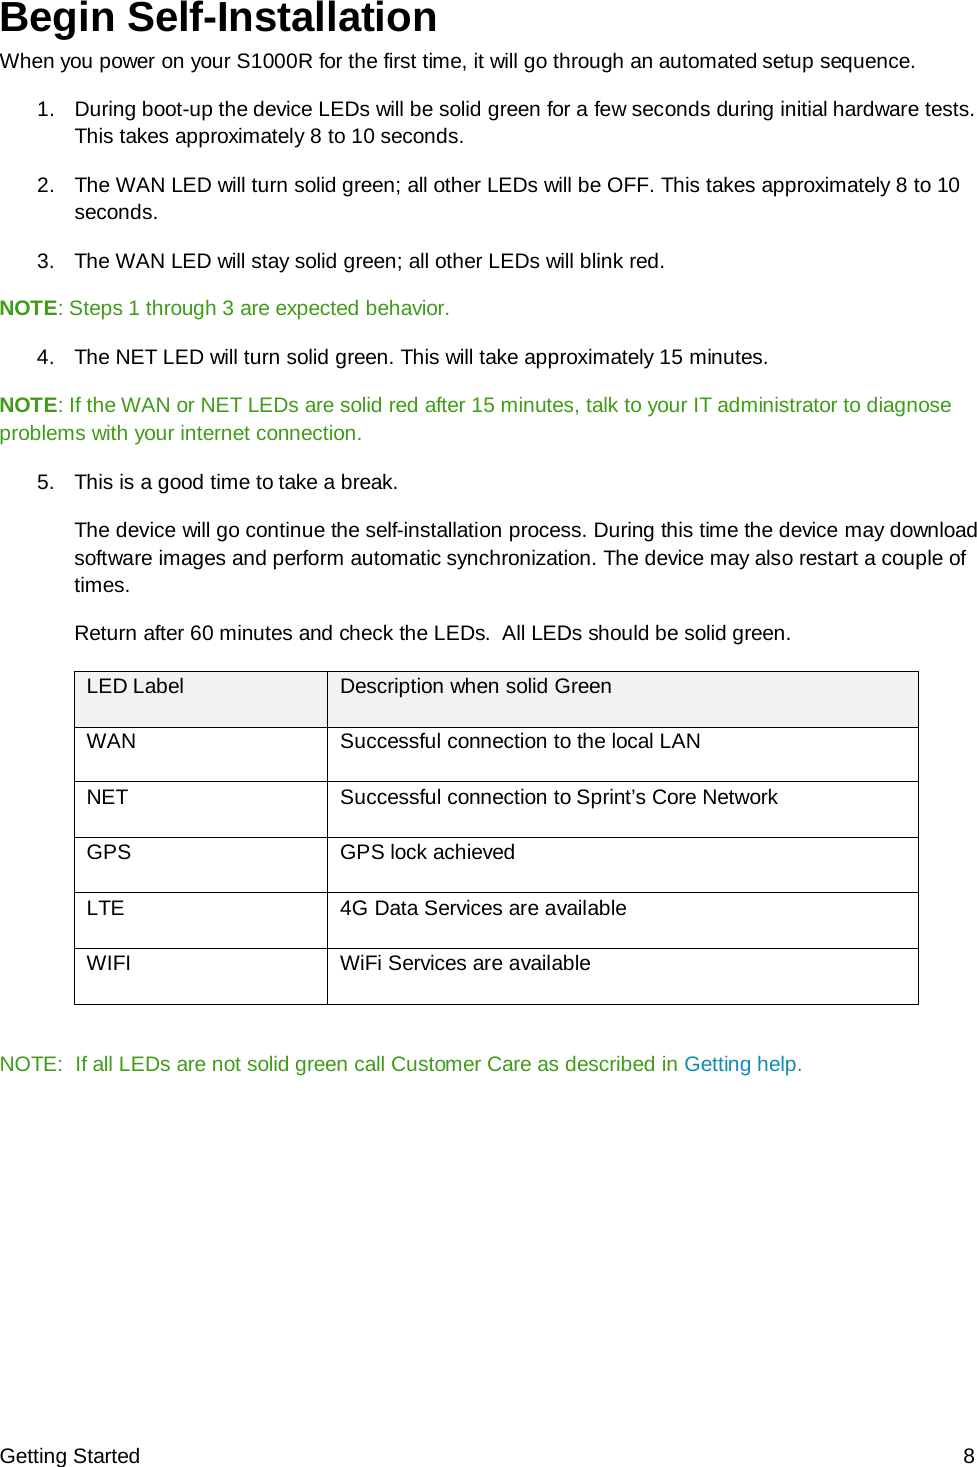
![S1000R User Guide [UG template version 16a] sprint_commscope_S1000R_ug_en_112016_d1](https://usermanual.wiki/CommScope-Technologies/S1000R/User-Guide-3248520-Page-1.png)