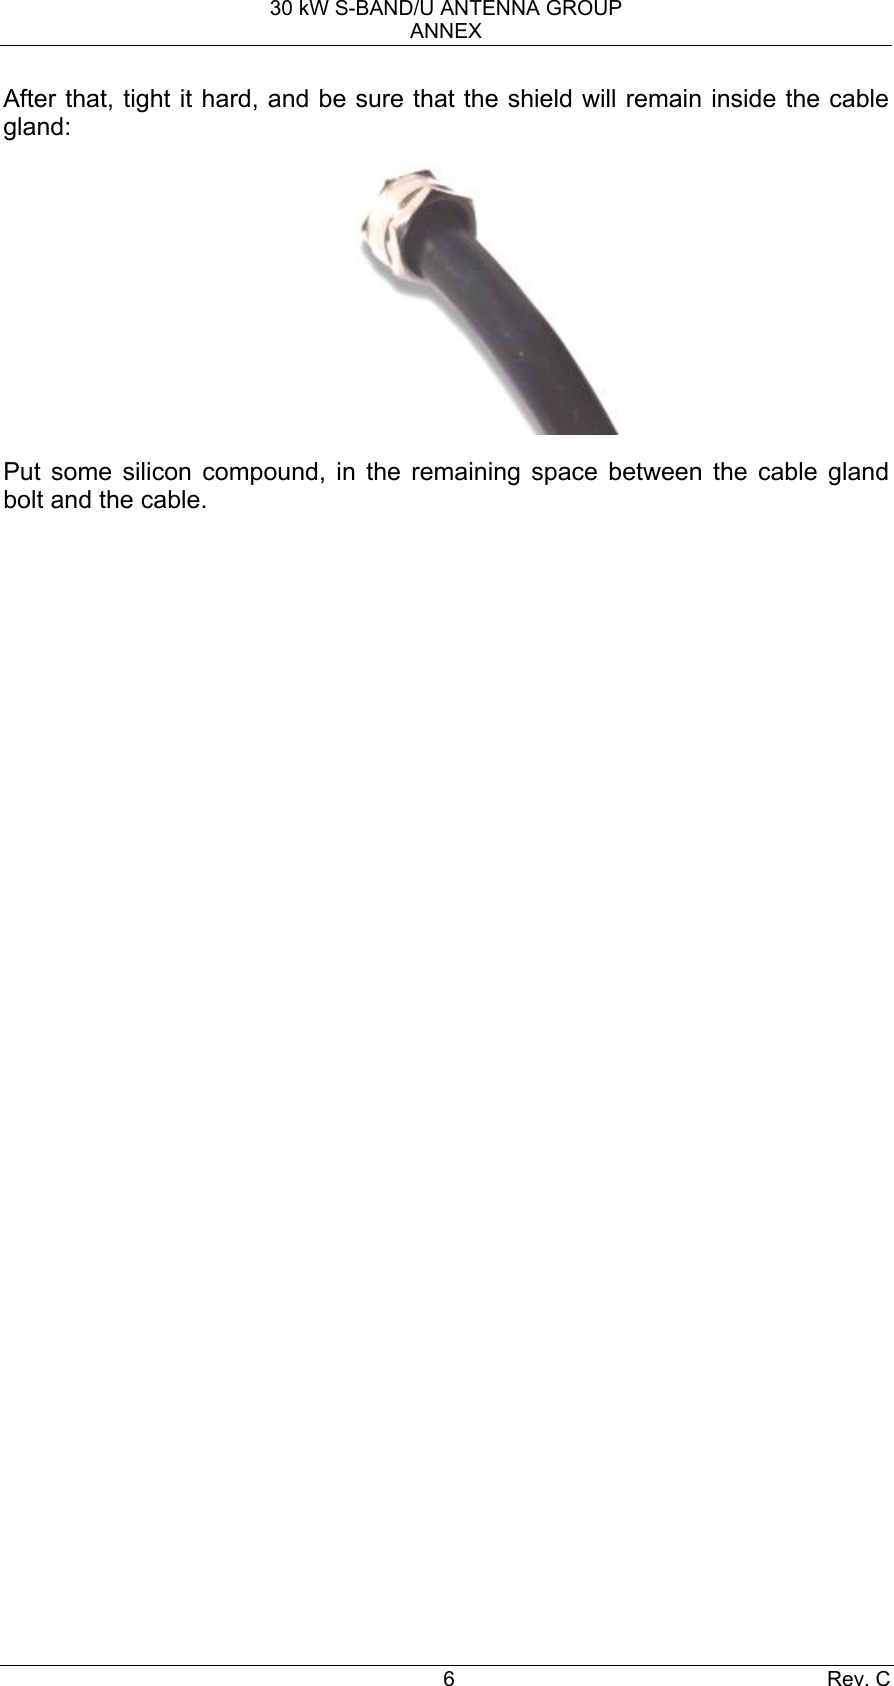
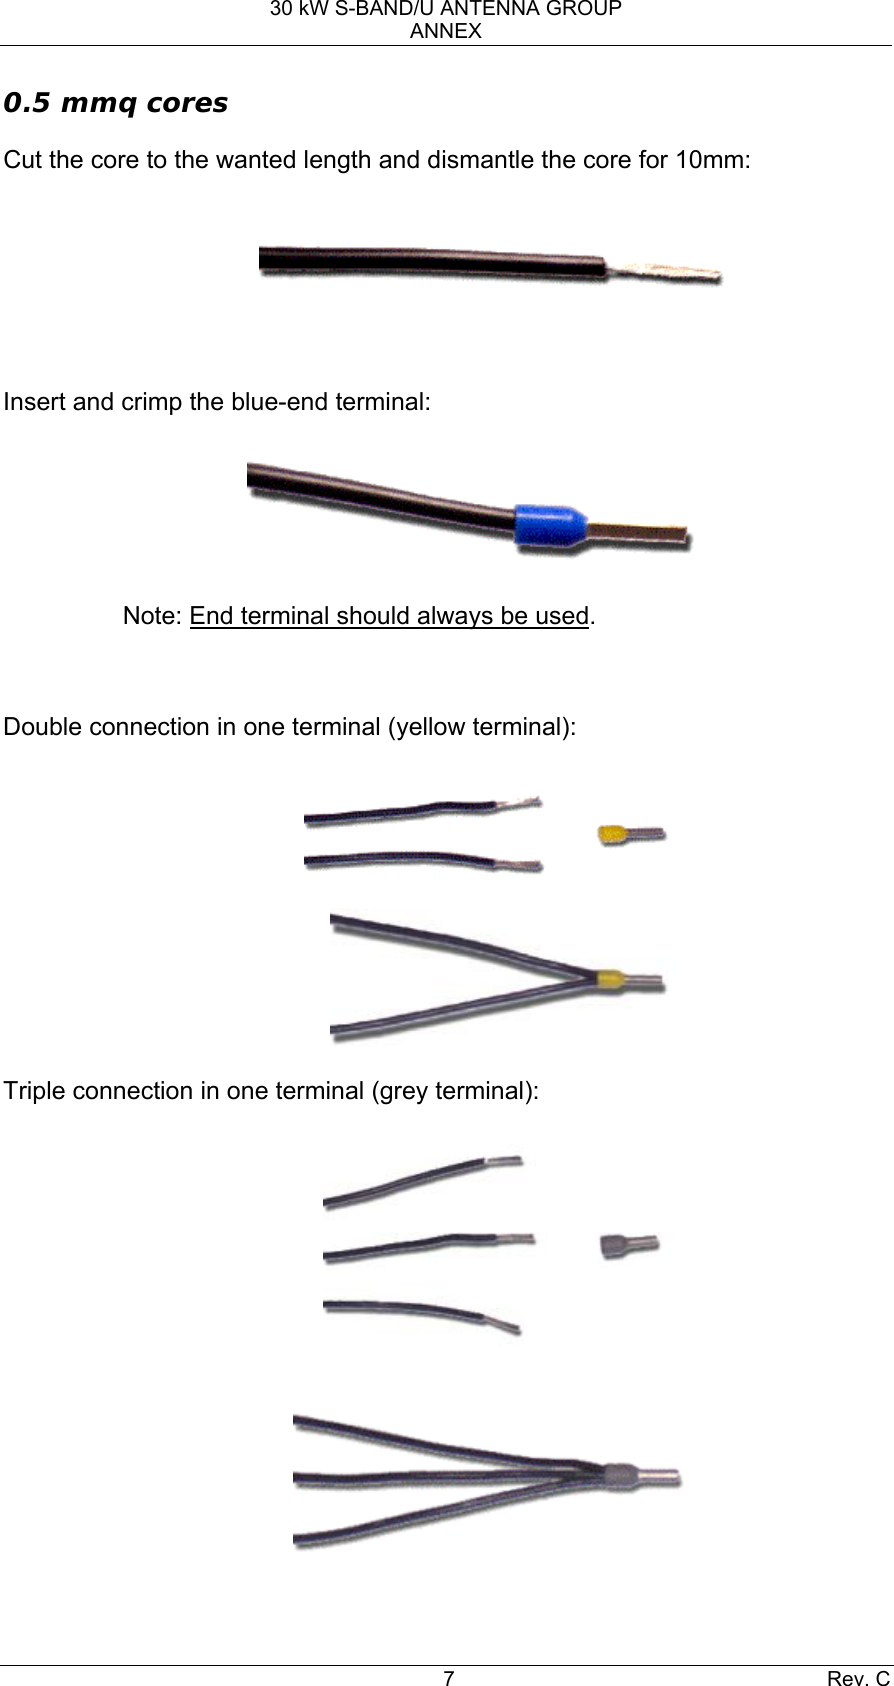
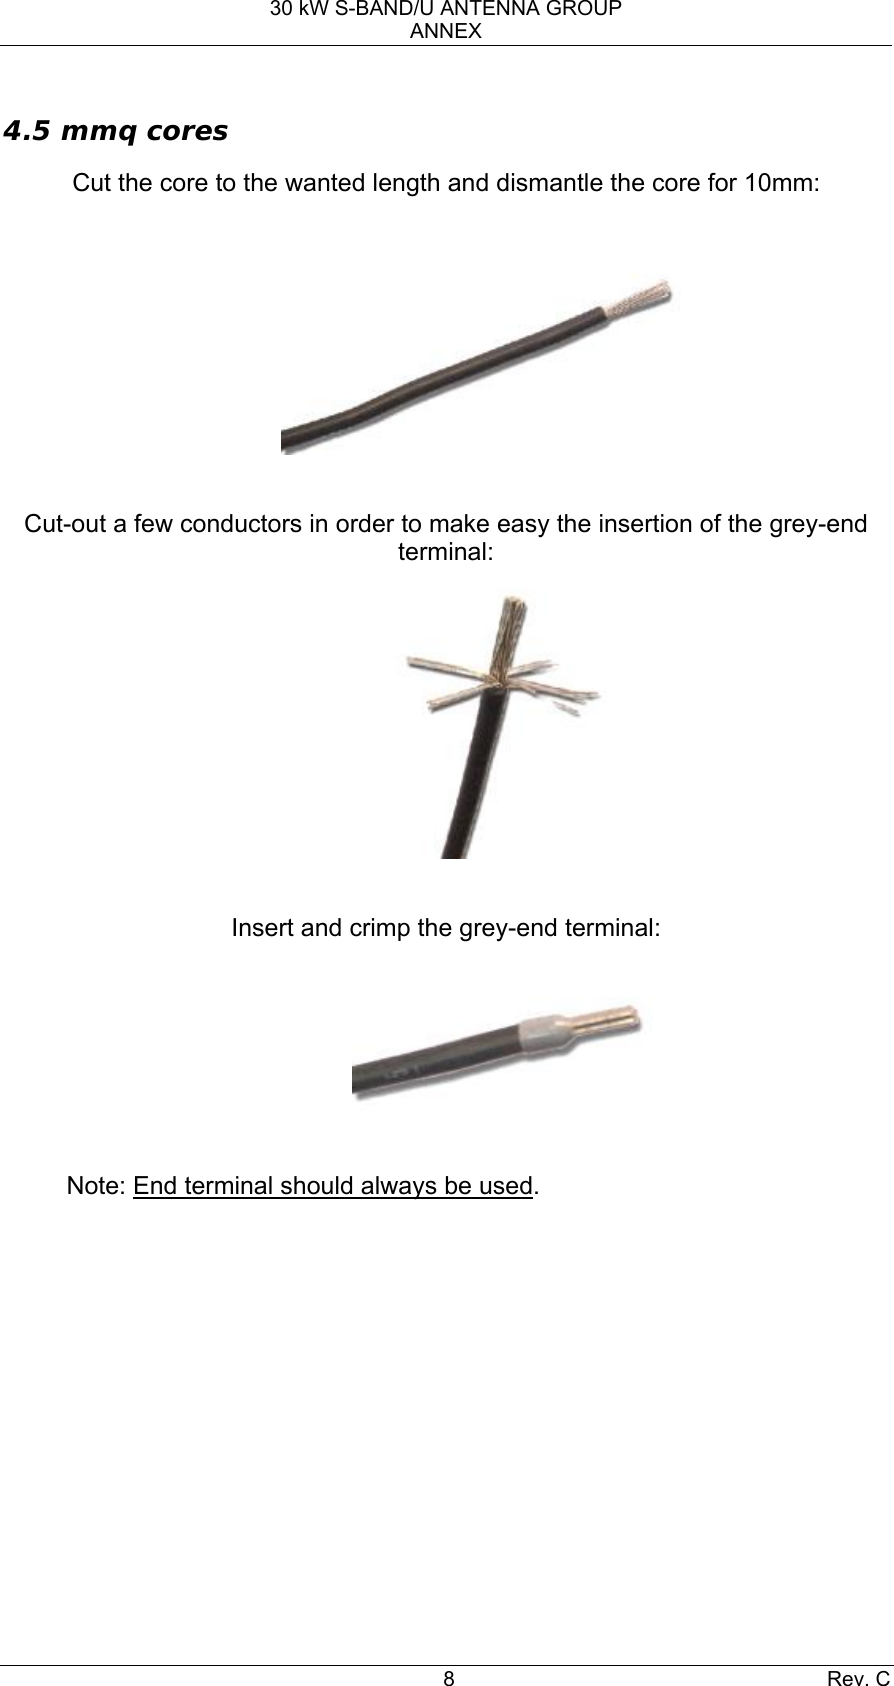
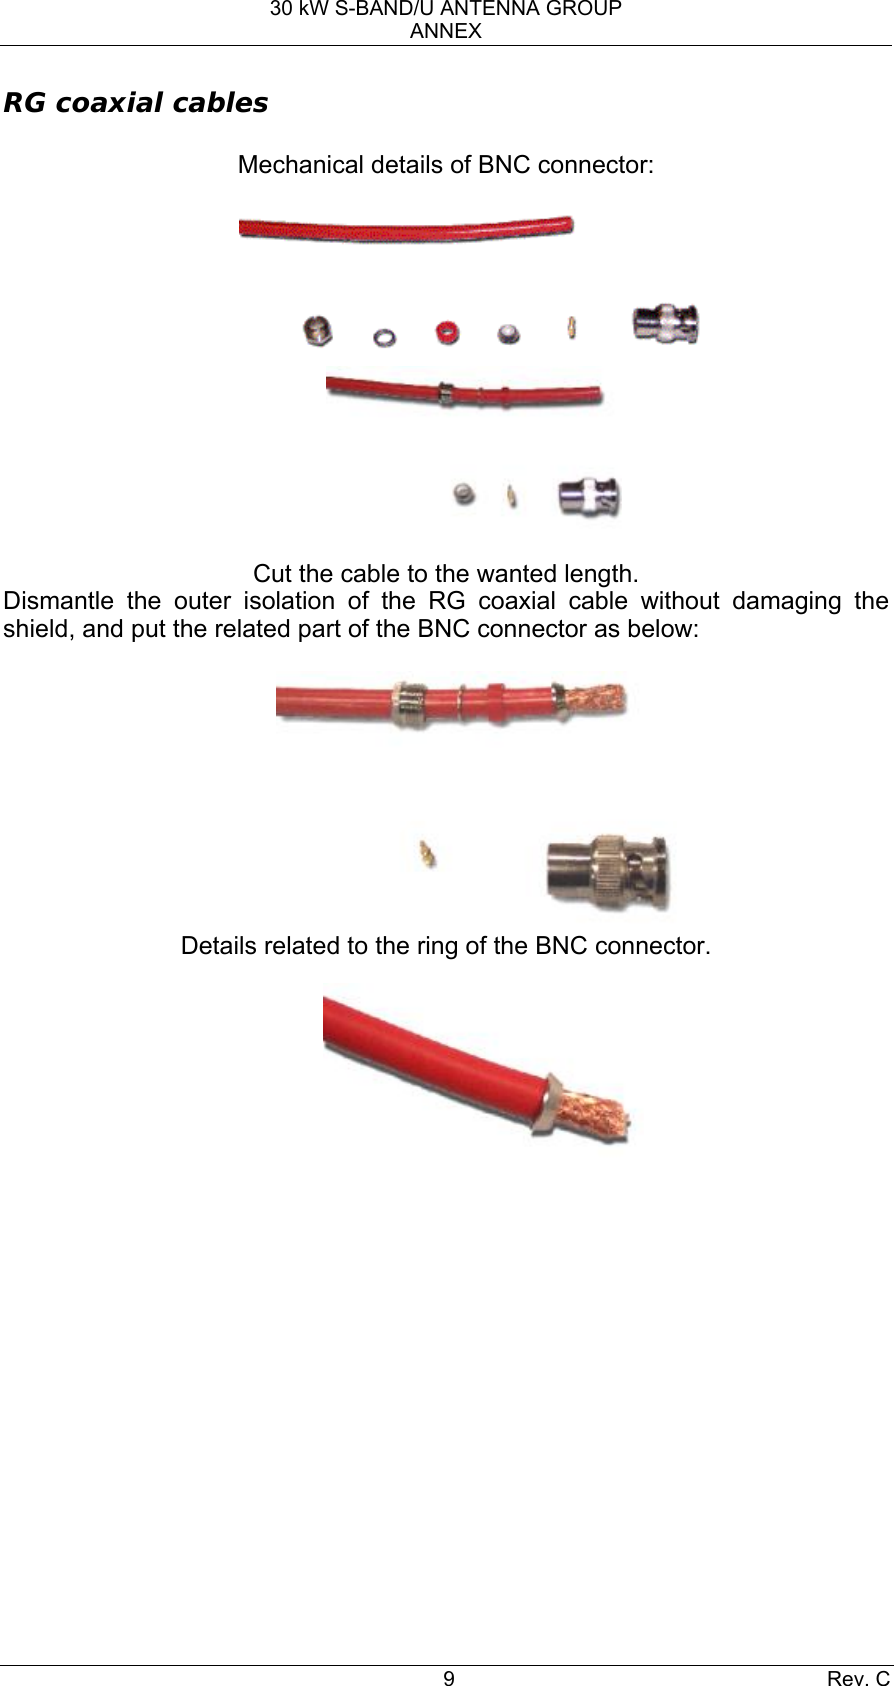
Consilium Marine US 0009N011 30K WATT S BAND MARINE RADAR User Manual 303766P001 Rev C
Consilium Marine US Inc. 30K WATT S BAND MARINE RADAR 303766P001 Rev C
UserManual.wiki
>
Consilium Marine US
>
0009N011 User Manual
>
Users Manual 1
Contents
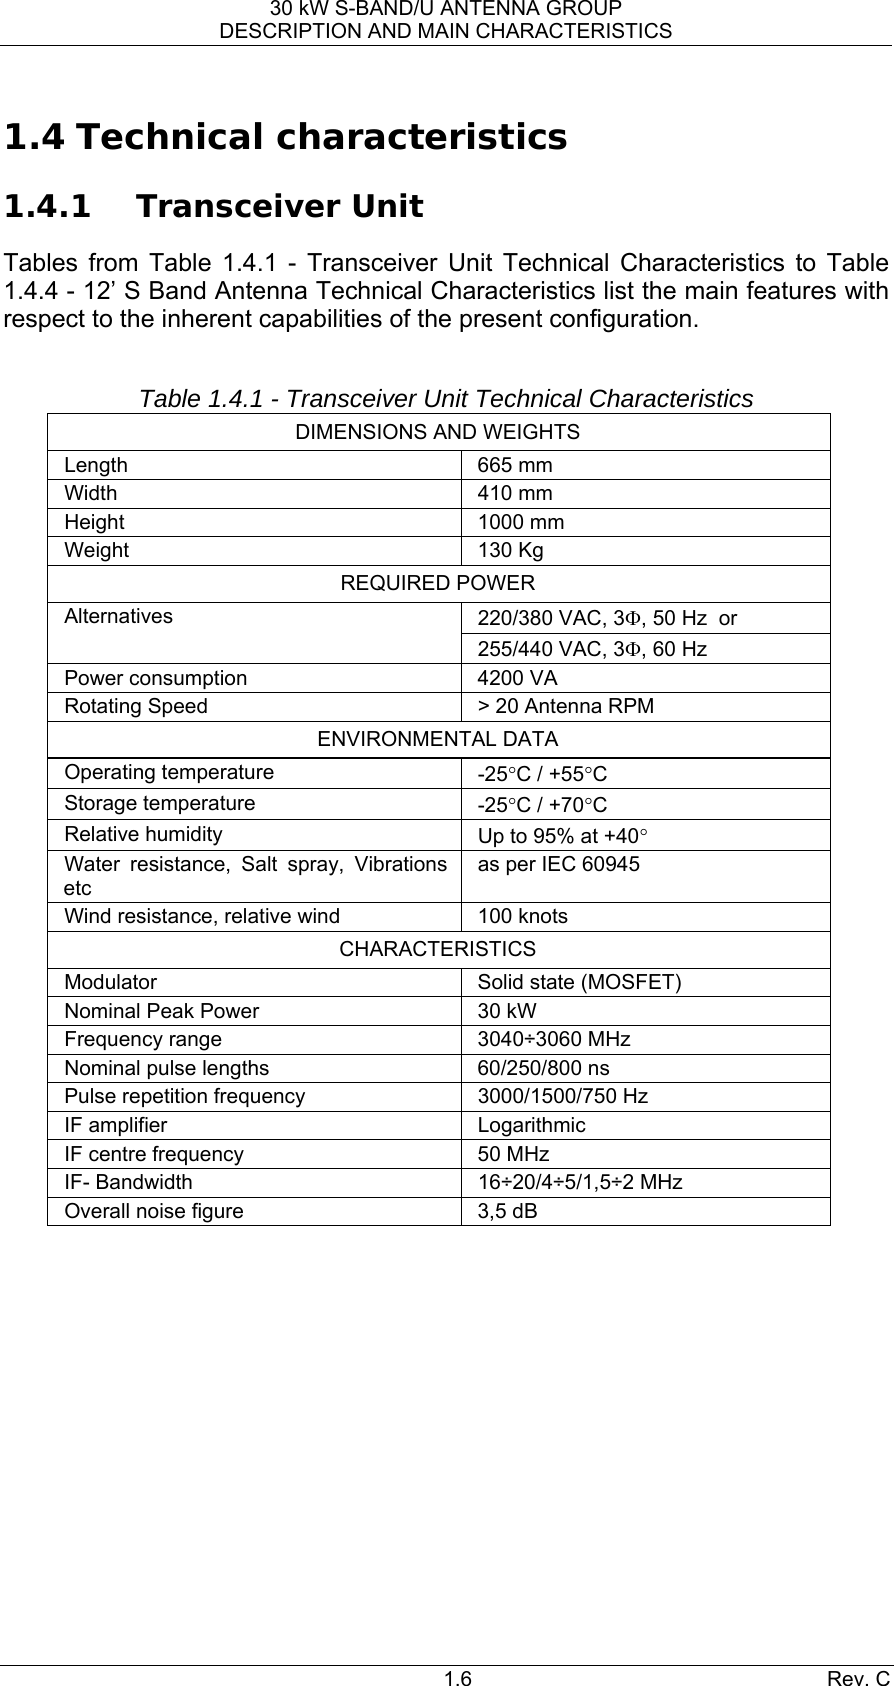
1.
Users Manual 1
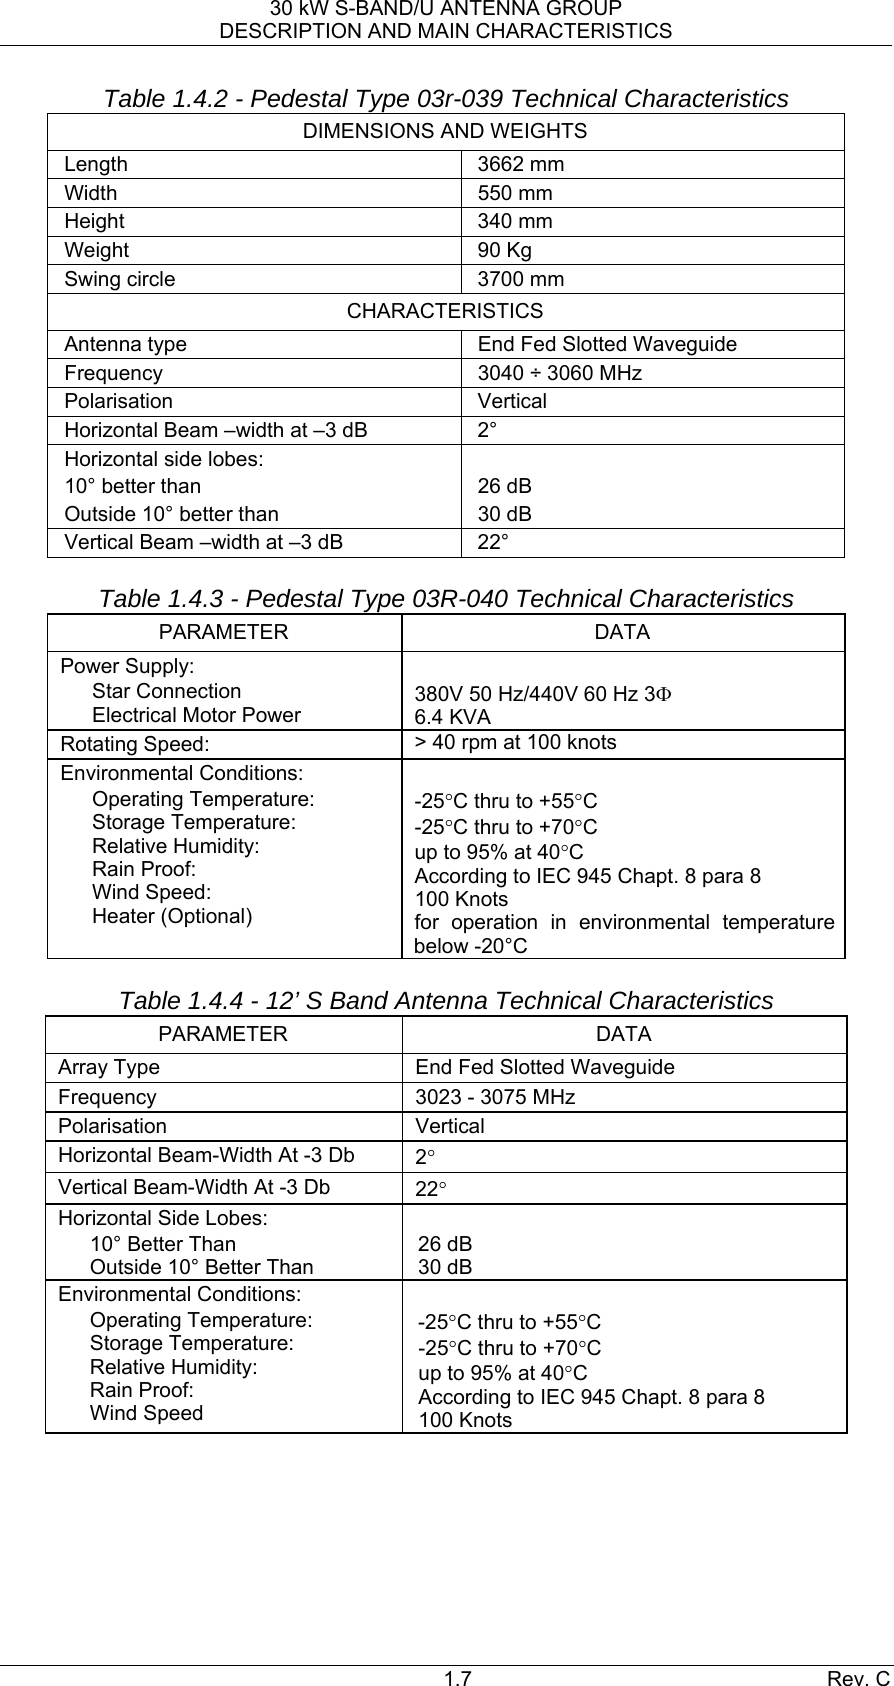
2.
Users Manual 2
Users Manual 1
Navigation menu
Upload a User Manual
Namespaces
Wiki Guide
HTML
PDF
Info
Views
User Manual
Discussion / Help
Navigation