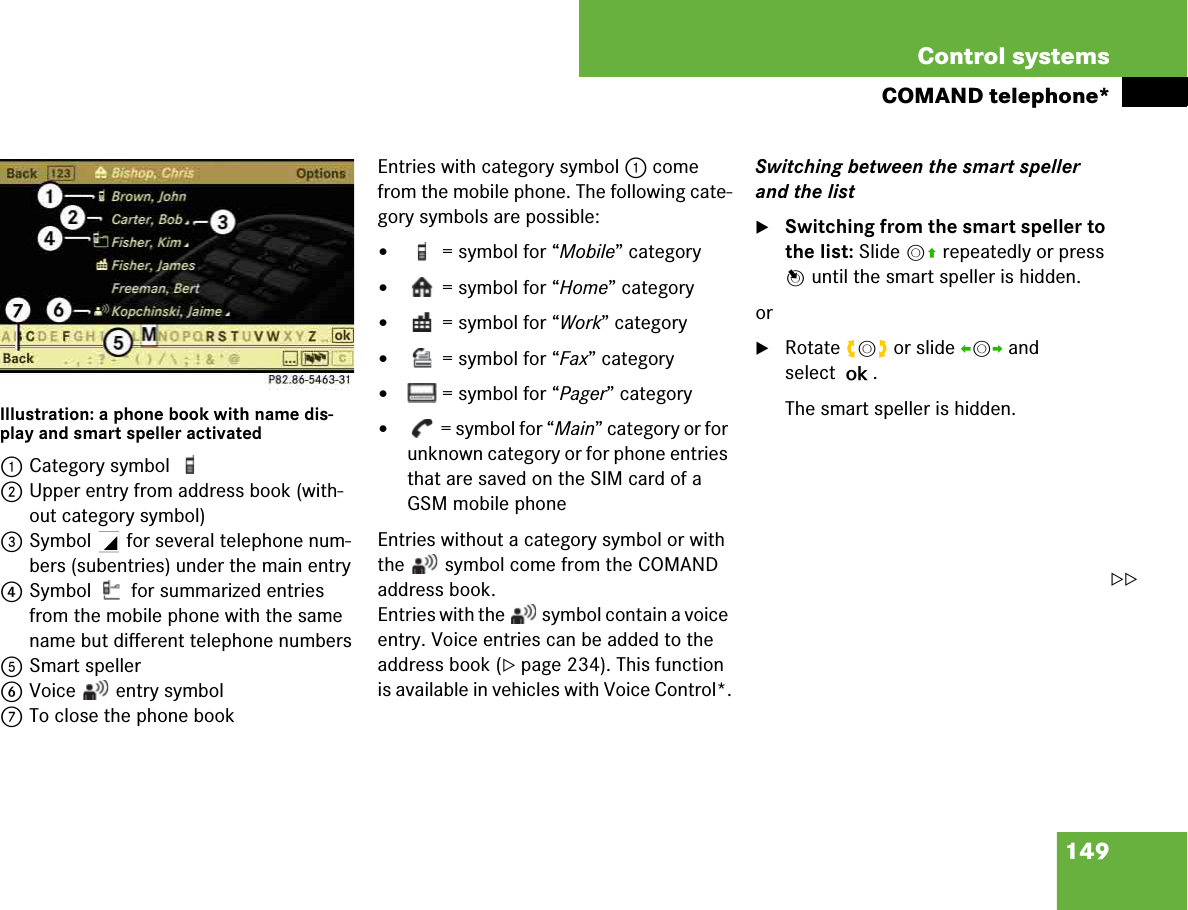
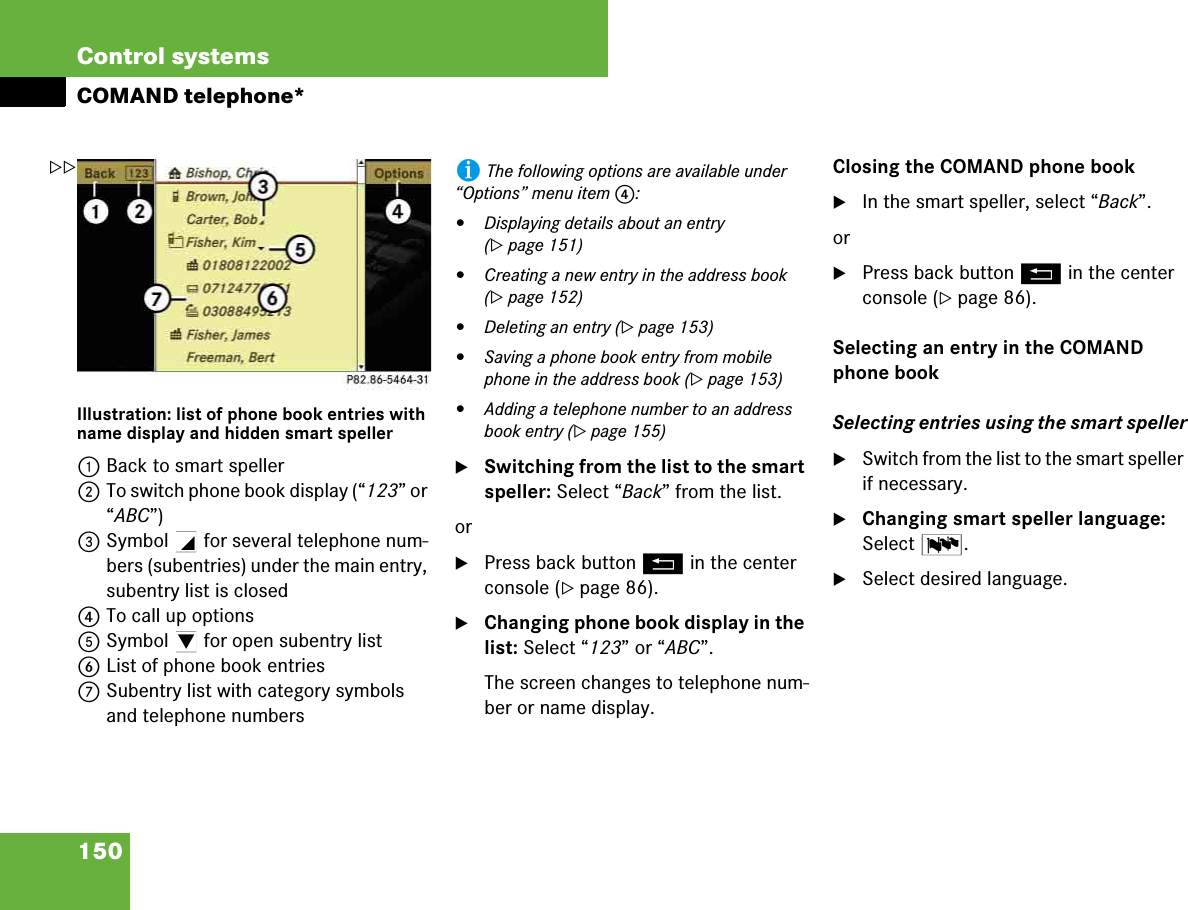
Continental Automotive Systems UHI-5100 Bluetooth Handsfree Car Kit with HFP User Manual
Continental Automotive Systems, Inc. Bluetooth Handsfree Car Kit with HFP
UserManual.wiki
>
Continental Automotive Systems
>
UHI 5100 User Manual
User Manual
Navigation menu
Upload a User Manual
Namespaces
Wiki Guide
HTML
PDF
Info
Views
User Manual
Discussion / Help
Navigation


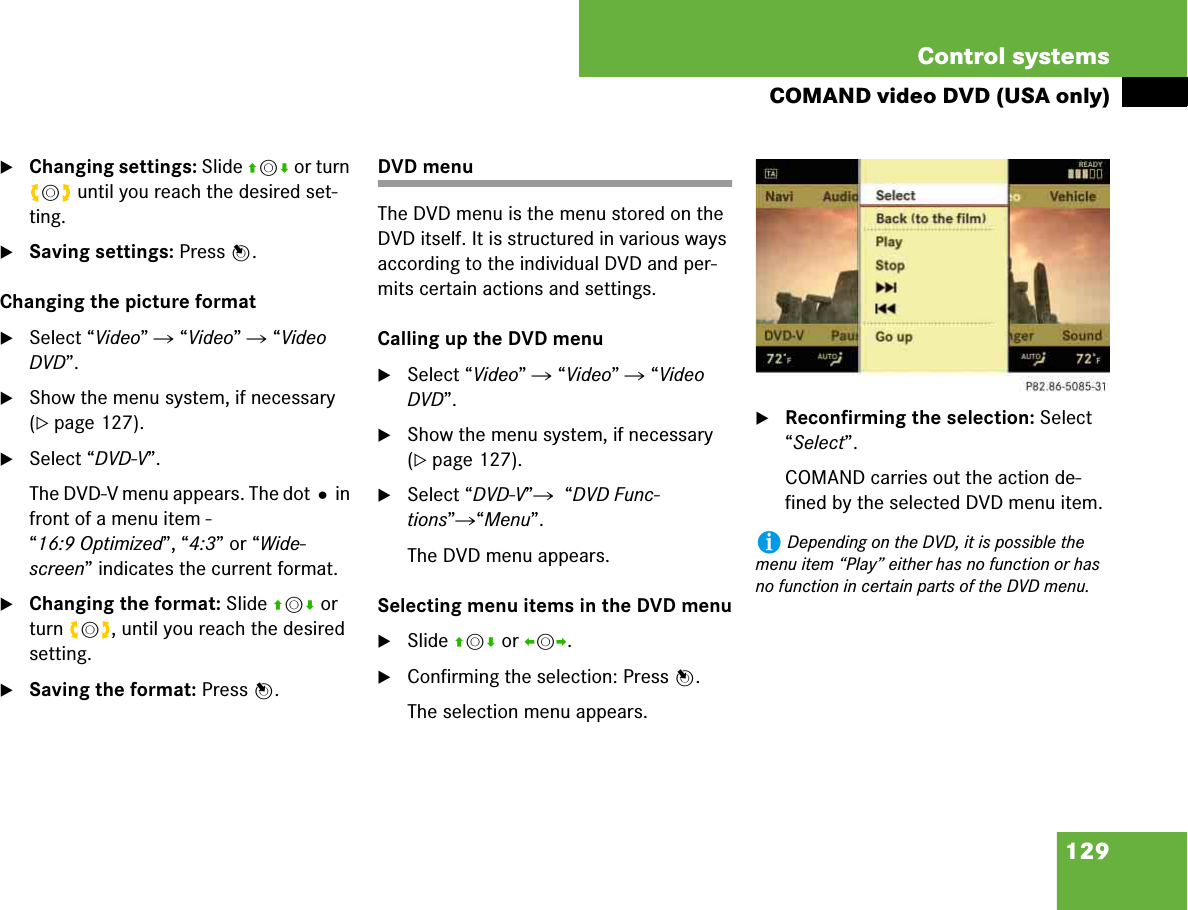
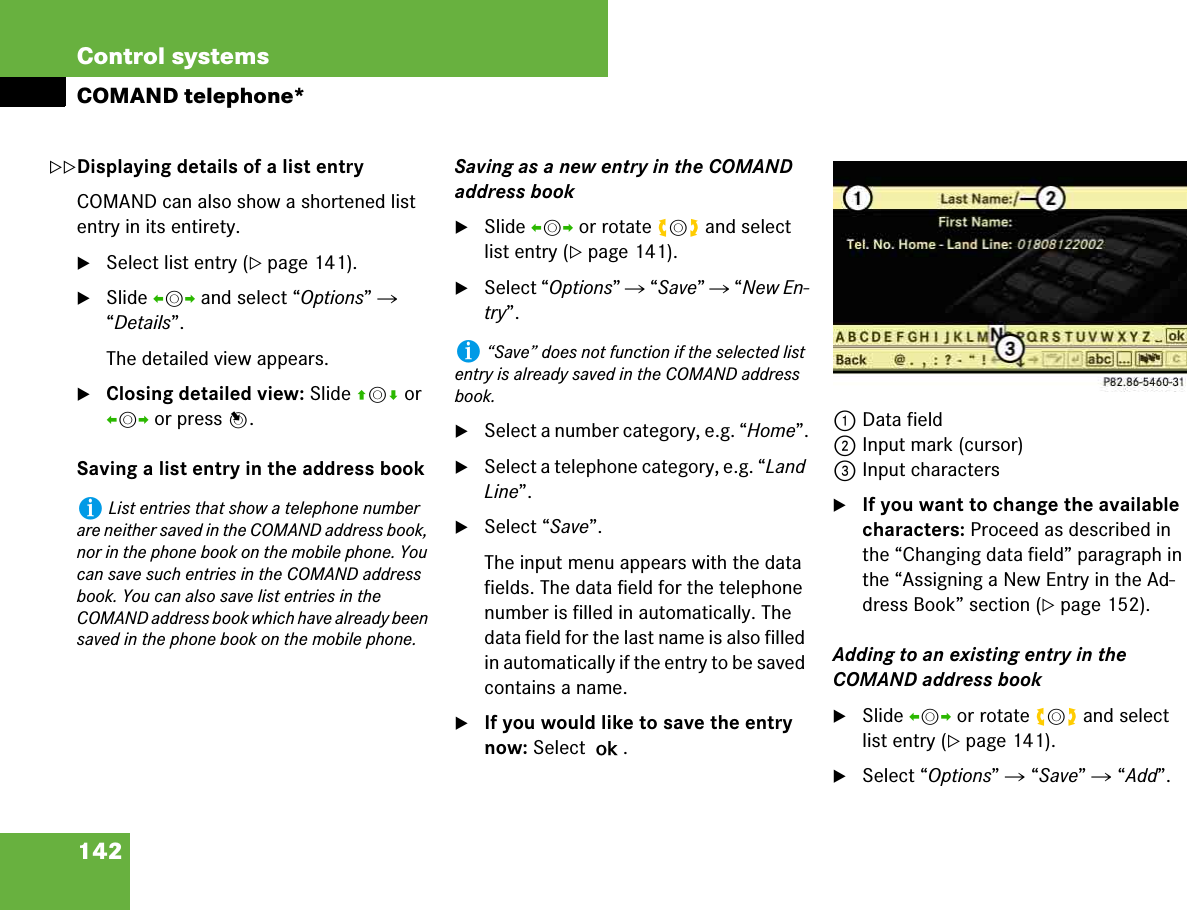
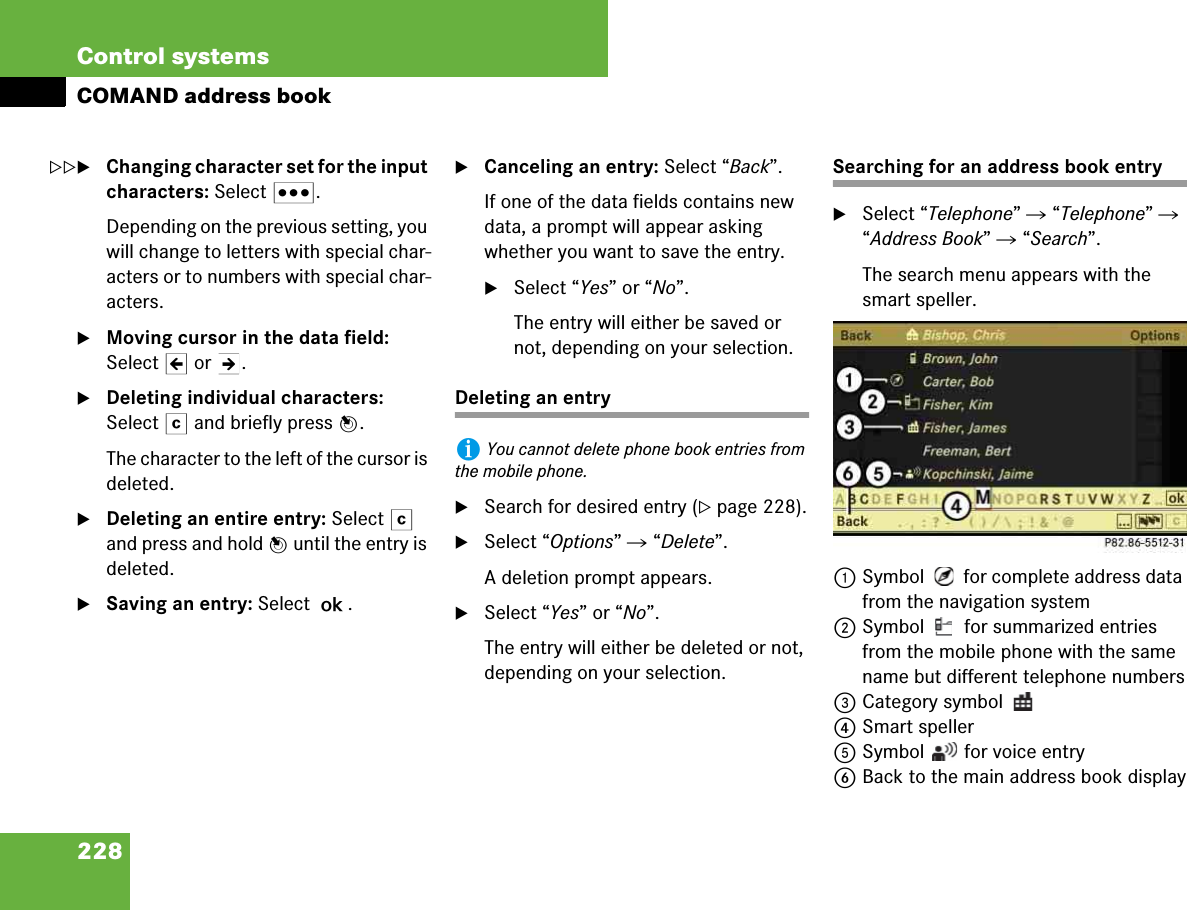
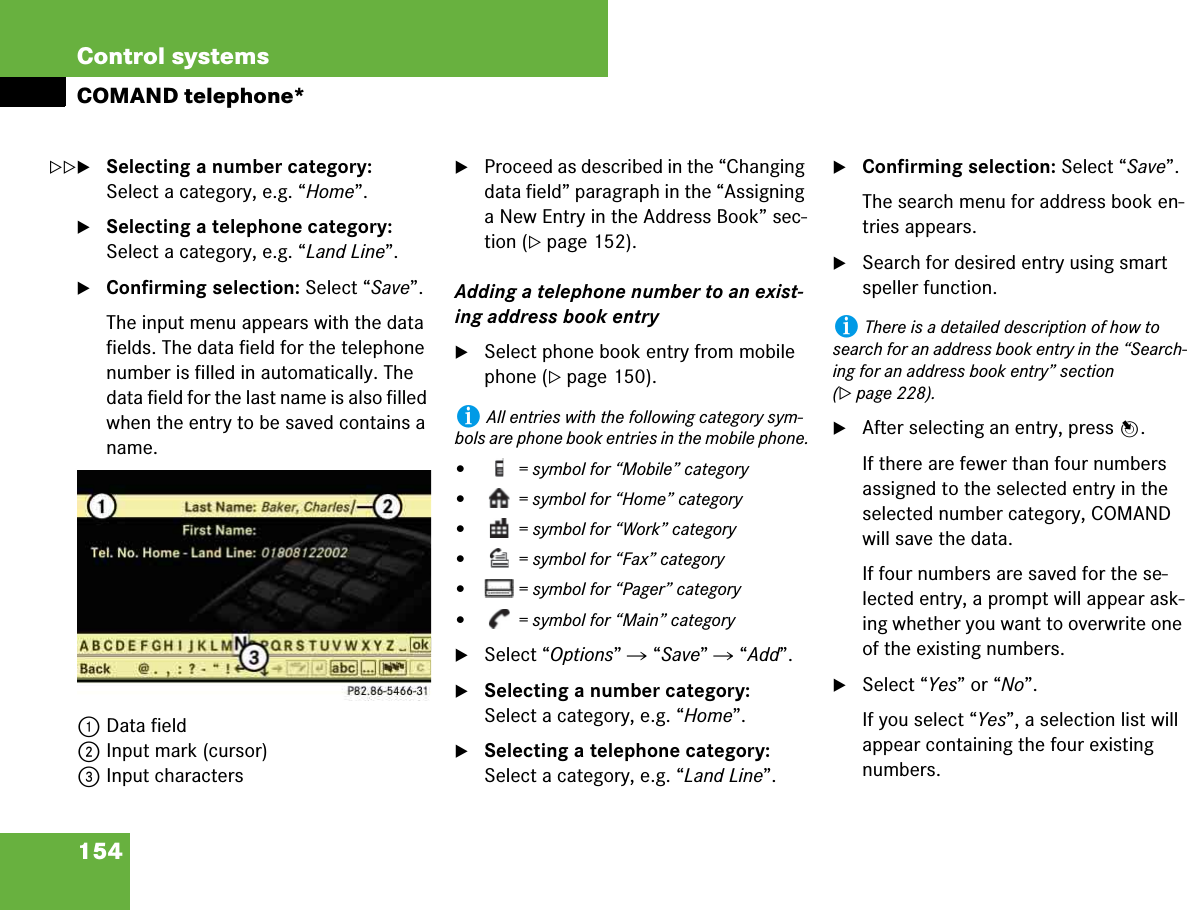
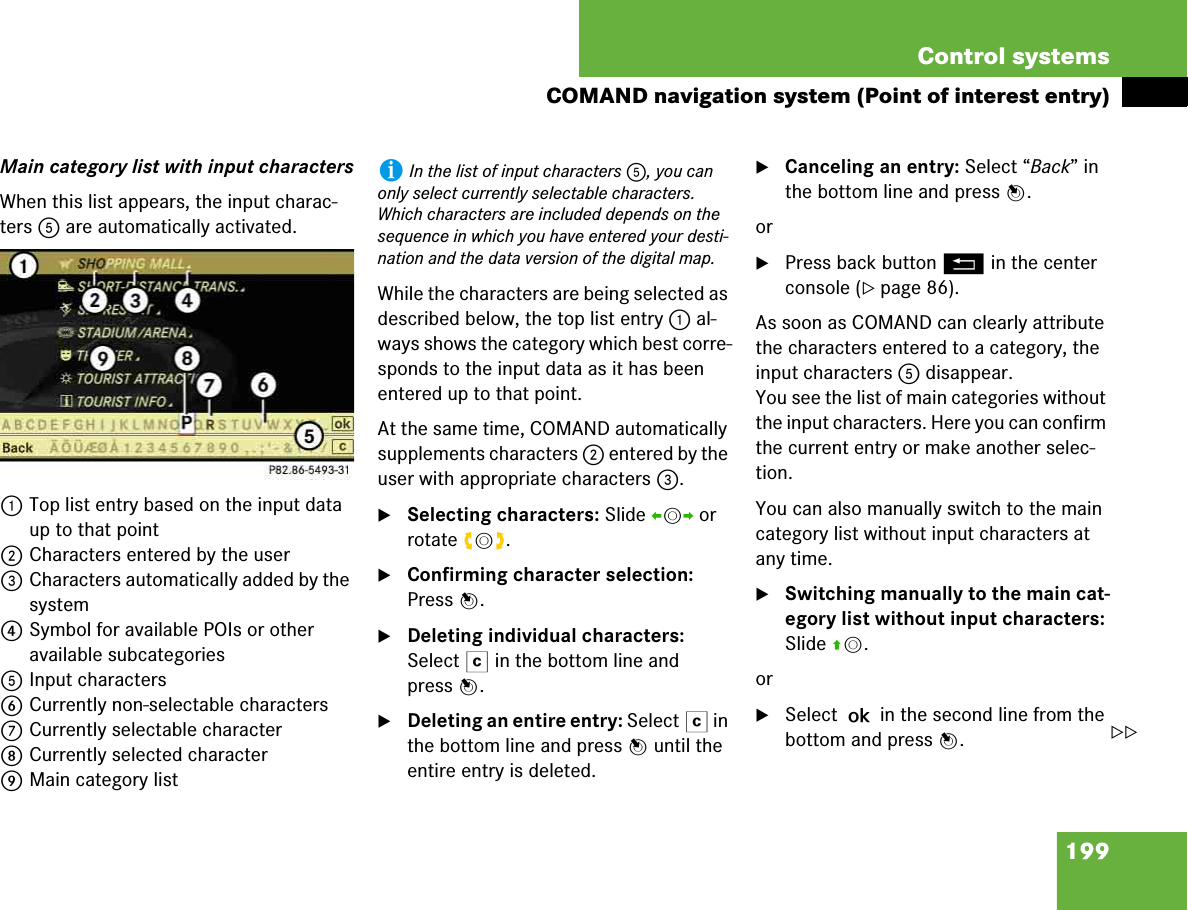
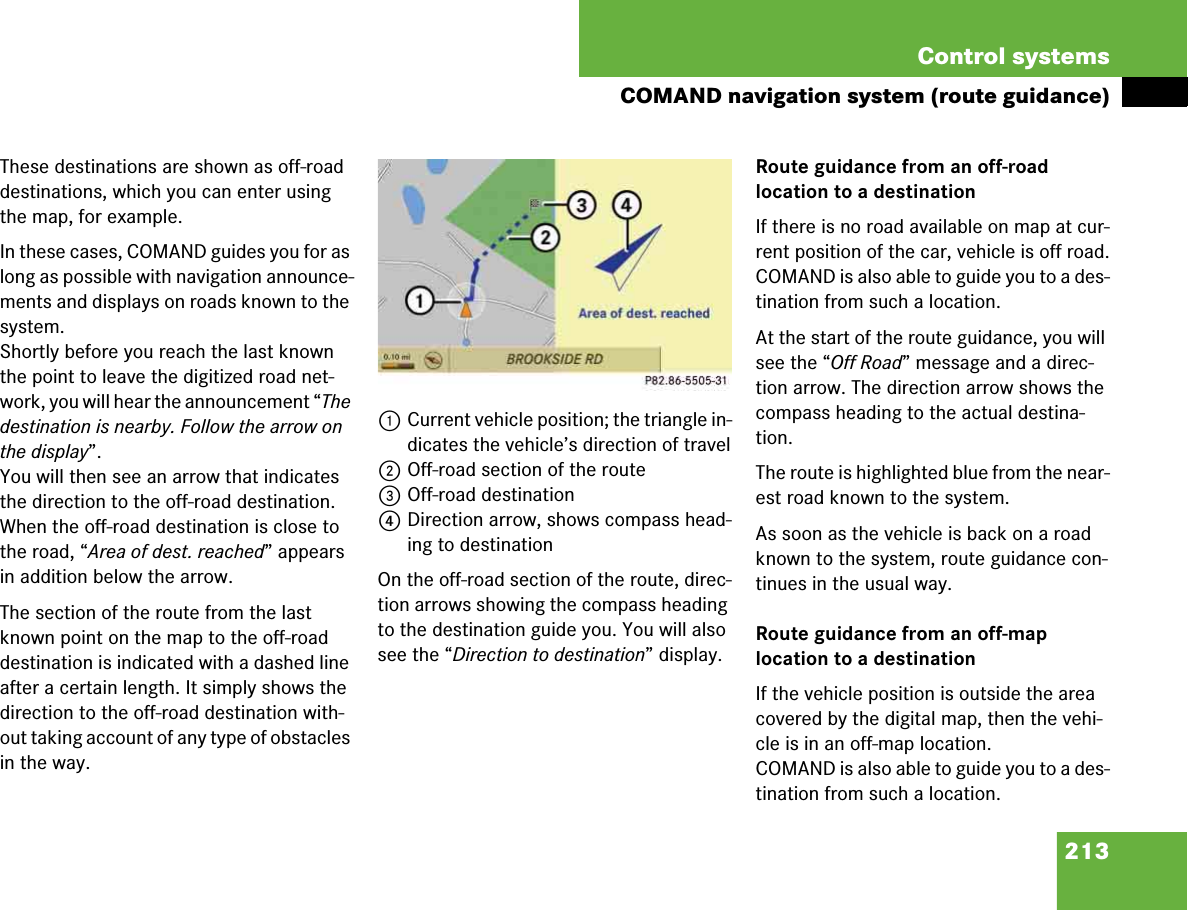
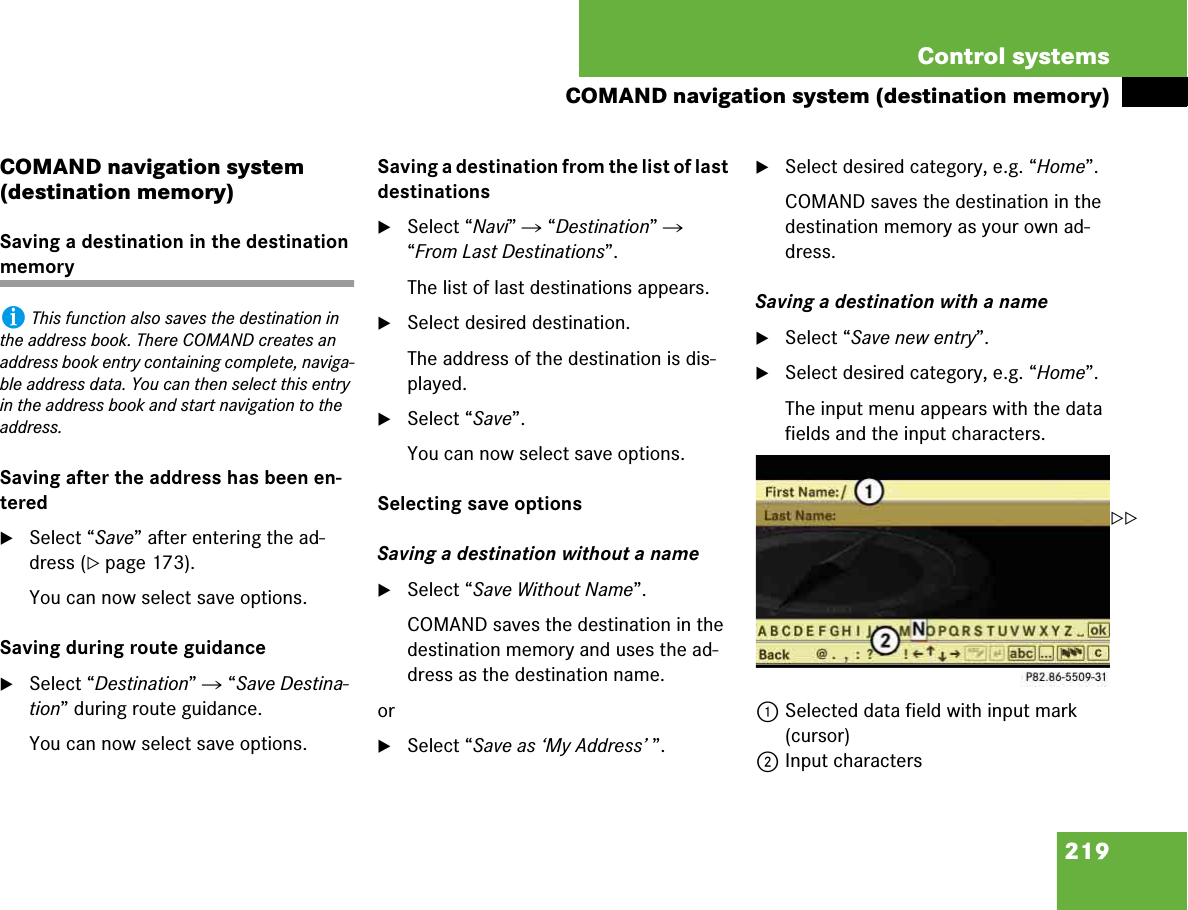
![152Control systemsCOMAND telephone*Assigning a New Entry in the Address Book왘Select “Options” “New Entry” in the COMAND phone book list.왘Selecting a number category: Select a category, e.g. “Home”.왘Selecting a telephone category: Select a category, e.g. “Land Line”.왘Confirming selection: Select “Save”.The input menu appears with the data fields.1Data field2Input mark (cursor)3Input characters왘Changing data field: Slide qmr re-peatedly until desired data field is high-lighted.or 왘Select [ or ] repeatedly until de-sired data field is highlighted.왘Entering data into a field: Select all characters one by one from the input characters line 3.왘Toggling upper and lower case for the input characters: Select & or (.왘Changing language for the input characters: Select !.왘Select desired language.왘Changing character set for the input characters: Select #.Depending on the previous setting, you will change to letters with special char-acters or to numbers with special char-acters.왘Displaying special characters as in-put characters: Select ! “Sym-bols”.왘Returning input characters to nor-mal characters: Select ! the desired language.왘Moving cursor in the data field: Select Y or Z.iThis function is used to create a new entry in the address book and to enter the data (first name, last name and telephone number) manu-ally.컄컄](https://usermanual.wiki/Continental-Automotive-Systems/UHI-5100/User-Guide-778784-Page-70.png)
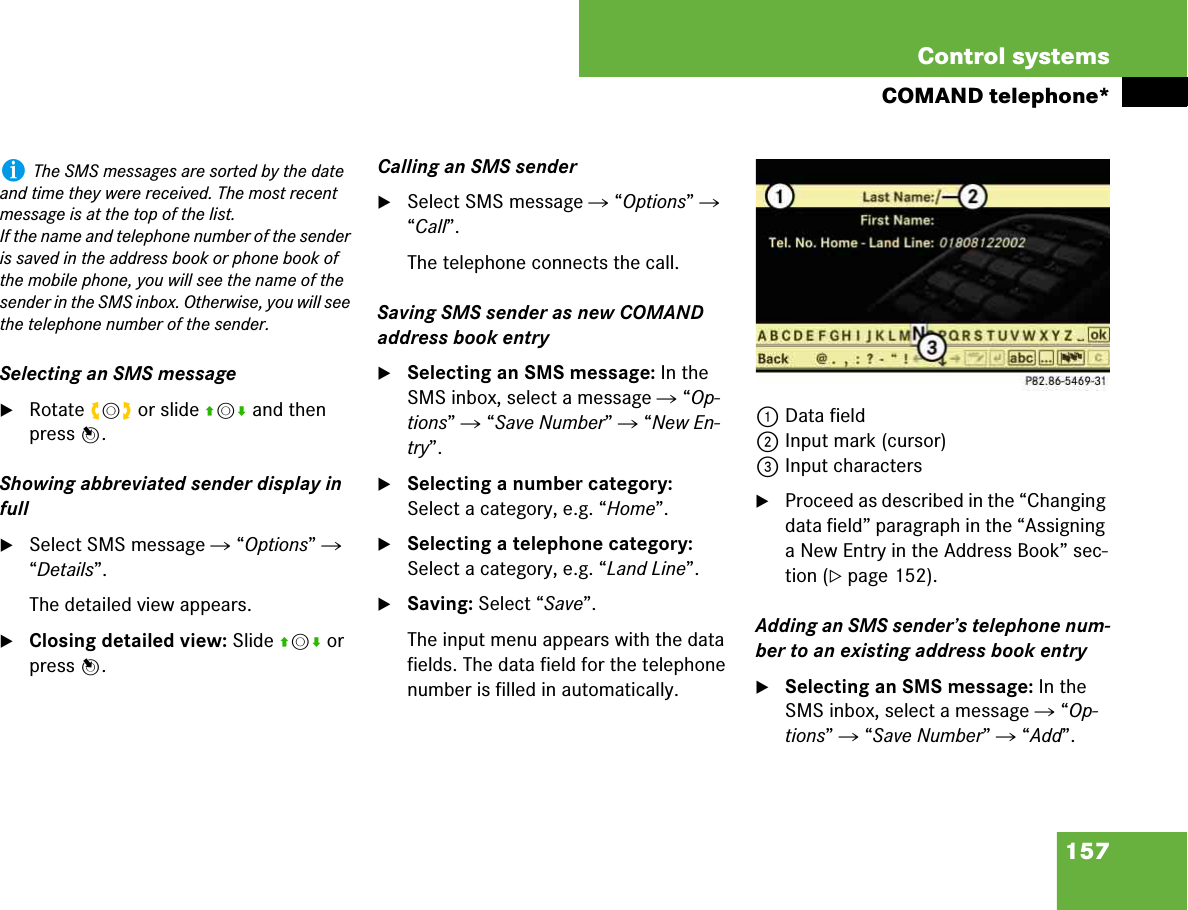


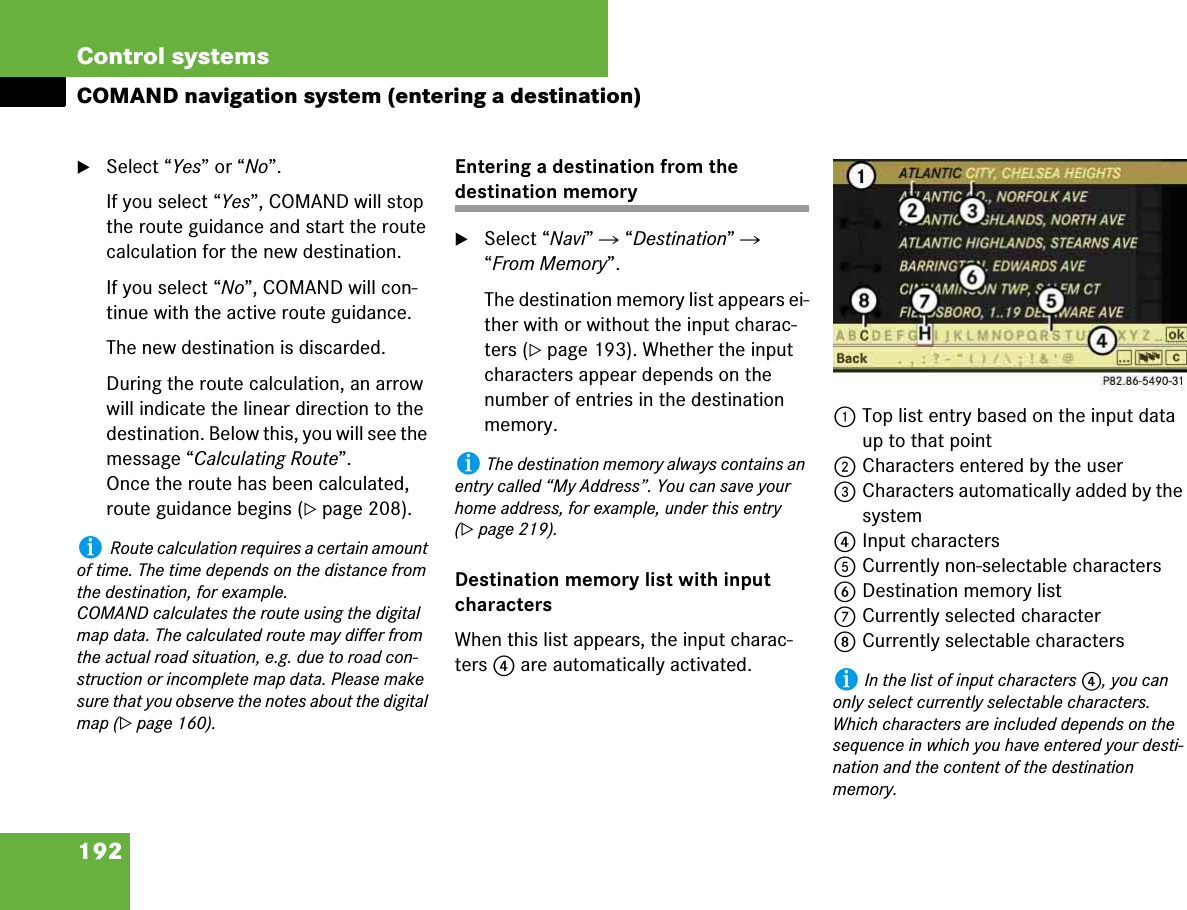
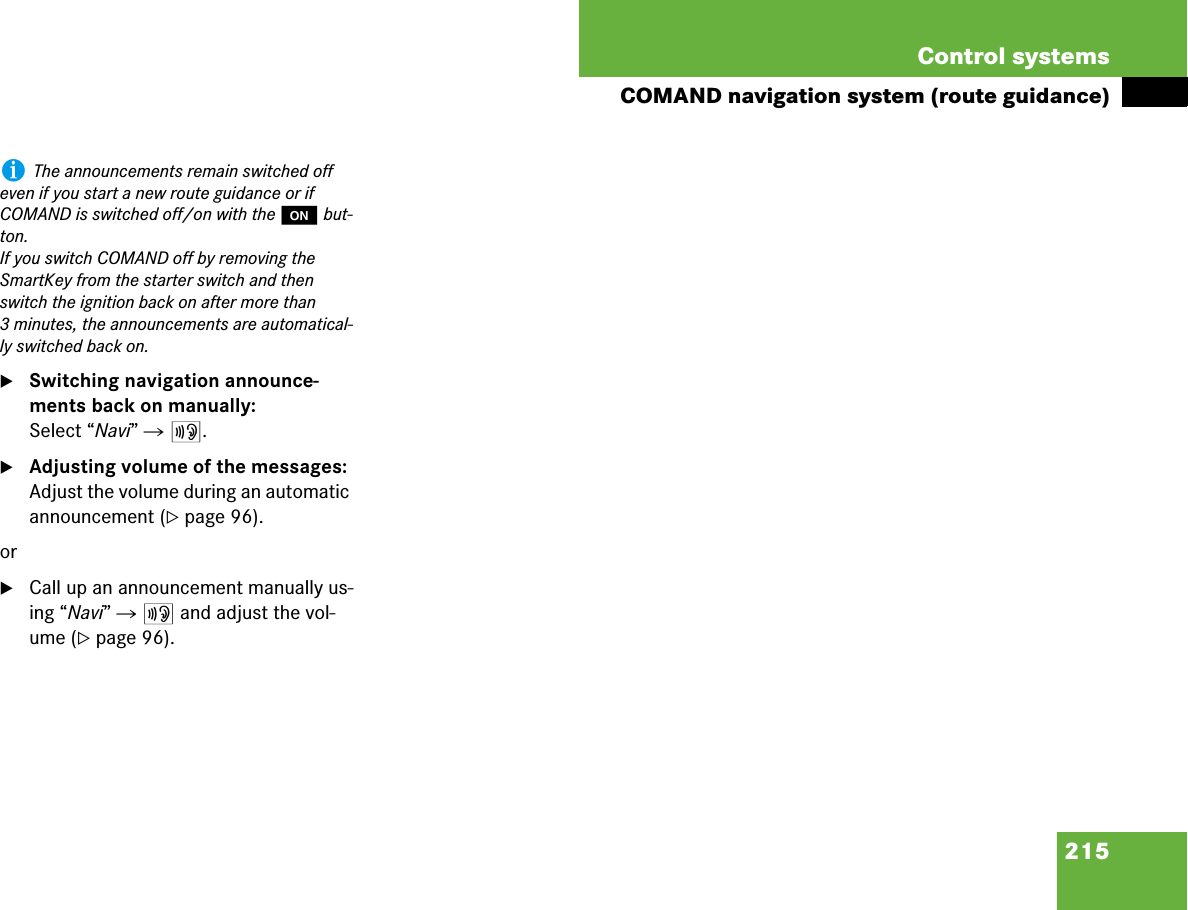

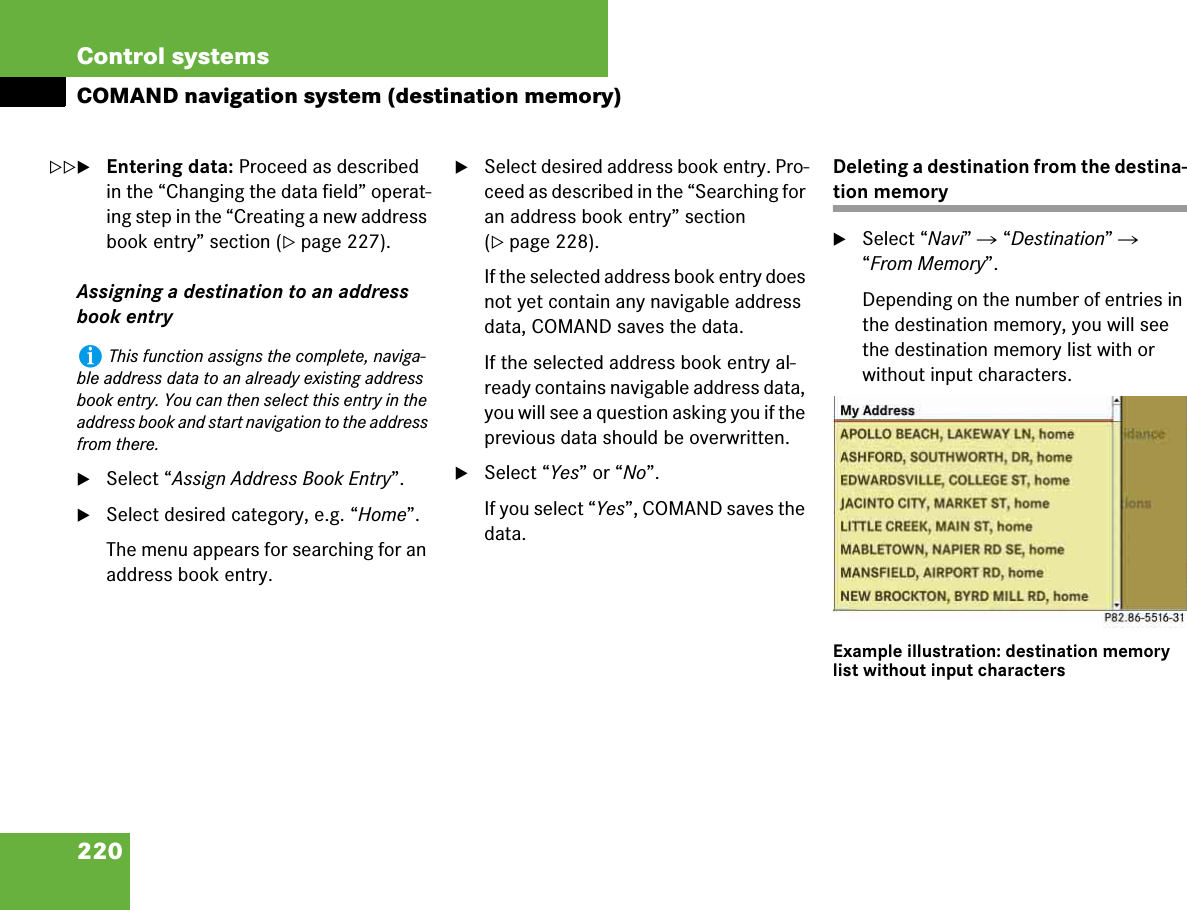
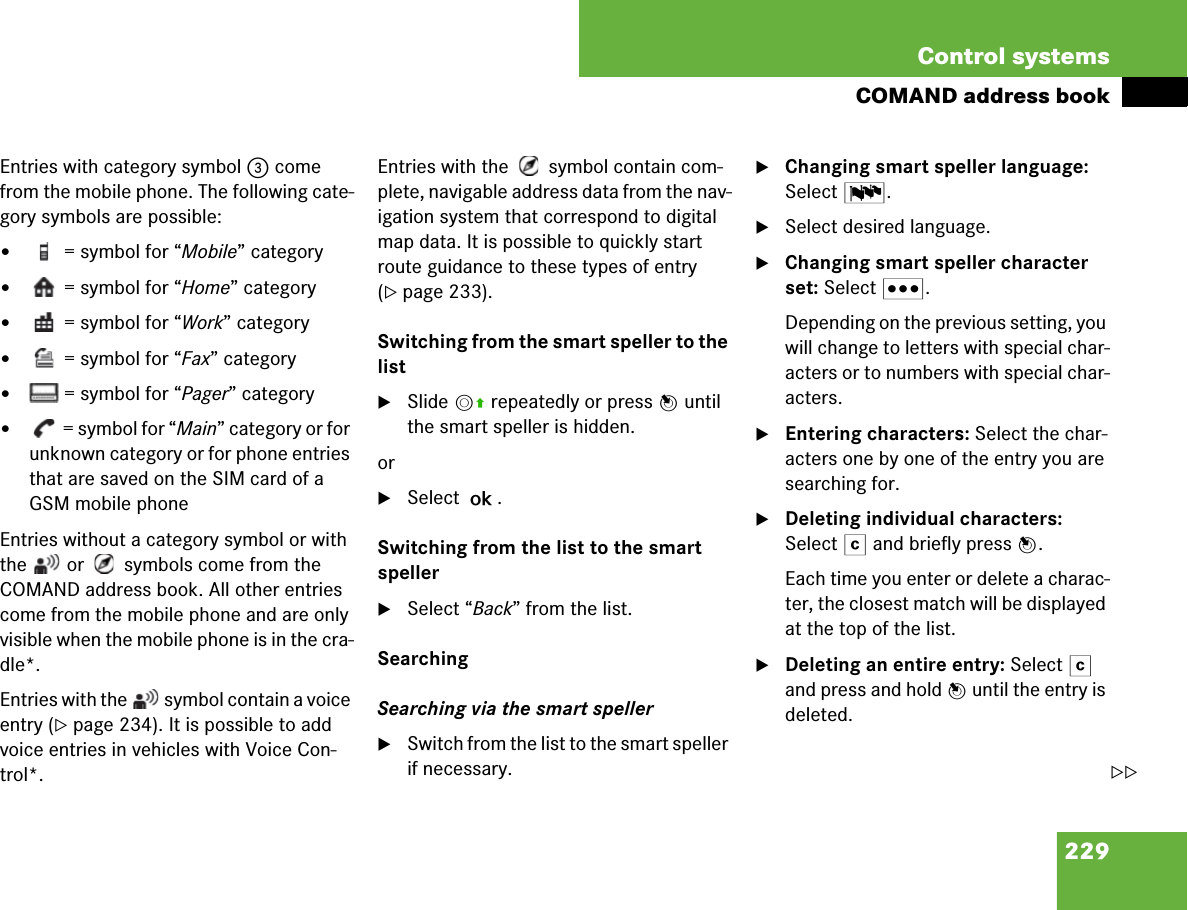
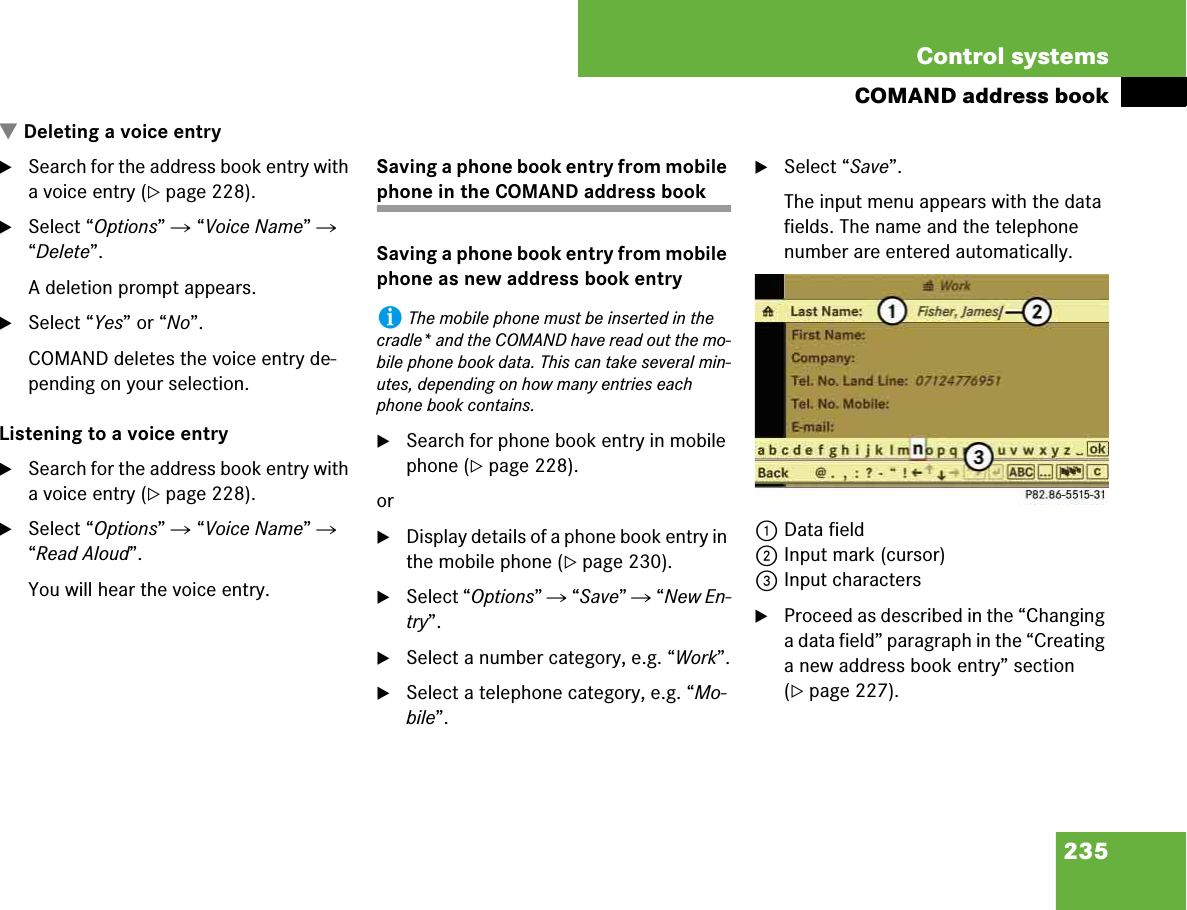
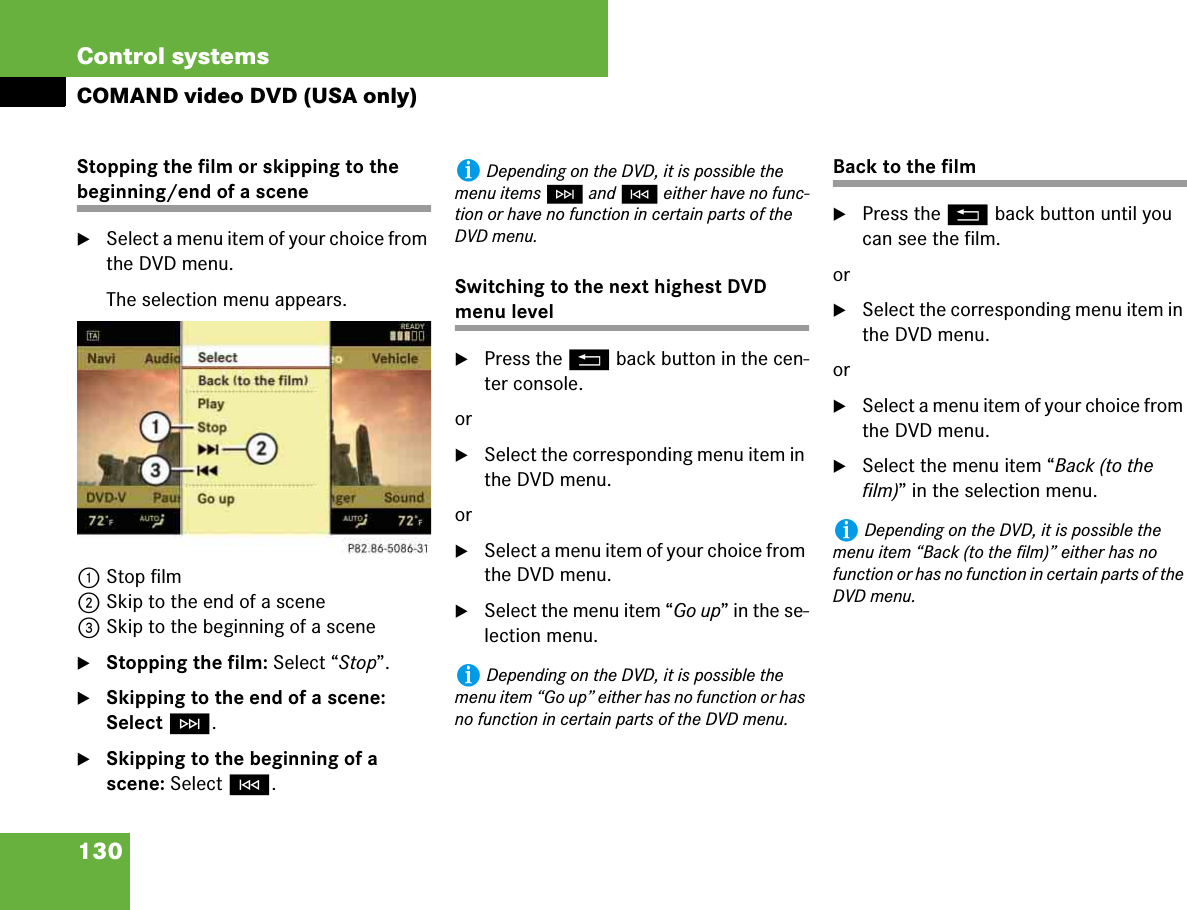
![227Control systemsCOMAND address bookSelecting an entry in the main address book display왘Slide omp or rotate ymz until the main area is selected.Creating a new address book entry왘Select “Telephone” “Telephone” “Address Book” “New Entry”.The input menu appears with the data fields and the input characters.Illustration: input menu for private data1To switch between work and home data ( or symbol)2Selected data field with input mark (cursor)3Display of set data type – in example display, home data is set ( symbol and “Home” display)4Input characters왘Switching between private and business data: Select symbol 1.The display switches to private or busi-ness data, depending on the previous status.왘Changing data field: Slide rmq re-peatedly until desired entry is highlight-ed.or왘Select [ or ] repeatedly until de-sired entry is highlighted. 왘Entering data into a field: Select desired characters one by one from the input characters.왘Toggling upper and lower case for the input characters: Select & or (.왘Changing language for the input characters: Select !.왘Select desired language.iPlease observe the following when creating a new address book entry:You can define your own address in the destina-tion memory in navigation mode. When defining the address, you can transfer data already en-tered as an address book entry.In the address book entry, the town/city and street must be spelled in the same way as the destination entry so that the data matches the digital map data. In order for the state (province) to match the map data, its complete name or abbreviation may be entered.Examples:앫Florida or FL앫Colorado or CO앫Alberta or AB앫Ontario or ON컄컄](https://usermanual.wiki/Continental-Automotive-Systems/UHI-5100/User-Guide-778784-Page-145.png)