Continental Conair GH3100H Cordless Phone User Manual GH3150ib eng1
Continental Conair Limited Cordless Phone GH3150ib eng1
UserManual.wiki
>
Continental Conair
>
GH3100H User Manual
>
Usera Manual
Contents
1.
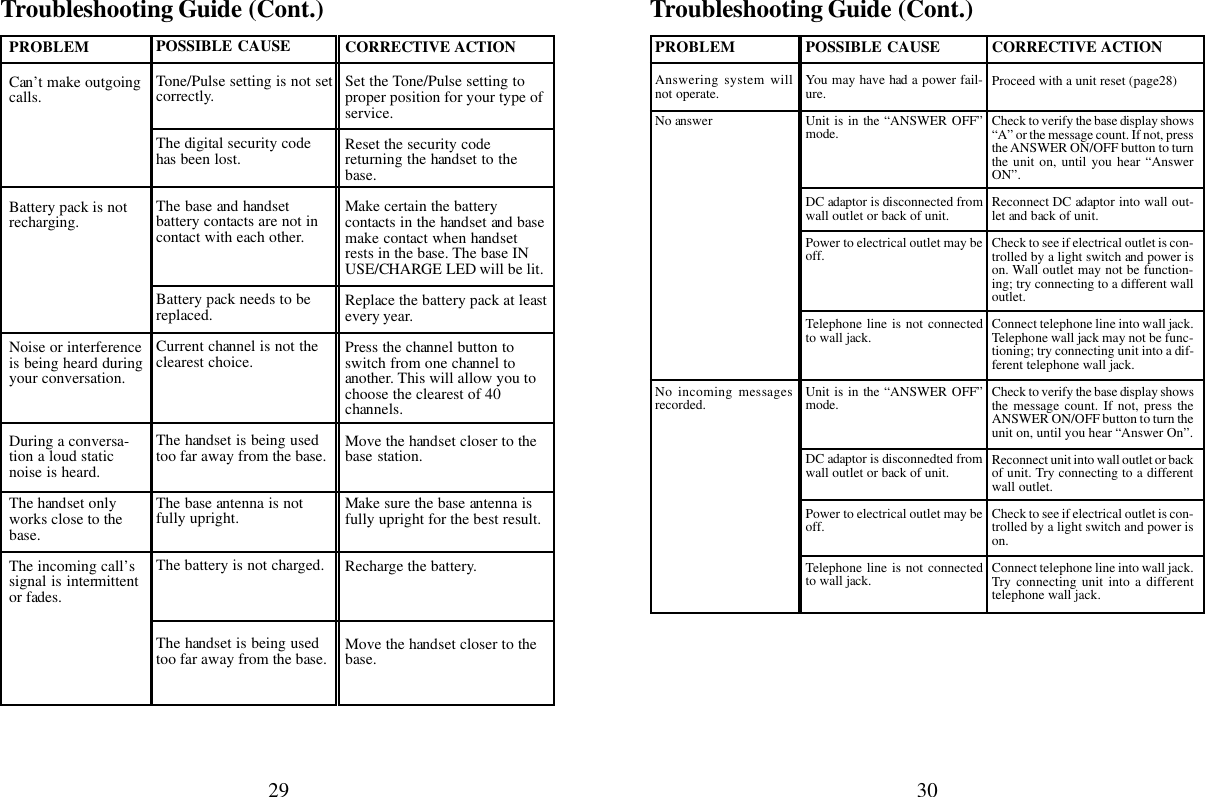
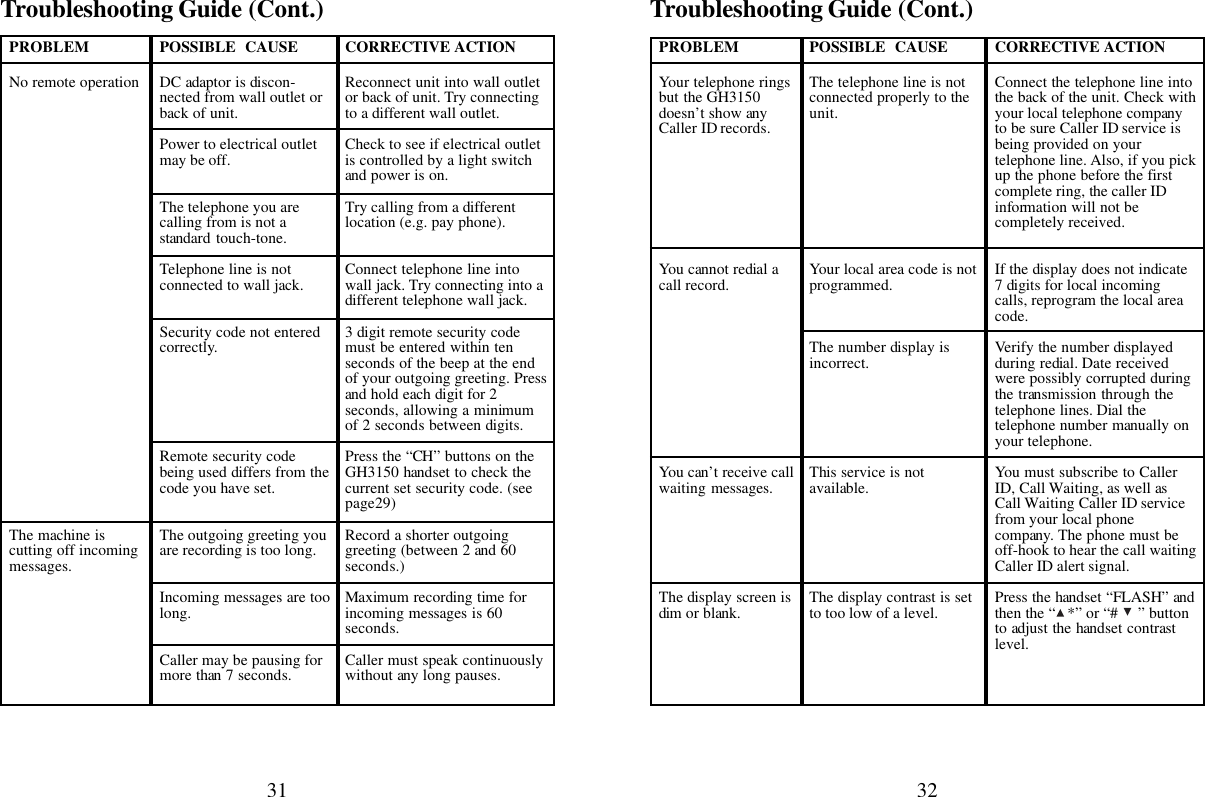
Usera Manual
2.
GH3100 Users Manual
3.
GH3110 Users Manual
Usera Manual
Navigation menu
Upload a User Manual
Namespaces
Wiki Guide
HTML
PDF
Info
Views
User Manual
Discussion / Help
Navigation

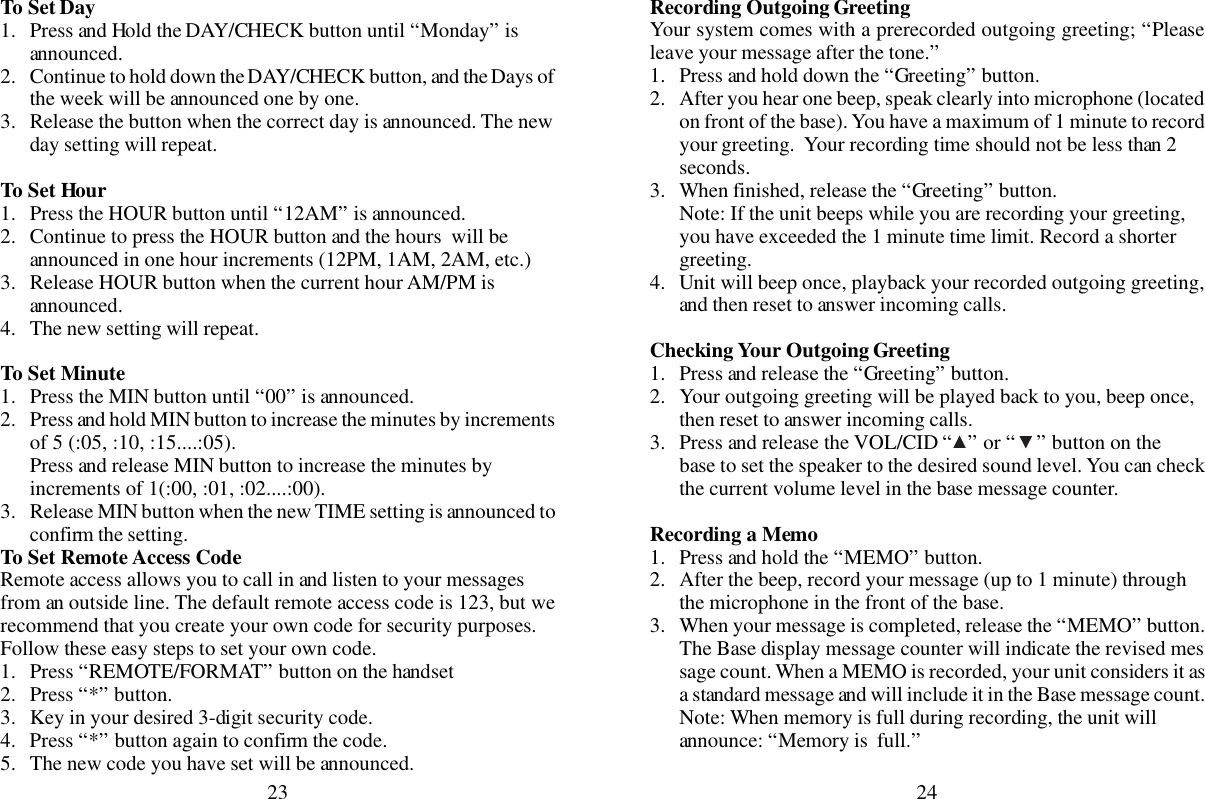
![33 34FCC Wants You To KnowThis equipment complies with Part 68 of the FCC rules and the re-quirements adopted by the ACTA. On the bottom of this equipmentis a label that contains, among other information, a product identifierin the format US:AAAEQ##TXXXX. If requested, this number mustbe provided to the telephone company. You must, upon request, pro-vide this information to your telephone company.FCC compliant telephone cord and modular plug are provided withthis equipment. This equipment is designed to be connected to thetelephone network or premise wiring using a compatible modularjack which is Part 68 compliant. See installation instructions for de-tails.The REN is used to determine the number of devices that may beconnected to a telephone line. Excessive RENs on a telephone linemay result in the devices not ringing in response to an incoming call.In most but not all areas, the sum of RENs should not exceed five(5.0).To be certain of the number of devices that may be concerned to aline, as determined by the total RENs, contact the local telephonecompany. [For products approved after July 23, 2001, the REN forthis product is part of the product identifier that has the formatUS:AAAEQ##TXXXX. The digits represented by ## are the RENwithout a decimal point (e.g., 03 is a REN of 0.3). For earlier prod-ucts, the REN is separately shown on the label.].If your telephone equipment causes harm to the telephone network,the telephone company may discontinue your service temporarily. Ifpossible, they will notify you in advance. But if advance notice isn’ tpractical, you will be notified as soon as possible. You will be in-formed of your right to file a complaint with the FCC.Your telephone company may make changes in its facilities, equip-ment, operations, or procedures that could affect the proper func-tioning of your equipment. If they do, you will be notified in advanceto give you an opportunity to maintain uninterrupted telephone ser-vice. If you experience trouble with this telephone equipment, dis-connect from the network until the problem has been corrected oruntil you are sure that the equipment is not malfunctioning.This equipment may not be used on coin service provided by thetelephone company.Connection to party lines is subject to state tariffs.This equipment is hearing aid compatible.An applicable certification jacks Universal Service Order Codes(USOC) for the equipment is provided (i.e., RJ11C) in the packagingwith each piece of approved terminal equipment.Warning: Changes or modifications to this unit not expressly approvedby the party responsible for compliance could void the user’s au-thority to operate the equipment.NOTICE: If your home has specially wired alarm equipment con-nected to the telephone line, ensure the installation of this [GH3150]does not disable your alarm equipment. If you have questions aboutwhat will disable alarm equipment, consult your telephone companyor a qualified installer.NOTE: This equipment has been tested and found to comply with thelimits for a Class B digital device, pursuant to Part 15 of the FCCRules. These limits are designed to provide reasonable protectionagainst harmful interference in a residential installation. This equip-ment generates, uses, and can radiate radio frequency energy not in-stalled and used in accordance with the instructions, may cause harmfulinterference to radio communication. However, there is no guaranteethat interference will not occur in a particular installation. If thisequipment does cause harmful interference to radio or television re-ception, which can be determined by turning the equipment off andon, the user is encouraged to try to correct the interference by one ormore of the following measures:* Reorient or relocate the receiving antenna.* Increase the separation between the equipment and receiver.* Connect the equipment to an outlet on a circuit different fromthat to which the receiver is connected.* Consult the dealer or an experienced radio TV technician forhelp.](https://usermanual.wiki/Continental-Conair/GH3100H.Usera-Manual/User-Guide-421236-Page-18.png)