Continental Conair GH3100H Cordless Phone User Manual 3110ib eng
Continental Conair Limited Cordless Phone 3110ib eng
UserManual.wiki
>
Continental Conair
>
GH3100H User Manual
>
GH3110 Users Manual
Contents
1.
Usera Manual
2.
GH3100 Users Manual
3.
GH3110 Users Manual
GH3110 Users Manual
Navigation menu
Upload a User Manual
Namespaces
Wiki Guide
HTML
PDF
Info
Views
User Manual
Discussion / Help
Navigation


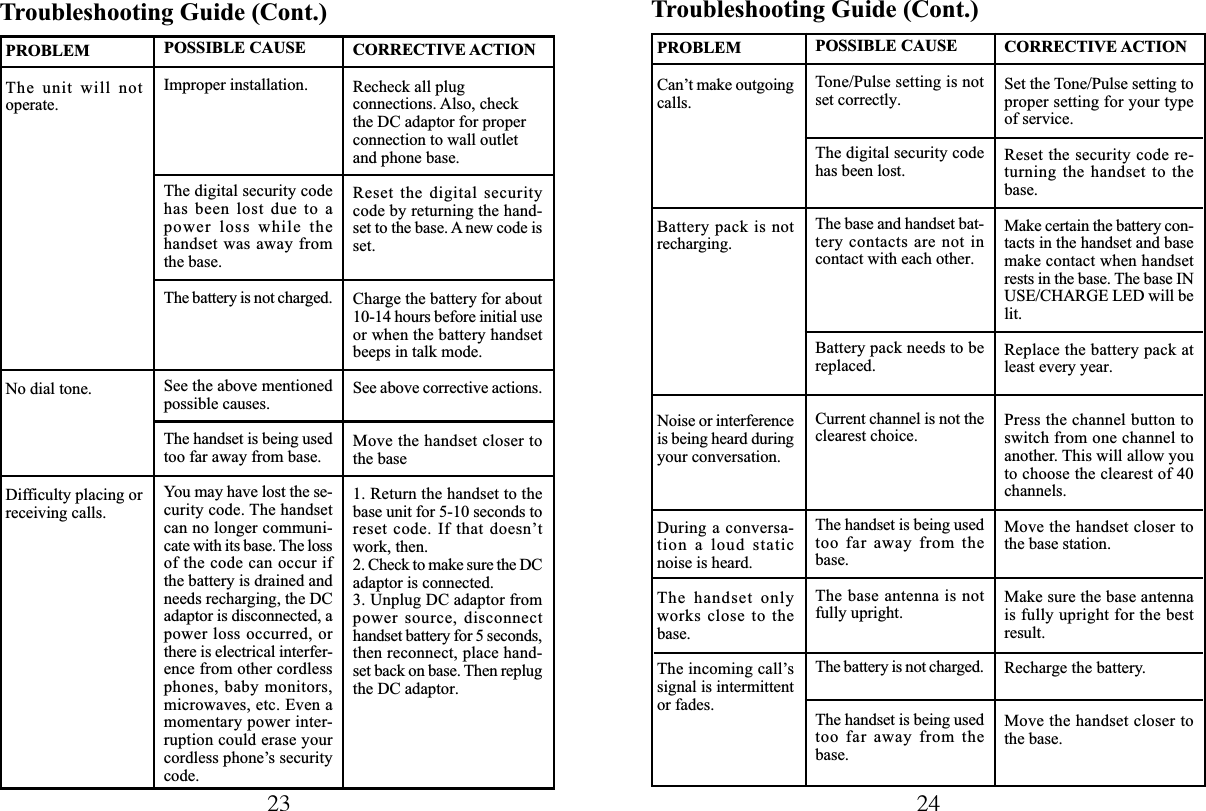
![OR OSTroubleshooting Guide (Cont.)PROBLEMYour telephonerings but theGH3110 doesn’tshow any CallerID records.You cannot rediala call record.You can’t receivecall waitingmessages.POSSIBLE CAUSEThe telephone line isnot connected properlyto the unit.Your local area code isnot programmed.The number displayedis incorrect.This service is notavailable.CORRECTIVE ACTIONConnect the telephoneline into the back of theunit. Check with your lo-cal telephone company tobe sure Caller ID serviceis being provided on yourtelephone line. Also, ifyou pick up the phone be-fore the first completering, the caller ID infor-mation will not be com-pletely received.If the display does not in-dicate 7 digits for local in-coming calls, reprogramthe local area code.Verify the number dis-played during redial. Datereceived were possiblycorrupted during thetransmission through thetelephone lines. Dial thetelephone number manu-ally on your telephone.You must subscribe toCaller ID, Call Waiting, aswell as Call WaitingCaller ID service fromyour local phonecompany. The phonemust be off-hook to hearthe call waiting Caller IDalert signal.FCC Wants You To KnowThis equipment complies with Part 68 of the FCC rules and the require-ments adopted by the ACTA. On the bottom of this equipment is a labelthat contains, among other information, a product identifier in the for-mat US:AAAEQ##TXXXX. If requested, this number must be pro-vided to the telephone company. You must, upon request, provide thisinformation to your telephone company.FCC compliant telephone cord and modular plug are provided with thisequipment. This equipment is designed to be connected to the telephonenetwork or premise wiring using a compatible modular jack which isPart 68 compliant. See installation instructions for details.The REN is used to determine the number of devices that may be con-nected to a telephone line. Excessive RENs on a telephone line mayresult in the devices not ringing in response to an incoming call. Inmost but not all areas, the sum of RENs should not exceed five(5.0). Tobe certain of the number of devices that may be concerned to a line, asdetermined by the total RENs, contact the local telephone company.[For products approved after July 23, 2001, the REN for this product ispart of the product identifier that has the format US:AAAEQ##TXXXX.The digits represented by ## are the REN without a decimal point (e.g.,03 is a REN of 0.3). For earlier products, the REN is separately shownon the label.].If your telephone equipment causes harm to the telephone network, thetelephone company may discontinue your service temporarily. Ifpossible, they will notify you in advance. But if advance notice isn'tpractical, you will be notified as soon as possible. You will be informedof your right to file a complaint with the FCC.Your telephone company may make changes in its facilities, equipment,operations, or procedures that could affect the proper functioning ofyour equipment. If they do, you will be notified in advance to give youan opportunity to maintain uninterrupted telephone service. If you ex-perience trouble with this telephone equipment, disconnect from thenetwork until the problem has been corrected or until you are sure thatthe equipment is not malfunctioning.](https://usermanual.wiki/Continental-Conair/GH3100H.GH3110-Users-Manual/User-Guide-426546-Page-14.png)
![OT OUThis equipment may not be used on coin service provided by the tele-phone company.Connection to party lines is subject to state tariffs.This equipment is hearing aid compatible.An applicable certification jacks Universal Service Order Codes (USOC)for the equipment is provided (i.e., RJ11C) in the packaging with eachpiece of approved terminal equipment.Warning: Changes or modifications to this unit not expressly approvedby the party responsible for compliance could void the user's authorityto operate the equipment.NOTICE: If your home has specially wired alarm equipment connectedto the telephone line, ensure the installation of this [GH3110] does notdisable your alarm equipment. If you have questions about what willdisable alarm equipment, consult your telephone company or a quali-fied installer.NOTE: This equipment has been tested and found to comply with thelimits for a Class B digital device, pursuant to Part 15 of the FCC Rules.These limits are designed to provide reasonable protection against harm-ful interference in a residential installation. This equipment generates,uses, and can radiate radio frequency energy not installed and used inaccordance with the instructions, may cause harmful interference toradio communication. However, there is no guarantee that interferencewill not occur in a particular installation. If this equipment does causeharmful interference to radio or television reception, which can be de-termined by turning the equipment off and on, the user is encouraged totry to correct the interference by one or more of the following measures:*Reorient or relocate the receiving antenna.*Increase the separation between the equipment and receiver.*Connect the equipment to an outlet on a circuit different from thatto which the receiver is connected.* Consult the dealer or an experienced radio TV technician for help.Caution: This device complies with Part 15 of the FCC Rules. Operation issubject to the following two conditions: (1) this device may not causeharmful interference, and (2) this device must accept any interfer-ence received, including interference that may cause undesiredoperation.Privacy of communications may not be ensured when using thisphone.Product CareA. Avoid putting cordless phones near heating appliances anddevices that generate electrical noise (motors, fluorescent lamps,etc.)B. Avoid rough treatment of the phone by placing the handset gentlyinto the base when hanging up. Avoid dropping the handset.C. Clean your cordless telephone only with a soft cloth slightlydampened with water or mild hand soap. Do not use any type ofsolvent or abrasive cleaner. Before cleaning, always unplug thephone from the wall outlet.D. Retain the original packaging should you need to ship the phoneat a later date.Additional InformationA. Connecting this telephone to a coin operated telephone or partyline is prohibited by law.B. If it is determined that your telephone is malfunctioning, the FCCrequires that it be disconnected from the modular outlet until theproblem has been corrected.For immediate answers to all your questions regarding theoperation of your Southwestern Bell Freedom Phone, call theCustomer Hotline, toll-free at (800)366-0937.](https://usermanual.wiki/Continental-Conair/GH3100H.GH3110-Users-Manual/User-Guide-426546-Page-15.png)