Control4 C4TT75G PORTABLE 7INCH TOUCH SCREEN WITH WIFI User Manual T3 Series Tabletop Touch Screen Installation Guide
Control4 PORTABLE 7INCH TOUCH SCREEN WITH WIFI T3 Series Tabletop Touch Screen Installation Guide
Control4 >
C4-TT7 User Manual
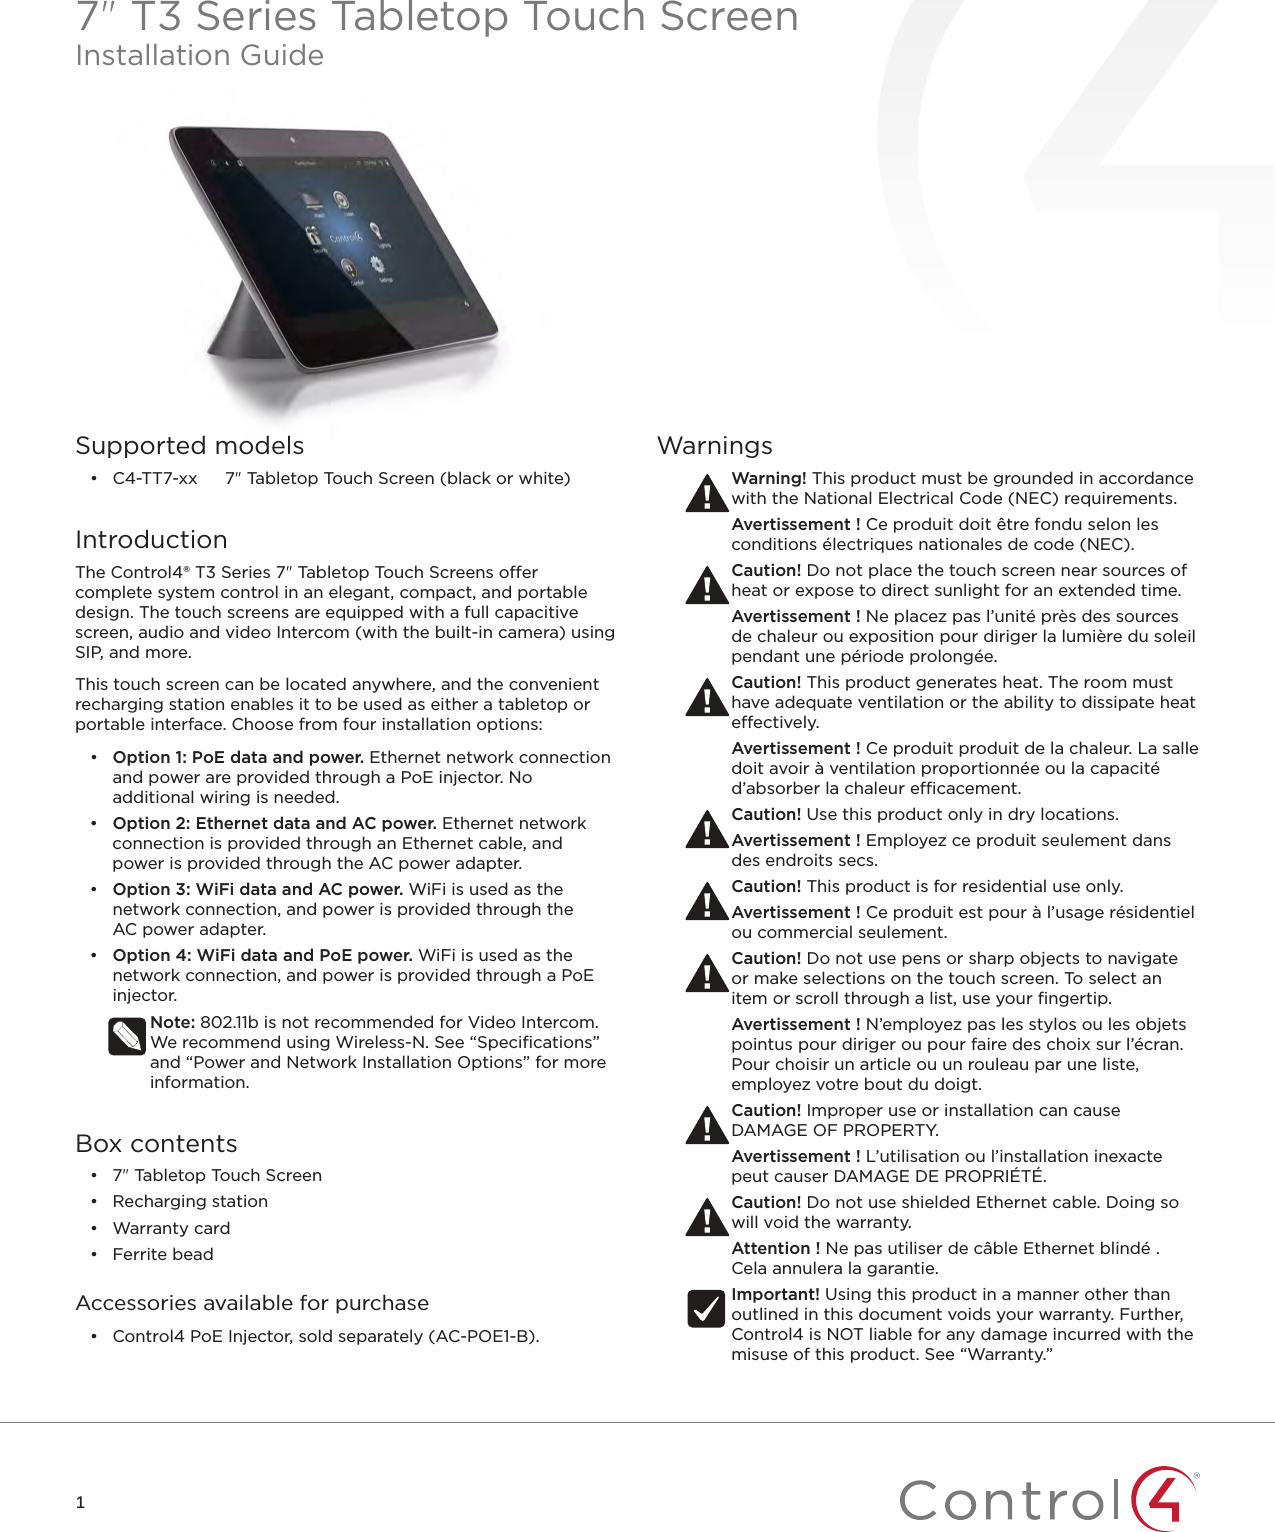
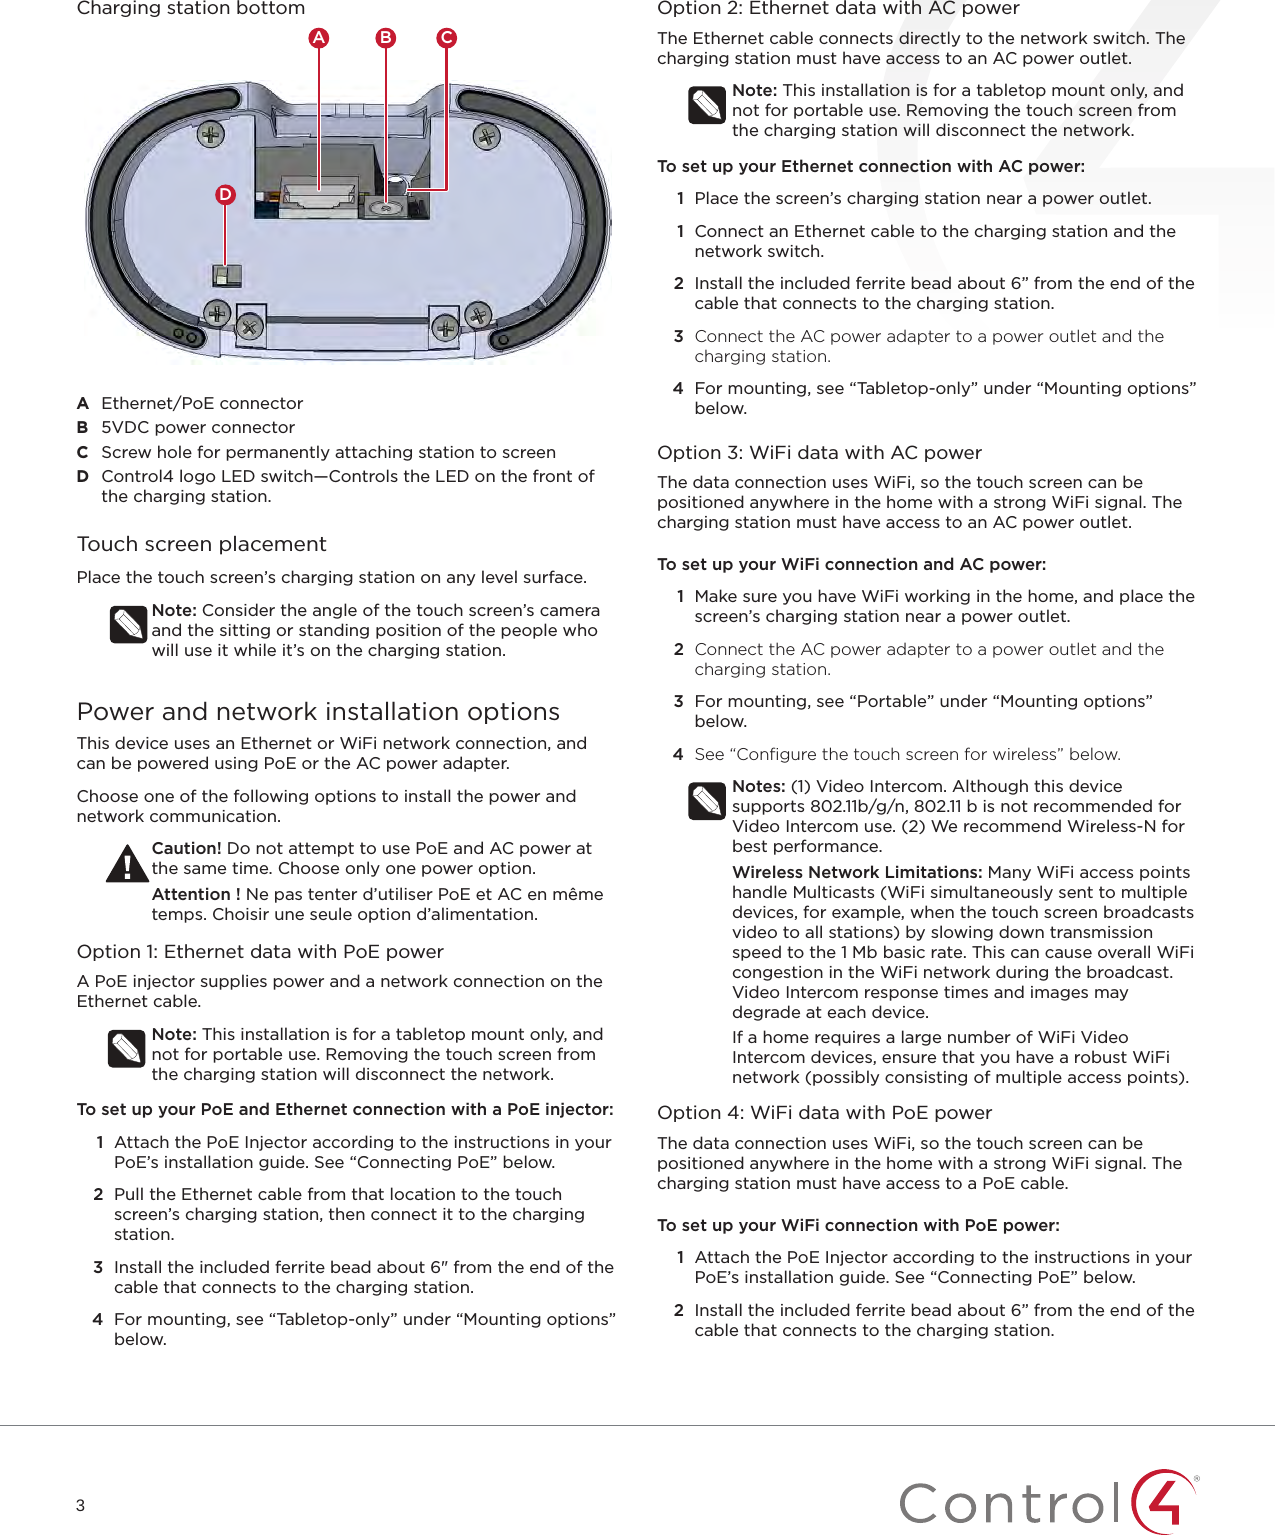
![2Specifications and requirementsSpecificationsModel Numbers C4-TT7-BL, C4-TT7-WHScreen Resolution: 1280 × 800, capacitive touchCamera: 720pNetworkEthernet or WiFi (802.11g/n [2.4 GHz])Security: WEP, WPA/WPA2 PSK, 802.1x EAP, PEAP Notes: (1) While technically the touch screen can use 802.11b, 802.11b is not supported. (2) 802.11n is recommended for best performance. Even with 802.11n, broadcasting to several devices will degrade Video Intercom response time and images. Broadcasting to additional devices will further degrade performance. See “Wireless Network Limitations.”Power supplyPoE (IEEE 802.3af) 13W peak100-240VAC, 50/60 HzInternational power supply adapters includedOperating temperature 32 ~ 104˚F (0˚ ~ 40˚C)Storage temperature 4 ~ 158˚F (-20˚ ~ 70˚C)Charging station connectionsRJ-45 (PoE, Ethernet)5VDC powerDimensions (W×H×D) Touch screen: 7.0 × 5.1 × 0.75" (178 × 130 × 19mm)Charging station: 4.2 × 2.3 × 3.1" (106 × 57 × 78mm)Weight Touch screen: 0.7 lbs. (0.32 kg)Charging station: 0.8 lbs. (0.36 kg)Requirements• A controller fully installed and configured with Control4 OS2.7.2 or later.• If using Ethernet data:• Ethernet network installed and available that includes a gateway/router/switch.• One Ethernet cable that runs from the Ethernet gateway/router/switch to the touch screen• If using WiFi data:• Wireless network (WiFi 802.11b/g/n) installed and available with a wireless access point (WAP). Security can be WEP, WPA/WPA2 PSK, 801.1x EAP, PEAP.• If using PoE power:• Control4 PoE Injector (model #AC-POE1-B) or another third-party PoE Injector or switch (UL/ANSI certified).• Two unshielded Ethernet CAT5/6 cables: (1) one that runs from the Ethernet gateway/router/switch to the PoE Injector/switch and (2) one that runs from the PoE injector/switch to the Ethernet connection in the touch screen’s wall box.• If using AC power:• Access to AC power outlet (AC power adapter included)• Wireless network (WiFi 802.11b/g/n) installed and available with a wireless access point (WAP). Security can be WEP, WPA/WPA2 PSK, 801.1x EAP, PEAP.• Access to AC power outlet (AC power adapter included)ViewsFrontCA BA Camera LEDB CameraC 7" diagonal, capacitive 1280 × 800 displayBackGC DA BEFA Power button. Press and release to toggle screen on/off, press and hold to reboot (if attached to charging station) or turn off (if detached from charging station)B Reset button (recessed). Use a straightened paper clip to press and release to reboot (if attached to charging station) or turn off (if detached from charging station)C Docking connectorD Screw hole for permanently mounting charging stationE Volume buttonsF Stereo speakersG Microphone](https://usermanual.wiki/Control4/C4TT75G/User-Guide-3728939-Page-2.png)