Control4 WR1X22 802.11ac Dual Band Wireless Router User Manual WR 1 Quick Start Guide
Control4 Corporation 802.11ac Dual Band Wireless Router WR 1 Quick Start Guide
Control4 >
Contents
- 1. Users Manual (Statement).pdf
- 2. Users Manual.pdf
Users Manual.pdf

WR-1
802.11ac Wireless Router
with BakPak
QUICK START GUIDE
BakPak
Enabled
22
Introduction
The Pakedge WR-1 Wireless Router gives you the convenience of a high-throughput
wired router integrated with an 802.11ac Wave 2 wireless access point. The router has
advanced features like port forwarding and static routes, while also supporting UPnP
for simple compatibility with common consumer devices. The WR-1 also integrates the
BakPak Management sub-agent, which means that you can access the power of BakPak
to monitor your WR-1 from anywhere in the world.
Key features:
• BakPak built in: Manage the WR-1 from the standard BakPak interface.
• 500+ Mbps WAN-to-LAN firewall throughput
• Secure VPN: Support for PPTP and OpenVPN
• BakPakDDNS: Free Dynamic DNS service built in
• 802.11ac Wave 2 2×2 wireless
• Simple-to-use web GUI
33
Access Point’s
Package contents
• (1) WR-1 Router
• (1) Power adapter
• (1) Quick Start Guide
• (1) Ethernet cable
User guide
• For more detailed instructions for this device and for the BakPak Management
Sub-agent, refer to the WR-1 User Guide (
pkdge.co/wr1-ug
).
Specifications
• System requirements: Windows or Mac PC with an Ethernet interface.

44
Overview
4 3 21WAN
USB 12V/1.5A
RESET
1 2 3 4
A B C
H I JGF
D E
Front panel
Back panel
A Power
B Internet
C LAN port activity
D 2.4 GHz active
E 5 GHz active
F RESET button
G USB port
H LAN ports
I WAN (to modem/Internet) port
J Power connector
55
Installing
Tools required:
• Computer with Ethernet interface and a web browser
• Ethernet cable
To install the unit:
1 Open the box and remove the WR-1.
2 Ensure that the unit is physically mounted away from obstructions that
could interfere with the wireless signal, such as metal racks or other wireless
transmitting electronic devices.
3 Connect an Ethernet cable from your ISP modem to the WAN port on the WR-1.
4 Connect power to the WR-1.
You are now ready to configure the unit to allow Internet access and register with
BakPak.
66
Logging in
1 After power is connected and a computer is connected to the LAN port, enter the
WR-1’s IP address into the address bar of your web browser. A login screen opens.
Default settings: The IP address will be automatically set to 192.168.1.99.
2 Type your user name and password, then click Login. (The default username is
pakedge and the password is pakedger.)
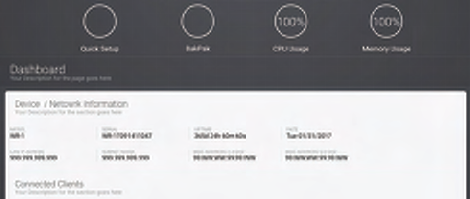
The Dashboard appears. The WR-1 Dashboard lets you navigate to all of the
router’s configuration sections.
3 To configure your network’s basic settings, go to Quick Setup.
4 To register the WR-1 with BakPak, click the BakPak icon in the top menu bar.

77
Registering your WR-1 with BakPak
You can connect your WR-1 to your existing BakPak account or create a new account to
manage all of your BakPak Management Agents.
To register your WR-1 to your BakPak account:
1 In the Dashboard, click BakPak. The BakPak Registration page opens.
2 Follow the on-screen instructions to complete your device registration.

Technical Support
For technical help:
www.pakedge.com/portal
support@pakedge.com
(650) 385-8703
For non-technical inquires:
customerservice@pakedge.com
(650) 385-8701
For regulatory information:
www.pakedge.com/regulatory
DOC-00273-A 2017-05-11 MS
11734 Election Road, Draper, UT 84020
Main: (650) 385-8700 Fax: (650) 685-5520
www.pakedge.com
sales@pakedge.com
©2017 Pakedge Device & Software Inc. All rights reserved.