Conversor CONVERSTV LICENSED NON-BROADCAST TRANSMITTER WORN ON BODY User Manual 39123 Conversor TV Pro A3 user guide
Conversor Products Limited LICENSED NON-BROADCAST TRANSMITTER WORN ON BODY 39123 Conversor TV Pro A3 user guide
Contents
- 1. Users Manual 1
- 2. Users Manual 2
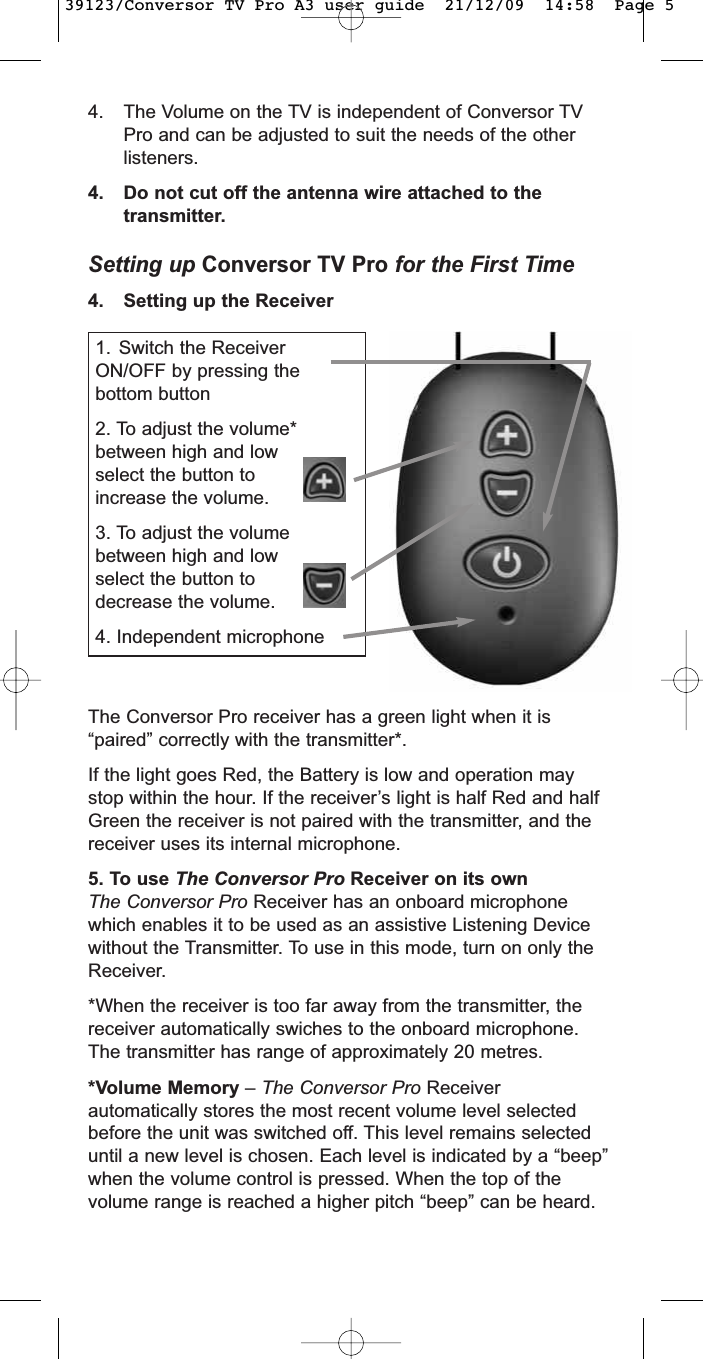
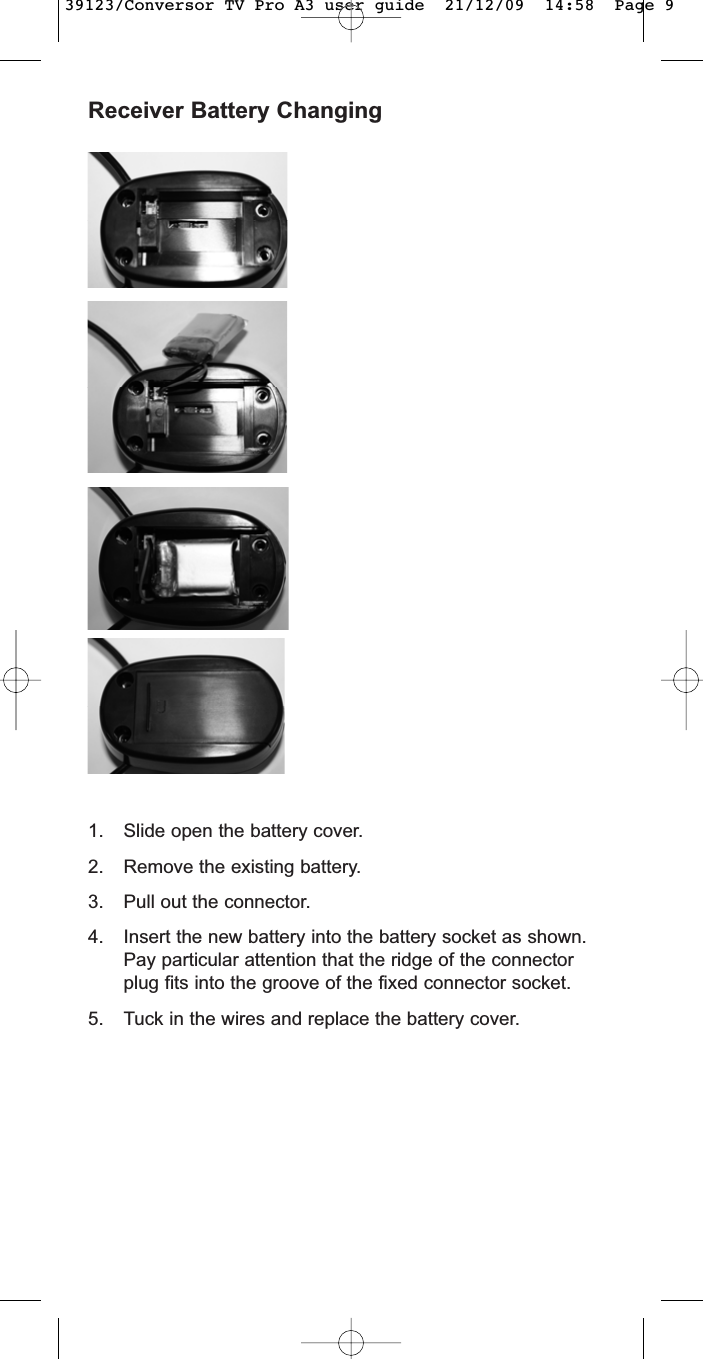
Users Manual 1