Conversor CONVERSTV LICENSED NON-BROADCAST TRANSMITTER WORN ON BODY User Manual 39123 Conversor TV Pro A3 user guide
Conversor Products Limited LICENSED NON-BROADCAST TRANSMITTER WORN ON BODY 39123 Conversor TV Pro A3 user guide
Contents
- 1. Users Manual 1
- 2. Users Manual 2
Users Manual 1
The Assistive Listening Device
by Conversor Limited
User’s Manual
39123/Conversor TV Pro A3 user guide 21/12/09 14:57 Page 1
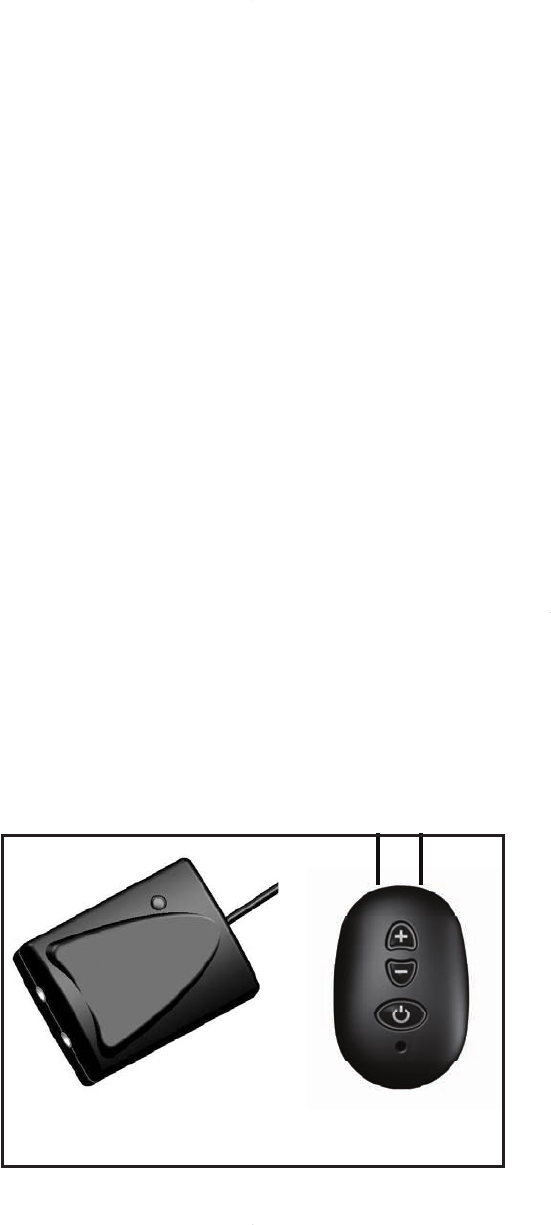
Table of Contents:
Welcome!
How to Charge Conversor TV Pro
Setting up Conversor TV Pro for the First Time
Make Sure Your Hearing Instrument
is/are Working
Setting up the Transmitter
Setting up the Receiver
To use the Receiver on its own
How to Listen with Conversor TV Pro
Checking the Sound Balance
Sockets and Connections
Care Instructions
Changing the Battery in the Receiver
Troubleshooting
Manufacturer’s Warranty
Statements of Compliance and Conformity
© Copyright 2009 Conversor Limited. All rights reserved
Welcome!
Thank you for your purchase of Conversor TV Pro,
an
Assistive Listening Devices which greatly enhances the clarity of
sound received by your Hearing Instrument(s).
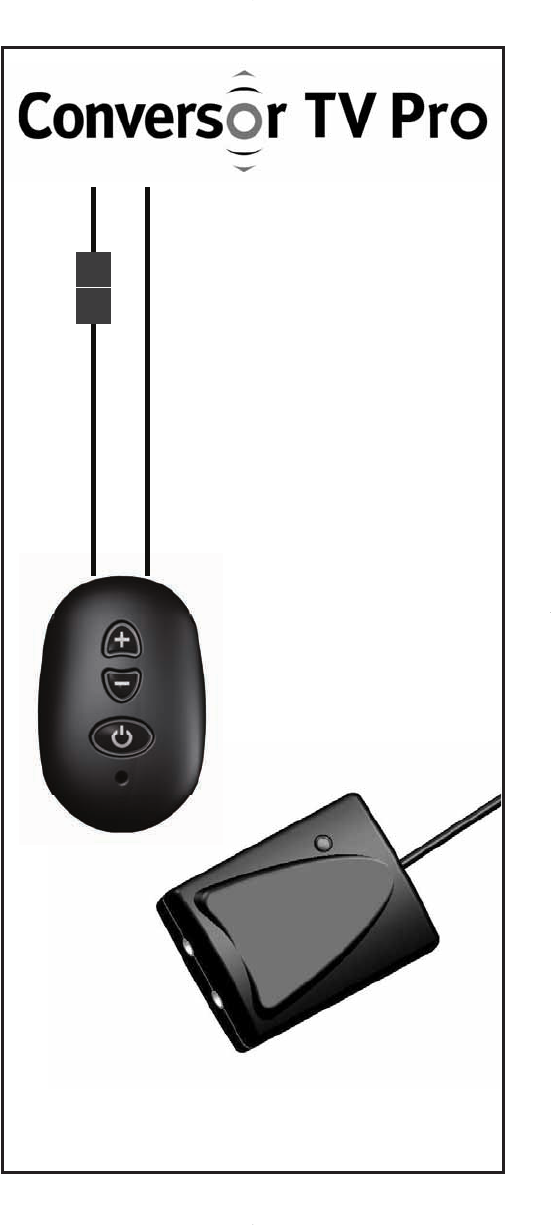
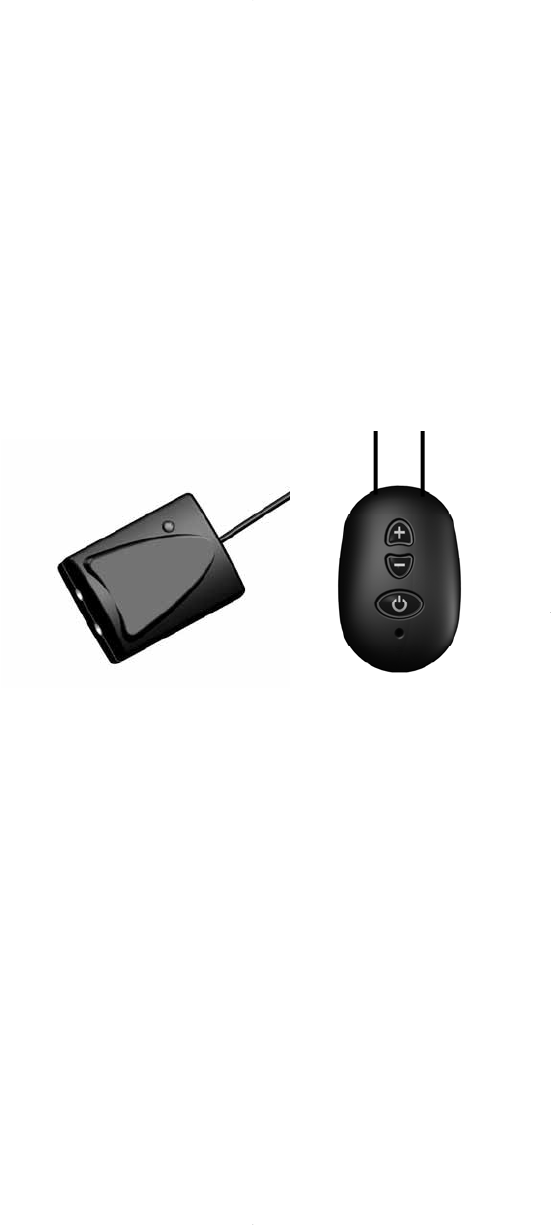
Conversor TV Pro consists of two lightweight components and
charging system, including:
• A Transmitter
• A Pendant Receiver
• A Power Supply Unit and Mains Lead
Conversor Pro
Pendant Receiver
Conversor TV Pro
Transmitter
39123/Conversor TV Pro A3 user guide 21/12/09 14:57 Page 2
Used together with your Hearing Instrument(s), Conversor TV
Pro will greatly improve your ability to hear, select and focus
on a particular sound. Connect the TV Pro transmitter to the
television or sound source, plug in and switch on. The
Pendant Receiver is worn at all times during use around your
neck, either above or beneath clothing. In order to set up
Conversor TV Pro correctly and to familiarize yourself with the
controls and buttons, please read this User Guide carefully. *In
order to receive the benefits of Conversor TV Pro, your
Hearing Instrument(s) must have a “T” or Telecoil setting.
How to switch on the TV Pro Transmitter and
how to Charge Conversor Pro Receiver:
TV Pro
Transmitter
Pendant
Receiver
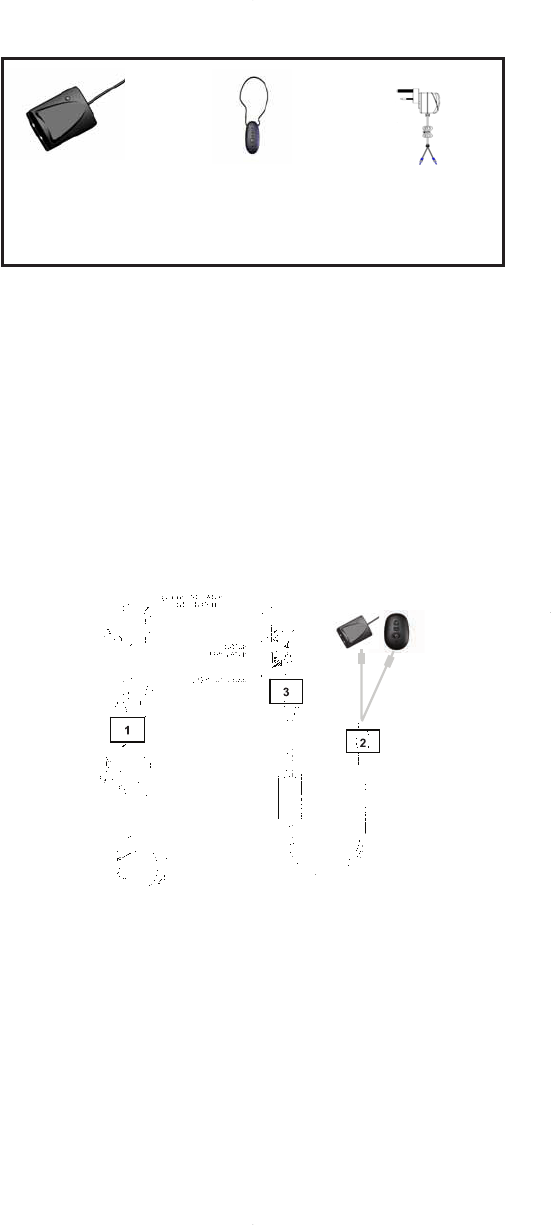
Power
Supply Unit
TV Adapter Cable; Audio Jack Cable
1. Attach the correct mains adaptor to the charger
2. Attach to the TV Pro Transmitter and Receiver using the
dual plugs
3. Plug into mains socket and charge according to the
instructions below
4. The green light will flash on the transmitter indicating that it
is transmitting. Note: the transmitter should be connected at
all times to the charger as it has no battery.
5. The lights on the ON/OFF switch on the receiver will stay
red until the unit is fully charged when they turn green
39123/Conversor TV Pro A3 user guide 21/12/09 14:57 Page 3
Below is a guide showing you charge times and corresponding
battery life.
* Please note that you do not need to wait until your batteries
are completely run down before you recharge them. You can
“top-up” the charge any time at your convenience. However it
is recommended you fully discharge all batteries
approximately once a month
When the battery indicator light turns red, it indicates that only
25% charge remains. The battery needs recharging soon
Setting up Conversor TV Pro for the First Time
Please ensure that the TV Pro Receiver is fully charged (see
page 6). and that the TV Pro Transmitter is connected to the
charger and the power switched on.
1. Make sure your hearing instrument is working
Switch your Hearing Instrument to the Telecoil Mode.
(See your Hearing Instrument User Guide or Consult your
Audiologist.)
2. Transmitter Set-up
Charge time on fully
discharged batteries*
25 Minutes
40 Minutes
65 Minutes
90 Minutes
150 Minutes
Approximate battery life
1 Hour
2 Hours
4 Hours
6 Hours
8 Hours
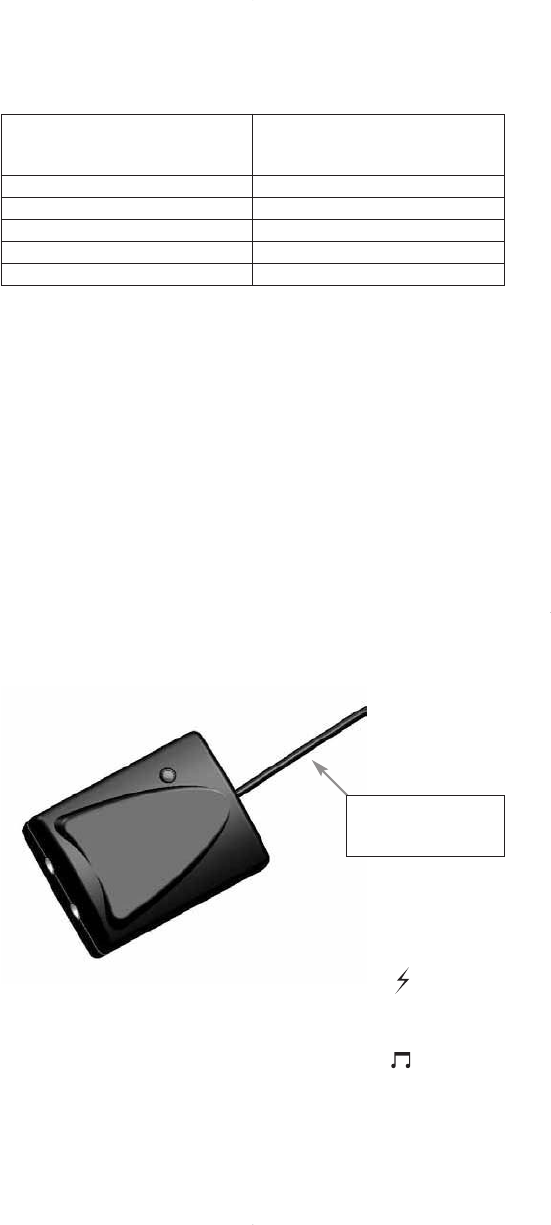
Antenna wire
- do not remove
1. Plug charger into the transmitter socket with symbol
and switch on the power. A green light will indicate that the
transmitter is working.
2. Insert Jack Plug into transmitter socket with symbol
and connect twin phono plugs to TV (with or without
connecting scart plug see page 11).
3.
Switch TV on and select programme. Adjust the volume on
the Receiver until you are comfortable with the volume level.
39123/Conversor TV Pro A3 user guide 21/12/09 14:57 Page 4
4. The Volume on the TV is independent of Conversor TV
Pro and can be adjusted to suit the needs of the other
listeners.
4. Do not cut off the antenna wire attached to the
transmitter.
Setting up Conversor TV Pro for the First Time
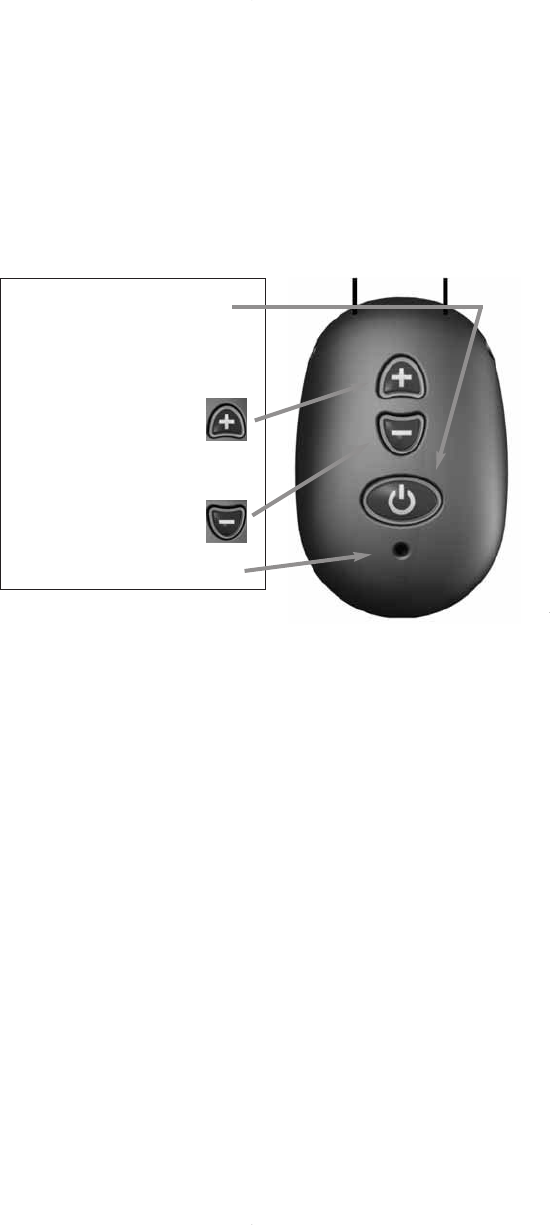
4. Setting up the Receiver
1. Switch the Receiver
ON/OFF by pressing the
bottom button
2. To adjust the volume*
between high and low
select the button to
increase the volume.
3. To adjust the volume
between high and low
select the button to
decrease the volume.
4. Independent microphone
The Conversor Pro receiver has a green light when it is
“paired” correctly with the transmitter*.
If the light goes Red, the Battery is low and operation may
stop within the hour. If the receiver’s light is half Red and half
Green the receiver is not paired with the transmitter, and the
receiver uses its internal microphone.
5. To use The Conversor Pro Receiver on its own
The Conversor Pro Receiver has an onboard microphone
which enables it to be used as an assistive Listening Device
without the Transmitter. To use in this mode, turn on only the
Receiver.
*When the receiver is too far away from the transmitter, the
receiver automatically swiches to the onboard microphone.
The transmitter has range of approximately 20 metres.
*Volume Memory – The Conversor Pro Receiver
automatically stores the most recent volume level selected
before the unit was switched off. This level remains selected
until a new level is chosen. Each level is indicated by a “beep”
when the volume control is pressed. When the top of the
volume range is reached a higher pitch “beep” can be heard.
39123/Conversor TV Pro A3 user guide 21/12/09 14:58 Page 5
6. How to Listen with Conversor TV Pro
Switch your hearing instrument to 'T', but do not adjust its
volume control.
Ensure the TV is switched on and the TV Pro transmitter
green light is on.
As you turn up the volume control on the Receiver, you should
begin to hear sound transmitted from the TV clearly.
7. Checking the sound balance
When the Hearing Instrument is set to the “T” Setting, a buzz
may be heard if the Hearing Instrument is close to strip
lighting, computers or TV Screens. Consult your Audiologist for
advice on adjusting or replacing the Telecoil for optimum use.
It is important to match the volume levels of your hearing
instrument with Conversor Pro Receiver, so that you can
switch between the two without any increase or decrease in
sound level.
8. Sockets and Connections
Conversor Pro receiver has one 3.5mm Jack Socket which is
used for both battery charging and for connection to
headphones.
Sockets and Connections – Transmitter
The Conversor TV Pro Transmitter can be connected to the
TV and other audio devices as described below. The following
Accessories are included in your package. Additional units can
be purchased by contacting your Distributor,
or Conversor Limited.
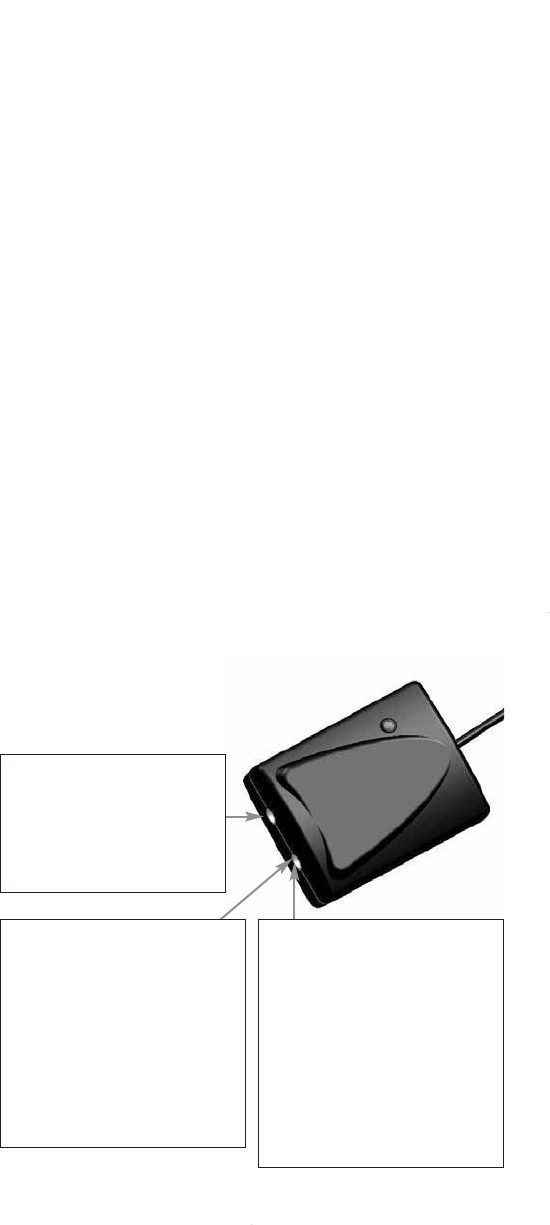
1. Plug one of the leads
from the charger into the
power socket on the TV
Pro Transmitter. Switch on
the power and leave
permanently connected.
2. Connecting to Radio or
Stereo Hi-Fi Equipment.
Use the enclosed Audio Jack
Cable supplied to connect to
the audio devices. Plug one
end into The Transmitter
Audio Input Socket and other
end to the audio device via
the headphone socket.
3. Connecting to the
Television, Sky or Cable box.
Use the enclosed TV Adaptor
cable (SCART block not for use
in the USA). For connection to
the audio device, plug the
Phono cables supplied into the
SCART block and connect it to
the television, Sky or Cable box.
Connect the jack pin end to the
Transmitter.
39123/Conversor TV Pro A3 user guide 21/12/09 14:58 Page 6
1. Direct Audio Input (TV Scart Adaptor)
The SCART socket is a multi pin socket found on the rear of
many Televisions, Sky and Cable boxes. By connecting the
Scart Adaptor with the Phono Cables to The Conversor TV Pro
transmitter, connection to the device is made simple and it
allows others to listen to the TV at the same time.
2. Direct Audio Input (Phono Cables only)
If your audio device does not have a SCART socket on the
rear panel, it will most likely have Audio Phono Sockets. These
are small circular rings with a red or white plastic insert, and
they may be located on the front or rear of the audio device
(Please refer to your audio device owner’s manual). As with
the SCART Adaptor, connection does not interrupt sound to
the speakers, allowing others to listen at the same time. You
can connect The Conversor TV Pro transmitter into these
sockets using the Phono Cables.
3. Direct Audio Input (Audio Jack Cable) (not supplied)
Most current TV, Radio or Stereo models have a headphone
socket on the front panel. Plug the Audio Jack Cable into this
socket to connect the audio device to The Conversor TV Pro
transmitter.
By plugging the Audio Jack Cable into the headphone
socket on the TV or Audio Device, the speaker of the audio
device will be disconnected, so that other people cannot listen
at the same time.
Sockets and Connections – Receiver
The Conversor Pro Reciever can also be used with an
earpiece or binaural headphones instead of using your
Hearing Instrument, as described below.
Simply plug the ear piece or headphones jack into the socket
located on the bottom of The Conversor Pro Receiver.
This socket is an Audio Output Socket. It can also be used to
connect the output to desktop speakers for added amplification. For
further information on how to use it in this way, please contact your
Distributor or Conversor Limited.
39123/Conversor TV Pro A3 user guide 21/12/09 14:58 Page 7
Care Instructions
•The Conversor TV Pro has been calibrated for optimum
use.
• Do not subject The Conversor TV Pro Transmitter or
Receiver to heavy shock.
• Keep both units away from moisture and high humidity –
they are not waterproof.
• Try to avoid long periods of exposure to direct sunlight.
• Gently coil the Receiver Neck Loop for storage rather
than tightly winding it around the unit. It contains a wire
and quick release connection, which could be damaged.
• Do not attempt to open either The Conversor TV Pro
Transmitter or Receiver casing (other than the battery
compartment to change the battery). They contain no
user-serviceable parts. Opening either unit will invalidate
the Manufacturer’s Warranty (See over).
Changing the Battery in the Receiver
Lithium batteries are available from your distributor or
audiologist, and they can replace them for you. You can also
change them yourself, following these instructions:
Conversor TV
Pro Transmitter
The Conversor Pro
Pendant Receiver
39123/Conversor TV Pro A3 user guide 21/12/09 14:58 Page 8
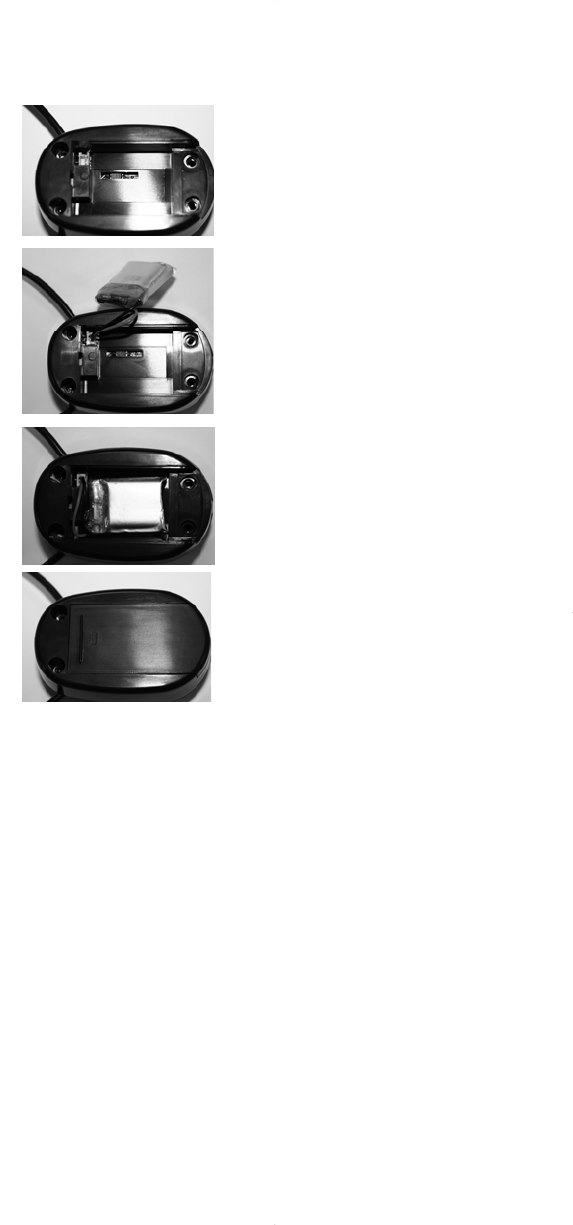
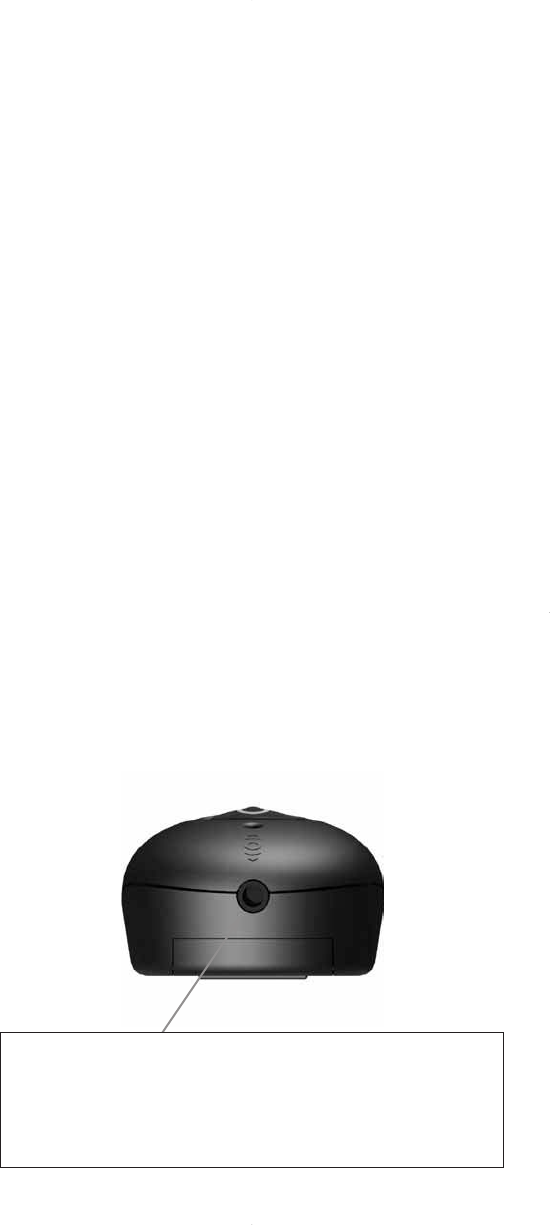
Receiver Battery Changing
1. Slide open the battery cover.
2. Remove the existing battery.
3. Pull out the connector.
4. Insert the new battery into the battery socket as shown.
Pay particular attention that the ridge of the connector
plug fits into the groove of the fixed connector socket.
5. Tuck in the wires and replace the battery cover.
39123/Conversor TV Pro A3 user guide 21/12/09 14:58 Page 9

Troubleshooting
Transmitter & Receiver do not start:
Please ensure that the charger is plugged into the Transmitter
and the green light is on and ensure that the Receiver is
charged correctly. The ON/OFF button must be pressed to
operate the receiver. A green light will glow behind the button
to signal that the unit is on.
If it still does not work, please check that the charger
leads are connected properly as well as the connection to the
mains, then recharge. If this still does not solve the problem,
please contact your distributor for a battery check / change.
Poor sound quality:
Please ensure that the range in which you are trying to
operate does not exceed the operating distance. Check that
the batteries are fully charged, as this can result in a drop in
sound quality and operating range. If the batteries are low, the
led will change from green to red.
Poor range and interference:
Conversor TV Pro has been designed for optimum sound
quality and range. In certain environments consisting of iron /
steel or metalwork frames, the range can be reduced. There
may also be some interfering equipment close by such as strip
lighting, PC equipment, fans or motors. These items give off
an electrical magnetic field, which can interfere with radio
equipment.
NOTE:
To identify if the environment you are in is likely to give any
interference, select the Telecoil setting on your Hearing
Instrument without Conversor TV Pro switched on, and walk
around the room to see if there are any unusual sounds being
picked up by the Hearing Instrument. If a lot of interference is
heard, please be aware that by using Conversor TV Pro, these
sounds will be amplified.
39123/Conversor TV Pro A3 user guide 21/12/09 14:58 Page 10

The manufacturer, Conversor Limited, issues a two-year limited
warranty to the original consumer of this product. This warranty
will go into effect upon the date of original purchase of this
equipment, and shall remain in effect for two calendar years from
that date.
What is covered by this warranty?
Any electronic component which, because of workmanship,
manufacturing, or design defects, fails to function properly under
normal use during the life of this warranty will be replaced or
repaired at no charge for parts or labor when returned to the point
of purchase. Transportation costs shall be paid by the customer. If
it is determined that repair is not feasible, the entire unit may be
replaced with an equivalent unit upon mutual agreement of the
Distributor and the customer.
What is not covered by this warranty?
This two-year limited warranty does not apply to:
• Malfunctions resulting from abuse, neglect, or accident.
• Peripheral accessories as itemized within the product
brochure, when such items are returned after 90 days from the
original purchase.
• Batteries and Receiver Neck Loop.
• Instruments installed, connected, used, or adjusted in a
manner contrary to the instructions provided.
• Consequential damages and damages resulting from delay or
loss of this unit. The exclusive remedy under this warranty is
strictly limited to repair or replacement as herein provided.
• Products damaged in transit unless investigated by the shipper
and returned to the warrantor with the investigation report.
The manufacturer reserves the right to make changes in the
design or construction of any of its products at any time without
incurring any obligation to make any changes whatsoever on units
previously purchased.
This warranty is in lieu of all other expressed warranties by the
manufacturer. No representative or person is authorized to
represent or assume for the manufacturer any liability in
connection with the sales or use of this products other than as set
forth above.
If your unit requires service under the terms of this warranty,
carefully package the complete product to prevent damage in
transit and return it to the point of purchase. Include a detailed
description of the problem, your full name, billing and shipping
address, and telephone number.
The above warranty does not affect any legal rights that you might
have under applicable national legislation governing the sale of
consumer goods. Your point of purchase may have issued a
warranty that goes beyond the clauses of this limited warranty.
Please consult your point of purchase for further information.
39123/Conversor TV Pro A3 user guide 21/12/09 14:58 Page 11

October 2009
CONVERSTV
CONVERSTV
Contact Details:
Made in the EU for Conversor Limited
www.conversorproducts.com
*
39123/Conversor TV Pro A3 user guide 21/12/09 14:58 Page 12