Coretronic M64ET DLP Projector with 2.4G transceiver User Manual OwnersManual
Coretronic Corp. DLP Projector with 2.4G transceiver OwnersManual
UserManual.wiki
>
Coretronic
>
M64ET User Manual
Users Manual
Navigation menu
Upload a User Manual
Namespaces
Wiki Guide
HTML
PDF
Info
Views
User Manual
Discussion / Help
Navigation

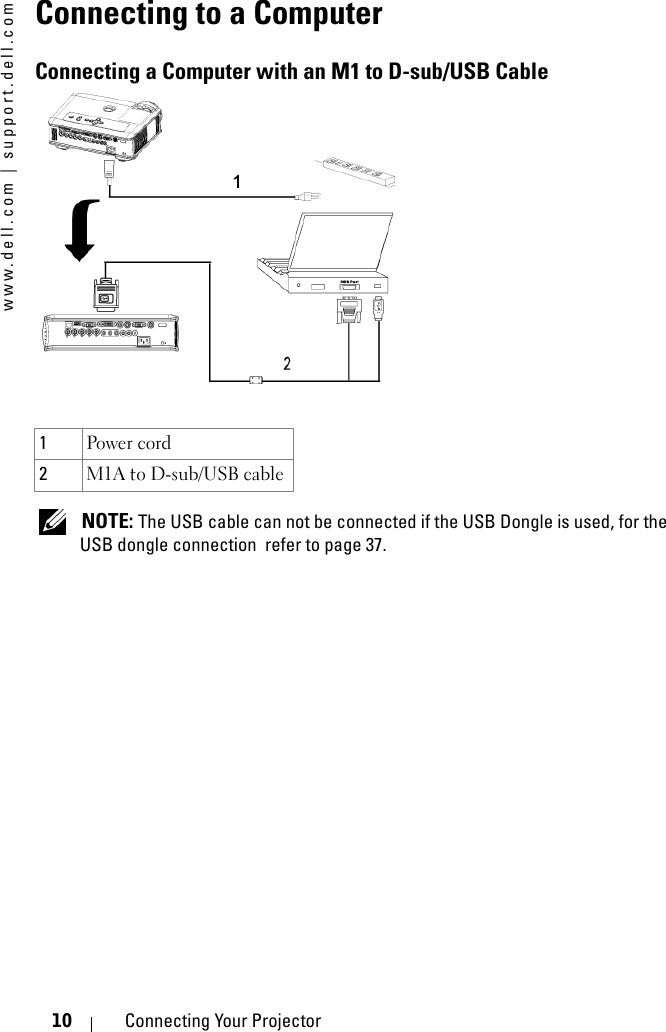


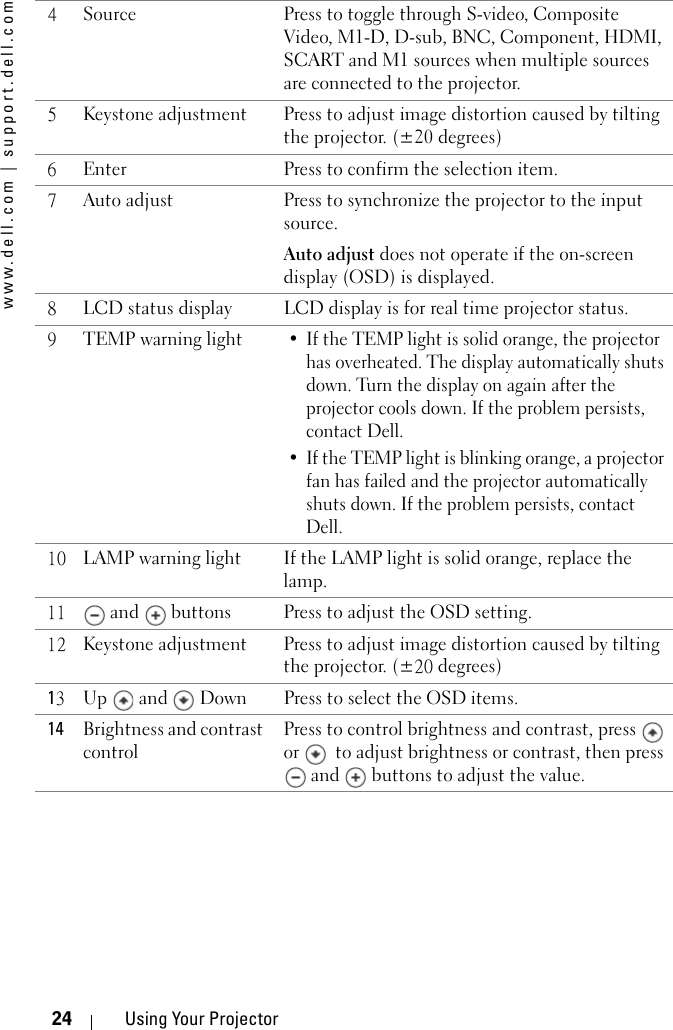


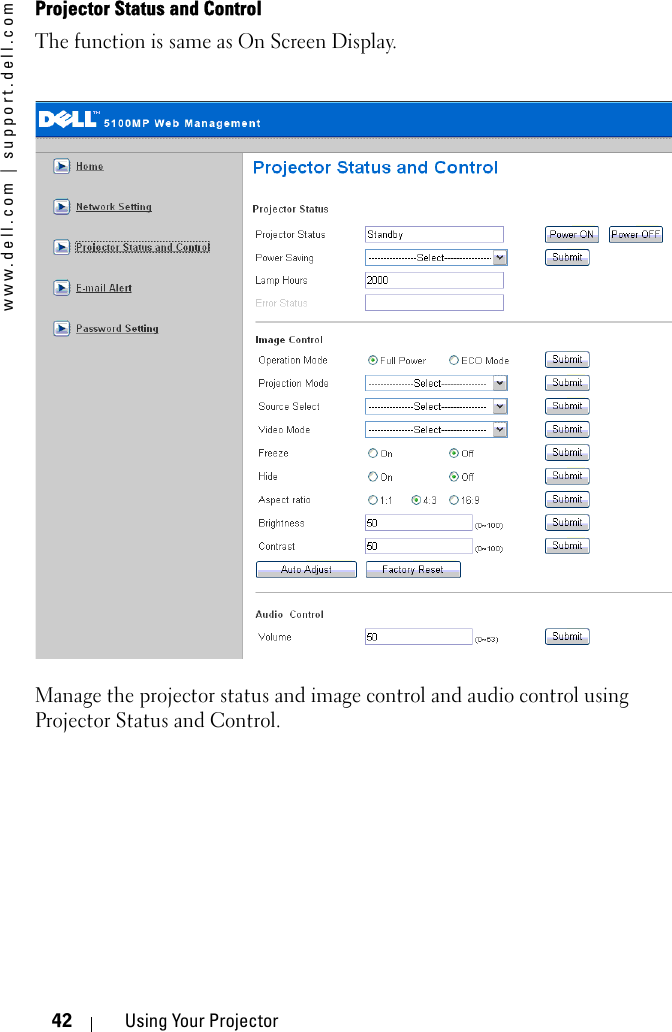
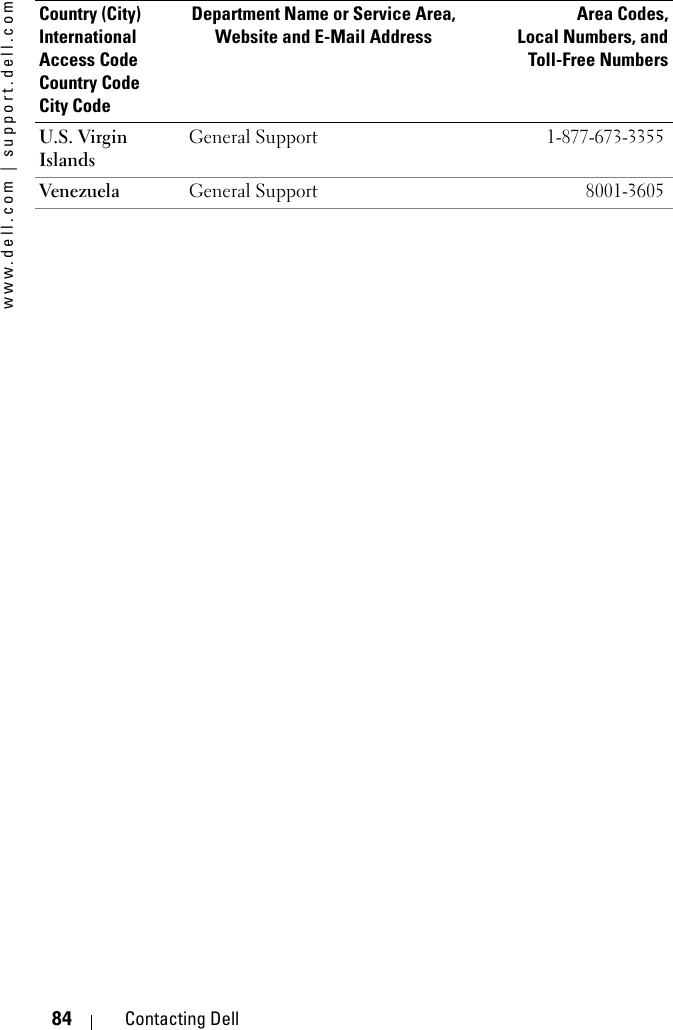
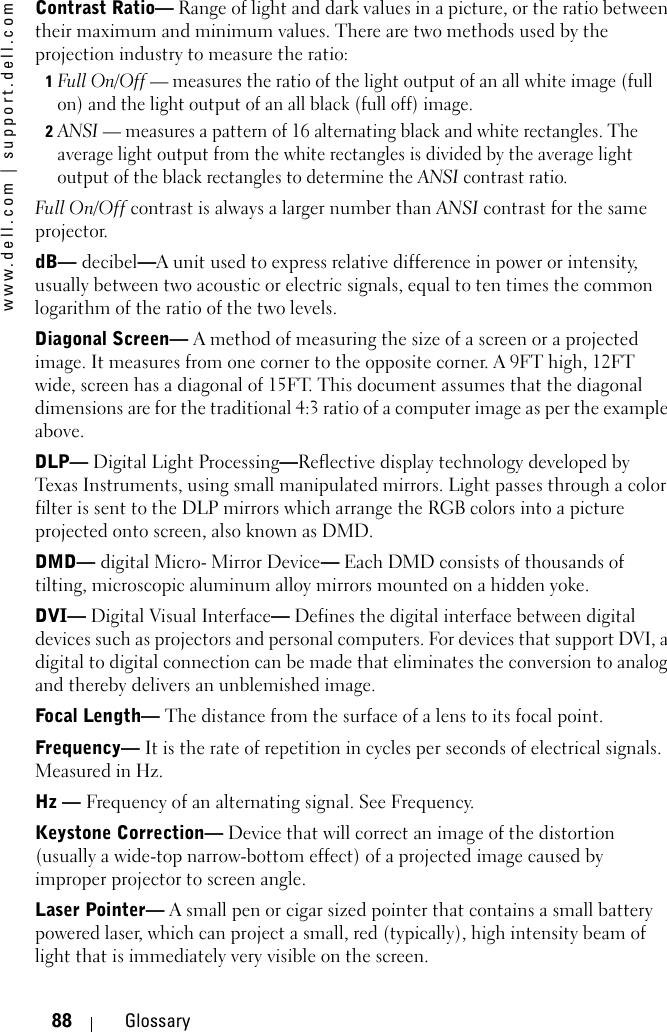
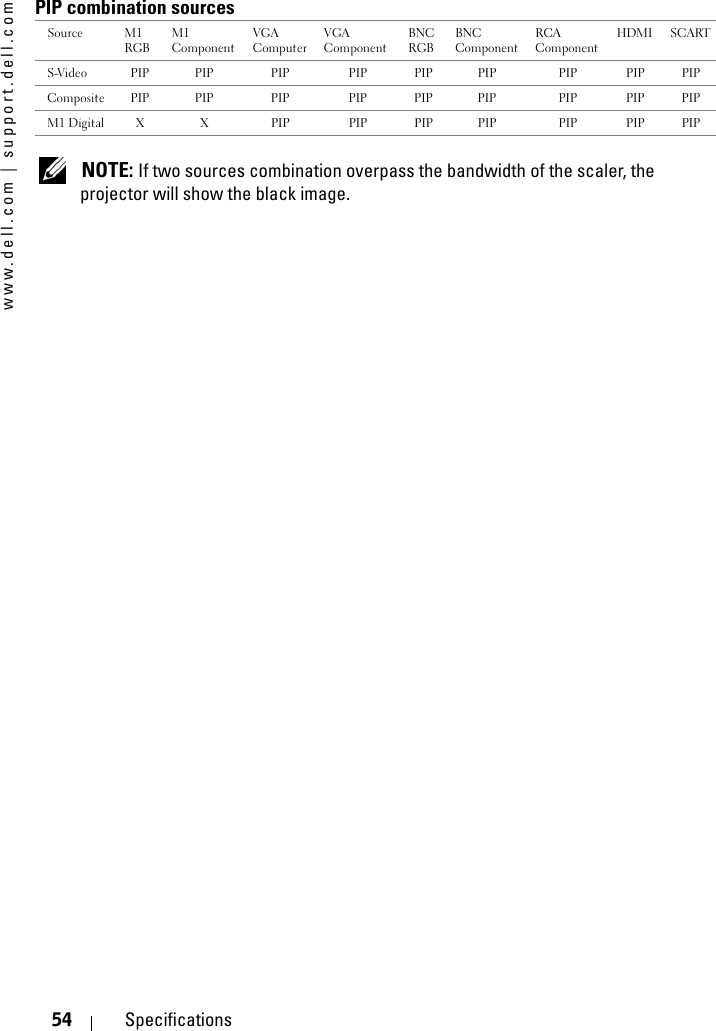
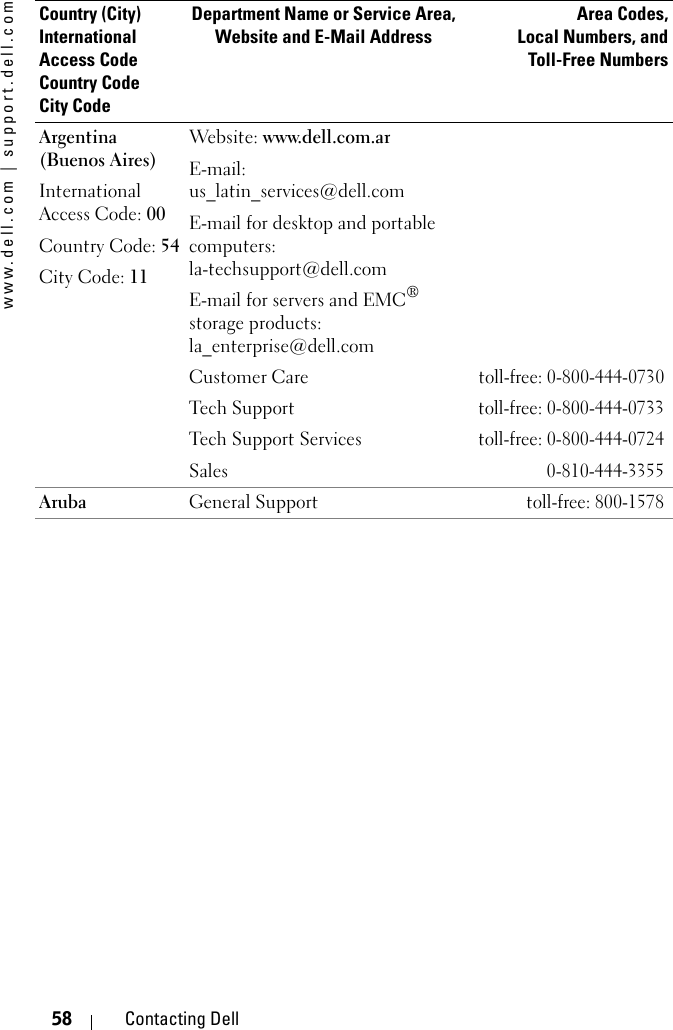
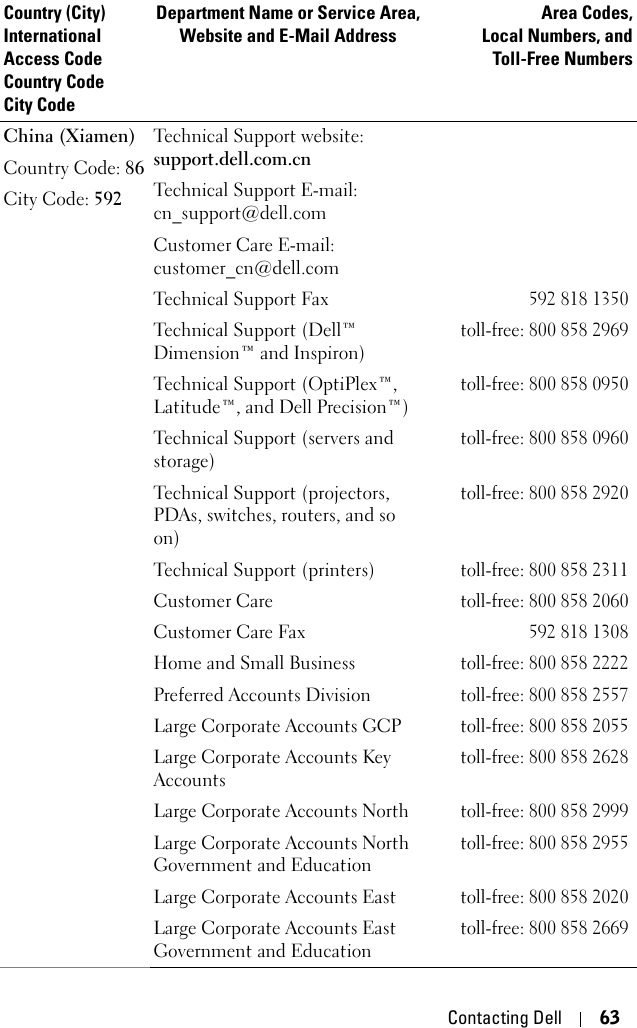
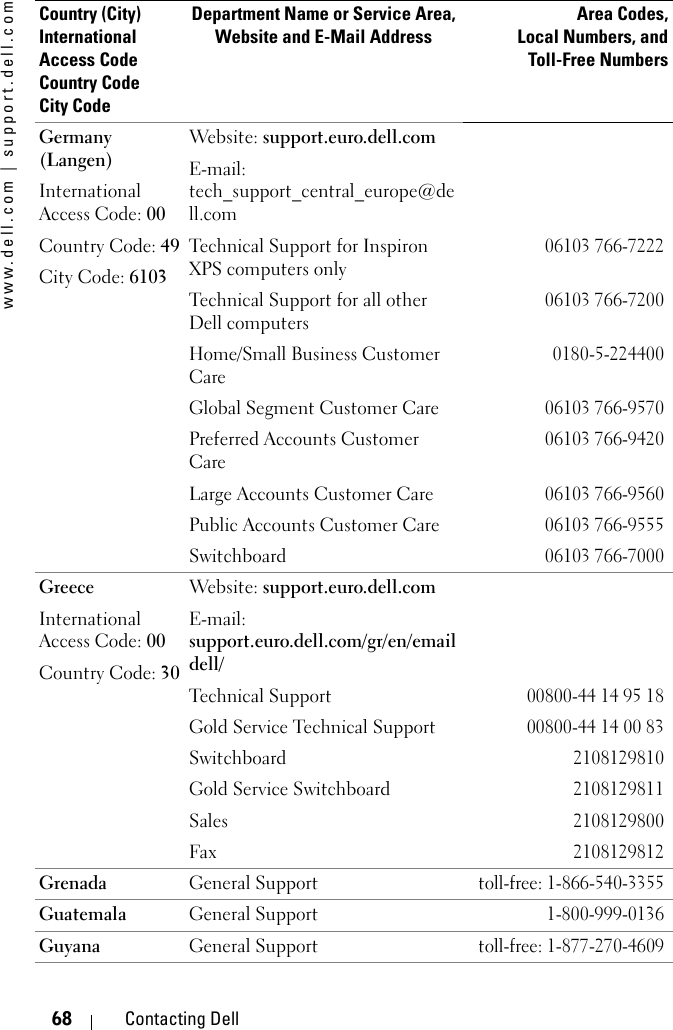
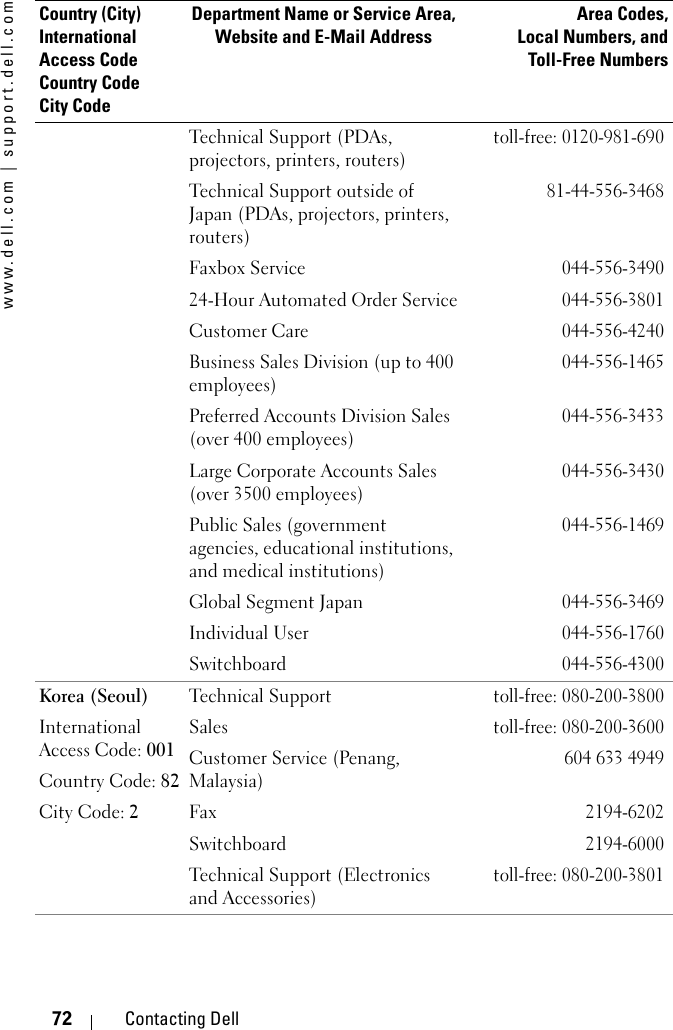
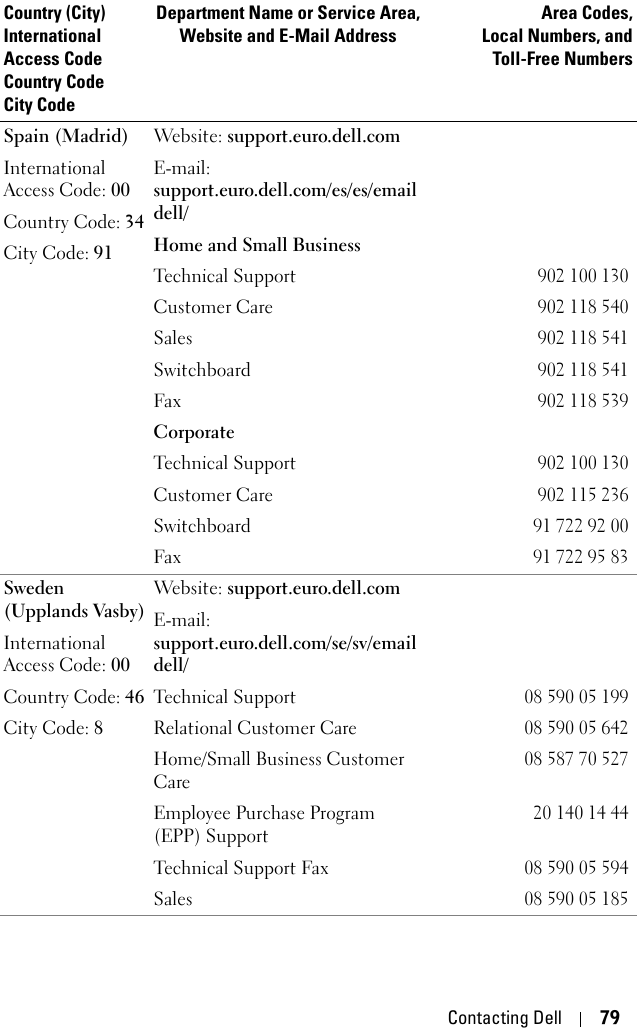
![www.dell.com | support.dell.com46 Troubleshooting Your ProjectorPartial, scrolling, or incorrectly displayed image•Press the Resync button on the remote control or the control panel. •If you are using a Dell portable computer, set the resolution of the computer to XGA (1024 x 768): aRight-lick the unused portion of your Windows desktop, click Properties and then select Settings tab.bVerify the setting is 1024 x 768 pixels for the external monitor port.cPress . If you experience difficulty in changing resolutions or your monitor freezes, restart all the equipment and the projector.If you are not using a Dell portable computer, see your documentation.The screen does not display your presentationIf you are using a portable computer, press . Image is unstable or flickering Adjust the tracking in the OSD Computer Source tab. Image has vertical flickering barAdjust the frequency in the OSD Computer Source tab.Image color is not correct • If your graphic card output signal is sync on Green, and you would like to display VGA at 60Hz signal, please go into OSD select Management, select Signal Type and then select RGB. • Run the Self-diagnostic test (see " Self-diagnostic for video ") for preliminary diagnostic on image color problem. Ensure that the colors of the test pattern are correct. Image is out of focus 1Adjust the focus ring on the projector lens.2Ensure that the projection screen is within the required distance from the projector (4.9ft [1.5m] to 39.4ft [12m]).Problem (continued)Possible Solution (continued)](https://usermanual.wiki/Coretronic/M64ET/User-Guide-554291-Page-47.png)

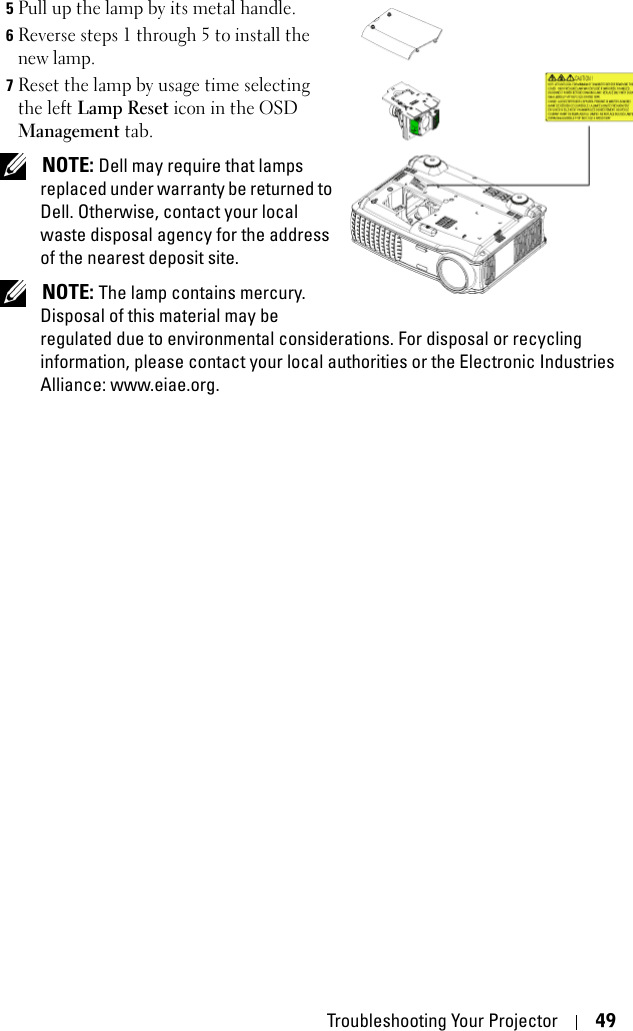

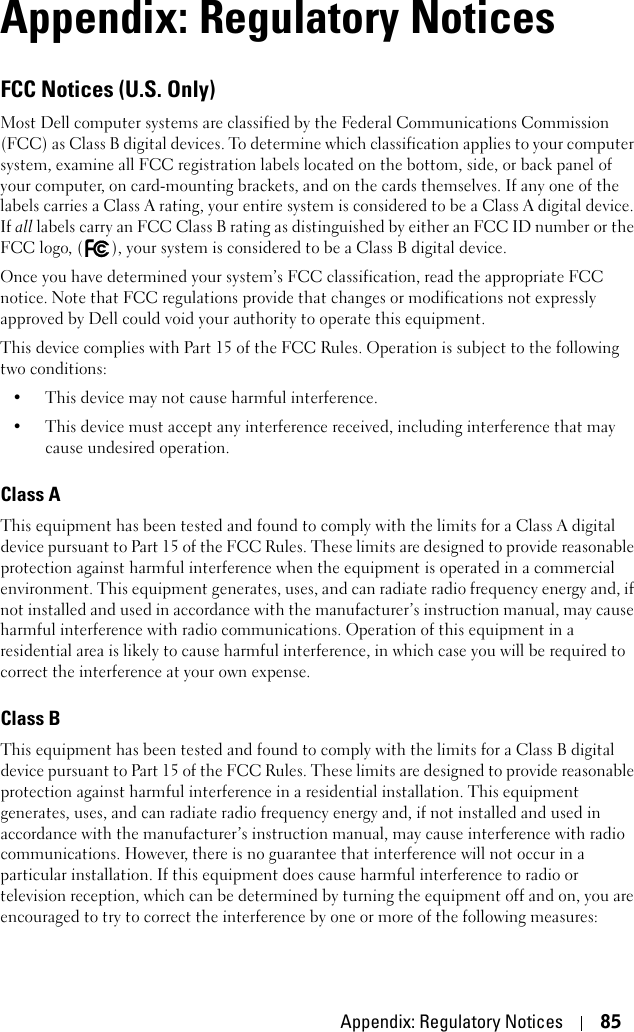
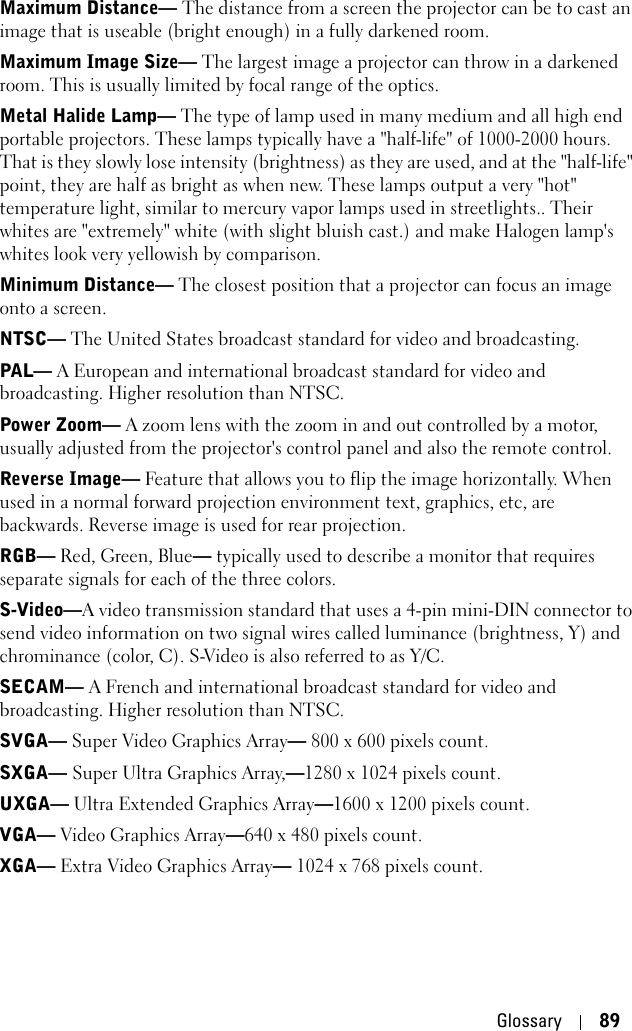
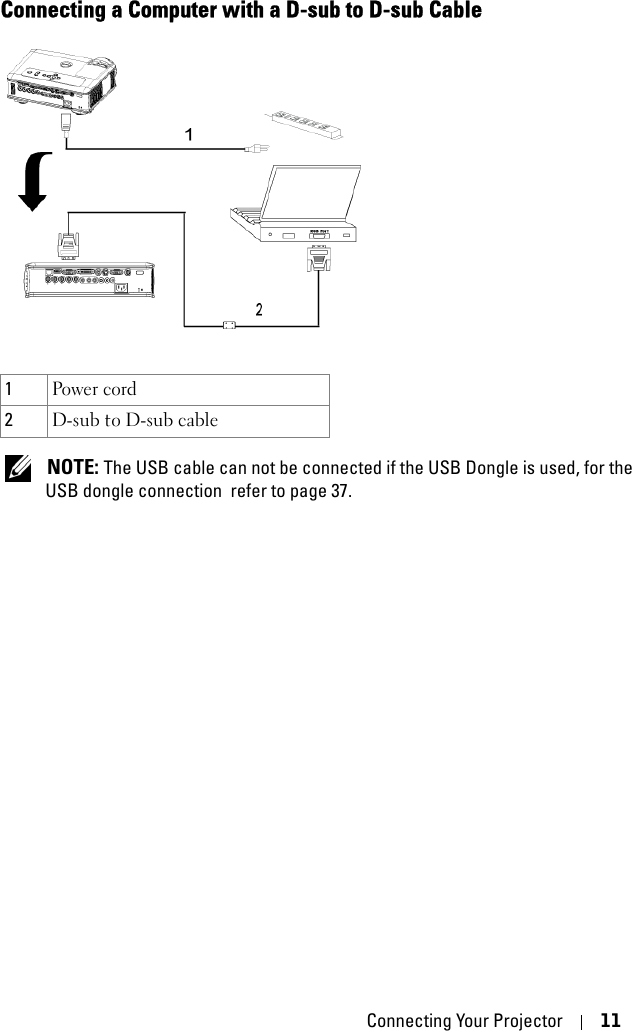
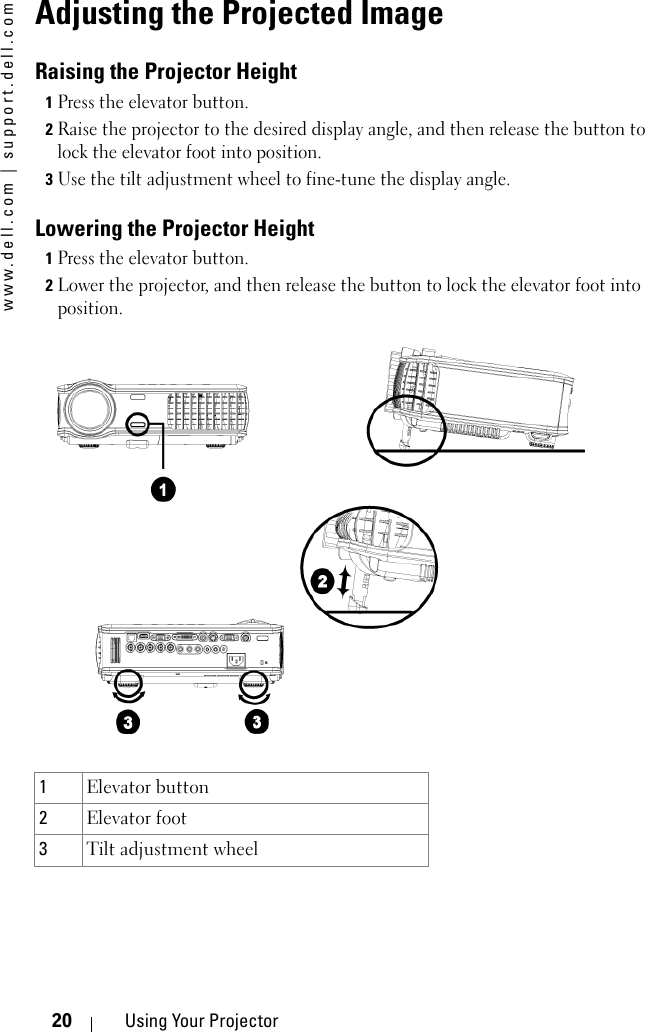
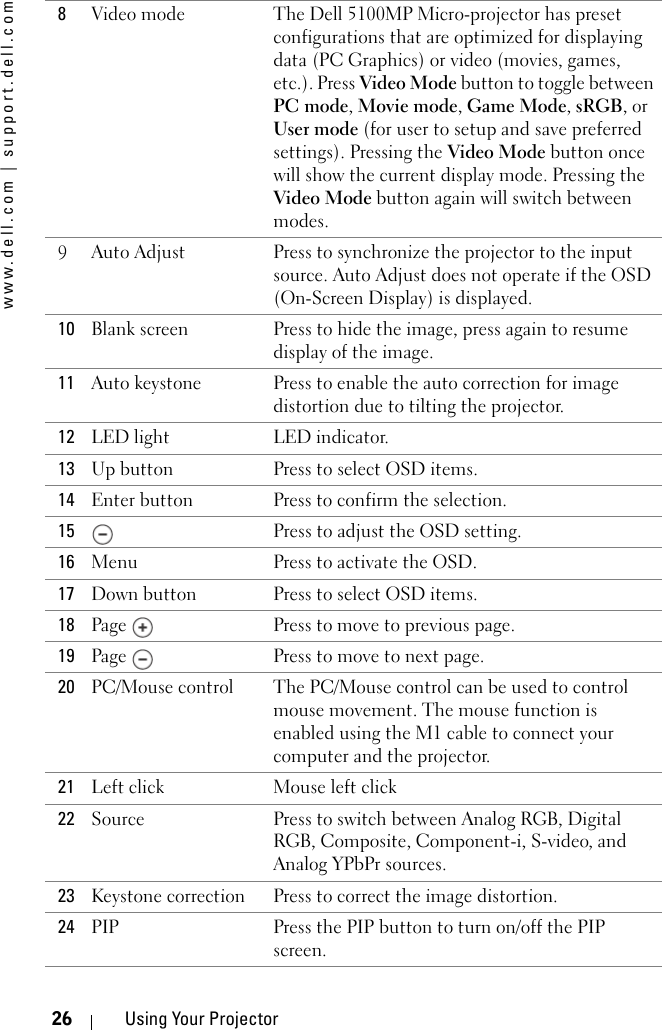
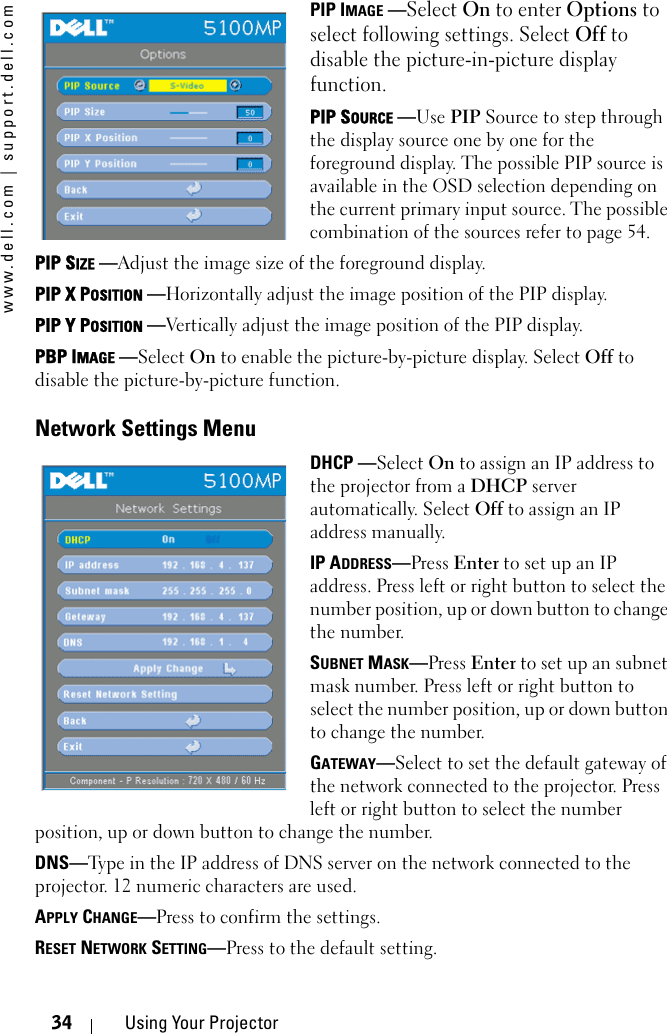
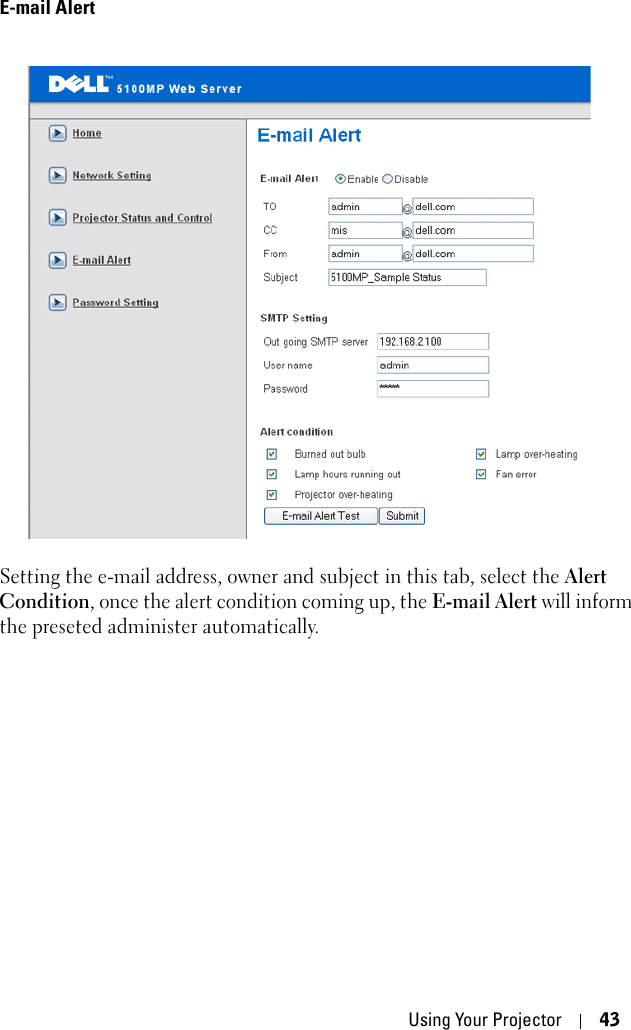
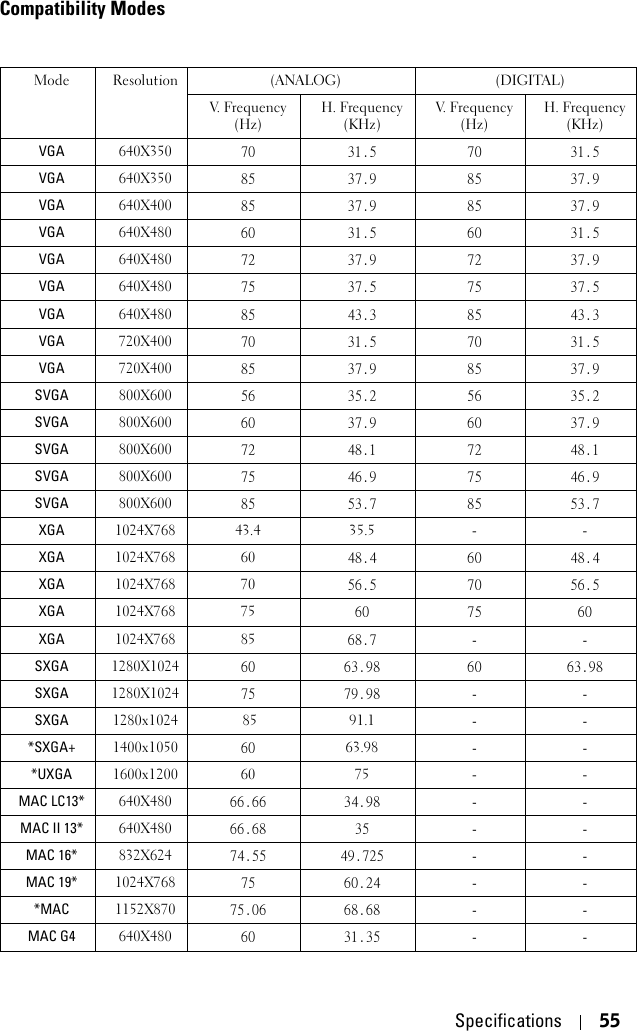
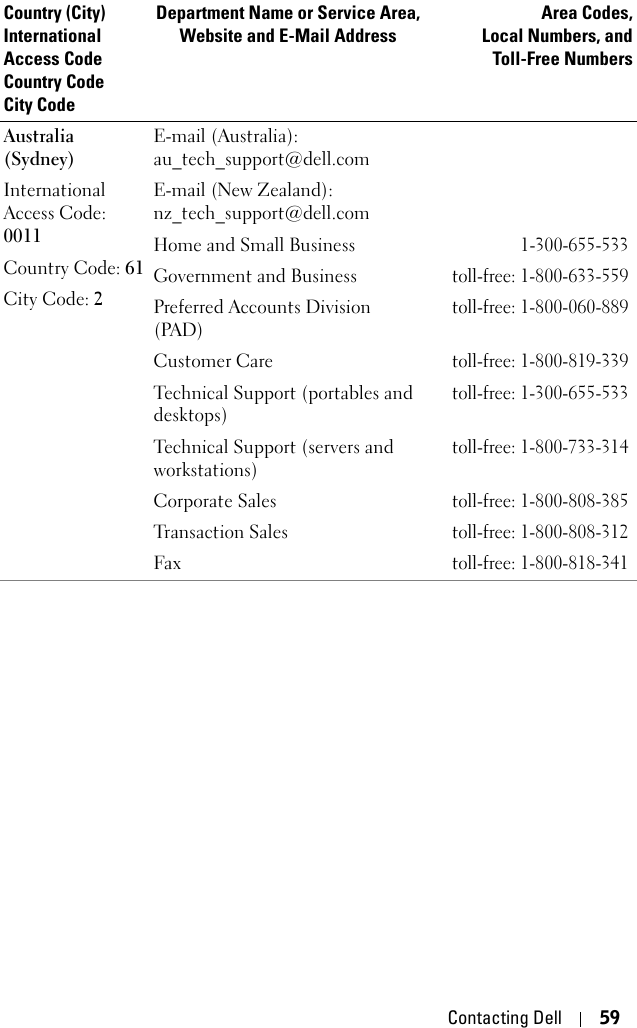
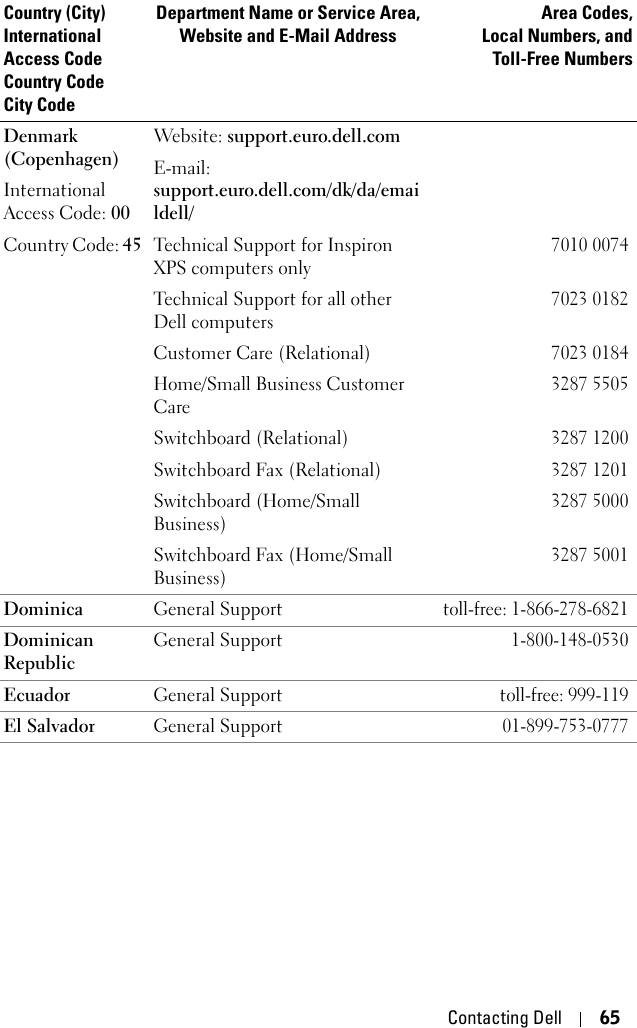
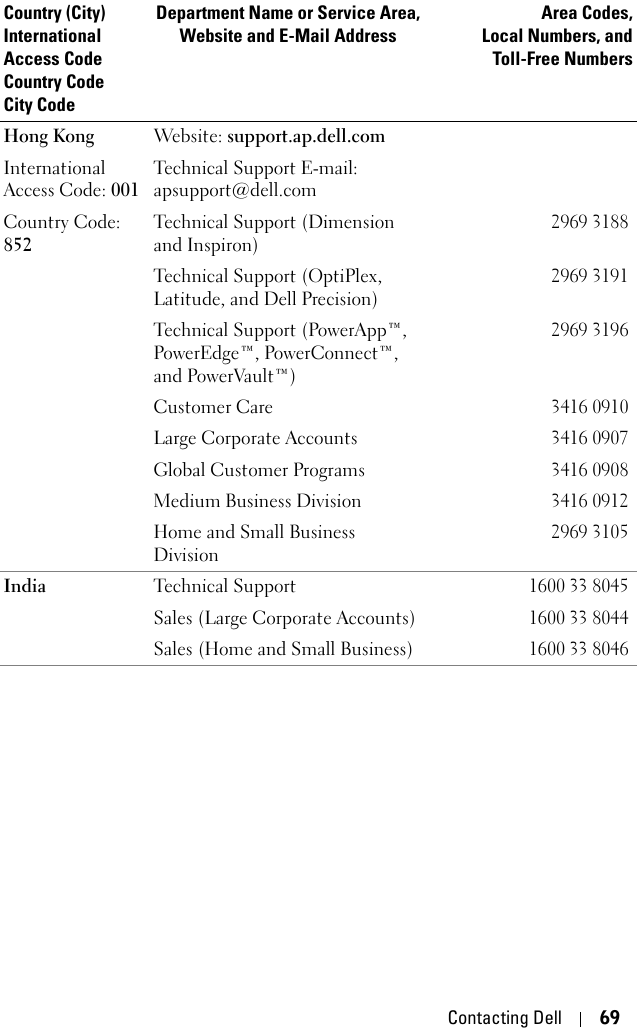
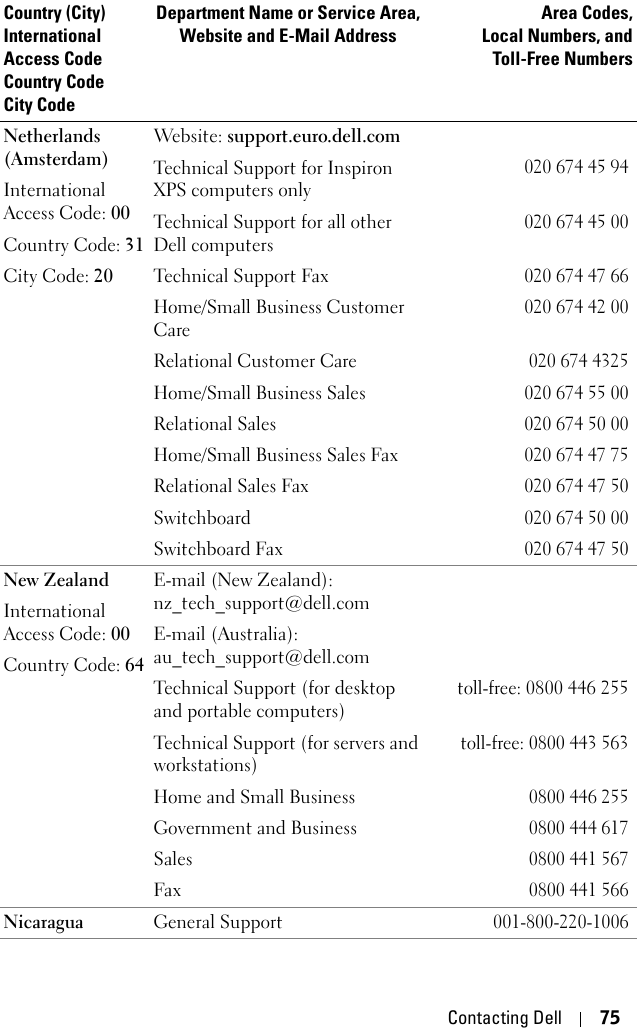
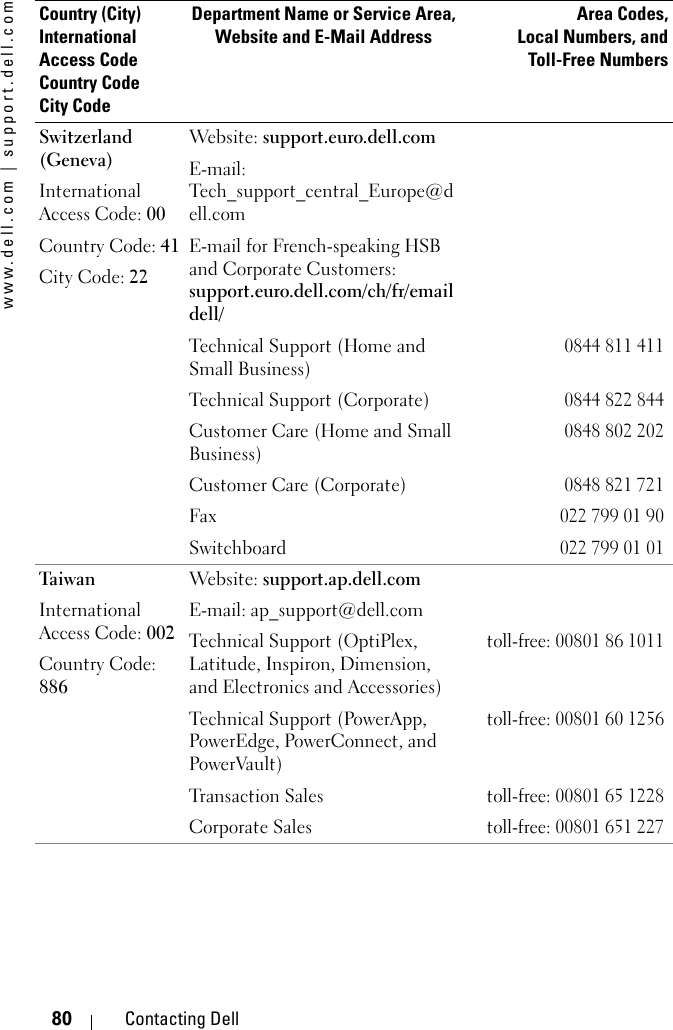
![Specifications 53RS232 Pin AssignmentRS232 Protocol • Communication Settings • Control command Syntax (From PC to Projector)[H][AC][SoP][CRC][ID][SoM][COMMAND] •Example: power on the projector Enter the following code: 0xBE 0xEF 0x10 0x05 0x00 0xC7 0xBF 0x11 0x11 0x01 0x00 0x02•Control Commands List Go to support.dell.com to view the latest RS232 code.Video input: 3 RCA connectors for component video/ HDTV input, one mini-DIN 4-pin S-video input, one RCA jack for composite video inputAudio input: one phone jack (diameter 3.5mm)DC jack 12 volt @ 200mA output, relay control for automatic projection screen controlOne RJ45 connector for networkingOne HDMI inputOne mini-DIN RS232 for wired remote projector control from PCConnection settings Val ueBaud Rate: 19200Data Bits: 8Parity NoneStop Bits 1](https://usermanual.wiki/Coretronic/M64ET/User-Guide-554291-Page-54.png)
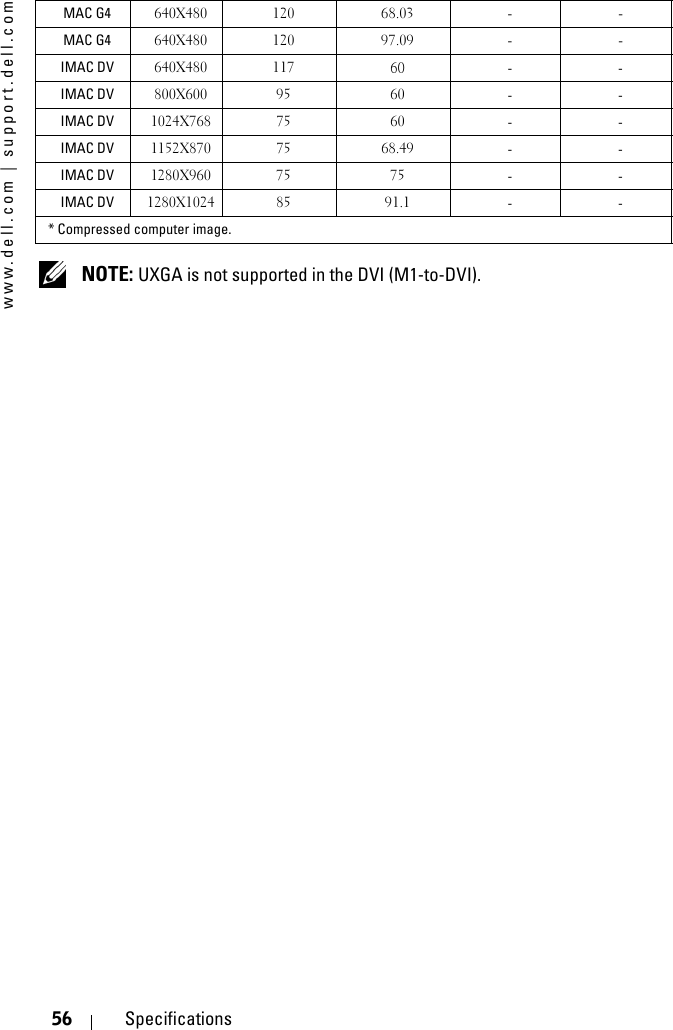
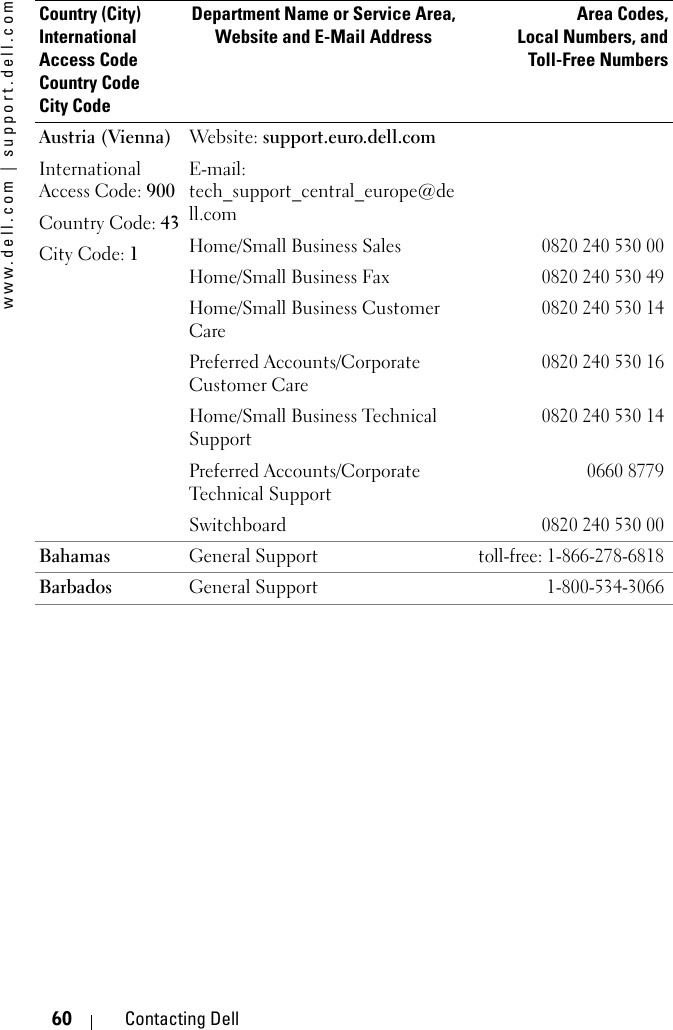


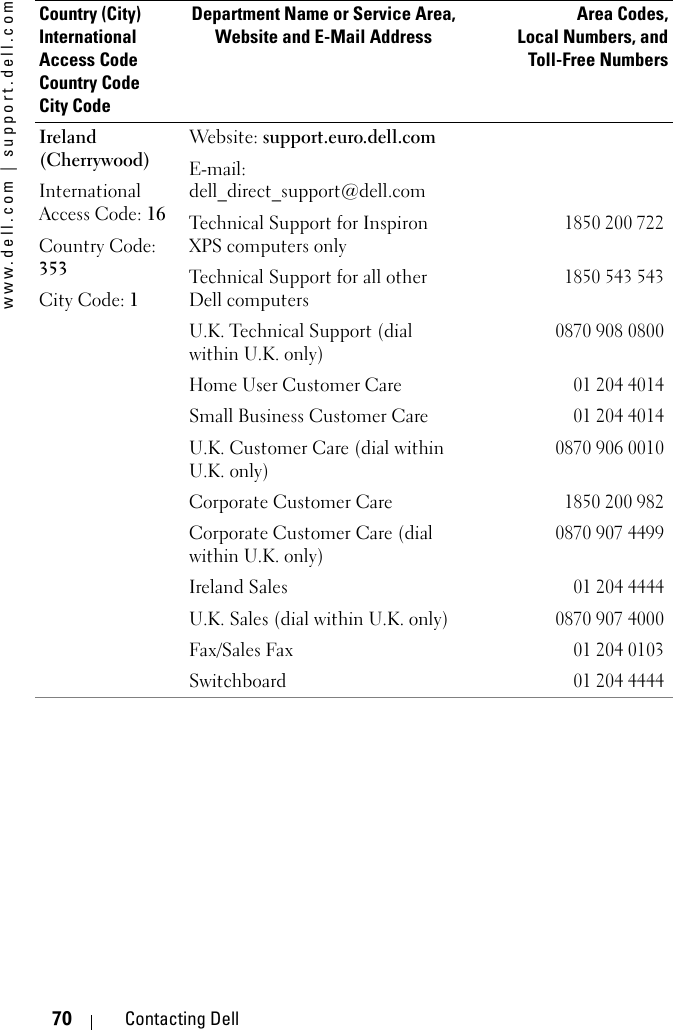


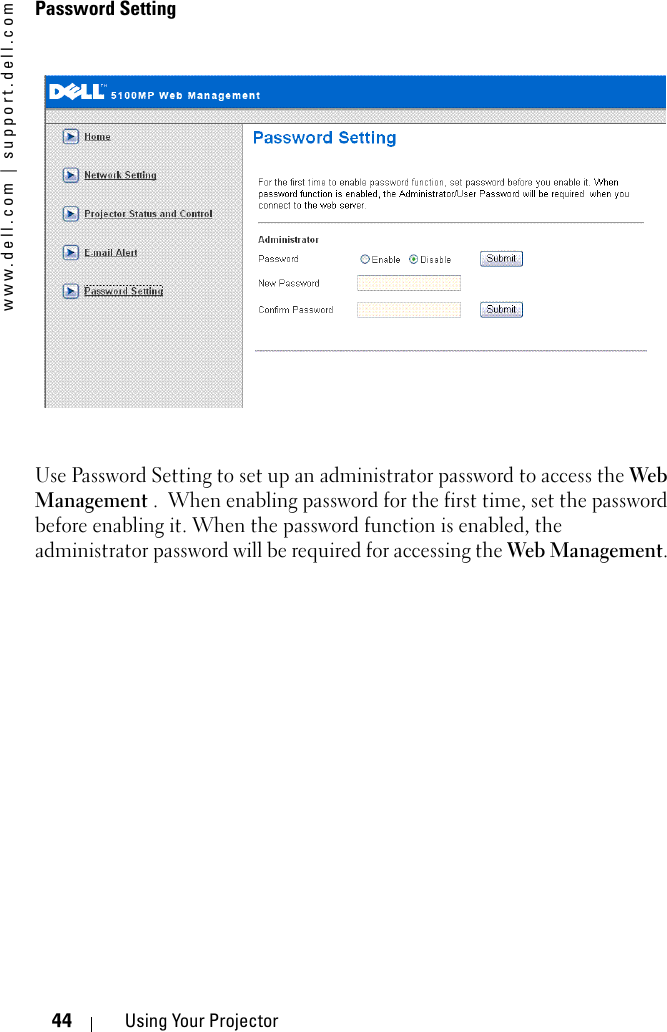
![www.dell.com | support.dell.com82 Contacting DellU.K. (Bracknell)International Access Code: 00Country Code: 44City Code: 1344Website: support.euro.dell.comCustomer Care website: support.euro.dell.com/uk/en/ECare/Form/Home.aspE-mail: dell_direct_support@dell.comTechnical Support (Corporate/Preferred Accounts/PAD [1000+ employees])0870 908 0500Technical Support (direct and general)0870 908 0800Global Accounts Customer Care01344 373 186Home and Small Business Customer Care 0870 906 0010Corporate Customer Care01344 373 185Preferred Accounts (500–5000 employees) Customer Care0870 906 0010Central Government Customer Care01344 373 193Local Government & Education Customer Care01344 373 199Health Customer Care01344 373 194Home and Small Business Sales0870 907 4000Corporate/Public Sector Sales01344 860 456Home and Small Business Fax0870 907 4006Uruguay General Supporttoll-free: 000-413-598-2521Country (City)International Access Code Country CodeCity CodeDepartment Name or Service Area,Website and E-Mail AddressArea Codes,Local Numbers, andToll-Free Numbers](https://usermanual.wiki/Coretronic/M64ET/User-Guide-554291-Page-83.png)
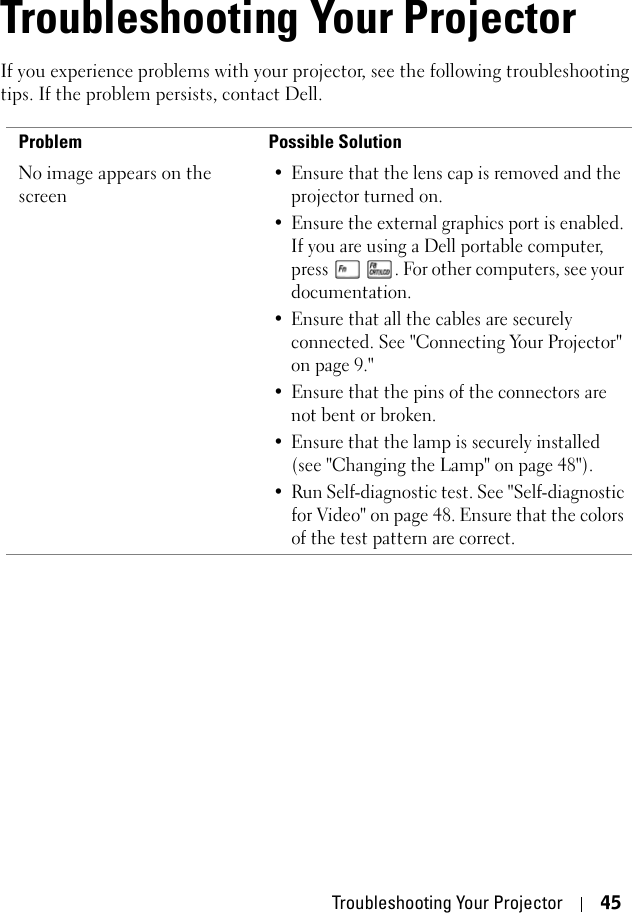
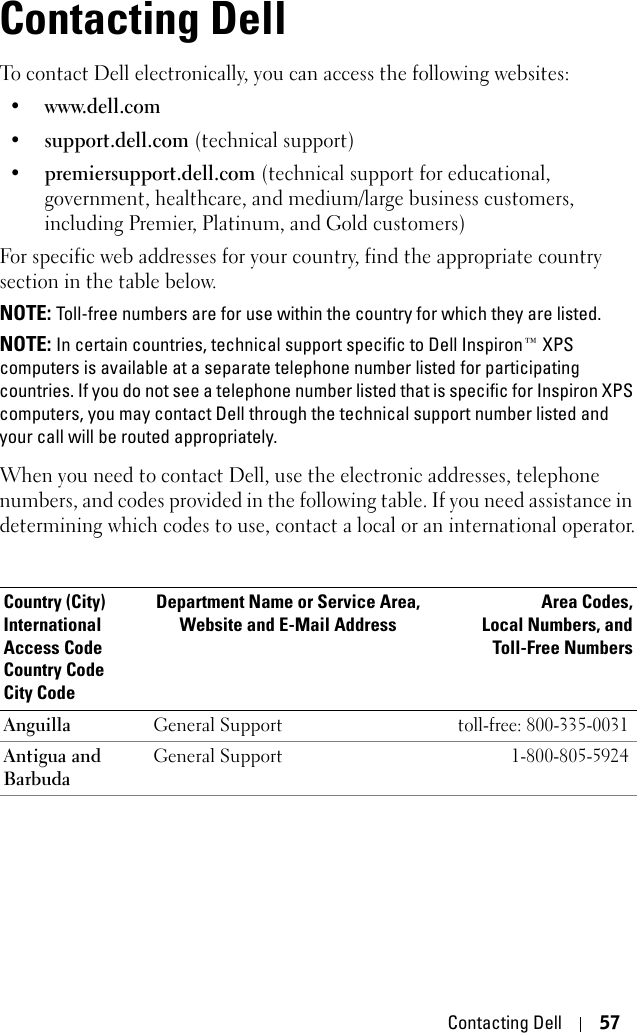
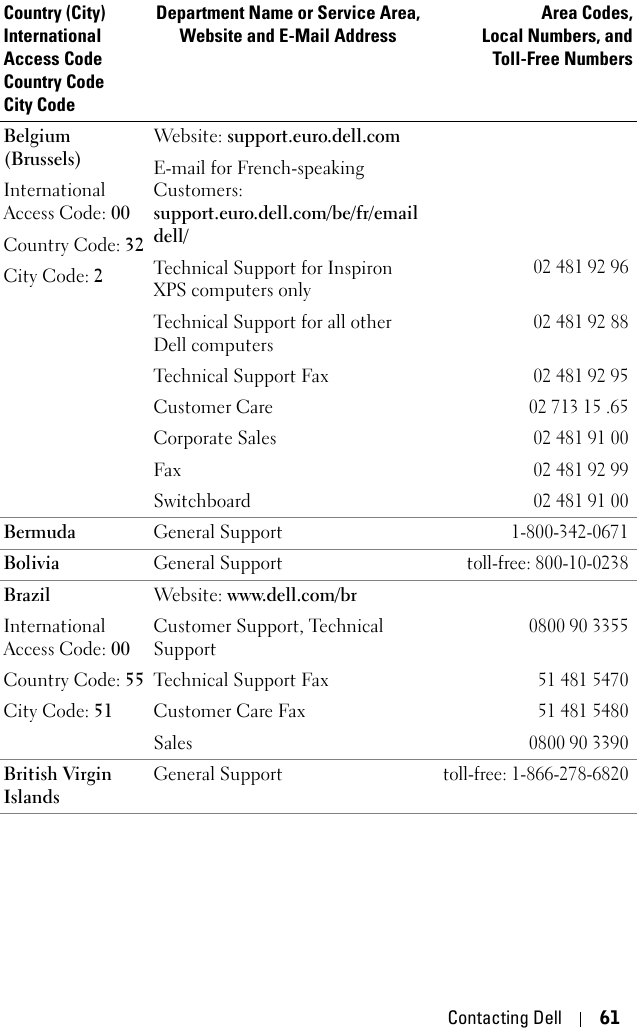
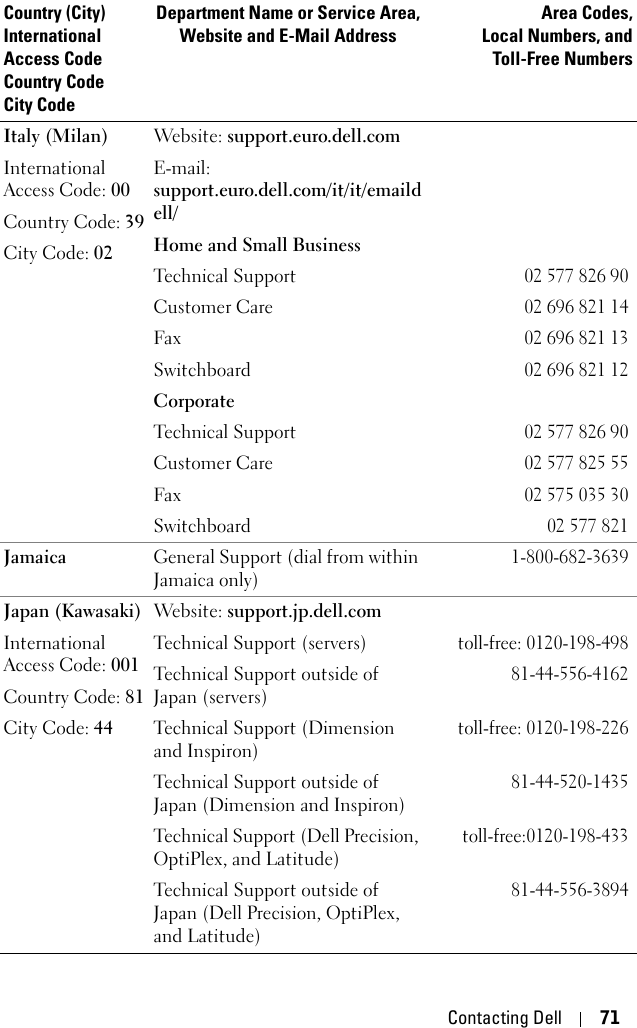
![Contacting Dell 83U.S.A. (Austin, Texas)International Access Code: 011Country Code: 1Automated Order-Status Servicetoll-free: 1-800-433-9014AutoTech (portable and desktop computers)toll-free: 1-800-247-9362Consumer (Home and Home Office) Technical Support toll-free: 1-800-624-9896Customer Service toll-free: 1-800-624-9897DellNet™ Service and Supporttoll-free: 1-877-Dellnet(1-877-335-5638)Employee Purchase Program (EPP) Customerstoll-free: 1-800-695-8133Financial Services website:www.dellfinancialservices.comFinancial Services (lease/loans)toll-free: 1-877-577-3355Financial Services (Dell Preferred Accounts [DPA])toll-free: 1-800-283-2210Business Customer Service and Technical Supporttoll-free: 1-800-822-8965Employee Purchase Program (EPP) Customerstoll-free: 1-800-695-8133Printers and Projectors Technical Supporttoll-free: 1-877-459-7298Public (government, education, and healthcare)Customer Service and Technical Supporttoll-free: 1-800-456-3355Employee Purchase Program (EPP) Customerstoll-free: 1-800-234-1490Dell Salestoll-free: 1-800-289-3355 or toll-free: 1-800-879-3355Country (City)International Access Code Country CodeCity CodeDepartment Name or Service Area,Website and E-Mail AddressArea Codes,Local Numbers, andToll-Free Numbers](https://usermanual.wiki/Coretronic/M64ET/User-Guide-554291-Page-84.png)