Coretronic S718QL DELL ADVANCED PROJECTOR User Manual Coretronic Dell S718QL UM
Coretronic Corp. DELL ADVANCED PROJECTOR Coretronic Dell S718QL UM
UserManual.wiki
>
Coretronic
>
S718QL User Manual
User Manual
Navigation menu
Upload a User Manual
Namespaces
Wiki Guide
HTML
PDF
Info
Views
User Manual
Discussion / Help
Navigation


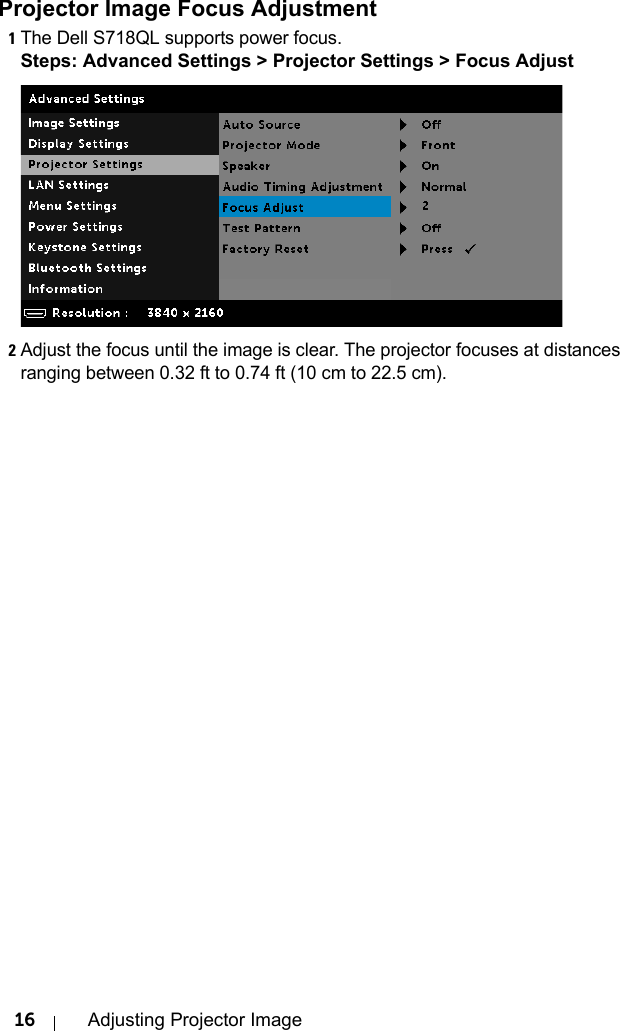
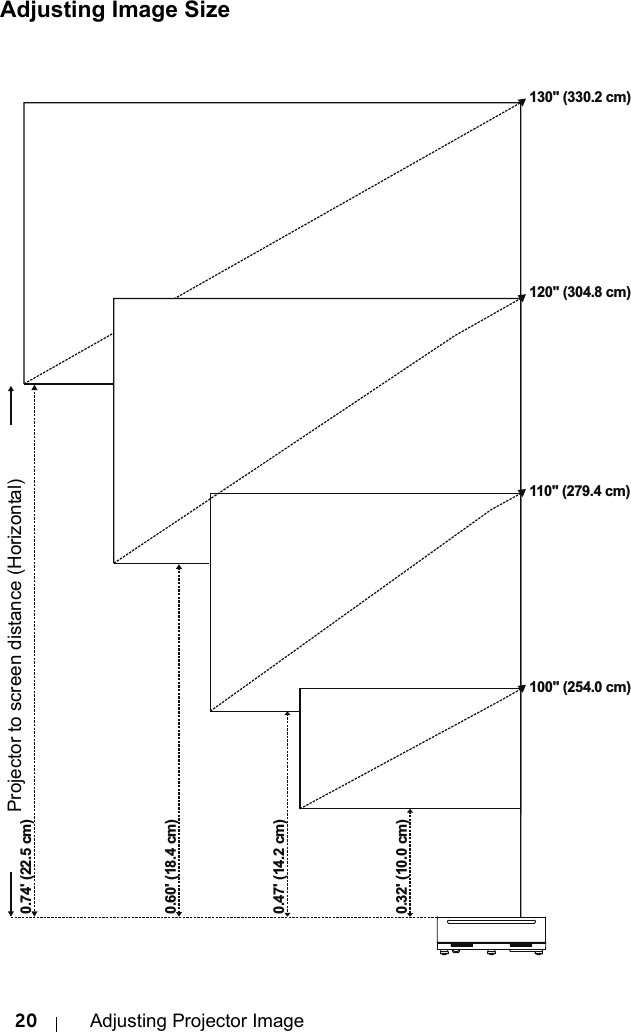
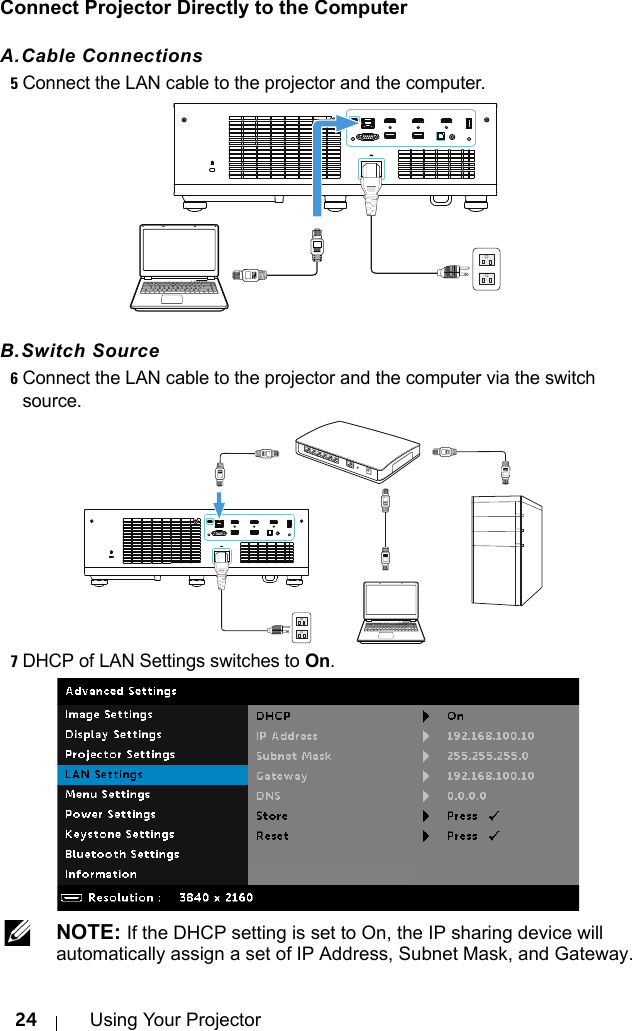
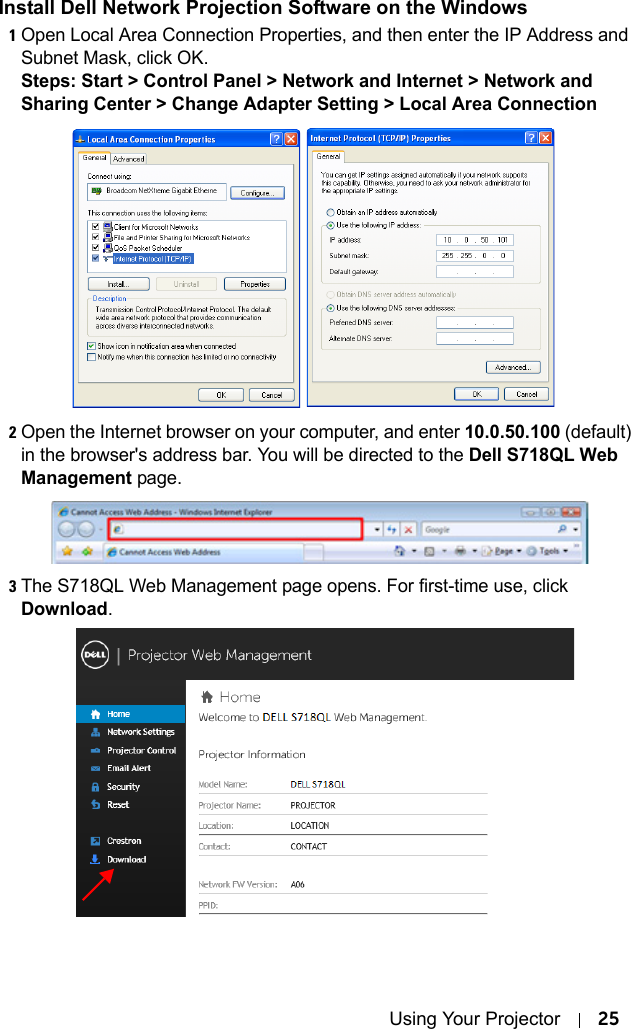
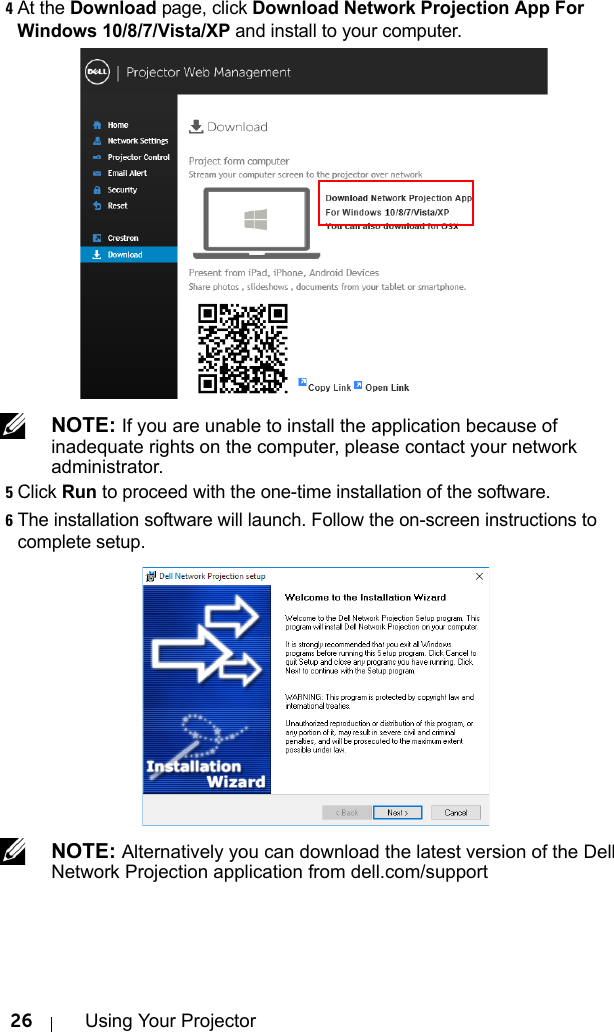

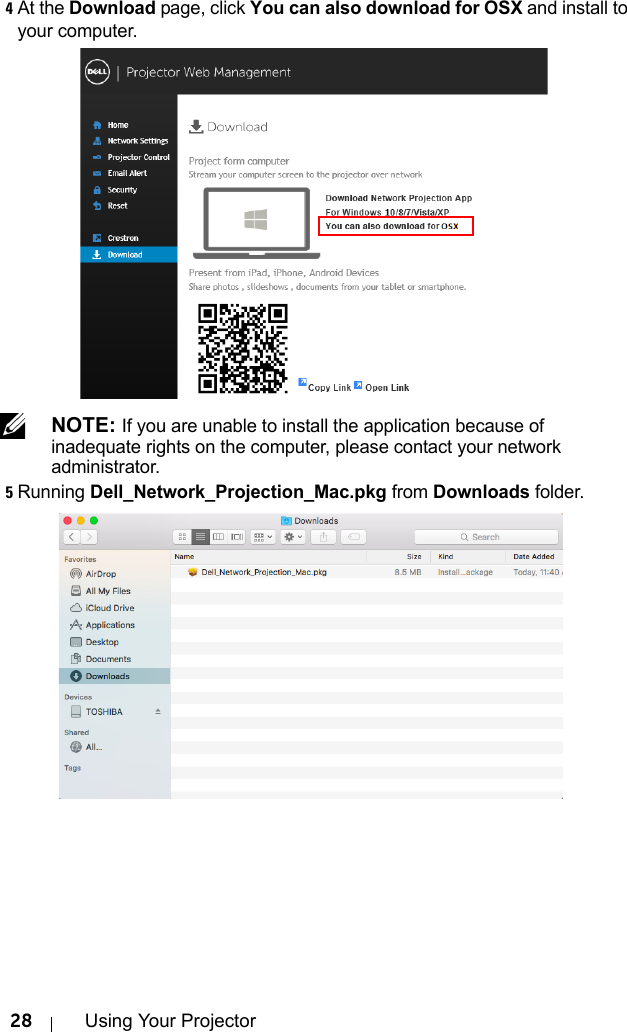
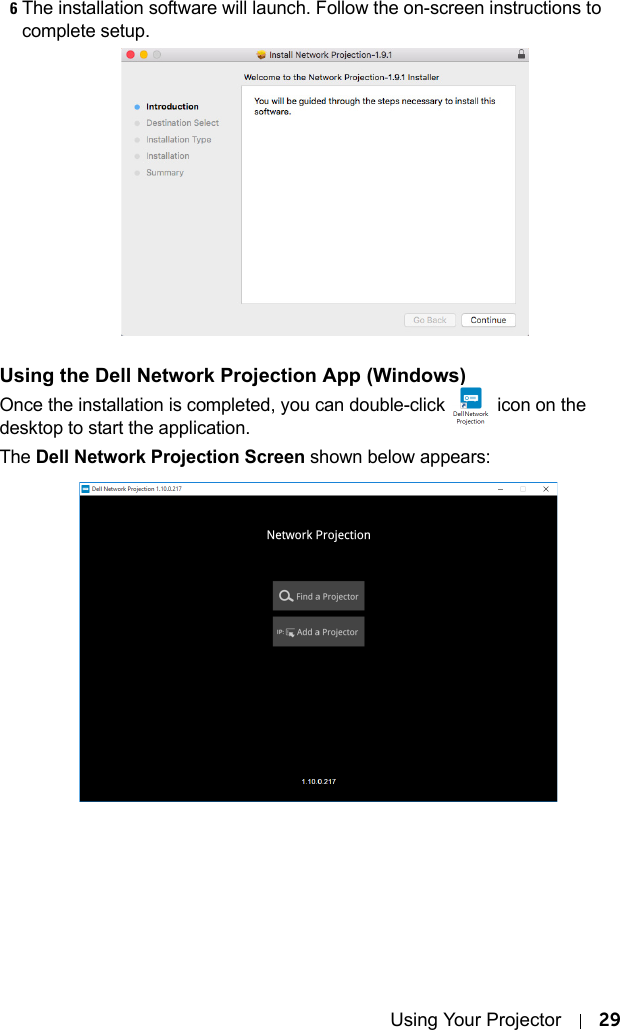

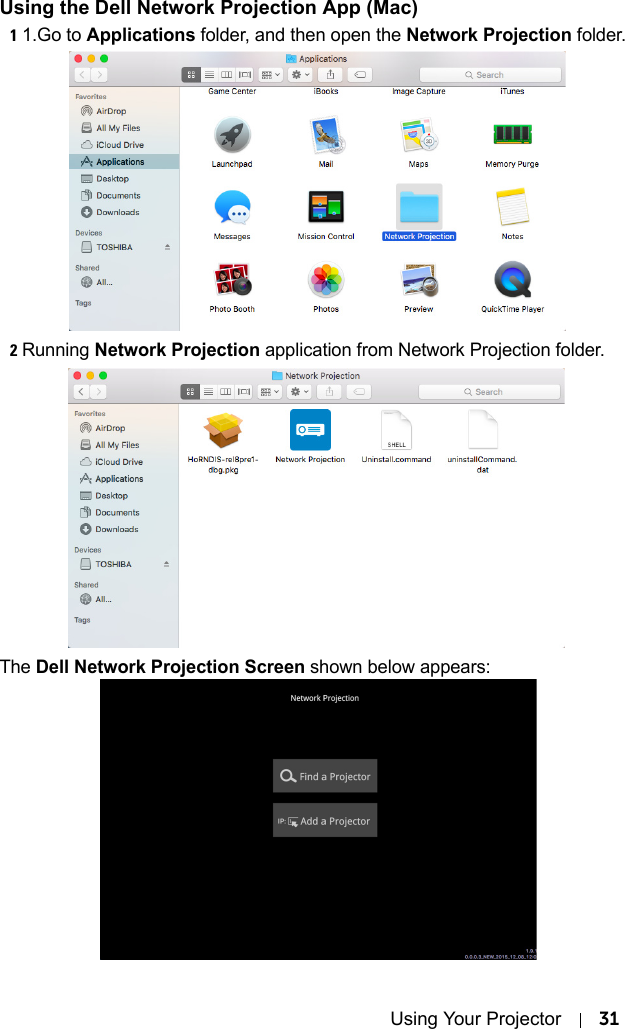
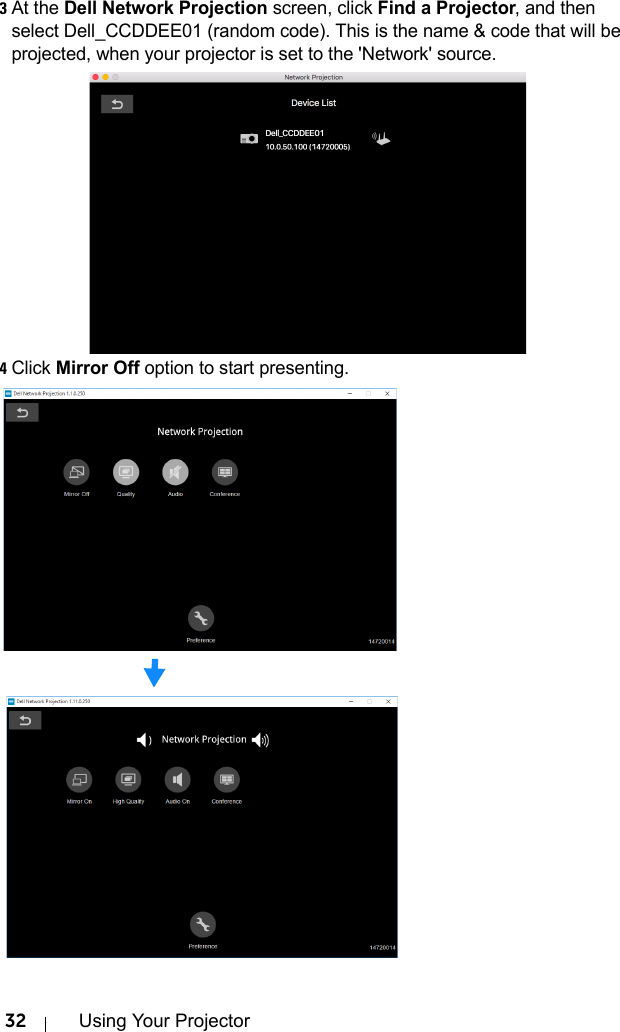

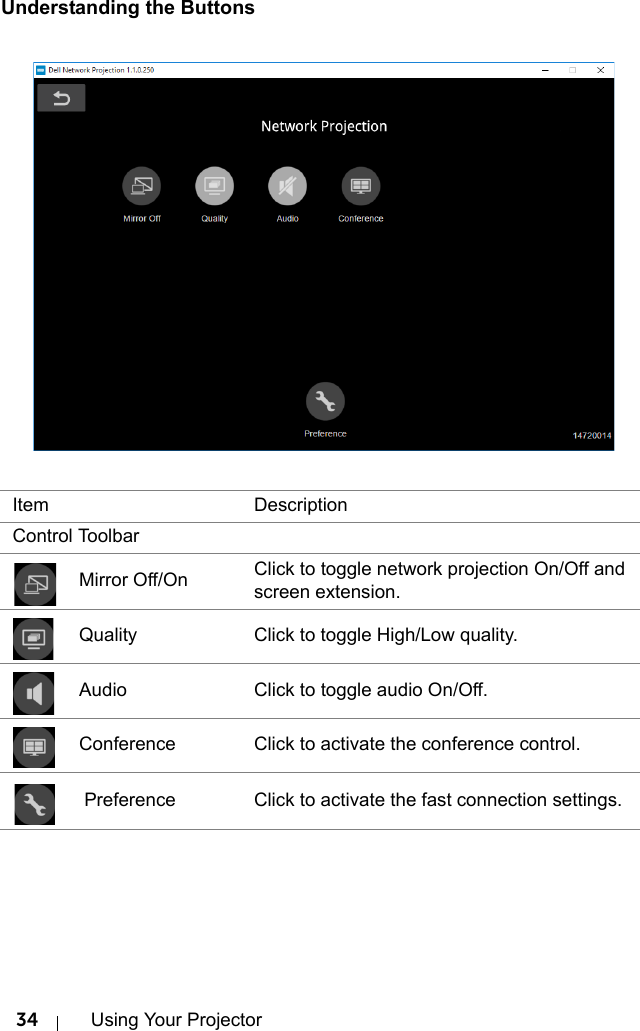

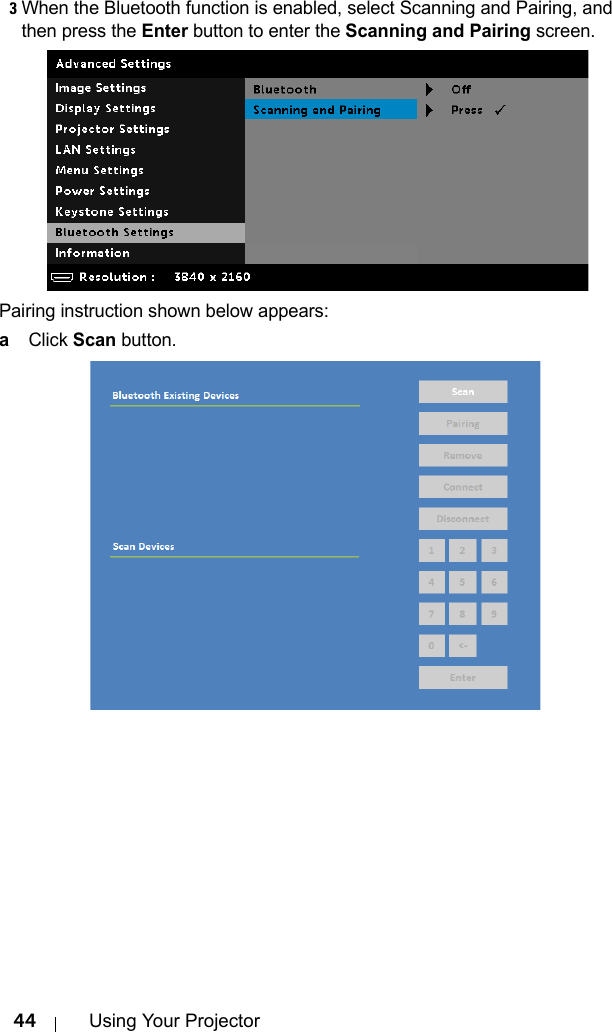
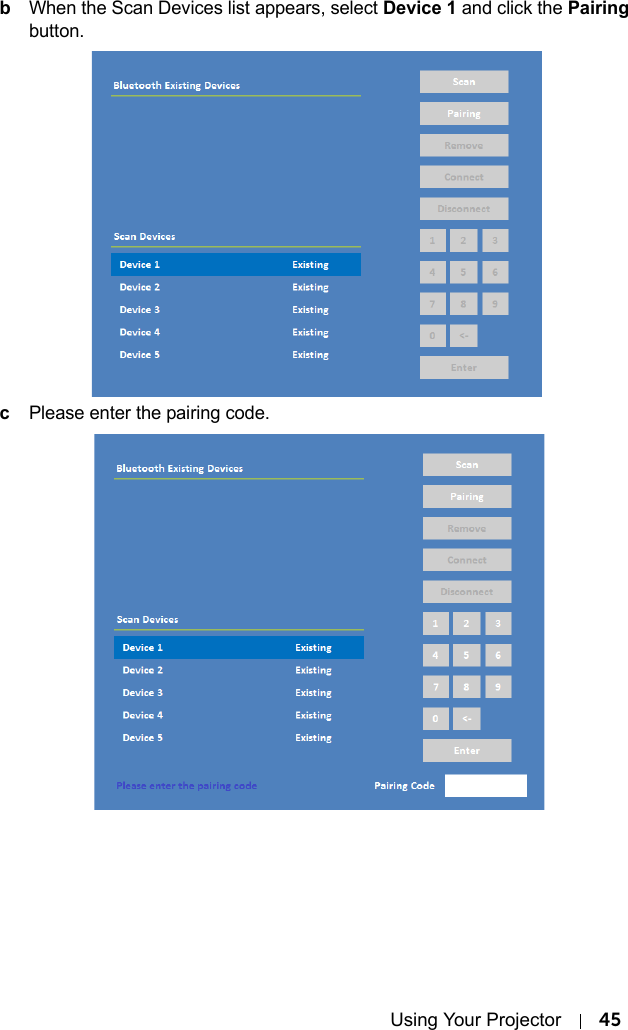
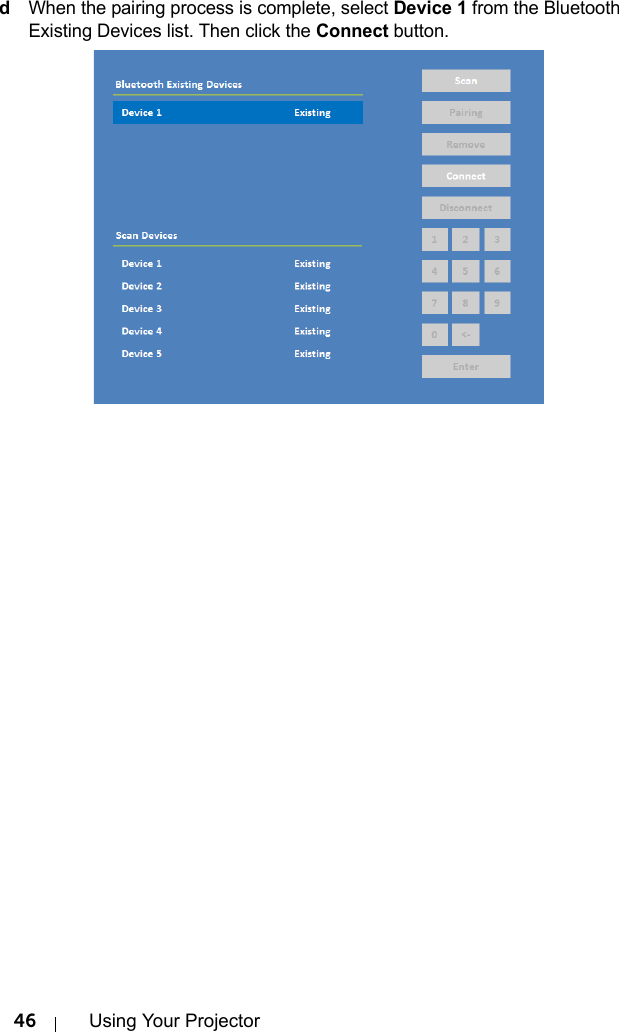
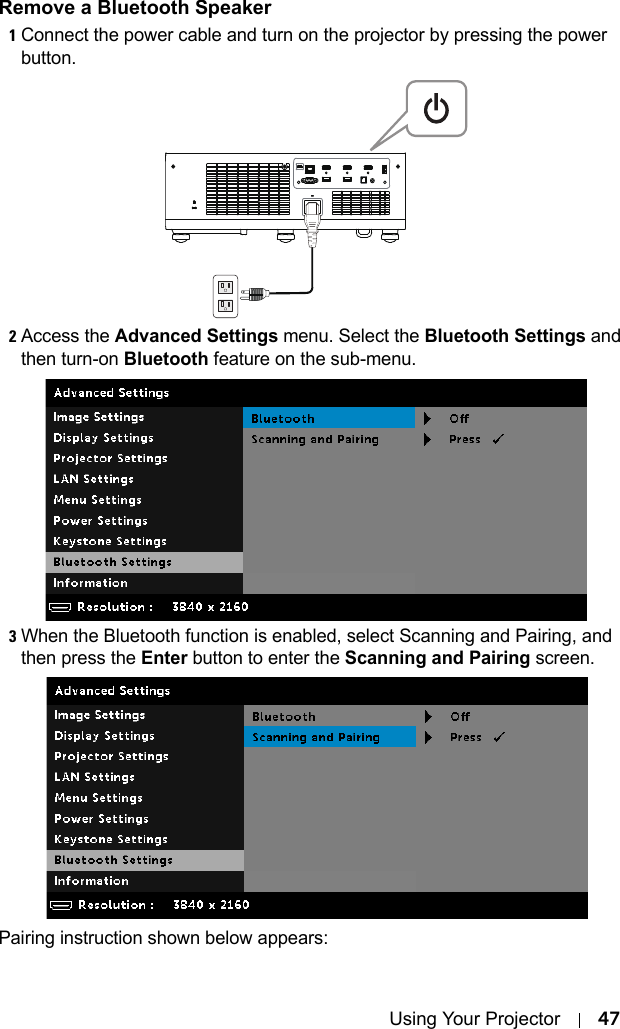
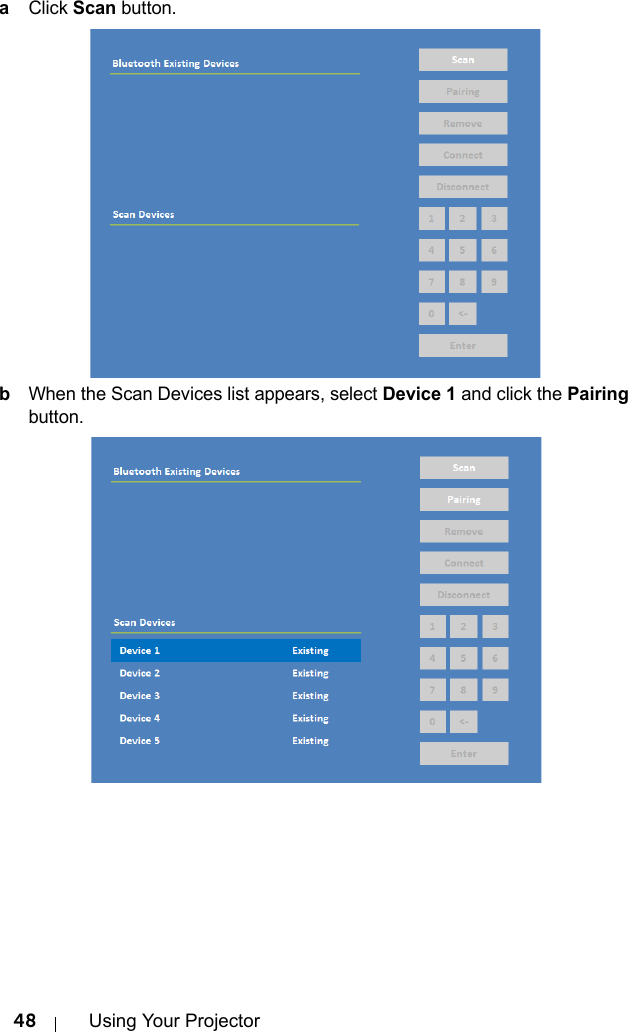
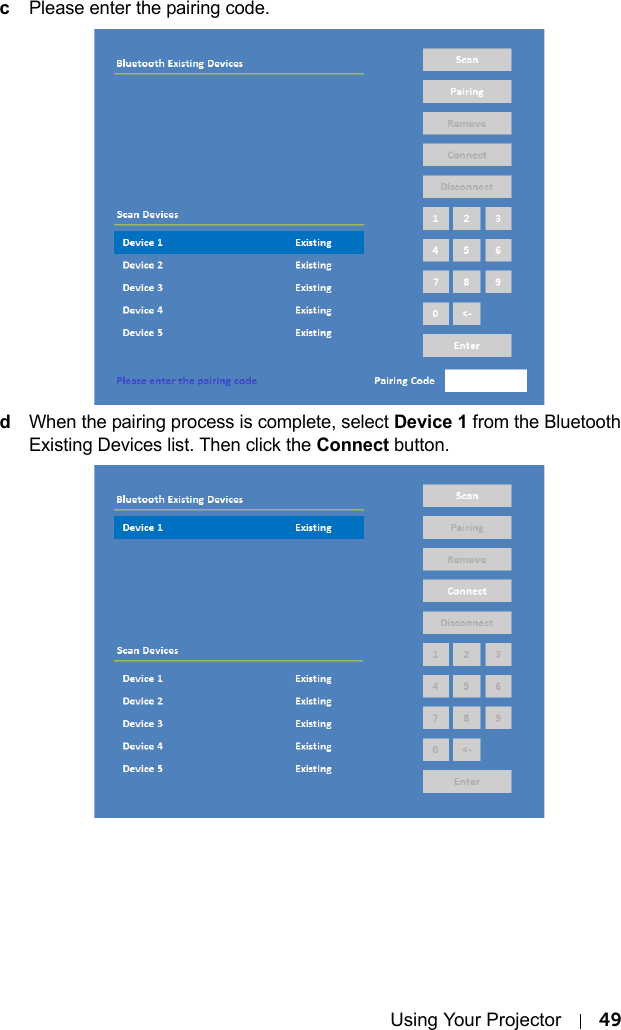
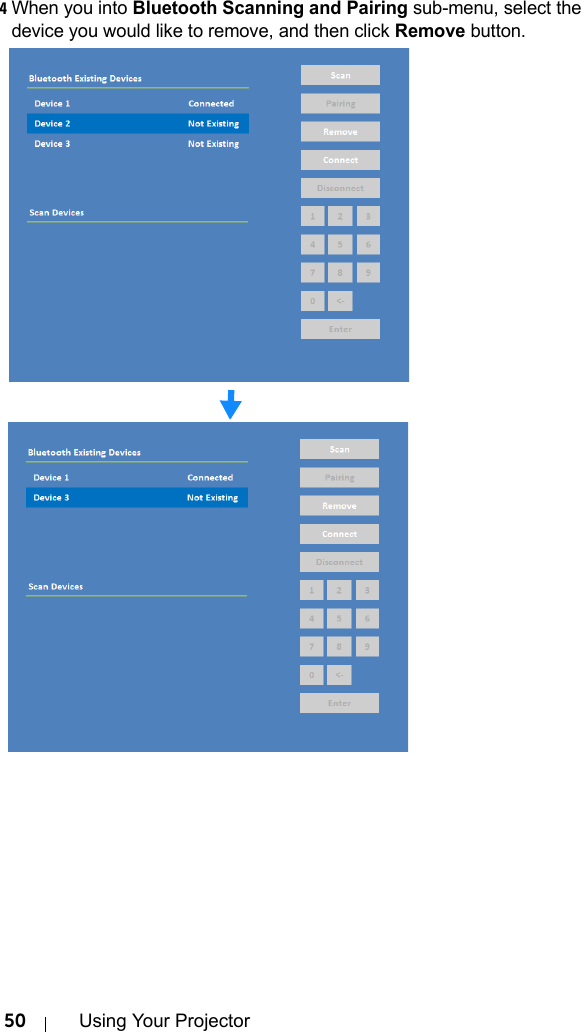


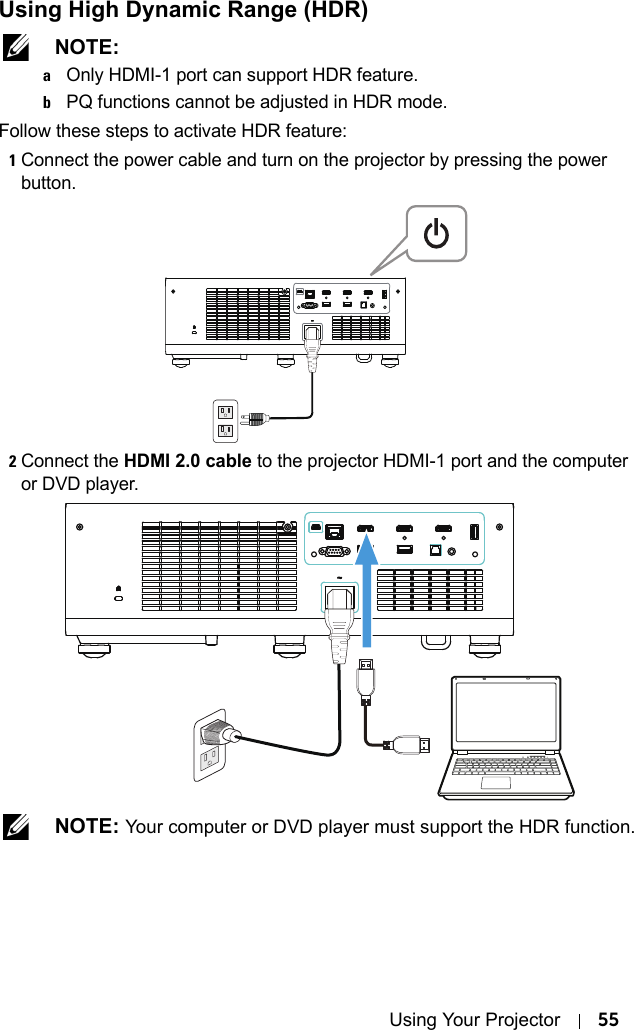

![58 TroubleshootingPartial, scrolling, or incorrectly displayed imageIf you are using a Dell laptop computer, set the resolution of the computer to 4K (3840 x 2160):aRight-click the unused portion of your Microsoft® Windows® desktop, click Properties, and then select Settings tab.bVerify that the setting is 3840 x 2160 pixels for the external monitor port.cPress (Fn+F8). If you experience difficulty in changing resolutions, or if your monitor freezes, restart all the equipment and the projector.If you are not using a Dell laptop computer, see your documentation. If images are not displayed properly, please upgrade the video driver of your computer. For a Dell computer, see www.dell.com/support.The screen does not display your presentationIf you are using a portable computer, press (Fn+F8). Image color is incorrect•If the display receives the wrong signal output from the graphics card, please set the signal type to RGB in the OSD Image Settings of the Advanced Settings tab.•Use Test Pattern in the Projector Settings of the Advanced Settings menu. Ensure that the colors of the test pattern are correct. Image is out of focus 1Adjust the focus until the image is clear. Use Focus Adjust in the Projector Settings of the Advanced Settings menu.2Ensure that the projection screen is within the required distance from the projector (0.32 ft [10 cm] ~ 0.74 ft [22.5 cm]).Problem (continued) Possible Solution (continued)](https://usermanual.wiki/Coretronic/S718QL/User-Guide-3505085-Page-57.png)