Corning Optical Communication VECELLPCSFB VE CELL PCS FULL BAND DISTRIBUTED ANTENNA SYSTEM User Manual EnCOVER Dual Band
Corning Optical Communication Wireless VE CELL PCS FULL BAND DISTRIBUTED ANTENNA SYSTEM EnCOVER Dual Band
UserManual.wiki
>
Corning Optical Communication
>
VECELLPCSFB User Manual
Users Manual
Navigation menu
Upload a User Manual
Namespaces
Wiki Guide
HTML
PDF
Info
Views
User Manual
Discussion / Help
Navigation
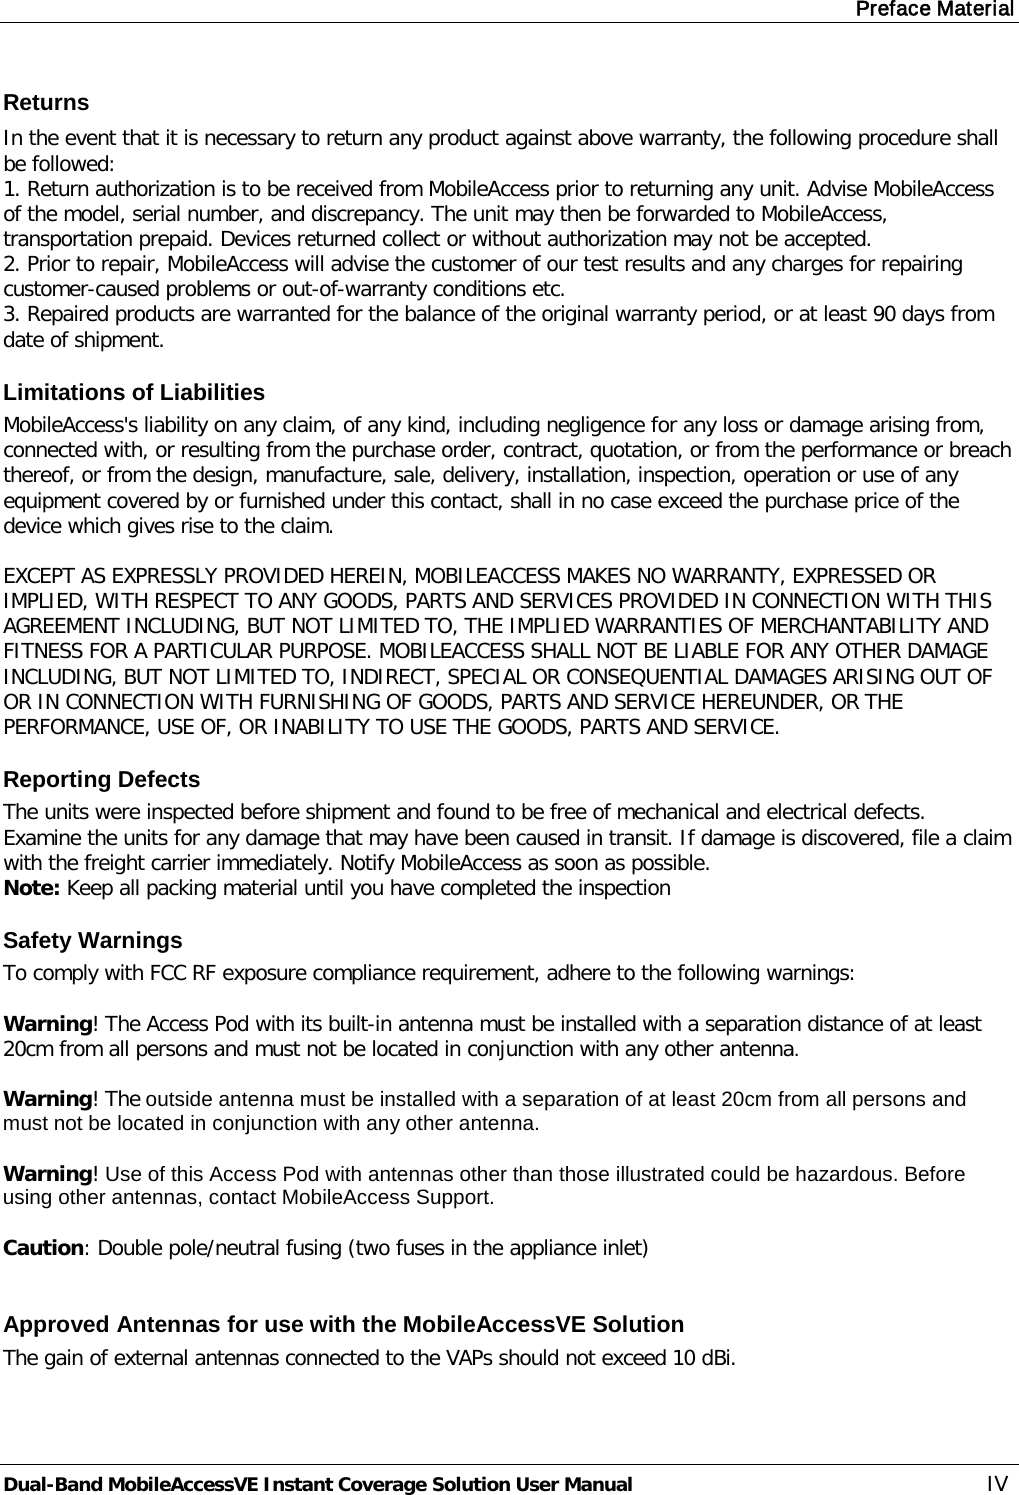

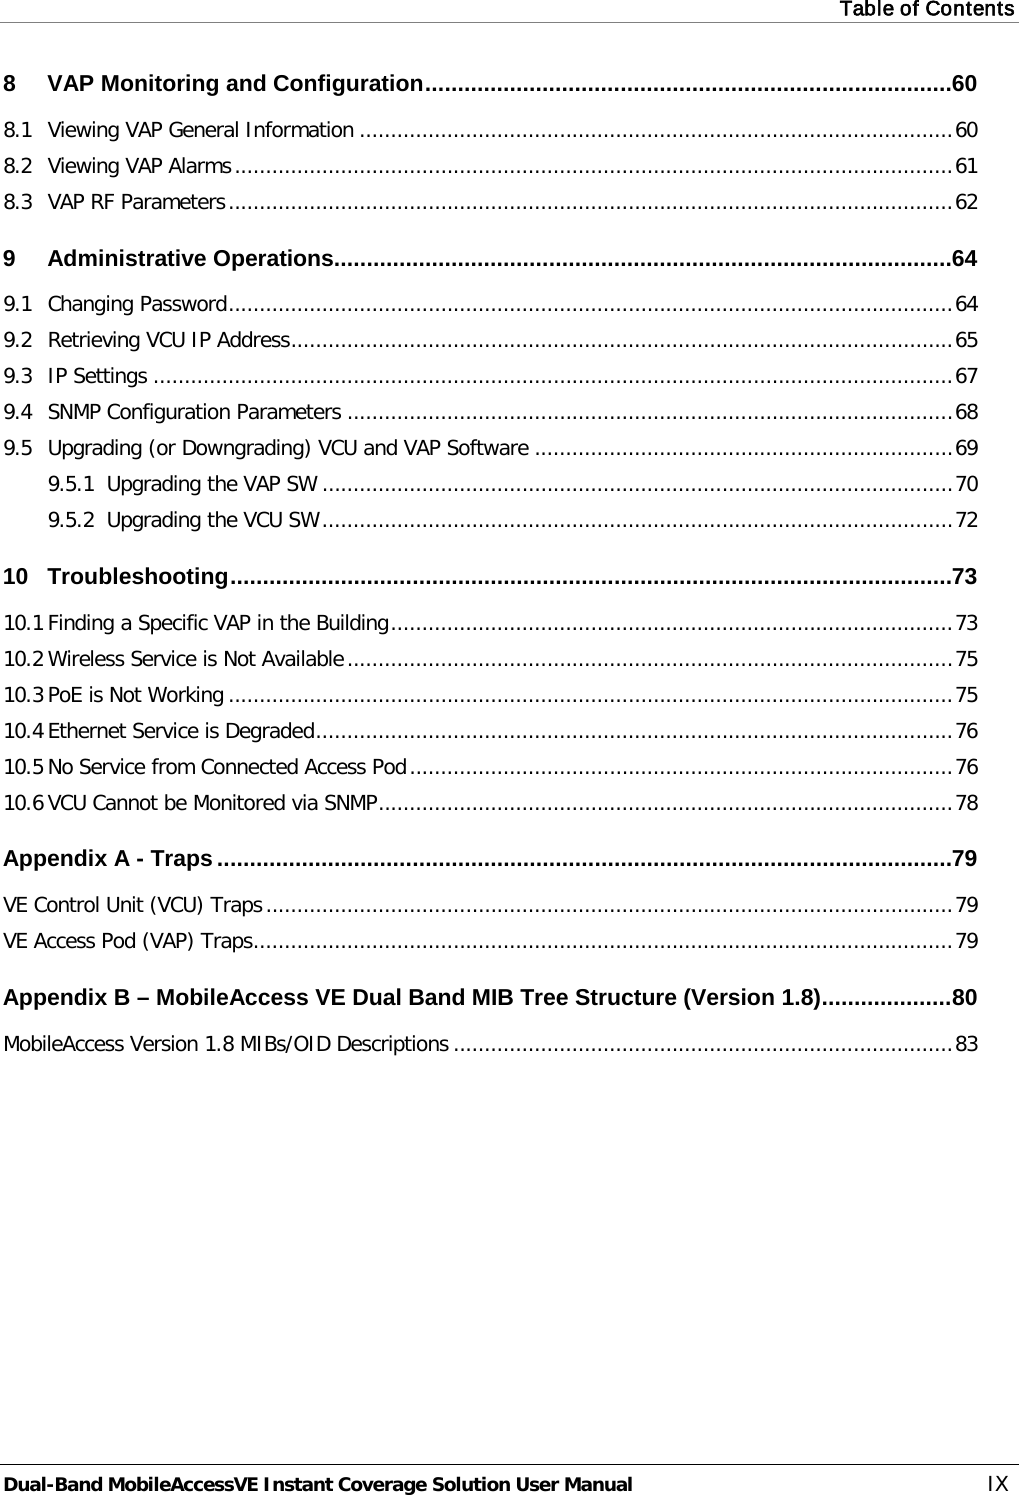

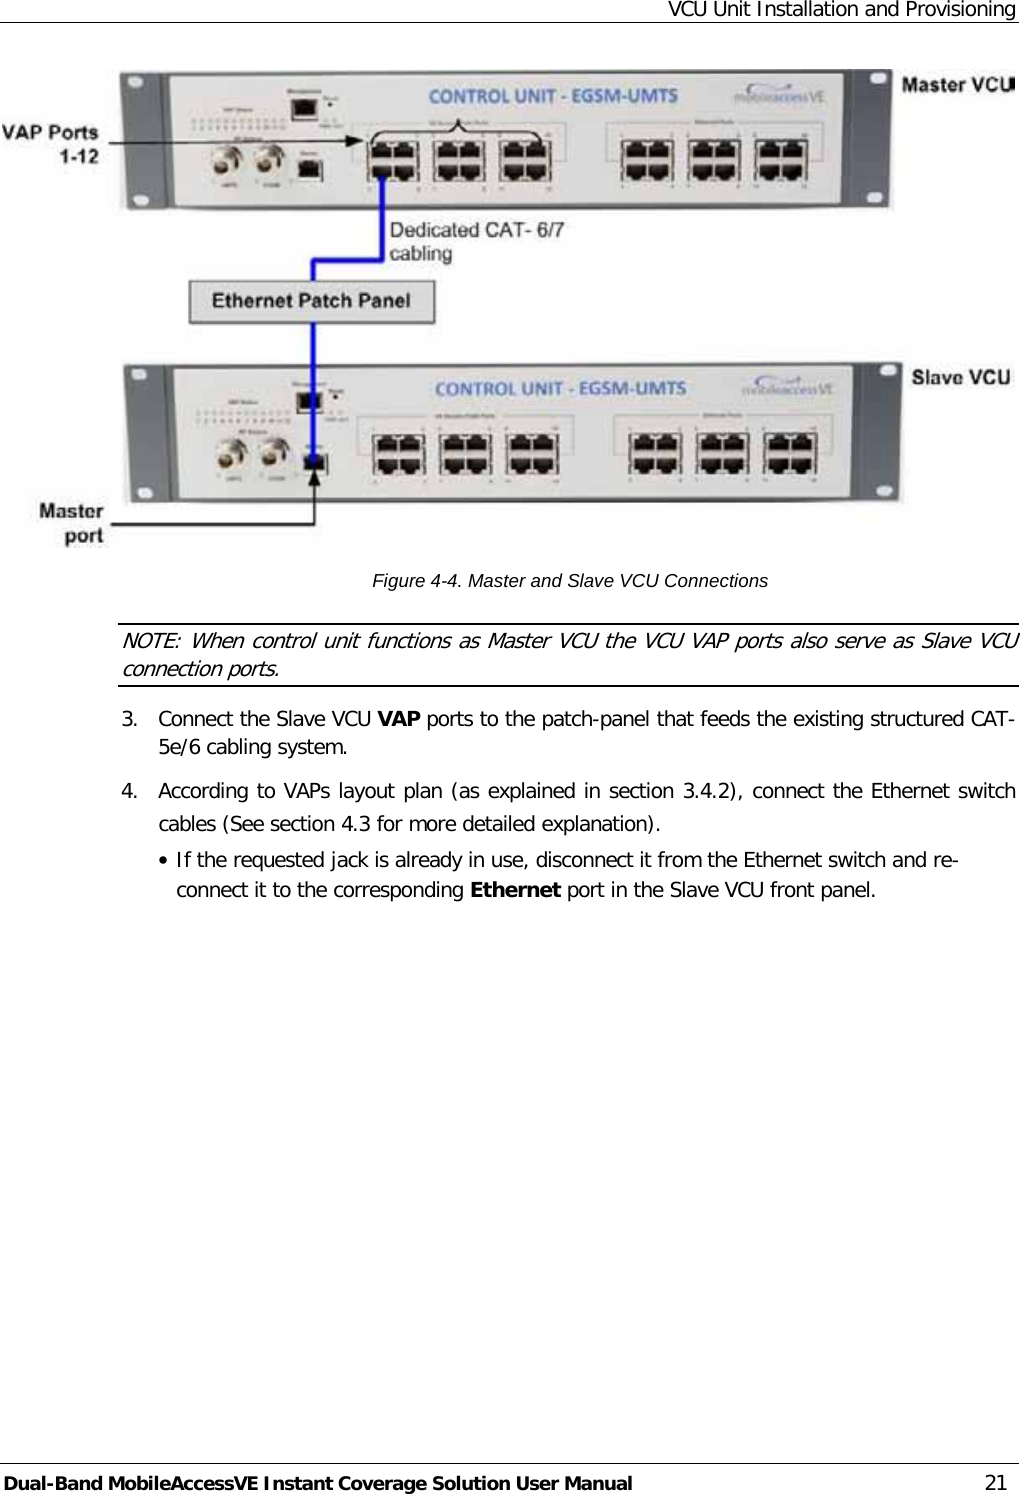
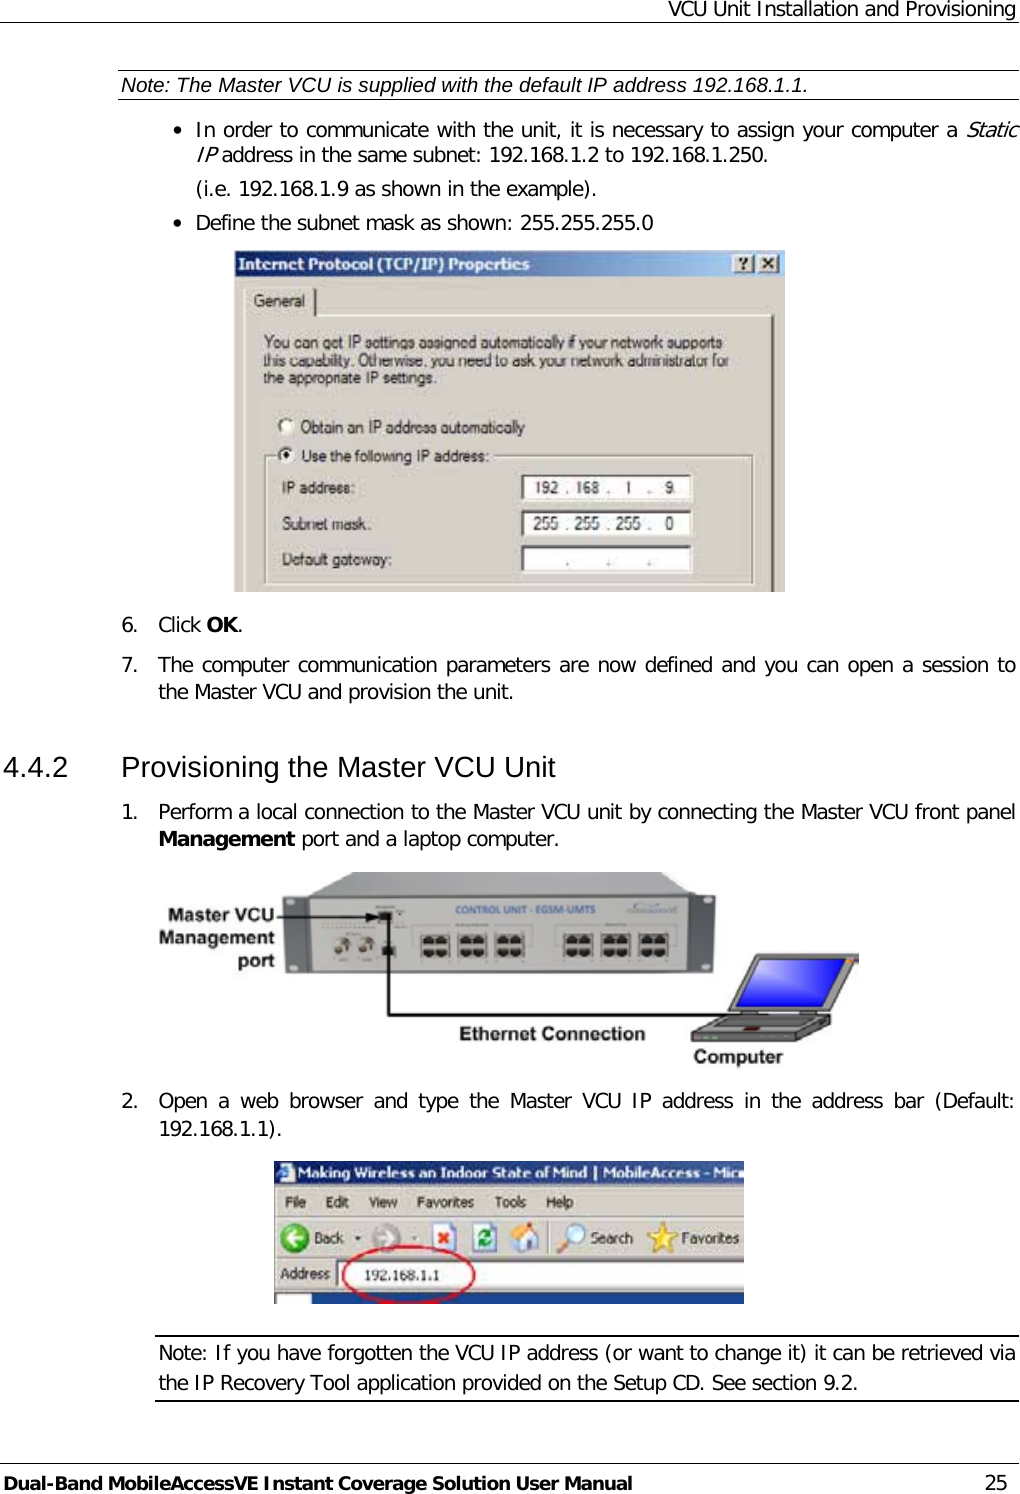


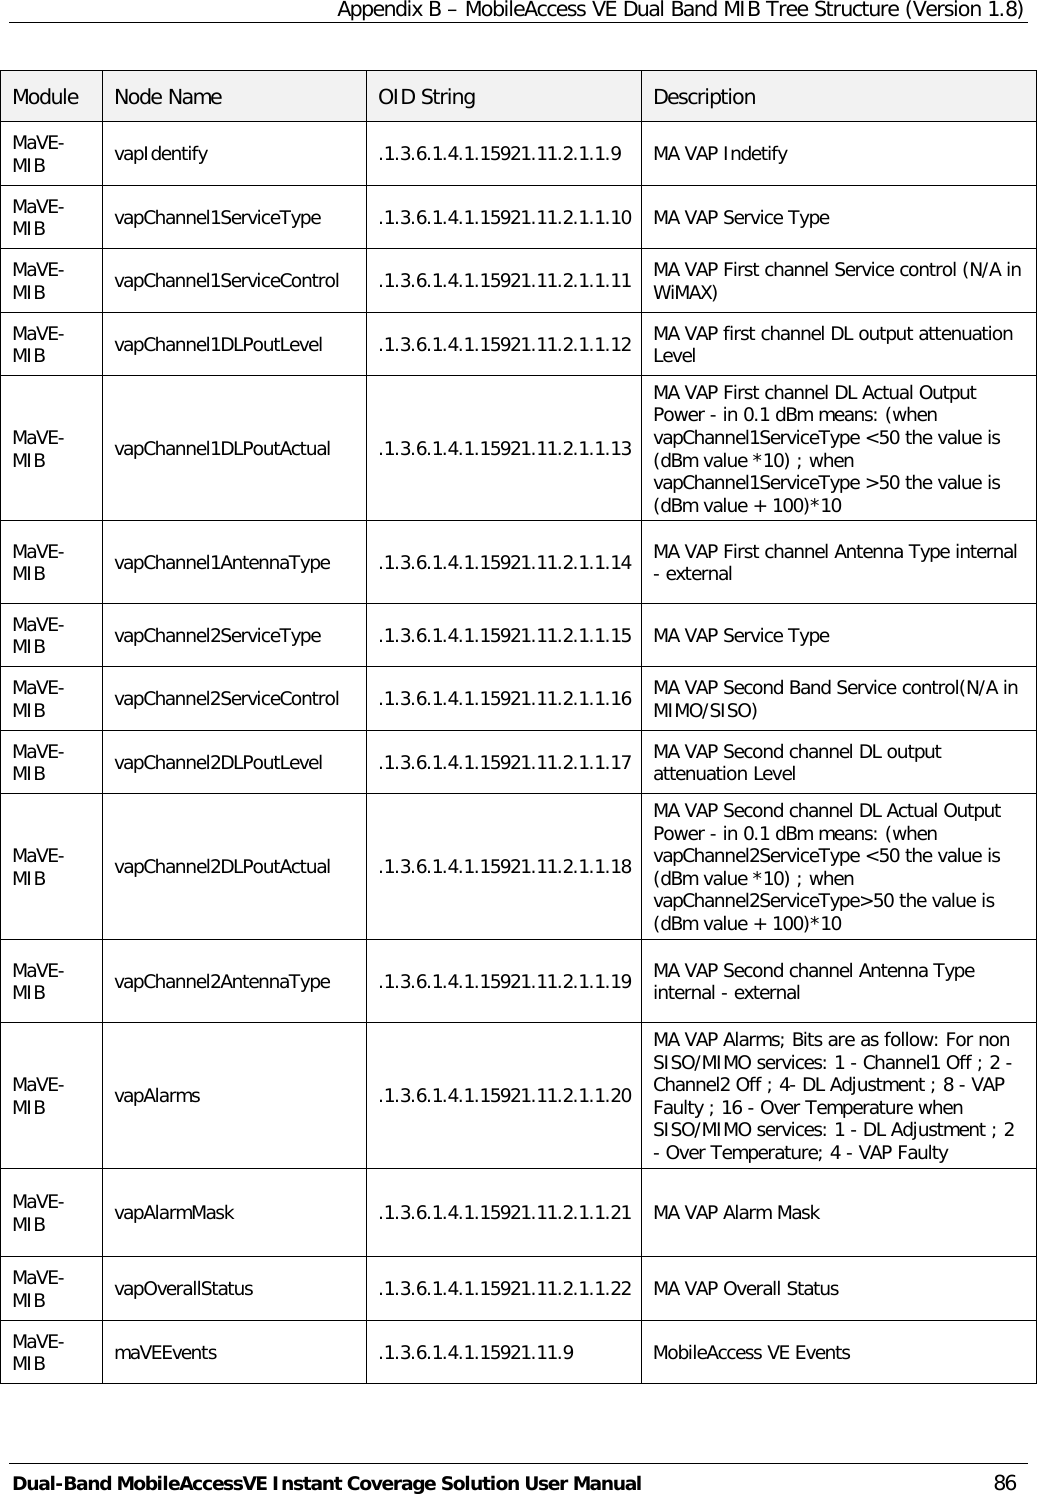
![VAP Installation and Provisioning Dual-Band MobileAccessVE Instant Coverage Solution User Manual 38 5.2.2 Horizontal Ceiling Mount VAP Installations Note: This type of installation is ONLY relevant for VAPs to which EXTERNAL antennas are connected. The Horizontal installation procedure varies depending on the type of ceiling: · Lowered ceilings. · Concrete/Wood ceilings (See section 5.2.2.3). 5.2.2.1 VAP Kit Contents Please verify that the VAP Ceiling Mount Installation kit (P/N AK-VAP-CEILING-MT-H) includes the items listed below. Kit Items Description Unit Mounting Brackets A) Ceiling Bracket B) Locke Bracket “Twist on” Track Light Clip assembly Used for installation on lowered ceilings. A) Track Light Clip B) Screw, Bolt, and Washer (3) Flat Head Screws 100', 4/40 x 1/4 [NEROSTA] Used for assembling brackets (4) Self Screws 3dim L=8 ,Flat HD 90 [Steel zinc] Used for securing bracket assembly to VAP B A B A](https://usermanual.wiki/Corning-Optical-Communication/VECELLPCSFB/User-Guide-1515057-Page-47.png)
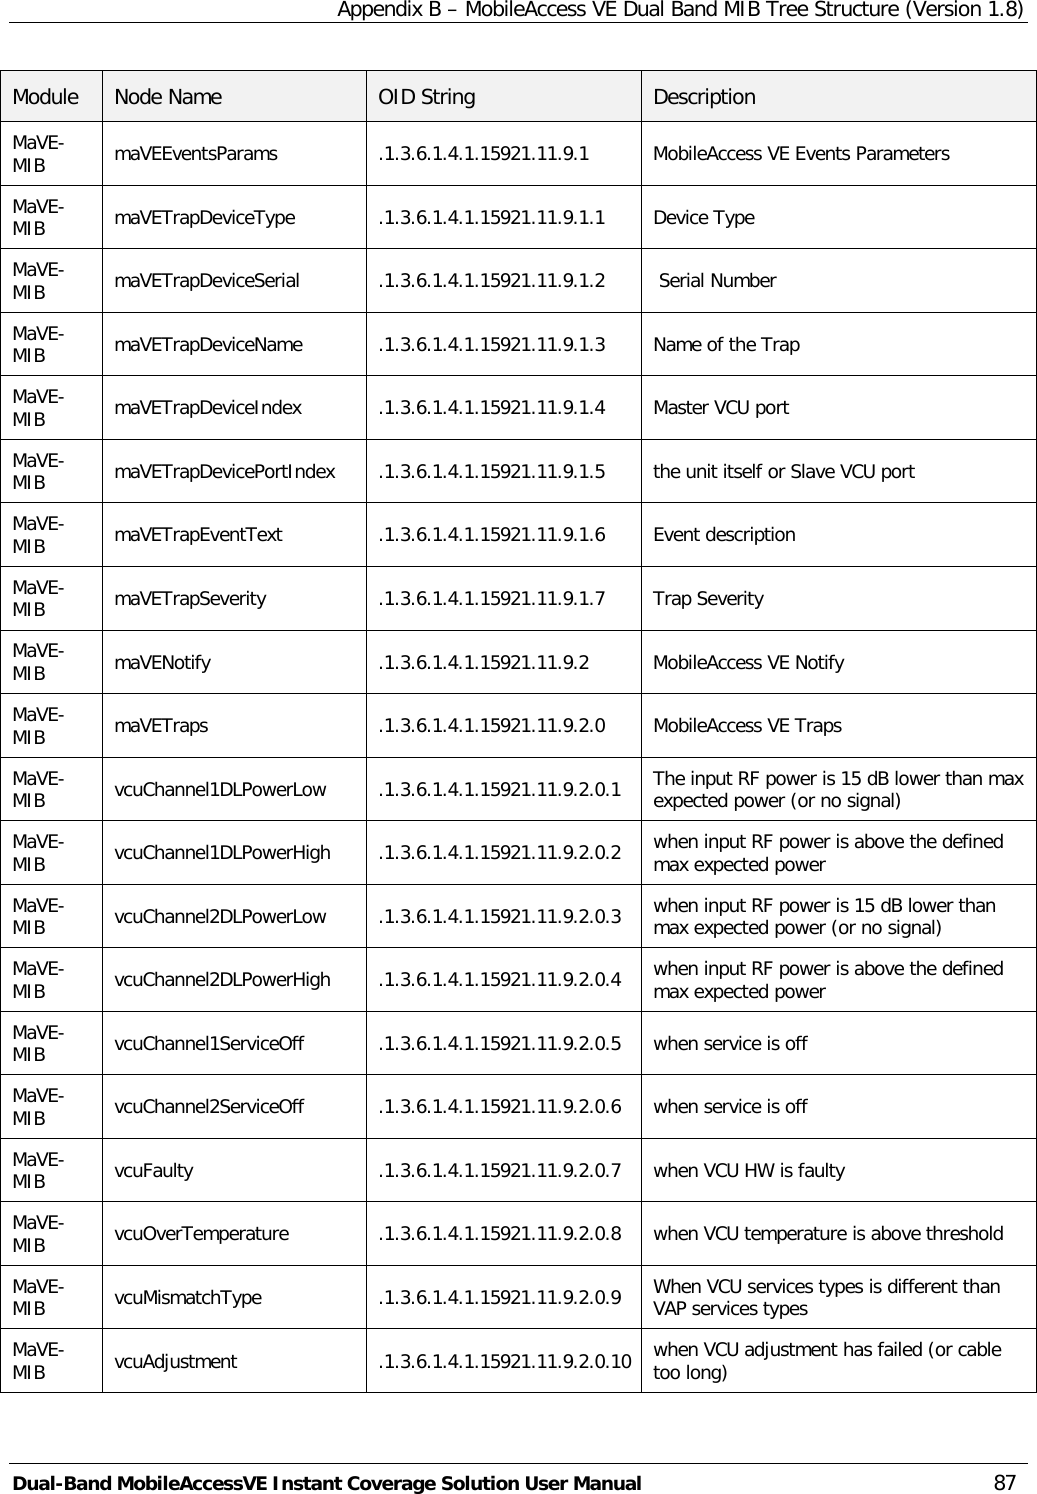
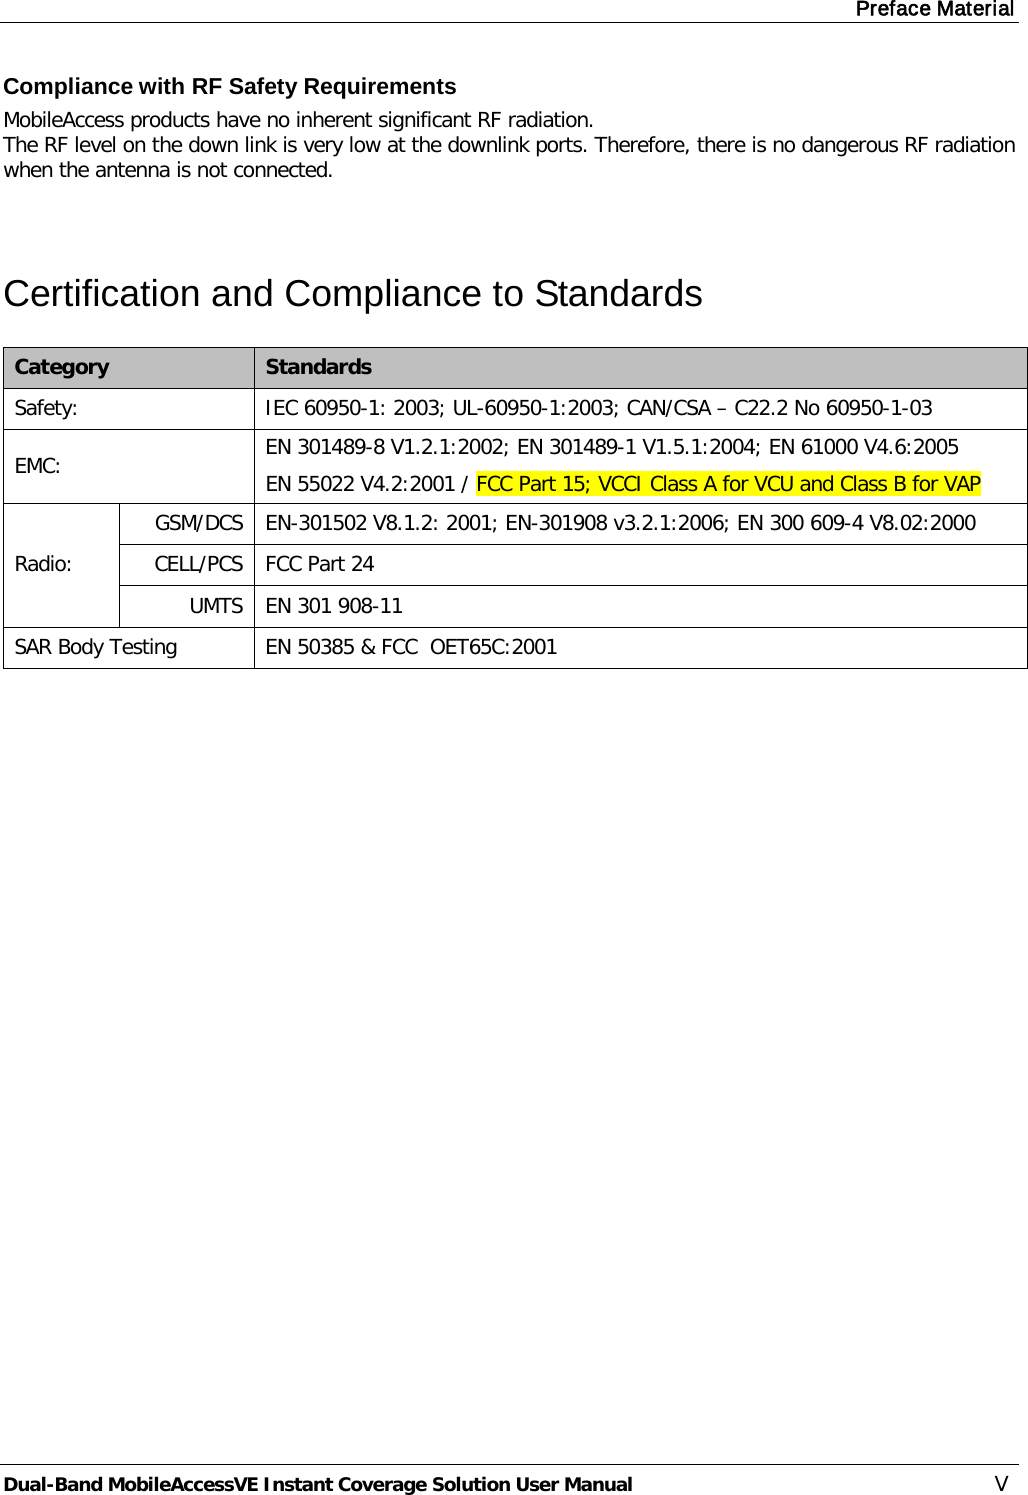
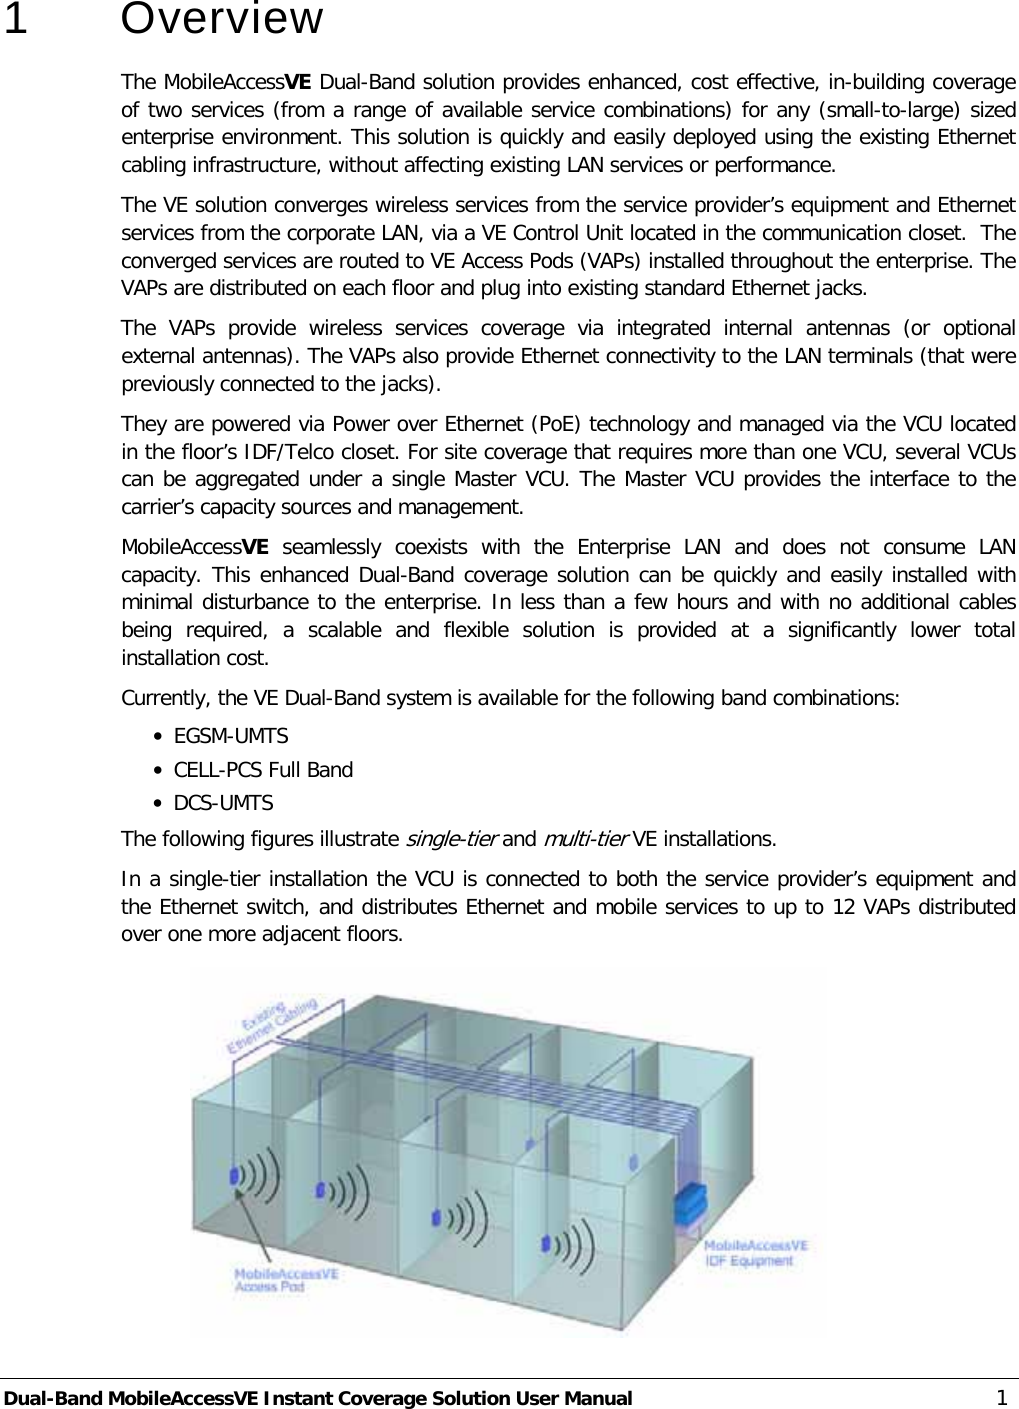
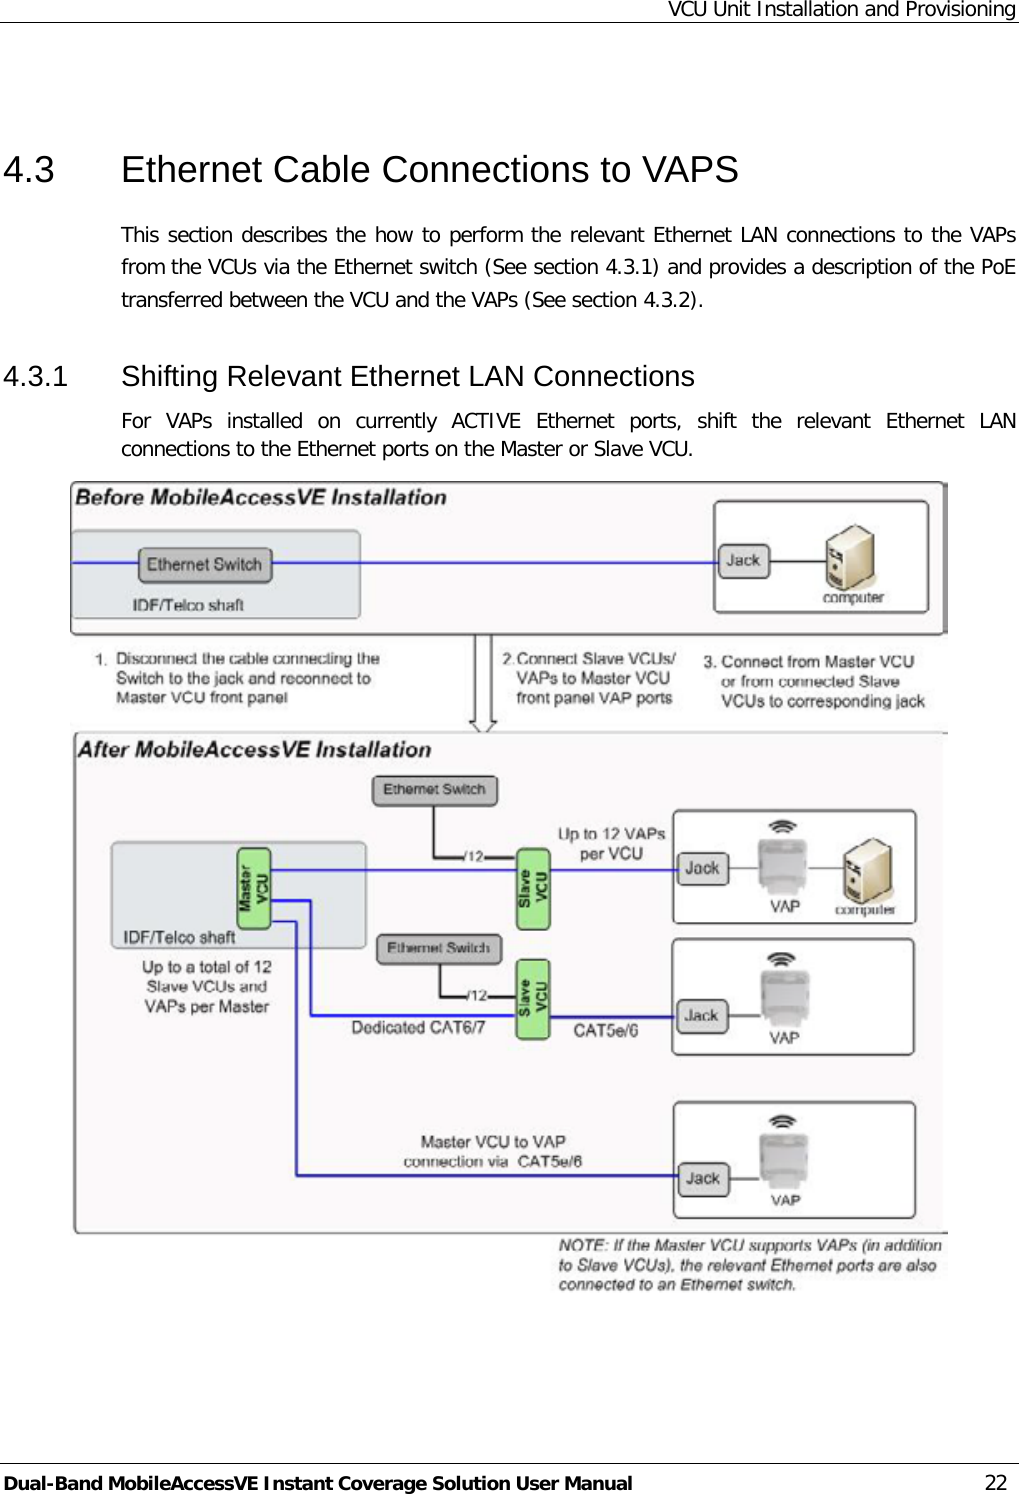
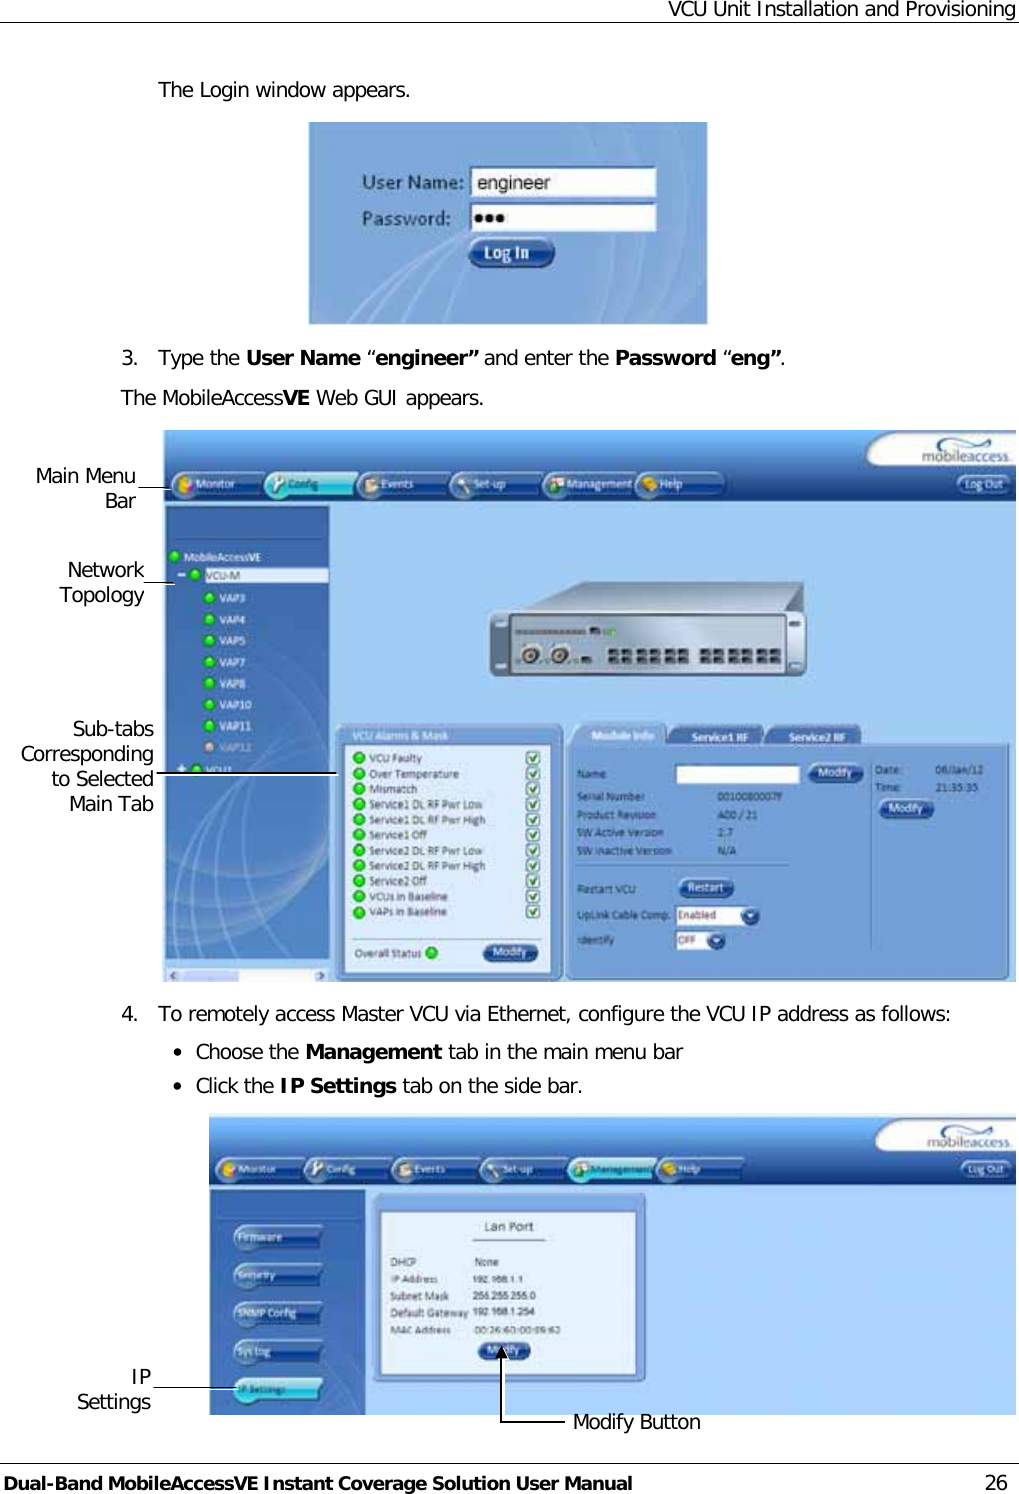
![VAP Installation and Provisioning Dual-Band MobileAccessVE Instant Coverage Solution User Manual 42 5.2.3 Vertical Ceiling Mount VAP Installations Note: This type of installation option is applicable for VAPs working with either the INTERNAL antennas or the EXTERNAL antennas (internal antennas are designed to provide uniform coverage when aligned vertically on desk, wall or from ceiling). The Vertical installation procedure varies depending on the type of ceiling: · Lowered ceilings (See section 0). · Concrete/Wood ceilings (See section 5.2.3.3). 5.2.3.1 VAP Kit Contents Please verify that the VAP Ceiling Mount Installation kit (P/N AK-VAP-CEILING-MT-V) includes the items listed below. Kit Items Description Unit Mounting Brackets A) Ceiling Bracket B) Locke Bracket “Twist on” Track Light Clip Assembly A) Track Light Clip B) Screw, Bolt, and Washer (3) Flat Head Screws 100', 4/40 x ¼ [NEROSTA] Used for assembling brackets together (4) Self Screws 3dim L=8 ,Flat HD 90 [Steel zinc] Used for securing bracket assembly to VAP A B A B](https://usermanual.wiki/Corning-Optical-Communication/VECELLPCSFB/User-Guide-1515057-Page-51.png)