Craftsman 78615160 User Manual SPRAY 2.0 GALLON Manuals And Guides L0803447
CRAFTSMAN Sprayer and Accessory Manual L0803447 CRAFTSMAN Sprayer and Accessory Owner's Manual, CRAFTSMAN Sprayer and Accessory installation guides
User Manual: Craftsman 78615160 78615160 CRAFTSMAN SPRAY 2.0 GALLON - Manuals and Guides View the owners manual for your CRAFTSMAN SPRAY 2.0 GALLON #78615160. Home:Farm Equipment Parts:Craftsman Parts:Craftsman SPRAY 2.0 GALLON Manual
Open the PDF directly: View PDF ![]() .
.
Page Count: 6
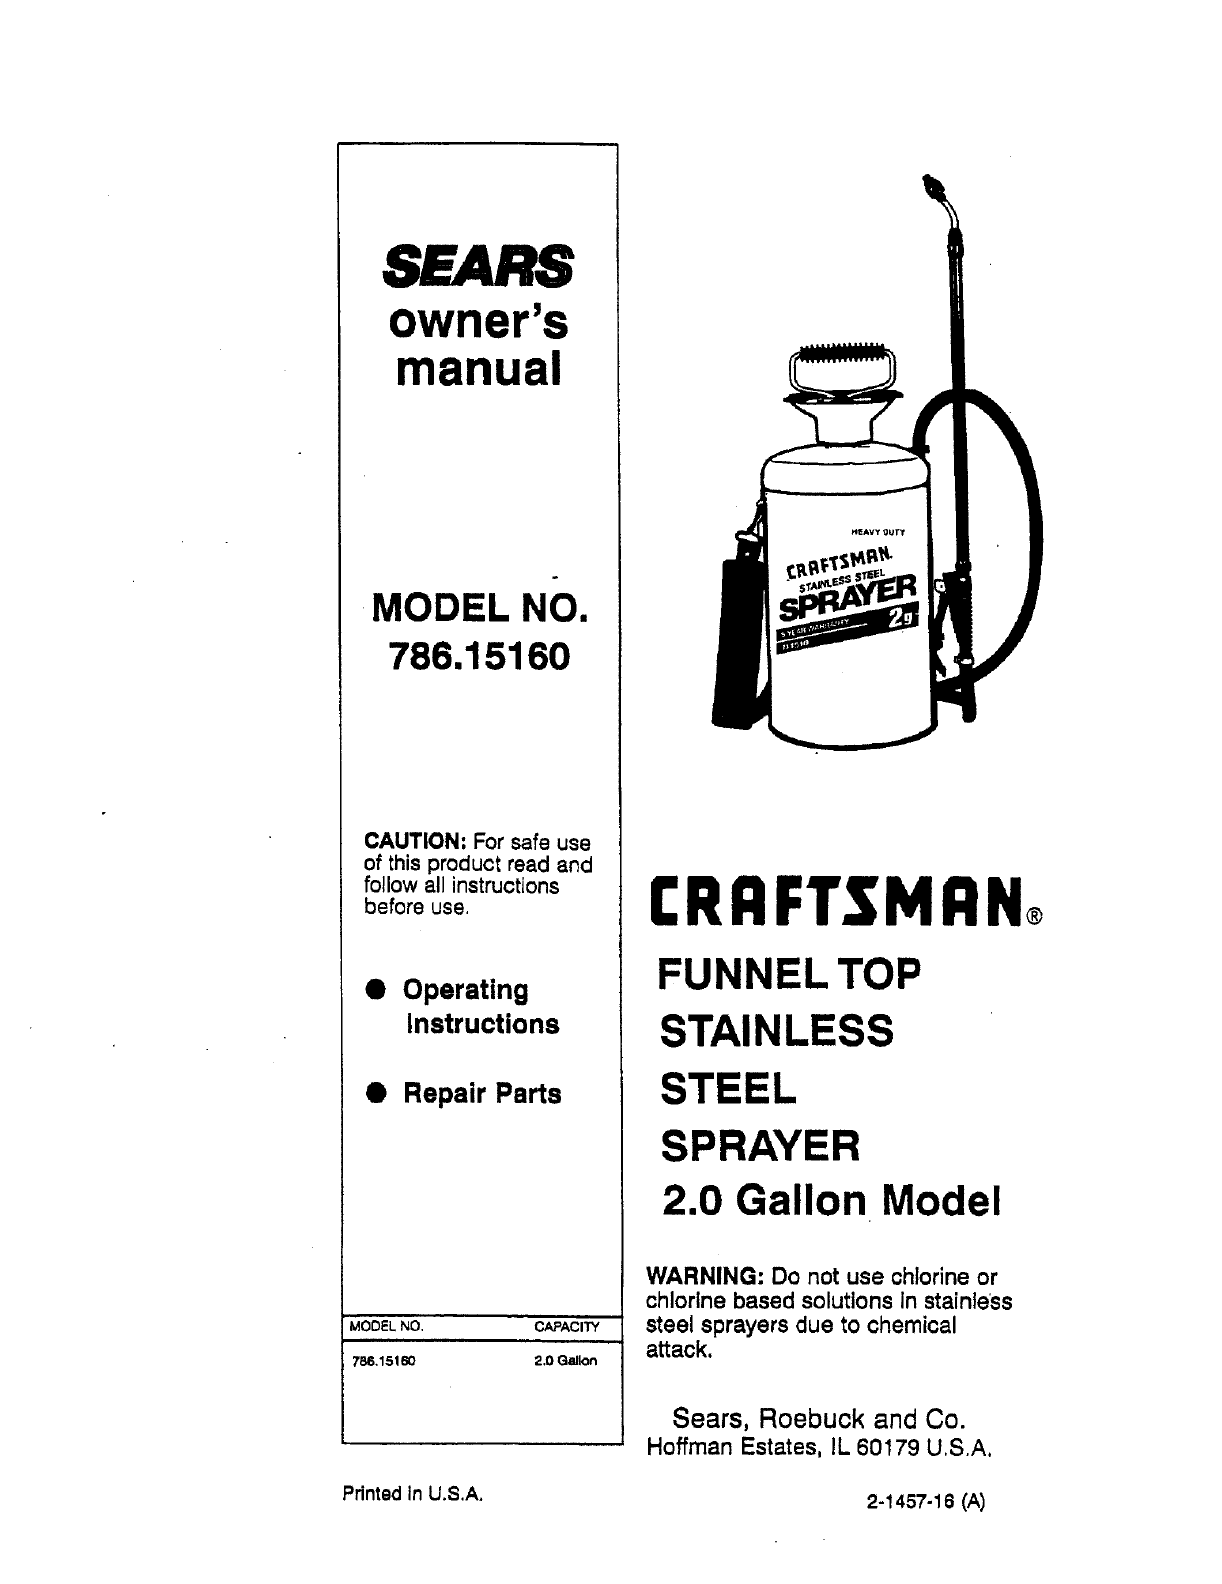
SEARS
owner's
manual
MODEL NO.
786.15160
CAUTION: For safe use
of this product read and
follow all instructions
before use.
•Operating
Instructions
• Repair Parts
MODEL NO, CAPACITY
_86,15160 2,0 Gallon
I:RI:IFTSMRN
FUNNEL TOP
STAINLESS
STEEL
SPRAYER
2.0 Gallon Model
WARNING: Do not use chlorine or
chlorine based solutions in stainless
steel sprayers due to chemical
attack.
Sears, Roebuck and Co.
Hoffman Estates, IL 60179 U,S.A.
Pdnted in U.S.A. 2-1457-16 (A)
,_ RULES FORSAFE OPERATION _lk
•Always read Owner's Manual before using sprayer.
I Always wear protective goggles, gloves, and clothing.
Q Never spray flammable materials.
• Always read and follow chemical container label instructions
before use.
• Never leave sprayer in the sun.
• Always release pressure in sprayer before disassembling.
• Never store material in tank.
• Always release pressure, empty and clean sprayer after use.
• Never modify sprayer from original condition.
WARNING
IMPROPERUSEORFAILURETO FOLLOWINSTRUCTIONSCANRESULTIN
EXPLOSIONCAUSINGMAJORINJURY.FORSAFEUSEOFTHISPRODUCTYOU
MUSTREADANDFOLLOWALLINSTRUCTIONSBEFOREUSE,
PRE-USE SPRAYER SAFETY INSPECTION:
1. Check tightness of hose clamp with screwdriver to be sure hose
is securely attached to the tank outlet nipple.
2. Inspect hose for deterioration, cracks, softness or brittleness, If
any of these conditions are found, replace hose before using.
Replace with original manufacturer's parts only.
3. Remove pump {SEE PRESSURE RELEASE INSTRUCTIONS)
4. }nspect interiorand exterior of tank for signs of deterioration (i,e.
rust, cracks, bubbling and/or pitting) of body and bottom. Any
sign of deterioration indicates possible tank weakening and
could result inexplosive bursting under pressure. If any of these
signs are found, DISCARD TANK IMMEDIATELY.AND REPLACE,
CAUTION: Do not attempt to patch leaks, etc. as this could result in serious
injury,
5. Forpressure testing orto become familiarwith sprayeruse,u=e
water only, and follow steps 1,2,5,6 and 7 ofFILLING
INSTRUCTIONS.
6. Once unit is filled with water, inspect for leaks by following
PRESSURIZING INSTRUCTIONS, except that in step 2, only pump
piunger 8 to 10strokes.
7. After inspection is completed, pump p[unger until it works hard
and lock handle.
8. (FOLLOW SPRAYING INSTRUCTIONS) to verify desired spraying
patterns and practice spraying.
9. Torelease pressure (SEE PRESSURERELEASING INSTRUCTIONS)
10. Empty tank.
11. Proceedwith filling, pressurizing and sprayinginstructions with desired
chemical solution.

WARNING " I
NEVERSPRAYFLAMMABLEMATERIALS.ALWAYSREADCHEMICALLABEL
BEFOREFILLINGSPRAYERASSOMECHEMICALSMAYBEHAZARDOUS
WHENUSEDWiTHTHISSPRAYER,
FILLING INSTRUCTIONS:
1. To engage handle in lock position: Push handle down to com-
pletely compress spring, Rotate handle 1/4 turn clockwise.
Allow handle to raise into the lock position.
2. Toremove pump engage handte in locked position and turn pump
handle counterclockwise.
3. Prepare spray solutionfollowing directions on chemical con*
tainer label.
4, Strain solutionto remove foreign particles which can clog
sprayer nozzle,
5. Filltank to indicated or desired usable capacity, leaving remaining
space for compressed air (SEE FRONT PAGE OF MANUAL
FOR THE MAXIMUM USABLE CAPACITY).
6. Check pump barrel to be sure no dirt or grass is stuck to barrel.
7. Place pump into tank opening and rotateclockwise until tightly
locked and sealed into tank opening,
PRESSURIZING INSTRUCTIONS:
CAUTION: Toprevent ejected pump assembly and/or solutionfrom striking
ang injurin.gyou, never eta.no wl_ face or body over top
of tank when pumping or lOOSening pump. Never .
pressurize sprayer oy any means other [nan the origir_l pump.
1. Disengage handle from locked position by pushing down and
turning 1/4 turn counterclockwise to re{ease handle.
2. TO PRESSURIZE TANK, pump plunger up and down untilIt works
hard,
3, Engage handle in lock position,
!i,,, •
WARNING i
THISSPRAYERIS NOWUNOERPRESSUREANDDANGEROUS,
SPRAYING INSTRUCTIONS:
1. Nways wear protective goggles, gloves; long sleeve shirt,long
pants and sturdy foot protection.
2. Pointnozzle away from you.
3. Squeeze shut-off handle to open and adjust nozzle to desired
spray pattern by rotating nozzle cap (not complete nozzle)
clockwise from fine sprayto solid stream (max{mum2 turns).
WARNING
TURNINGNOZZLECAPTOOFARWILLRESULTINCAPFLYINGOFFALLOWING
SPRAYMATERIALTOSPRAYBACKONYOU,Re-pumpunitasrequiredtoma{ntain
sprayforce,
CAUTION: Do not leave a pressurized sprayer in the hot _sun.Heat can
cause pressure build-up,
PRESSURE RELEASE INSTRUCTIONS:
WARNING
Tosafely release pressure in tank and avoid possibilityof i_ljury,
Completely follow steps 1through 4AS LISTED BELOW:
1, Place unit on its side with top directed away from you and
with hose outlet on top.
2. Direct nozzle away from you and open shut-off allowingspray
solutionin discharge assembly and remaining air pressure to
be completely exhausted.
3. Turn sprayer upright,
4. Remove pump (FOLLOW STEPS 1and 2 OF FILLING
INSTRUCTIONS) while maintaining position of top of sprayer
directed away from you,
CLEANING SPRAYER AFTER USE:
1. Rinse tank thoroughlywith clear water,
2. Empty tank.
3. Refill tank with clear water.
4. Check pump barrel to be sure no dirt or grass is stuck to barrel,
5. Place pump into tank opening and rotate clockwise until tightly
locked and sealed in tank opening.
6. Disengage handle fromlocked position by pushing clownand
turning 1/4 turn counterclockwiseto release handle.
7. Pump plunger up and down 8-10 strokes,
8. Open shut-oft and allow water to run through to clean discharge
assembly.
9. Release pressure (FOLLOW PRESSURE RELEASE
INSTRUCTIONS).
10, Remove pump.
11, Empty sprayer.
12, REPEAT STEPS 1-11 IF NECESSARY.
SPRAYER MAINTENANCE:
1. Pump should be periodically oiled by dropping 10-12 drops of
light oil down pump rod, through opening in cover,
2. If nozzle clogs:
a. Remove complete nozzle assembly,
b. Disassemble nozzle.
c. Clean open{ngs of any obstructions.
3. Never use any too! to remove pump if there is pressure in
sprayer.
4. Periodically remove nozzle and extension tube from shut-off.
With shut-off discharge hole pointingupward, place 6-8 drops
of lightoil into discharge hole, then activate lever.
5. For shut-off maintenance see drawing on following page,
SPRAYER STORAGE:
1. Sprayer tank should be stored upside down, with pump
removed, in a warm dry location.
2. Do not store or leave any solutionin tank after use,
CAUTION, Use only Sears parts to repair this product.
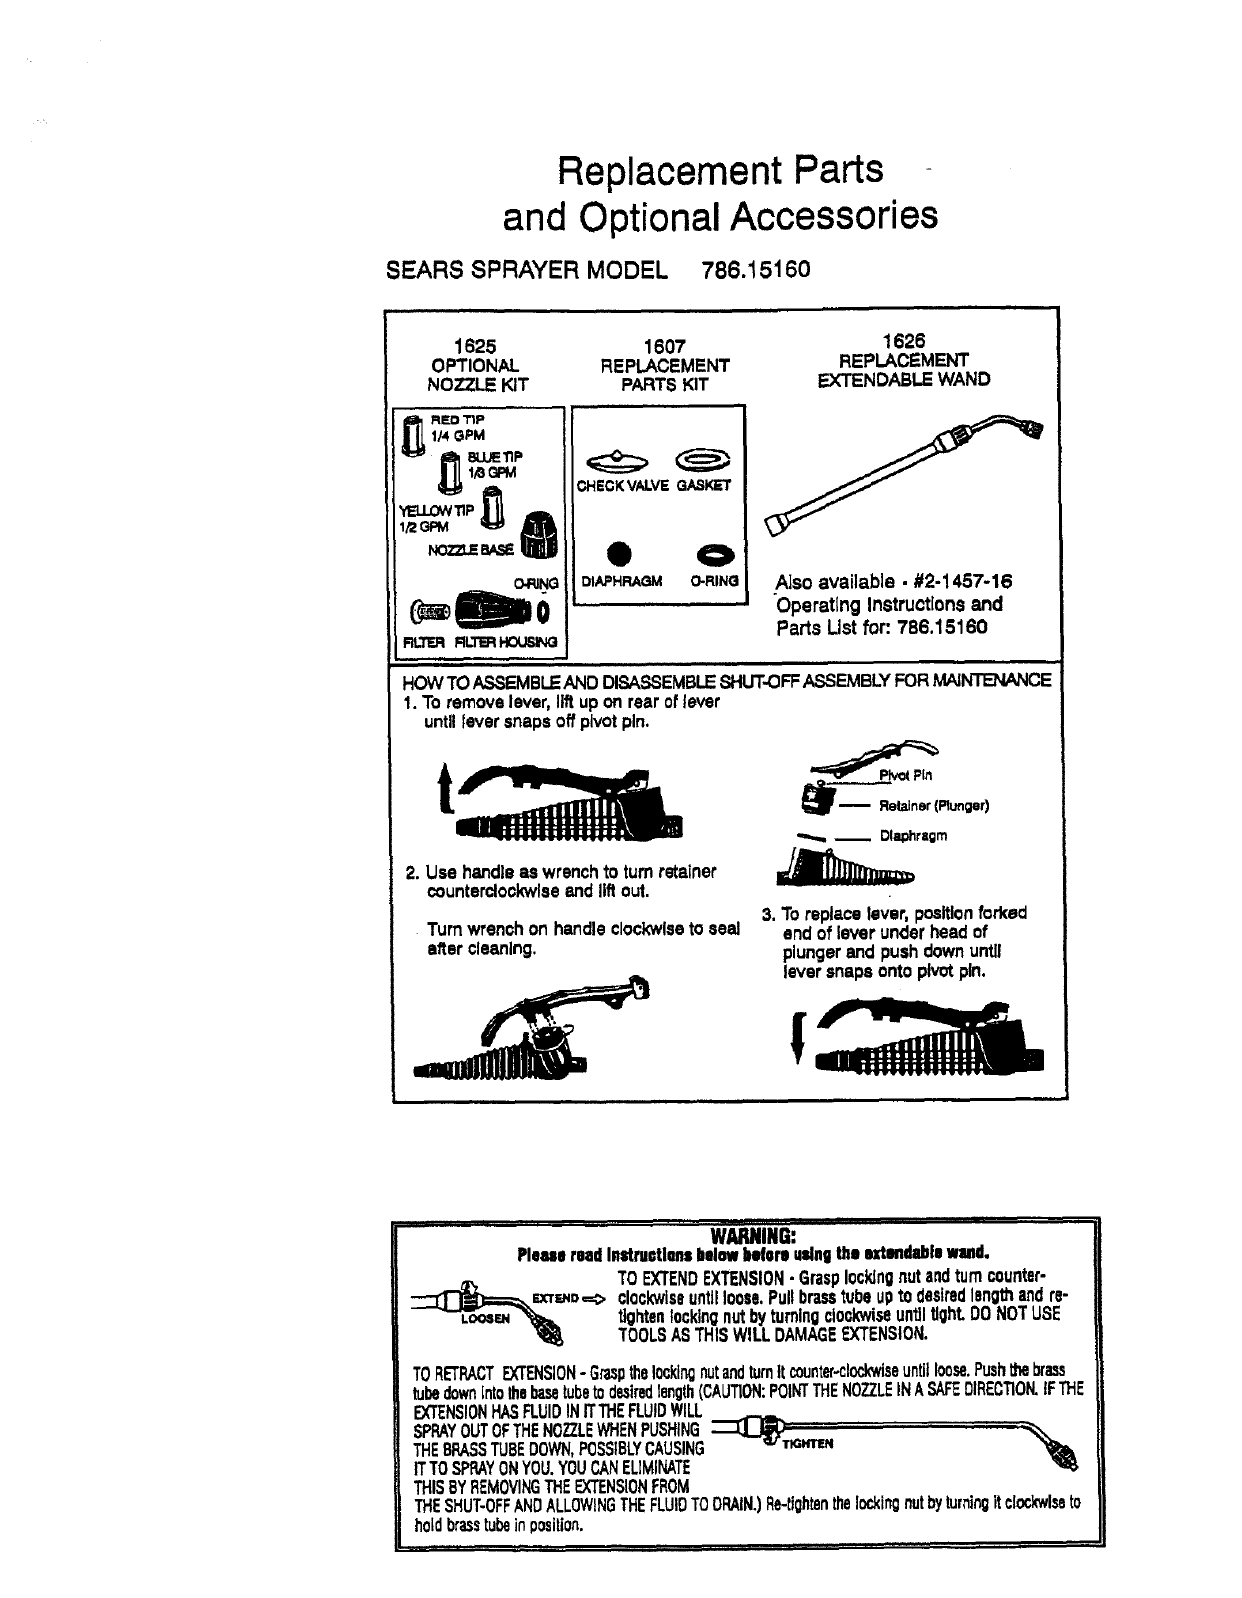
Replacement Parts
and Optional Accessories
SEARS SPRAYER MODEL 786.15160
1625 1607 1626
OPTIONAL REPLACEMENT REPLACEMENT
NOZZLE KIT PARTSKIT EXTENDABLEWAND
O._IG
RL'TER RLT_ HO_
CHECKVALVE
O-RING Also available • #2-1457-16
"Operating Instructionsand
Parts List for: 786.15160
HOW TO ASSEMBLEAND DISASSEMBLE SHUT-OFFASSEMBLY FOR MAINTENANCE
1. To remove lever, liftup on rear of lever
untillever snaps off pivot pin.
t
2. Use handleas wrenchto turn retainer
counterclockwiseand lift out.
Turnwrenchon handleclockwiseto seal
aftercleaning.
r_ Retainer (Plunger)
_Dlaghr,,gm
3. Toreplace lever, positionforked
end of lever underheadof
plungerand pushdownunUl
leversnapsontopivotpin.
WARNING:
PleasereadInstructionsbelowimforeusingthe extendablewand.
TOEXTENDEXTENSION-Grasplockingnutandturncounter-
L'-__==_r=,, ==c. clockwiseuntilloose.Pullbrasstubeupto desiredIsnglt_andre-
tightenlockingnutbyturningclockwiseuntiltight.DONOTUSE
TOOLSASTHISWILLDAMAGEEXTENSION.
TORETRACTEXTENSION- Gap thelockingnutandturnItcounter.clock'dseuntilloose.Pushthebrass
tubedownintothebasetubetodesiredlength(CAUTION:POINTTHENOZZLEINASAFEDIRECTION.IFTHE
EXTENSIONHASFLUIDINITTHEFLUIDWILL
SPRAYOUTOFTHENOZZLEWHENPUSHING_T_ .... _
THEBRASSTUBEDOWN.POSSIBLYCAUSING .T_.
ITTOSPRAYONYOU.YOUCANELIMINATE
THISBYREMOVINGTHEEXTENSIONFROM
THESHUT-OFFANDALLOWINGTHEFLUIDTODRAIN.)Re-tightenthelockingnutbyturningitclockwiseto
holdbrasstubeinposition.
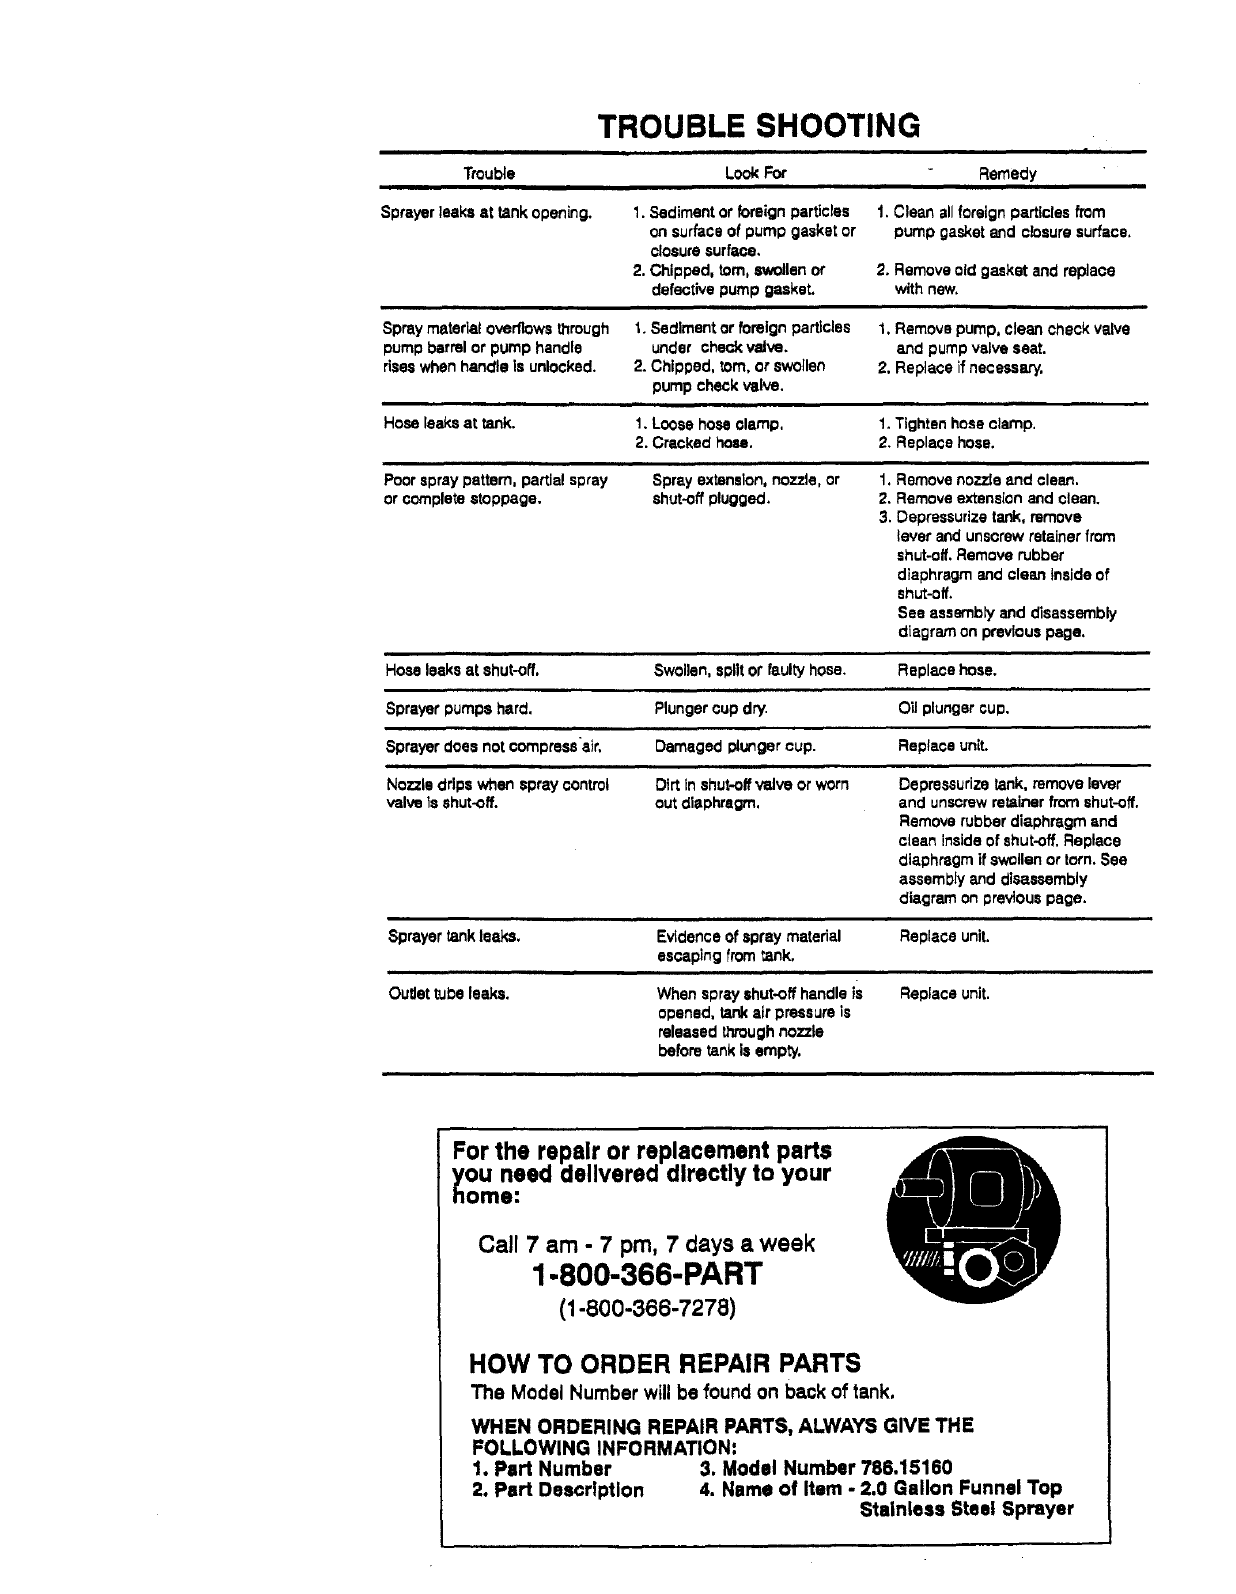
TROUBLE SHOOTING
i
Trouble Look For Remedy
iiii
Sprayer leaks at tank opening. 1. Sediment or foreign particles 1. Clean all foreign particles from
on surface of pump gasket or pump gasket and closure surface.
closure surface.
2. Chipped, tom, swollen or 2. Remove old gasket and replace
defective pump gaskeL with new.
Spray material overflows through 1. Sediment or foreign particles 1. Remove pump, clean check valve
pump barrel or pump handle under check valve, and pump valve seat.
rises when handle is unlocked. 2. Chipped. _om. or swollen 2. Replace if necessary.
pump check valve.
,,m
Hose leaks at tank. 1. Loose hose clamp. 1. Tighten hose clamp.
2. Cracked hose. 2. Replace hose.
Poorspray pattern, partial spray Spray extension, nozzle, or 1. Remove nozzle and clean.
or complete stoppage, shut.off pluggecl. 2. Remove extane[on and clean.
3. Deprassurize tank, remove
lever and unscrew retainer from
shut.off. Remove rubber
diaphragm and clean inside of
shut-off.
See assembly and disassembly
diagram on previous page.
Hose leaks at shut-off. Swollen. split or faulty hose. Replace hose.
Sprayer pumps hard. Plunger cup dry. Oil plunger cup.
Sprayer does not compressair. Damaged plunger cup. Replace unit.
Nozzle drips when spray control
valve is shut-off.
Sprayertankleaks.
Dirt In shut.off valve or worn
out diaphragm.
i.
Evidence of spray material
escaping from _ank.
Depressurize tank. remove lever
and unscrew retainer from shut-off.
Remove rubber diaphragm and
clean inside of shut-off. Replace
cliaph_gm if swollen or torn. See
asseml01y and disassembly
diagram on previous page.
Replace unit.
OuUettuDeleaks. When sprayshut-.offhandleis
opened, tankairpressureis
releasedthroughnozzle
before tankis empty.
Replace unit.
For the repair or replacement parts
ou need delivered directly to your
_ome:
Call 7 am - 7 pro, 7 days aweek
1-800-366-PART
(1-800-366-7278)
HOW TO ORDER REPAIR PARTS
The Model Number will be found on back of tank.
WHEN ORDERING REPAIR PARTS, ALWAYS GIVE THE
FOLLOWING INFORMATION:
1. Part Number 3. Model Number 756.15160
2. Part Description 4. Name of Item -2.0 Gallon Funnel Top
Stainless Steel Sprayer
