Crane Payment Innovations 5IN1 5 in 1 Credit Card Bezel User Manual manual
MEI 5 in 1 Credit Card Bezel manual
manual
Bezel Cable
Bezel Cable
A
A
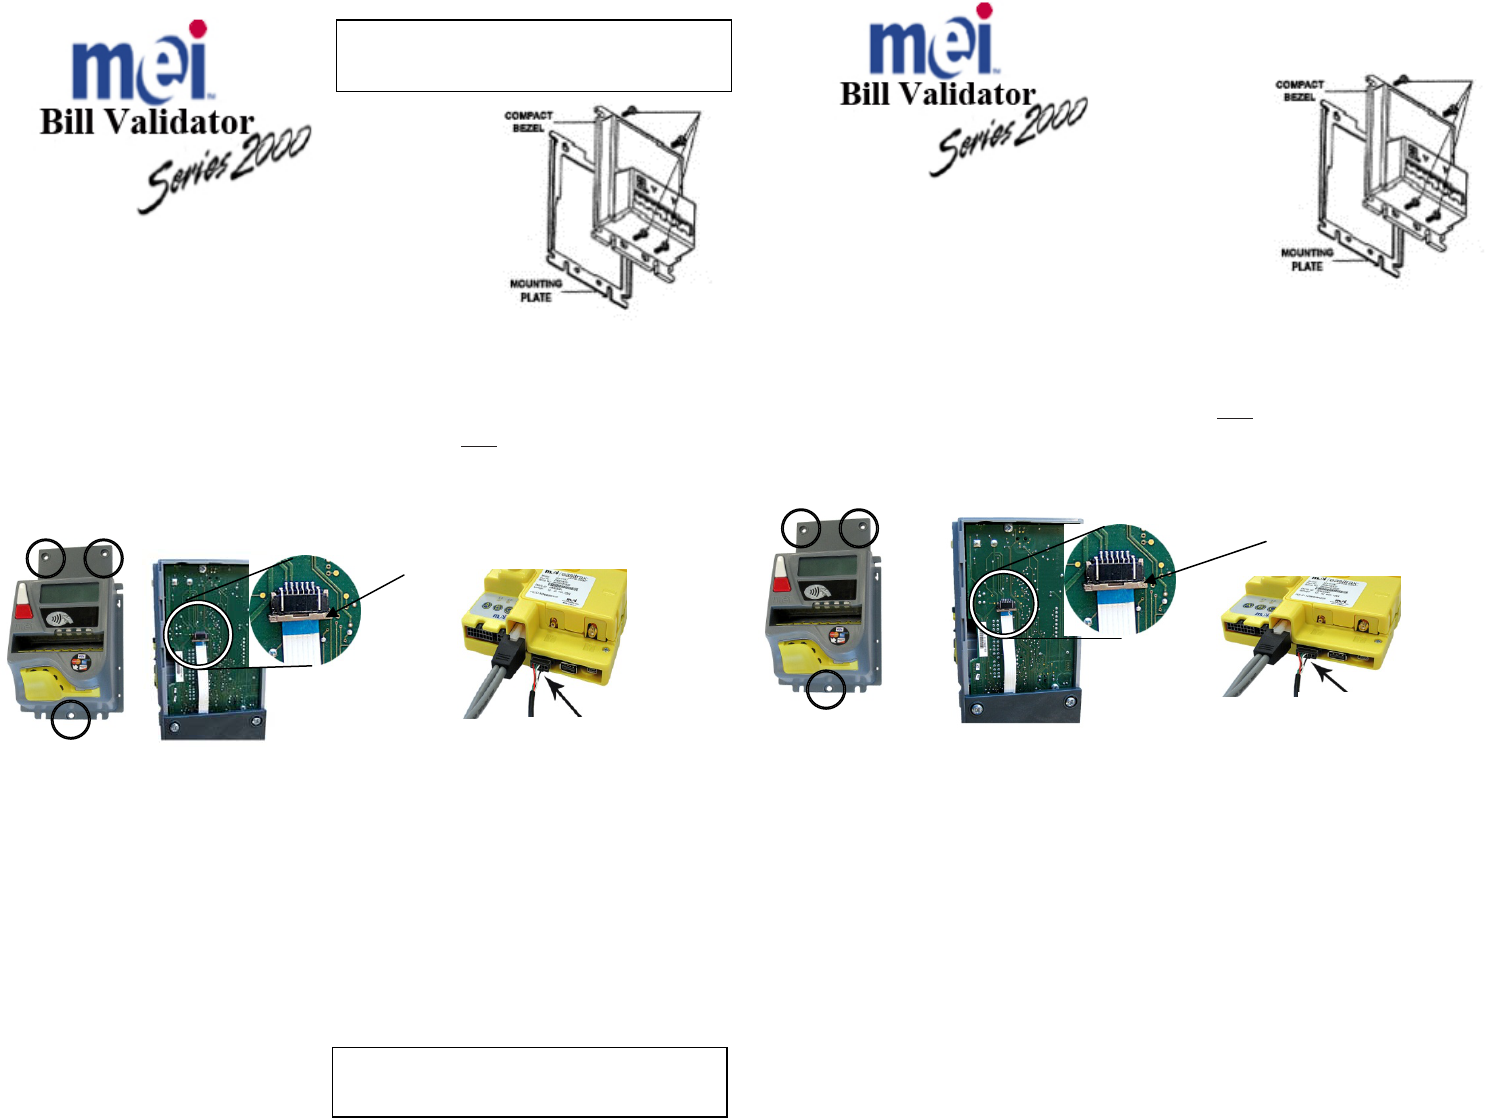
General Information
The 5 in 1 bezel kit has been designed to add a credit card
reader to a Series 2700 bill validator.
The 5 in 1 bezel replaces the compact bezel.
Remove the bill validator from the vending machine.
To remove the compact bezel from the validator:
1. Remove four phillips screws (A) located on the front of the bezel. Slide the PCB
cover ¼ inch towards the top of the validator and lift it off.
Remove the old bezel and mounting plate.
5 in 1 bezel installation
2. Place the 5 in 1 bezel on the bill validator and tighten the three screws. Plug the
ribbon cable (blue side up) into the locking socket on the validator control board.
Be careful not to pinch or damage the bezel cables when installing the 5 in 1 bezel.
3. Re-install the PCB cover. Remount the bill validator in the vending machine.
4. Plug the 5 in 1 bezel cable into the Advance 5000 Bezel Socket.
5 in 1
Notes:
FCC ID: QP85IN1 CANADA - IC: 1297A-MEI5IN1
CAUTION: changes or modifications not expressly approved by the party responsible for compliance
could void the user’s authority to operate the equipment.
This device complies with part 15 of the FCC rules. Operation is subject to the following two
conditions: (a) This device may not cause harmful interference, and (b) this device must accept any
interference received, including interference that may cause undesired operation.
Le présent appareil est conforme aux CNR d'Industrie Canada applicables aux appareils radio
exempts de licence. L'exploitation est autorisée aux deux conditions suivantes : (1) l'appareil ne doit pas produire de
brouillage, et (2) l'utilisateur de l'appareil doit accepter tout brouillage
radioélectrique subi, même si le brouillage est susceptible d'en compromettre le fonctionnement.
Contact MEI Technical Support @ 1-800-345-8172 with any questions.
MEI 1301 Wilson Drive West Chester, Pa. 19380
©2012 MEI Inc. Part # XXXXXXXXX www.meigroup.com
General Information
The 5 in 1 bezel kit has been designed to add a credit card
reader to a Series 2700 bill validator.
The 5 in 1 bezel replaces the compact bezel.
Remove the bill validator from the vending machine.
To remove the compact bezel from the validator:
1. Remove four phillips screws (A) located on the front of the bezel. Slide the PCB cover
¼ inch towards the top of the validator and lift it off.
Remove the old bezel and mounting plate.
5 in 1 bezel installation
2. Place the 5 in 1 bezel on the bill validator and tighten the three screws. Plug the
ribbon cable (blue side up) into the locking socket on the validator control board.
Be careful not to pinch or damage the bezel cables when installing the 5 in 1 bezel.
3. Re-install the PCB cover. Remount the bill validator in the vending machine.
4. Plug the 5 in 1 bezel cable into the Advance 5000 Bezel Socket.
5 in 1
Notes:
FCC ID: QP85IN1 CANADA - IC: 1297A-MEI5IN1
CAUTION: changes or modifications not expressly approved by the party responsible for compliance
could void the user’s authority to operate the equipment.
This device complies with part 15 of the FCC rules. Operation is subject to the following two
conditions: (a) This device may not cause harmful interference, and (b) this device must accept any
interference received, including interference that may cause undesired operation.
Le présent appareil est conforme aux CNR d'Industrie Canada applicables aux appareils radio
exempts de licence. L'exploitation est autorisée aux deux conditions suivantes : (1) l'appareil ne doit pas produire de
brouillage, et (2) l'utilisateur de l'appareil doit accepter tout brouillage
radioélectrique subi, même si le brouillage est susceptible d'en compromettre le fonctionnement.
Contact MEI Technical Support @ 1-800-345-8172 with any questions.
MEI 1301 Wilson Drive West Chester, Pa. 19380
©2012 MEI Inc. Part # XXXXXXXXX www.meigroup.com
VN2700 series Bill Validator, 5 in 1
Bezel Kit Installation Guide
VN2700 series Bill Validator, 5 in 1
Bezel Kit Installation Guide
Locking collar
Locking collar