Creative Labs AVPSB1660 Sound Blaster FREE User Manual Sound Blaster Free
Creative Labs Inc Sound Blaster FREE Sound Blaster Free
UserManual.wiki
>
Creative Labs
>
AVPSB1660 User Manual
>
User Manual Part 2
Contents
1.
User Manual Part 1
2.
User Manual Part 2
3.
User Manual 1
4.
User Manual 2
User Manual Part 2
Navigation menu
Upload a User Manual
Namespaces
Wiki Guide
HTML
PDF
Info
Views
User Manual
Discussion / Help
Navigation

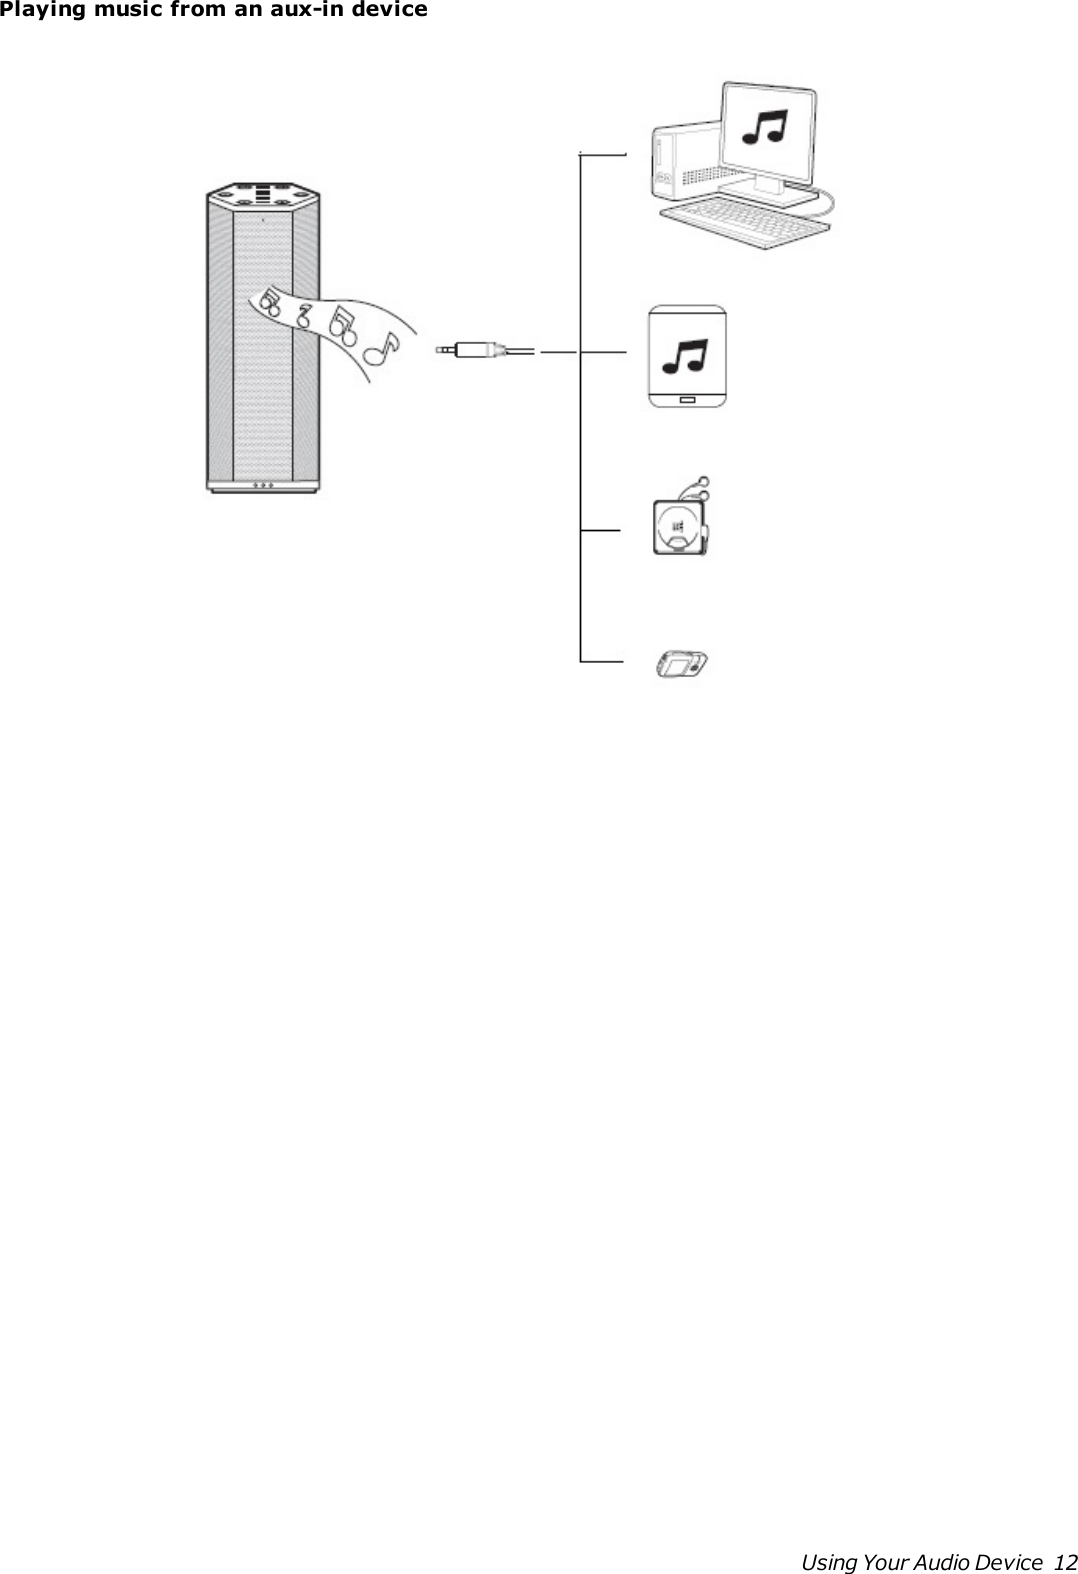


![European ComplianceThis product conforms to the following:RoHS Directive 2011/65/EU.EMC Directive 2004/108/EC.Mains operated products for the European market comply with Low Voltage Directive 2006/95/EC andCommission Regulation(s) Implementing Directive 2009/125/EC.Communication / RF wireless products for the European market comply with R&TTE Directive1999/5/EC.CAUTION: To comply with the Europe CE requirement, this device must be installed with CE certifiedcomputer equipment which meet with Class B lmits.All cables used to connect this device must be shielded, grounded and no longer than 3m in length.Operation with non-certified computers or incorrect cables may result in interference to other devicesor undesired effects to the product.MODIFICATION: Any changes or modifications not expressly approved by Creative Technology Limitedor one of its affliated companies could void the user's warranty and guarantee rights.[FR] European ComplianceCe produit est conforme aux normes suivantes :Directive 2004/108/CE sur les émissions électromagnétiques.Directive RoHS 2011/65/UE.Les produits secteur pour le marché européen sont conformes à la Directive sur la faible tension2006/95/CE et à la réglementation de la Commission exécutant la Directive 2009/125/CE.Les produits de communication/sans fil RF destinés au marché européen sont conformes à la directiveR&TTE 1999/5/CE.ATTENTION : pour respecter les critères CE d'Europe, cet appareil doit être installé avec du matérielinformatique certifié CE respectant les limites de la classe B. Tous les câbles utilisés pour connecter cetappareil doivent être blindés, reliés à la terre et ne pas faire plus de 3 m de long. L'utilisationd'ordinateurs non certifiés ou de câbles inappropriés peut entraîner des interférences avec d'autresappareils ou des effets indésirables sur le produit.MODIFICATION : toute modification non approuvée explicitement par Creative Technology Limited oul'une de ses sociétés affiliées peut entraîner l'annulation de la garantie et des droits de garantie del'utilisateur.[IT] Conformità alle normative europeeQuesto prodotto è conforme alla seguente normativa:Direttiva EMC 2004/108/CE.Direttiva RoHS 2011/65/UE.I prodotti che funzionano con corrente di rete per il mercato europeo sono conformi alla direttiva bassatensione 2006/95/CE e alla direttiva di implementazione nelle normative europee 2009/125/CE.I prodotti di comunicazione/wireless RF per il mercato europeo sono conformi alla Direttiva R&TTE1999/5/CE.ATTENZIONE: ai fini della conformità con i requisiti del marchio CE europeo, il dispositivo deve essereinstallato in un computer certificato CE conforme ai limiti di Classe B. Tutti i cavi usati per collegare ilRegulatory Information 29](https://usermanual.wiki/Creative-Labs/AVPSB1660.User-Manual-Part-2/User-Guide-2640001-Page-29.png)
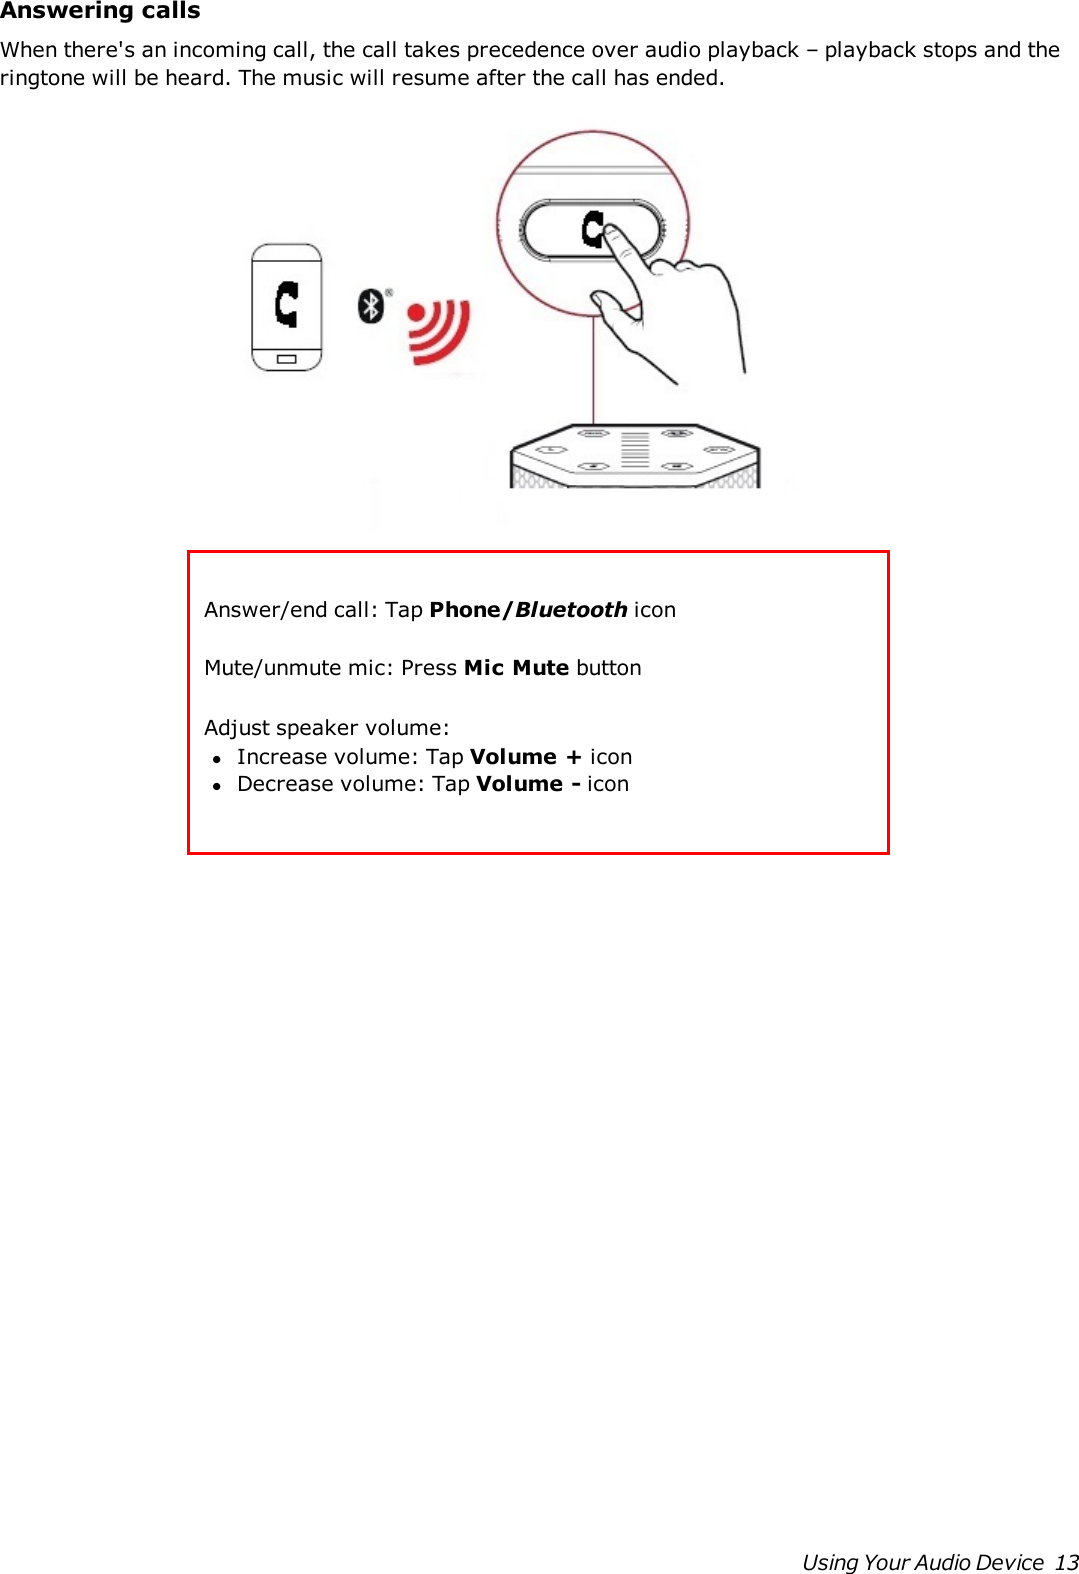
![dispositivo devono essere schermati, dotati di idonea messa a terra e avere una lunghezza massima di3 metri. L'uso del dispositivo con computer non certificati o cavi non idonei può provocare interferenzead altri dispositivi nonché danneggiare il prodotto stesso.MODIFICHE: eventuali modifiche o alterazioni non espressamente approvate da Creative TechnologyLimited o dalle sue società controllate possono rendere nulli la garanzia e il diritto dell'utente autilizzare il prodotto.[DE] Einhaltung der europäischen BestimmungenDieses Produkt erfüllt die folgenden Bestimmungen:EMC-Richtlinie 2004/108/EG.RoHS-richtlinie 2011/65/EU.Netzbetriebene Produkte für den europäischen Markt erfüllen die Niederspannungsverordnung2006/95/EG und der Commission Regulation(s) Implementing-Verordnung 2009/125/EG.Drahtlose Kommunikationsgeräte/Funksender und -empfänger für den europäischen Markt erfüllen dieR&TTE-Richtlinie 1999/5/EG.ACHTUNG: Um die Anforderungen der europäischen CE-Norm zu erfüllen, muss dieses Produkt aneinem CE-geprüften Computer der Klasse B angeschlossen werden.Alle Verbindungskabel zu diesemGerät müssen abgeschirmt und geerdet sein und dürfen nicht länger als 3 m sein. Der Betrieb mit nichtzertifizierten Computern oder nicht ordnungsgemäßen Kabeln kann zu Störungen anderer Geräte oderunerwünschten Auswirkungen auf das Produkt führen.MODIFIZIERUNG: Jegliche Änderung oder Modifizierung des Produkts, die nicht ausdrücklich vonCreative Technology Limited oder einer der zugehörigen Firmen genehmigt worden ist, kann für denBenutzer zum Erlöschen der Garantie und der Gewährleistungsrechte führen.[ES] Homologación para EuropaEste producto cumple:la Directiva de compatibilidad electromagnética 2004/108/CE.Directiva RoHS 2011/65/UE.Los productos funcionando con corriente electrica cumplen con la Directiva 2006/95/CE de baja tensióny con la implementación de los requisitos de la Comisión para la directiva 2009/125/CE.Los productos inalámbricos de comunicación o frecuencias de radio para el mercado europeo cumplen laDirectiva 1999/5/CE de equipos de radio y terminales de telecomunicaciones.ATENCIÓN: para cumplir con los requisitos de Homologación para Europa, este dispositivo debeinstalarse con un equipo informático con certificación CE que cumpla los límites de la Clase B. Todos loscables utilizados para conectar este dispositivo deben estar protegidos, conectados a tierra y no tenermás de 3 m de longitud. El funcionamiento del dispositivo con equipos no certificados o cablesincorrectos podría provocar interferencias a otros dispositivos o efectos no deseados al producto.MODIFICACIÓN: los cambios o modificaciones no aprobados expresamente por Creative TechnologyLimited o una de sus empresas afiliadas podrían invalidar la garantía del usuario y los derechos de lagarantía.[NL] Europese nalevingDit product voldoet aan de volgende voorschriften:EMC-richtlijn 2004/108/EG.RoHS-richtlijn 2011/65/EU.Regulatory Information 30](https://usermanual.wiki/Creative-Labs/AVPSB1660.User-Manual-Part-2/User-Guide-2640001-Page-30.png)
![Electrische producten voor de Europese markt voldoen aan de Laagspanningsrichtlijn 2006/95/EG en ECand Verordening(en) voor uitvoering van Richtlijn 2009/125/EG.Communicatie- of draadloze RF-producten voor de Europese markt voldoen aan de richtlijn R&TTE1999/5/EG.LET OP: Om te voldoen aan de Europese CE-norm, moet dit apparaat zijn geïnstalleerd incomputerapparatuur die CE-gecertificeerd is voor de Klasse B-limieten. Alle kabels die worden gebruiktom dit apparaat aan te sluiten, moeten zijn afgeschermd en geaard, en mogen niet langer dan 3 meterzijn. Gebruik met niet-gecertificeerde computers of incorrecte kabels kan leiden tot interferentie vanandere apparaten of ongewenste effecten op het product.AANPASSING: Alle wijzigingen of modificaties die niet uitdrukkelijk zijn goedgekeurd door CreativeTechnology Limited of een van de gelieerde maatschappijen, kunnen ertoe leiden dat de rechten van degebruiker met betrekking tot garantie en vrijwaring vervallen.[PT] Conformidade EuropeiaEste produto está em conformidade com a seguinte regulamentação:Directiva EMC 2004/108/EC.Directiva RoHS 2011/65/UE.Os produtos com ligação à rede destinados ao mercado europeu estão em conformidade com a directivade baixa voltagem 2006/95/CE. Directiva de Implementação do(s) Regulamento(s) da Comissão2009/125/CE.Os produtos de comunicação/radiofrequência sem fios destinados ao mercado europeu estão emconformidade com a directiva R&TTE 1999/5/CE.ATENÇÃO: De modo a cumprir com os requisitos da marca CE Europeia, este dispsotivo deve serinstalado com equipamento informático com certificação CE que cumpra com os limites de Classe Blimits. Todos os cabos usados para ligar este dispositivo devem ser blindados, ligados à terra e nãodevem exceder os 3m de comprimento. O funcioanemnto com computadores não certificados ou cabosincorrectos pode resultar em interferências em outros dispositivos ou provocar efeitos indesejados noproduto.MODIFICAÇÃO: Quaisquer alterações ou modificações que não sejam expressamente aprovadas pelaCreative Technology Limited ou por uma das suas afiliadas, pode anular a garantia do utilizador e osdireitos inerentes à mesma.[SV] Europeisk efterlevnadDenna produkt uppfyller följande:EMC-direktivet 2004/108/EC.RoHS Direktivet 2011/65/EU.Produkter för den europeiska marknaden som drivs via elnätet uppfyller Lågspänningsdirektivet2006/95/EC och Kommissionens regleringsimplementeringsdirektiv 2009/125/EG.Trådlösa kommunikations/RF-produkter för den europeiska marknaden uppfyller R&TTE-direktivet1999/5/EC.VARNING: För att uppfylla CE-kraven i Europa måste denna produkt installeras med CE-certifieraddatorutrustning som uppfyller gränsvärdena för klass B. Alla kablar som används för anslutning avdenna produkt måste vara avskärmade, jordade och får inte vara längre än 3 m. Användning med ickecertifierade datorer eller felaktiga kablar kan leda till interferens på annan utrustning eller oönskadeeffekter på produkten.Regulatory Information 31](https://usermanual.wiki/Creative-Labs/AVPSB1660.User-Manual-Part-2/User-Guide-2640001-Page-31.png)
![MODIFIERING: Alla förändringar och modifieringar som inte är uttryckligen tillåtna av CreativeTechnology limited eller något av dess filialföretag kan göra användarens garanti och garantirättigheterogiltiga.[NO] Europeisk samsvarDette produktet er i samsvar med følgende:EMC-direktivet 2004/108/EC.RoHS-Direktivet 2011/65/EU.Elektriske produkter til det europeiske markedet er i samsvar med Lavspenningsdirektivet 2006/95/ECog Økodesigndirektivet 2009/125/EC.Kommunikasjon/RF trådløse produkter til det europeiske markedet er i samsvar med R&TTEdirektivet1999/5/EC.ADVARSEL: For å overholde det europeiske CE-kravet må denne enheten installeres med CEsertifisertdatautstyr som tilfredsstiller klasse B-grensene. Alle kabler som kobles til enheten må være skjermet,jordet og ikke lenger enn 3 m i lengde. Bruk av ikke-sertifiserte datamaskiner eller feil kabler kan føretil forstyrrelse av andre enheter eller uønsket effekt på produktet.MODIFIKASJON: Eventuelle endringer eller modifikasjoner som ikke uttrykkelig er godkjent avCreative Technology Limited eller et av dets tilknyttede selskaper, kan ugyldiggjøre garantien ellergarantirettighetene.[DK] Overholdelse af Europæiske regler og standarderDette produkt overholder følgende:EMC-direktivet 2004/108/EC.RoHS-Direktivet 2011/65/EU.Produkter til det Europæiske marked, skal ovberholde Lavspændingsdirektivet 2006/95/EC ogKommissionens forordninger for implementering af direktivet 2009/125/EF.Kommunikations- / RF-trådløse produkter til det Europæiske overholder R&TTE-direktivet 1999/5/EC.ADVARSEL: For at overholde Europe CE-kravet, skal denne enheden installeres med CE-certificeretcomputerudstyr, der opfylder klasse B-grænserne. Alle kabler der anvendes til at tilslutte enheden skalvære skærmede, jordforbundne og ikke længere end 3 m lange. Drift med ikke-certificerede computereog ukorrekte kabler kan medføre interferens for andre enheder eller uønskede effekter på produktet.MODIFIKATION: Enhver ændring eller modifikation, der ikke er udtrykkeligt godkendt af CreativeTechnology Limited eller et associerede selskab, vil gøre brugerens garanti og garanterede rettighederugyldig.[FI] Eurooppalainen yhdenmukaisuusTämä tuote täyttää seuraavat tuotemääritykset:TEMC-direktiivin 2004/108/EC.RoHS-direktiivin 2011/65/EU.Euroopan markkinoiden verkkovirtaa käyttävät tuotteet ovat matalajännitedirektiivin 2006/95/EYmukaisia. Euroopan parlamentin ja neuvoston ohjaava direktiivi 2009/125/EY.Euroopan markkinoiden tietoliikenne- ja langattomat radiotaajuustuotteet noudattavat R&TTEdirektiiviä1999/5/EY.Regulatory Information 32](https://usermanual.wiki/Creative-Labs/AVPSB1660.User-Manual-Part-2/User-Guide-2640001-Page-32.png)
![VAROITUS: Jotta tämä laite noudattaisi Euroopan CE-vaatimuksia , tämä laite on asennettavaCEsertifioituun tietokoneeseen, joka noudattaa luokan B rajoituksia. Kaikki tämän laitteen liittämiseenkäytetyt kaapelit tulee suojata ja maadoittaa eivätkä ne saa olla 3 m pidempiä. Luokan rajoituksianoudattamattoman tietokoneen tai vääränlaisten kaapeleiden käyttäminen voi aiheuttaa häiriöitämuihin laitteisiin tai haitata itse laitteen toimintaa.MUOKKAUKSET: Muutokset tai muokkaukset, joita Creative Technology Limited tai sen tytäryhtiöteivät nimenomaisesti ole hyväksyneet, voivat mitätöidä tuotteelle annetun takuun.[CZ] Evropská shodaTento výrobek splňuje následující směrnice:Směrnice EMC 2004/108/EC.Směrnice RoHS 2011/65/EU.Výrobky napájené z elektrické zásuvky pro evropský trh splňují směrnici o nízkém napětí 2006/95/EC asměrnici komise 2009/125/EC o zavádění předpisů.Komunikační / vysokofrekvenční bezdrátové výrobky pro evropský trh splňují směrnici R&TTE1999/5/EC.UPOZORNĚNÍ: Aby toto zařízení splňovalo evropský požadavek CE, musí být nainstalováno spočítačovým vybavením s certifikátem CE, které splňuje limity pro zařízení třídy B. Veškeré kabelypoužívané pro připojení tohoto zařízení musí být stíněné, uzemněné a nesmí být delší než 3 metry. Připoužívání s necertifikovanými počítači nebo nesprávnými kabely může dojít k rušení jiných zařízenínebo k nežádoucím vlivům na produkt.ÚPRAVY: Jakékoli změny nebo úpravy, které nebyly vysloveně schváleny společností CreativeTechnology Limited nebo některou z jejích dceřiných společností, mohou způsobit propadnutí zárukyuživatele a záručních práv.[PL] Zgodność z przepisami europejskimiUrządzenie jest zgodne zdyrektywą EMC 2004/108/EC.Dyrektywa RoHS 2011/65/UE.Urządzenia zasilane z sieci elektrycznej przeznaczone na rynek europejski muszą być zgodne zdyrektywą dotyczącą urządzeń niskonapięciowych 2006/95/EC oraz z dyrektywą wdrażającą komisjiregulacyjnej 2009/125/WE.Urządzenia komunikacyjne / bezprzewodowe wykorzystujące transmisję radiową przeznaczone narynek europejski spełniają warunki dyrektywy RTTE 1999/5/EC.UWAGA: Aby uzyskać zgodność z wymogami europejskiej normy CE urządzenie musi byćzainstalowane wraz ze sprzętem komputerowym mającym certyfikat CE z ograniczeniami klasy B.Wszystkie przewody używane do podłączania niniejszego urządzenia muszą być ekranowane, uziemionei nie dłuższe niż 3 metry. Użytkowanie z komputerami nie posiadającymi certyfikatów lubwykorzystanie niewłaściwych przewodów może powodować zakłócenia pracy innych urządzeń lubopisywanego urządzenia.MODYFIKACJE: Dokonanie jakichkolwiek zmian lub modyfikacji, na które firma Creative TechnologyLimited lub spółki z nią stowarzyszone nie udzielają wyraźnej zgody, może doprowadzić dounieważnienia praw gwarancji i rękojmi użytkownika.[HU] Európai megfelelőségEz a termék megfelel a következőknek:Regulatory Information 33](https://usermanual.wiki/Creative-Labs/AVPSB1660.User-Manual-Part-2/User-Guide-2640001-Page-33.png)
![2004/108/EGK sz., az elektromágneses összeférhetőségre. 2011/65/EU, RoHS.Az Európa területére szánt hálózati termékek megfelelnek az alacsony feszültségre vonatkozó2006/95/EC irányelvnek.Az irányelvet 2009/125/EK végrehajtó bizottsági rendeletek.Az Európa területére szánt, távközlési, illetve rádiófrekvenciás vezeték nélküli termékek megfelelnek arádióés távközlő végberendezésekre vonatkozó 1999/5/EK irányelvnek.FIGYELEM!: Az európai CE követelmények teljesítéséhez ezt a készüléket a B kategóriájú értékeknekmegfelelő, CE minősítésű számítógéppel együtt kell telepíteni. A készülék csatlakoztatására használtvalamennyi kábelnek árnyékoltnak és földeltnek kell lennie, továbbá hosszúsága nem haladhatja meg a3 métert. A nem hitelesített számítógépekkel vagy helytelen kábelekkel való használat más készülékekzavarását vagy a termék nem kívánatos befolyásolását okozhatja.MÓDOSÍTÁS: Minden módosítás vagy változtatás, amit kifejezetten nem hagyott jóvá a CreativeTechnology Limited vagy valamelyik leányvállalata, érvénytelenítheti a készülék garanciáját ésfelhasználó garanciális jogait.[EL] Ευρωπαϊκή συμμόρφωσηΤο παρόν προϊόν συμμορφώνεται με τα παρακάτω:Οδηγία ΗΜΣ 2004/108/EΚ.Οδηγία RoHS 2011/65/EE.Τα προϊόντα που λειτουργούν με ρεύμα για την ευρωπαϊκή αγορά συμμορφώνονται με την Οδηγία περίχαμηλής τάσης 2006/95/EΚ και τους κανονισμούς της επιτροπής που υλοποιούν την οδηγία 2009/125/EK.Τα ασύρματα προϊόντα επικοινωνιών / RF για την ευρωπαϊκή αγορά συμμορφώνονται με την οδηγίαR&TTE 1999/5/EK.ΠΡΟΣΟΧΗ: Για τη συμμόρφωση με τις απαιτήσεις του ευρωπαϊκού CE, αυτή η συσκευή θα πρέπει ναεγκατασταθεί σε εξοπλισμό υπολογιστή με πιστοποίηση CE ο οποίος πληροί τα όρια της κατηγορίας Β.Όλα τα καλώδια που χρησιμοποιούνται για τη σύνδεση της συσκευής θα πρέπει να είναι θωρακισμένα,γειωμένα και να μην υπερβαίνουν σε μήκος τα 3μ. Η λειτουργία με μη πιστοποιημένους υπολογιστές ήλάθος καλώδια μπορεί να οδηγήσει σε παρεμβολές με άλλες συσκευές ή ανεπιθύμητες επιδράσεις στοπροϊόν.ΤΡΟΠΟΠΟΙΗΣΗ: Οι όποιες αλλαγές ή τροποποιήσεις που δεν έχουν εγκριθεί ρητά από την CreativeTechnology Limited ή κάποια από τις θυγατρικές της ενδέχεται να ακυρώσουν την εγγύηση του χρήστηκαι τα δικαιώματα που απορρέουν από αυτήν[LT] Europos Sąjungos atitiktisŠis gaminys atitinka šiuos reikalavimus:„Elektromagnetinės atitikties“ („EMC“) direktyva 2004/108/EC.RoHS direktyva 2011/65/ES.Produktai, kurie veikia maitinami iš elektros tinklo, skirti Europos rinkai, atitinka Žemos įtamposdirektyvą 2006/95/EB.Komisijos reglamentas(-ai) dėl Direktyvos 2009/125/EB įgyvendinimo.Europos Sąjungos rinkai skirti ryšių / radijo dažnių bevieliai gaminiai atitinka 1999/5/EB direktyvą „Dėlradijo ryšio įrenginių ir telekomunikacijų galinių įrenginių bei abipusio jų atitikties pripažinimo“.ATSARGIAI: Tam, kad šis prietaisas atitiktų Europos Sąjungos „CE“ reikalavimus, jis turi būti įdiegtas į„CE“ sertifikuotą kompiuterinę įrangą, atitinkančią „B“ klasės ribas. Visi su šiuo prietaisu naudojamilaidai turi būti ekranuoti, įžeminti ir neviršyti 3 m ilgio. Nesertifikuotų kompiuterių ar netinkamų laidųRegulatory Information 34](https://usermanual.wiki/Creative-Labs/AVPSB1660.User-Manual-Part-2/User-Guide-2640001-Page-34.png)
![naudojimas gali tapti trikdžių kitiems prietaisams arba nepageidaujamų šio gaminio veikimo pasekmiųpriežastimi.MODIFIKAVIMAS: Bet kokie pakeitimai ar modifikavimai neturint aiškiai patvirtinto „CreativeTechnology Limited“ ar vienos iš su ja susijusių bendrovių leidimo gali panaikinti vartotojo garantiją irgarantijos teises.[SK] Dodržiavanie predpisov Európskej únieTento výrobok spĺňa nasledujúce normy:Smernica EMC 2004/108/ES.Smernica RoHS 2011/65/EÚ.Výrobky napájané zo siete určené na európsky trh sú v súlade so smernicou o harmonizácii právnychpredpisov členských štátov týkajúcich sa elektrického zariadenia určeného na používanie v rámciurčitých limitov napätia 2006/95/ES a s nariadeniami Komisie, ktorými sa vykonáva smernica2009/125/ES.Bezdrôtové komunikačné/RF výrobky určené na európsky trh sú v súlade so smernicou R&TTE1999/5/ES.VAROVANIE: Toto zariadenie musí byť nainštalované s počítačovým zariadením s certifikáciou CE,ktoré spĺňa limity triedy B, aby bolo v súlade s európskymi požiadavkami CE. Všetky káble použité napripojenie tohto zariadenia musia byť tienené, uzemnené a nie dlhšie ako 3 m. Prevádzka pomocounecertifikovaných počítačov alebo nesprávnych káblov môže mať za následok rušenie iných zariadeníalebo nežiaduce účinky na výrobok.ÚPRAVY: Akékoľvek zmeny alebo úpravy, ktoré neboli výslovne odsúhlasené spoločnosťou CreativeTechnology Limited alebo jednou z jej sesterských spoločností, môžu zrušiť platnosť záruky a záručnýchpráv používateľa.[RU] Соответствие европейским нормамДанное изделие соответствует следующим стандартам:EMC Директива 2004/108/EC.RoHS директива 2011/65/EU.Продукция с питанием от сети, поставляемая на европейский рынок, соответствует Директиве понизковольтному оборудованию 2006/95/EC и Имплементирующей директиве постановления (- й)комиссии 2009/125/EC.Коммуникационное/радио- беспроводное оборудование, поставляемое на европейский рынок,соответствует Директиве по оконечному радио- и телекоммуникационному оборудованию1999/5/EC.ВНИМАНИЕ! Для обеспечения соответствия европейским требованиям CE, это устройство должноустанавливаться с компьютерным оборудованием, сертифицированным по стандарту CE иудовлетворяющим нормам класса B. Все кабели, используемые для подключения данногоустройства, должны быть экранированы, заземлены и иметь длину не более 3 м. Работа снесертифицированными компьютерами или неподходящими кабелями может привести квозникновению помех другим устройствам или негативному влиянию на работу самого изделия.ИЗМЕНЕНИЯ КОНСТРУКЦИИЛюбые изменения конструкции, на которые не было полученопрямое разрешение компании Creative Technology Limited или ее дочерней компании, можетпривести к аннуляции гарантии и связанных с нею прав.[TR] Avrupa UyumuBu ürün aşağıdakilere uygundur:Regulatory Information 35](https://usermanual.wiki/Creative-Labs/AVPSB1660.User-Manual-Part-2/User-Guide-2640001-Page-35.png)
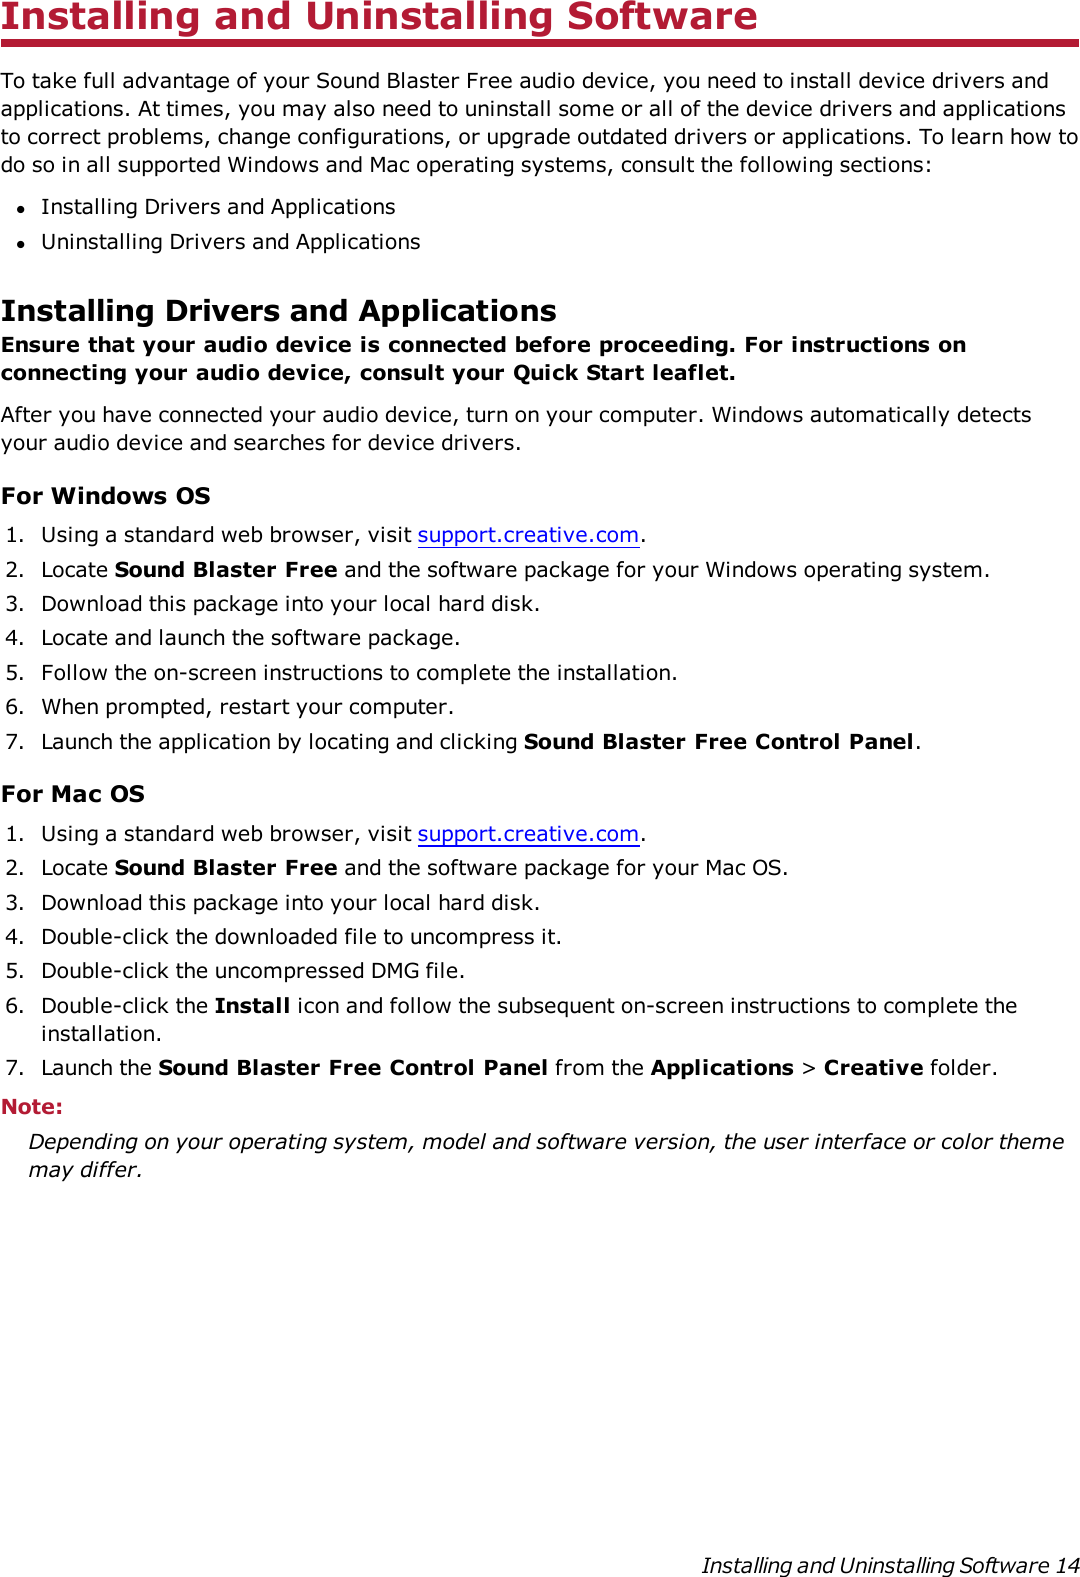
![Safe Removal of Built-in BatteryThis product contains an integrated battery which should ONLY be removed by service centers orrecycling facilities with reference to the instructions herein. Creative and its affiliates will not be liablefor any damages resulting from attempting to remove and/or tampering with the battery or any part ofthe product by an end user.CAUTION:"Make sure the product is disconnected from the charging cable before removing the battery""Cover one of the battery terminals with insulation tape to prevent short circuit" - not applicable tobattery with connectorBattery removal instruction:1. Remove rubber pad from the right side of the speaker.2. Unfasten the screws on the red cover.3. Remove the red cover.4. Slide the metal grill out from the right side.5. Unfasten the screws on the front cover.6. Remove the front cover.7. Pull out the battery cable outlet from the main PCBA. Unfasten the screws and remove the mainPCBA. Then, remove the battery.[FR] Démontage sécurisé de la batterie intégréeCe produit contient une batterie intégrée qui ne devrait être démontée que par des centres de servicesou des installations de recyclage en référence aux instructions indiquées dans ce document. Creative etSafety Information 39](https://usermanual.wiki/Creative-Labs/AVPSB1660.User-Manual-Part-2/User-Guide-2640001-Page-40.png)
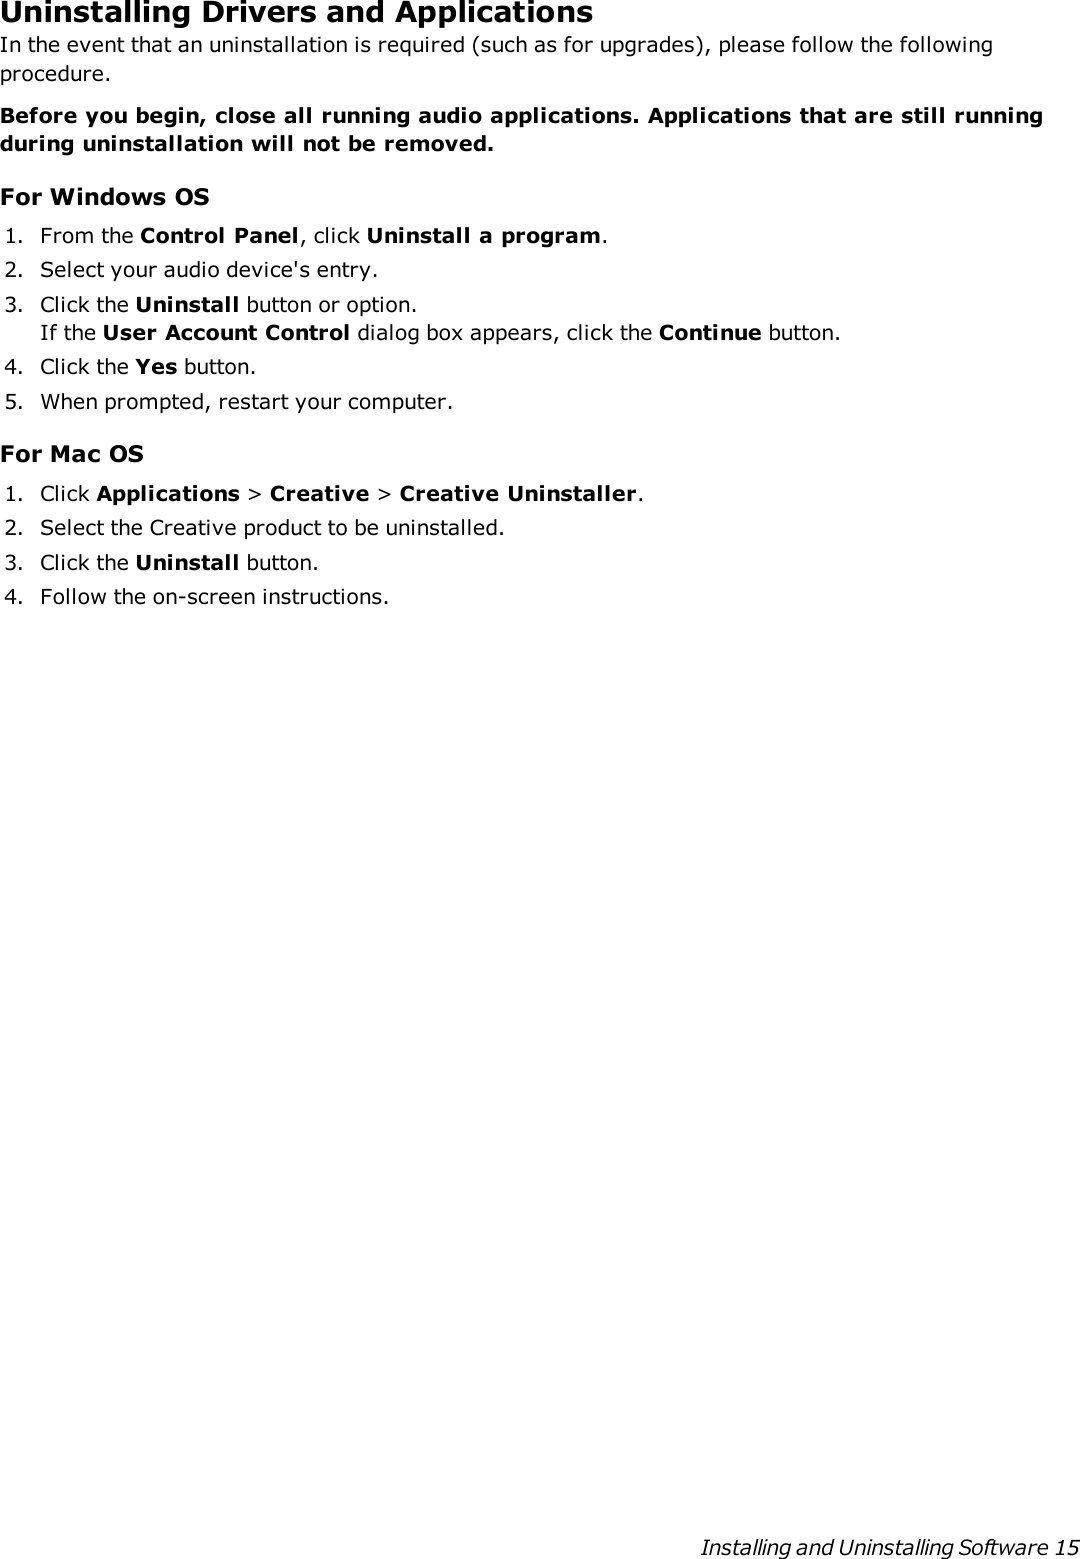
![ses sociétés affiliées ne seront pas responsables de tout dommage résultant de votre essai de démonteret / ou altérer la batterie ou une partie du produit par un utilisateur final.ATTENTION:« Assurez-vous que le produit est déconnecté du câble de chargement avant de démonter la batterie ».« Couvrez une des bornes de la batterie avec du ruban isolant pour éviter un court-circuit » - Cela nes'applique pas à la batterie avec connecteur.Instructions du démontage de la batterie:1. Remove rubber pad from the right side of the speaker.2. Unfasten the screws on the red cover.3. Remove the red cover.4. Slide the metal grill out from the right side.5. Unfasten the screws on the front cover.6. Remove the front cover.7. Pull out the battery cable outlet from the main PCBA. Unfasten the screws and remove the mainPCBA. Then, remove the battery.[IT] Rimozione sicura della batteria integrataIl prodotto contiene una batteria integrata che deve essere rimossa SOLO dai centri di assistenza o daicentri adibiti al riciclaggio, con riferimento alle presenti istruzioni. Creative e le società affiliate nonsaranno ritenute responsabili per eventuali danni derivanti dal tentativo da parte dell'utente finale dirimuovere e/o manomettere la batteria o parti del prodotto.ATTENZIONE:"Prima di rimuovere la batteria, accertarsi che il prodotto sia scollegato dal cavo di carica""Coprire uno dei terminali della batteria con nastro isolante per evitare cortocircuiti" (non applicabilealle batterie con connettore)Istruzioni di rimozione della batteria:1. Remove rubber pad from the right side of the speaker.2. Unfasten the screws on the red cover.3. Remove the red cover.4. Slide the metal grill out from the right side.5. Unfasten the screws on the front cover.6. Remove the front cover.7. Pull out the battery cable outlet from the main PCBA. Unfasten the screws and remove the mainPCBA. Then, remove the battery.[DE] Sicherer Ausbau des integrierten AkkusDieses Produkt enthält einen integrierten Akku, der NUR durch Service-Center oder Recycling-Stellenunter Befolgung der hier enthaltenen Anleitung entfernt werden darf. Creative und dessen Partnerhaften nicht für eventuelle Schäden, die aus dem Versuch entstehen, den Akku oder beliebige andereTeile des Produkts auszubauen oder zu manipulieren.VORSICHT:"Stellen Sie sicher, dass das Produkt vom Ladekabel getrennt wurde, bevor Sie den Akku ausbauen""Überkleben Sie einen der Akku-Pole mit Isolierband, um einen Kurzschluss zu verhindern" - gilt nichtfür Akkus mit SteckerAusbauanleitung des Akkus:Safety Information 40](https://usermanual.wiki/Creative-Labs/AVPSB1660.User-Manual-Part-2/User-Guide-2640001-Page-41.png)
![1. Remove rubber pad from the right side of the speaker.2. Unfasten the screws on the red cover.3. Remove the red cover.4. Slide the metal grill out from the right side.5. Unfasten the screws on the front cover.6. Remove the front cover.7. Pull out the battery cable outlet from the main PCBA. Unfasten the screws and remove the mainPCBA. Then, remove the battery.[ES] Extracción de seguridad de la batería integradaEste producto contiene una batería integrada que SOLAMENTE debe ser extraída por centros de servicioo instalaciones de reciclaje con referencia a estas instrucciones. Creative y sus filiales no seránconsideradas responsables por cualquier daño resultante del intento de extracción o alteración de labatería o de cualquier otra pieza del producto por parte del usuario final.PRECAUCIÓN:"Asegúrese de que el cable de carga del producto está desconectado antes de la extracción de labatería""Cubra uno de los terminales de la batería con cinta aislante para prevenir cortocircuitos" - no aplicablea baterías con conectoresInstrucciones para la extracción de la batería:1. Remove rubber pad from the right side of the speaker.2. Unfasten the screws on the red cover.3. Remove the red cover.4. Slide the metal grill out from the right side.5. Unfasten the screws on the front cover.6. Remove the front cover.7. Pull out the battery cable outlet from the main PCBA. Unfasten the screws and remove the mainPCBA. Then, remove the battery.[NL] Veilige verwijdering van ingebouwde batterijDit product bevat een ingebouwde batterij en mag alleen worden verwijderd door servicecentra ofrecyclingfaciliteiten met verwijzing naar de hieronder beschreven aanwijzingen. Creatieve en haargelieerde bedrijven zijn niet aansprakelijk voor schade die veroorzaakt wordt door het verwijderenen/of modificeren van de batterij of een deel van het product door een eindgebruiker.LET OP:"Zorg ervoor dat het apparaat wordt losgekoppeld van de oplaadkabel voordat u de batterij verwijdert""Één van de terminals van de batterij afplakken met isolatietape om kortsluiting te voorkomen" - nietvan toepassing op batterij met een connectorAanwijzingen voor het verwijderen van de batterij:1. Remove rubber pad from the right side of the speaker.2. Unfasten the screws on the red cover.3. Remove the red cover.4. Slide the metal grill out from the right side.5. Unfasten the screws on the front cover.6. Remove the front cover.Safety Information 41](https://usermanual.wiki/Creative-Labs/AVPSB1660.User-Manual-Part-2/User-Guide-2640001-Page-42.png)
![7. Pull out the battery cable outlet from the main PCBA. Unfasten the screws and remove the mainPCBA. Then, remove the battery.[PT] Remoção em segurança da bateria integradaEste produto contém uma bateria integrada que APENAS deve ser removida pelos centros de serviço ouinstalações de reciclagem com referência às instruções deste documento. A Creative e as suas afiliadasnão podem ser consideradas responsáveis por quaisquer danos resultantes da tentativa para removere/ou adulterar a bateria ou qualquer peça do produto por parte de um utilizador final.CUIDADO:"Certifique-se de que o cabo de carregamento do produto está desligado antes de remover a bateria""Tape um dos terminais da bateria com fita isoladora para prevenir um curto-circuito" - não aplicável abaterias com conectorInstruções para remoção da bateria:1. Remove rubber pad from the right side of the speaker.2. Unfasten the screws on the red cover.3. Remove the red cover.4. Slide the metal grill out from the right side.5. Unfasten the screws on the front cover.6. Remove the front cover.7. Pull out the battery cable outlet from the main PCBA. Unfasten the screws and remove the mainPCBA. Then, remove the battery.[DK] Sikker fjernelse af indbygget batteriDette produkt indeholder et indbygget batteri, som KUN må fjernes af servicecentre ellergenbrugsanlæg, i overensstemmelse med de medfølgende vejledninger. Creative og dets associeredeselskaber, kan ikke holdes ansvarlige for skader forårsaget af forsøg på at fjerne og/eller ændrebatteriet, eller nogle andre dele af produktet, på vegne af en slutbruger.FORSIGTIG:"Kontroller at produktet er afbrudt fra opladerkablet, før batteriet fjernes""Tildæk en af batteripolerne med isoleringstape for at forhindre en kortslutning" - ikke gældende forbatteri med konnektorVejledning til fjernelse af batteri:1. Remove rubber pad from the right side of the speaker.2. Unfasten the screws on the red cover.3. Remove the red cover.4. Slide the metal grill out from the right side.5. Unfasten the screws on the front cover.6. Remove the front cover.7. Pull out the battery cable outlet from the main PCBA. Unfasten the screws and remove the mainPCBA. Then, remove the battery.[SV] Säker borttagning av inbyggt batteriDenna produkt innehåller ett integrerat batteri som bör tas bort ENDAST av personal på servicecentereller återvinningsanläggningar vilka tar hänsyn till instruktionerna här nedan. Creative och dessSafety Information 42](https://usermanual.wiki/Creative-Labs/AVPSB1660.User-Manual-Part-2/User-Guide-2640001-Page-43.png)
![dotterbolag ansvarar inte för skador som uppkommit på grund av att slutanvändaren har försökt att taur och/eller manipulera batteriet eller någon annan produktdel.VARNING!"Säkerställ att produkten inte är ansluten med nätkabeln innan du tar ur batteriet.""Täck en av batteriterminalerna med isoleringstejp för att förhindra kortslutning" – gäller ej förbatterier med anslutningInstruktioner för borttagning av batteri:1. Remove rubber pad from the right side of the speaker.2. Unfasten the screws on the red cover.3. Remove the red cover.4. Slide the metal grill out from the right side.5. Unfasten the screws on the front cover.6. Remove the front cover.7. Pull out the battery cable outlet from the main PCBA. Unfasten the screws and remove the mainPCBA. Then, remove the battery.[NO] Sikker fjerning av innebygd batteriDette produktet har et integrert batteri som KUN skal fjernes av servicesentre eller gjenbruksanleggmed referanse til instruksjonene heri. Creative og deres samarbeidspartnere vil ikke være ansvarligefor noen skader oppstått ut fra forsøk på å fjerne og/eller tukle med batteriet eller noen del avproduktet av en sluttbruker.FORSIKTIG:«Påse at produktet er koblet fra ladekabelen før batteriet fjernes»«Dekk til en av batteriterminalene med isolasjonstape for å forhindre kortslutning» - gjelder ikke forbatteri med koblingInstruksjoner for fjerning av batteri:1. Remove rubber pad from the right side of the speaker.2. Unfasten the screws on the red cover.3. Remove the red cover.4. Slide the metal grill out from the right side.5. Unfasten the screws on the front cover.6. Remove the front cover.7. Pull out the battery cable outlet from the main PCBA. Unfasten the screws and remove the mainPCBA. Then, remove the battery.[FI] Sisäänrakennetun akun turvallinen poistaminenTässä tuotteessa on sisäänrakennettu akku, jonka saavat poistaa VAIN huoltokeskukset taikierrätyskeskukset tässä mainittuja ohjeita noudattaen. Creative ja sen tytäryritykset eivät olevastuussa mistään vahingoista, jotka johtuvat siitä, että loppukäyttäjä yrittää poistaa ja/tai peukaloidaakkua tai muuta tuotteen osaa.VAROITUS:"Varmista, että tuote on irrotettu latausjohdosta ennen akun poistamista.""Peitä yksi akun terminaaleista eristysteipillä, jotta estetään oikosulku" - ei koske akkua, jossa on liitinAkun irrotusohjeet:Safety Information 43](https://usermanual.wiki/Creative-Labs/AVPSB1660.User-Manual-Part-2/User-Guide-2640001-Page-44.png)
![1. Remove rubber pad from the right side of the speaker.2. Unfasten the screws on the red cover.3. Remove the red cover.4. Slide the metal grill out from the right side.5. Unfasten the screws on the front cover.6. Remove the front cover.7. Pull out the battery cable outlet from the main PCBA. Unfasten the screws and remove the mainPCBA. Then, remove the battery.[EL] Ασφαλής αφαίρεση της ενσωματωμένης μπαταρίαςΑυτό το προϊόν περιέχει ενσωματωμένη μπαταρία η οποία πρέπει να αφαιρείται ΜΟΝΟ από εξειδικευμένακέντρα ή εγκαταστάσεις ανακύκλωσης με καθοδήγηση από τις παρούσες οδηγίες. Η Creative και οισυνεργάτες της δε φέρουν καμία ευθύνη για φθορές λόγω απόπειρας αφαίρεσης της μπαταρίας ή άλλουεξαρτήματος του προϊόντος από τον τελικό χρήστη.ΠΡΟΣΟΧΗ:"Σιγουρευτείτε ότι έχετε αφαιρέσει το καλώδιο φόρτισης προτού αφαιρέσετε την μπαταρία""Καλύψτε ένα από τα τερματικά της μπαταρίας με μονωτική ταινία ώστε να αποφύγετε τυχόνβραχυκύκλωμα" - δεν ισχύει για μπαταρίες με βύσμαΟδηγίες αφαίρεσης της μπαταρίας:1. Remove rubber pad from the right side of the speaker.2. Unfasten the screws on the red cover.3. Remove the red cover.4. Slide the metal grill out from the right side.5. Unfasten the screws on the front cover.6. Remove the front cover.7. Pull out the battery cable outlet from the main PCBA. Unfasten the screws and remove the mainPCBA. Then, remove the battery.[PL] Bezpieczne usuwanie wbudowanej bateriiTen produkt zawiera zintegrowaną baterię, którą należy usuwać TYLKO w punktach serwisowych lubzakładach recyklingowych oraz zgodnie z zamieszczonymi instrukcjami. Firma Creative i jej partnerzynie ponoszą odpowiedzialności za jakiekolwiek szkody wynikające z podejmowania prób wyjęcia bateriii/lub manipulowania baterią lub jakąkolwiek częścią produktu przez użytkownika końcowego.UWAGA:"Przed przystąpieniem do wyjęcia baterii upewnić się, że produkt jest odłączony od kabla ładującego.""Osłonić jeden ze styków baterii taśmą izolacyjną, aby zapobiec wystąpieniu zwarcia." - nie dotyczybaterii wyposażonych w złączeInstrukcja wyjmowania baterii:1. Remove rubber pad from the right side of the speaker.2. Unfasten the screws on the red cover.3. Remove the red cover.4. Slide the metal grill out from the right side.5. Unfasten the screws on the front cover.6. Remove the front cover.Safety Information 44](https://usermanual.wiki/Creative-Labs/AVPSB1660.User-Manual-Part-2/User-Guide-2640001-Page-45.png)
![7. Pull out the battery cable outlet from the main PCBA. Unfasten the screws and remove the mainPCBA. Then, remove the battery.[CZ] Bezpečné vyjmutí zabudované baterieProdukt obsahuje integrovanou baterii, kterou mohou vyjímat POUZE pracovníci servisních center neborecyklačních zařízení dle zde uvedených pokynů. Společnost Creative a její přidružené společnostinebudou odpovídat za žádné škody vyvstávající z nedovolené manipulace nebo pokusu o vyjmutí baterieči jakékoli součásti produktu koncovým uživatelem.UPOZORNĚNÍ:„Než se pokusíte vyjmout baterii, ujistěte se, že je produkt odpojen od napájecího kabelu.“„Jeden z pólů baterie zakryjte izolační páskou, čímž zabráníte zkratování“ – tento pokyn se netýkábaterie s konektoremPokyny k vyjmutí baterie:1. Remove rubber pad from the right side of the speaker.2. Unfasten the screws on the red cover.3. Remove the red cover.4. Slide the metal grill out from the right side.5. Unfasten the screws on the front cover.6. Remove the front cover.7. Pull out the battery cable outlet from the main PCBA. Unfasten the screws and remove the mainPCBA. Then, remove the battery.[SK] Bezpečné vyberanie vstavanej batérieTento výrobok obsahuje integrovanú batériu, ktorú môžu vybrať IBA v servisných strediskách alebo vorganizáciách určených na zber a recykláciu odpadu v súlade s pokynmi v tomto dokumente. SpoločnosťCreative a jej pobočky nenesú zodpovednosť za žiadnu škodu, ak koncový používateľ vyberie batériualebo ak manipuluje s touto batériou alebo s ktorýmkoľvek z dielov v tomto výrobku.UPOZORNENIE:„Pred vyberaním batérie sa uistite, že nabíjací kábel je odpojený od výrobku.“„Na jeden kontakt batérie založte izolačnú pásku, aby sa zabránilo skratu“ - neplatí pre batériu skonektoromPokyny týkajúce sa vyberania batérie:1. Remove rubber pad from the right side of the speaker.2. Unfasten the screws on the red cover.3. Remove the red cover.4. Slide the metal grill out from the right side.5. Unfasten the screws on the front cover.6. Remove the front cover.7. Pull out the battery cable outlet from the main PCBA. Unfasten the screws and remove the mainPCBA. Then, remove the battery.[HU] Az elem biztonságos eltávolításaEz a termék elemet is tartalmaz, amelyet azonban CSAK szervizekben vagy újrahasznosító telepekentávolíthatnak el a készülékből az erre vonatkozó utasítások betartása mellett. A Creative vállalat ésSafety Information 45](https://usermanual.wiki/Creative-Labs/AVPSB1660.User-Manual-Part-2/User-Guide-2640001-Page-46.png)
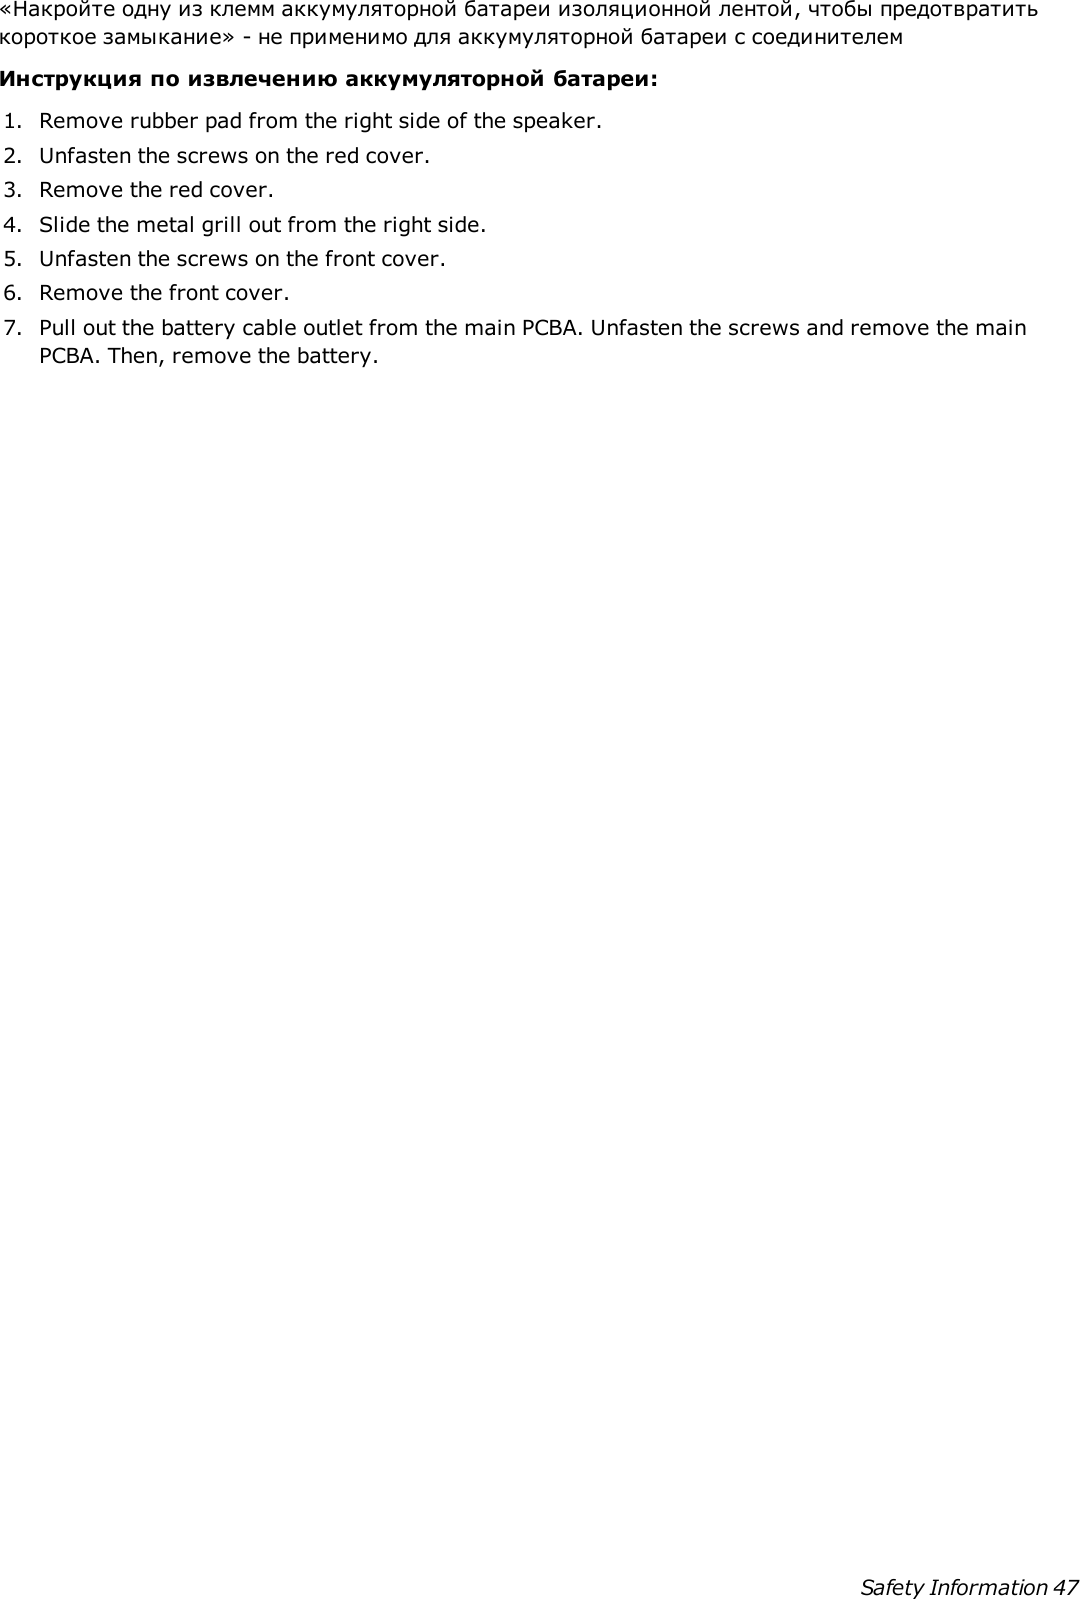
![annak leányvállalatai nem tehetőek felelőssé semminemű olyan kárért, amelyet egy végfelhasználóokozott az elem vagy a termék bármely részének eltávolításával és/vagy megrongálásával.FIGYELEM!„Az elem eltávolítása előtt győződjön meg arról, hogy a termék le van-e csatlakoztatva a töltőkábelről.”„Rövidzárlat megakadályozása érdekében ragassza le az elem egyik pólusát szigetelőszalaggal” – errenincs szükség csatlakozóval ellátott elemek eseténAz elem eltávolításának lépései:1. Remove rubber pad from the right side of the speaker.2. Unfasten the screws on the red cover.3. Remove the red cover.4. Slide the metal grill out from the right side.5. Unfasten the screws on the front cover.6. Remove the front cover.7. Pull out the battery cable outlet from the main PCBA. Unfasten the screws and remove the mainPCBA. Then, remove the battery.[LT] Saugus integruotos baterijos išėmimasŠiame produkte yra integruota bateriją, kurią galima išimti TIK aptarnavimo centre arba perdirbimoįstaigoje laikantis čia pateiktų instrukcijų. „Creative“ ir jos padaliniai neprisiima atsakomybės už žalą,patirtą galutiniam vartotojui bandant išimti ir / arba ardyti bateriją ar bet kurią produkto dalį.PERSPĖJIMAS:„Prieš išimdami bateriją įsitikinkite, kad produktas yra atjungtas nuo elektros laido“„Uždenkite vieną baterijos gnybtą lipnia juostele, kad neįvyktų trumpas jungimasis“ – netaikomabaterijoms su jungikliuBaterijos išėmimo instrukcija:1. Remove rubber pad from the right side of the speaker.2. Unfasten the screws on the red cover.3. Remove the red cover.4. Slide the metal grill out from the right side.5. Unfasten the screws on the front cover.6. Remove the front cover.7. Pull out the battery cable outlet from the main PCBA. Unfasten the screws and remove the mainPCBA. Then, remove the battery.[RU] Безопасное извлечение встроенной аккумуляторнойбатареиНастоящий продукт содержит встроенную аккумуляторную батарею, которую разрешаетсяизвлечь ТОЛЬКО в сервисном центре или на объекте по утилизации с соблюдением приведенных внастоящем документе инструкций. Компания Creative и ее дочерние компании не несутответственности за любые повреждения, нанесенные в результате попытки извлечения и/илинарушения целостности аккумуляторной батареи или любой части изделия конечнымпользователем.ВНИМАНИЕ:«Перед извлечением аккумуляторной батареи убедитесь, что изделие отсоединено от зарядногокабеля»Safety Information 46](https://usermanual.wiki/Creative-Labs/AVPSB1660.User-Manual-Part-2/User-Guide-2640001-Page-47.png)