Creatix Polymedia CTX404EV2 IEEE 802.11B WLAN PCI Card User Manual CTX404EV2 manual
Creatix Polymedia GmbH IEEE 802.11B WLAN PCI Card CTX404EV2 manual
Contents
- 1. Users Manual
- 2. User Manual
User Manual
Creatix 802.11b Wireless
PCI CARD
CTX404E V.2
User Manual
This handbook is protected by copyright. It must not be copied, reproduced,
translated or transmitted in electronic media, in whole or in part.
Accuracy of the information is not guaranteed.
Any mention in this handbook of products of other manufacturers is for
information purposes only and represents no misuse of trademarks.
Safety instructions
This equipment has been designed and tested in accordance with the
requirements of Standard IEC 950 „Safety of Information Technology
Equipment, Including Electrical Business Equipment“ Extracts from these
requirements according Standard IEC 950:
The CTX404E V.2 was evaluated for use in maximum ambient
temperature of 40 °C.
The CTX404E V.2 may only be used in countries where the card is
certified.
Regulatory Statements
FCC Certification
The United States Federal Communication Commission and the Canadian
Department of Communication have established certain rules governing the
use of electronic equipment.
Part15, Class B
This device complies with Part 15 of the FCC Rules.
Operation is subject to the following two conditions:
(1) This device my not cause harmful interference, and
(2) this device must accept any interference received, including interference
that may cause undesired operation. This equipment has been tested and
found to comply with the limits for a Class B digital device, pursuant to Part 15
of the FCC Rules. These limits are designed to provide reasonable protection
against harmful interference in a residential installation. This equipment
generates, uses and can radiate radio frequency energy and, if not installed
and used in accordance with the instructions, may cause harmful interference
to radio communications. However, there is no guarantee that interference will
not occur in a particular installation. If this equipment does cause harmful
interference to radio or on, the user is encouraged to try to correct the
interference by one or more of the following measures:
- Reorient or relocate the receiving antenna.
- Increase the separation between the equipment and receiver.
- Connect the equipment into an outlet on a circuit different from
that to which the receiver is connected.
- Consult the dealer or an experienced radio/TV technician for
help.
Caution:
1. This equipment complies with FCC radiation exposure limits set forth for an
uncontrolled environment. This equipment should be installed and operated
with minimum distance 20cm between the radiator and your body.
2. This transmitter must not be co-located or operating in conjunction with any
other antenna or transmitter.
3. Changes or modifications made to this equipment not expressly approved
by Creatix Polymedia GmbH may void the FCC authorization to operate this
equipment
Table of Contents
Safety Instructions…………………………………………….
Regulatory Statement…………………………………………
Introduction…………………………………………………….
Wireless Network Options…………………………………...
• Peer to Peer
• Access Point Network
Install……………………………………………………………..
• Windows XP
Configuration CTX404E V.2………………………………….
• Windows Utility
Configuration Network…………………………………………
Uninstall…………………………………………………………..
Support Inquiry………………………………………………….
Introduction
The 802.11b Wireless PCI Card is a powerful 32-bit PCI Card that plugs quickly and
easily into your Desktop PC for wireless network applications without wires or cables.
Based on the IEEE 802.11b standard, it offers a transferring date rate of 11Mbps in a
wireless LAN environment. Once connected with other networked PC’s, it allows you
to share hard disk drives, DVD drives, CD drives, printers, and the likes.
The 802.11b Wireless PCI Card allows you to take full advantage of your PC’s
mobility with access to real-time information and online services anytime and
anywhere. Plus, with the network installation simplicity and flexibility, you can
eliminate the need to pull cable through walls and ceilings. Exploring WWW and
augmenting networks can never be done more easily.
Features
Features:
Compliant with IEEE 802.11b standard for 2.4GHz Wireless LAN
Compliant with PCI Standard
Works with all existing network infrastructure.
Compatible with specific wireless products and services
Capable of up to 128-Bit WEP Encryption Protocol
Freedom to roam while staying connected
11 Mbps High-Speed Transfer Rate
Lower power consumption
Easy to install and configure
Wireless Network Options
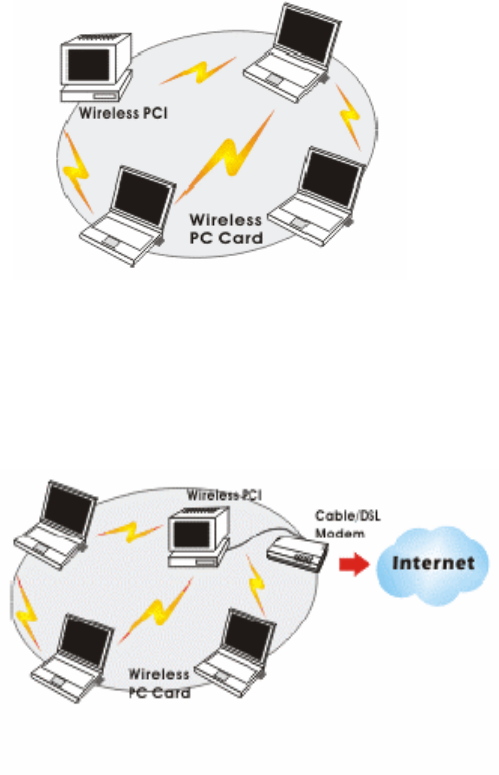
The Peer-to-Peer Network
This network installation lets you set a small wireless workgroup easily and quickly.
Equipped with wireless PCI or wireless PC Cards, you can share files and printers
between each PC and laptop.
Or you can use one computer as an Internet Server to connect to a wired global
network and share files and information with other PCs via a wireless LAN.
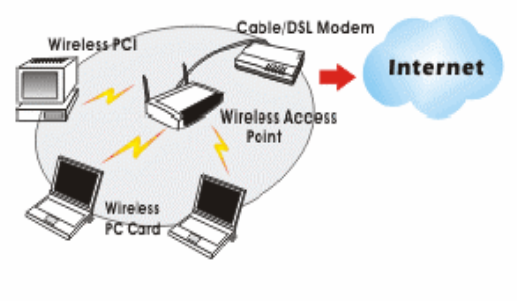
The Access Point Network
The network installation allows you to share files, printers, and Internet access much
more conveniently. With wireless PCI Cards, you can connect wireless LAN to a
wired global network via an Access Point.
Install the CTX404E V.2
1. Before installing the device, make sure the computer is turned off.
2. Remove the expansion slot cover from the computer.
3. Carefully slide the wireless PCI card into an available PCI slot, push
it evenly and firmly and ensure it is screwed securely in place using
the mounting screw.
4. Once the device has been connected to your computer, Windows will
detect the new hardware automatically.
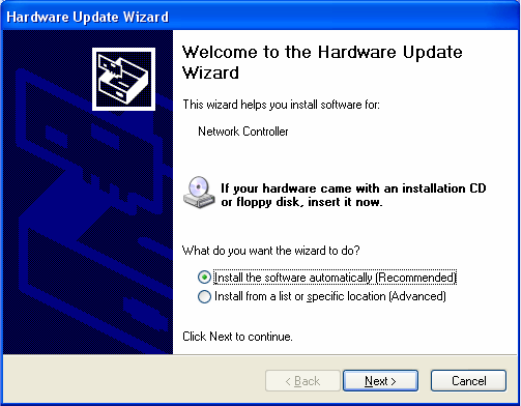
Windows XP
Click on „Install the software automatically (Recommended)” and click
“Next”>
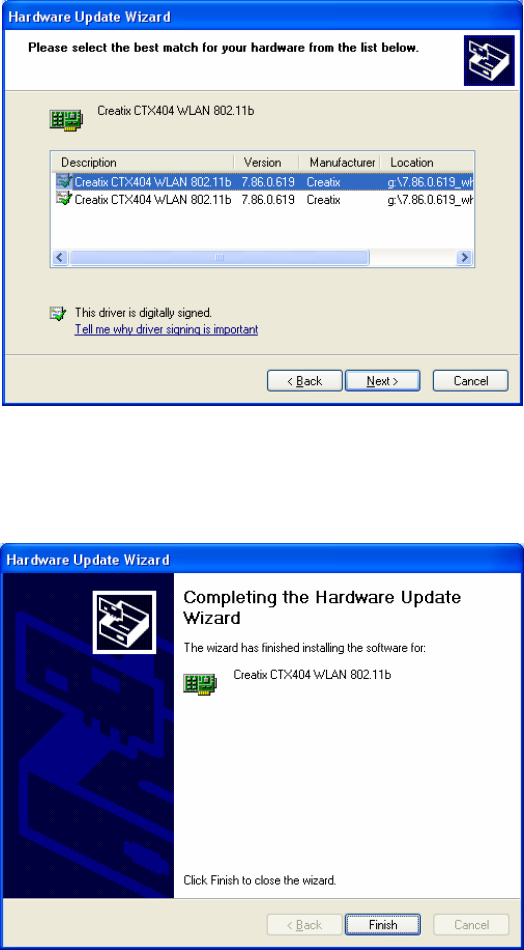
Click „Next“>
Finish the driver installation with a click on the “Finish“ button.
Installation Client Mgr 3.23
Select your CD-ROM, open the folder “Client Mgr 3.23”, double-click on
“setup.exe” to install the Wireless LAN Utility.
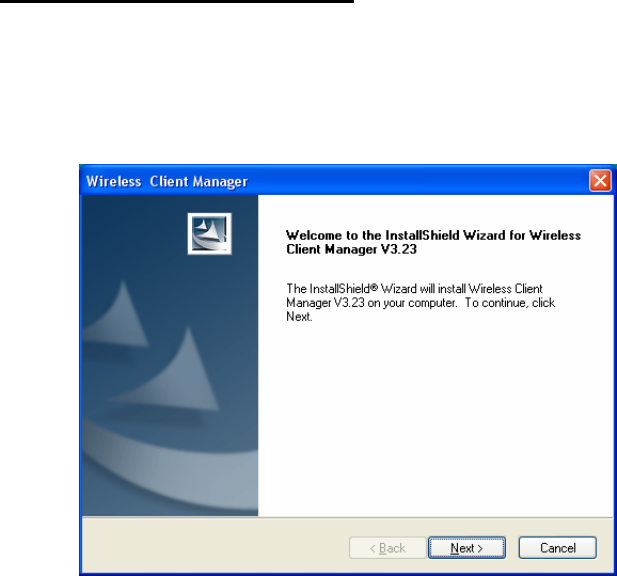
The Client Manager installation is managed via an installation wizard.
When the Welcome screen appears , click “Next “> to continue.
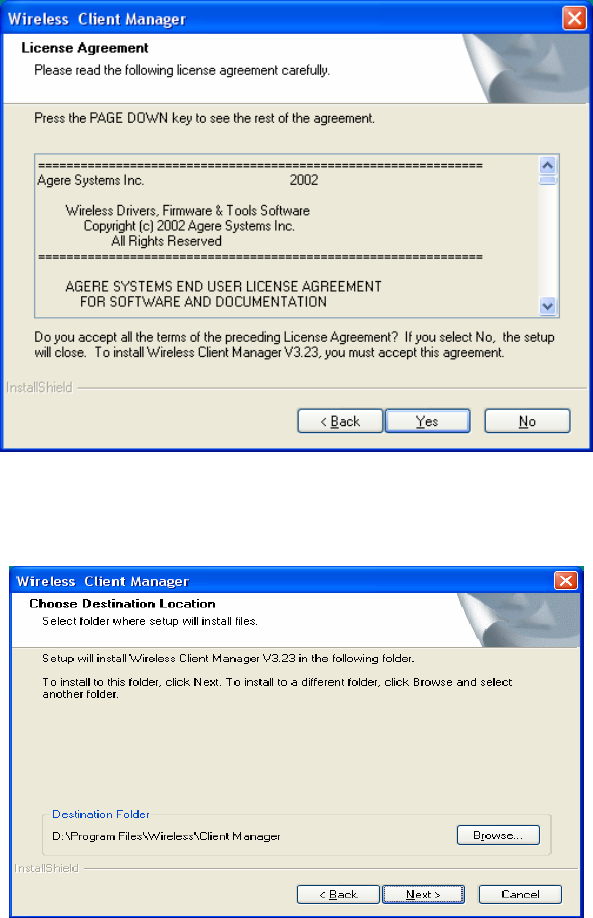
Click “Yes”.
Click “Next”> to continue
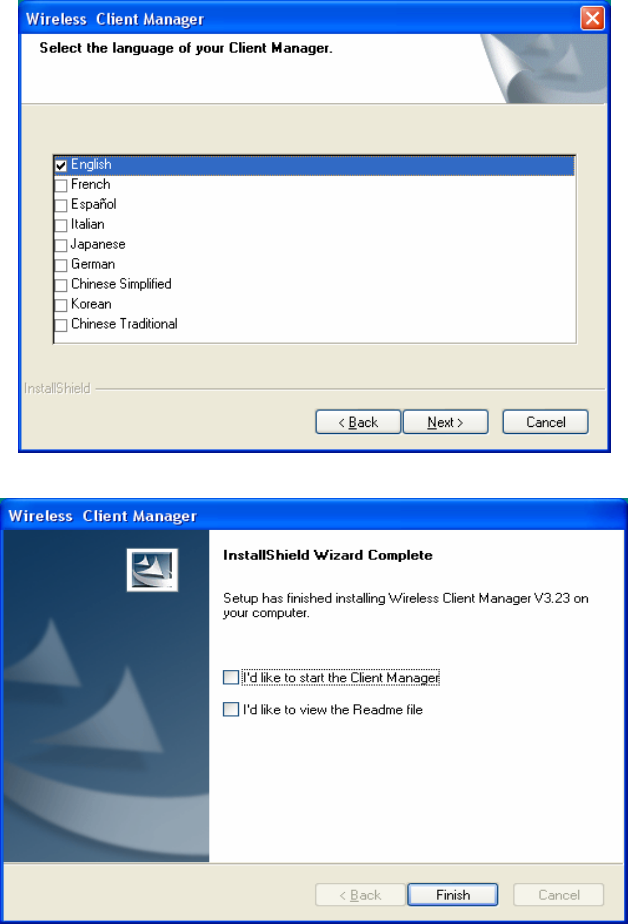
Select the language of your Client Manager and Click “Next”>.
Click “Finish”.
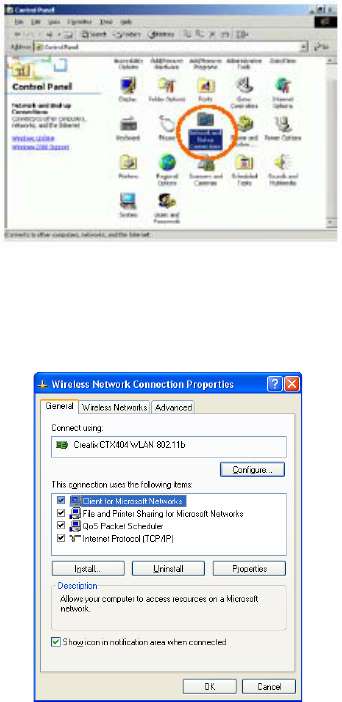
Configuration by Windows Utility
1. Go to Start Æ Control Panel Æ Network Connections.
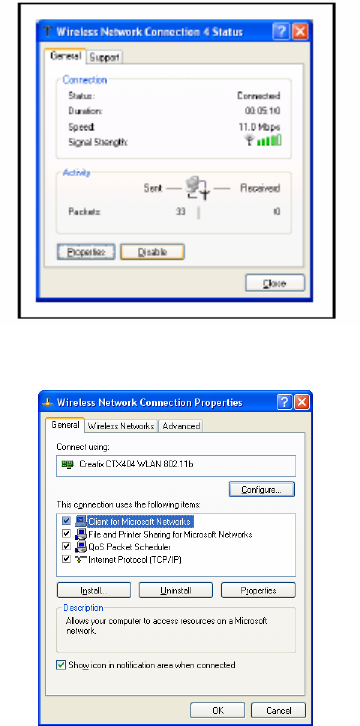
2. In Network Connections window, right-click the Wireless Network Connections
icon, and select Properties.
Note: Double-click the Wireless Network Connection icon and you can see the
status of the Wireless PCI Card as described below.
3. In Wireless Network Connection Properties window, select the General tab.
Click Configure to enable Windows configuration.

Antenna (Diversity, Antenna A or Antenna B):
These settings determine which antenna
will be used to transmit or receive.
Channel Select the appropriate channel from the
list provided to correspond with your
network settings. All devices in the
wireless LAN must be configured to
share the same radio channel in order to
work correctly.
(There are 14 channels available, depends
on the country.)
Data Rate Select (1, 2, 5.5, or 11Mbps or Auto)
from the pull-down list to change the
current transfer rate.
Network Type Select the appropriate Network Type
from 802.11 AdHoc Mode (Active),
802.11 AdHoc Mode (Passive) or
Infrastructure.
In AdHoc mode, Active mode is
recommended since it can generate/pass
beacon packets automatically.
Preamble A preamble is a signal used in wireless
environment to synchronize the
transmitting timing including
Synchronization and Start frame
delimiter. (Note: Please check the setting
of AP first.)
Auto Select Auto for the Network adapter to
select the Preamble type automatically
depending on the Access Point Preamble
type.
Long Preamble If in a "noisy" network environment, the
Preamble Type should be set to Long
Preamble.
Short Preamble The Short Preamble is intended for
applications where minimum overhead and
maximum performance is desired. If in a
"noisy" network environment, the
performance would be decreased.
RTS Threshold This value should remain at its default
setting of 2347. Should you encounter
inconsistent data flow, only minor
modifications of this value are
recommended
Select SharedKey Index Select from 1, 2, 3, 4 or No selection.
Sharekey1
Sharekey2
Sharekey3
Sharekey4
This setting is the configuration key used
in accessing the wireless network via WEP
encryption.
Fill in the appropriate value/phrase.
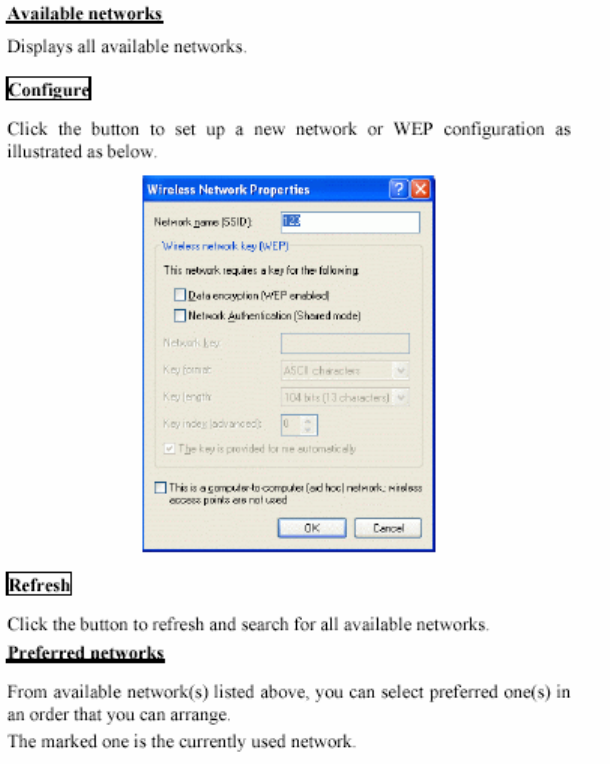
SSID SSID is the unique name shared among all
points in your wireless network. It must be
identical for all points in the network. It is
case-sensitive and must not exceed 32
characters. Make sure that all points in the
network are set the same.
WEP WEP is a data privacy mechanism based
on a 64 Bit/128 Bit shared key algorithm.
Select WEP key 128bit or WEP key
64bit to enable WEP encryption.
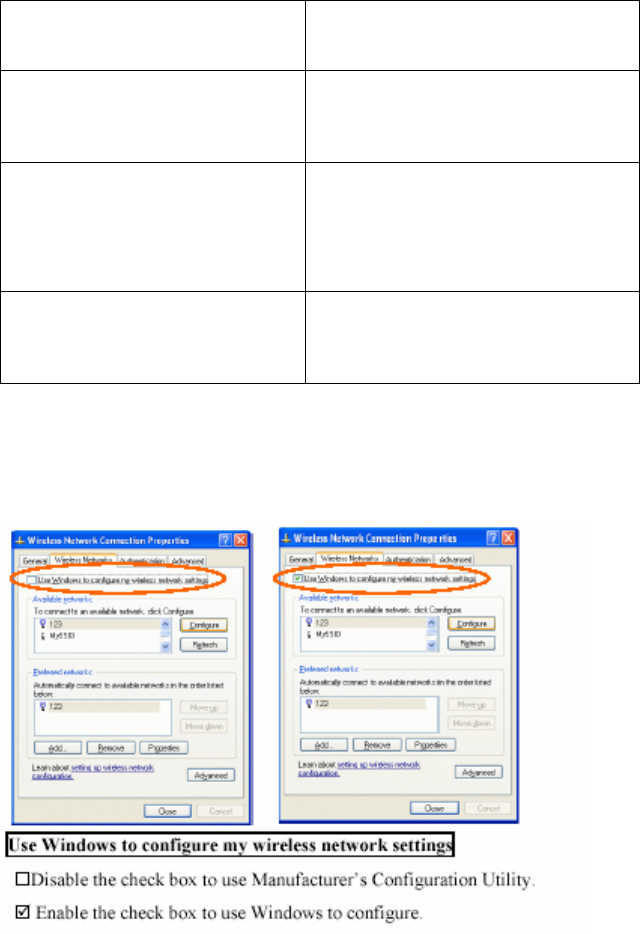
4. In Wireless Network Connection Properties window, select the Wireless
Networks tab.

Network Connection
Once the driver has been installed, you must make some changes to your network
settings.
Go to Start Æ Control Panel Æ Network Connections Æ Wireless Network Æ
Connection Enabled 802.11b Wireless PCI Card Æ Properties.
2. Make sure that you have all the following components installed.
Client for Microsoft Networks
NWLink NetBIOS
NWLink IPX/SPX/NetBIOS Compatible Transport Protocol
Internet Protocol (TCP/IP)
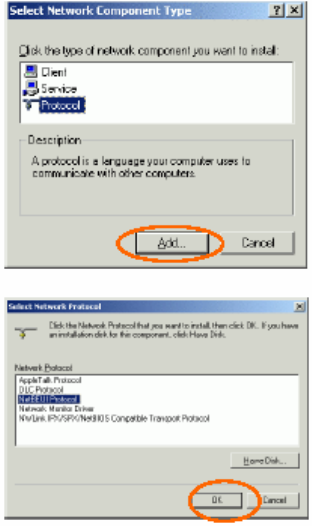
3. If any components are missing, click on the Install… button to select the
Client/Service/Protocol required. After selecting the component you need, click
Add… to add it in.
4. For making your computer visible on the network, make sure you have installed
File and Printer Sharing for Microsoft Networks.
5. When finished, you must restart your computer to complete the installation.
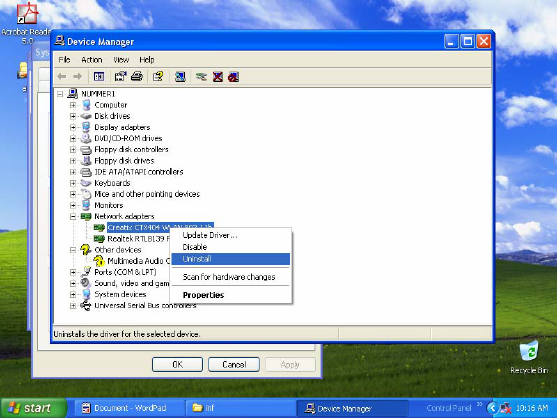
Uninstall
Go to the Control Panel < System – Hardware – Device Manager>
Click with the right mouse button to the Creatix CTX404WLAN 802.11b and
click uninstall.
Go into the hidden directory \ Windows \ Inf
Check all “oem.inf“ files (they can be opened by a double click) to find the
oem.inf file “Copyright 2002, Agere System Inc”
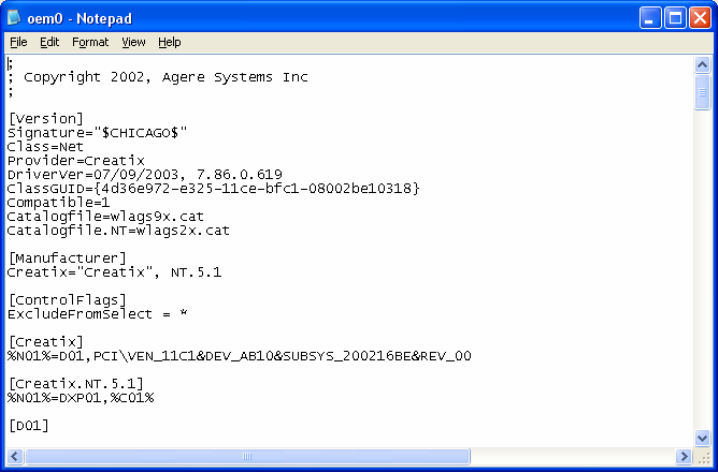
Delete this file.
After deleting the file shut down your PC to remove the card or restart to install
a new update for the driver.

Support-Inquiry
Medion USA, Inc
1721 Moon Lake Blvd #300
Hoffman Estates, IL 60194
Name Given name
Telephone Fax
Street Email
Zip Town
Product Serial-number
Operating system ❏ DOS ❏ Windows 95 ❏ Windows ME
❏ Windows 3.1 ❏ Windows 98 ❏ Windows 2000
❏ Windows 3.11 ❏ Windows NT 4.0 ❏ others
Software ❏ delivered - which?
❏ others:
Used settings COM-Port
(see Chapter 1) IRQ
Additional Cards ❏ no
(please give description about IRQ and DMA)
❏ Sound card
❏ Streamer-Controller
❏ Network Card
❏ CD-ROM-Controller
❏ others:
Do you use only the delivered Original cables?
❏ Yes
❏ others: (for example extension lead, Telephone cable end so on.)

Problems
You get the error message also:
❏ with an other Software
❏ using the device with an other PC
Wireless LAN general:
❏ no Connection
❏ abort of the Connection
❏ smear signs at the screen
❏ many errors with Up-/Downloads (Data transfer), which?
❏ other errors, Description:
Internet:
❏ no Connection
❏ abort of the Connection
❏ smear signs at the screen
❏ other Errors, Description:
Other problems or questions: