Crestron Electronics ST-1550C SmarTouch Remote Control User Manual Image2
Crestron Electronics Inc SmarTouch Remote Control Image2
UserManual.wiki
>
Crestron Electronics
>
ST 1550C User Manual
User manual
Navigation menu
Upload a User Manual
Namespaces
Wiki Guide
HTML
PDF
Info
Views
User Manual
Discussion / Help
Navigation
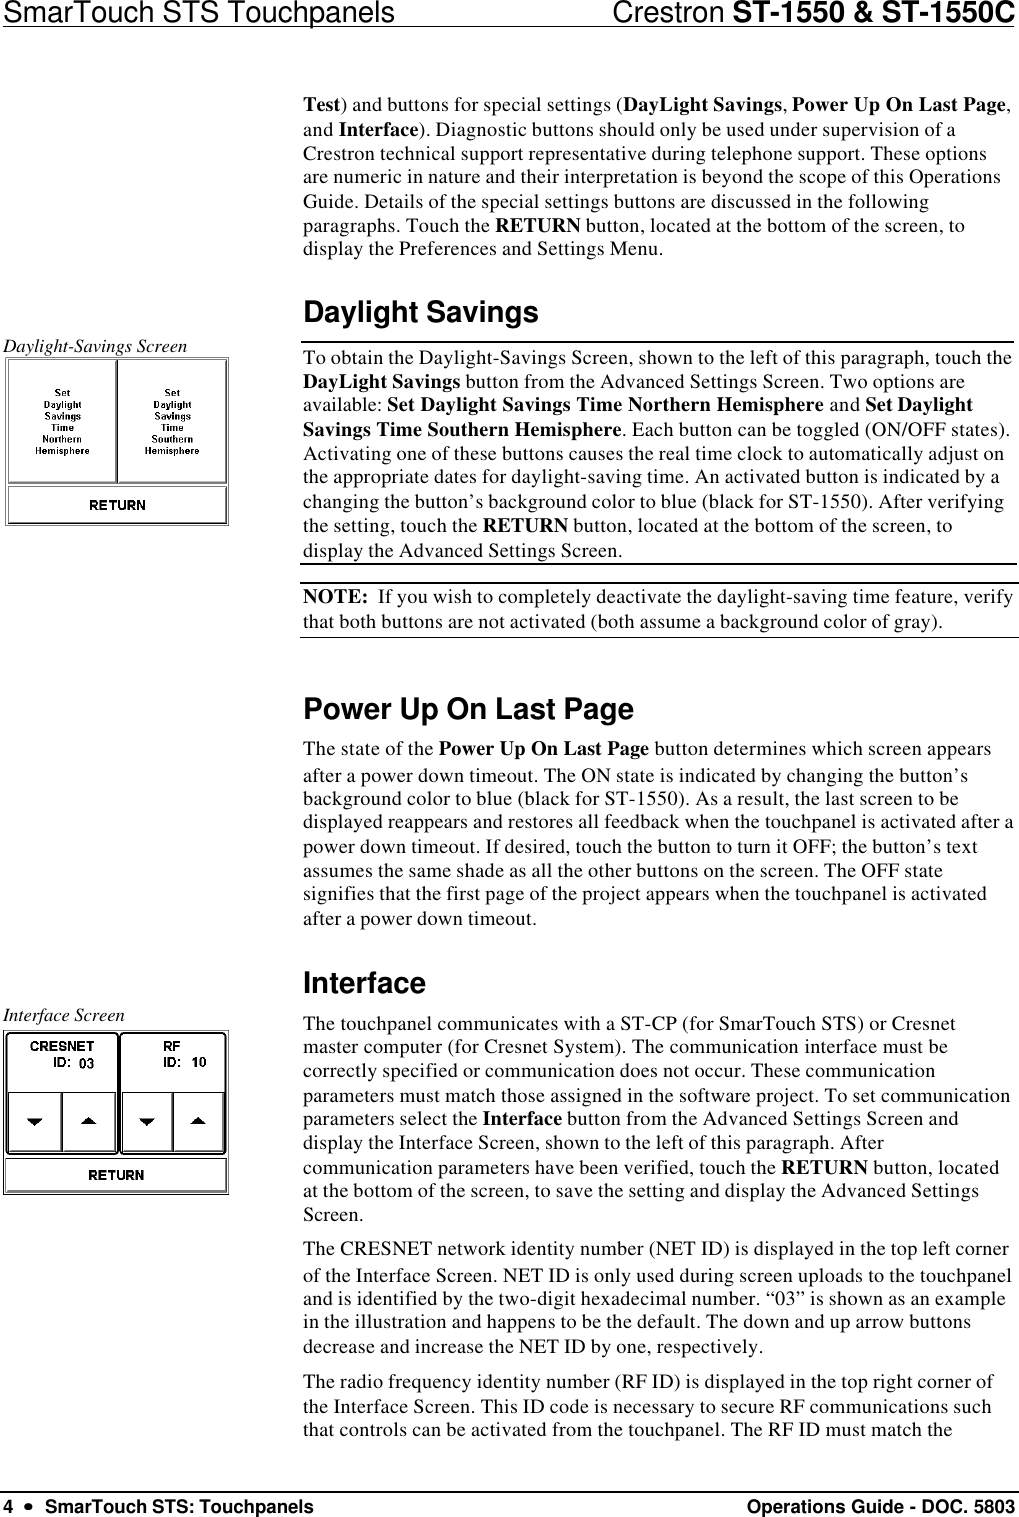
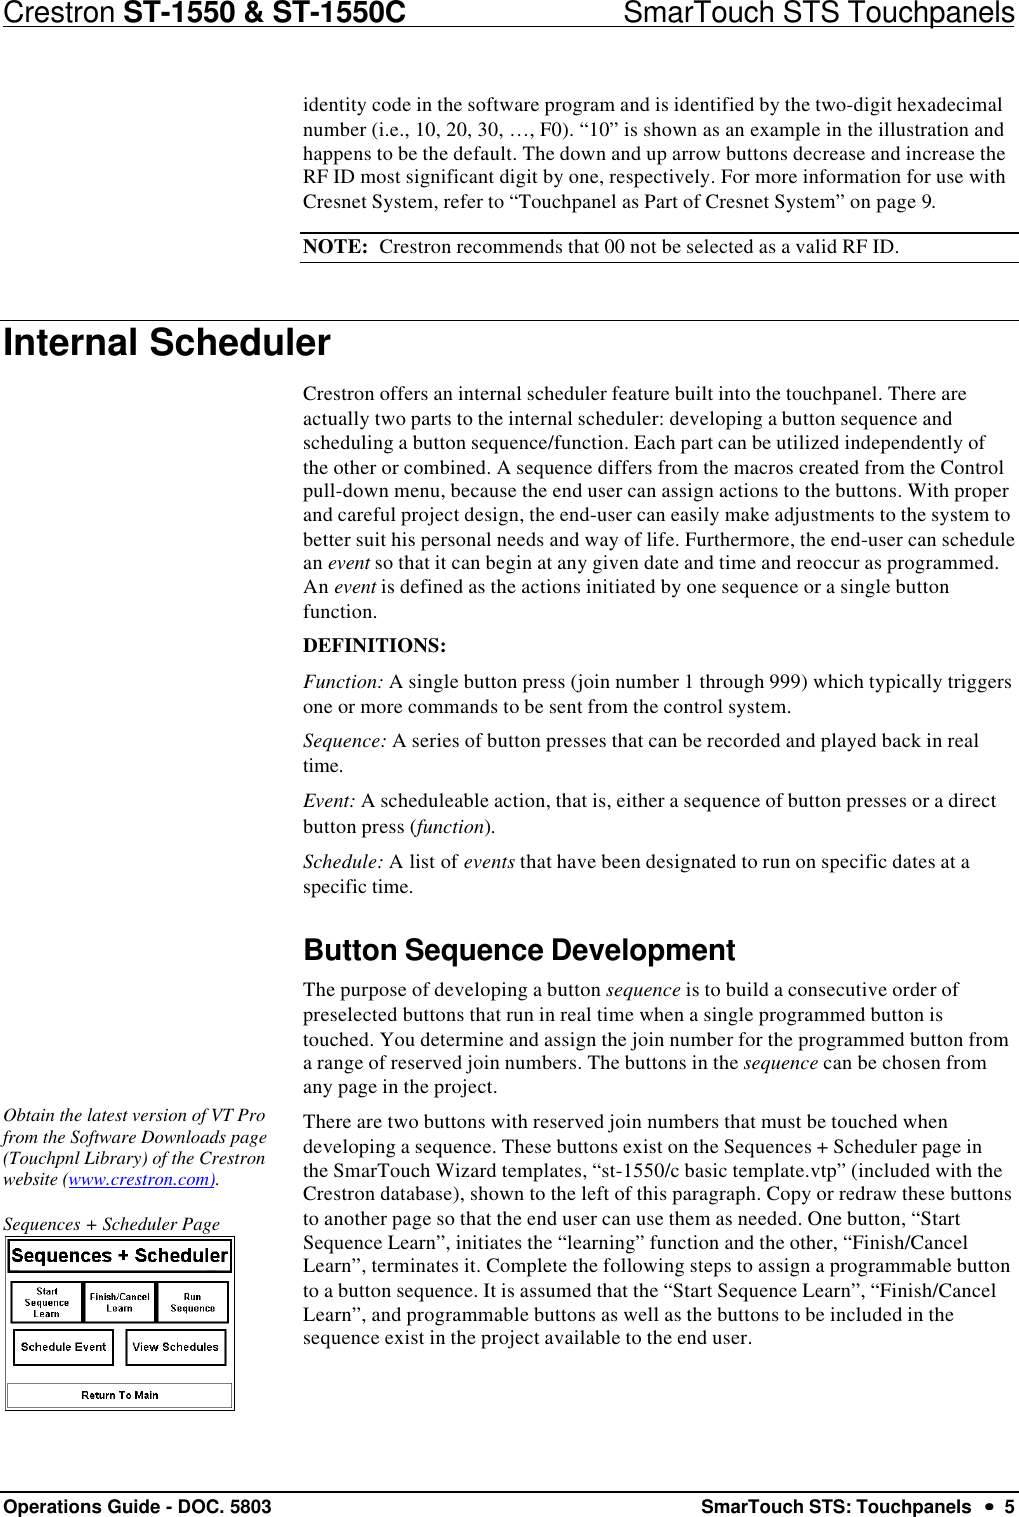
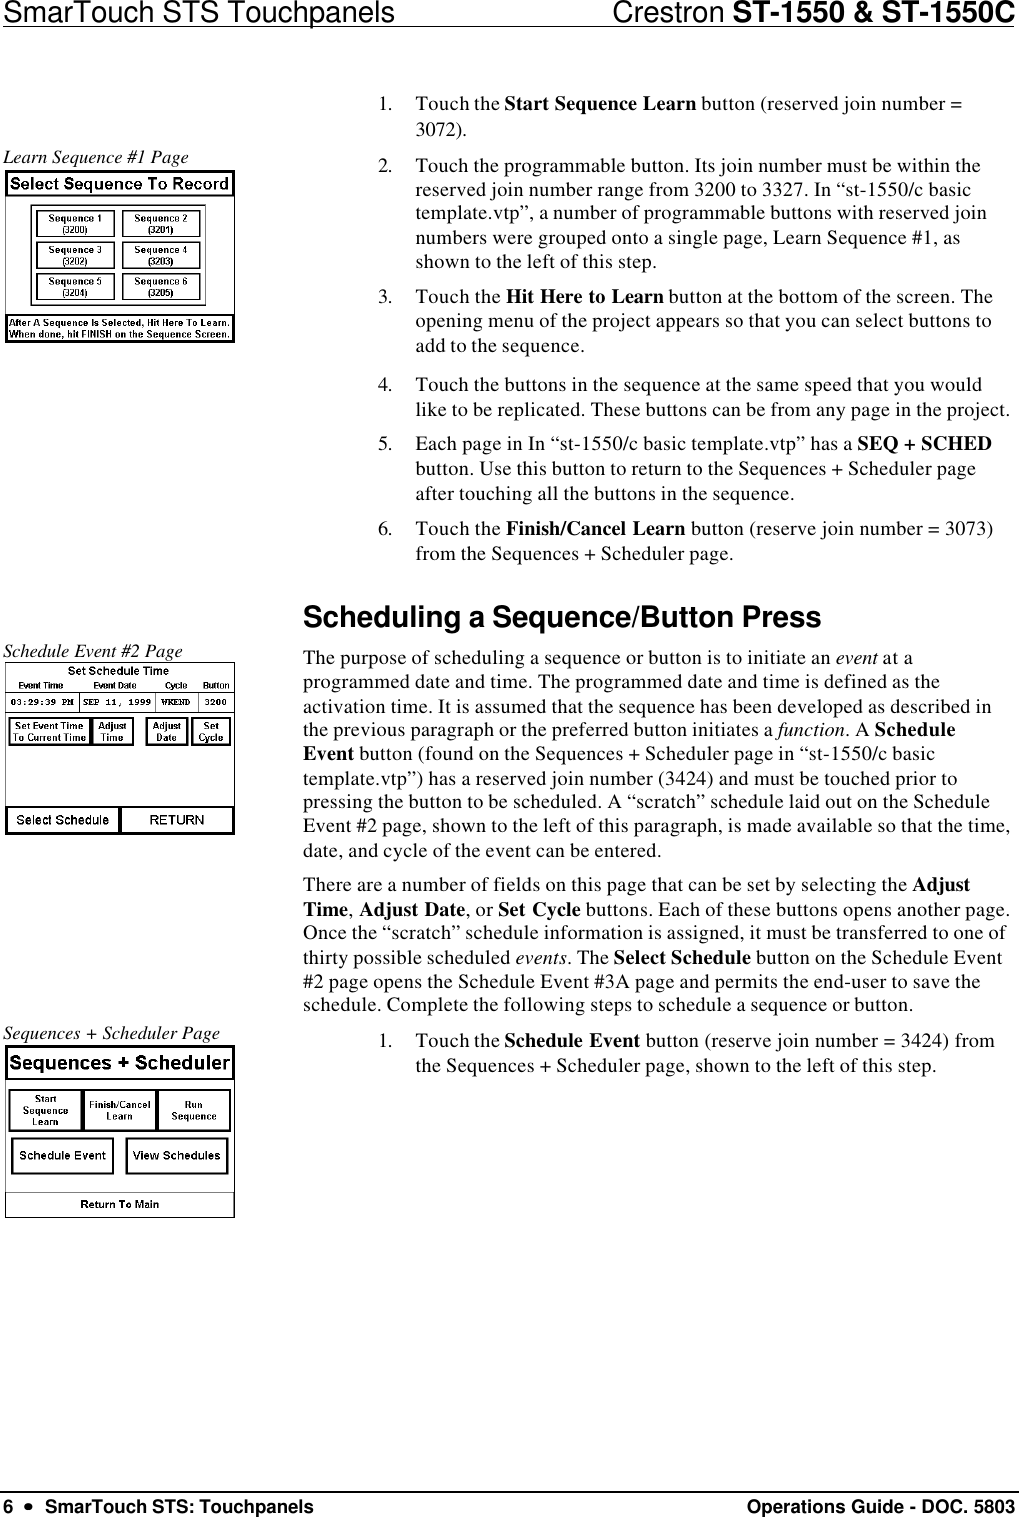
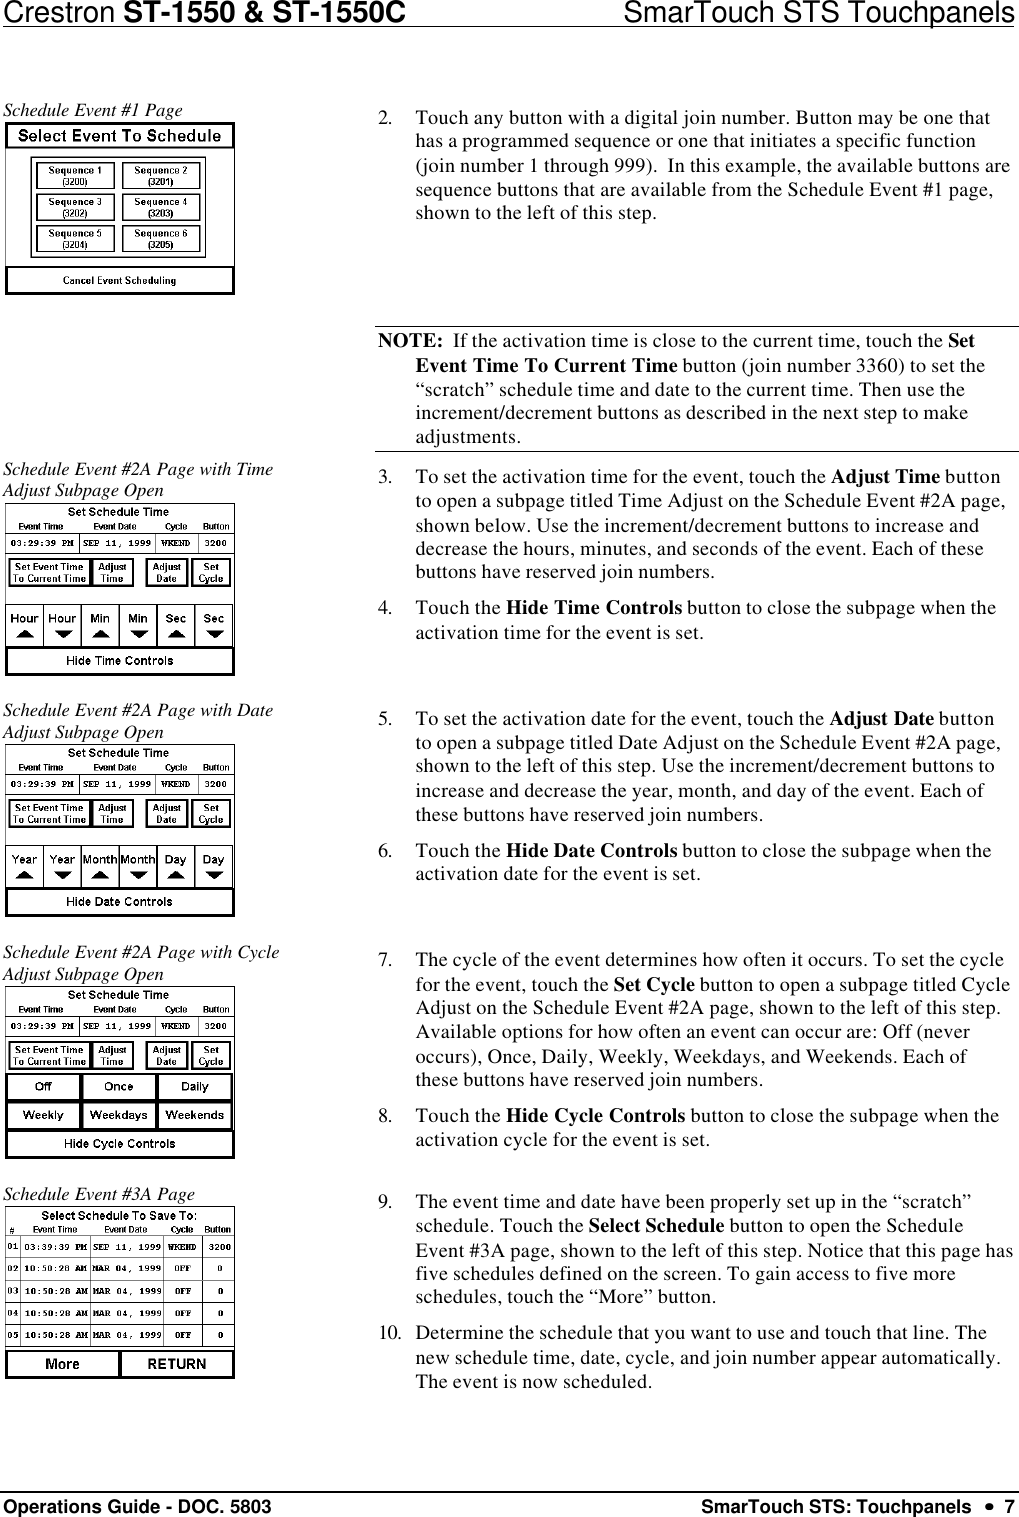
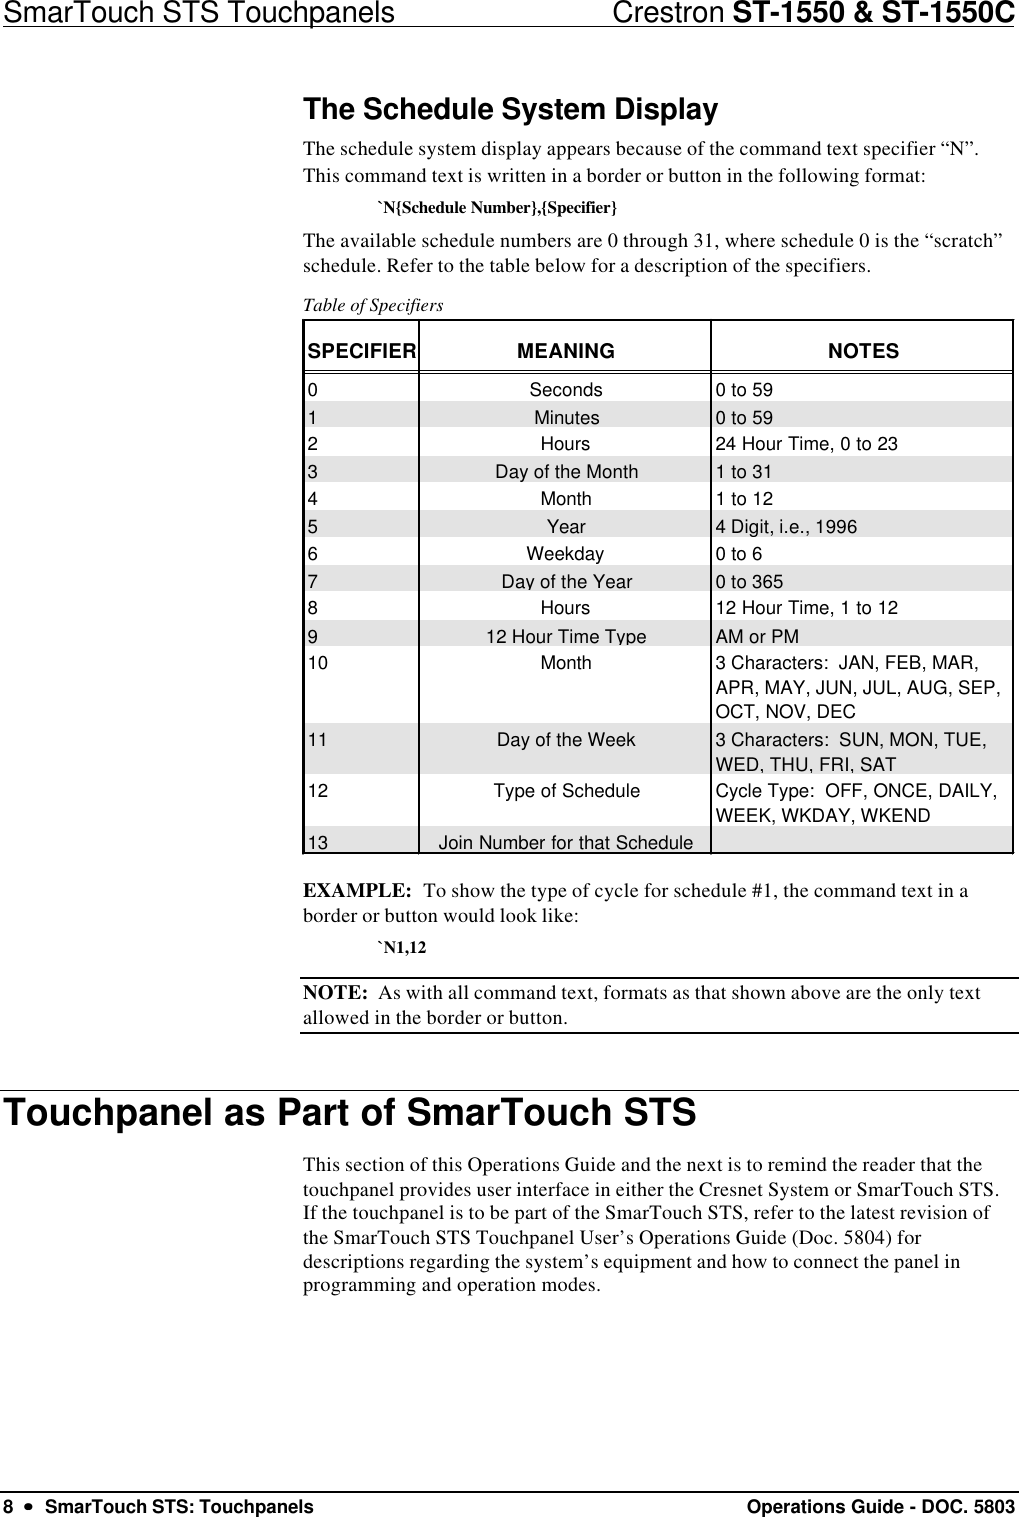
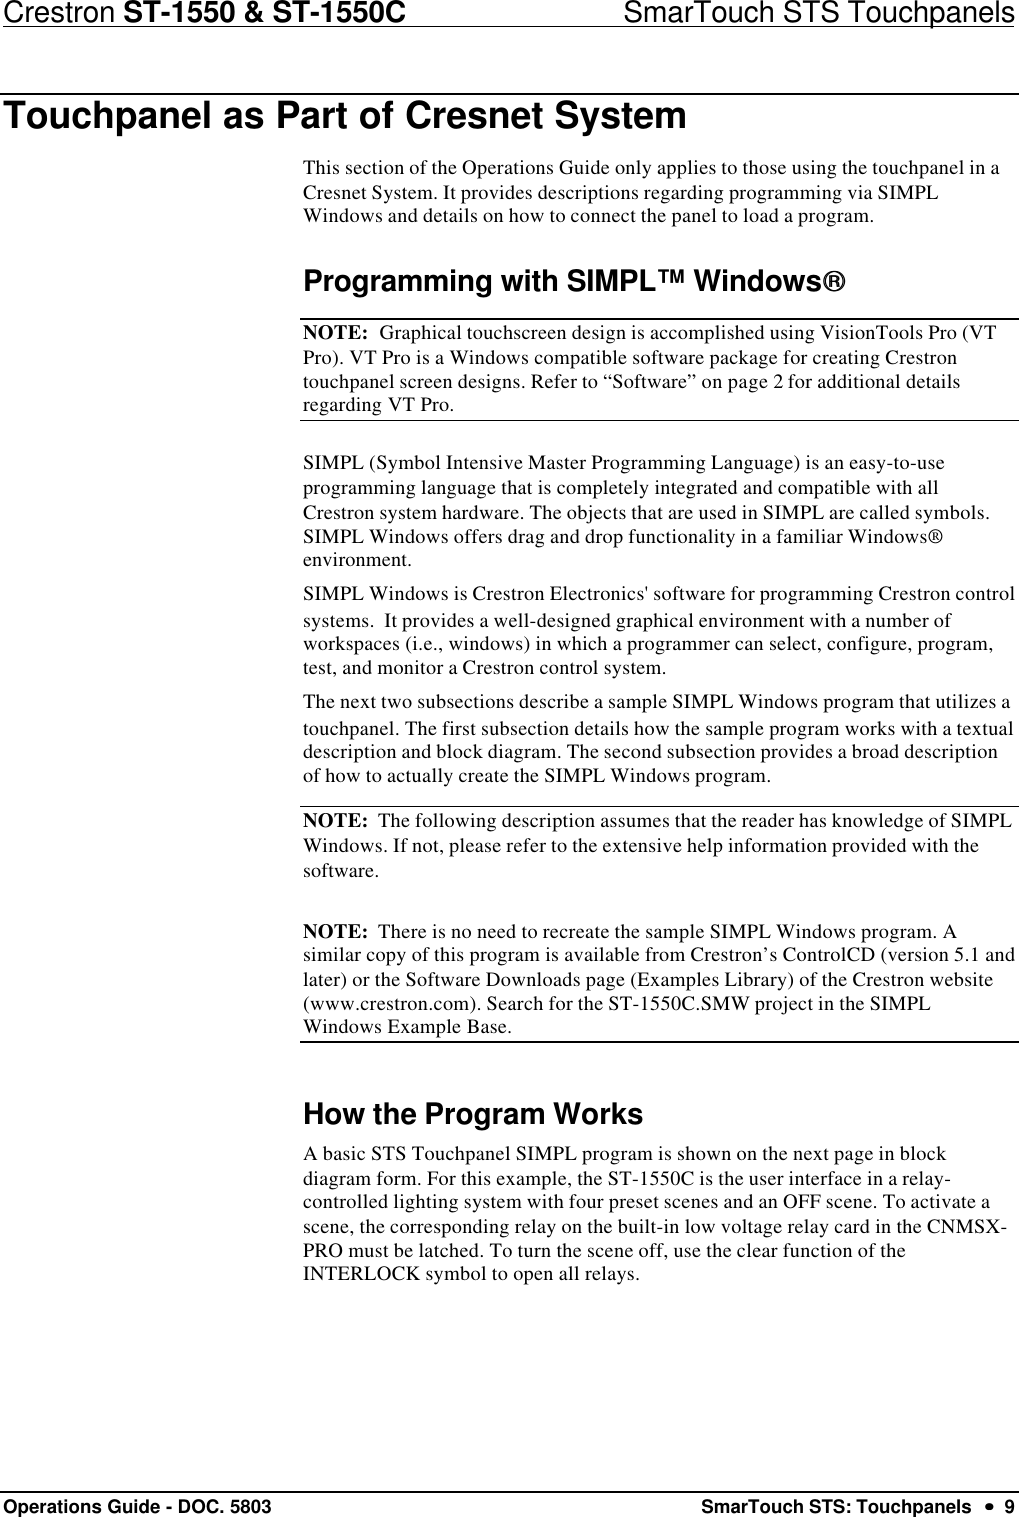


![SmarTouch STS Touchpanels Crestron ST-1550 & ST-1550C16 •• SmarTouch STS: Touchpanels Operations Guide - DOC. 5803SmarTouch STS Touchpanel Toubleshooting (Continued)TROUBLE POSSIBLE CAUSE(S)CORRECTIVE ACTIONTouchpanel does not function and RF LED on ST-CP illuminates, but COM or IR LEDs do not illuminate. Touchpanel RF ID is not set to match the RF ID assigned in the SmarTouch system program. Verify that RF ID match. Refer to "Interface" in this Operations Guide and RF ID parameters assigned in the program. Touchpanel display is Standby or power down timeout has elapsed. Touch screen to reactivate.dark. Power is not applied to the touchpanel.Verify that power is properly applied and all connections are made. Touchpanel display is dark or too light.Screen brightness or contrast is improperly set. Hold a finger to the touchscreen for more than 10 seconds as power is applied. The display sets the brightness and contrast to a safe value. Touchpanel exhibits slow operation.Compressed graphics take time to decompress. If there are no memory problems, decompressed graphics decrease the drawing time of panel pages.Further InquiriesIf after reviewing this Operations Guide for the SmarTouch STS Touchpanel, youcannot locate specific information or have questions, please take advantage ofCrestron's award winning technical support team by calling:• In the US and Canada, call Crestron’s corporate headquarters at1-888-CRESTRON [1-888-273-7876] or 1-201-767-3400.• In Europe, call Crestron International at +32-15-50-99-50.• In Asia, call Crestron Asia at +852-2341-2016.• In Latin America, call Crestron Latin America at +525-574-15-90.For local support from exclusive Crestron factory-trained personnel call:• In Australia, call Soundcorp at +613-941-61066.• In New Zealand, call Amber Technologies at +649-410-8382.](https://usermanual.wiki/Crestron-Electronics/ST-1550C/User-Guide-69253-Page-20.png)