Cross Match Technologies RJ0479V2 D Scan Authenticator CF User Manual
Cross Match Technologies GmbH D Scan Authenticator CF Users Manual
UserManual.wiki
>
Cross Match Technologies
>
RJ0479V2 User Manual
>
Users Manual
Contents
1.
Users Manual
2.
Quick Reference Guide
3.
Co-axial Option Pamplet
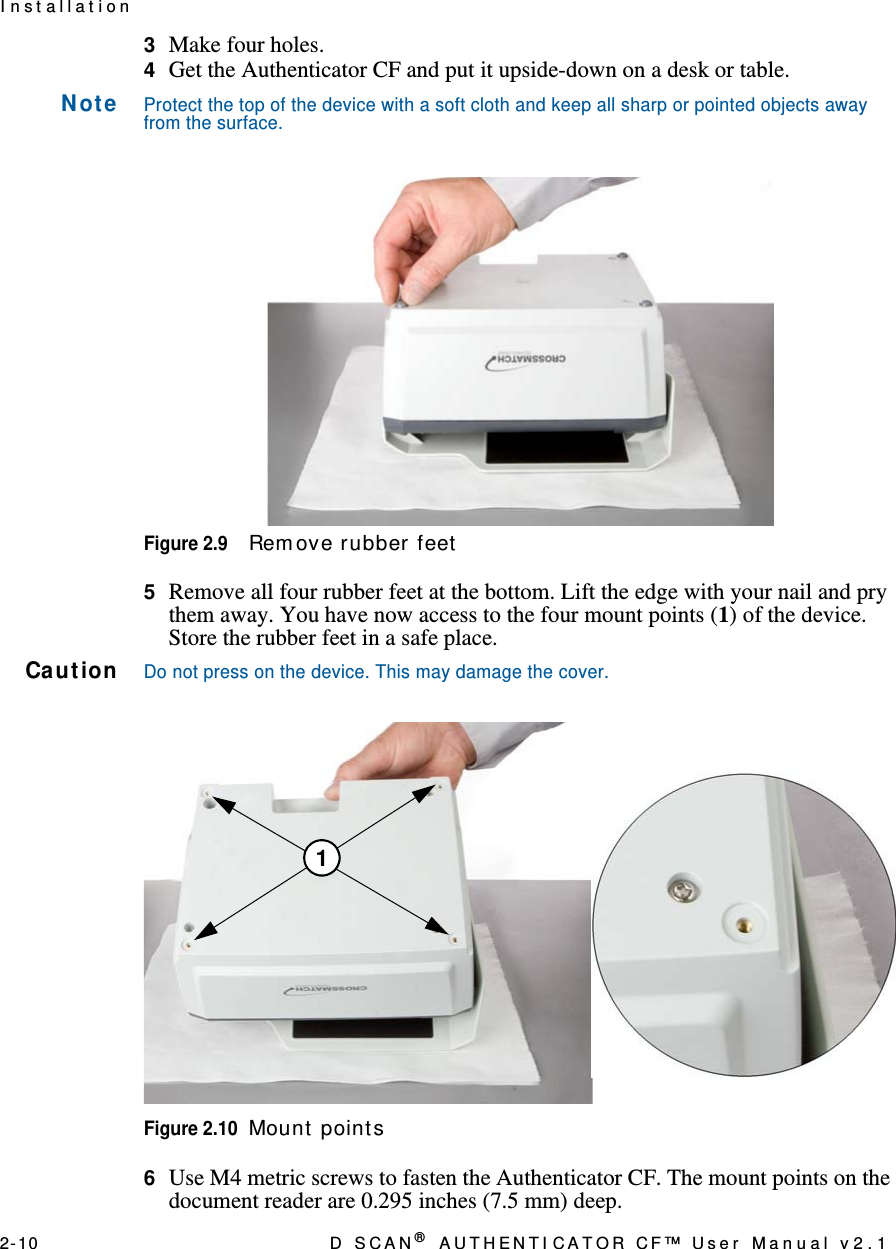
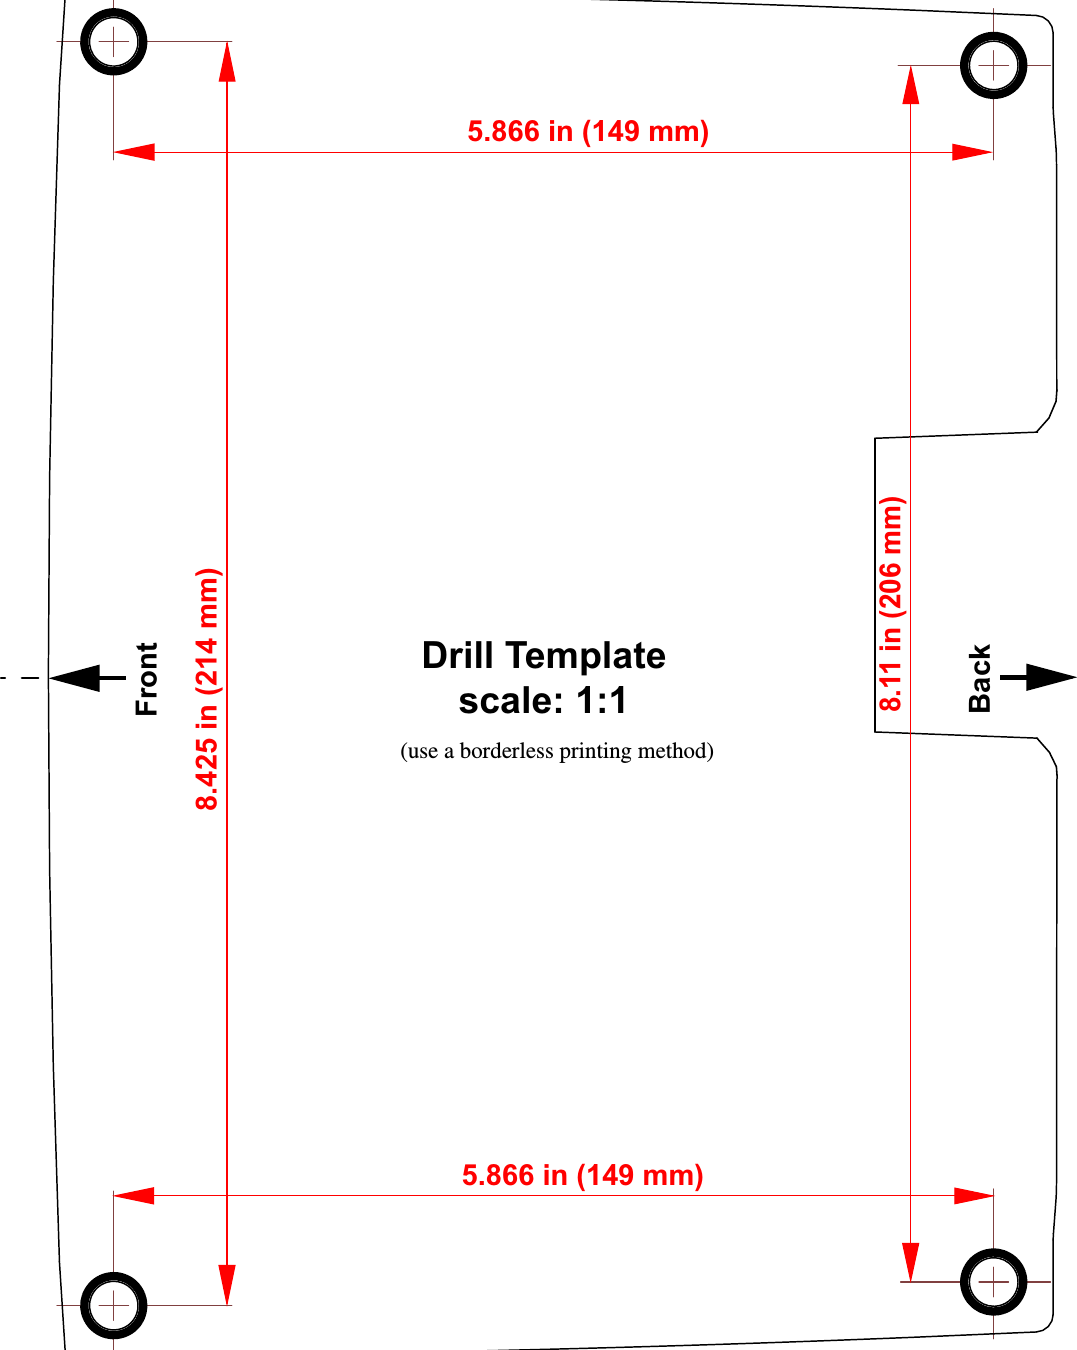
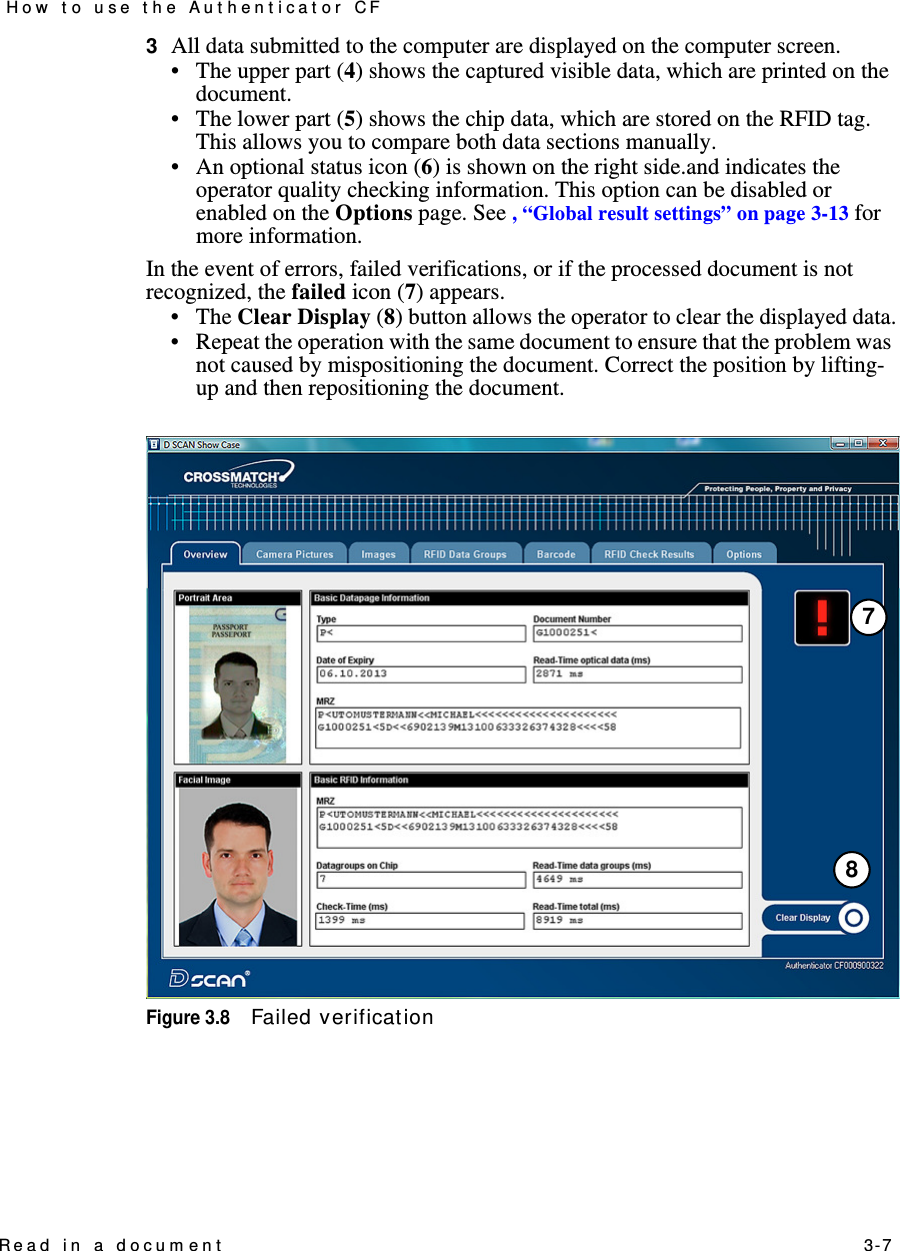
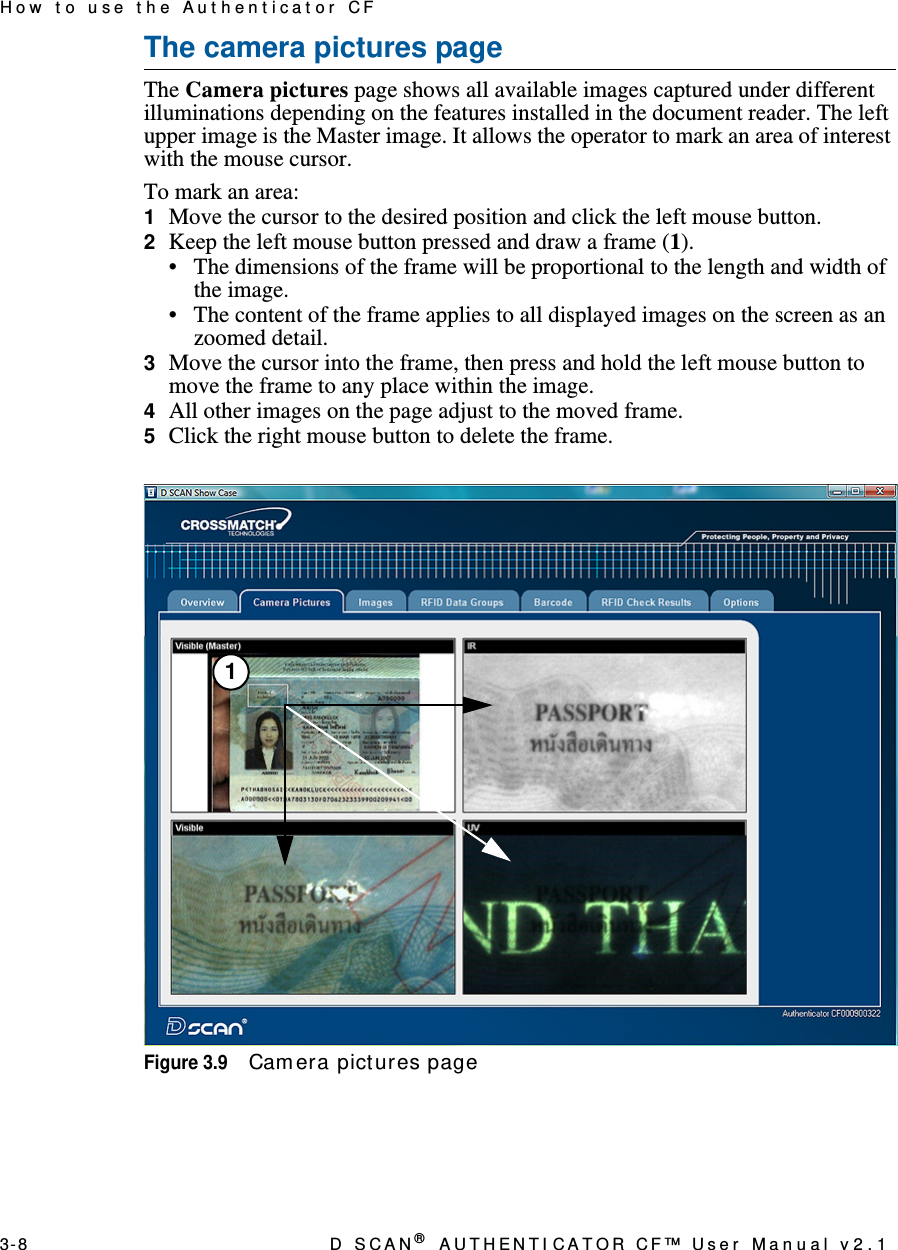
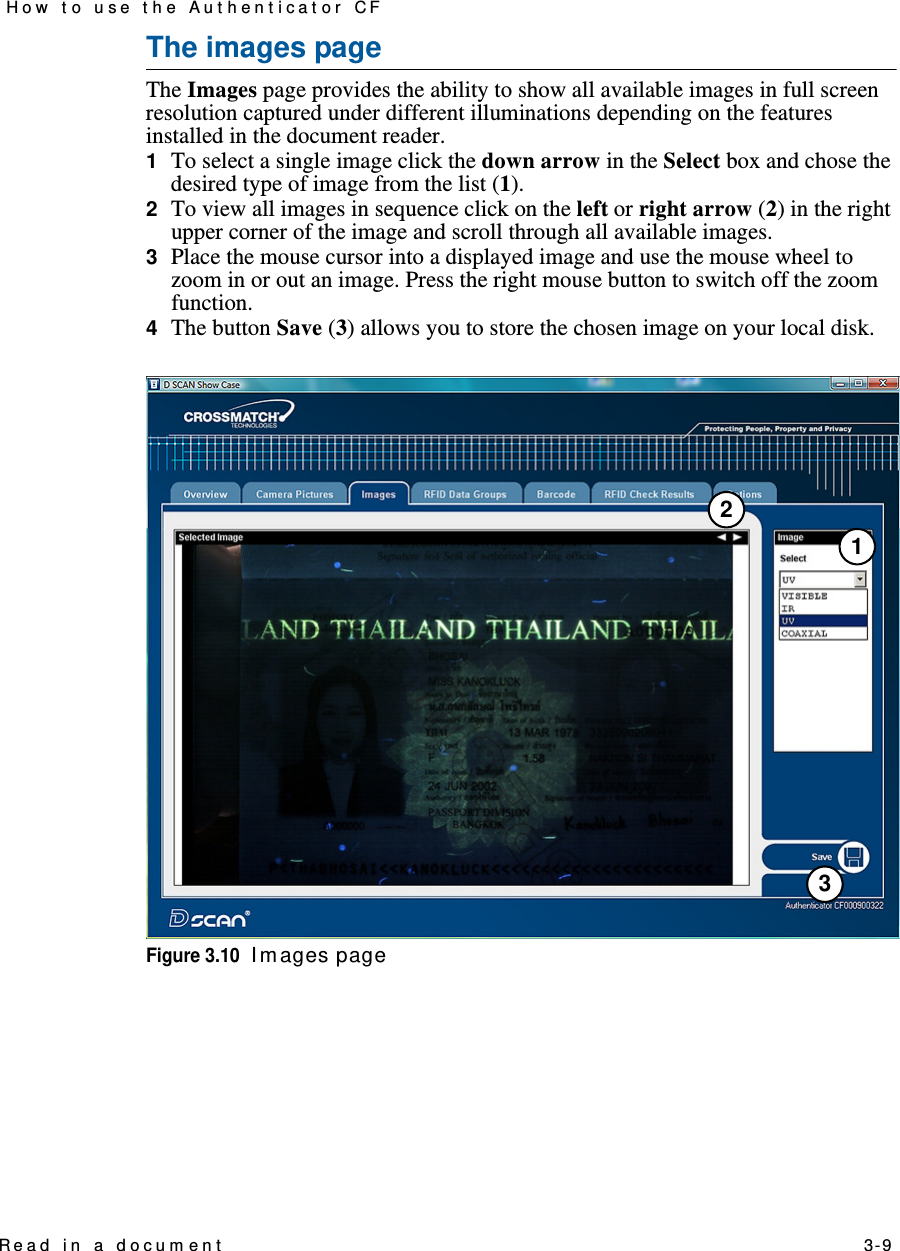
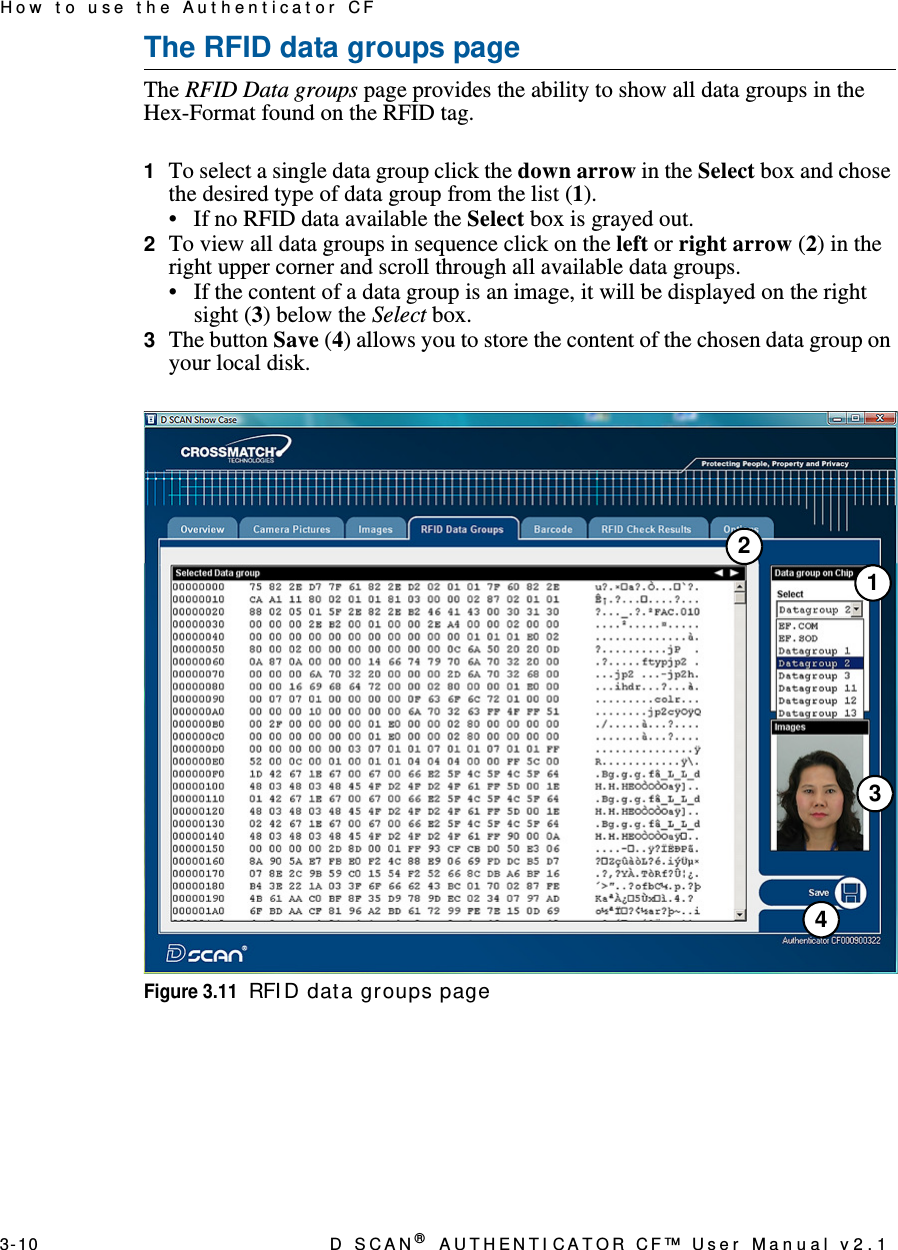
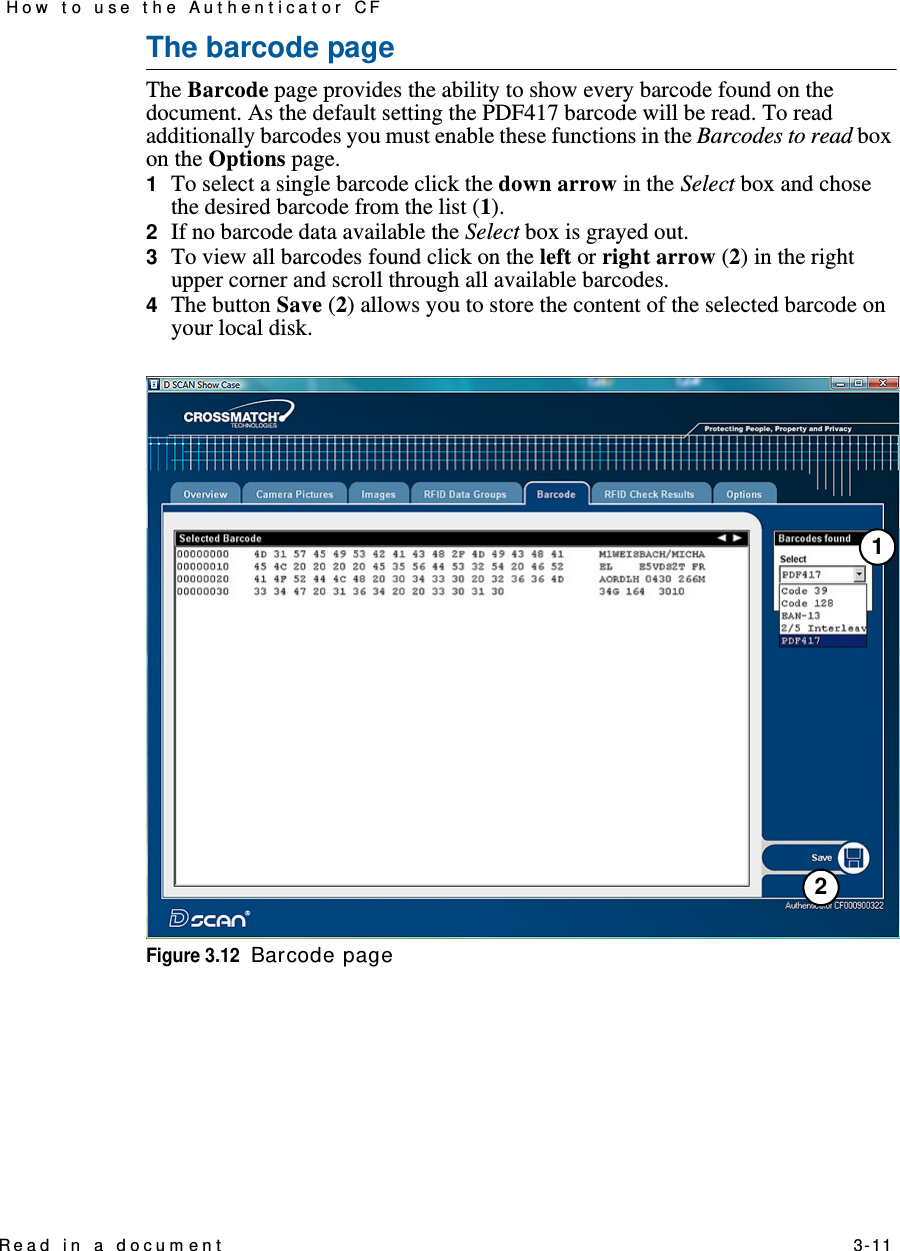
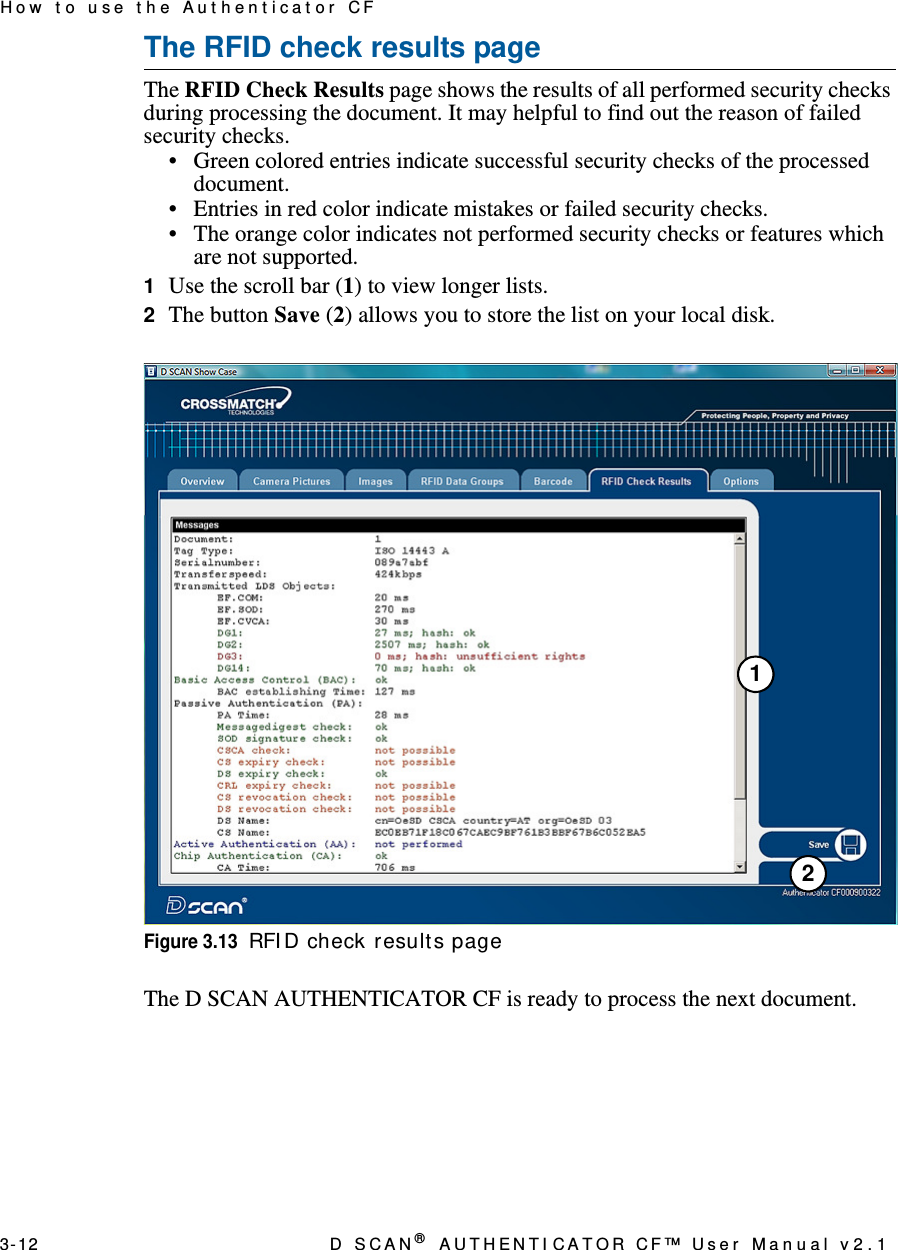
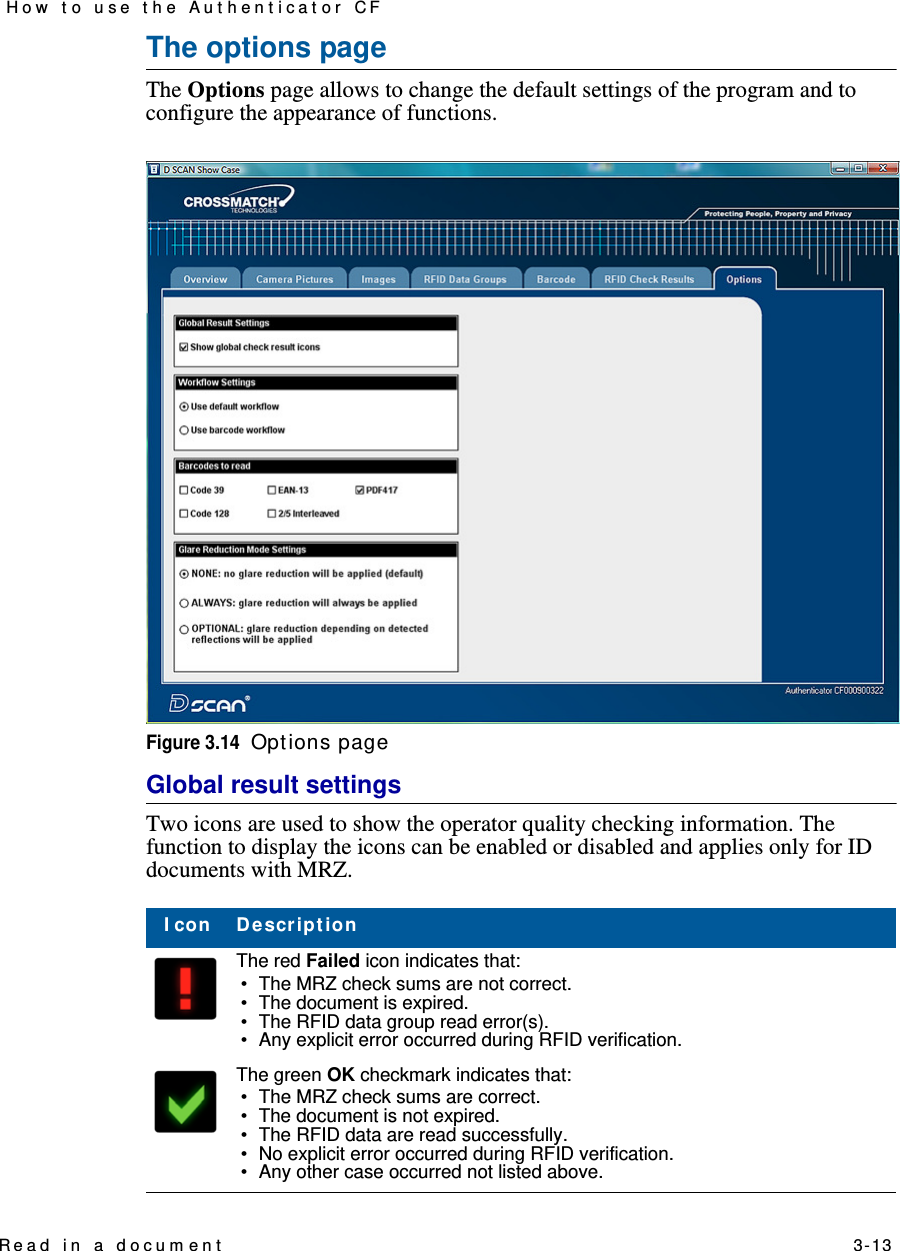
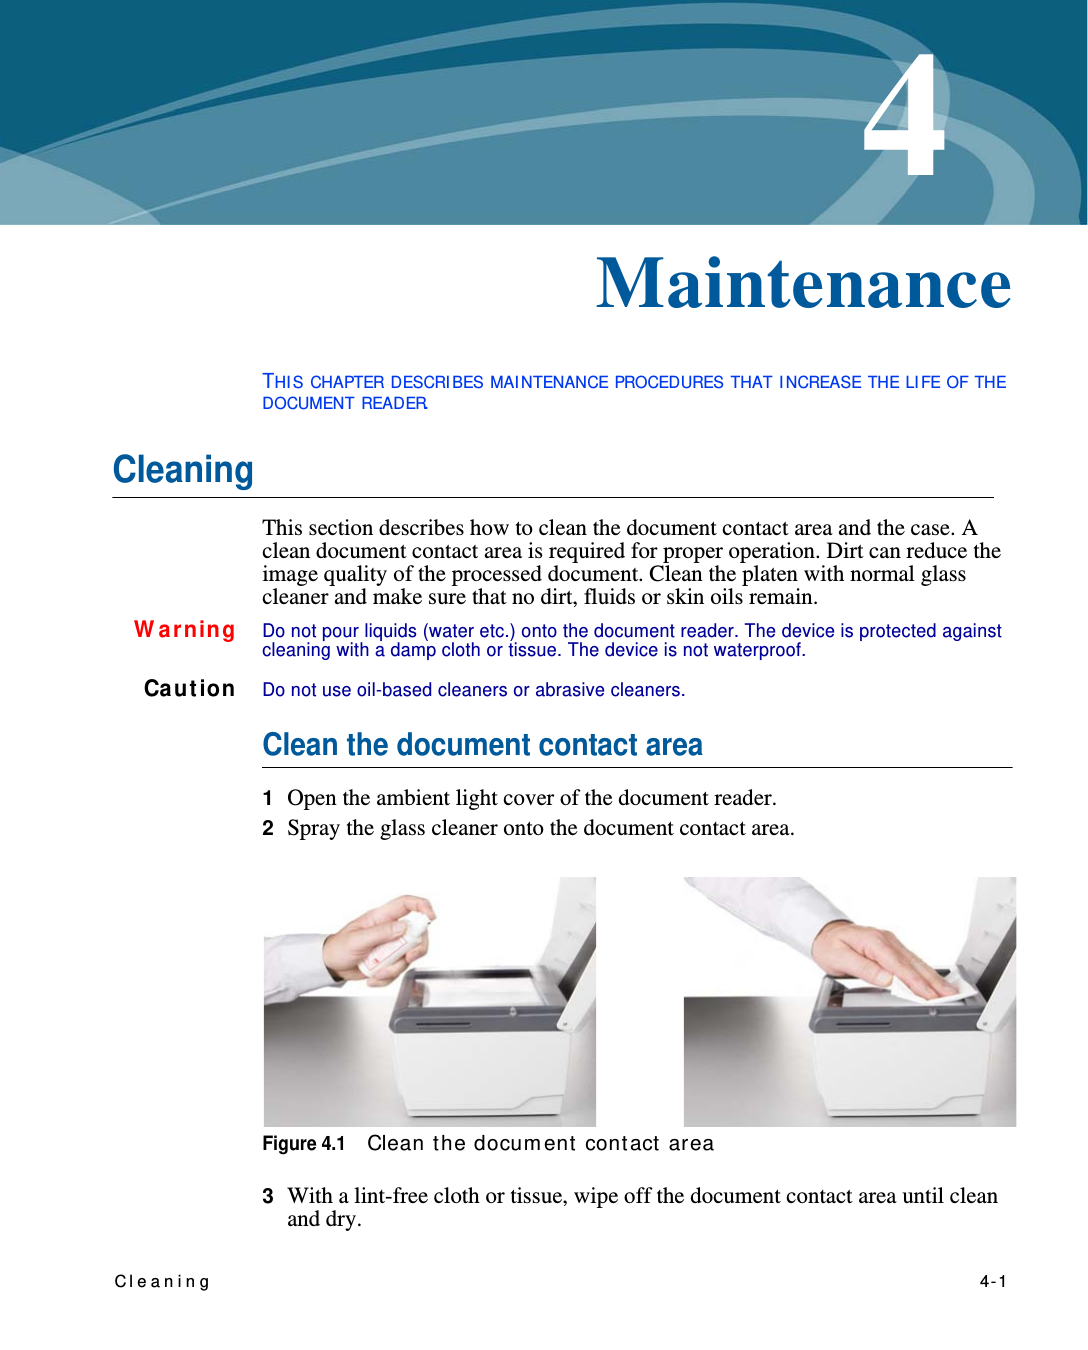
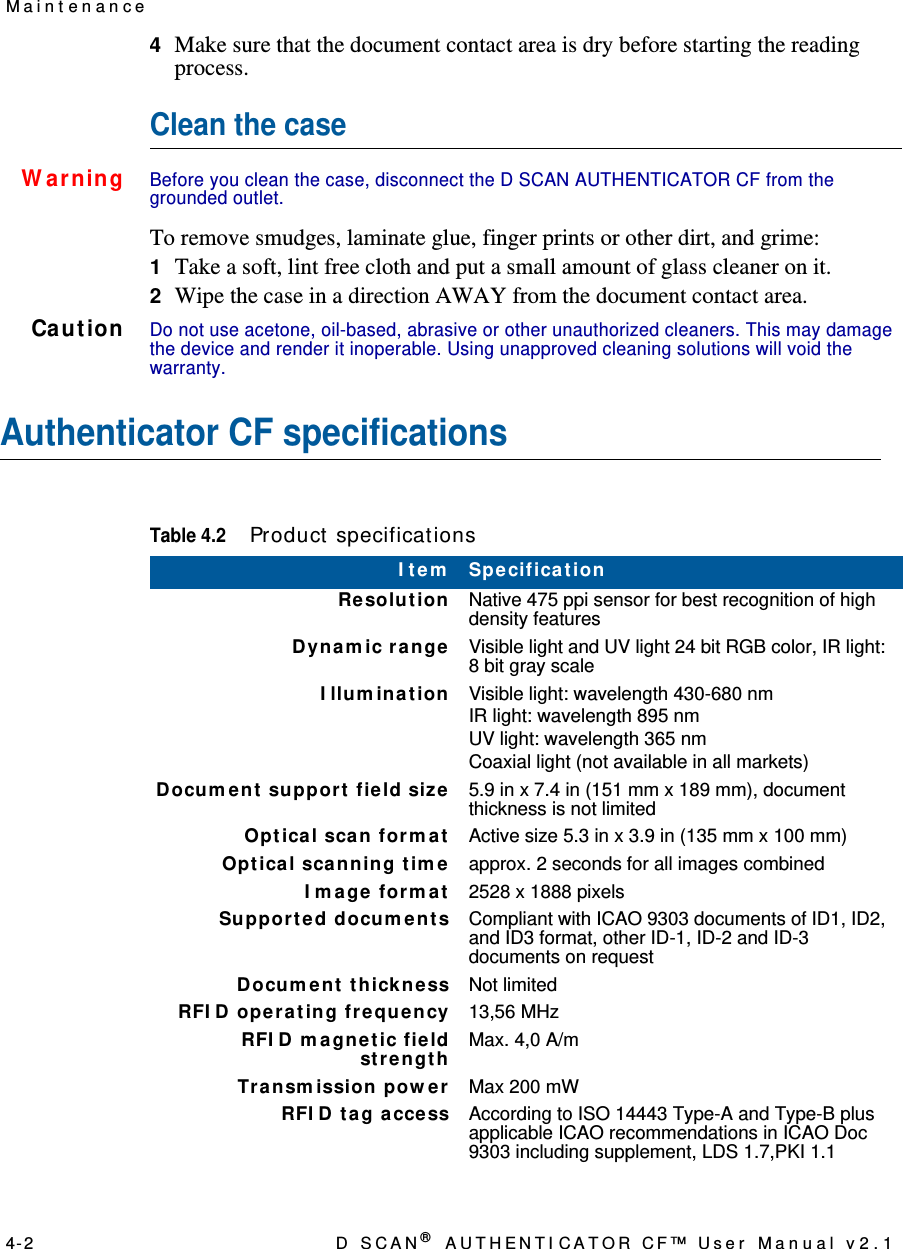
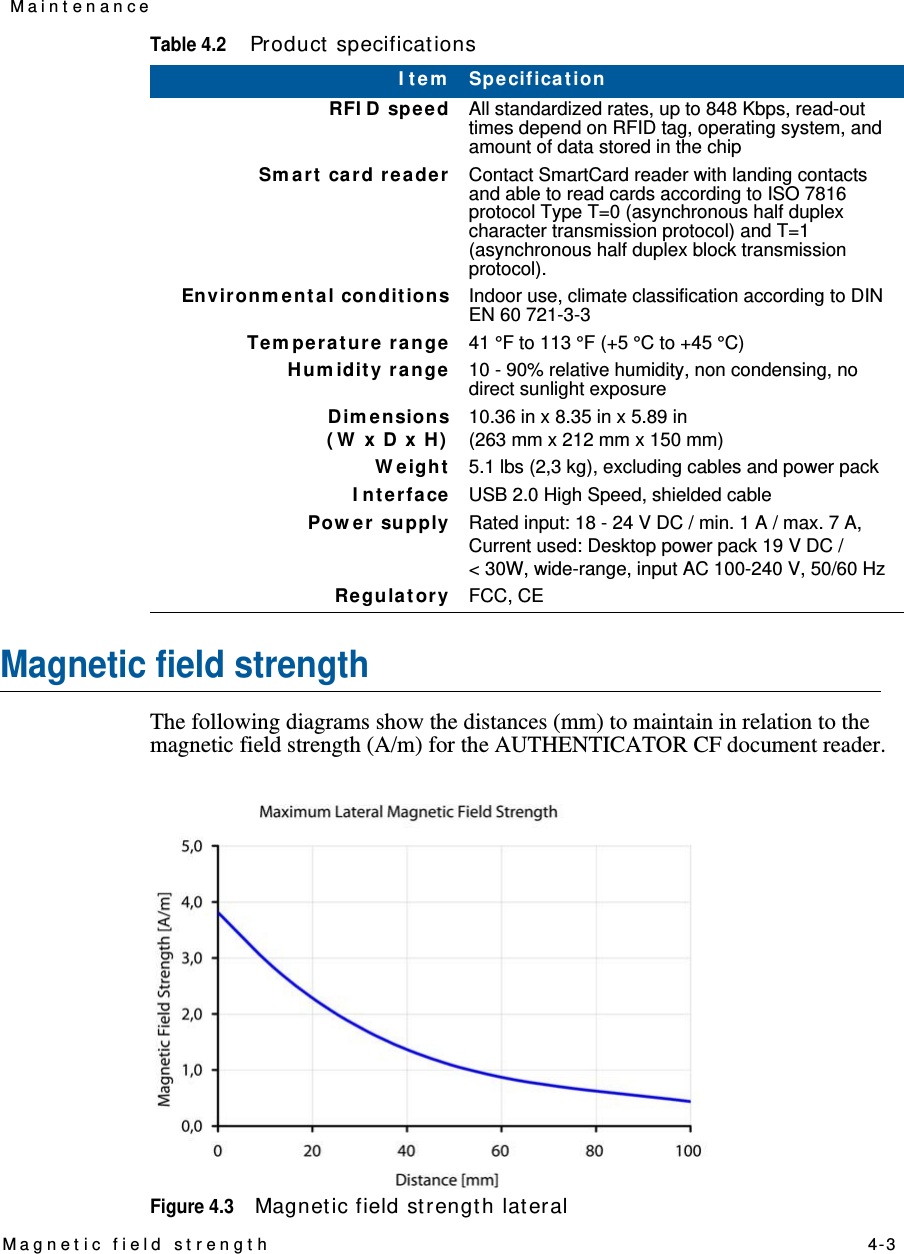
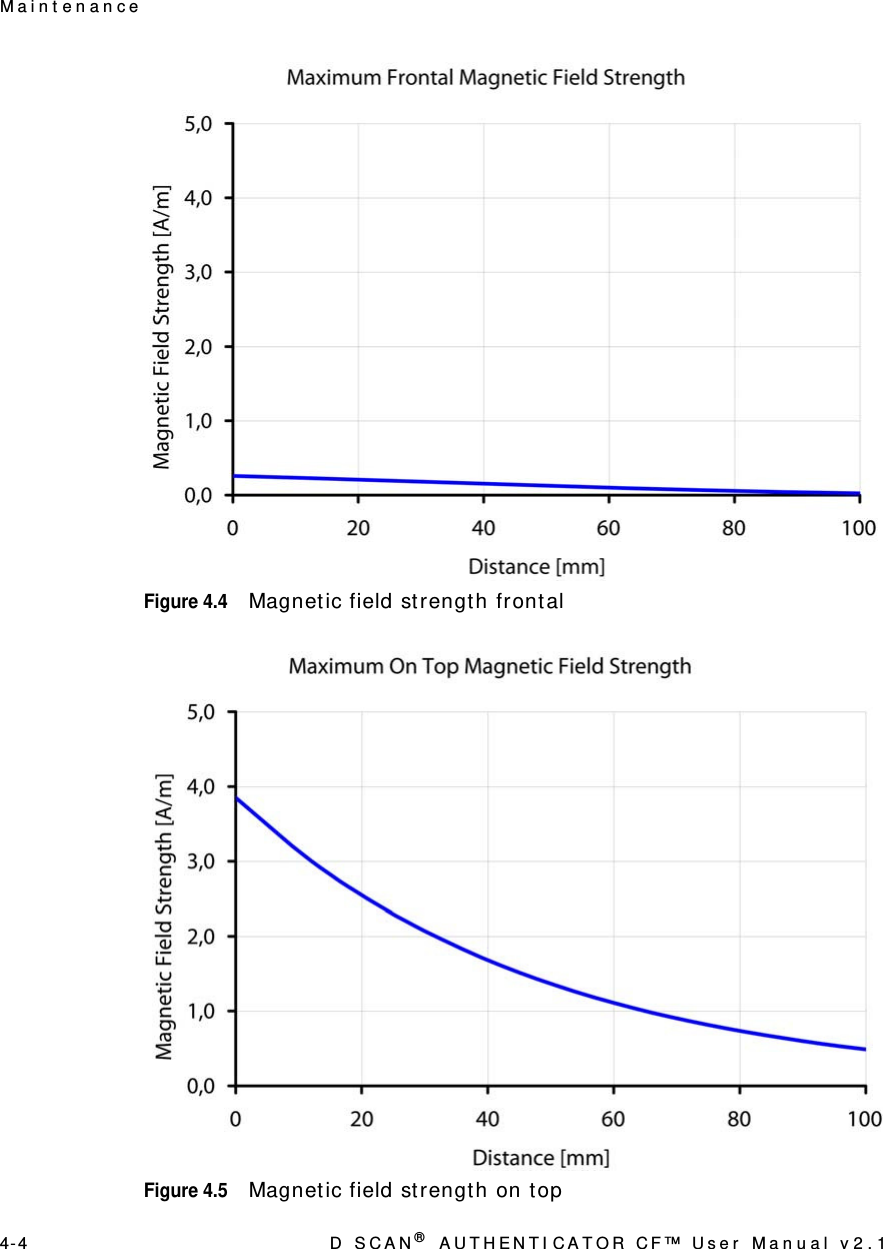
Users Manual
Navigation menu
Upload a User Manual
Namespaces
Wiki Guide
HTML
PDF
Info
Views
User Manual
Discussion / Help
Navigation