Crown Equipment 5000-01 RF ID Tracking System User Manual RFID Installation Guide
Crown Equipment Corporation RF ID Tracking System RFID Installation Guide
Contents
- 1. User Manual_system
- 2. RFID Installation Guide
- 3. User documentation
RFID Installation Guide
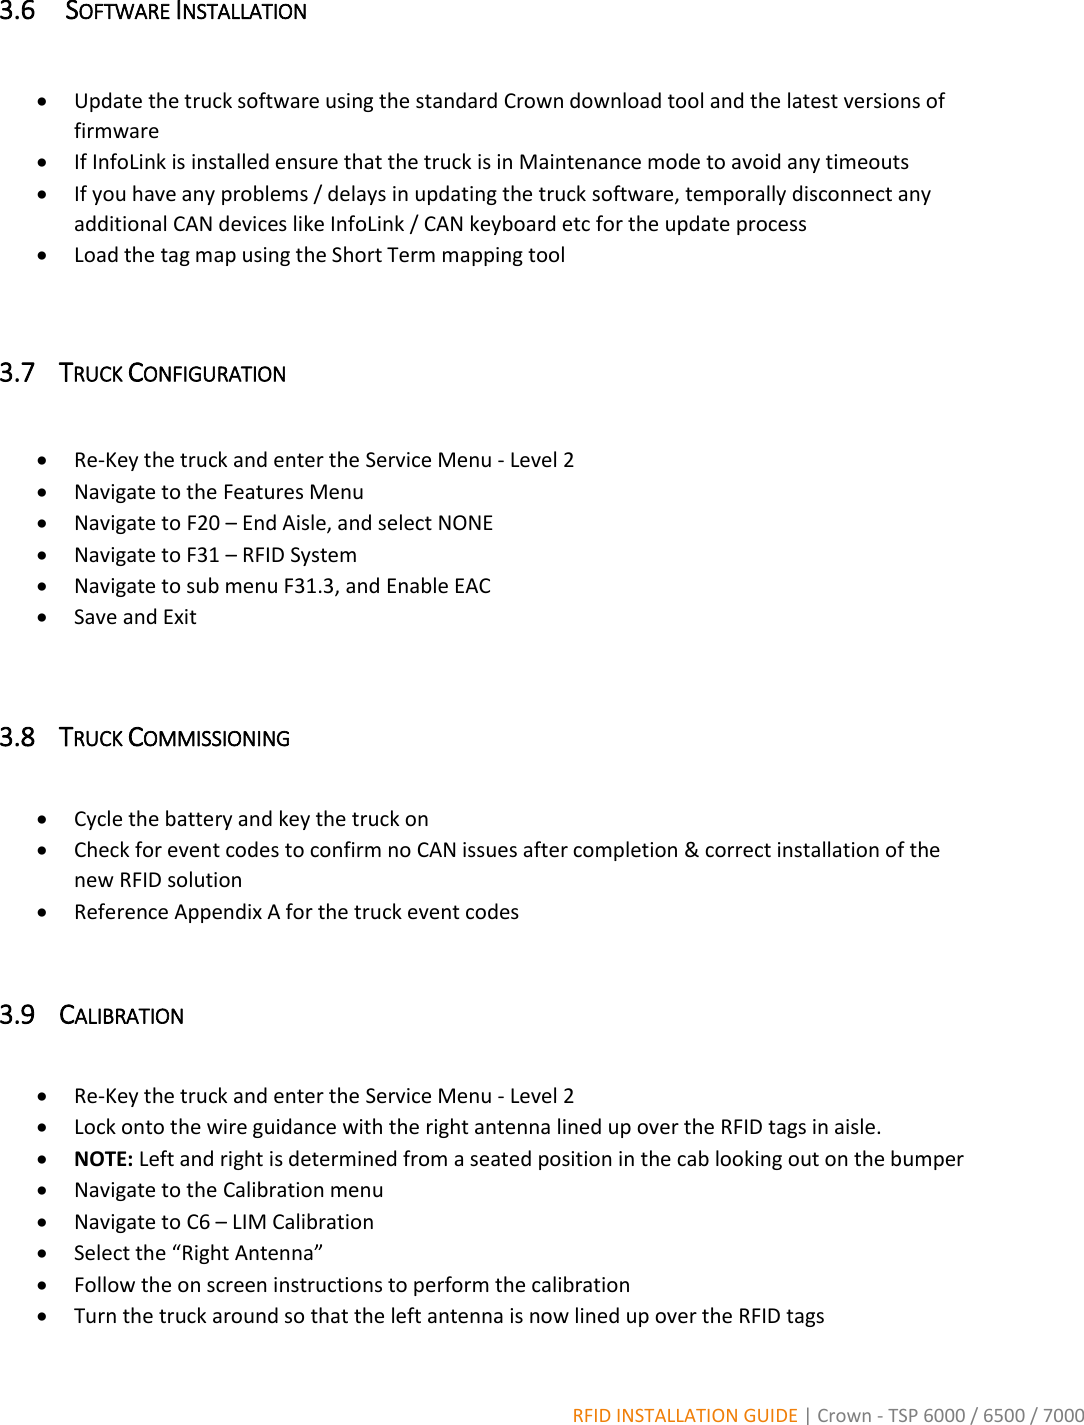
![RFID INSTALLATION GUIDE | Crown - TSP 6000 / 6500 / 7000 3 INSTALLATION 3.1 FOREWORD The Crown RFID system may only be installed by properly trained technicians. 3.2 BUMPER ASSEMBLY Insert the antennas first through the top where the LIM is to be mounted NOTE: Left and right is determined from a seated position in the cab looking out on the bumper Also, the slots for the antennas are "keyed" differently to avoid an incorrect mounting NOTE: Attach both cables to each antenna before bolting them to the bumper Feed the main harness through the slot (back and center) before mounting the LIM Secure the antennas ensuring that the measuring groove located on the top of the antenna is 290mm [Figure 1] from the center of the bumper Mount the LIM and connect the cables, ensuring the correct coax is associated with the corresponding antenna Figure 1 - Bumper Assembly](https://usermanual.wiki/Crown-Equipment/5000-01.RFID-Installation-Guide/User-Guide-2807673-Page-4.png)
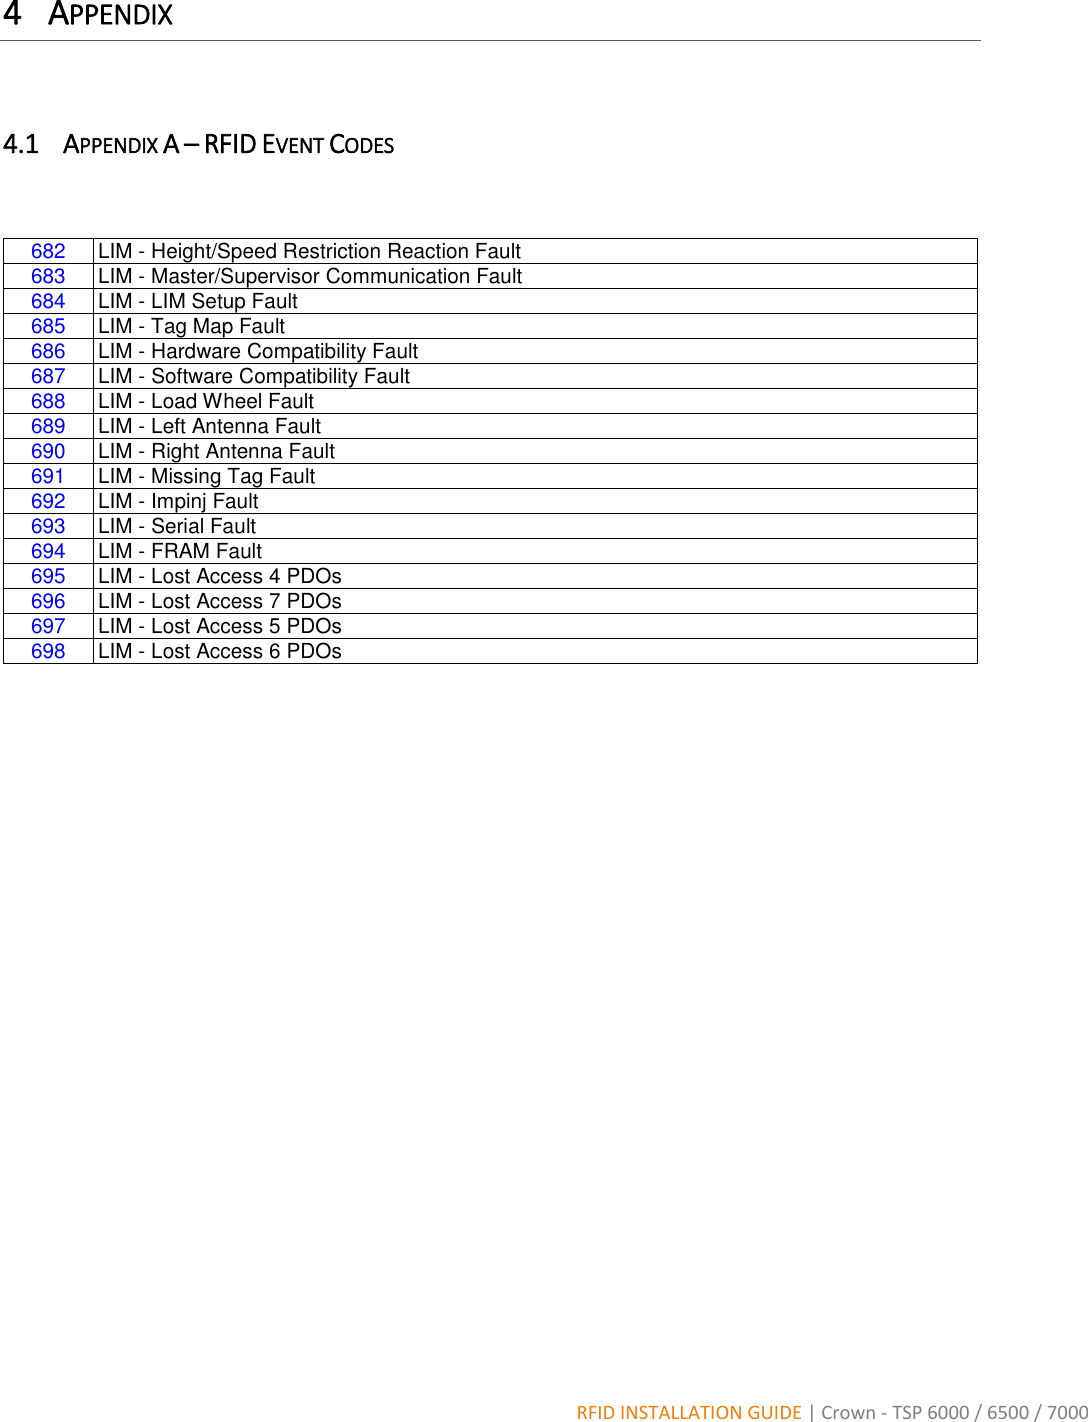
![RFID INSTALLATION GUIDE | Crown - TSP 6000 / 6500 / 7000 3.3 BUMPER INSTALLATION 3.3.1 Remove Existing Bumper Ensure that you remove the cover plate and disconnect the bumper from the current EAC wire harness Loosen and remove the counter weight bolts and remove the bumper Remove the cable protection plate Remove current EAC harness, normally this is routed under the center counter weight (if installed) 3.3.2 Install New Bumper Feed new harness through the counter weight (if installed) Connect the new harness to the LIM Tighten the counter bolts and secure the new bumper [torque to: 359 N-m / 265 lb-ft] [Figure 2] Figure 2 - Bumper Install](https://usermanual.wiki/Crown-Equipment/5000-01.RFID-Installation-Guide/User-Guide-2807673-Page-5.png)
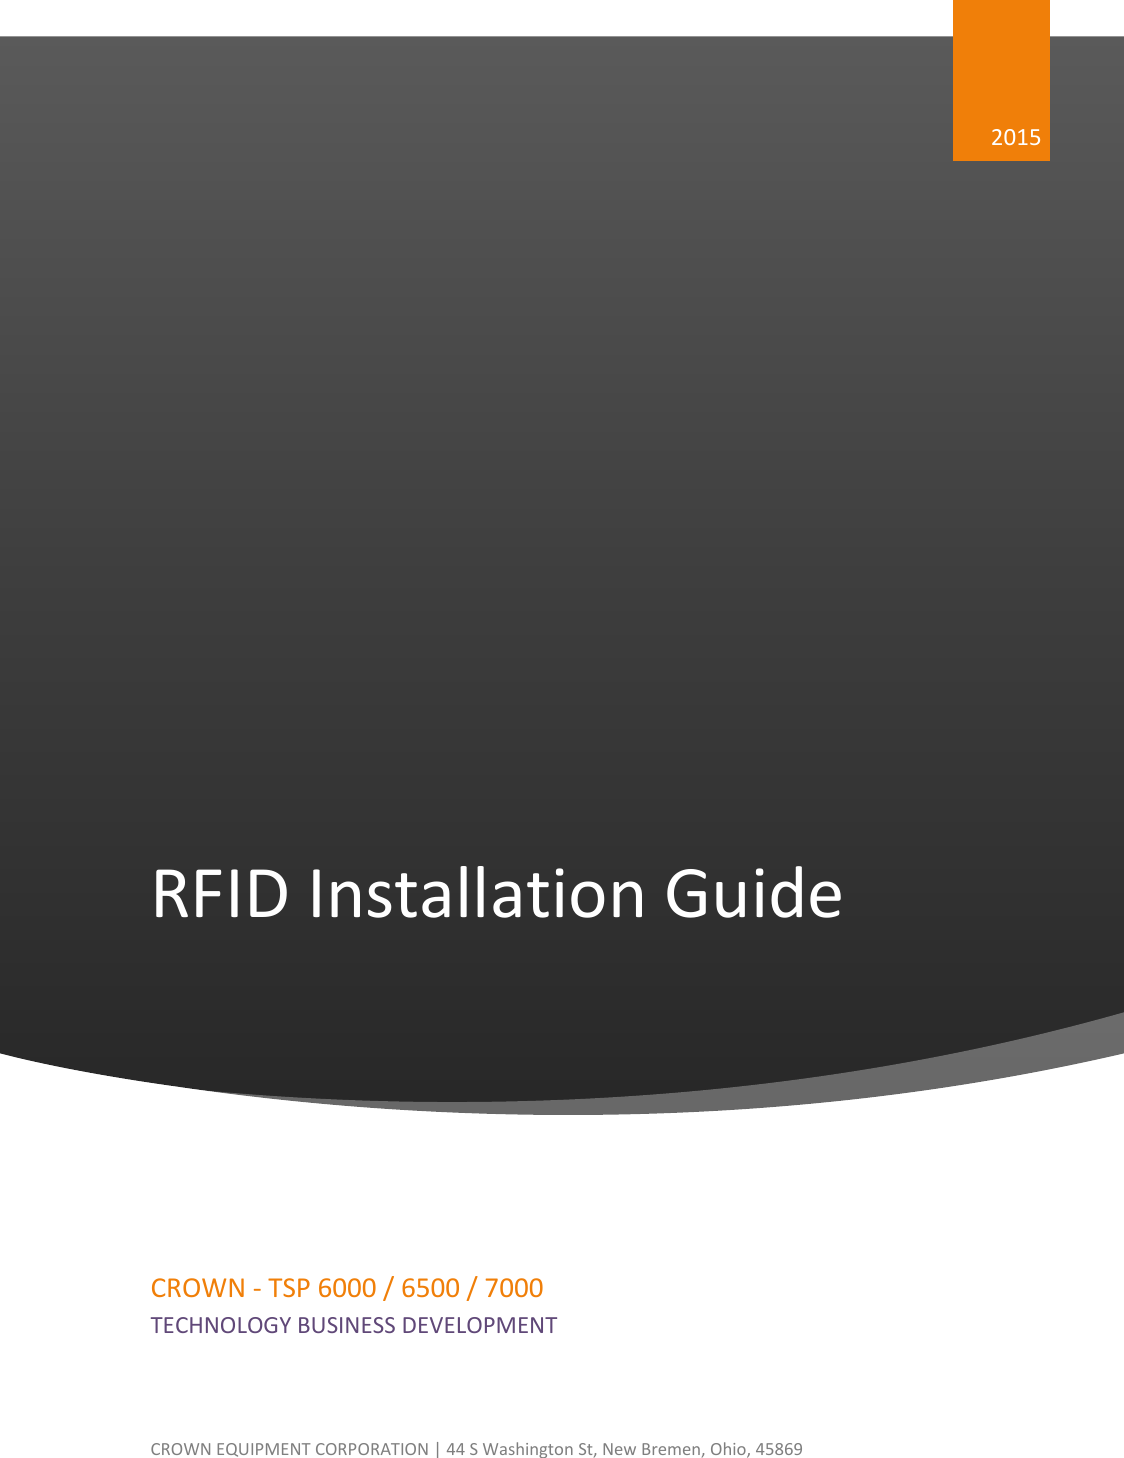
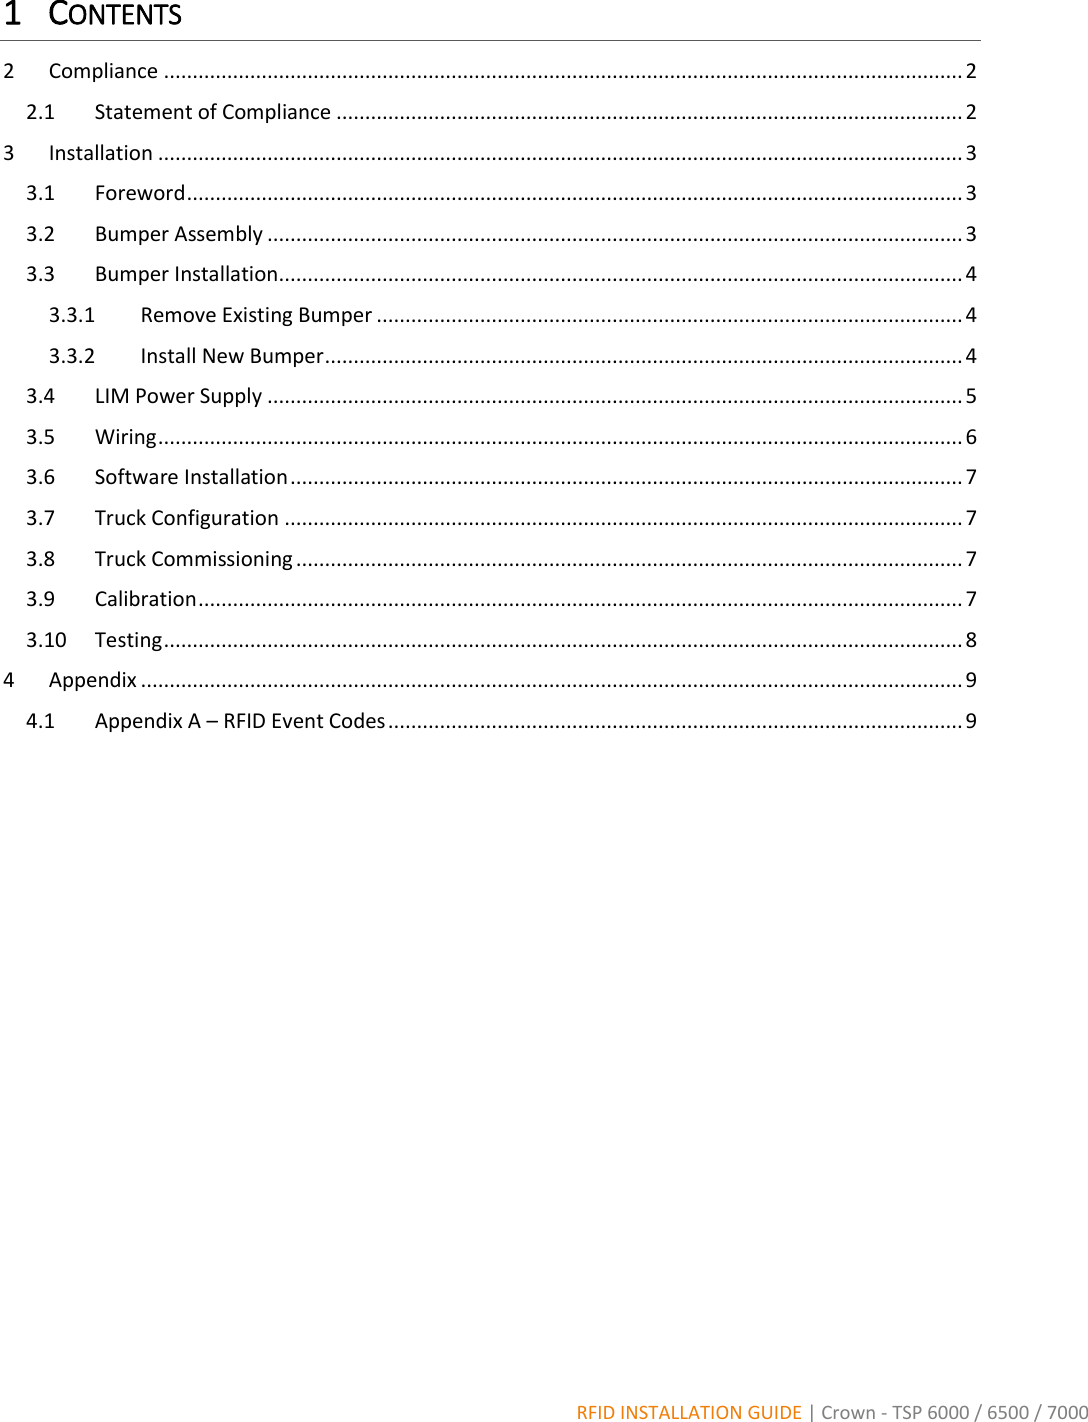
![RFID INSTALLATION GUIDE | Crown - TSP 6000 / 6500 / 7000 Re-attach the cable protection plate Mount the cover plate and align the LED on the LIM to complete assembly [Figure 3] Figure 3 - LIM Cover Plate 3.4 LIM POWER SUPPLY Using the power supply as a template, mark and drill two M8 holes to mount the external power supply to interior of the harness cover (Part # 133073) Plug the power supply into the new RFID harness Using the supplied M6 nuts and bolts, mount the power supply to the interior of the harness cover [Figure 4] Figure 4 - Power Supply Mounting](https://usermanual.wiki/Crown-Equipment/5000-01.RFID-Installation-Guide/User-Guide-2807673-Page-6.png)
![RFID INSTALLATION GUIDE | Crown - TSP 6000 / 6500 / 7000 3.5 WIRING Run the new RFID harness in the channel along the right side of the truck where the magnetic EAC harness typically runs Leave JC-644 connector plug in right rear cavity of truck Install the TSP retrofit harness: a. Connect the solid Red wire (22011) to position 15 on PC-205 b. Connect the Red/White wire (29140) to position 9 on PC-205 c. Connect the Negative wire (55116) to Negative bus bar [Figure 5] d. Connect CAN H (90012) and L (90011) to positions 12 and 5 respectively on PC-201 If the truck is a TSP 6500 or 7000 these positions will be already in use by the CAN programming plug on the truck. If this is the case, remove the wires existing wires in PC-201 and replace as per Step D above. The existing CAN programming plug is no longer required, as the new TSP retrofit harness has one Route PC-644 for the new TSP retrofit harness into the right rear cavity of the truck and connect to JC-644 Figure 5 - Negative Bus Bar](https://usermanual.wiki/Crown-Equipment/5000-01.RFID-Installation-Guide/User-Guide-2807673-Page-7.png)