CyberBank CB-0801 PDA With 800MHz CDMA & AMPS Dual Mode Cellular Phone User Manual MANUAL 2 OF 4
CyberBank Corp PDA With 800MHz CDMA & AMPS Dual Mode Cellular Phone MANUAL 2 OF 4
UserManual.wiki
>
CyberBank
>
CB-0801 User Manual
>
MANUAL 2 OF 4
Contents
1.
MANUAL 1 OF 4
2.
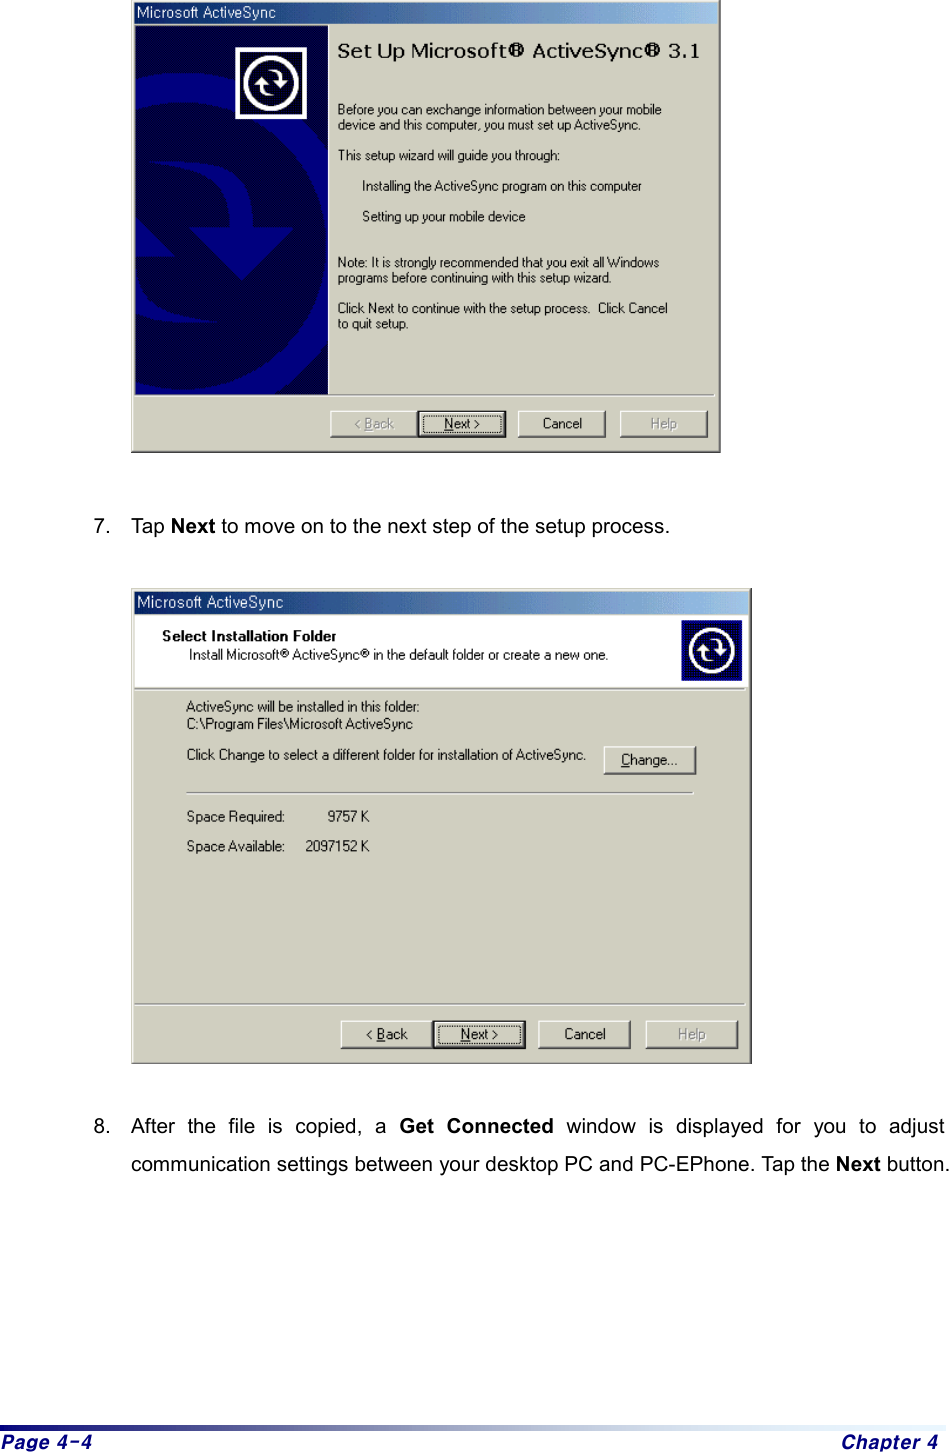
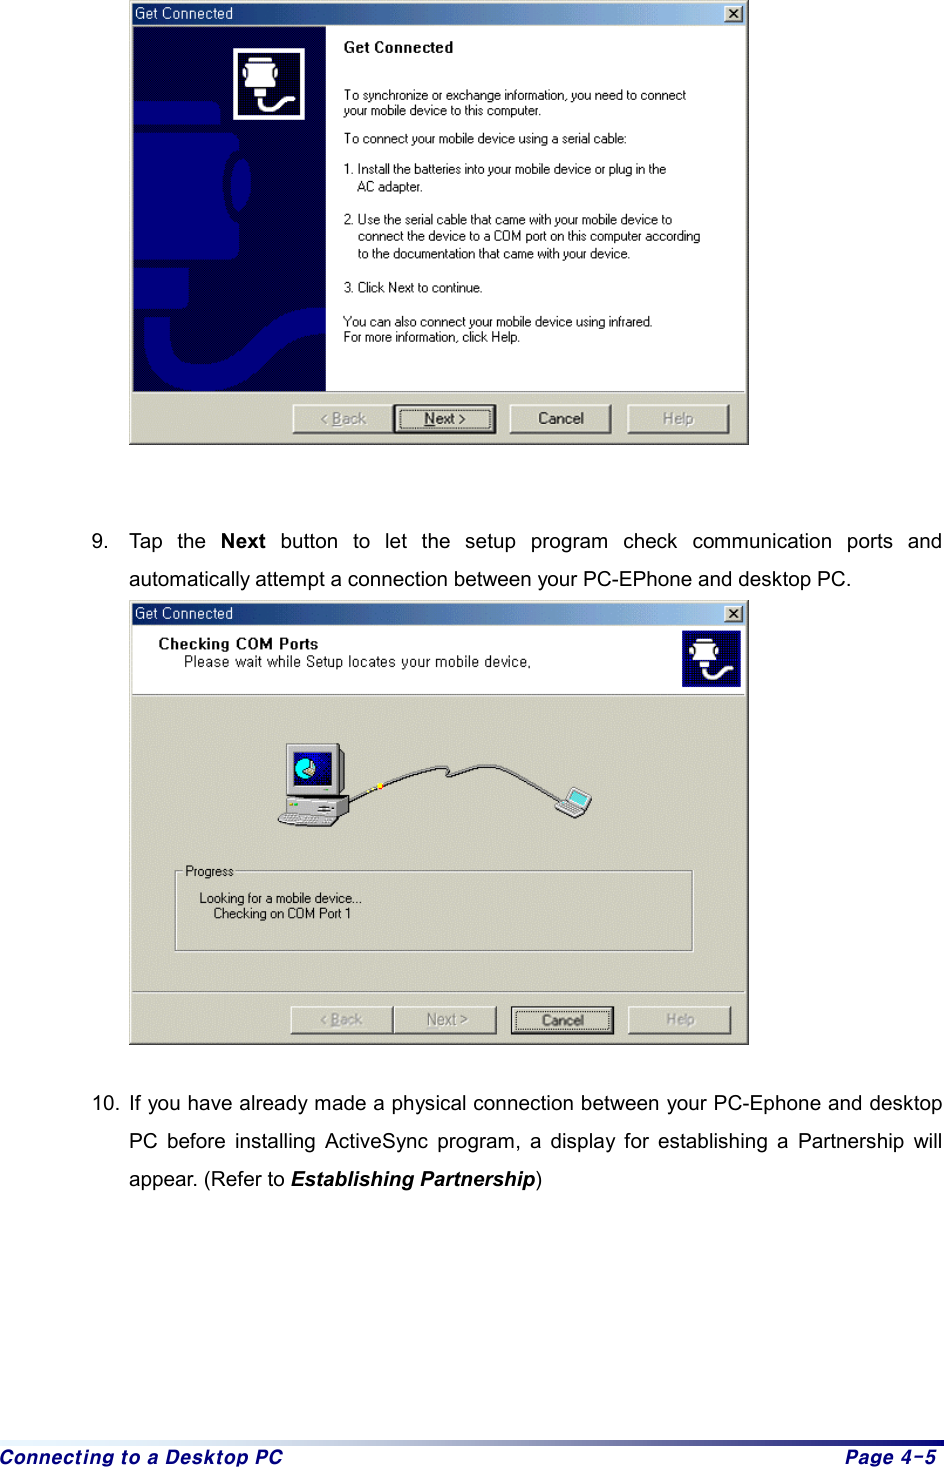
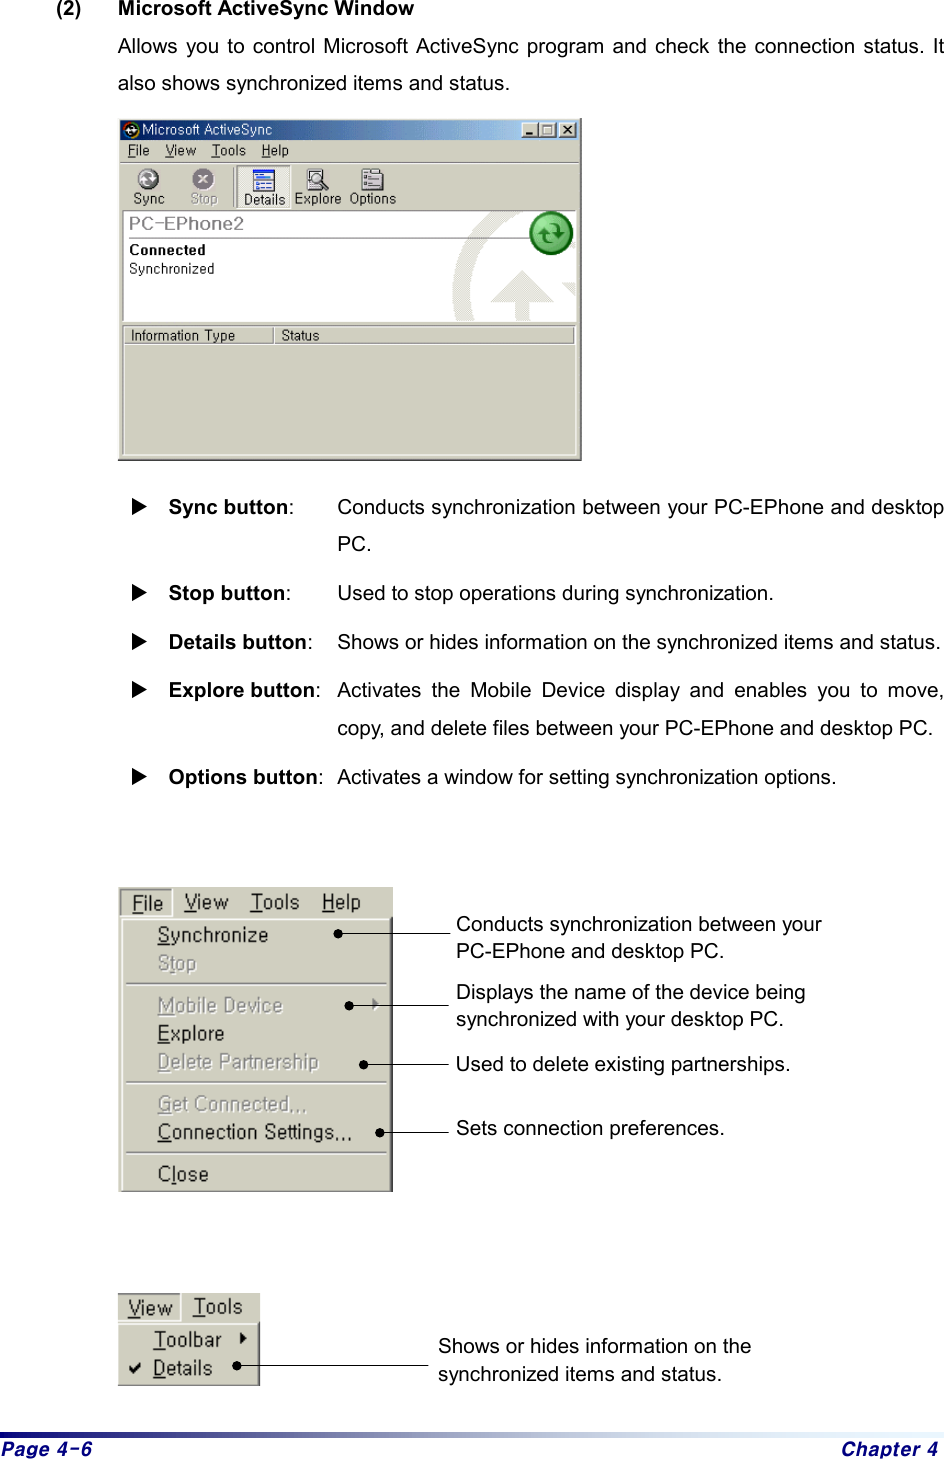
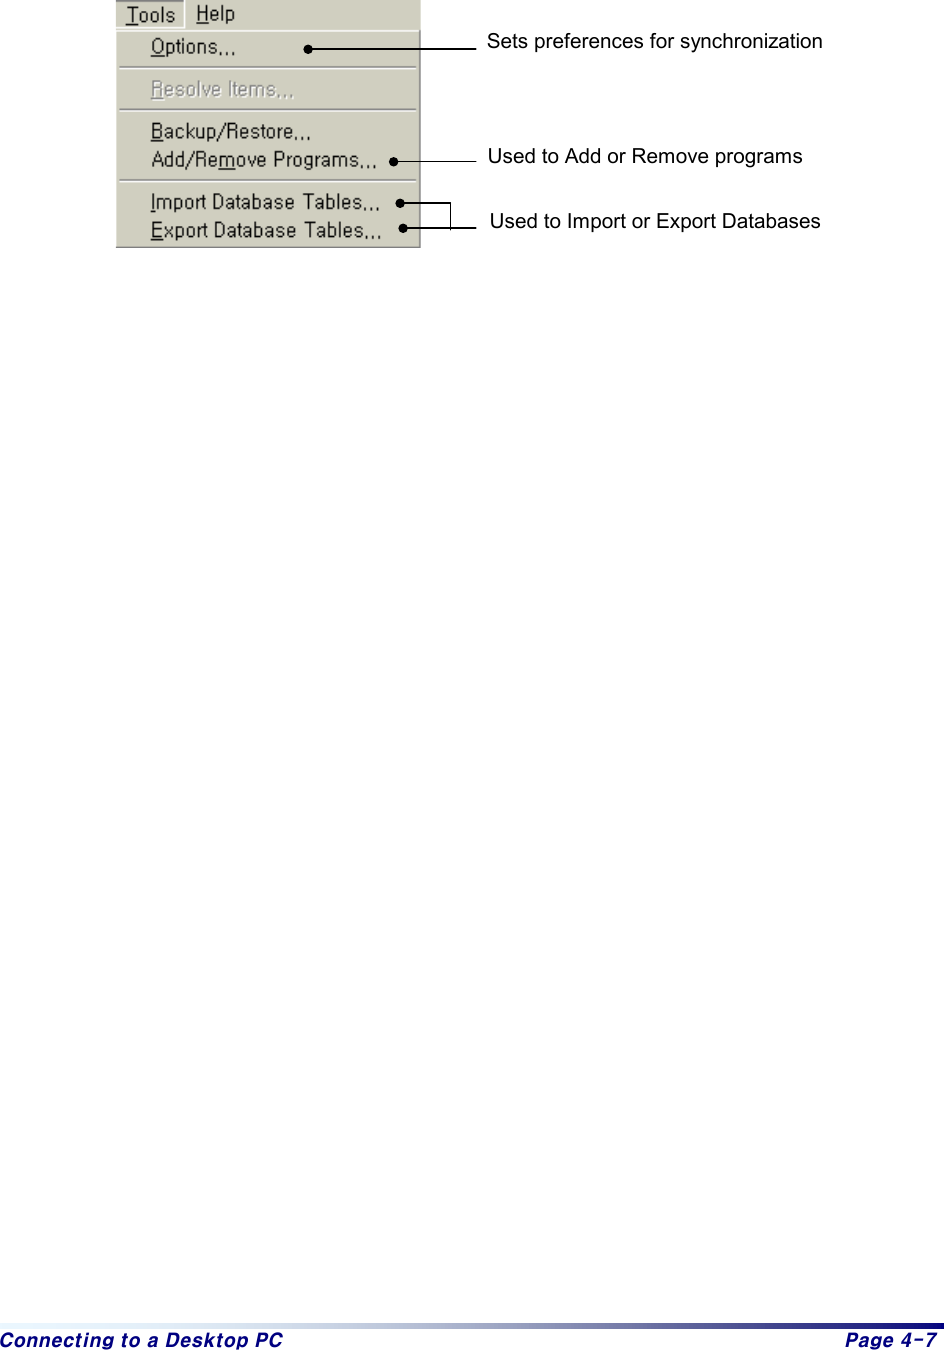
MANUAL 2 OF 4
3.
MANUAL 3 OF 4
4.
MANUAL 4 OF 4
5.
CRN 21224 revised user manual 1 of 2
6.
CRN 21224 revised user manual 2 of 2
MANUAL 2 OF 4
Navigation menu
Upload a User Manual
Namespaces
Wiki Guide
HTML
PDF
Info
Views
User Manual
Discussion / Help
Navigation