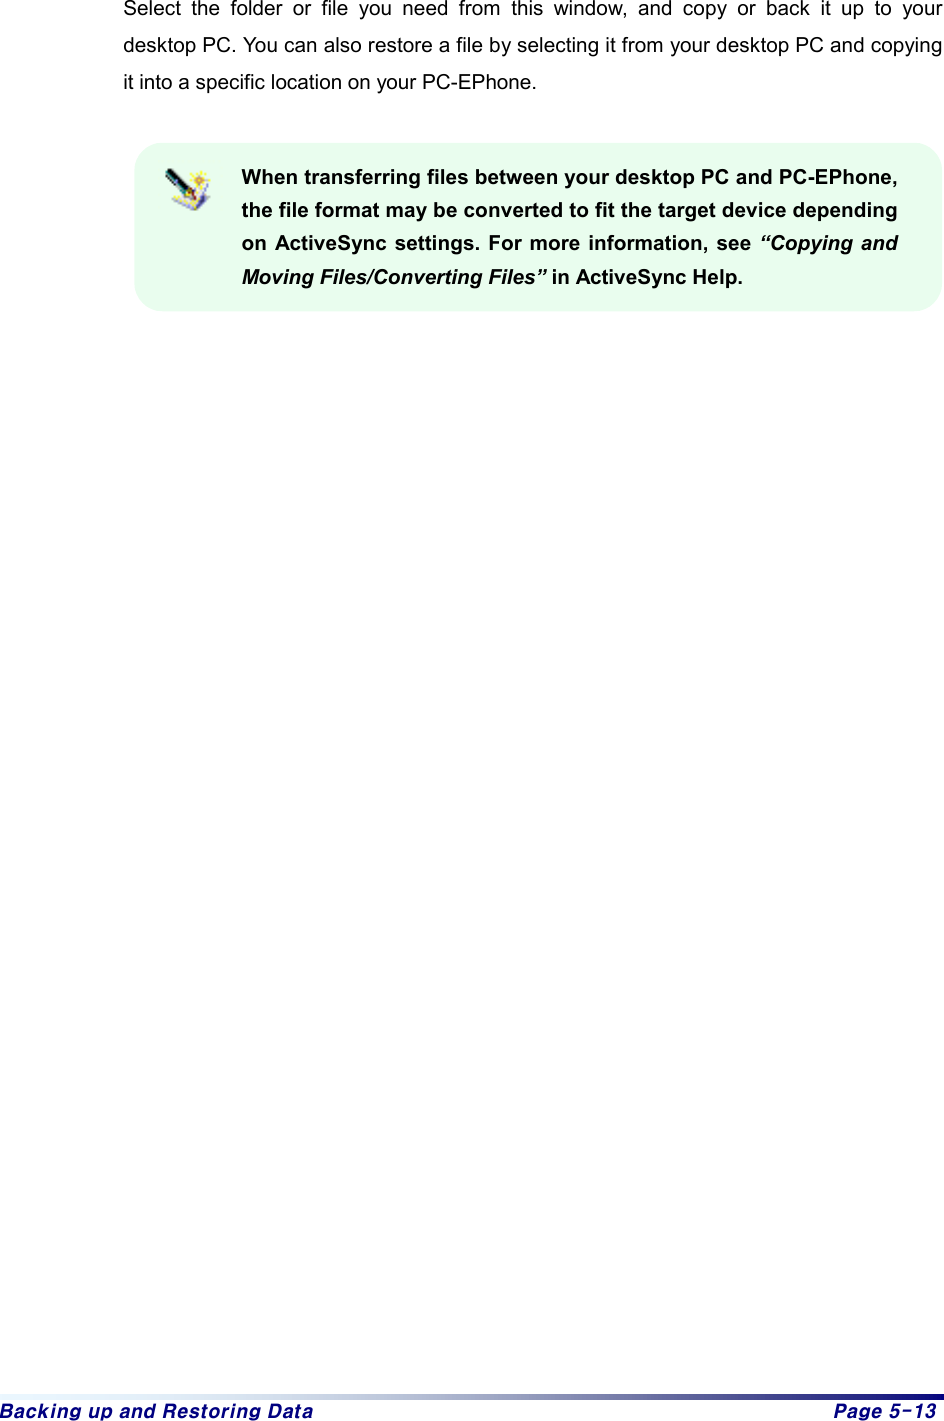
CyberBank CB-0801 PDA With 800MHz CDMA & AMPS Dual Mode Cellular Phone User Manual MANUAL 3 OF 4
CyberBank Corp PDA With 800MHz CDMA & AMPS Dual Mode Cellular Phone MANUAL 3 OF 4
UserManual.wiki
>
CyberBank
>
CB-0801 User Manual
>
MANUAL 3 OF 4
Contents
1.
MANUAL 1 OF 4
2.
MANUAL 2 OF 4
3.
MANUAL 3 OF 4
4.
MANUAL 4 OF 4
5.
CRN 21224 revised user manual 1 of 2
6.
CRN 21224 revised user manual 2 of 2
MANUAL 3 OF 4
Navigation menu
Upload a User Manual
Namespaces
Wiki Guide
HTML
PDF
Info
Views
User Manual
Discussion / Help
Navigation
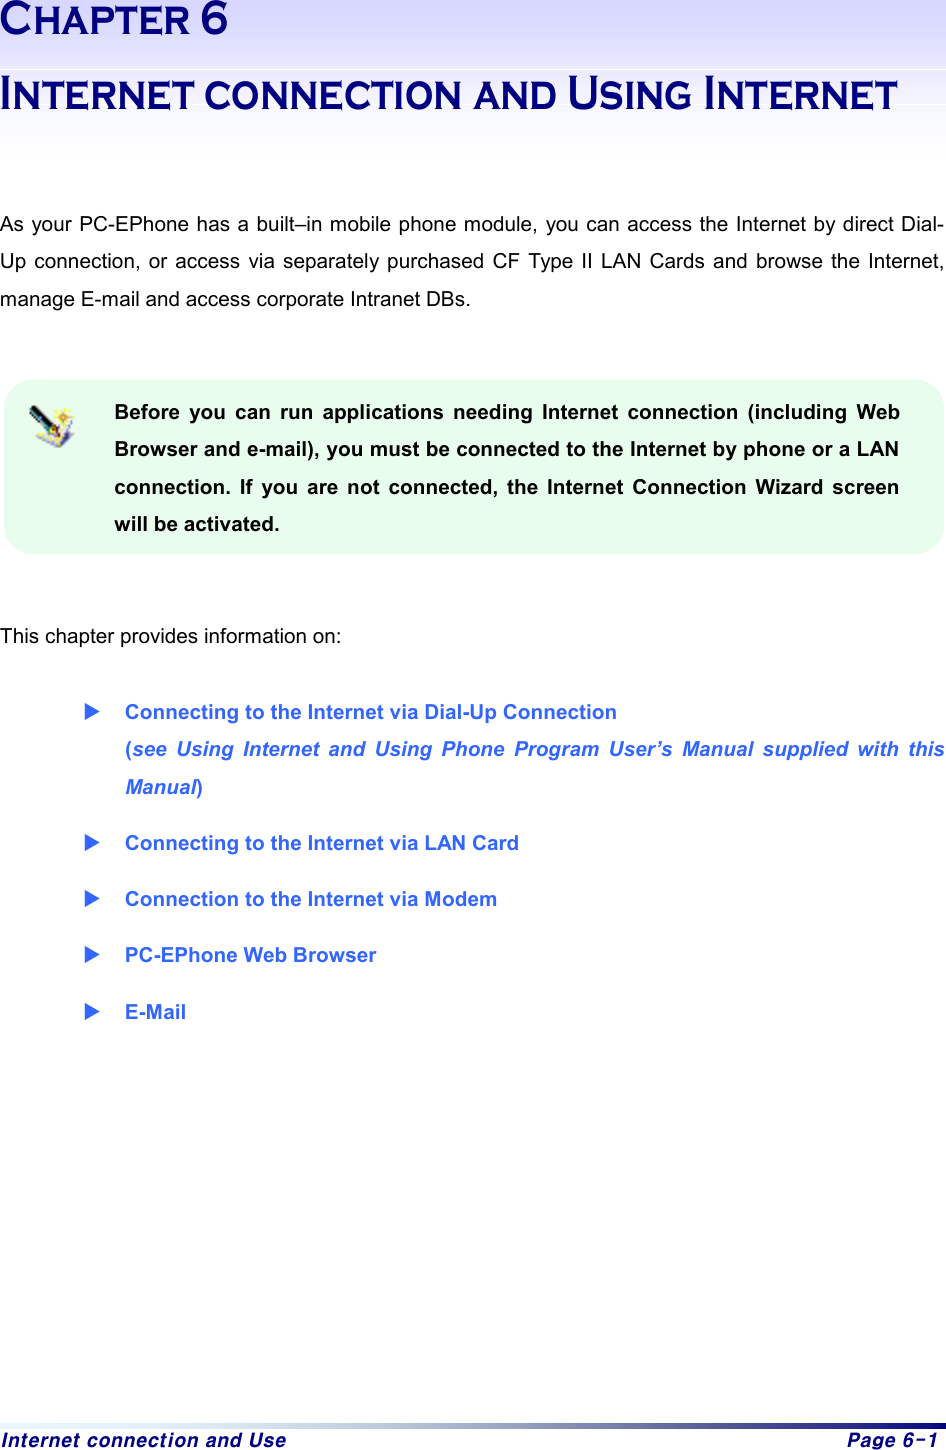


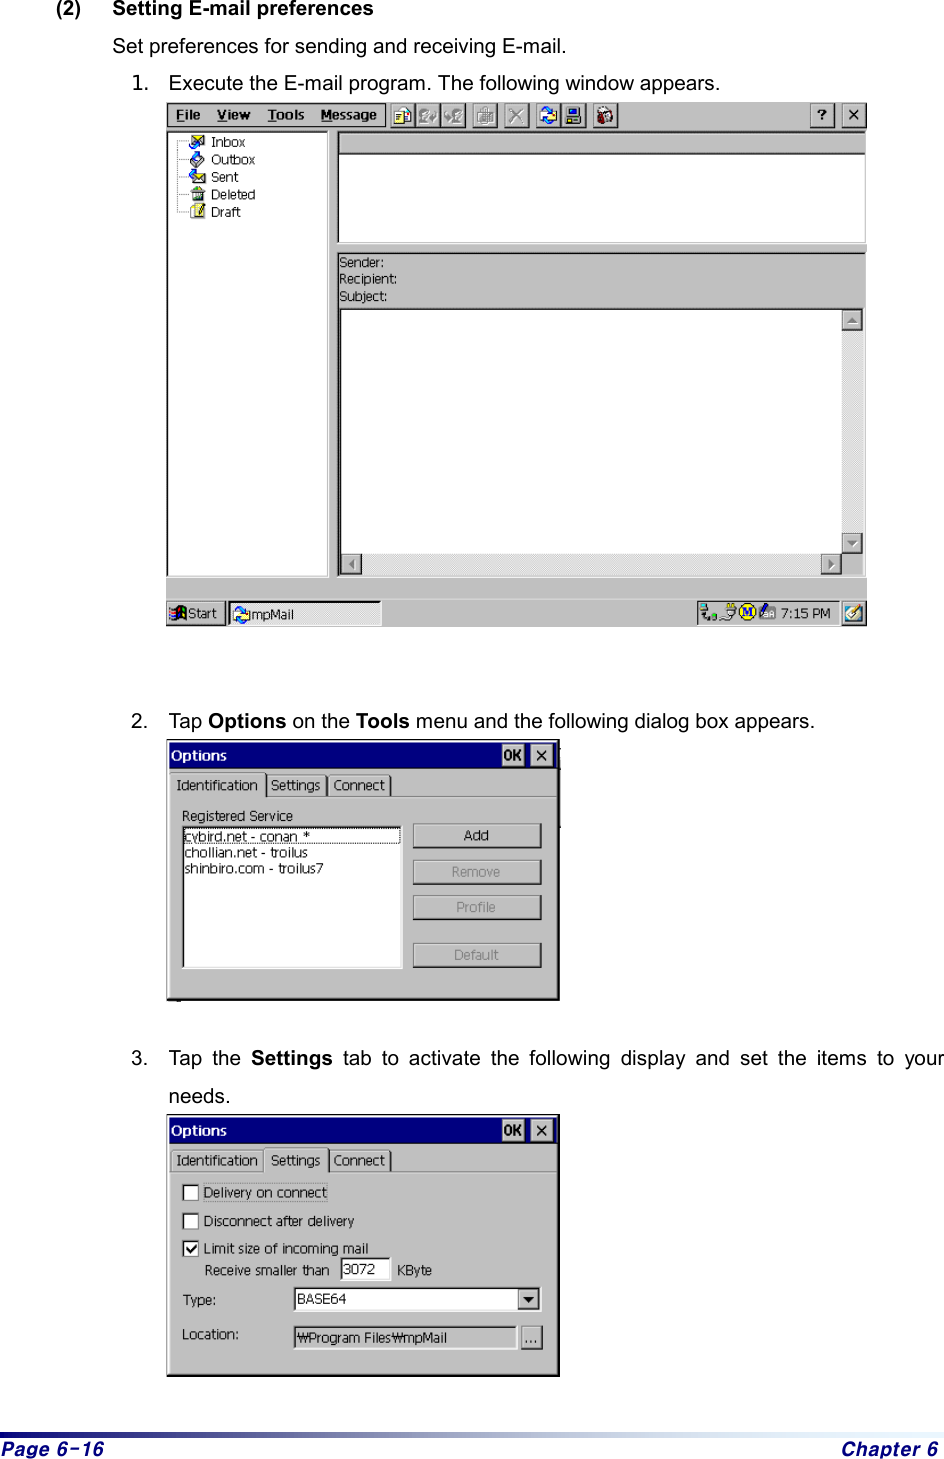
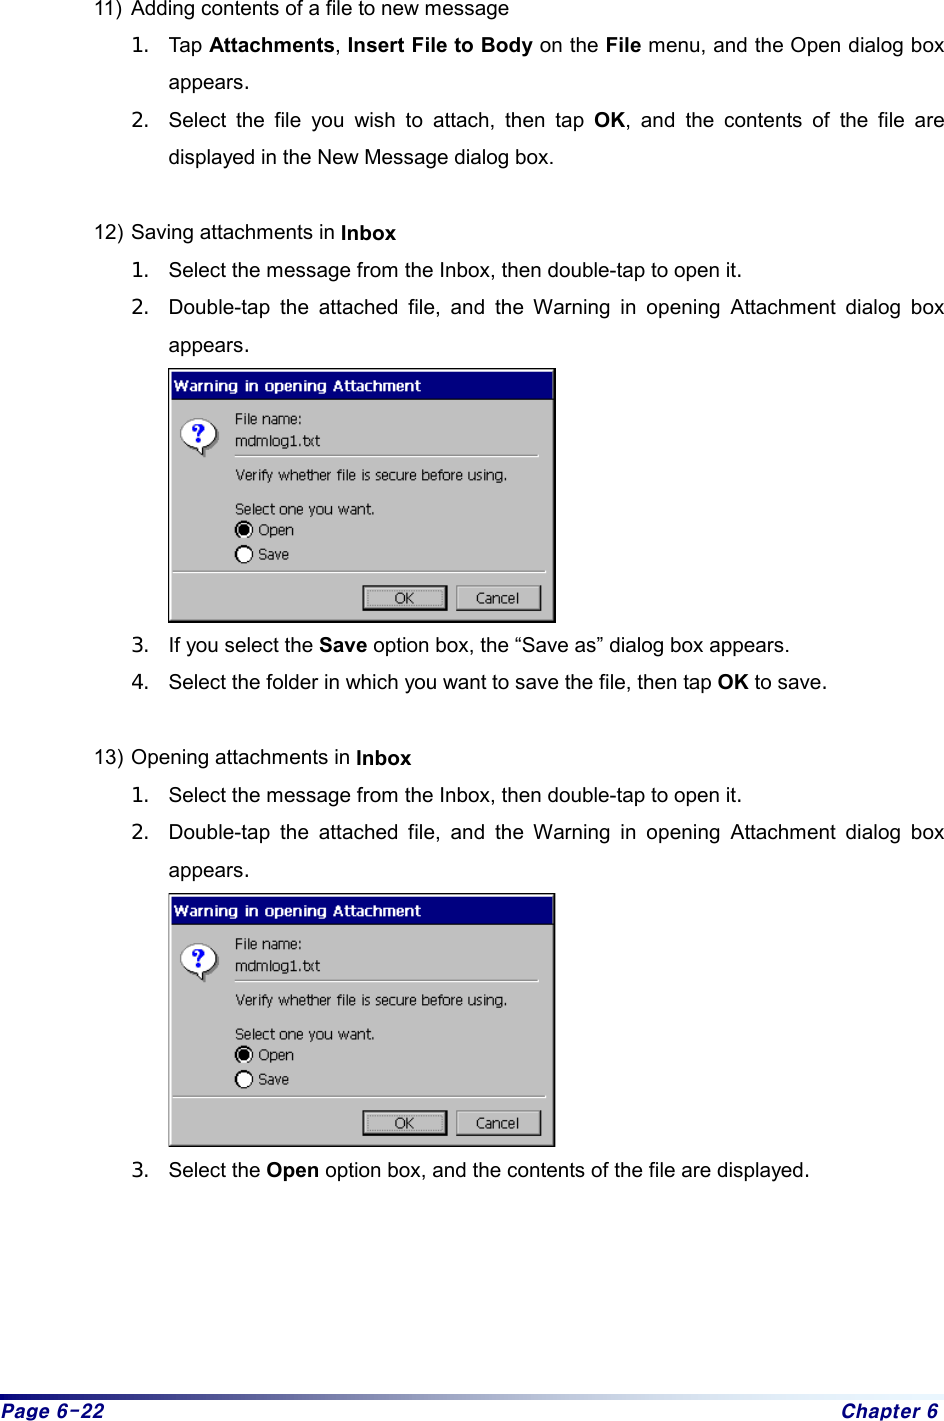
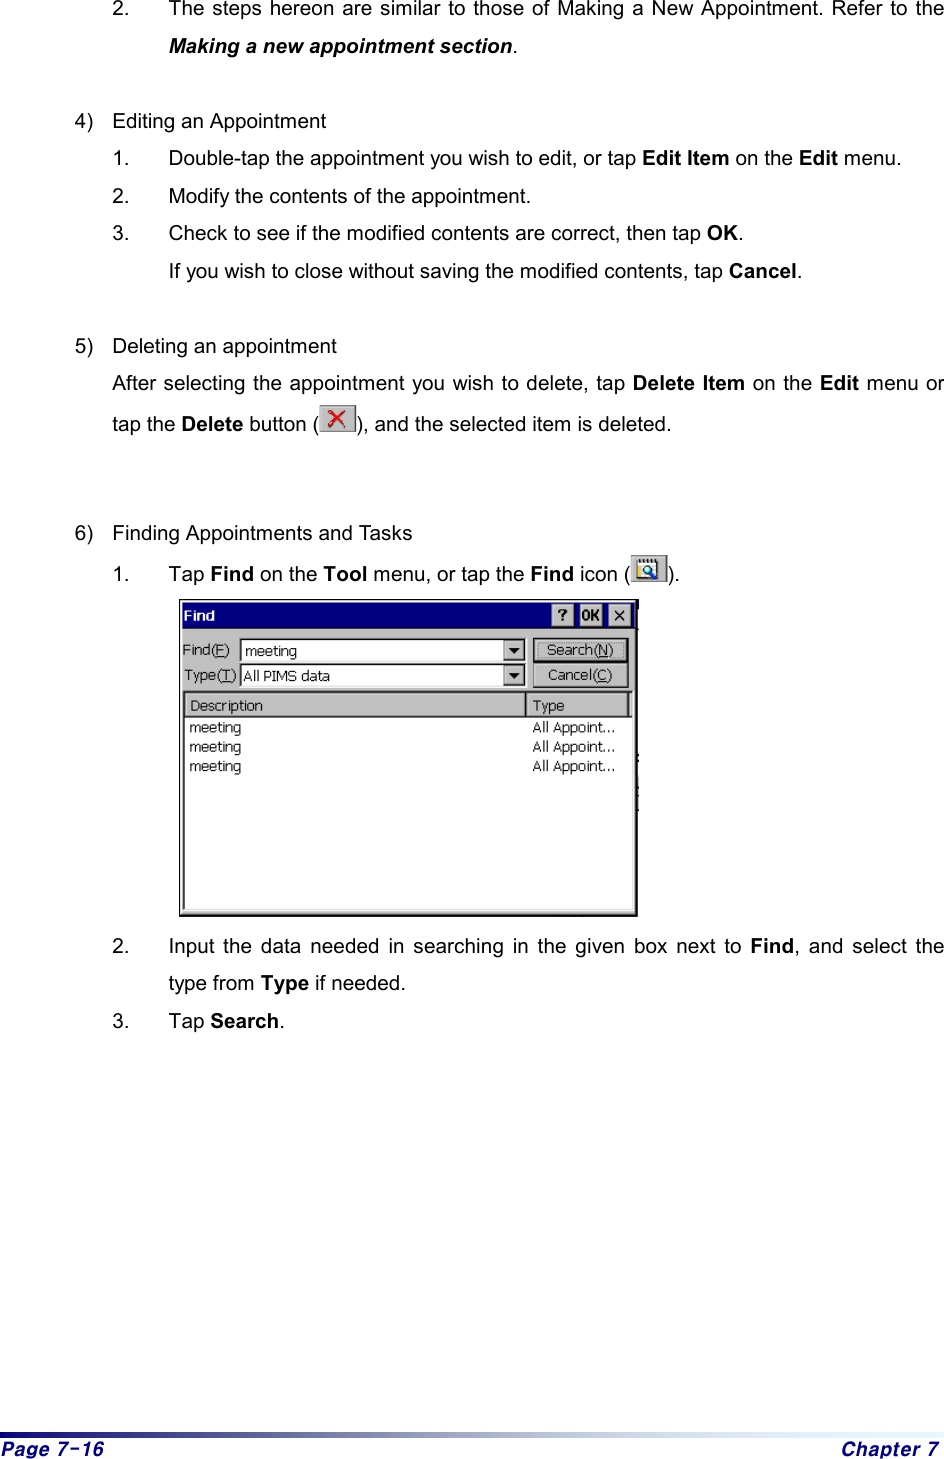
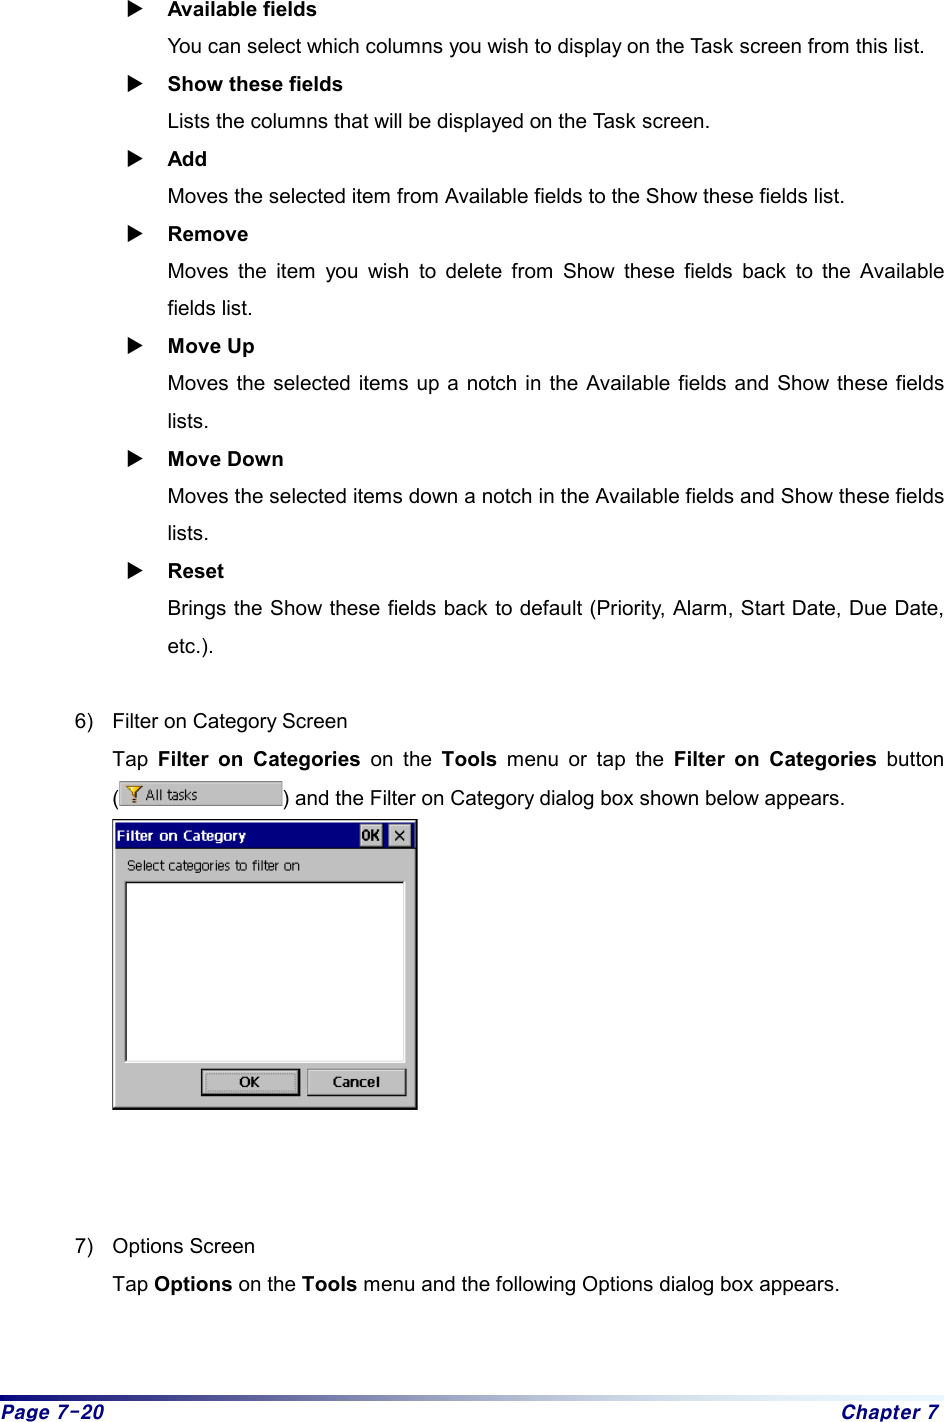
![Page 6-18 Chapter 6 4) Message (4) Using E-mail 1) Creating a New Message 1. Tap New on the File menu or tap the New message icon ( ). The New Message window appears as shown below. Recipient Input the E-mail address of the recipient or tap the button on the right side to select someone from Contacts. Used to write New Mail Used to reply to received Mail Used to forward received Mail to another person Used to delete Mail Used to move Mail to another folder Used to empty the [Deleted] folder](https://usermanual.wiki/CyberBank/CB-0801.MANUAL-3-OF-4/User-Guide-170630-Page-21.png)
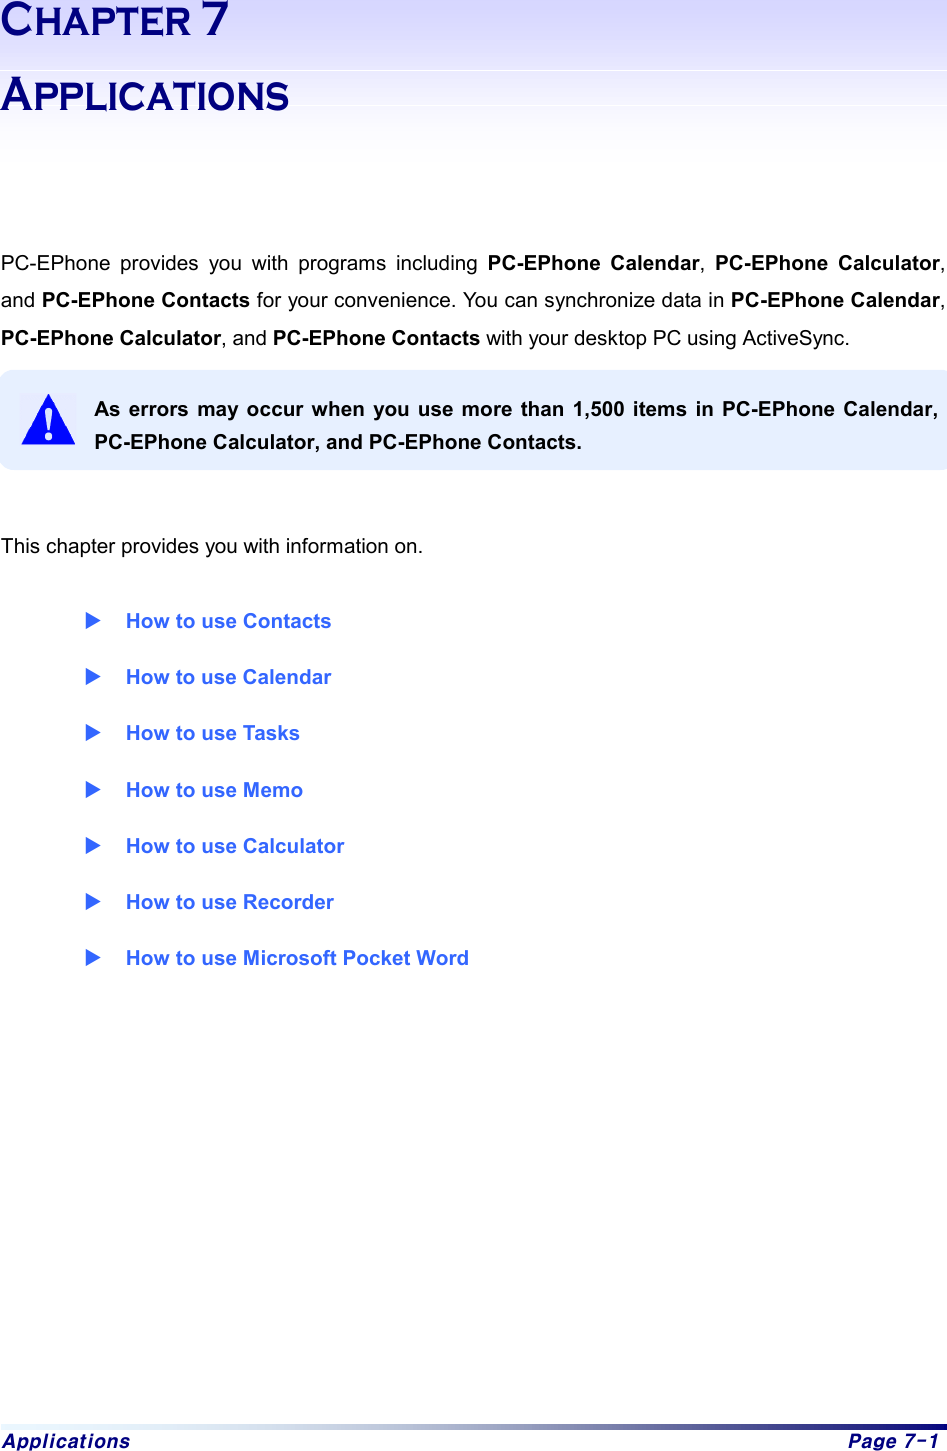
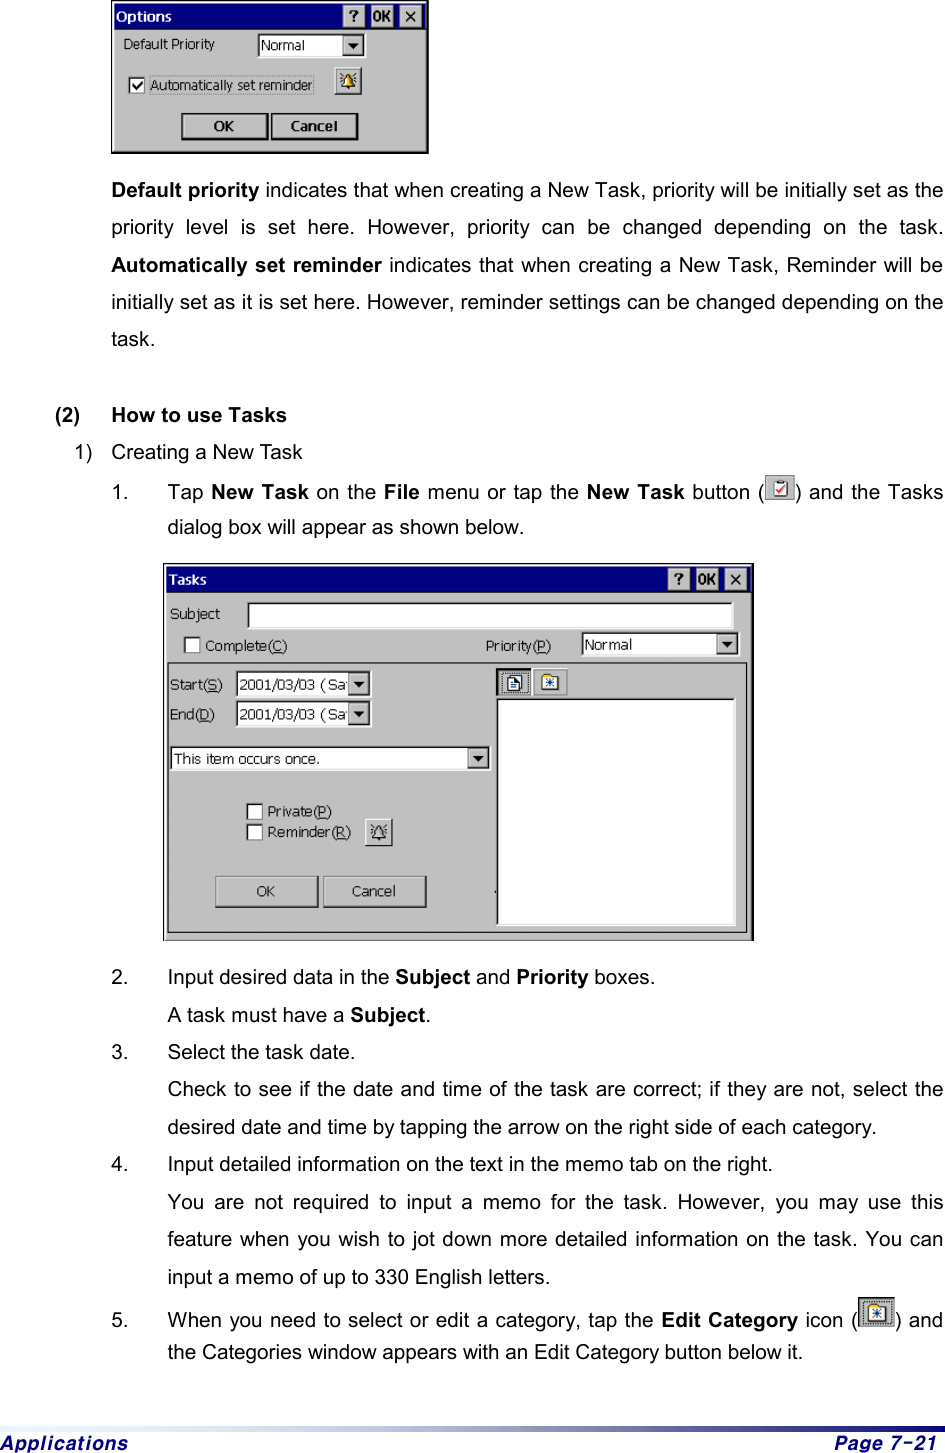
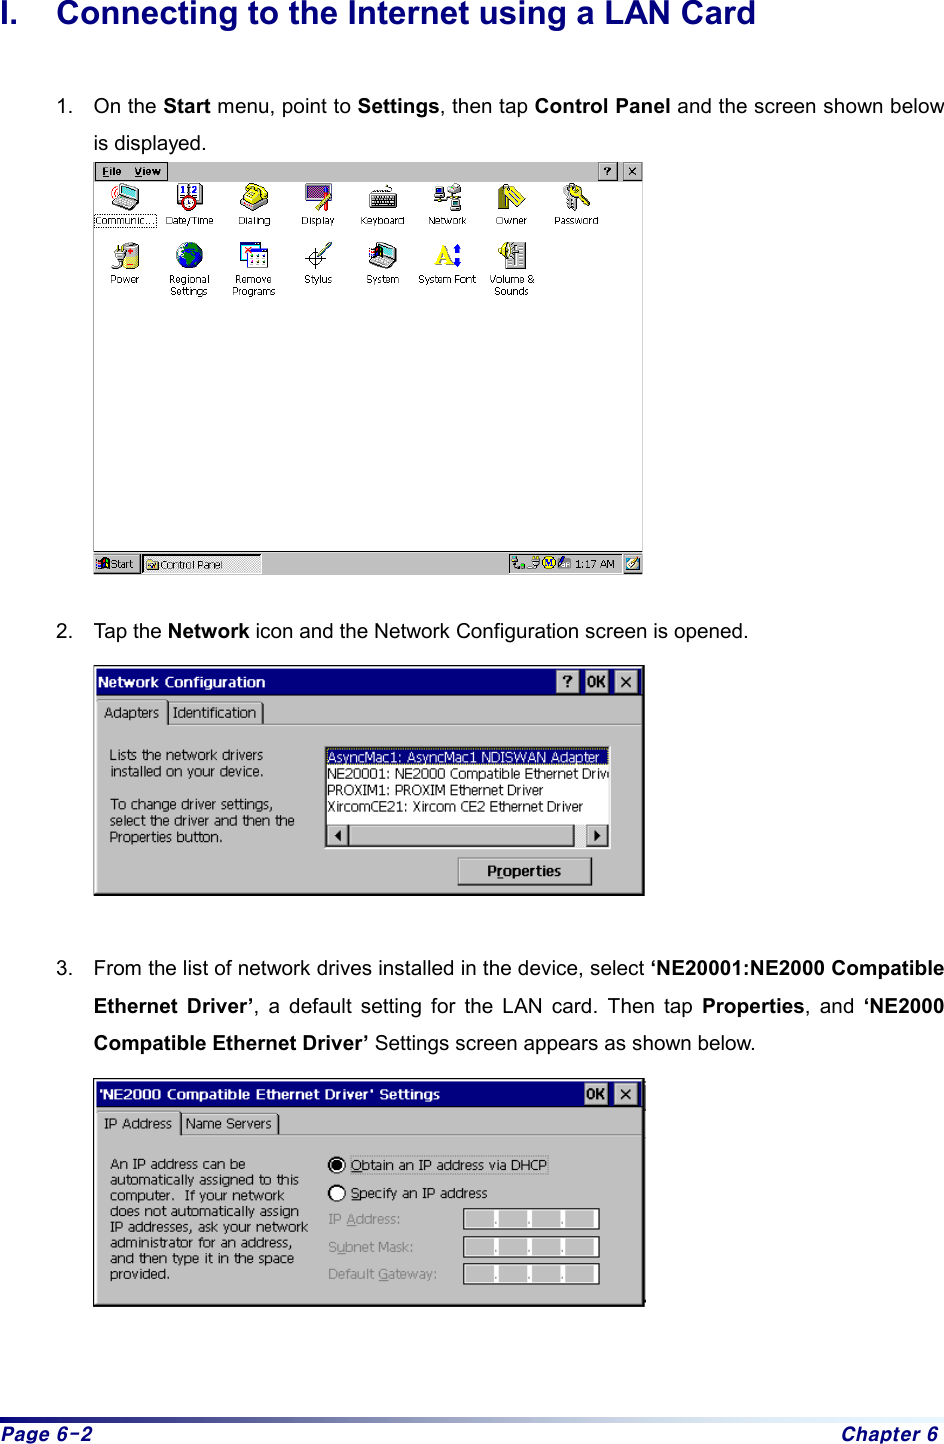
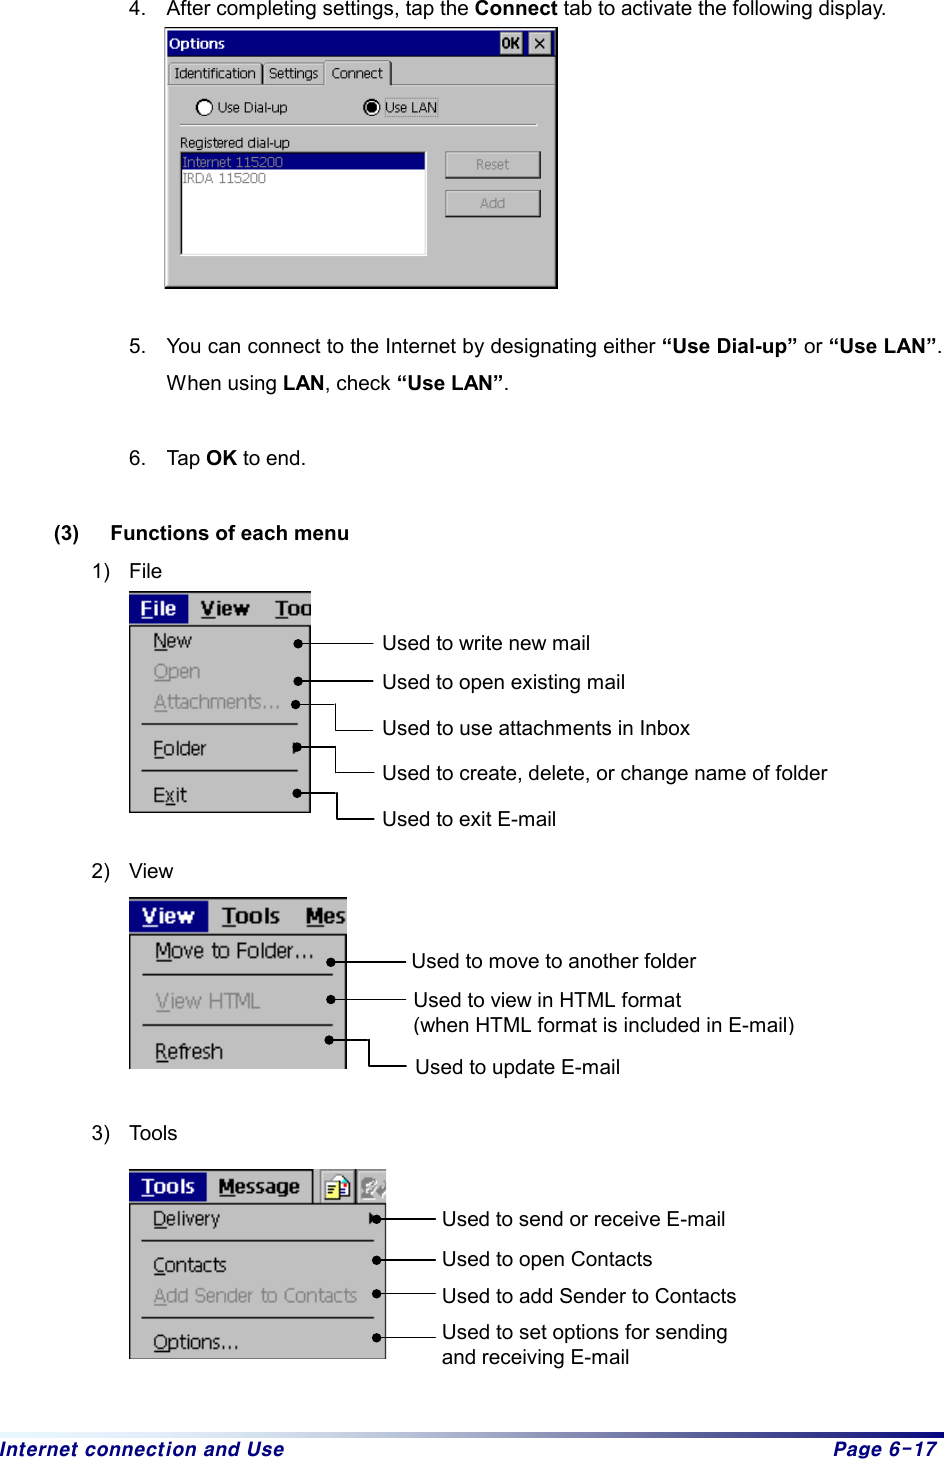
![Internet connection and Use Page 6-21 8) Deleting folders 1. Select the folder you wish to delete from the list of folders on the left. 2. Select Folder, Delete on the File menu. When you delete a folder, mail contained in that folder is transferred to the [Deleted] folder. You cannot rename or delete folders that are set by default (Inbox, Outbox, Sent, Deleted). 9) Moving messages Used to send a message saved in one folder to another. 1. Select the message you wish to move. 2. Select Move to Folder on the View menu. 3. Select the folder you wish to move the message to, and tap OK. 10) Attaching files to new messages 1. In the New Message dialog box, tap Attachments, Add on the File menu and the Open dialog box appears. 2. Select the file you wish to attach, then tap OK, and the attached file is displayed in the attachments window of the New Message dialog box. As the limit is set at 100 lines by default in the Internet E-mail account Advanced Set up, the attachment does not appear on the Sent box if the contents exceed 100 lines. Either select the “Get full copy of messages” option in Advanced Set up, or reset the limit.](https://usermanual.wiki/CyberBank/CB-0801.MANUAL-3-OF-4/User-Guide-170630-Page-24.png)