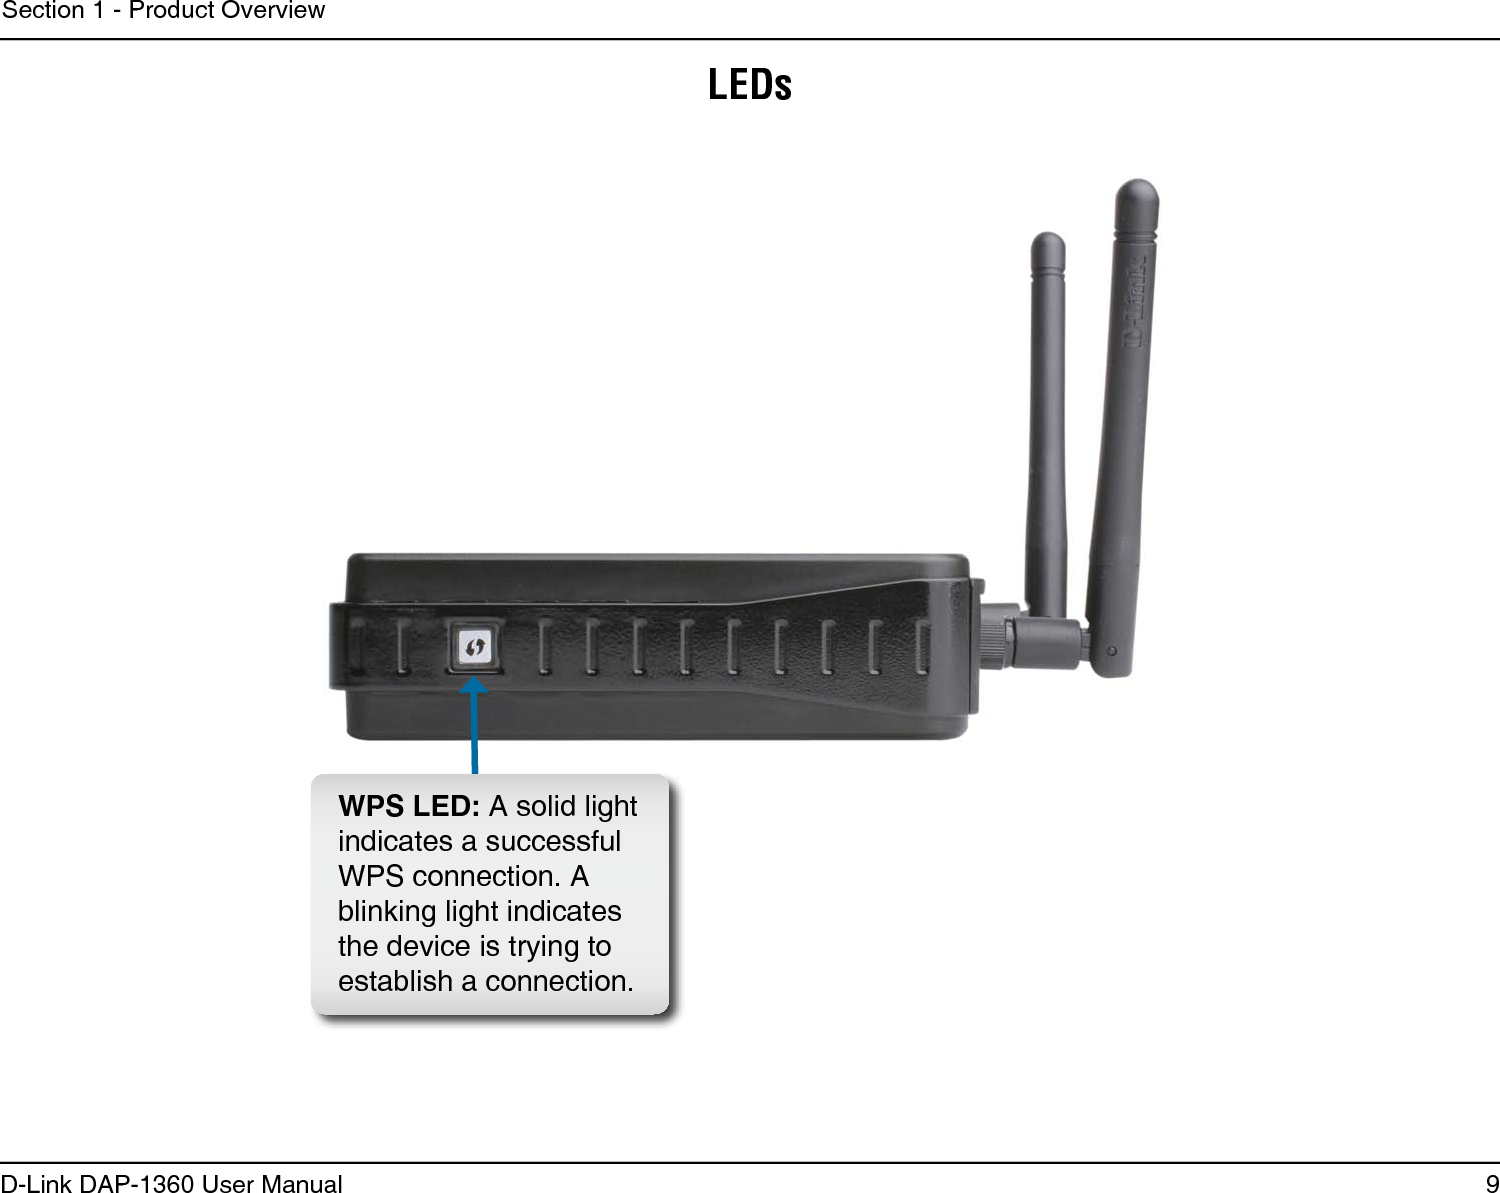
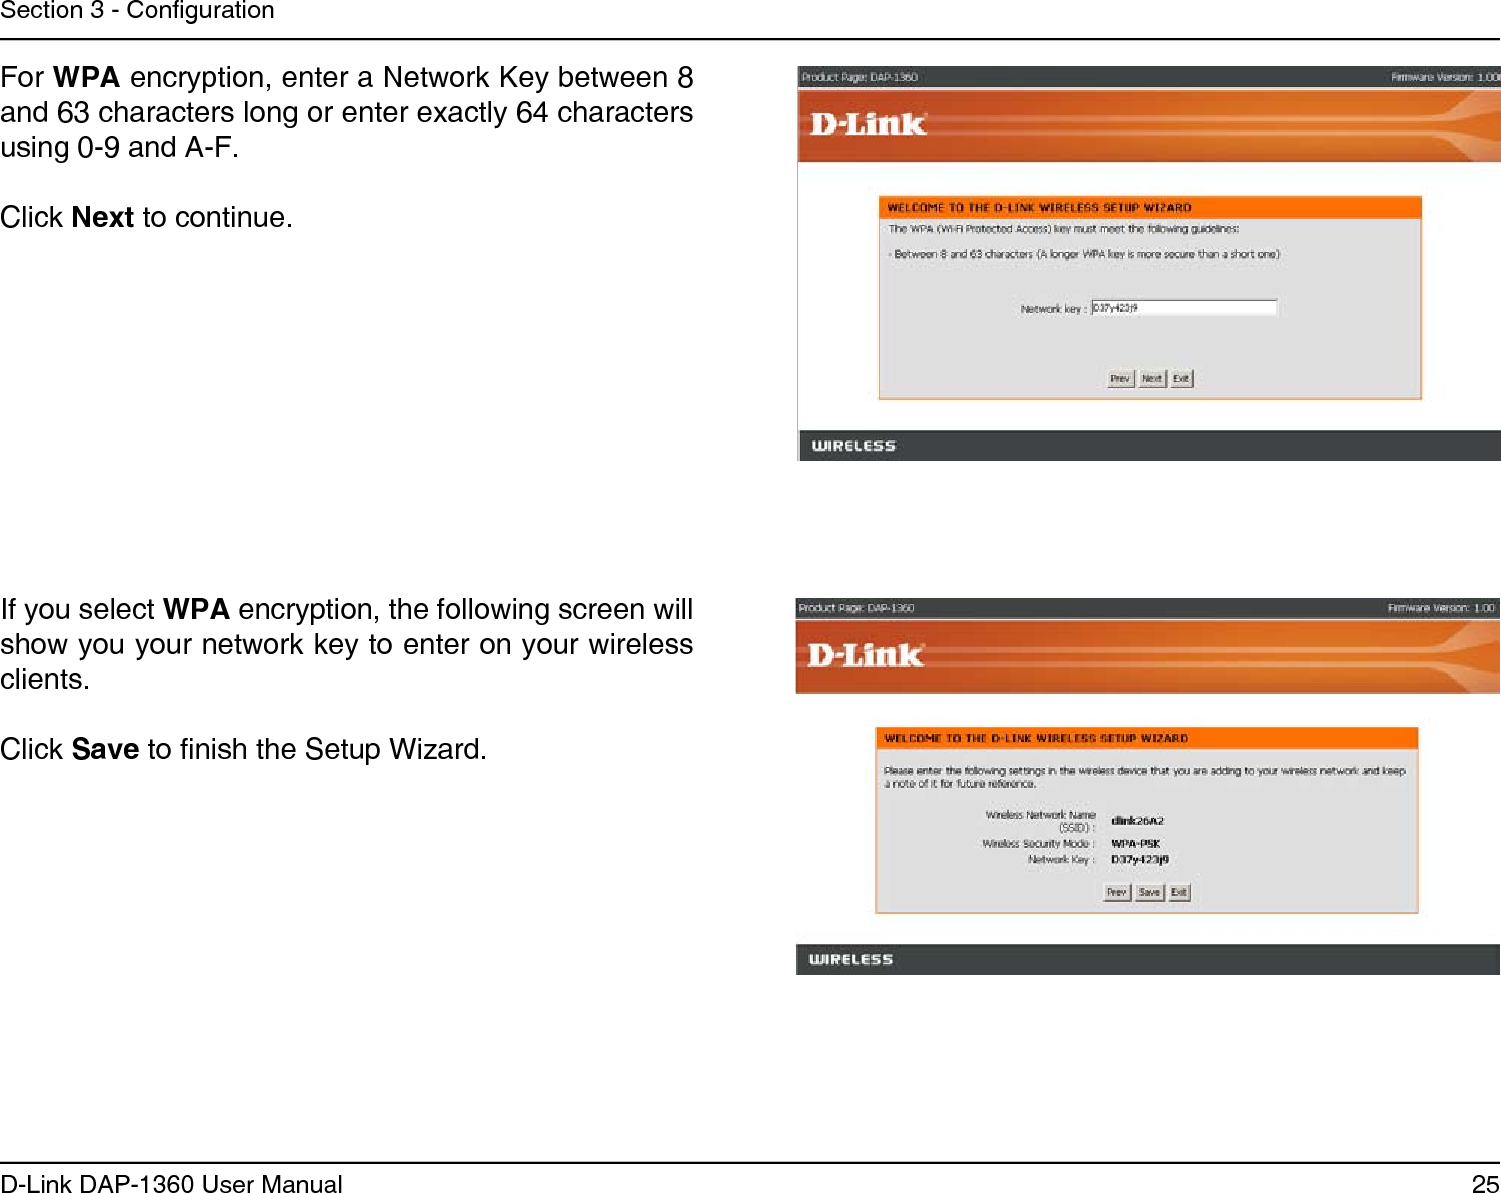
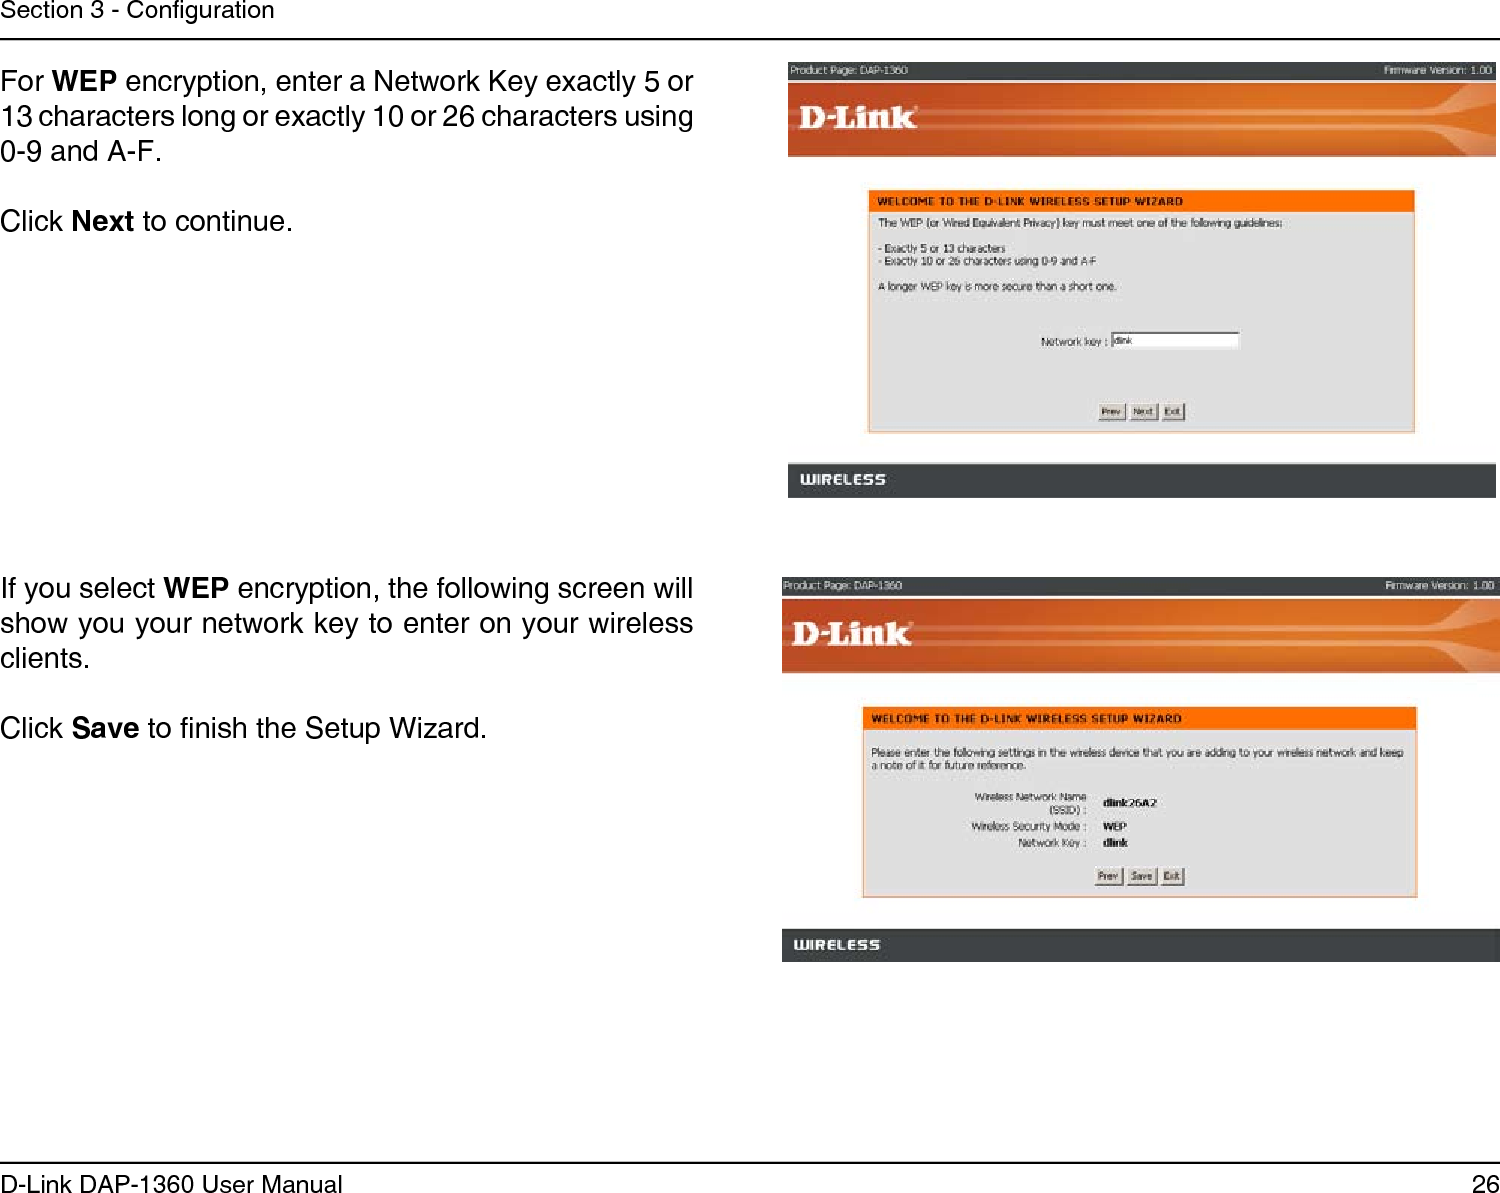
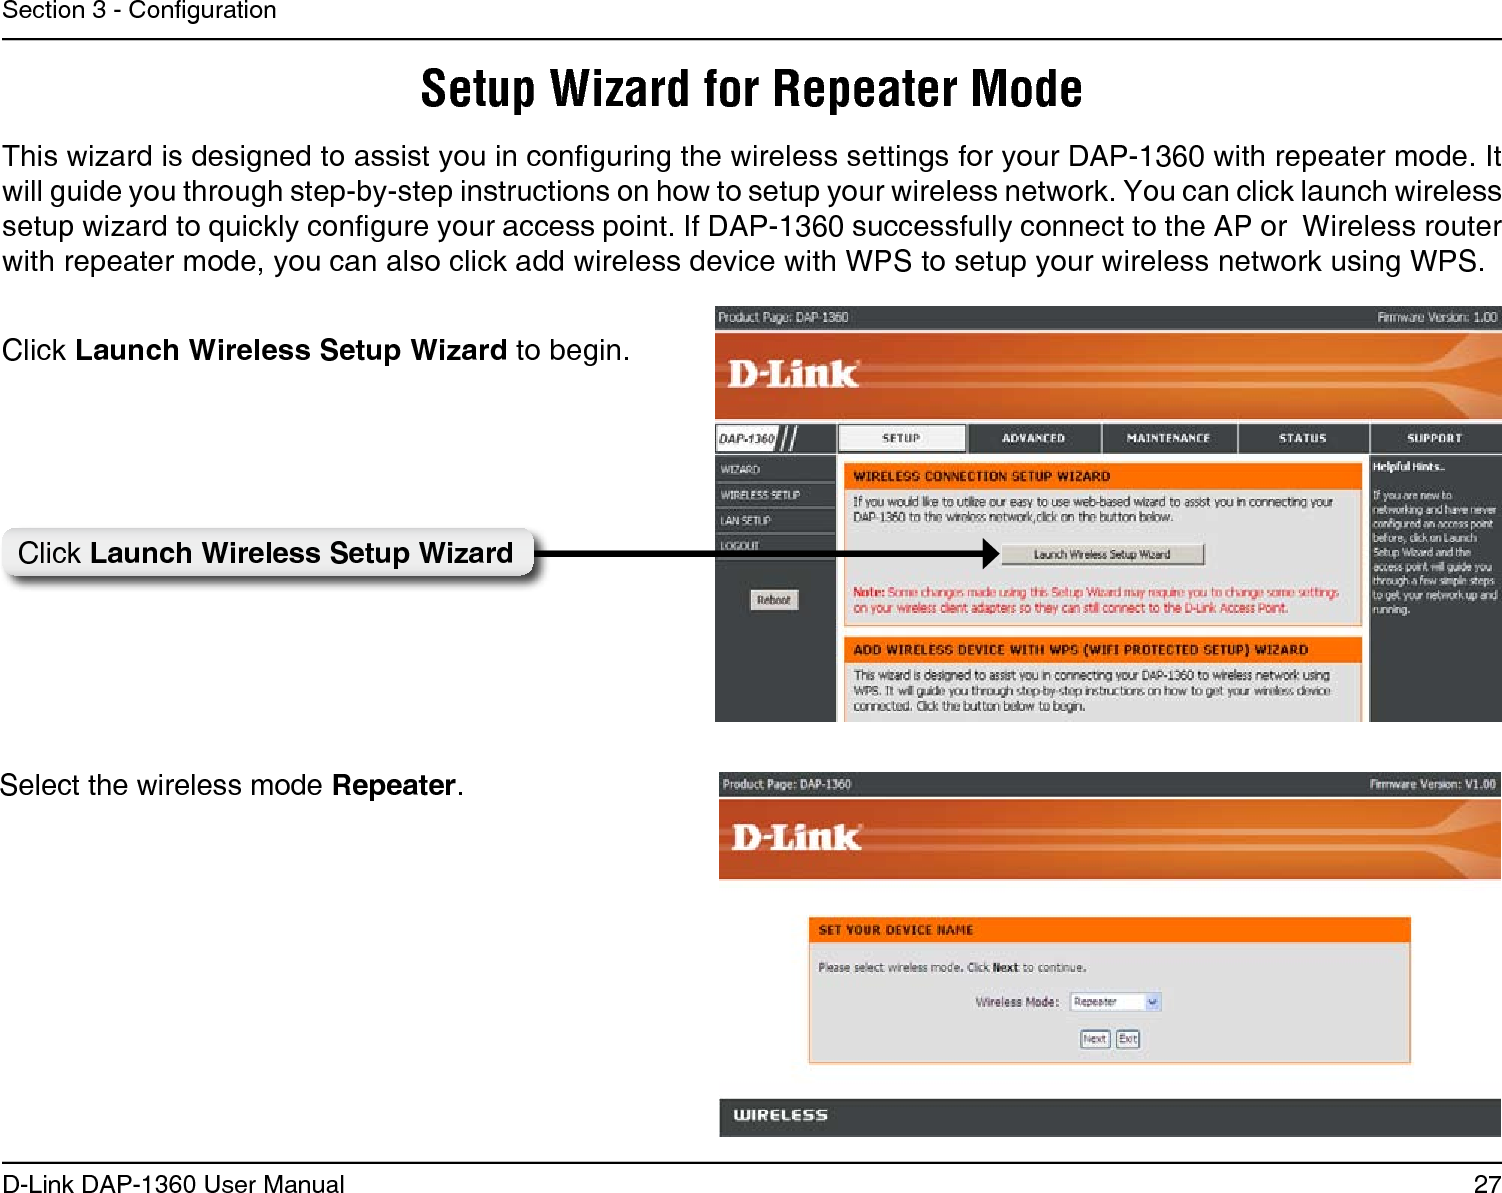
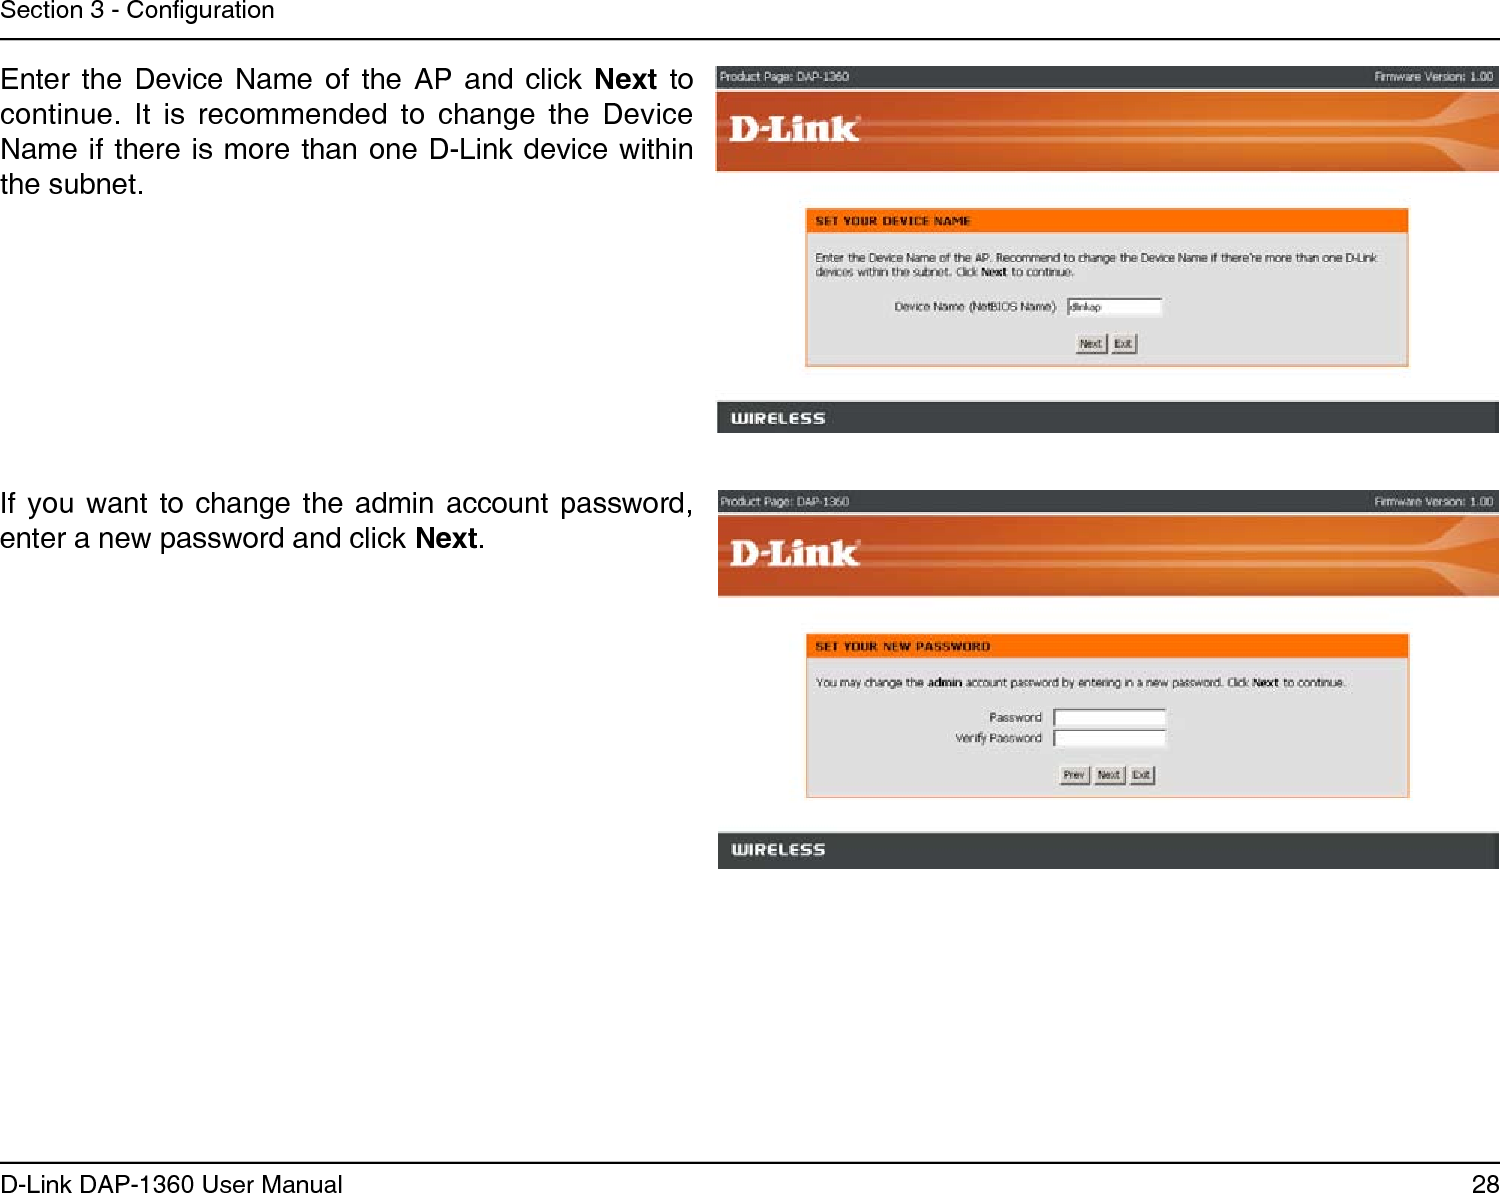
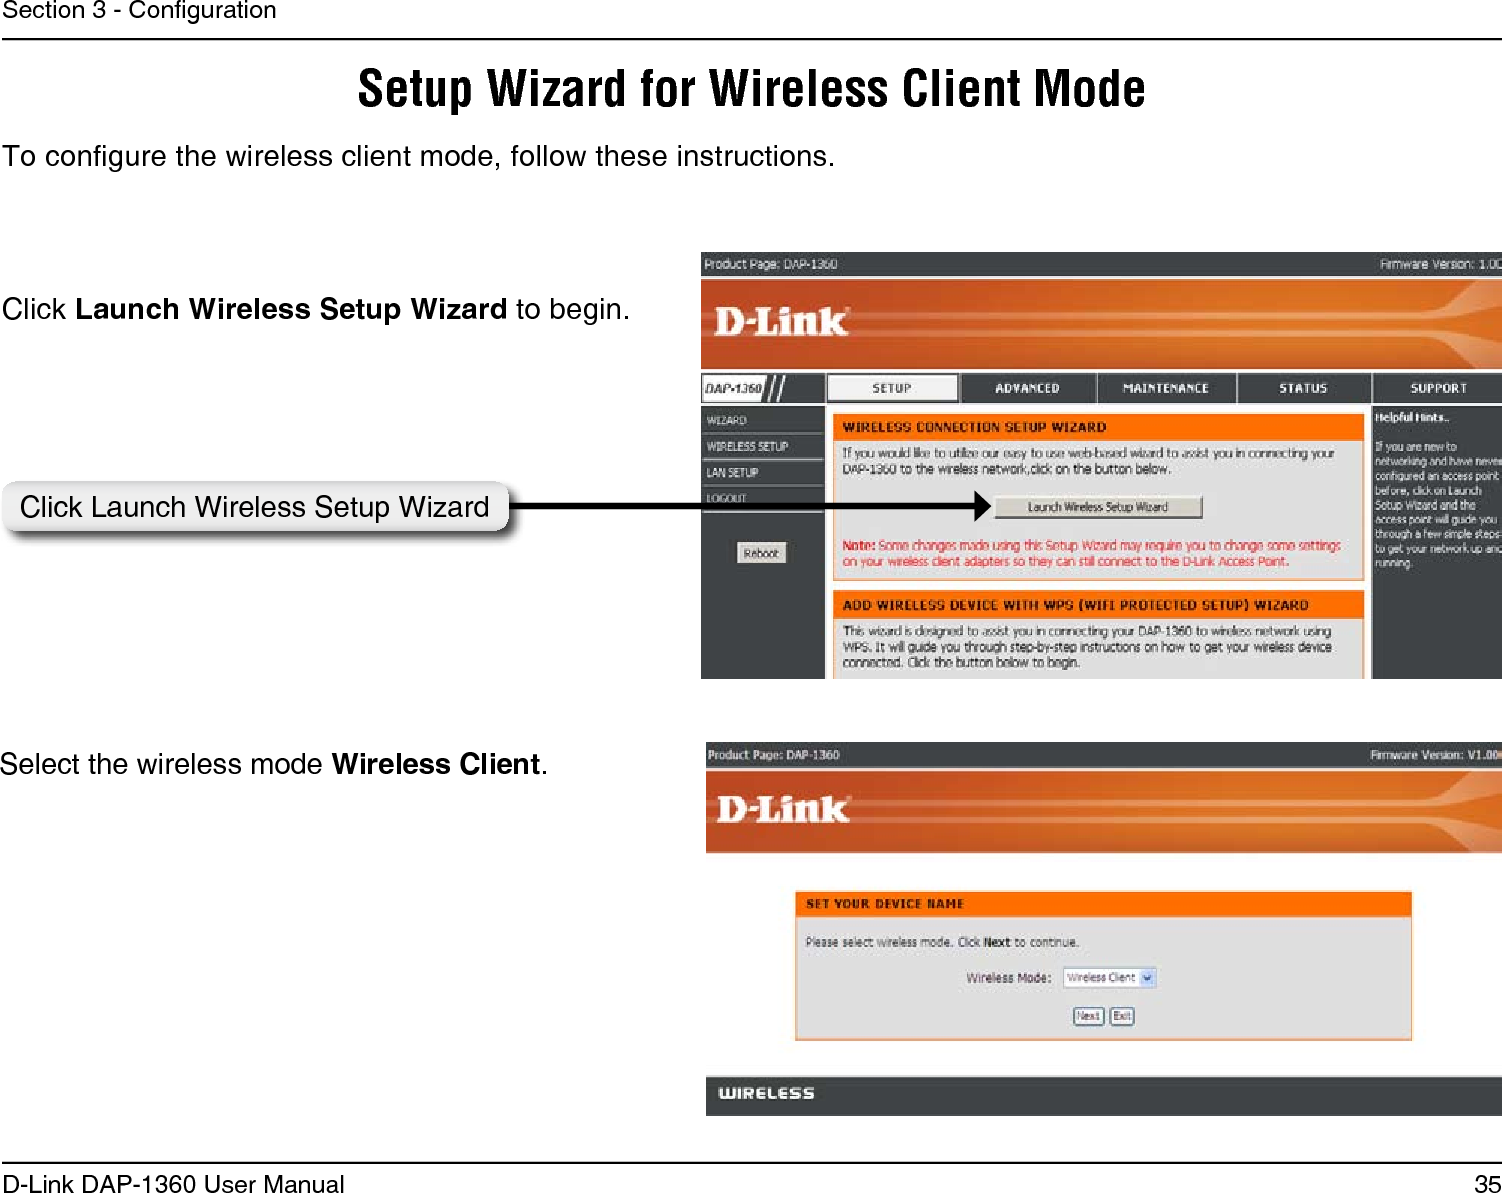
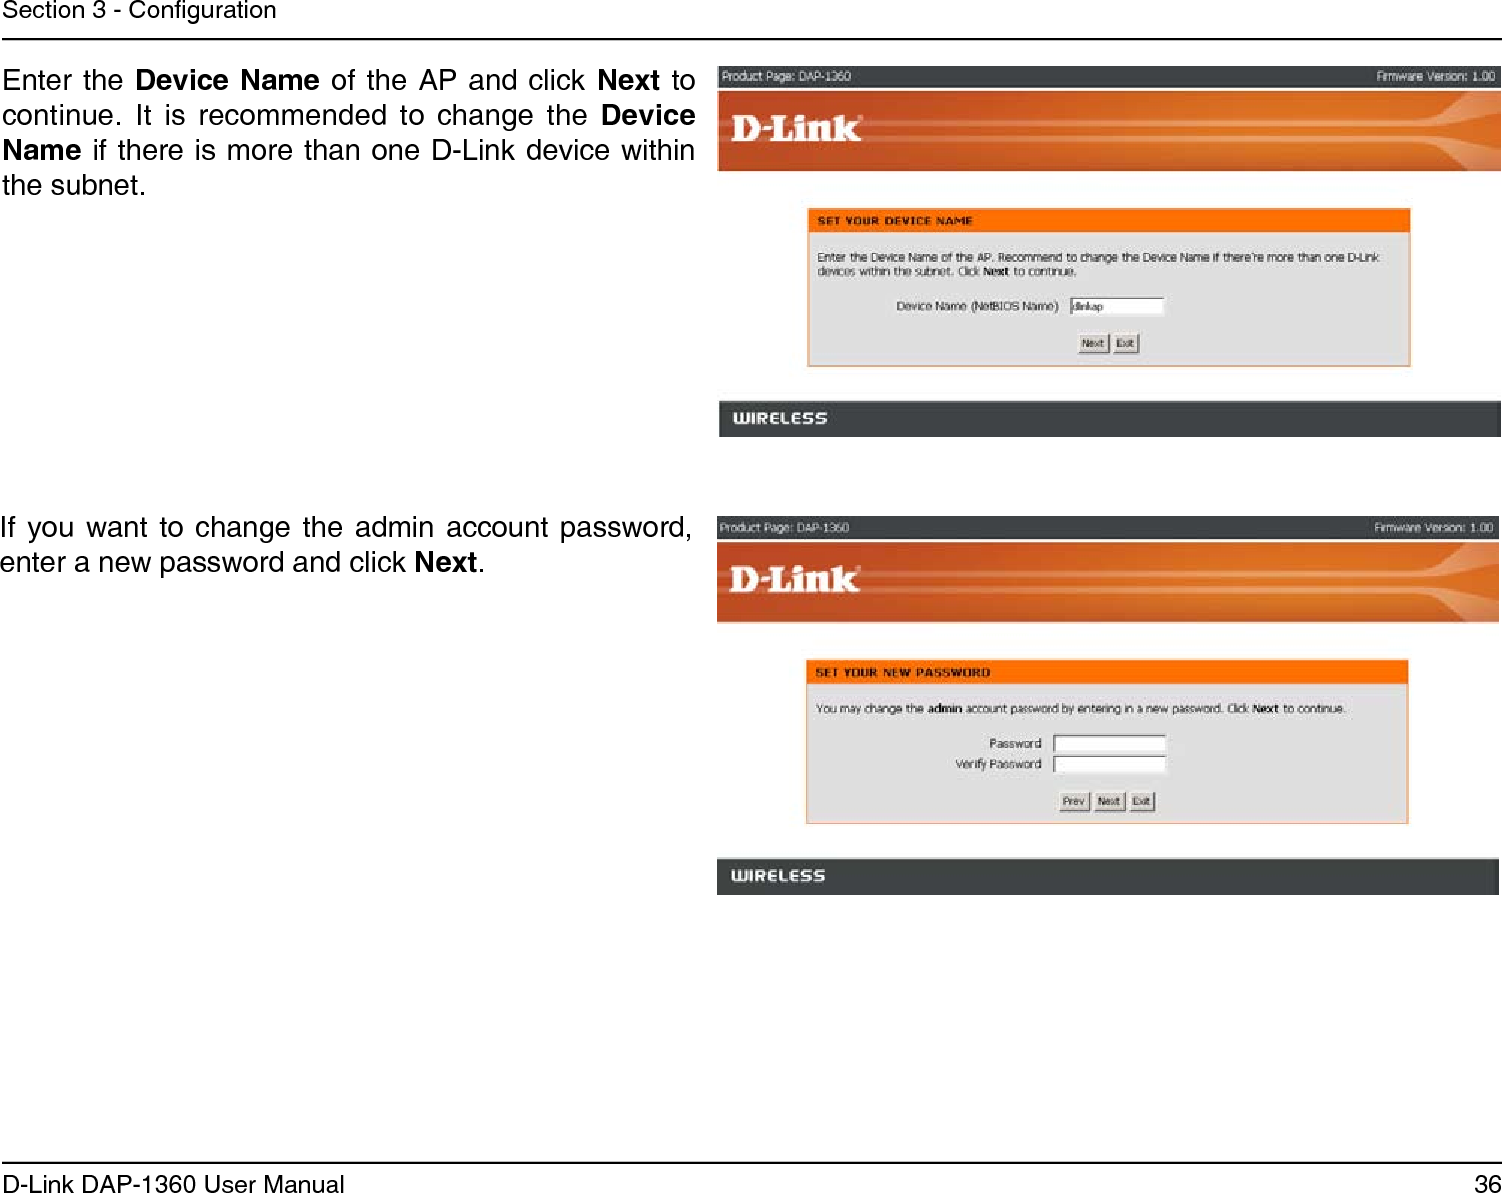
D Link AP1360B1 Wireless N Access Point/Wireless N Range Extender User Manual
D Link Corporation Wireless N Access Point/Wireless N Range Extender
UserManual.wiki
>
D Link
>
AP1360B1 User Manual
User Manual
Navigation menu
Upload a User Manual
Namespaces
Wiki Guide
HTML
PDF
Info
Views
User Manual
Discussion / Help
Navigation


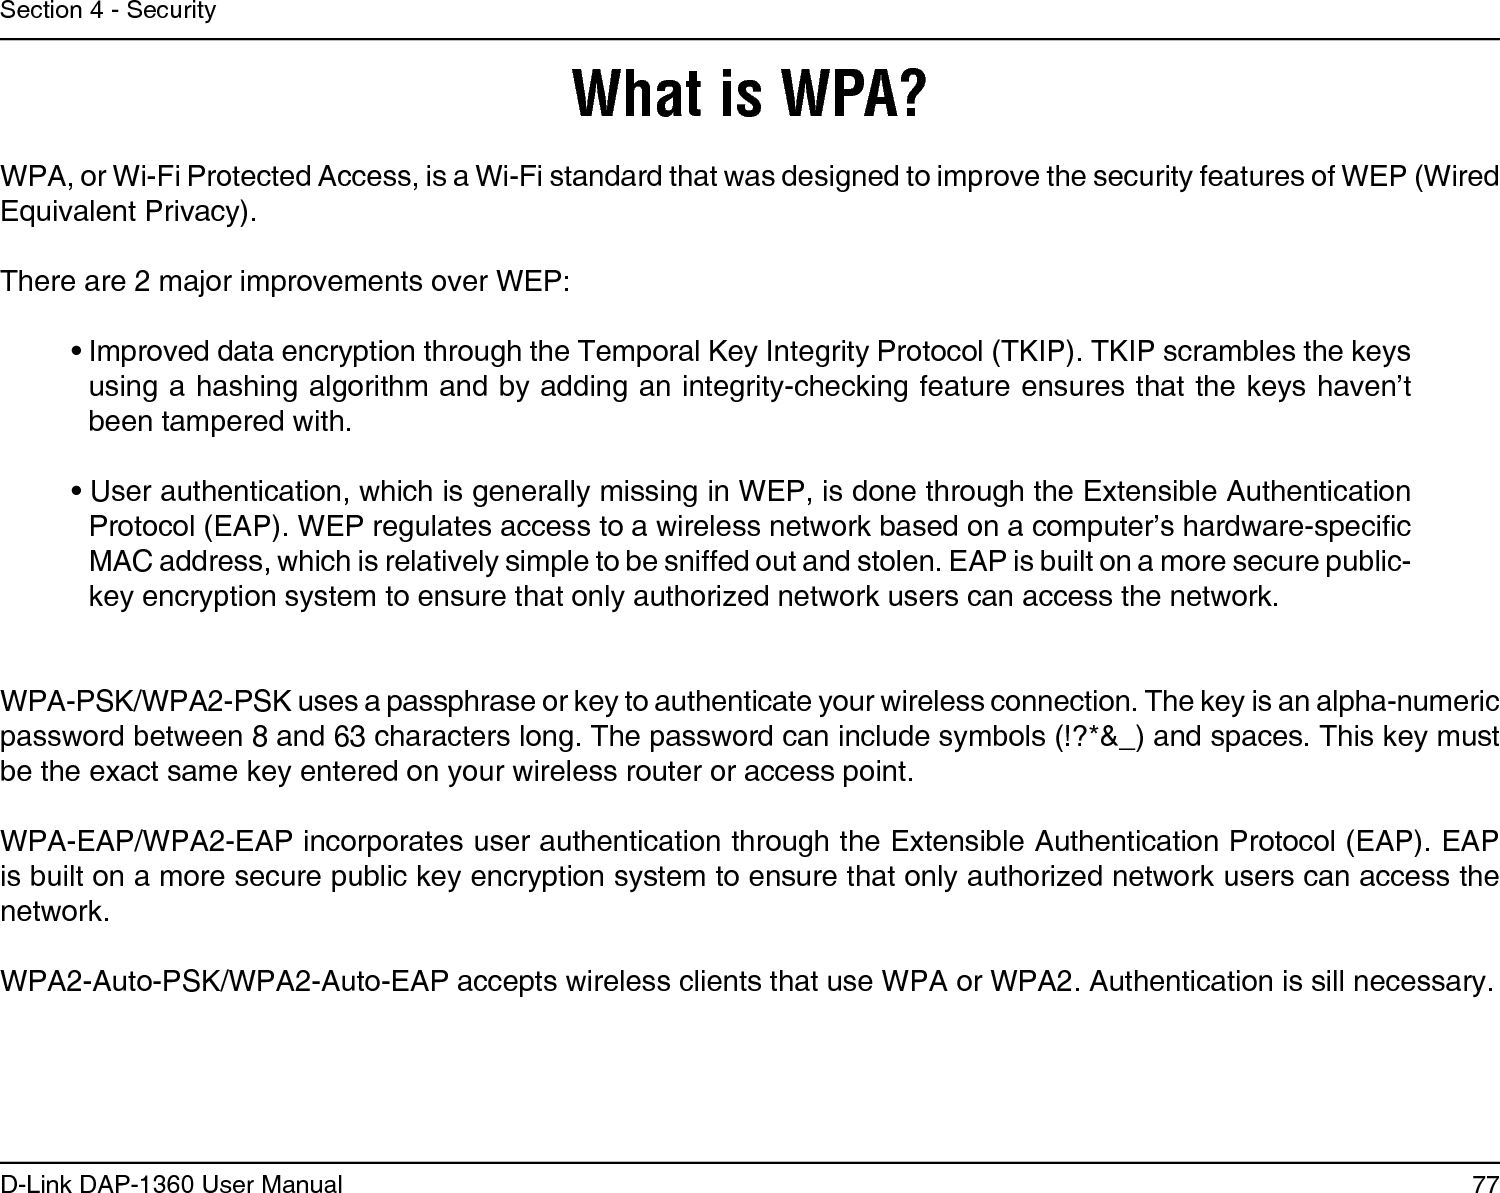

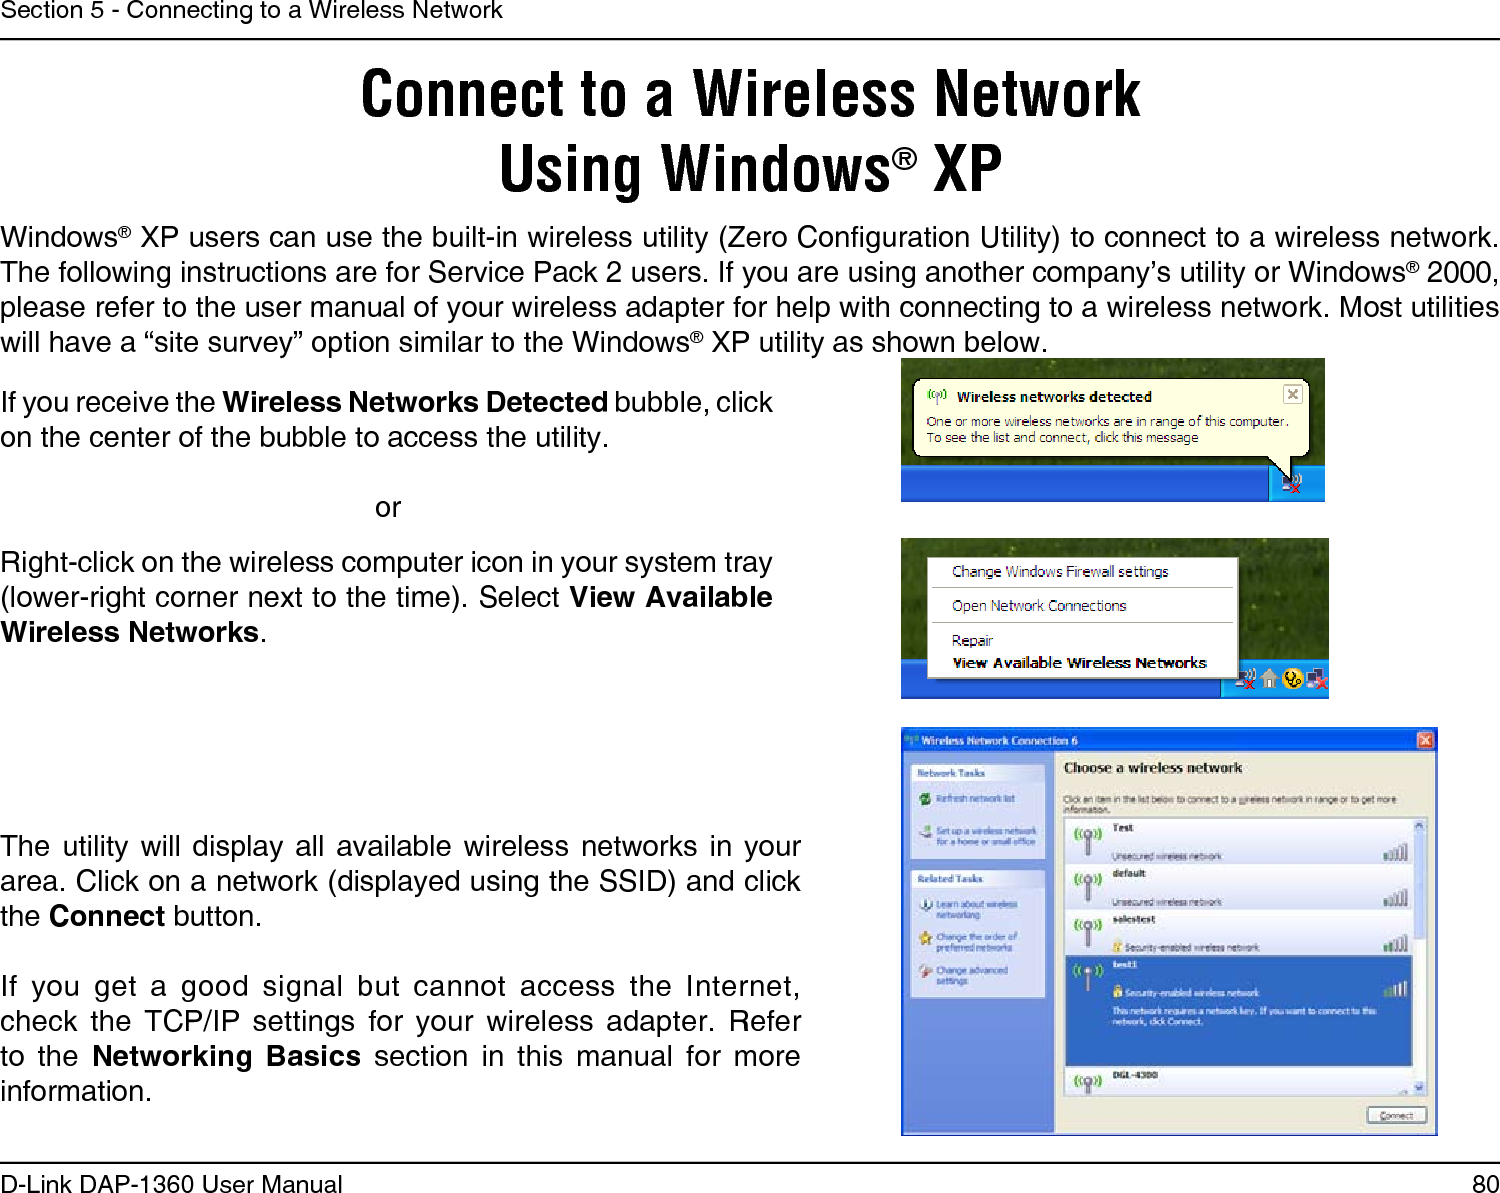
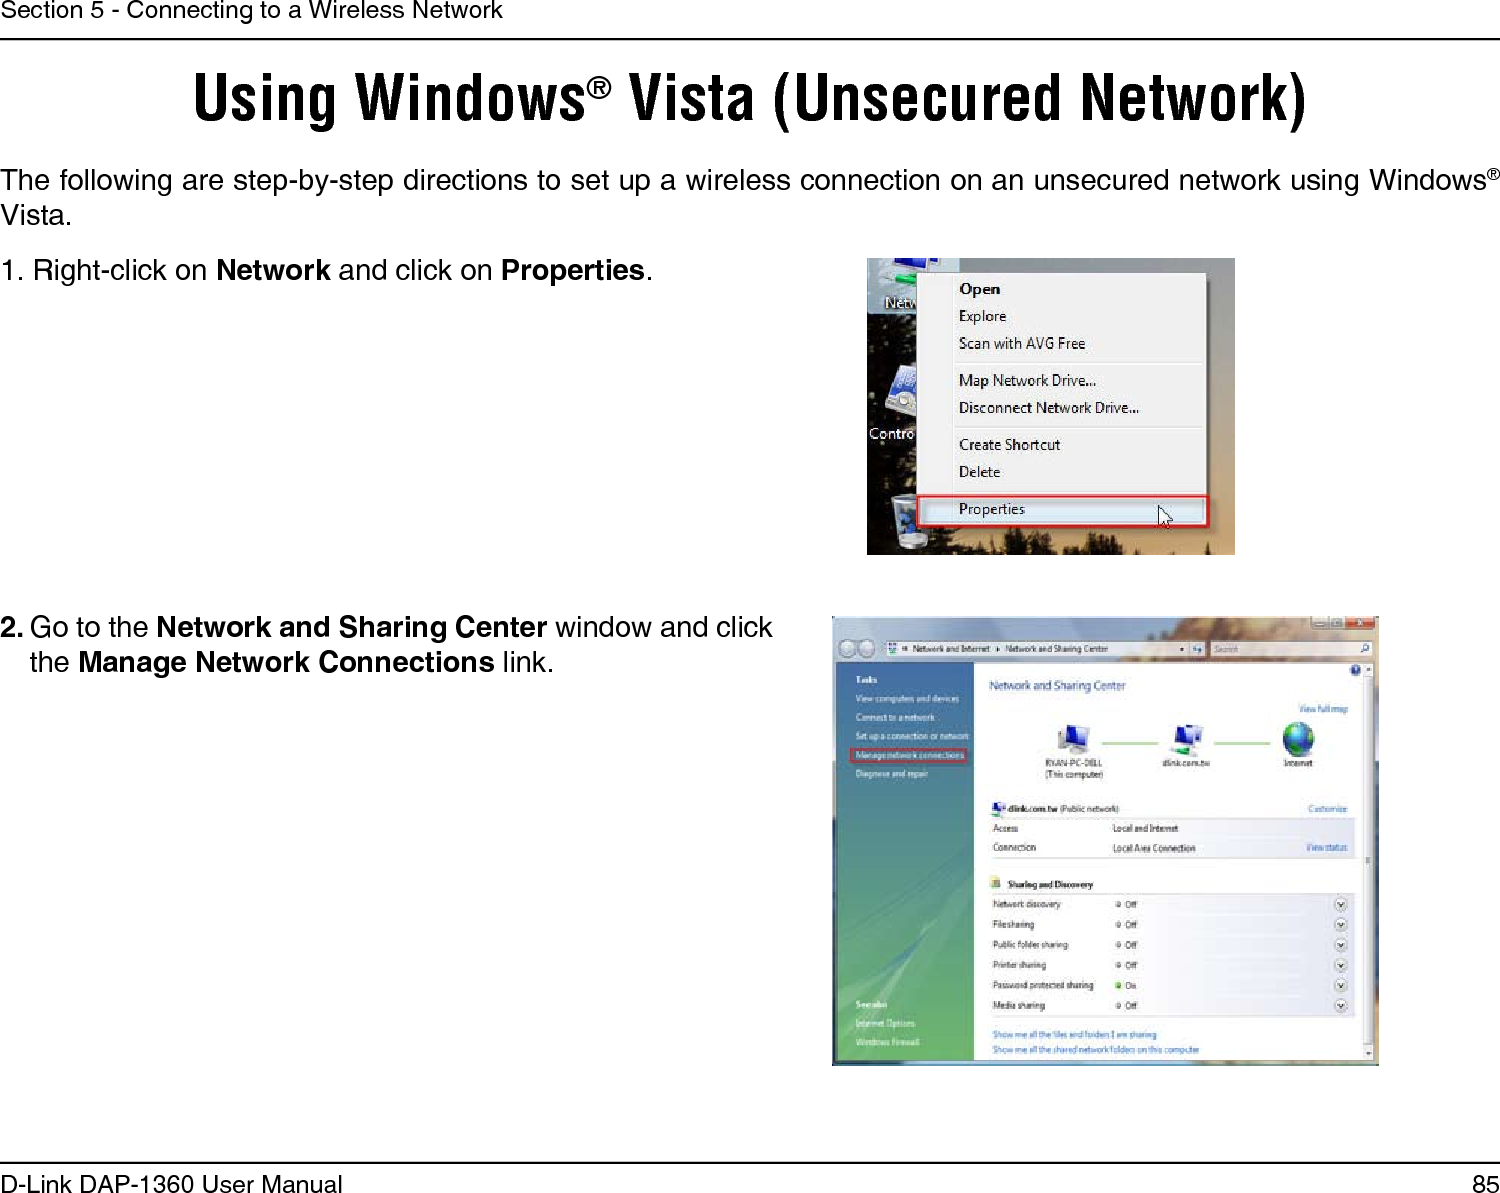
![84D-Link DAP-1360 User ManualSection 5 - Connecting to a Wireless Network7. The following Successfully connected to [SSID name] window is displayed. Choose to save this network and/or start this new connection automatically. When you are nished, click the Close button. 6. Enter the network security key or passphrase for the AP in the textbox provided in the Type the network security key or passphrase for [SSID name] window. When you are nished, click the Connect button.](https://usermanual.wiki/D-Link/AP1360B1/User-Guide-1233947-Page-84.png)
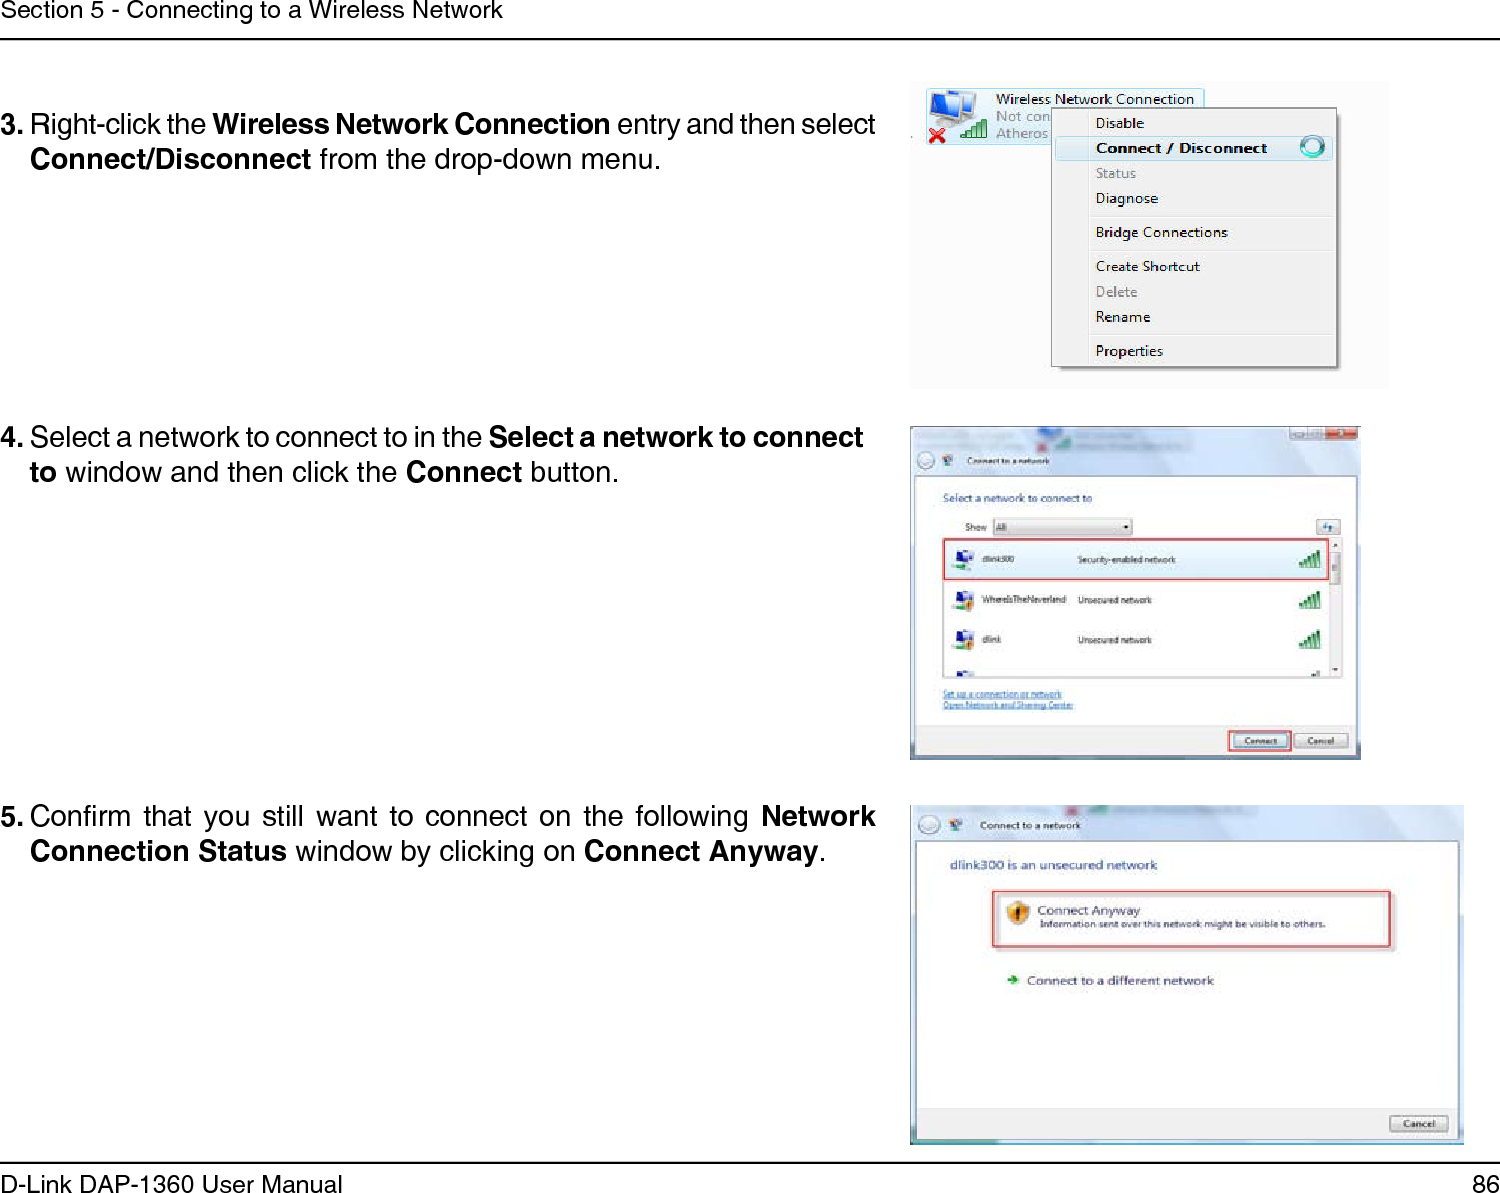
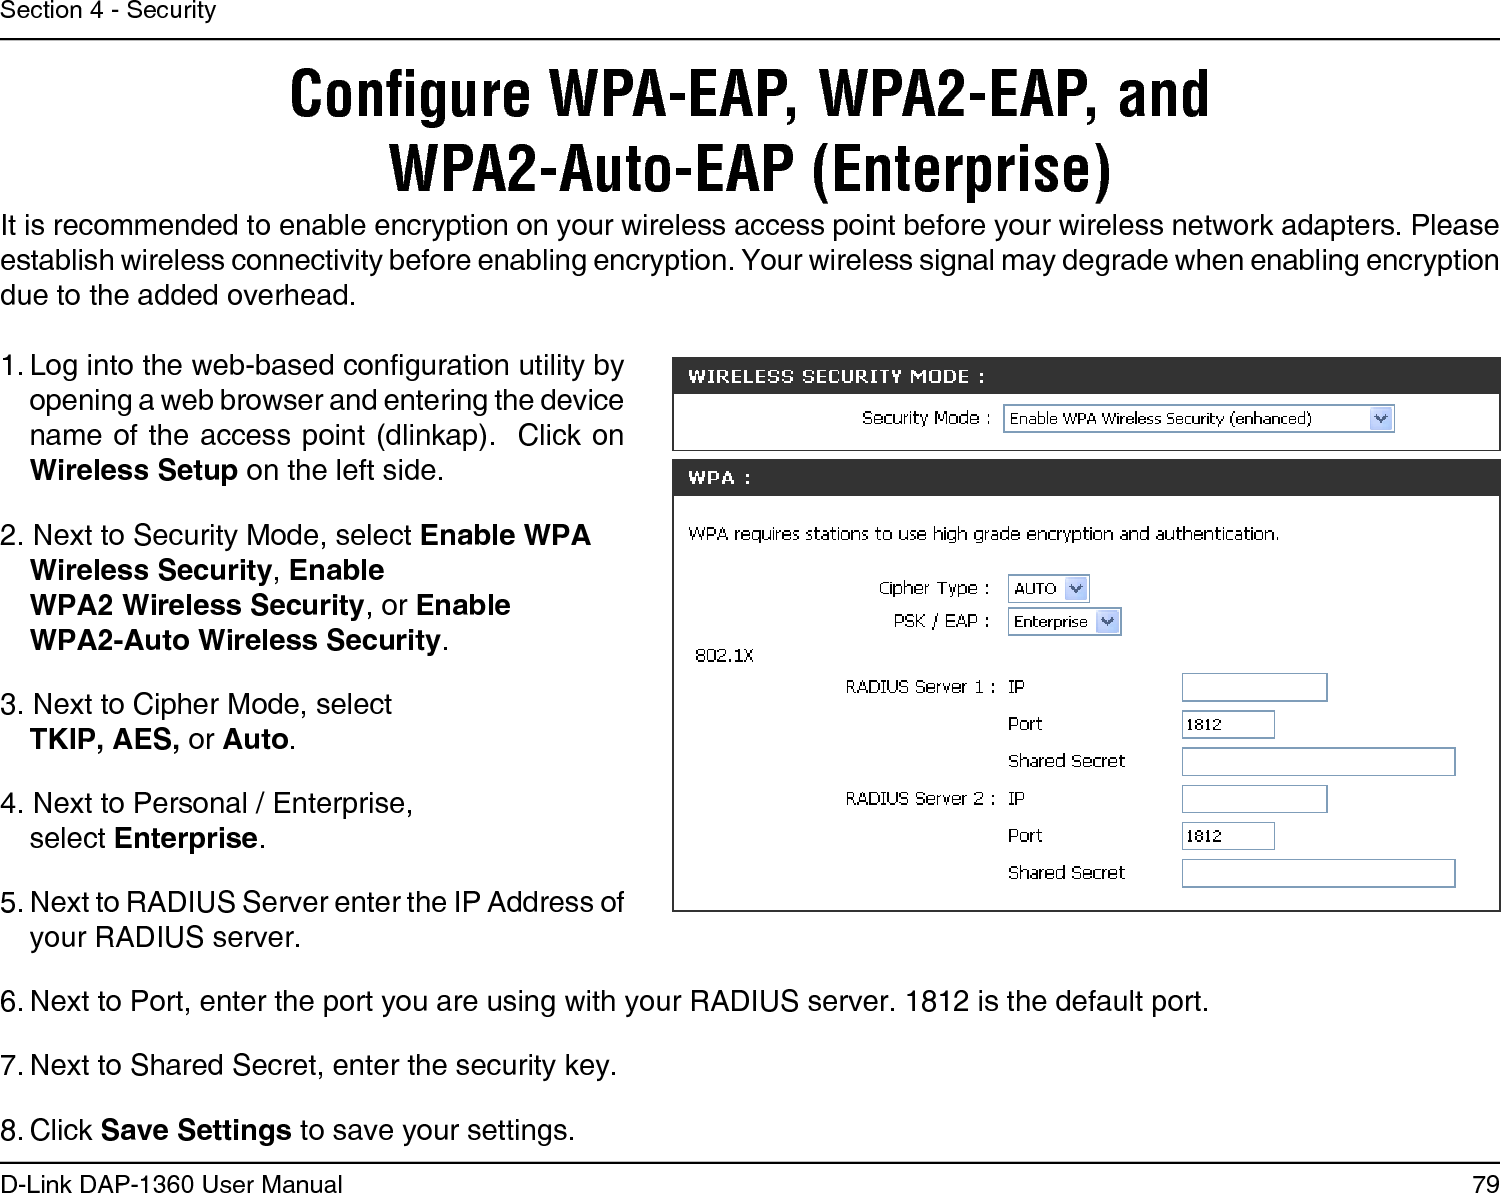
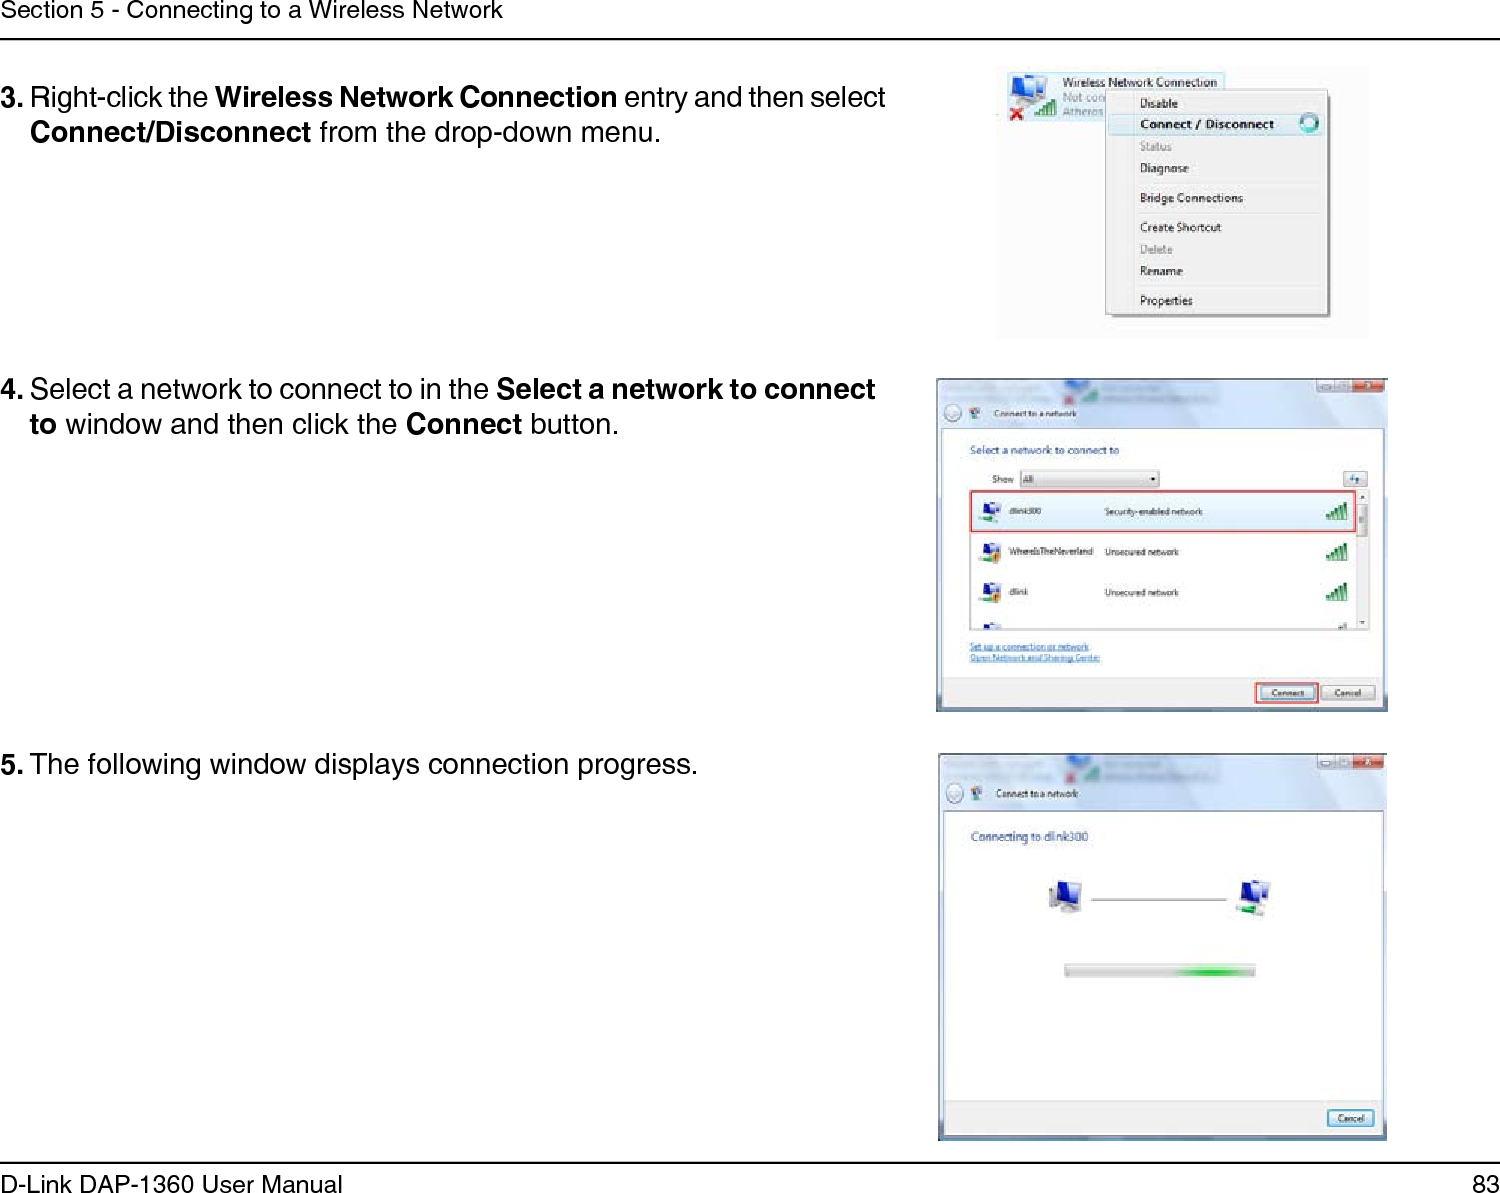
![87D-Link DAP-1360 User ManualSection 5 - Connecting to a Wireless Network6. The following Connect to a network wizard window displays the connection progress. 7. The following Successfully connected to [SSID name] window is displayed. Choose to save this network and/or start this new connection automatically. When you are nished, click the Close button.](https://usermanual.wiki/D-Link/AP1360B1/User-Guide-1233947-Page-87.png)