D Link DI524G2 Wireless Router User Manual 3
D Link Corporation Wireless Router Users Manual 3
D Link >
Contents
Users Manual 3
31
Using the Conguration Menu (continued)
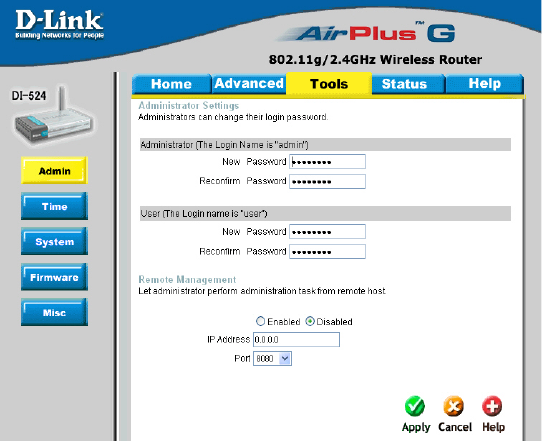
Tools> Admin
At this page, the DI-524 administrator can change the system password. There are two
accounts that can access the Broadband Router’s Web-Management interface. They
are admin and user. Admin has read/write access while user has read-only access.
User can only view the settings but cannot make any changes.
Remote Management- Remote management allows the DI-524 to be congured
from the Internet by a web browser. A username and password is still required to ac-
cess the Web-Management interface. In general, only a member of your network can
browse the built-in web pages to perform Administrator tasks. This feature enables
you to perform Administrator tasks from the remote (Internet) host.
IP Address- The Internet IP address of the computer that has access to the Broad-
band Router. If you input an asterisk (*) into this eld, then any computer will be able
to access the Router. Putting an asterisk (*) into this eld would present a security risk
and is not recommended.
Port- The port number used to access the Broadband Router.
Example- http://x.x.x.x:8080 where x.x.x.x is the WAN IP address of the Broadband
Router and 8080 is the port used for the Web-Mangement interface.
Administrator-
Password-
admin is the Administrator login name
Enter the password and enter again to conrm
User-
Password-
user is the User login name
Enter the password and enter again to conrm
32
Using the Conguration Menu (continued)
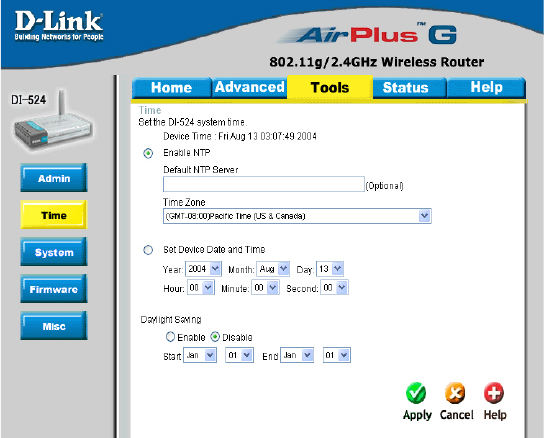
Tools > Time
Time Zone- Set Device Date and Time: To manually input the time. Enter
the values in these elds for the Year, Month, Day, Hour,
Minute, and Second.
Daylight
Saving-
To select Daylight Saving time manually, select enabled or
disabled, and enter a start date and an end date for daylight
saving time.
Set the Time- To manually input the time, enter the values in these elds for the
Year, Month, Day, Hour, Minute, and Second. Click Set Time.
Default
NTP Server-
NTP is short for Network Time Protocol. NTP synchronizes
computer clock times in a network of computers.
This eld is optional.
33
Using the Conguration Menu (continued)
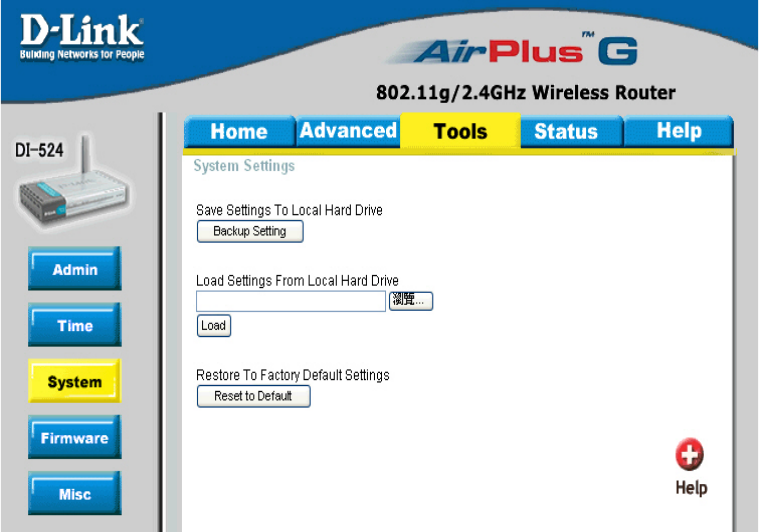
Tools > System
The current system settings can be saved as a le onto the local hard drive. The saved
le or any other saved setting le can be loaded back on the Broadband Router. To
reload a system settings le, click on Browse to browse the local hard drive and locate
the system le to be used. You may also reset the Broadband Router back to factory
settings by clicking on Restore.
Click Save to save the current settings to the local Hard Drive
Click Browse to nd the settings, then click Load
Save Settings to
Local Hard Drive-
Load Settings from
Local Hard Drive-
Restore to Factory
Default Settings- Click Restore to restore the factory default settings
34
Using the Conguration Menu (continued)
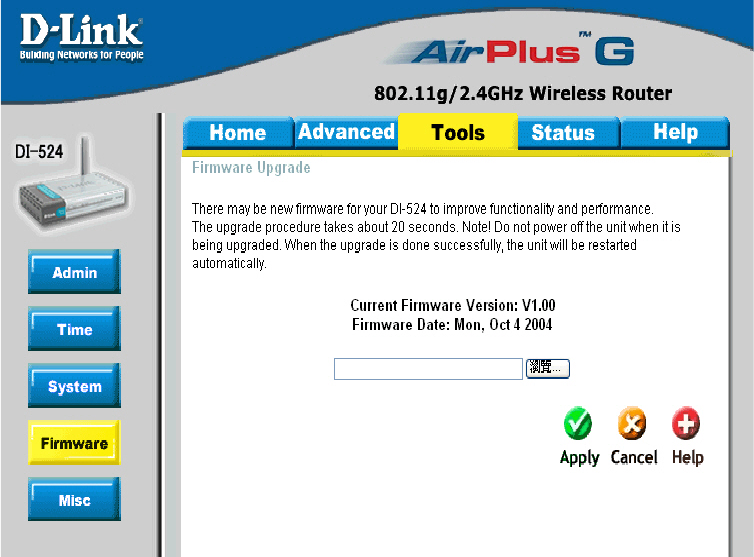
Tools > Firmware
You can upgrade the rmware of the Router here. Make sure the rmware you want
to use is on the local hard drive of the computer. Click on Browse to browse the local
hard drive and locate the rmware to be used for the update. Please check the D-Link
support site for rmware updates at http://support.dlink.com. You can download rmware
upgrades to your hard drive from the D-Link support site.
Firmware Upgrade-
Browse-
Click on the link in this screen to nd out if there is an up-
dated rmware; if so, download the new rmware to your hard
After you have downloaded the new rmware, click Browse in
this window to locate the rmware update on your hard drive.
Click Apply to complete the rmware upgrade.
35
Using the Conguration Menu (continued)
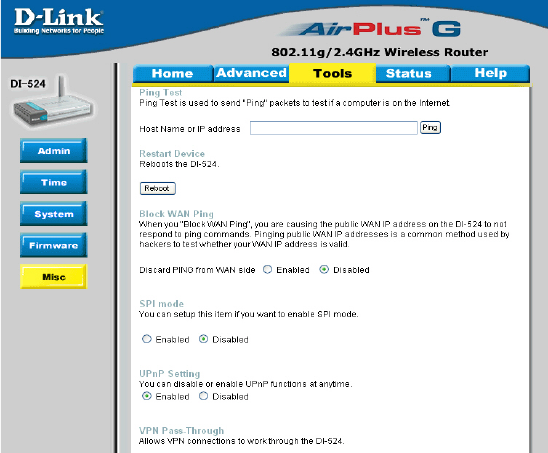
Tools > Misc
Ping Test-
Restart
Device-
Block
WAN
Ping-
Discard Ping from WAN side-
VPN
Pass
Through-
PPTP- select Enabled or Disabled
IPSec- select Enabled or Disabled
The Ping Test is used to send Ping packets to test if a computer is on the
Internet. Enter the IP Address that you wish to Ping, and click Ping
If you choose to block WAN Ping, the WAN IP Address of the DI-524
will not respond to pings. Blocking the Ping may provide some extra
security from hackers.
The DI-524 supports VPN (Virtual Private Network) pass-through for
both PPTP (Point-to-Point Tunneling Protocol) and IPSec (IP Security).
Once VPN pass-through is enabled, there is no need to open up virtual
services. Multiple VPN connections can be made through the DI-524.
This is useful when you have many VPN clients on the LAN network.
Click Reboot to restart the DI-524
Click Enabled to block the WAN ping
UPNP- To use the Universal Plug and Play feature click on Enabled. UPNP pro-
vides compatibility with networking equipment, software and peripherals
of the over 400 vendors that cooperate in the Plug and Play forum.
36
Using the Conguration Menu (continued)
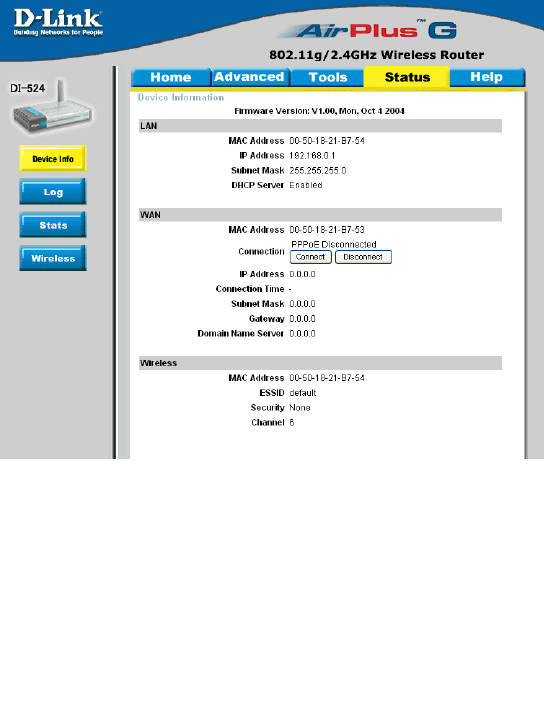
Status > Device Info
This page displays the current information for the DI-524. It will display the LAN, WAN
and MAC address information.
If your WAN connection is set up for a Dynamic IP address then a Release button
and a Renew button will be displayed. Use Release to disconnect from your ISP and
use Renew to connect to your ISP.
If your WAN connection is set up for PPPoE, a Connect button and a Disconnect but-
ton will be displayed. Use Disconnect to drop the PPPoE connection and use Connect
to establish the PPPoE connection.
This window will show the DI-524’s working status:
IP Address: WAN/Public IP Address
Subnet Mask: WAN/Public Subnet Mask
Gateway: WAN/Public Gateway IP Address
Domain Name Server: WAN/Public DNS IP Address
WAN Status: WAN Connection Status
Wireless
IP Address: LAN/Private IP Address of the DI-524
Subnet Mask: LAN/Private Subnet Mask of the DI-524
WAN
LAN
MAC Address: Displays the MAC address
SSID: Displays the current SSID
Channel: Displays the current channel
WEP: indicates whether WEP is enabled or disabled
37
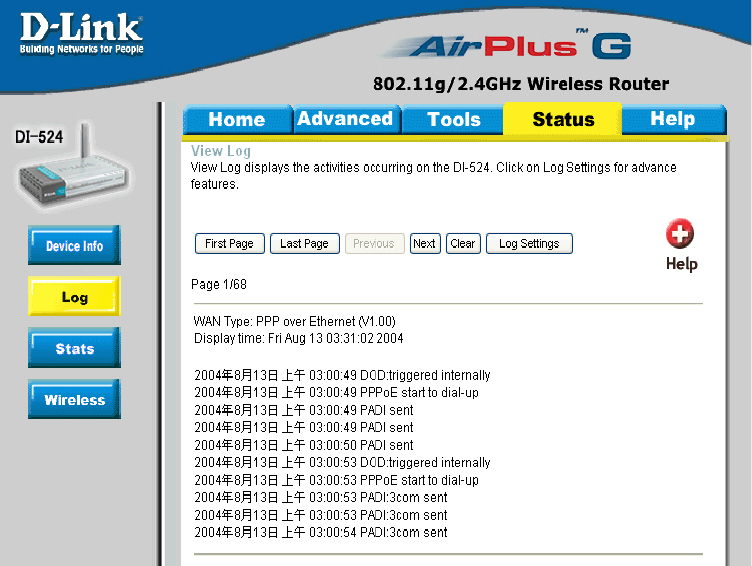
The Broadband Router keeps a running log of events and activities occurring on the
Router. If the device is rebooted, the logs are automatically cleared. You may save the
log les under Log Settings.
Using the Conguration Menu (continued)
Status > Log
View Log- First Page - The rst page of the log
Last Page - The last page of the log
Previous - Moves back one log page
Next - Moves forward one log page
Clear - Clears the logs completely
Log Settings - Brings up the page to congure the log
38
Using the Conguration Menu (continued)
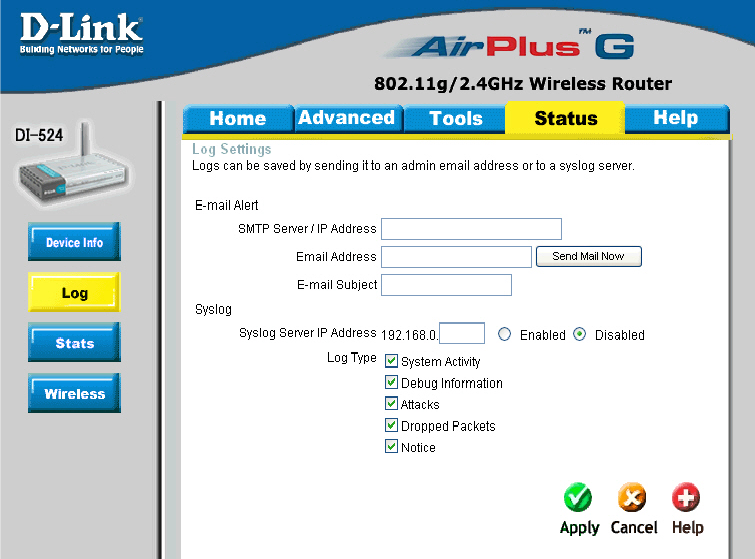
Status > Log > Log Settings
Not only does the Broadband Router display the logs of activities and events, it can
setup to send these logs to another location.
The address of the SMTP server that will be used to send the logs
The email address to which the logs will be sent.
Click on Send Mail Now to send the email.
SMTP Server/
IP Address -
Email Address -
39
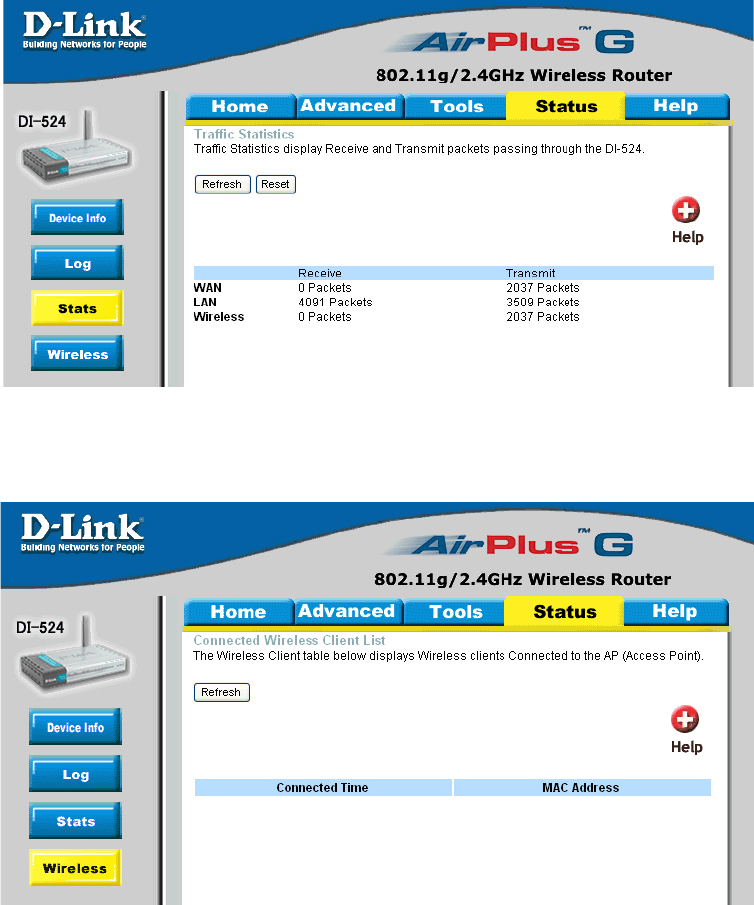
Status > Wireless
Using the Conguration Menu (continued)
Status > Stats
The screen above displays theTrafc Statistics. Here you can view the amount of
packets that pass through the DI-524 on both the WAN and the LAN ports. The trafc
counter will reset if the device is rebooted.
The wireless client table displays a list of current connected wireless clients. This
table also displays the connection time and MAC address of the connected wireless
client.
Click on Help at any time, for more information.
40
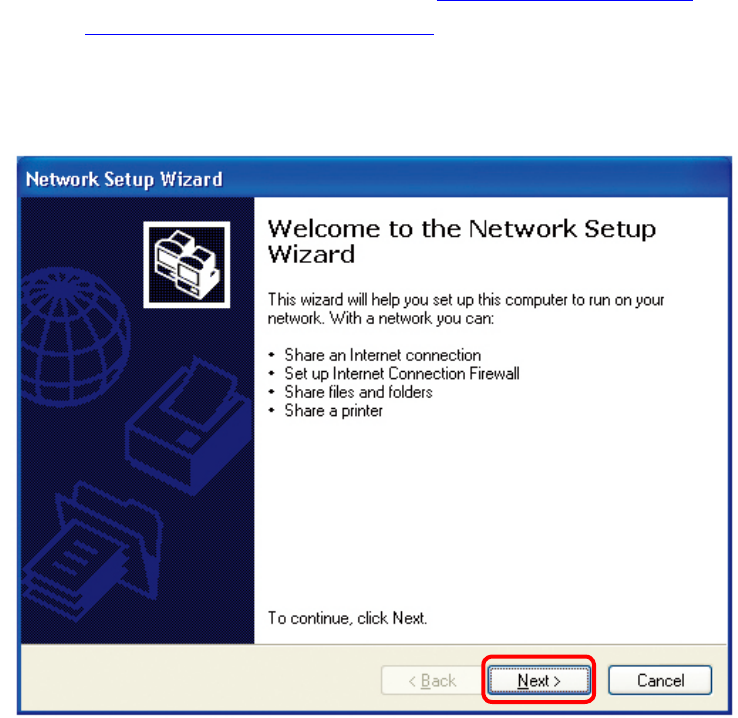
Using the Network Setup Wizard in Windows XP
In this section you will learn how to establish a network at home or work, using
Microsoft Windows XP.
Note: Please refer to websites such as http://www.homenethelp.com
and http://www.microsoft.com/windows2000 for information about networking
computers using Windows 2000, ME or 98.
Go to Start>Control Panel>Network Connections
Select Set up a home or small ofce network
Networking Basics
When this screen appears, Click Next.