D Link DSL-2650B Wireless ADSL Router User Manual Manual 3
D Link Corporation Wireless ADSL Router Manual 3
D Link >
Contents
- 1. Manual 1
- 2. Manual 2
- 3. Manual 3
Manual 3
Section 3 – Configuration
D-Link DSL-2650U User Manual 65
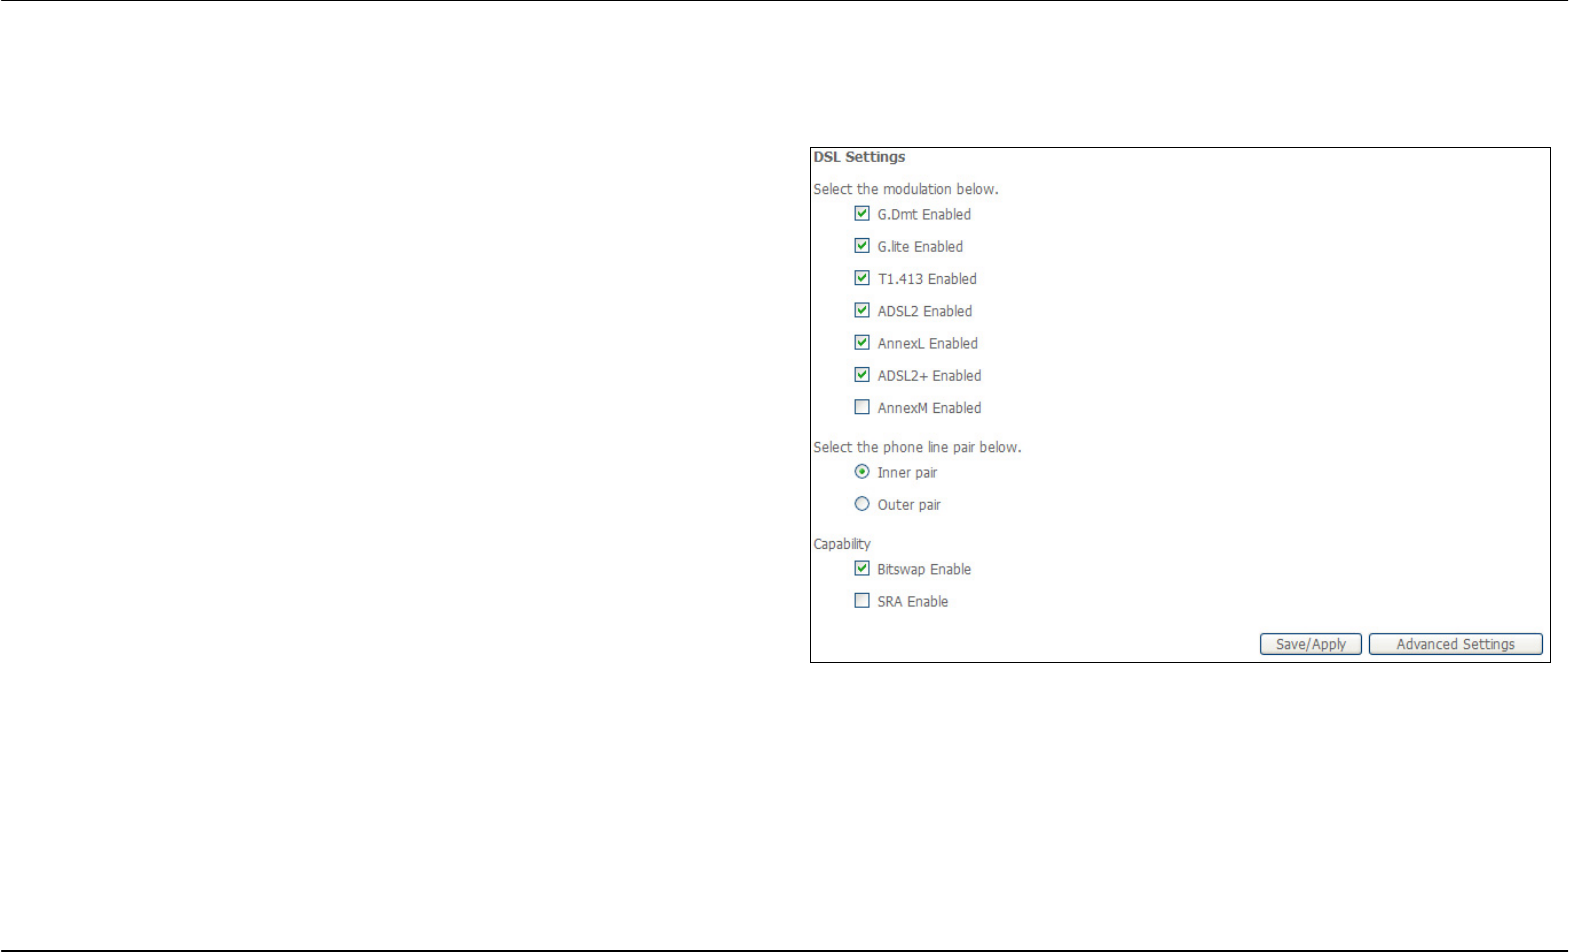
DSL
To access the DSL Settings window, click the DSL Setup button in the Advanced Setup directory.
This window allows you to select the desired modulation, phone line pair,
and capability. Click the Save/Apply button when you are finished.
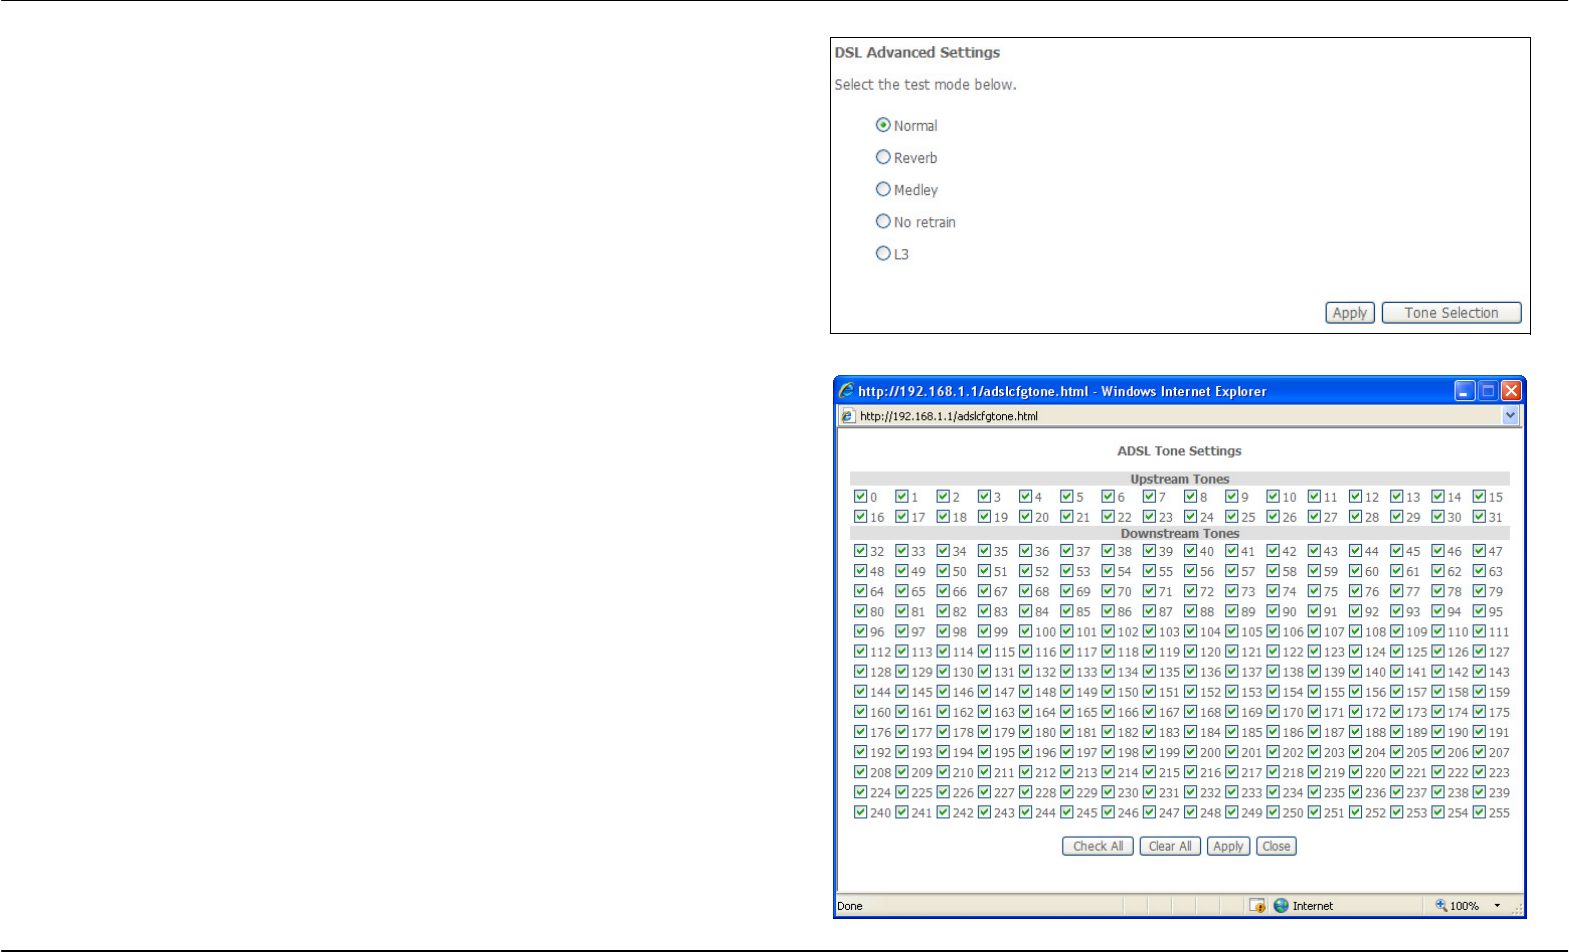
Click the Advanced Settings button to select a DSL test mode.
Section 3 – Configuration
D-Link DSL-2650U User Manual 66
Select the desired DSL test mode and then click the Apply button.
Click the Tone Selection button to modify the upstream and downstream
tones.
Select the appropriate upstream and downstream tones for your ADSL
connection. Click the Apply button to let your settings take effect.
Section 3 – Configuration
D-Link DSL-2650U User Manual 67
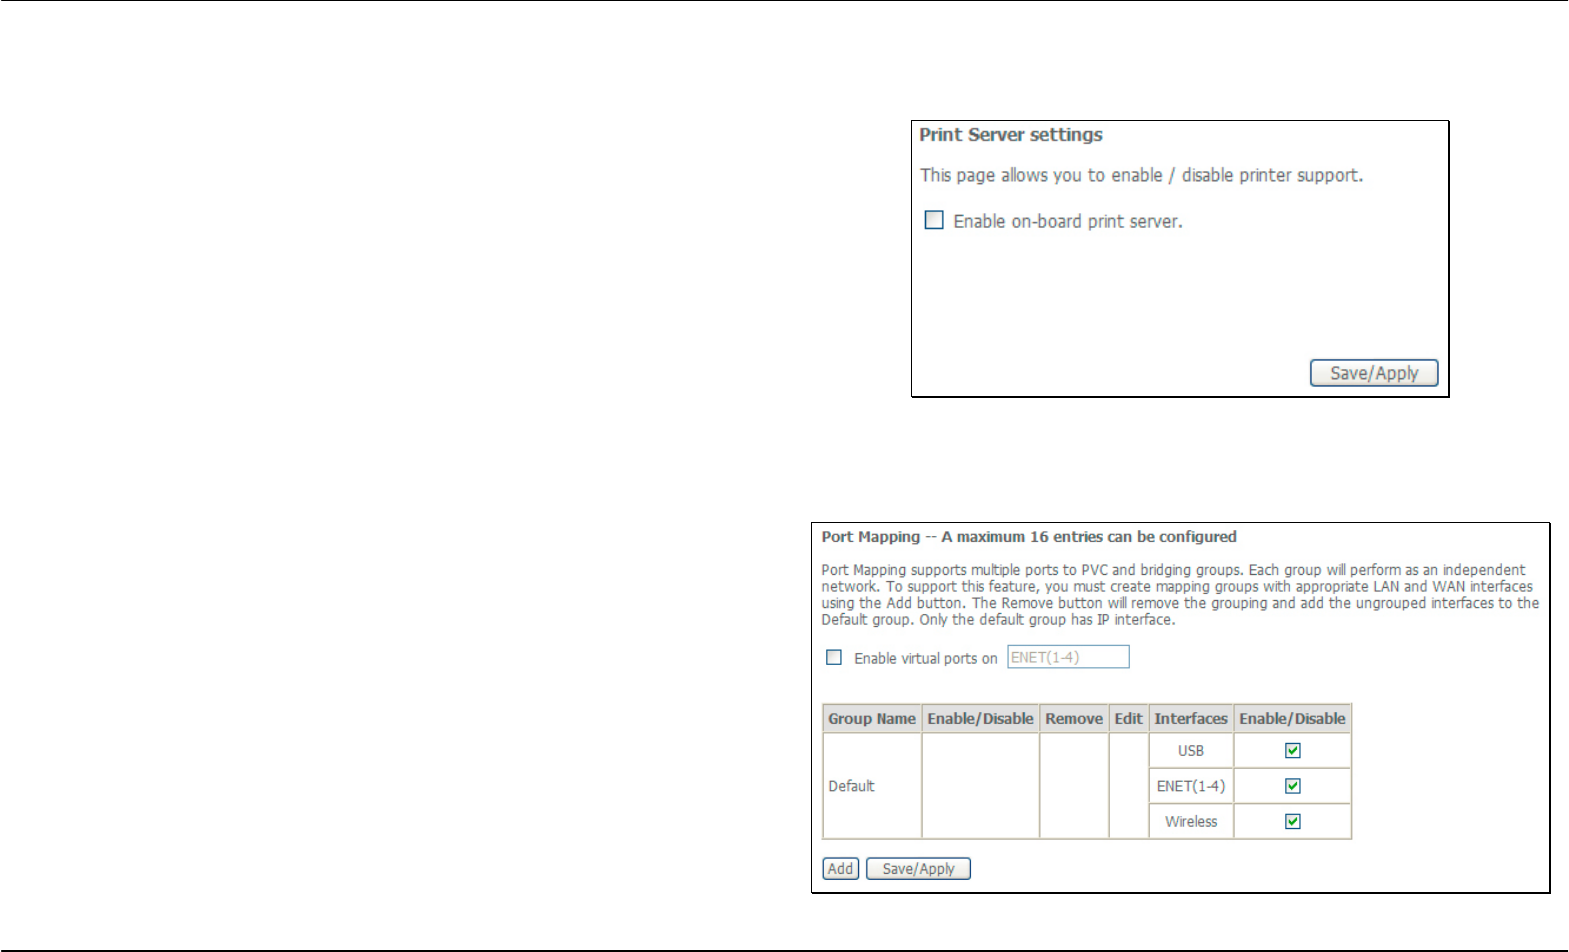
Print Server
To access the Print Server window, click the Print Server button in the Advanced Setup directory.
Tick the Enable on-board print server check box to support the print
server.
Click the Save/Apply button to save the changes.
Port Mapping
To access the Port Mapping window, click the Port Mapping button in the Advanced Setup directory.
Use this window to enable port mapping. Tick Enable virtual ports on
and enter
If you are setting up the mapping groups, click the Add button.
Section 3 – Configuration
D-Link DSL-2650U User Manual 68
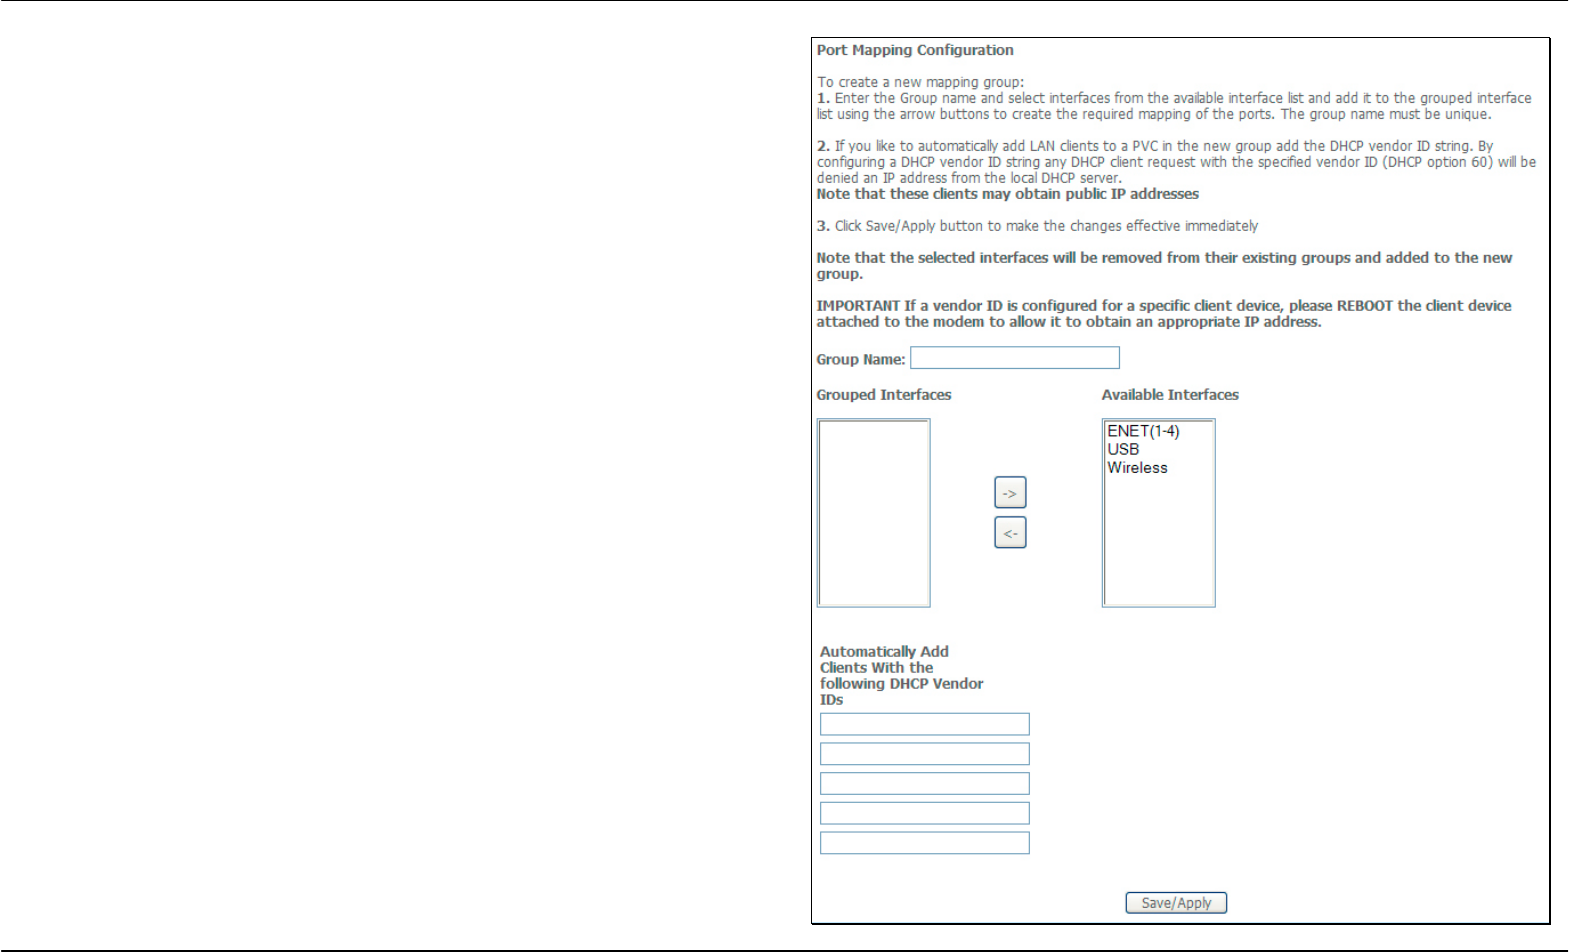
To create a new mapping group, enter Group Name, add interfaces to
Grouped Interfaces.
Click Save/Apply to save the changes.
Section 3 – Configuration
D-Link DSL-2650U User Manual 69
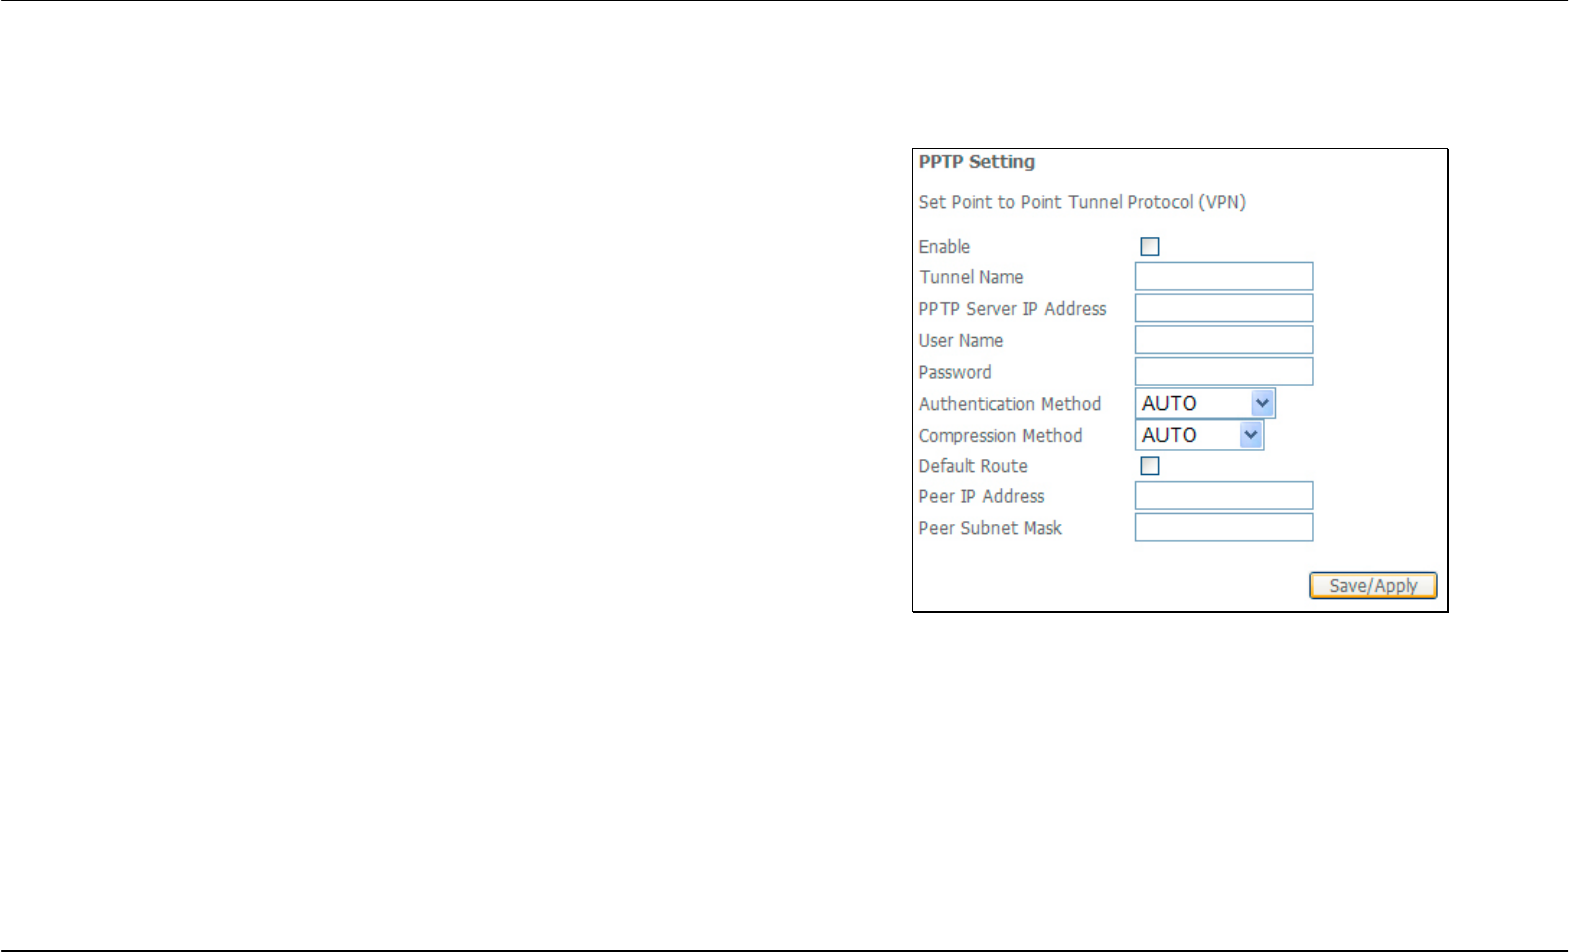
PPTP
To access the PPTP Setting window, click the PPTP button in the Advanced Setup directory.
To set up Point-to-Point Tunnel Protocol, tick the Enable check box, enter
the appropriate information in the fields offered, and then click the
Save/Apply button when you are finished.
Section 3 – Configuration
D-Link DSL-2650U User Manual 70
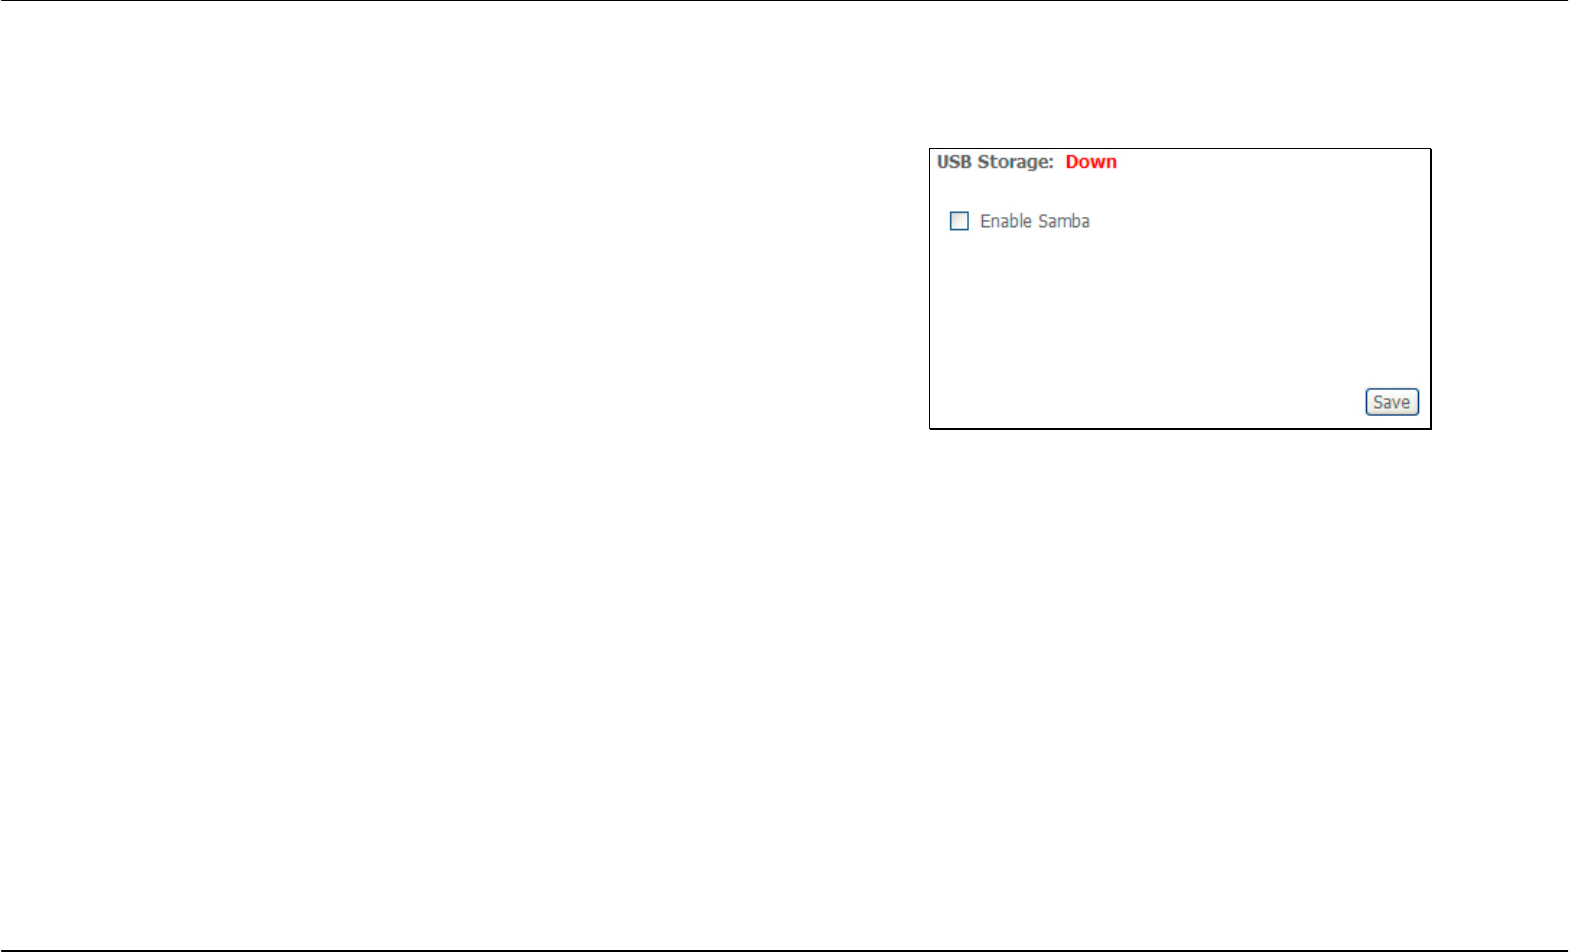
Samba Config
To access the Samba Config window, click the Samba Config button in the Advanced Setup directory.
To activate the Samba function, tick the Enable Samba check box, and
enter the NetBios Name and Directory Name.
Click the Save button to enable the function.
Section 3 – Configuration
D-Link DSL-2650U User Manual 71
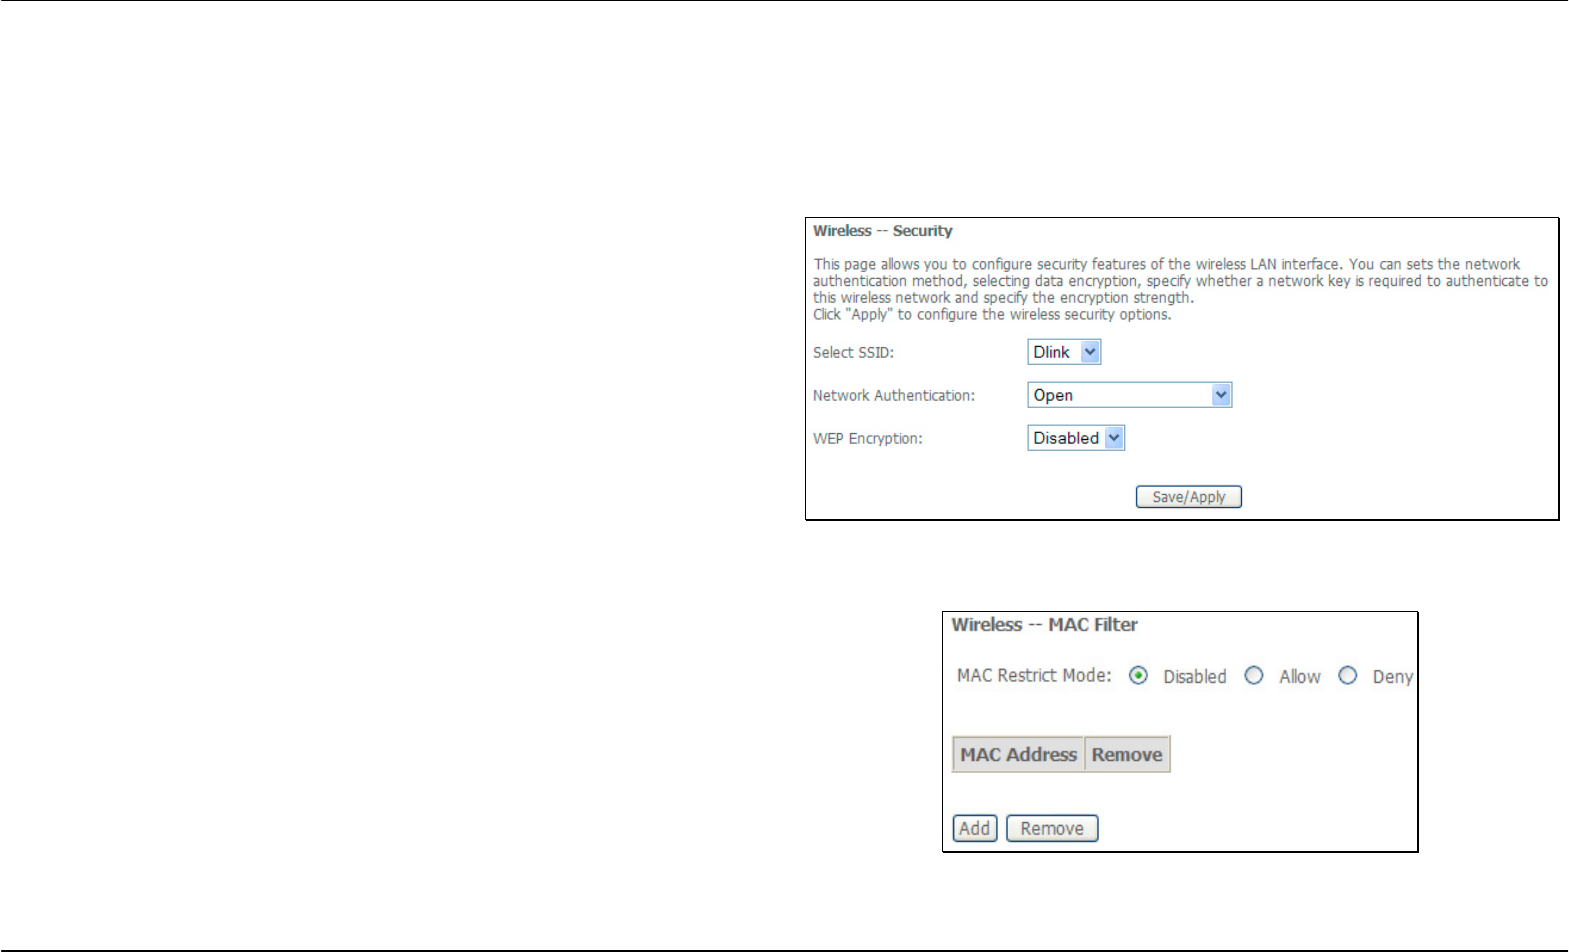
Wireless
To access the Wireless window, click the Wireless button in the Advanced Setup directory.
Security
In order to protect the privacy, you can setup the wireless security.
Available Network Authentication methods are Open, Shared, 802.1X,
WPA, WPA-PSK, WPA2, WPA2-PSK, Mixed WPA2/WPA and Mixed
WPA2/WPA-PSK.
Click Save/Apply to save the settings.
MAC Filter
This page can help you to allow or deny certain MAC addresses to pass
through or block out.
Click Add to see the following page.

Section 3 – Configuration
D-Link DSL-2650U User Manual 72
Enter MAC Address and click Save/Apply to add the MAC address to
MAC filter.
Wireless Bridge
This page allows you to configure bridge features of the wireless LAN.
Click Refresh to update the remote bridges.
Click Save/Apply to save the settings.
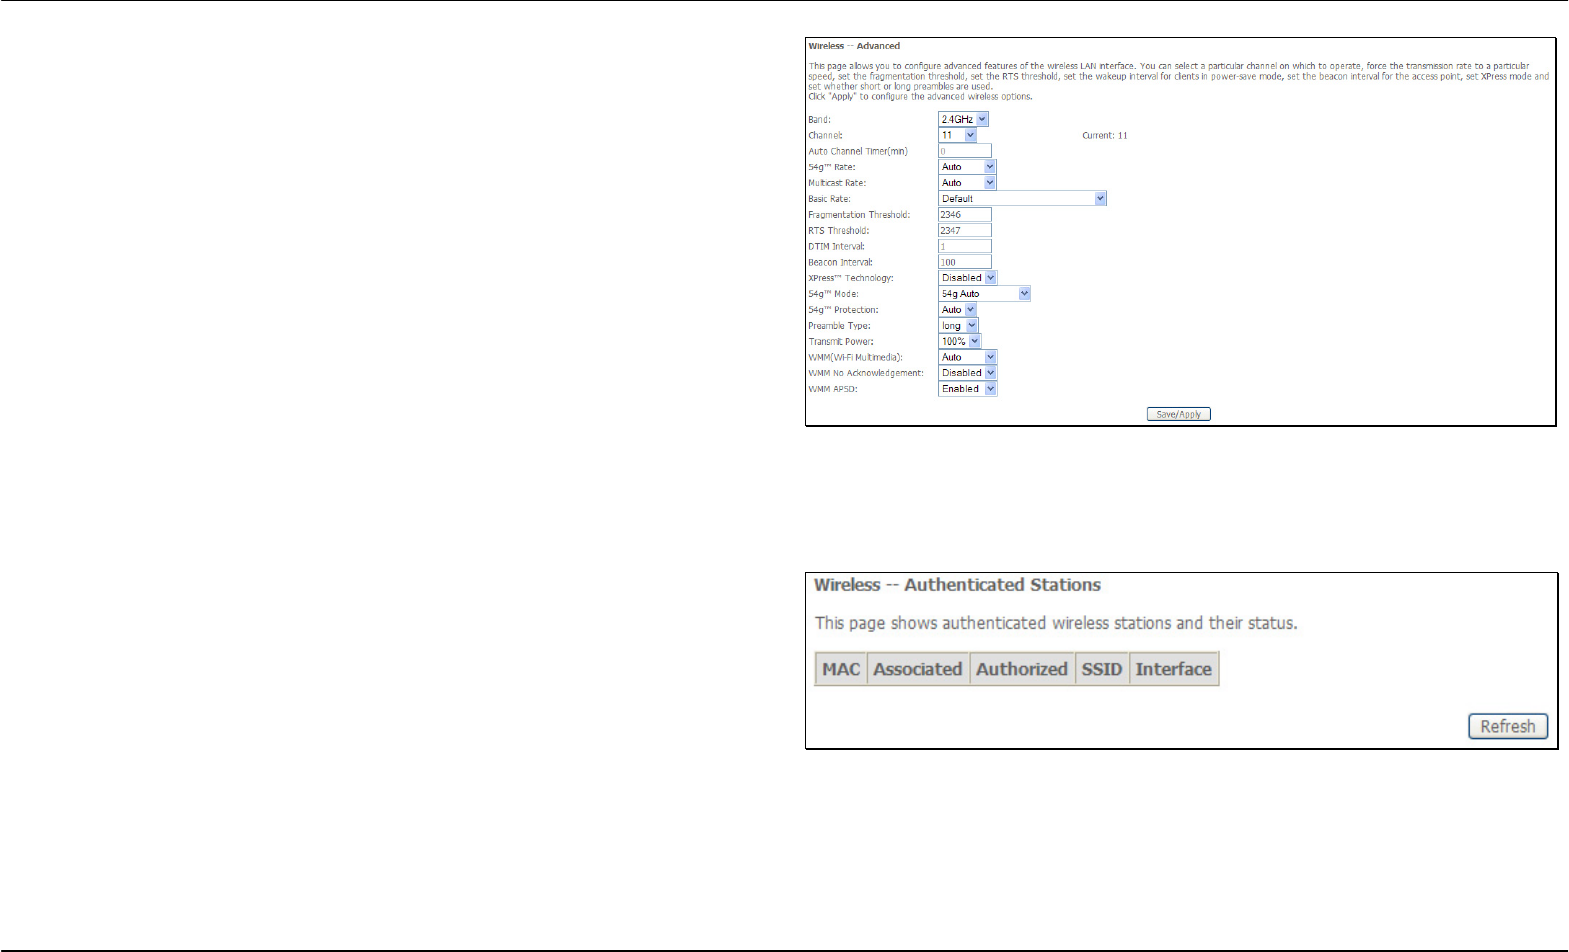
Advanced
Section 3 – Configuration
D-Link DSL-2650U User Manual 73
This page allows you to configure advanced wireless LAN interface.
Configuring these settings may increase the performance of your Router
but if you are not familiar with networking devices and protocols, this
section should be left at its default settings.
Click Save/Apply to save the settings.
Station Info
This page shows the authenticated wireless stations and their status.
Click Refresh to update the information.
Diagnostics
To access the Diagnostics window, click the Diagnostics button in the Diagnostics directory.
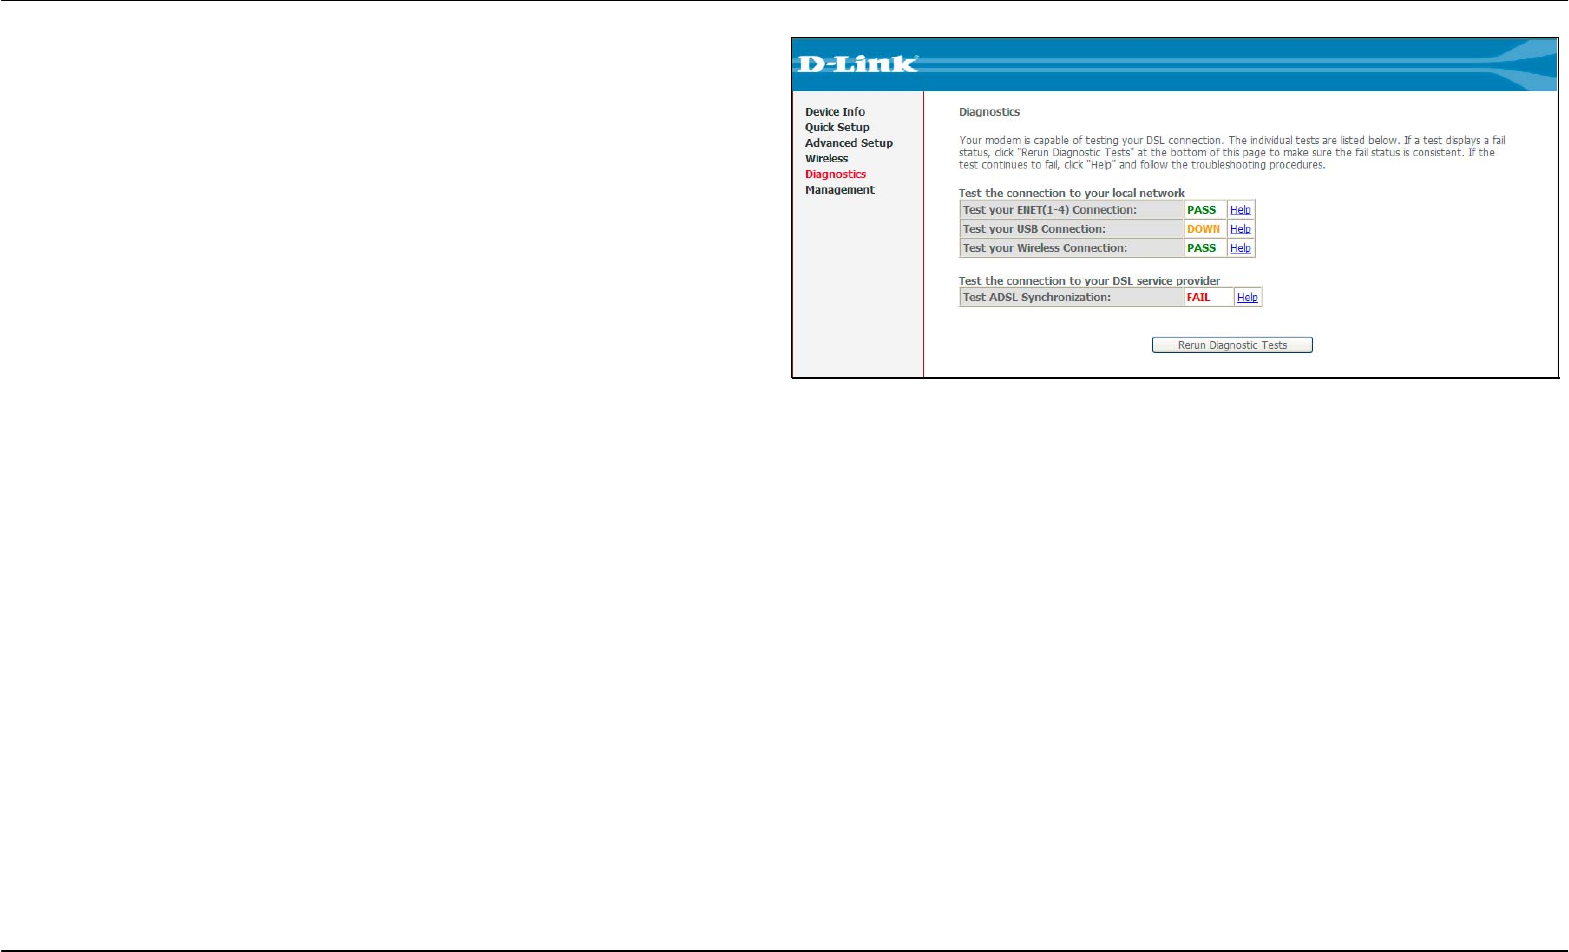
Section 3 – Configuration
D-Link DSL-2650U User Manual 74
This window is used to test connectivity of the Router.
Management
The Management directory features an array of options designed to help you get the most out of your Router.
Settings
To access the Settings - Backup window, click the Settings button in the Management directory.
Settings – Backup
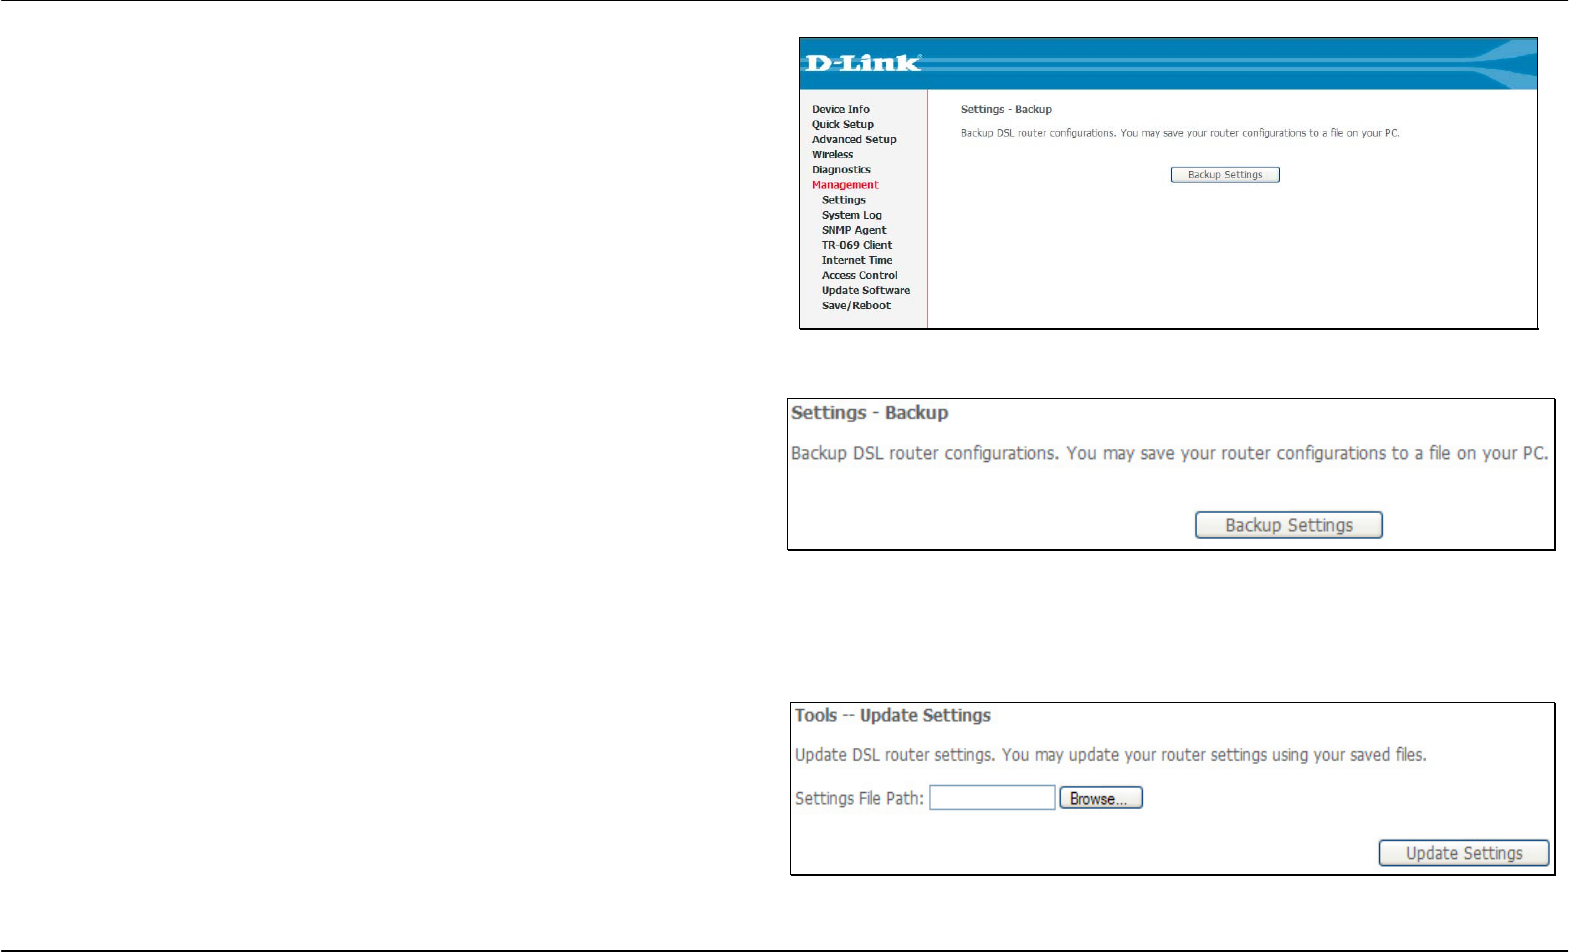
Section 3 – Configuration
D-Link DSL-2650U User Manual 75
This window allows you to backup your DSL Router configurations.
Click the Backup Settings button to save your Router configurations to
a file on your computer.
Settings – Backup
Click Backup Settings to save a backup file on the PC.
Settings – Update
Click Browse to select a file and click the Update Settings button to
update the Router settings.
Settings – Restore Default
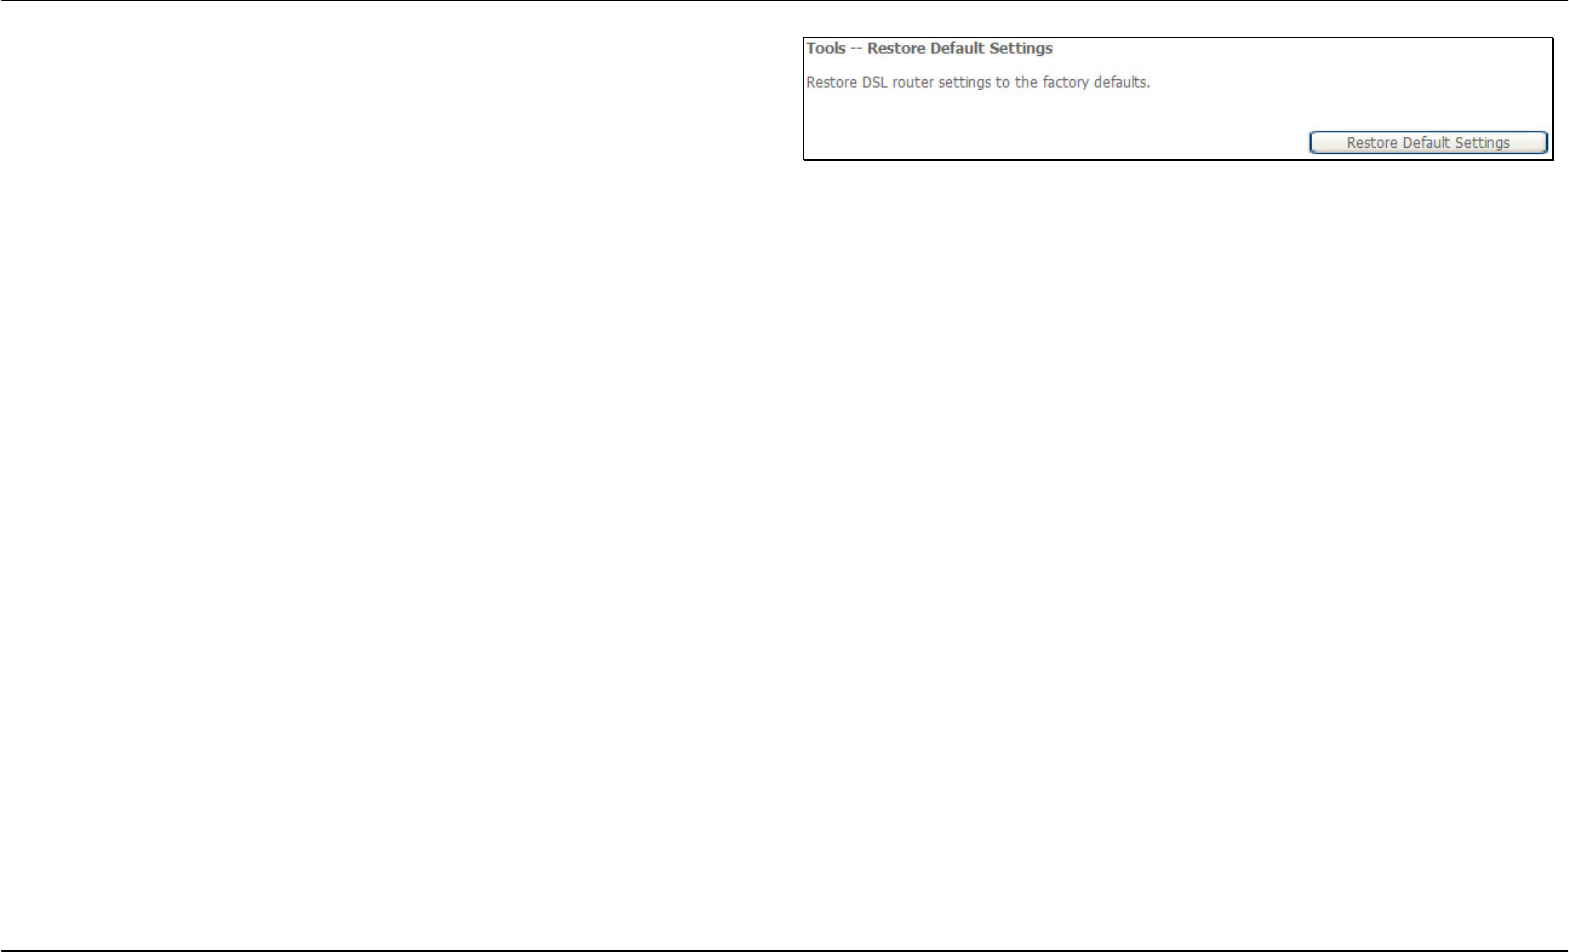
Section 3 – Configuration
D-Link DSL-2650U User Manual 76
Click the Restore Default Settings button to reset your Router back to
the factory default settings including IP settings (192.168.1.1) and
Administrator password (admin).
Section 3 – Configuration
D-Link DSL-2650U User Manual 77
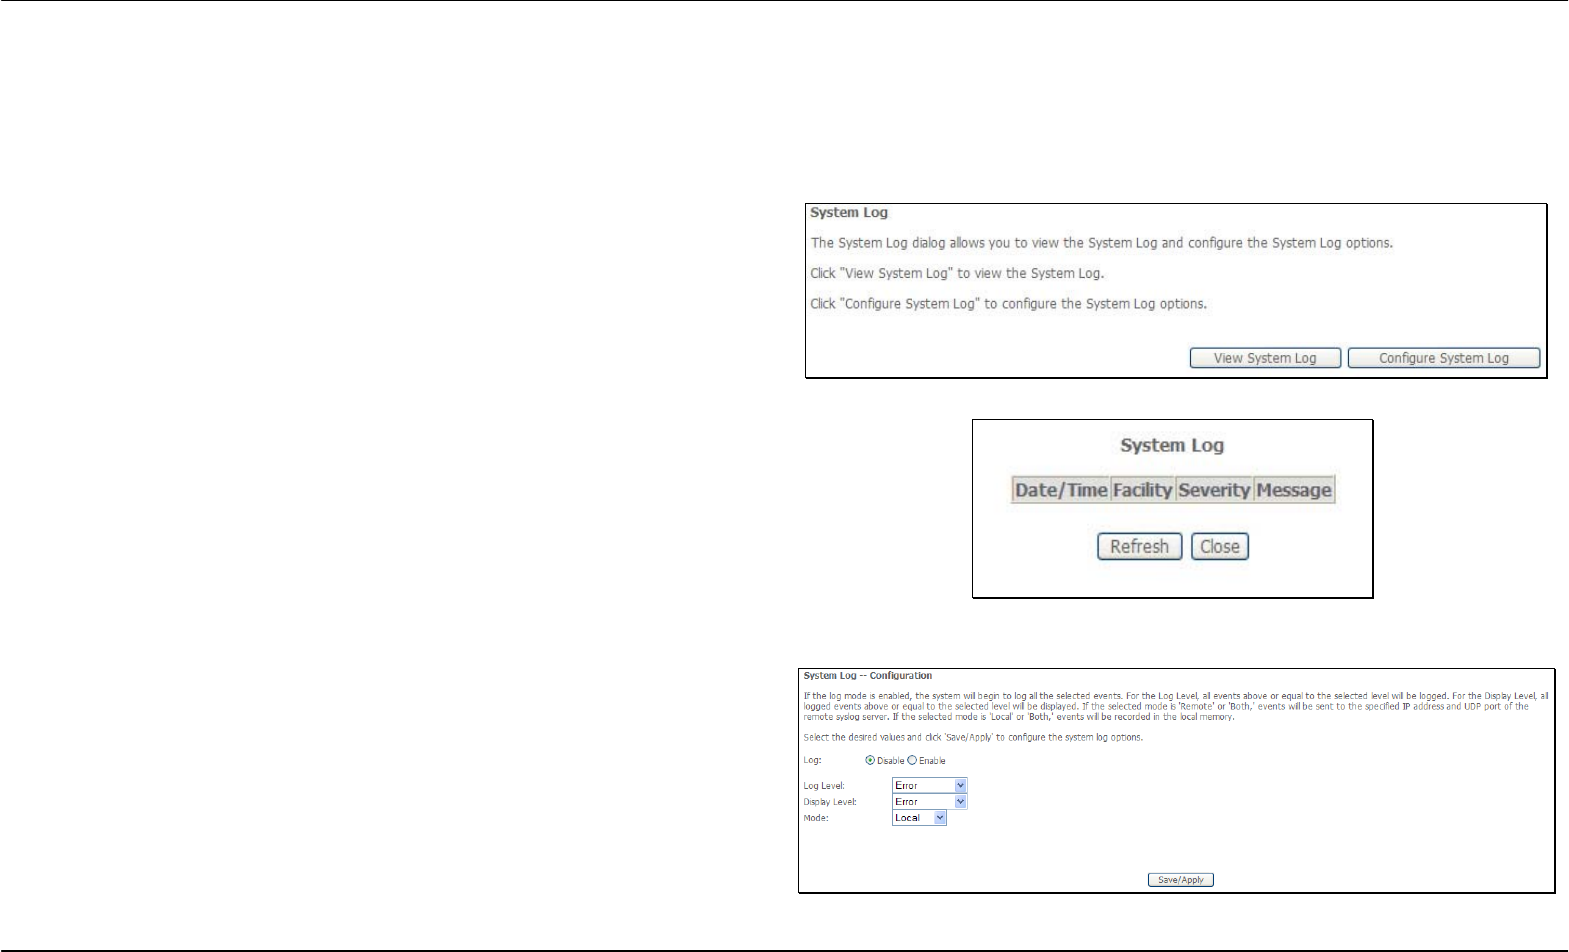
System Log
These windows allow you to view the System Log and configure the System Log options. To access the System Log window, click the System Log
button in the Management directory.
Click the View System Log button to view the System Log.
Click the Configure System Log button to configure the System Log
options.
Click on the Refresh button to refresh the system log settings.
System Log – Configuration
The system log displays chronological event log data. The event log can
be read from local host or sent to a System Log server. The available
event severity levels are: Emergency, Alert, Critical, Error, Warning,
Notice, Informational, and Debugging.
This window allows you to log selected events. When you are finished,
click the Save/Apply button.
Section 3 – Configuration
D-Link DSL-2650U User Manual 78
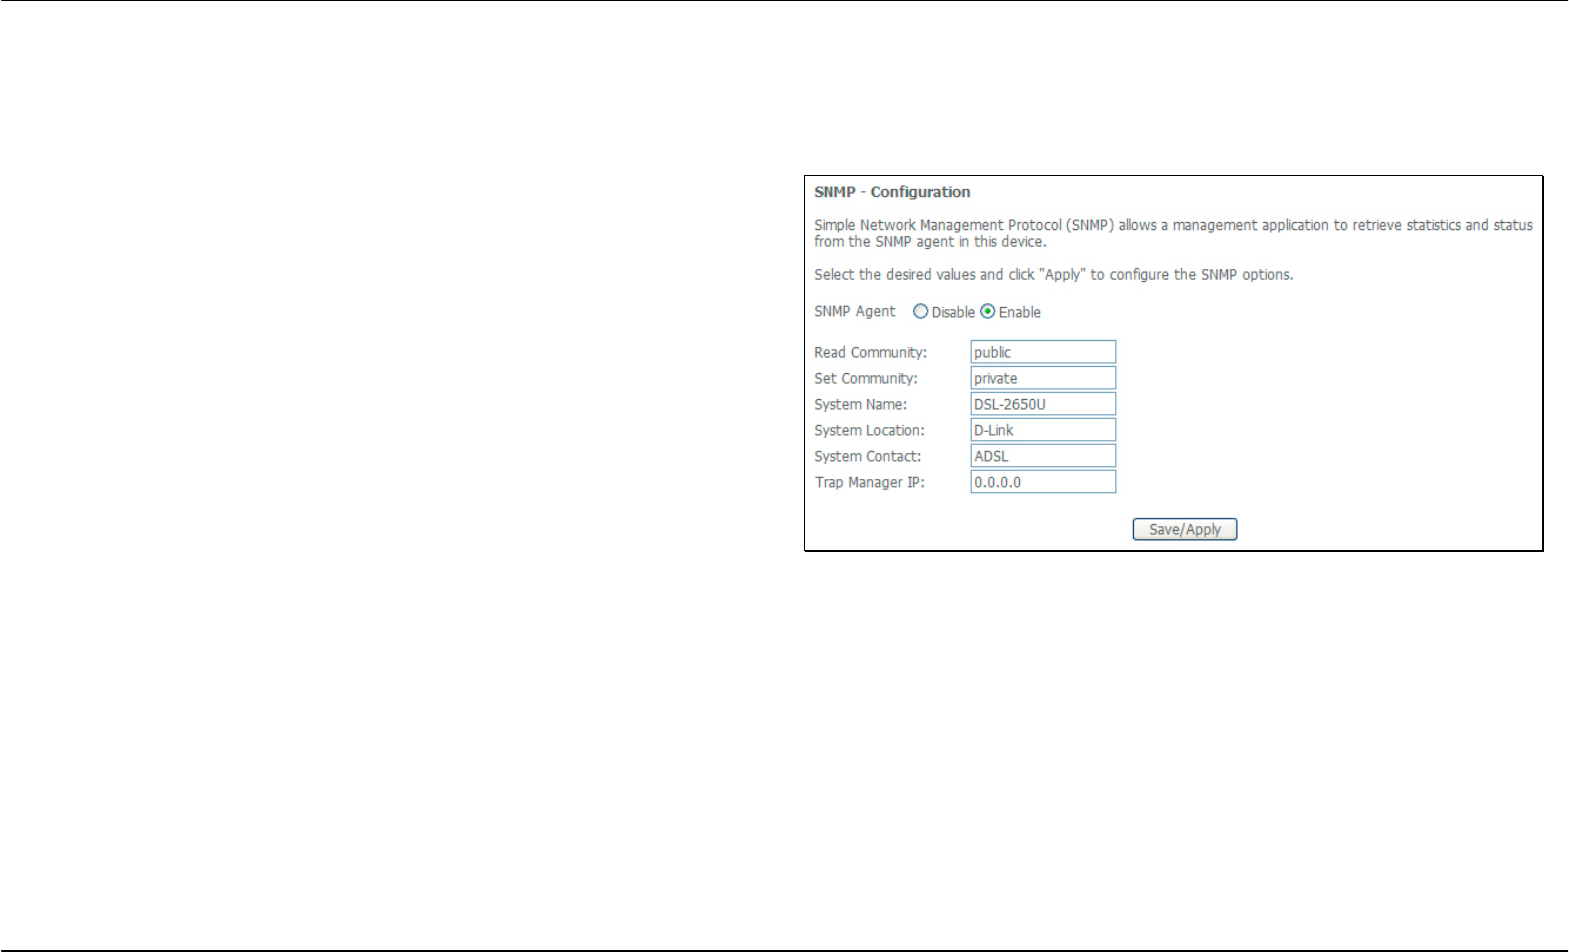
SNMP Agent
To access the SNMP – Configuration window, click the SNMP Agent button in the Management directory.
Simple Network Management Protocol allows a management application
to retrieve statistics and status from the SNMP agent in the Router. When
you are finished, click the Save/Apply button.
Section 3 – Configuration
D-Link DSL-2650U User Manual 79
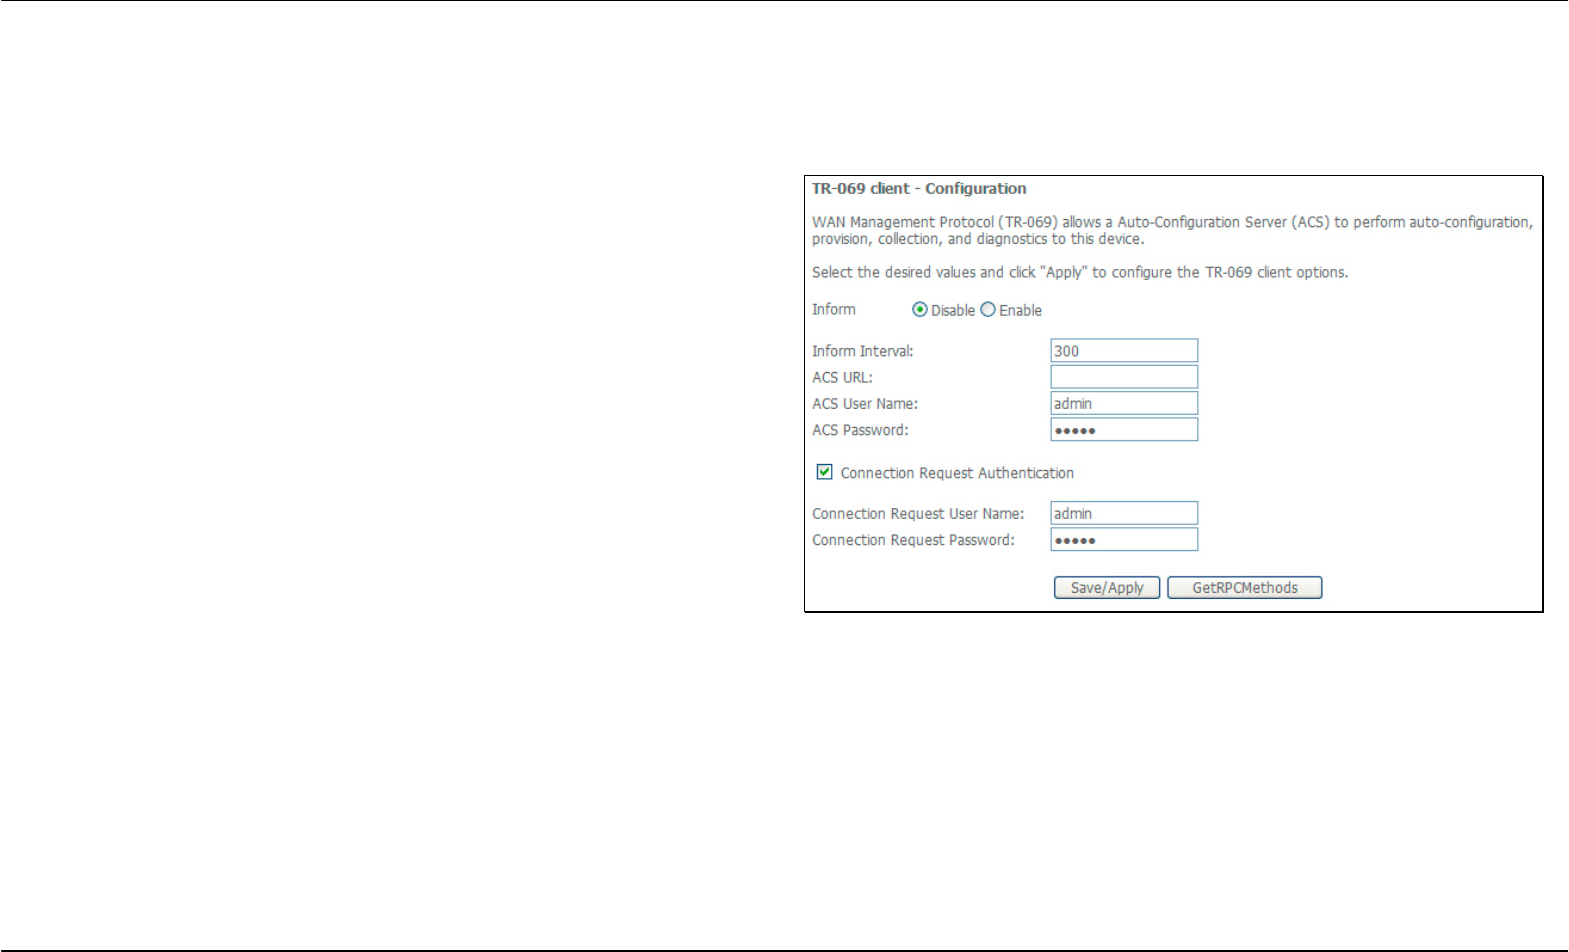
TR-069 Client
To access the TR-069 Client window, click the TR-069 Client button in the Management directory.
TR069 management allows the remote configuration to the Router.
Click the Enable radio button in Inform and configure the TR069
management access information.
Click the Apply button when you are satisfied that all the settings are
configured correctly.
Section 3 – Configuration
D-Link DSL-2650U User Manual 80
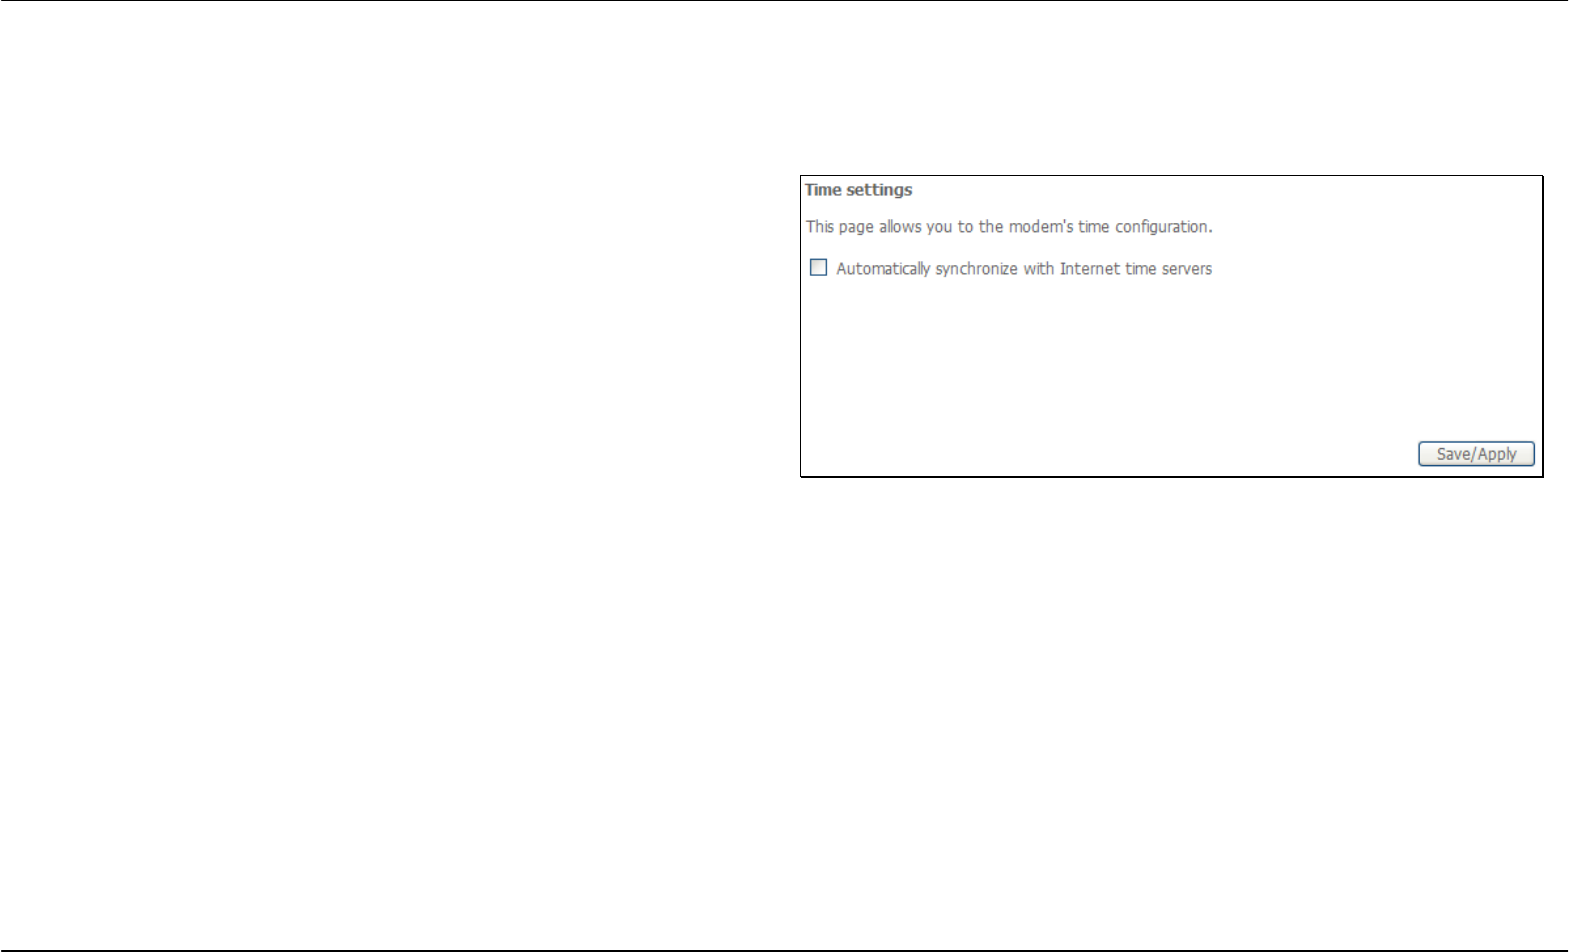
Internet Time
To access the Time settings window, click the Internet Time button in the Management directory.
This window allows you to set the Router’s time configuration. When you
are finished, click the Save/Apply button.
Section 3 – Configuration
D-Link DSL-2650U User Manual 81
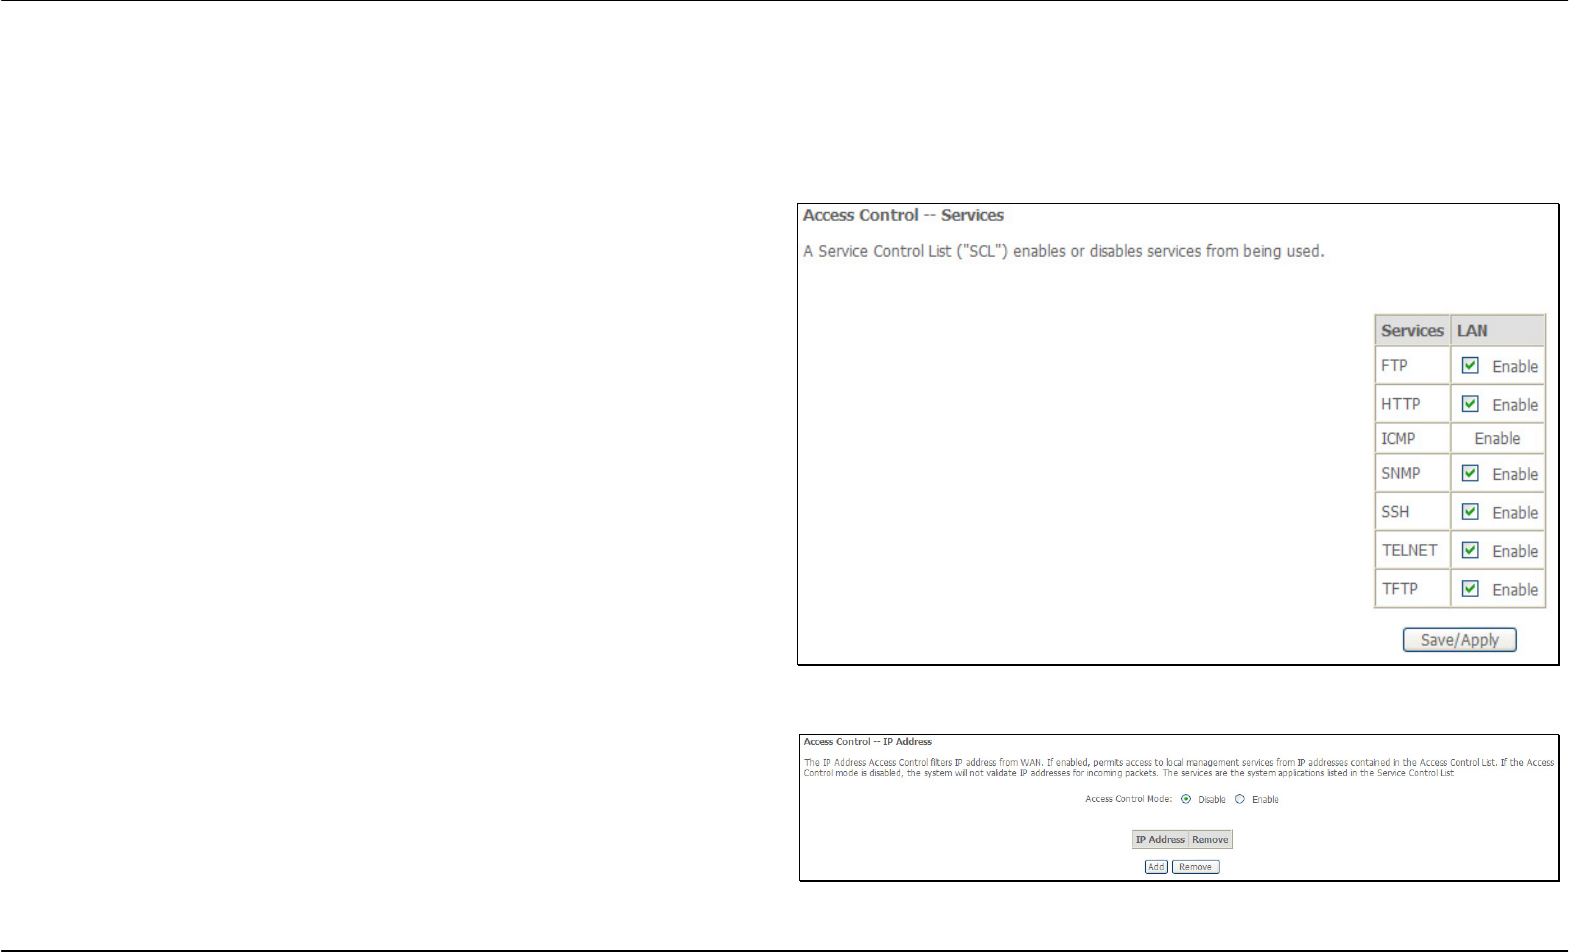
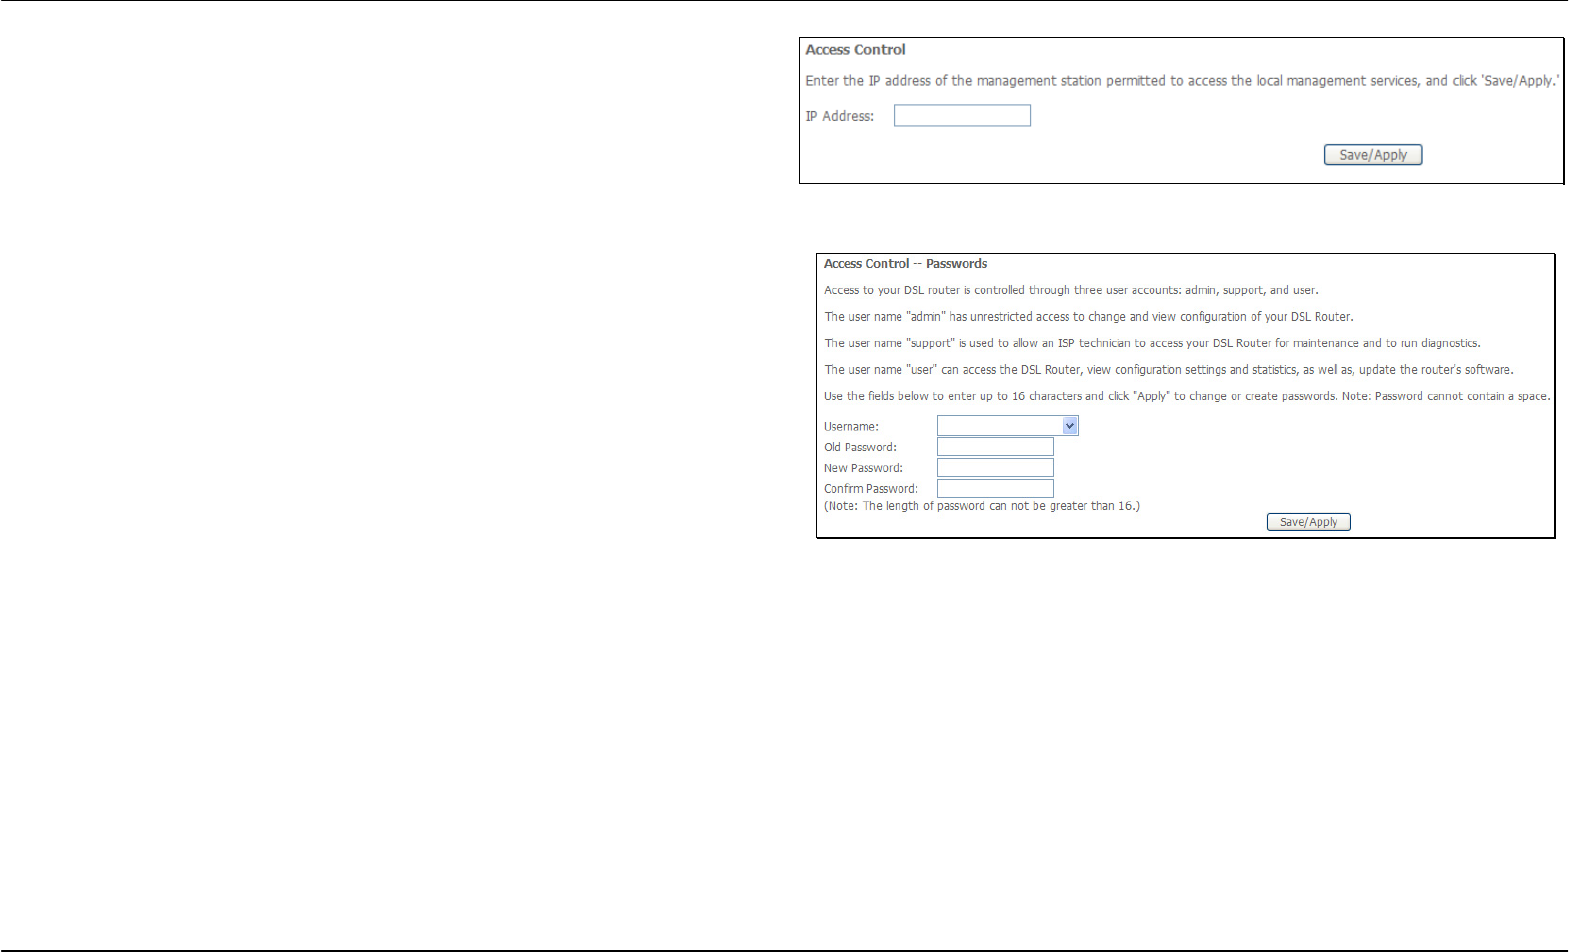
Access Control
To access the Access Control windows, click the Access Control button in the Management directory.
Access Control – Services
Enable or disable the desired LAN services. When you are finished, click
the Save/Apply button.
Access Control – IP Address
This window allows you to enable or disable Access Control Mode. To
add an IP address management station, click the Add button.
Section 3 – Configuration
D-Link DSL-2650U User Manual 82
Enter the IP address of the management station permitted to access the
local management services. When you are finished, click the Save/Apply
button.
Access Control – Passwords
This window allows you to change the password on the Router. When
you are finished, click the Save/Apply button.
Section 3 – Configuration
D-Link DSL-2650U User Manual 83
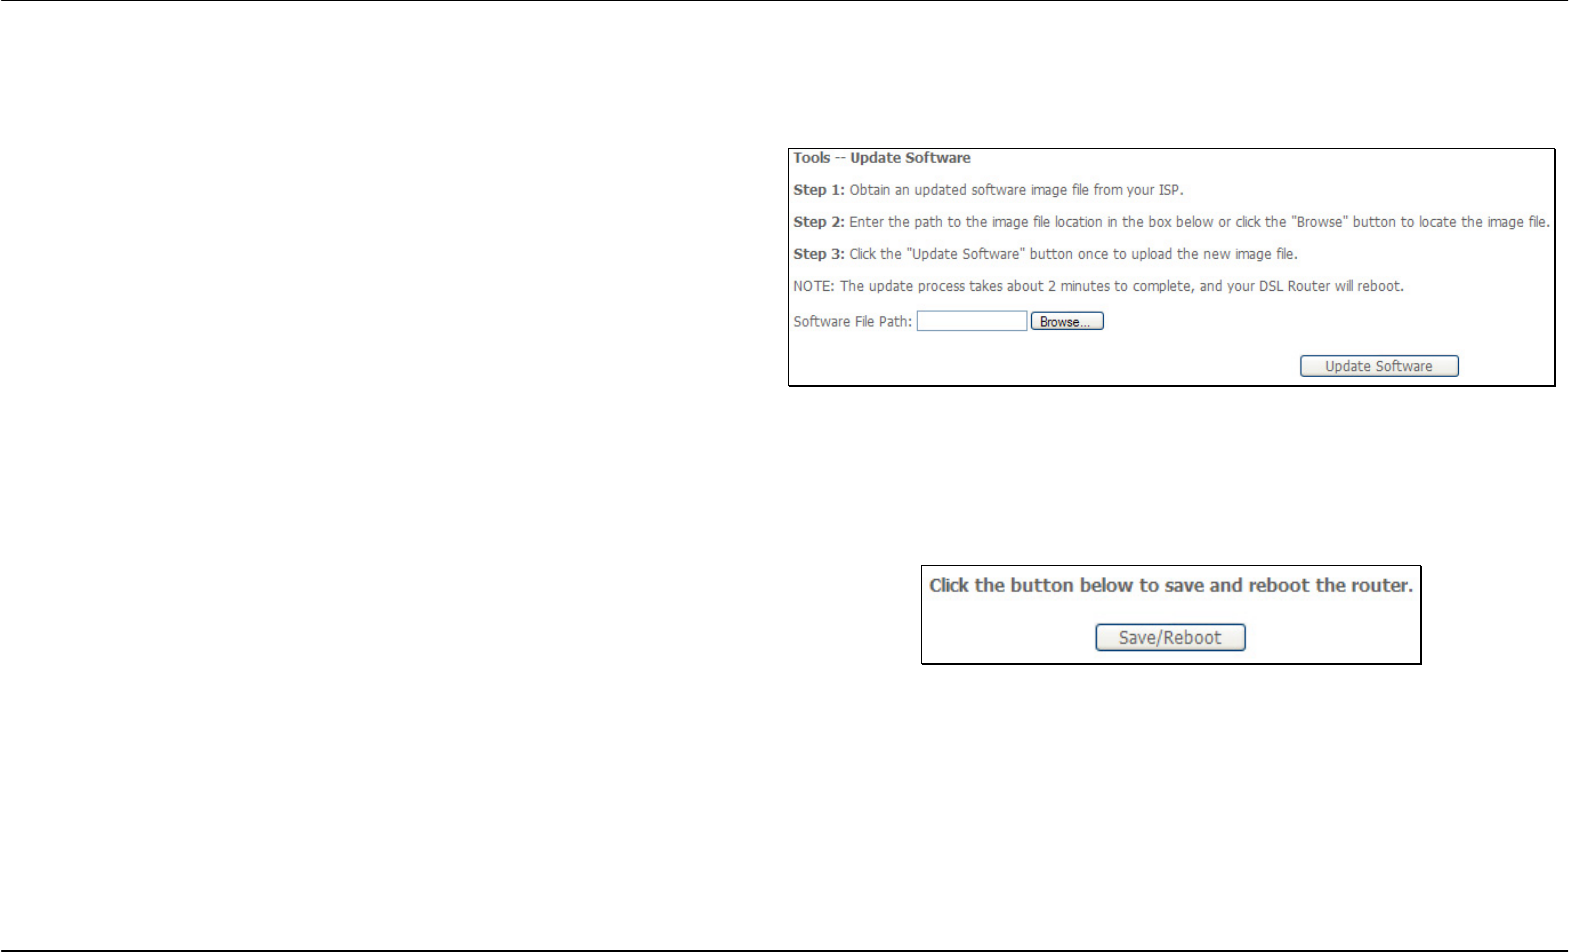
Update Software
To access the Tools - Update Software window, click the Update Software button in the Management directory.
This window allows you to update the Router’s software.
Save/Reboot
To access this window, click the Save/Reboot button in the Management directory.
To save your settings and reboot the system, click the Save/Reboot
button.

Appendix A – Troubleshooting
D-Link DSL-2650U User Manual 84
Troubleshooting
This chapter provides solutions to problems that might occur during the installation and operation of the DSL-2650U. Read the following
descriptions if you are having problems. (The examples below are illustrated in Windows® XP. If you have a different operating system, the
screenshots on your computer will look similar to the following examples.)
1. How do I configure my DSL-2650U Router without the CD-ROM?
• Connect your PC to the Router using an Ethernet cable.
• Open a web browser and enter the address http://192.168.1.1
• The default username is ‘admin’ and the default password is ‘admin’.
• If you have changed the password and cannot remember it, you will need to reset the Router to the factory default setting (see question 2),
which will set the password back to ‘admin’.
Note: Please refer to the next section “Networking Basics” to check your PC’s IP configuration if you can’t see the login windows.
2. How do I reset my Router to the factory default settings?
• Ensure the Router is powered on.
• Press and hold the reset button on the back of the device for approximately 3 to 5 seconds.
• This process should take around 30~60 seconds.
Note: Resetting the Router to the factory default settings will erase the current configuration settings. To reconfigure your settings, login to the Router as
outlined in question 1, then run the Quick Setup wizard.
3. What can I do if my Router is not working correctly?
There are a few quick steps you can take to try and resolve any issues:
• Follow the directions in Question 2 to reset the Router.
• Check that all the cables are firmly connected at both ends.
• Check the LEDs on the front of the Router. The Power indicator should be on, the Status indicator should flash, and the DSL and LAN
indicators should be on as well.
Appendix A – Troubleshooting
D-Link DSL-2650U User Manual 85
• Please ensure that the settings in the Web-based configuration manager, e.g. ISP username and password, are the same as the settings
that have been provided by your ISP.
4. Why can’t I get an Internet connection?
For ADSL ISP users, please contact your ISP to make sure the service has been enabled/connected by your ISP and that your ISP username and
password are correct.
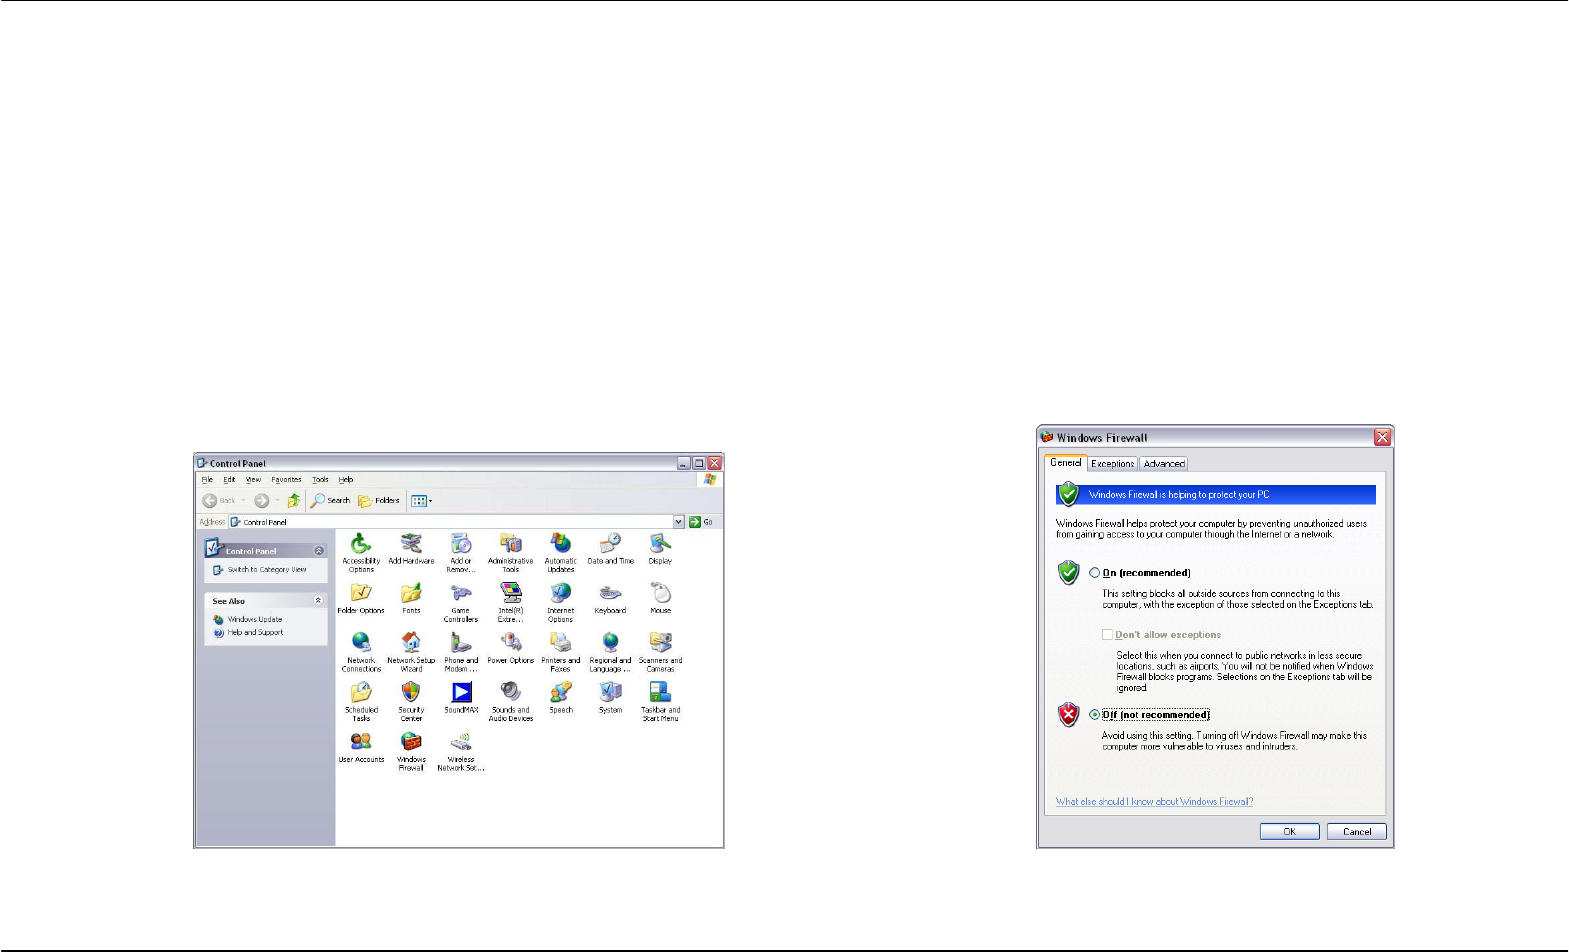
5. What can I do if my Router can’t be detected by running installation CD?
• Ensure the Router is powered on.
• Check that all the cables are firmly connected at both ends and all LEDs work correctly.
• Ensure only one network interface card on your PC is activated.
• Click on Start > Control Panel > Security Center to disable the setting of Firewall.
Note: There might be a potential security issue if you disable the setting of Firewall on your PC. Please remember to turn it back on once you have finished
the whole installation procedure and can surf on Internet without any problem.
Appendix B - Networking Basics
D-Link DSL-2650U User Manual 86
Networking Basics
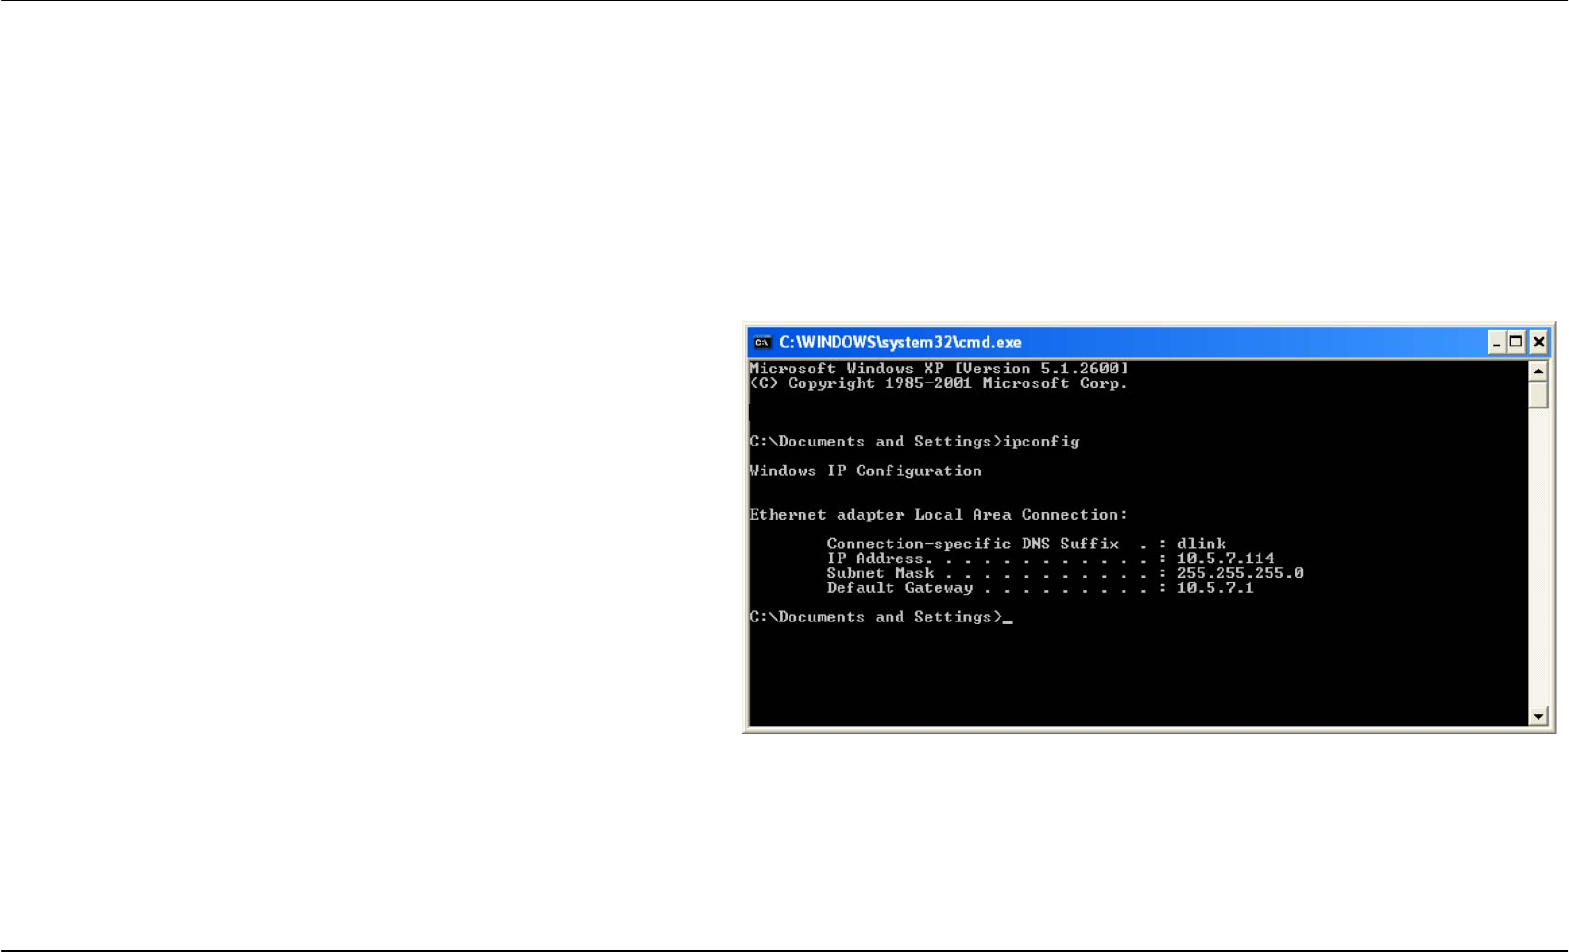
Check Your IP Address
After you install your new D-Link adapter, by default, the TCP/IP settings should be set to obtain an IP address from a DHCP server (i.e. wireless
router) automatically. To verify your IP address, please follow the steps below.
Click on Start > Run. In the run box type cmd and click on the OK.
At the prompt, type ipconfig and press Enter.
This will display the IP address, subnet mask, and the default
gateway of your adapter.
If the address is 0.0.0.0, check your adapter installation, security
settings, and the settings on your Router. Some firewall software
programs may block a DHCP request on newly installed adapters.
If you are connecting to a wireless network at a hotspot (e.g. hotel,
coffee shop, airport), please contact an employee or administrator
to verify their wireless network settings.

Appendix B - Networking Basics
D-Link DSL-2650U User Manual 87
Statically Assign An IP Address
If you are not using a DHCP capable gateway/router, or you need to assign a static IP address, please follow the steps below:
Step 1
Windows® XP - Click on Start > Control Panel > Network Connections.
Windows® 2000 - From the desktop, right-click on the My Network Places > Properties.
Step 2
Right-click on the Local Area Connection which represents your D-Link network adapter and select Properties.
Step 3
Highlight Internet Protocol (TCP/IP) and click on the Properties.
Step 4
Click on the Use the following IP address and enter an IP address that is on the same subnet as
your network or the LAN IP address on your router.
Example: If the router’s LAN IP address is 192.168.1.1, make your IP address 192.168.1.X where X
is a number between 2 and 99. Make sure that the number you choose is not in use on the network.
Set Default Gateway the same as the LAN IP address of your router (192.168.1.1).
Set Primary DNS the same as the LAN IP address of your router (192.168.1.1). The Secondary
DNS is not needed or you may enter a DNS server from your ISP.
Step 5
Click on the OK twice to save your settings.

Appendix C – Technical Specification
D-Link DSL-2650U User Manual 88
Technical Specifications
ADSL Standards
• ANSI T1.413 Issue 2
• ITU G.992.1 (G.dmt) Annex A
• ITU G.992.2 (G.lite) Annex A
• ITU G.994.1 (G.hs)
ADSL2 Standards
• ITU G.992.3 (G.dmt.bis) Annex A/L/M
RE-ADSL2 (Reach Extended SDSL2) Standards
• Annex L
ADSL2+ Standards
• ITU G.992.5 Annex A/M
Protocols
• IEEE 802.1d Spanning
Tree
• TCP/UDP
• ARP
• RARP
• ICMP
• RFC1058 RIP v1
• RFC1213 SNMP v1 & v2c
• RFC1334 PAP
• RFC1389 RIP v2
• RFC1577 Classical IP over
ATM
• RFC1483/2684
Multiprotocol
Encapsulation over ATM
Adaptation Layer 5 (AAL5)
• RFC1661 Point to Point
Protocol
• RFC1994 CHAP
• RFC2131 DHCP Client /
DHCP Server
• RFC2364 PPP over ATM
• RFC2516 PPP over
Ethernet
Data Transfer Rate
• G.dmt full rate downstream: up to 8 Mbps / upstream: up to 1
Mbps
• G.lite: ADSL downstream up to 1.5 Mbps / upstream up to 512
Kbps
• G.dmt.bis full rate downstream: up to 12 Mbps / upstream: up to
1 Mbps
• ADSL full rate downstream: up to 24 Mbps / upstream: up to 1
Mbps
Wireless Transfer Rates
• IEEE 802.11b: 11, 5.5, 2, and 1Mbps
• IEEE 802.11g: 6, 9, 12, 18, 24, 36, 48, 54Mbps
Media Interface
• ADSL interface: RJ-11 connector for connection to 24/26 AWG
twisted pair telephone line
• LAN interface: RJ-45 port for 10/100BASE-T Ethernet
connection