D Link DWL2700APB1 IEEE802.11g Outdoor Access Point User Manual Manual 2
D Link Corporation IEEE802.11g Outdoor Access Point Manual 2
D Link >
Contents
- 1. Manual 1
- 2. Manual 2
- 3. Manual 3
Manual 2
81
DWL-2700AP User’s Manual
D-Link Systems, Inc.
Using the AP Manager
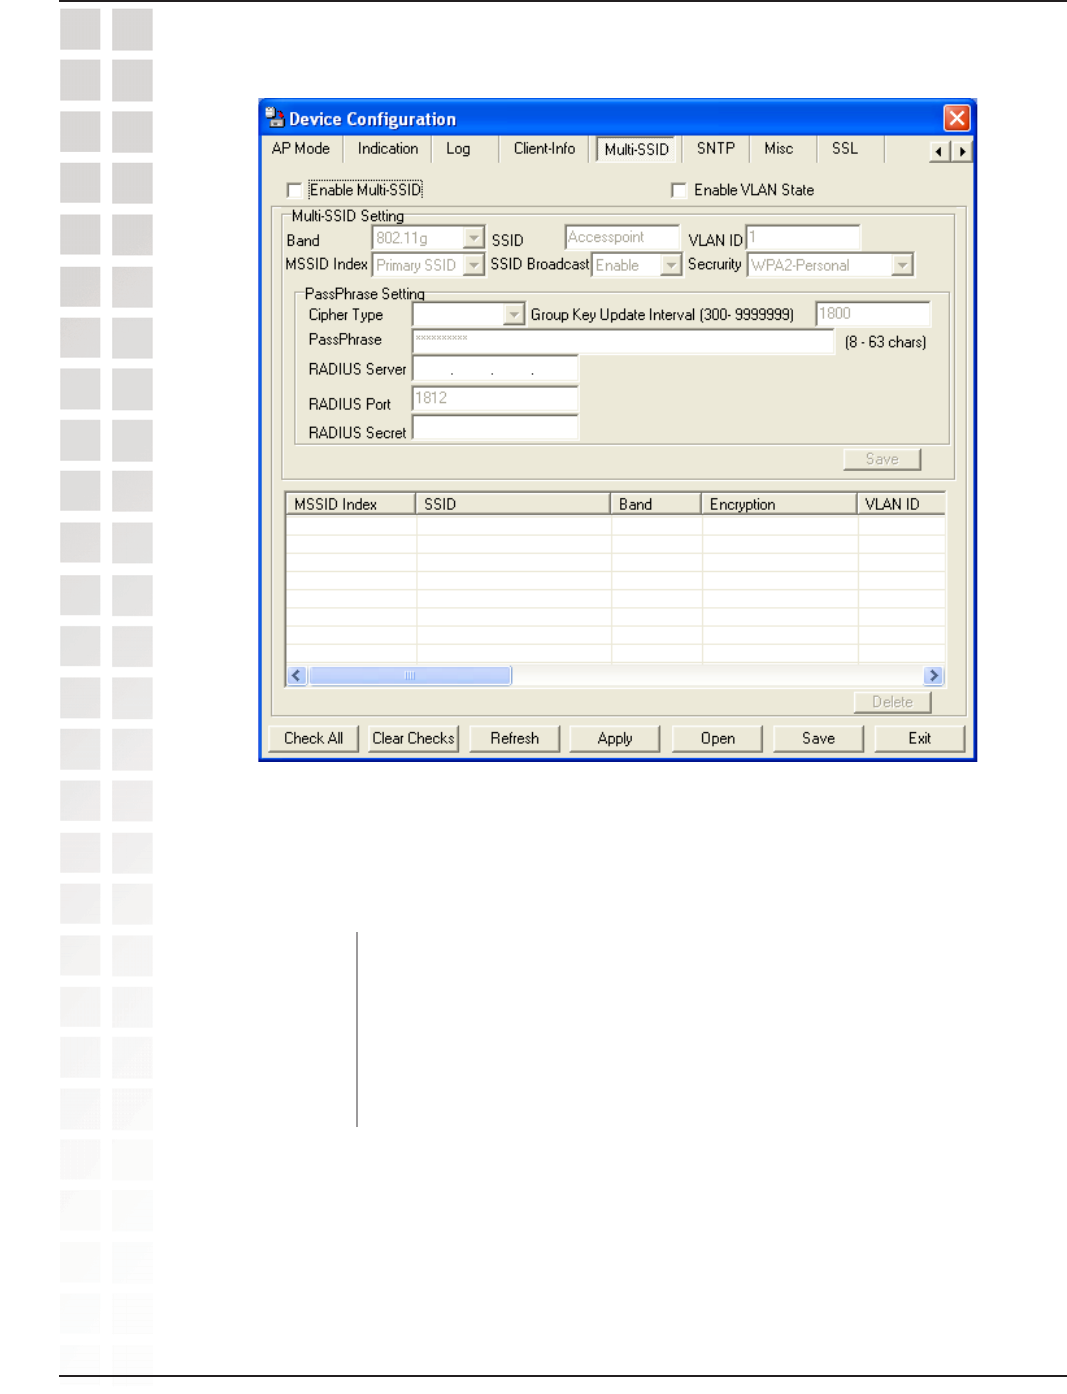
Device Configuration > Multi-SSID
The Primary SSID and Security can not be changed here. Those
values follow the settings in Home > Wireless.
The Security options for Multi-SSID 1-7 are Open System, Shared
Key, WPA-Personal, WPA2-Personal, and WPA-Auto-Personal.
If you want to configure the Guest and Internal networks on Virtual LAN (VLANs), the
switch and DHCP server you are using must support VLANs. As a prerequisite step,
configure a port on the switch for handling VLAN tagged packets as described in the
IEEE 802.1Q standard.
Primary SSID:
Multi-SSID: When you Enable Multi-SSID you can name each guest SSID.
Security:
Note: Security Setting Limit:
When the Primary SSID is set to use one key index for WEP, you can use the 3 other
key indexes for Guest SSIDs.
If the Primary SSID is set to WPA/WPA2-Personal, or WPA-Auto-Personal, you can
only use WEP key index 1 and 4 for Guest SSIDs.

82
DWL-2700AP User’s Manual
D-Link Systems, Inc.
Device Configuration > Multi-SSID (continued)
Using the AP Manager
Check this box to enable multiple SSIDs and select the band.
Available when Both is selected, select the band you want to use
on the pull-down menu.
Enable Multi-SSID:
Enable VLAN
State:
Check this box to enable VLANs.
Band:
If you enable Multiple-SSID, and configure Internal and MSSID on
VLANs, this field will be enabled.
Provide a number between 1 and 4094 for the Internal VLAN.
This will cause the access point to send DHCP requests with the
VLAN tag. The switch and the DHCP server must support VLAN
IEEE 802.1Q frames. The access point must be able to reach the
DHCP server.
Check with the Administrator regarding the VLAN and DHCP
configurations.
SSID:
Multi SSID Setting
The Service Set (network) Identifier.
VLAN ID:
Cipher Type: Select a cipher type from the pull-down menu.
Group Key Update: Select the interval during which the group key will be valid. 1800 is the
recommended setting. A lower interval may reduce transfer rates.
Passphrase: Enter a PassPhrase between 8-63 characters in length.
83
DWL-2700AP User’s Manual
D-Link Systems, Inc.
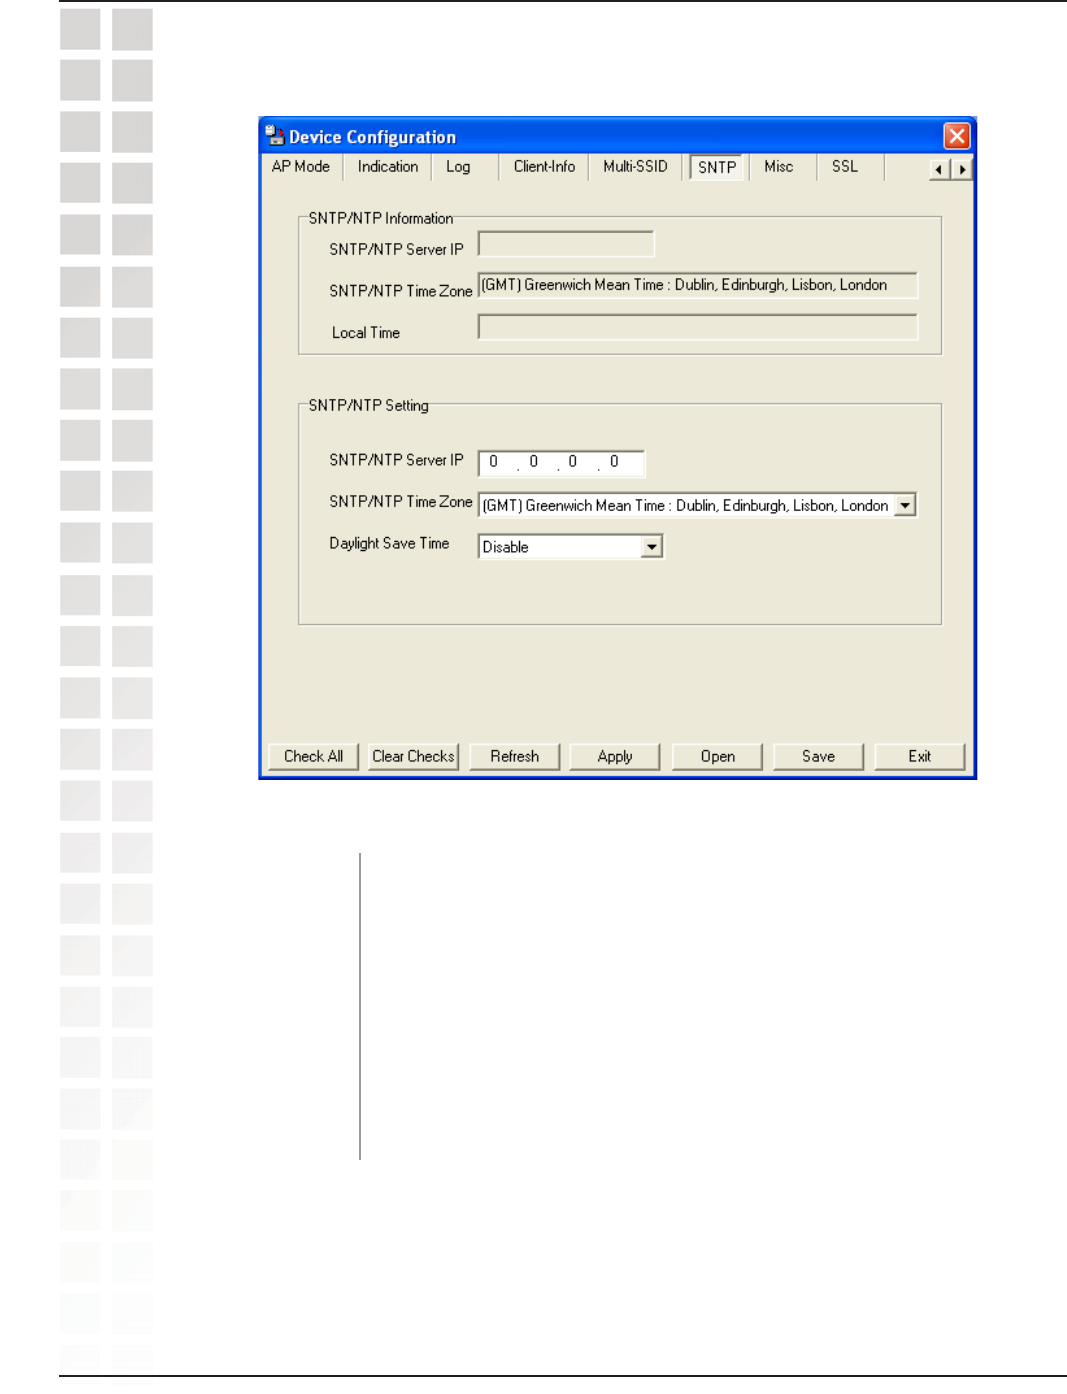
SNTP/NTP
Information:
Displays the current SNTP/NTP settings.
SNT/NTP Server
IP Address:
Enter the SNTP/NTP server IP address.
SNTP/NTP
Time Zone:
Select your correct Time Zone.
Daylight Saving
Time:
Check the box to Enable Daylight Saving Time.
Device Configuration > SNTP
84
DWL-2700AP User’s Manual
D-Link Systems, Inc.
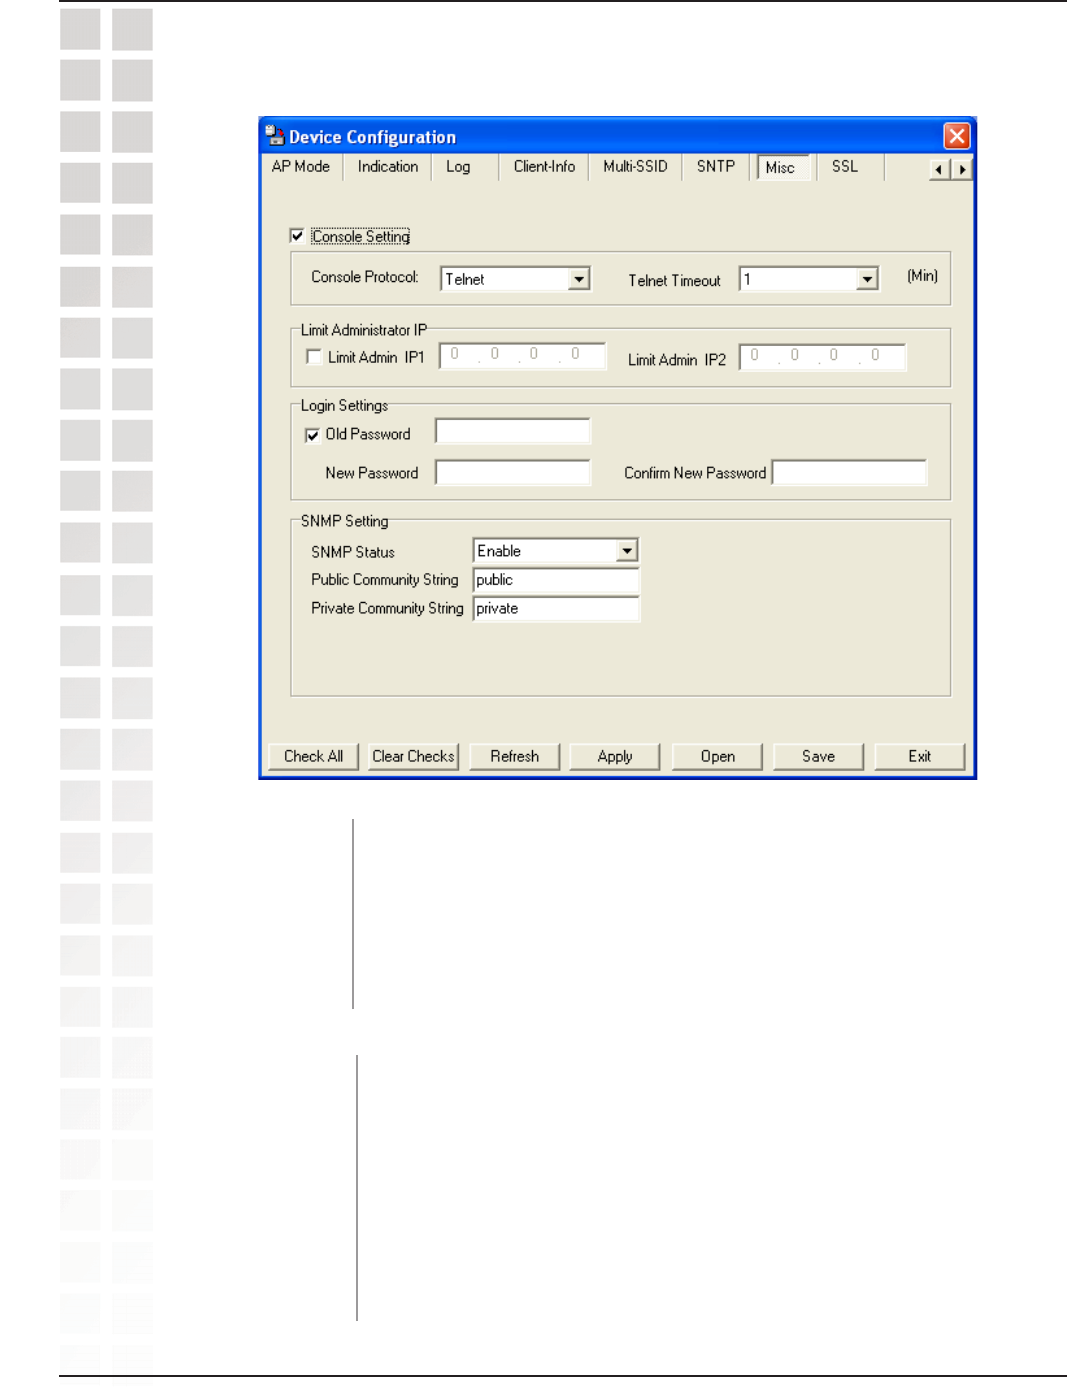
Device Configuration > Misc.
Console Settings: Check the box to enable the device console settings.
Console Protocol: Select the type of protocol you would like to use, Telnet or SSH.
Telnet Timeout: Select the telnet timeout value (in seconds).
Limit Administrator
IP 1:
Enter the IP address that the administrator will be allowed to log
in from.
Limit
Administrator IP
Limit Administrator
IP 2:
Enter a secondary IP address that the administrator will be allowed
to log in from.
Check the box to enable the feature.

85
DWL-2700AP User’s Manual
D-Link Systems, Inc.
SNMP Settings
Public Community
String:
Enter the public SNMP community string.
Status: Status is Enabled by default. Uncheck the box to disable the SNMP
functions.
Private Community
String:
Enter the private SNMP community string.
User Status
Notification:
Check the box to enable user status notification.
Trap Server IP: Enter the IP address of the trap server.
Device Configuration > Misc.
86
DWL-2700AP User’s Manual
D-Link Systems, Inc.
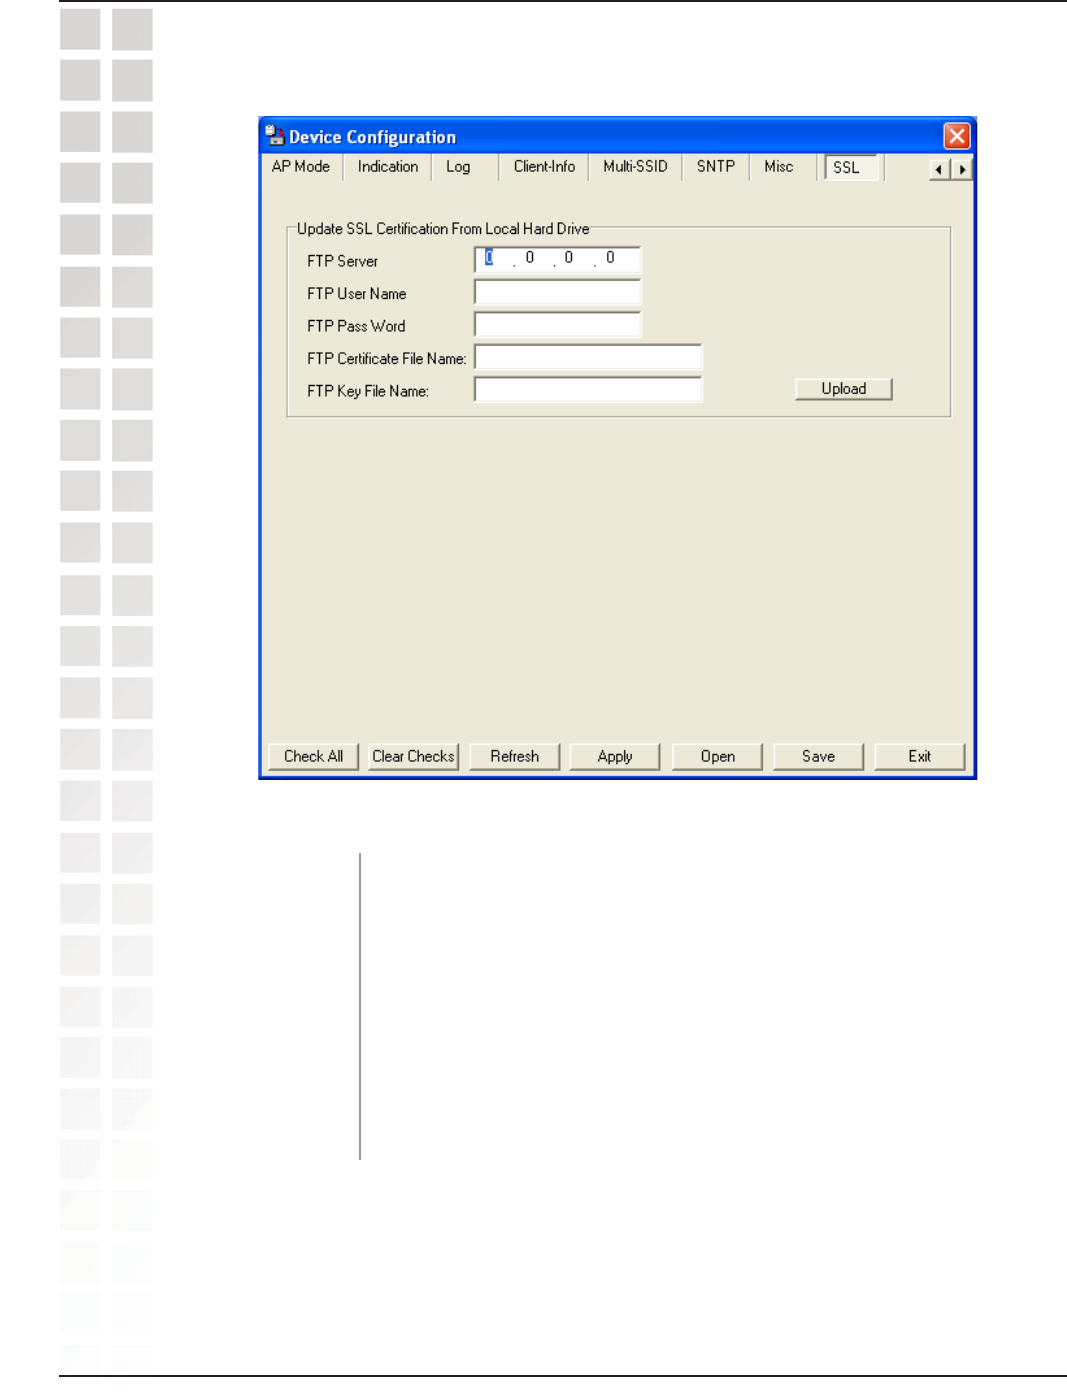
FTP Server: Enter the IP address of the FTP server.
Device Configuration > SSL
FTP User Name:
FTP Password:
FTP Certificate
File Name:
FTP Key File
Name:
Upload:
Enter the FTP user name.
Enter the password for the FTP user name.
Enter the FTP certificate file name.
Enter the FTP key file name.
Click Upload to load the settings.
87
DWL-2700AP User’s Manual
D-Link Systems, Inc.
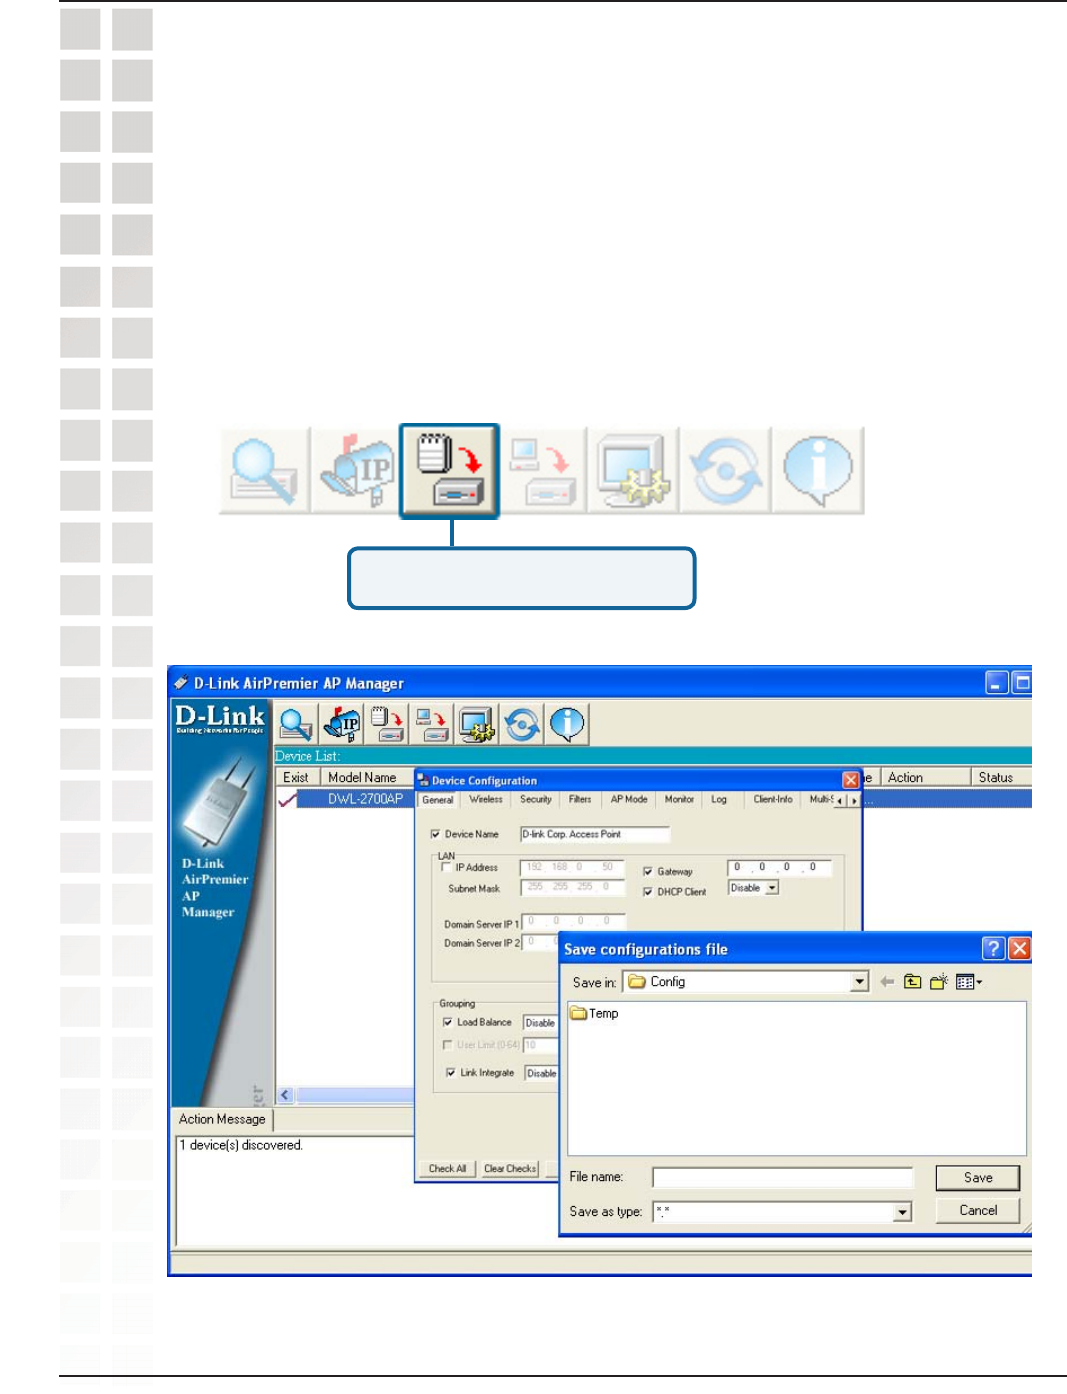
Using the AP Manager
Configuration Files
The DWL-2700AP allows you to save the device settings to a configuration file. To save
a configuration file follow these steps:
Select a device from the Device List on the main screen of the AP Manager.
Click the device configuration button.
Click the Save button after you have all the settings as you want them.
A popup window will appear prompting you for a file name and location. Enter the
file name, choose a file destination, and click Save.
Device Configuration button.
88
DWL-2700AP User’s Manual
D-Link Systems, Inc.
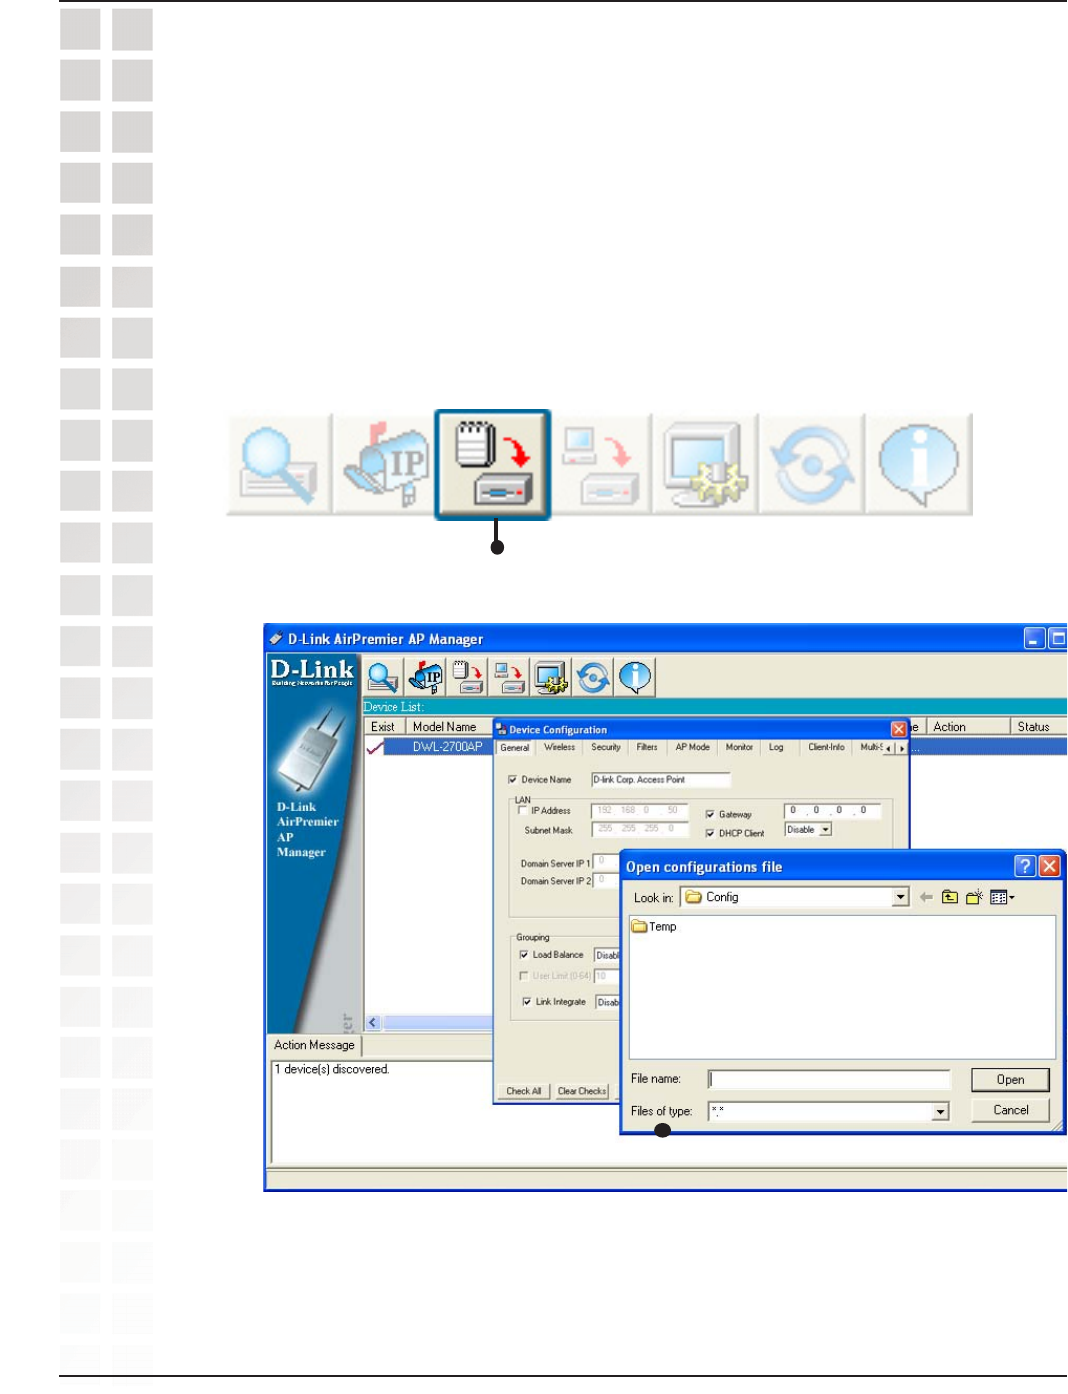
You must always click Apply in the Configuration window if you want the settings to
take effect.
Using the AP Manager
To load a previously saved configuration file, follow these steps:
Select a device from the Device List on the main screen of the AP Manager.
Click the device configuration button.
Click the Open button.
A popup window will appear prompting you to locate the configuration file. Locate
the file and click Open.
The configuration file is loaded into the AP Manager but has not actually been
written to the device(s). If you want to use the newly loaded configuration for the
selected device(s), click Apply and the configuration settings will be written to the
device(s).
Device Configuration button.
89
DWL-2700AP User’s Manual
D-Link Systems, Inc.
Using the AP Manager
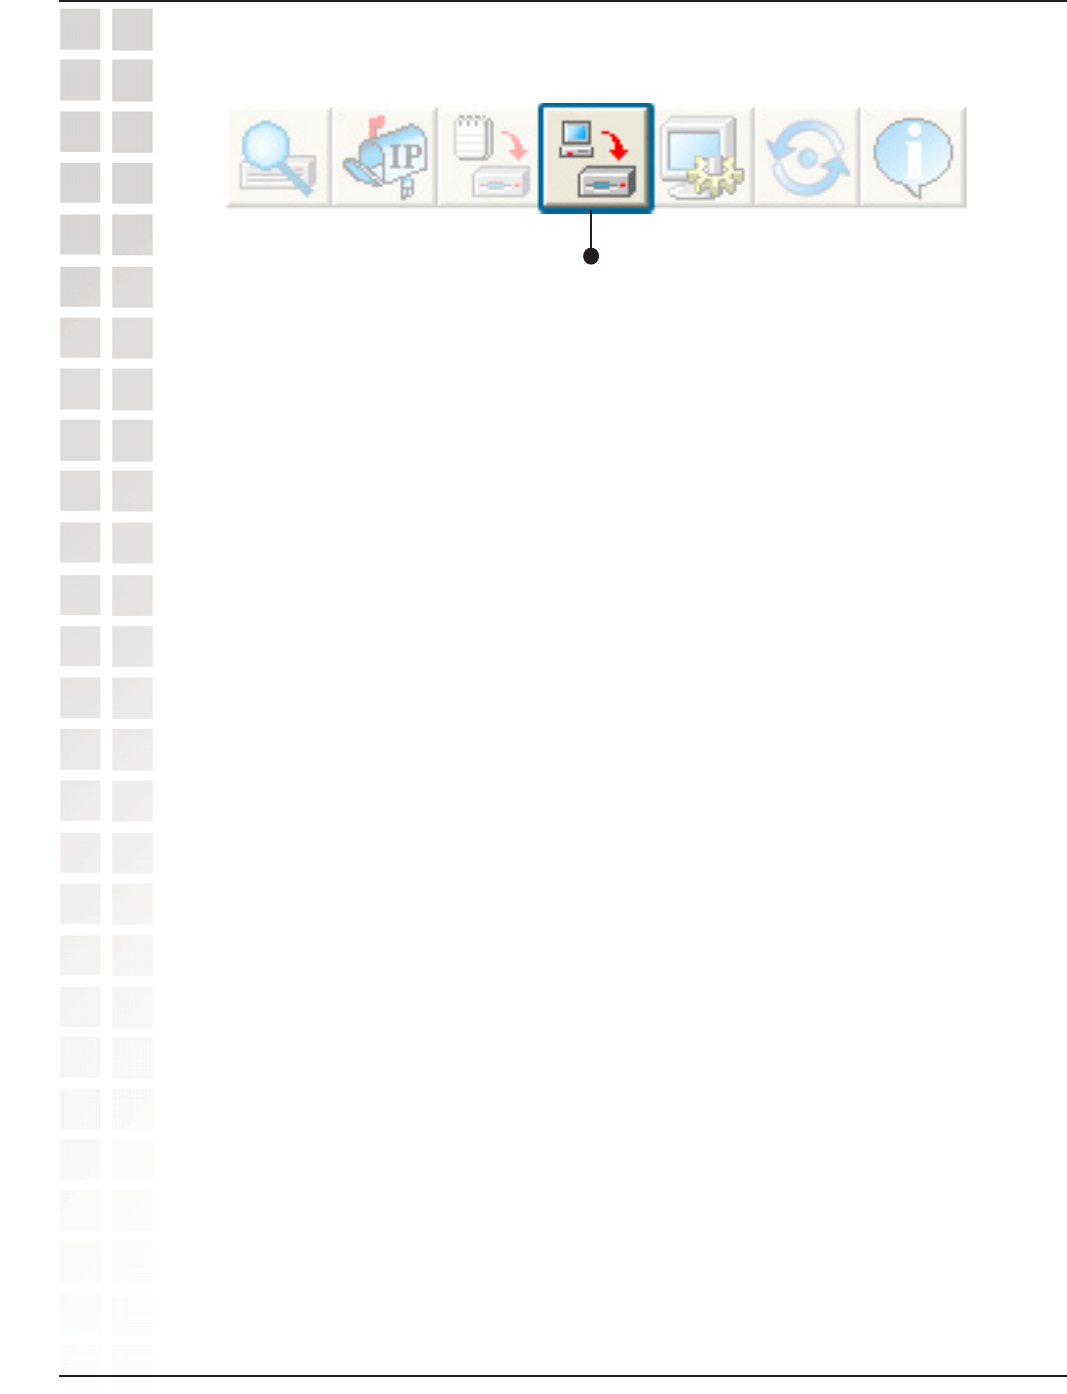
To upgrade the firmware:
Download the latest firmware upgrade from http://support.dlink.com
to an easy to find location on your hard drive.
Click on the firmware button as shown above.
A popup window will appear. Locate the firmware upgrade file and
click Open.
You can upgrade the firmware by clicking on this button after
selecting the device(s).
Firmware
IMPORTANT! DO NOT DISCONNECT POWER FROM THE UNIT WHILE THE
FIRMWARE IS BEING UPGRADED.
90
DWL-2700AP User’s Manual
D-Link Systems, Inc.
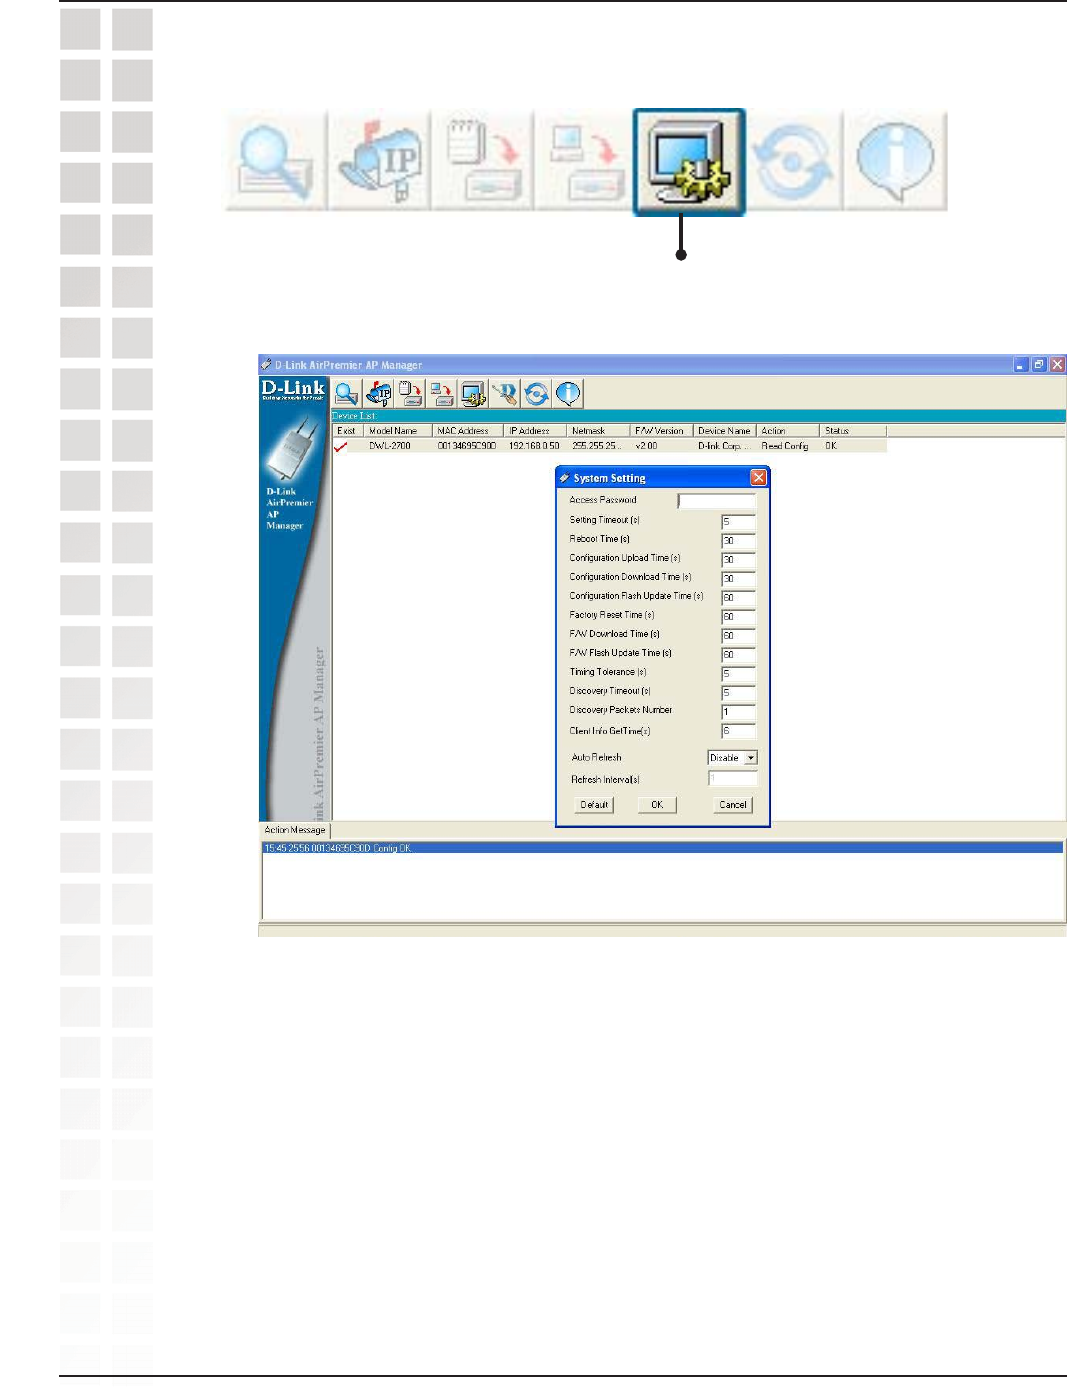
You can customize the basic System Settings for the
DWL-2700AP by clicking on this button.
System Settings
Access Password: This sets the admin password for the select device(s).
Auto Refresh: This setting allows you to enable auto refreshing of the network
device list. By default this option is disabled. If you choose to enable it, you must
enter the refresh interval in seconds. All other settings on this screen should
be left at the default setting.
Using the AP Manager
91
DWL-2700AP User’s Manual
D-Link Systems, Inc.
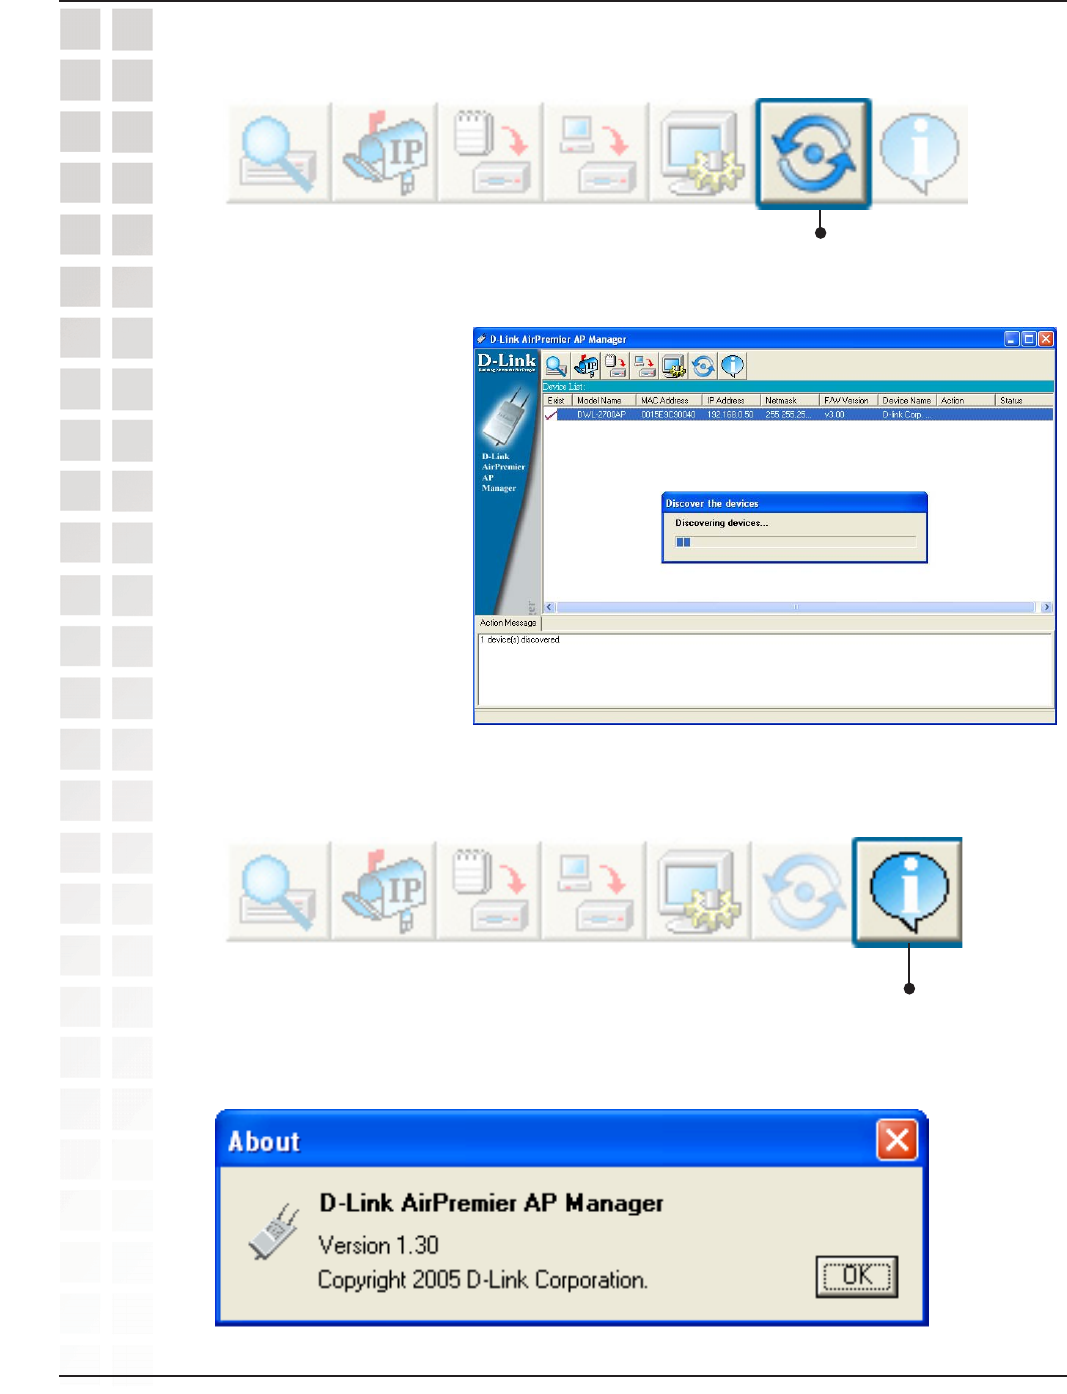
Using the AP Manager
Refresh
Click on this button to refresh the list of
devices available on the network.
Devices with a check
mark next to them are still
available on the network.
Devices with an X are no
longer available on the
network.
Click on this button to view the
version of AP Manager.
About

92
DWL-2700AP User’s Manual
D-Link Systems, Inc.
Using the Console Port
You can connect to the DWL-2700AP console port to configure device settings via the
command line.
2. Run HyperTerminal on the PC:
• Go to the Start Menu
• Select All Programs
• Select Accessories
• Select Communications
• Select HyperTerminal
1. Connect one end of the provided serial console cable to the console port on the
DWL-2700AP, and the other to an available serial port on the PC you wll use to connect
to the device.
3. Enter a New Connection name:
93
DWL-2700AP User’s Manual
D-Link Systems, Inc.
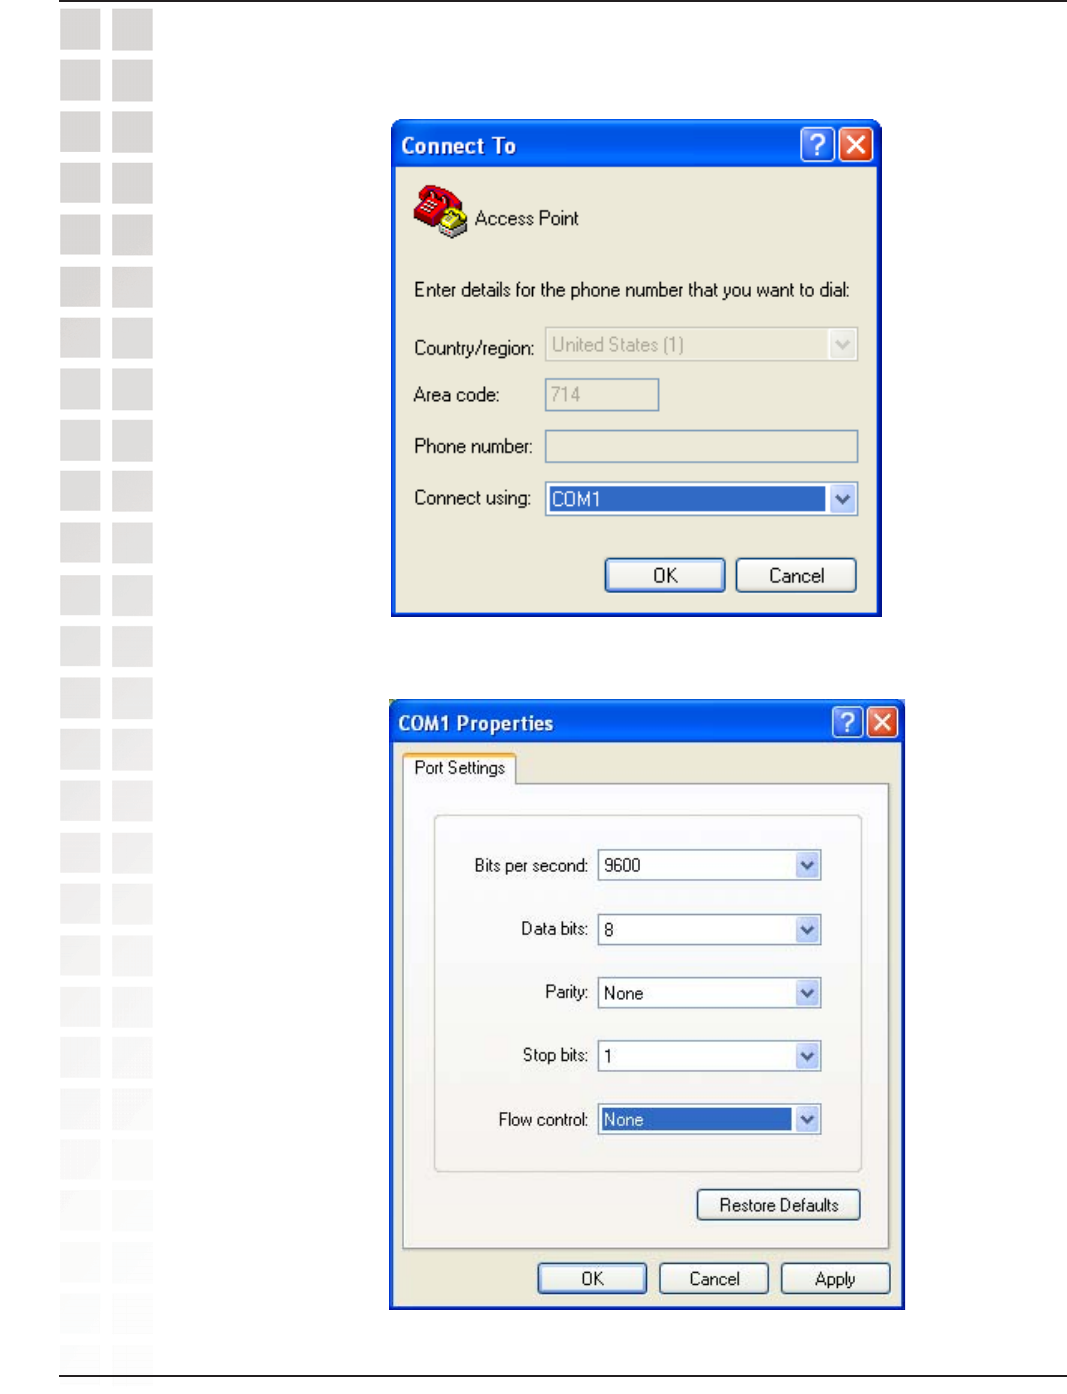
4. Select the appropriate COM port:
5. Configure the Port Settings:
Note: Your terminal emulation must be set to 9600 bits per second.
94
DWL-2700AP User’s Manual
D-Link Systems, Inc.
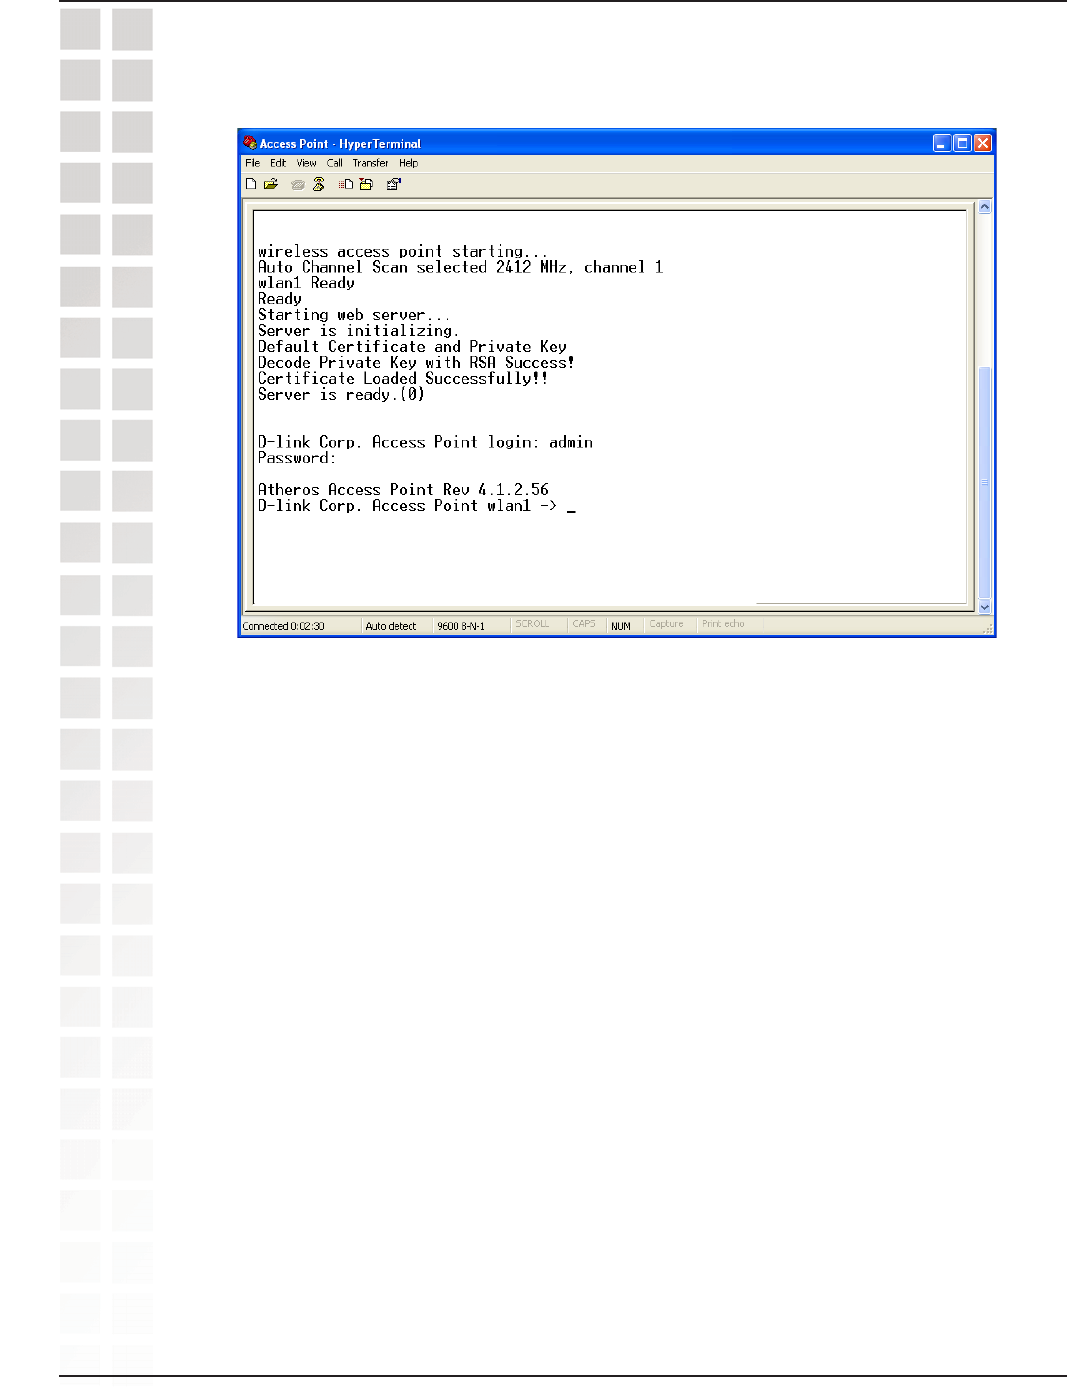
6. Enter Login Name and Password:
Once logged in, you will be able to run configuration commands from the command line
prompt.

95
DWL-2700AP User’s Manual
D-Link Systems, Inc.
Using the Network Setup Wizard in Windows® XP
In this section you will learn how to establish a network at home or work, using Microsoft
Windows® XP.
Note: Please refer to websites such as http://www.homenethelp.com
and http://www.microsoft.com/windows2000 for information about networking computers
using Windows® 2000.
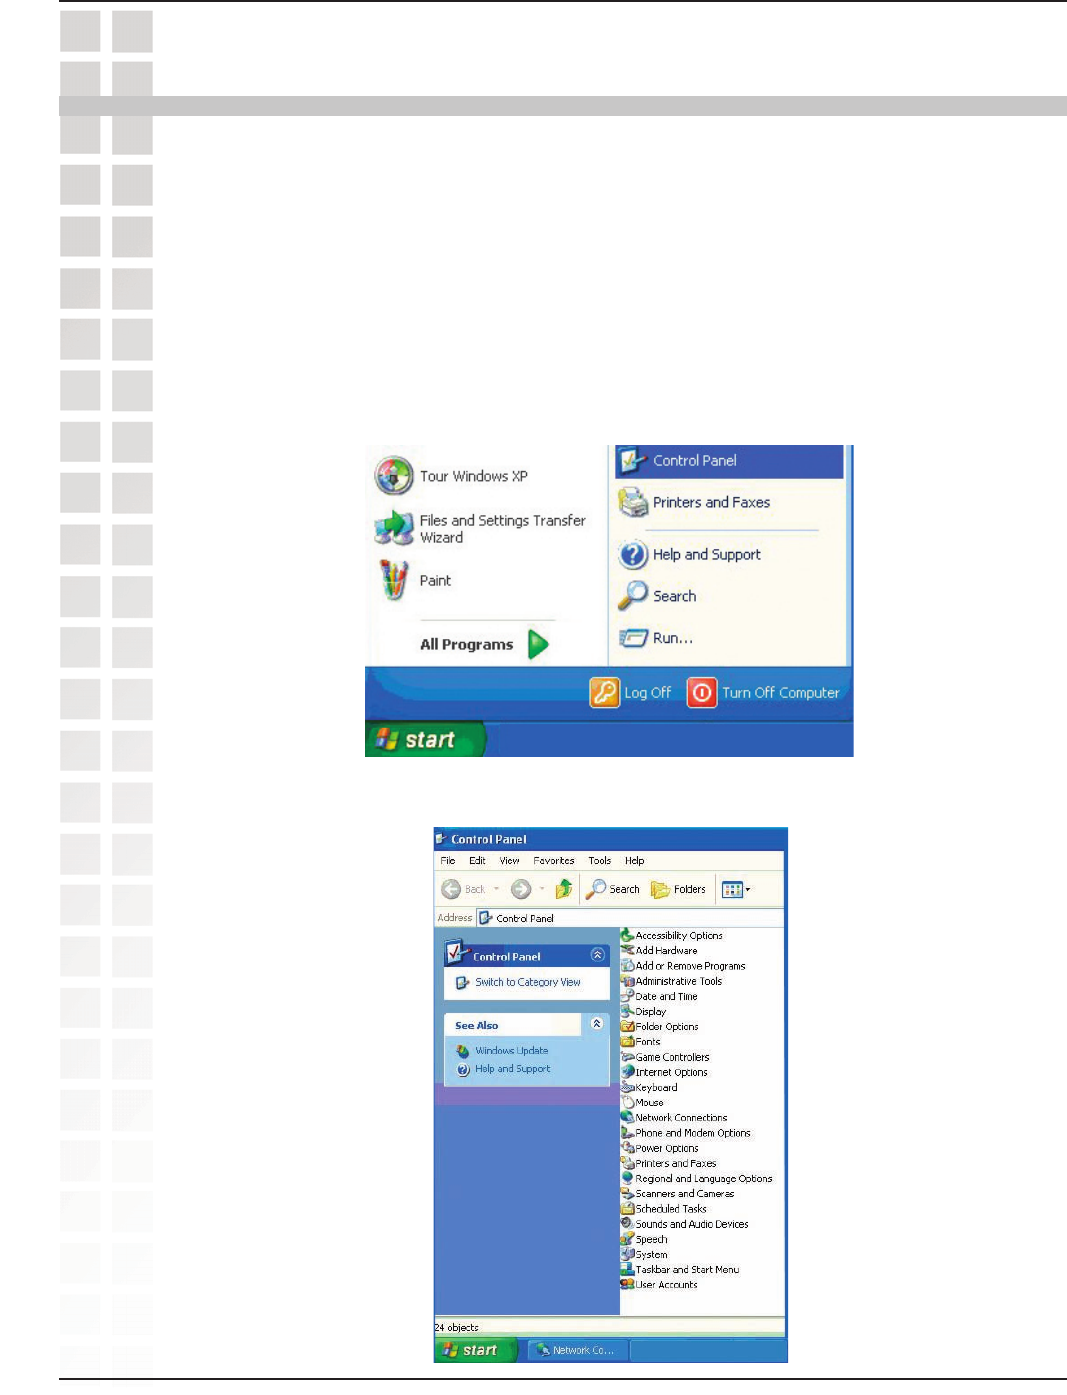
Go to Start>Control Panel>Network Connections
Select Set up a home or small office network
Networking Basics
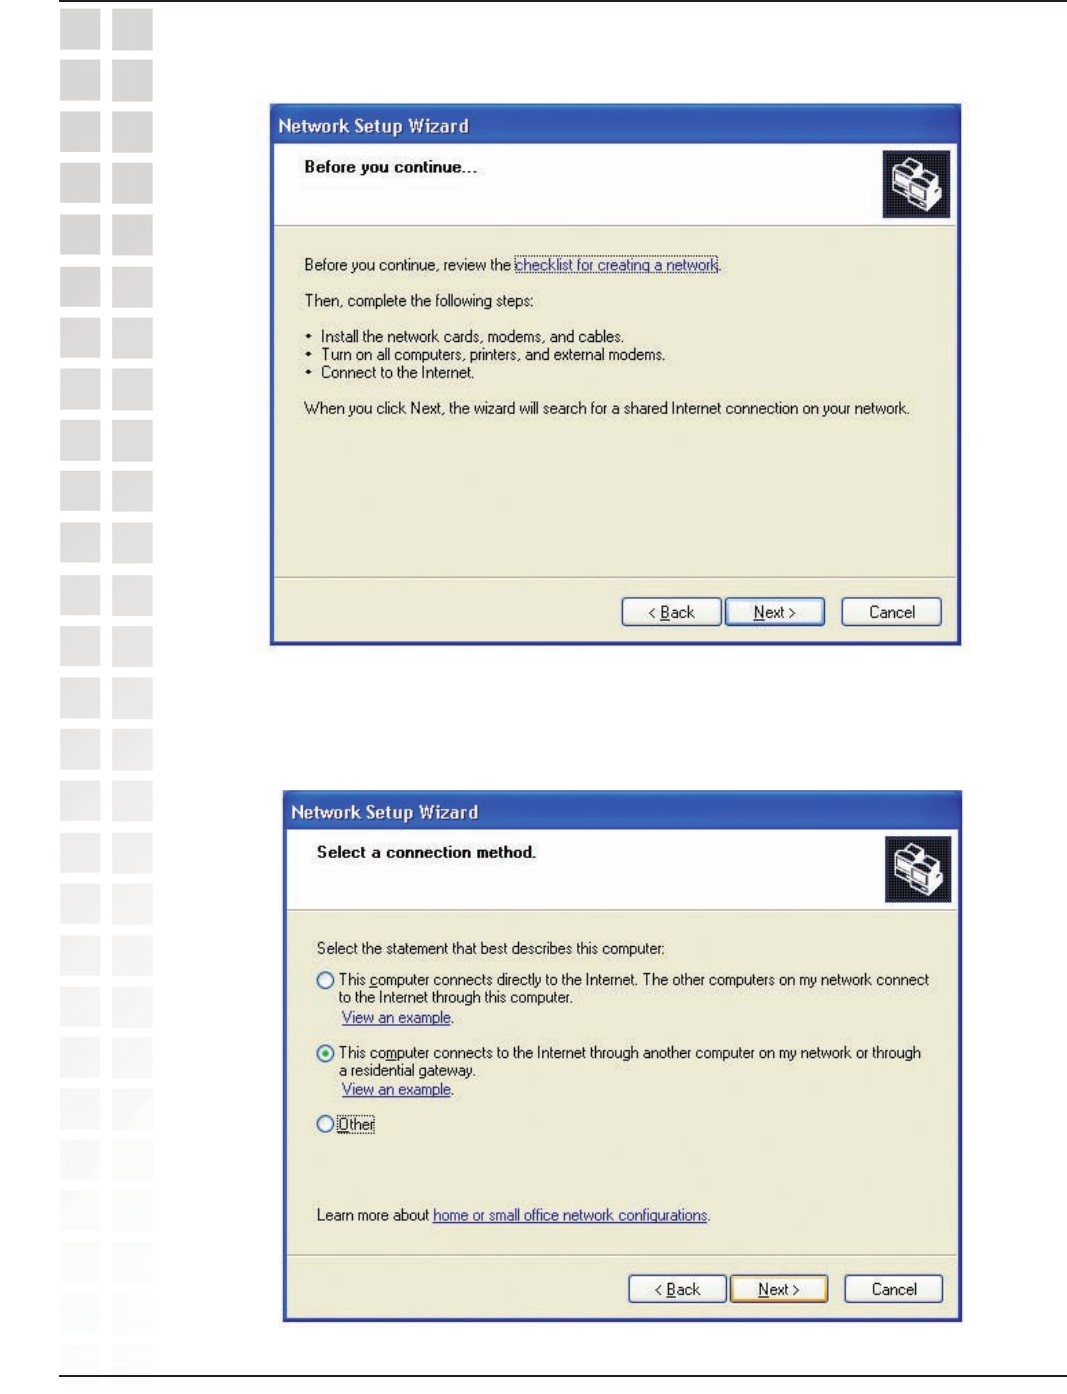
When this screen appears, click Next.
Networking Basics
96
DWL-2700AP User’s Manual
D-Link Systems, Inc.
Networking Basics
Click Next.
In the following window, select the best description of your computer. If your computer
connects to the internet through a gateway/router, select the second option as
shown.
Click Next.
Please follow all the instructions in this window:
97
DWL-2700AP User’s Manual
D-Link Systems, Inc.
Networking Basics
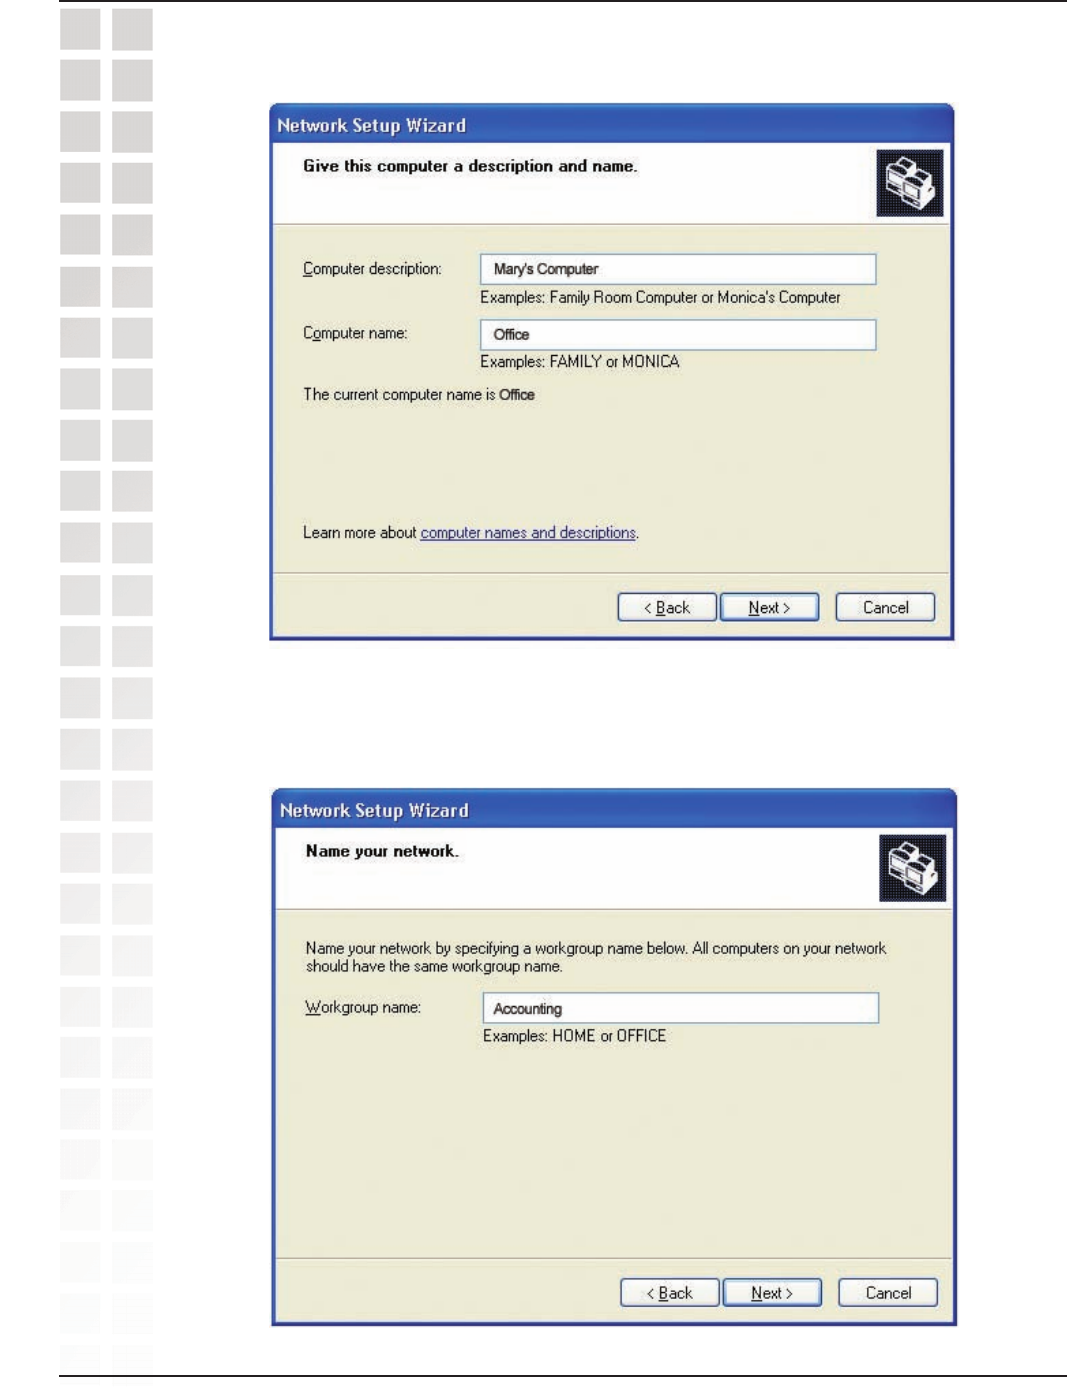
Enter a Computer description and a Computer name (optional).
Click Next.
Enter a Workgroup name. All computers on your network should have the same
Workgroup name.
Click Next.
98
DWL-2700AP User’s Manual
D-Link Systems, Inc.
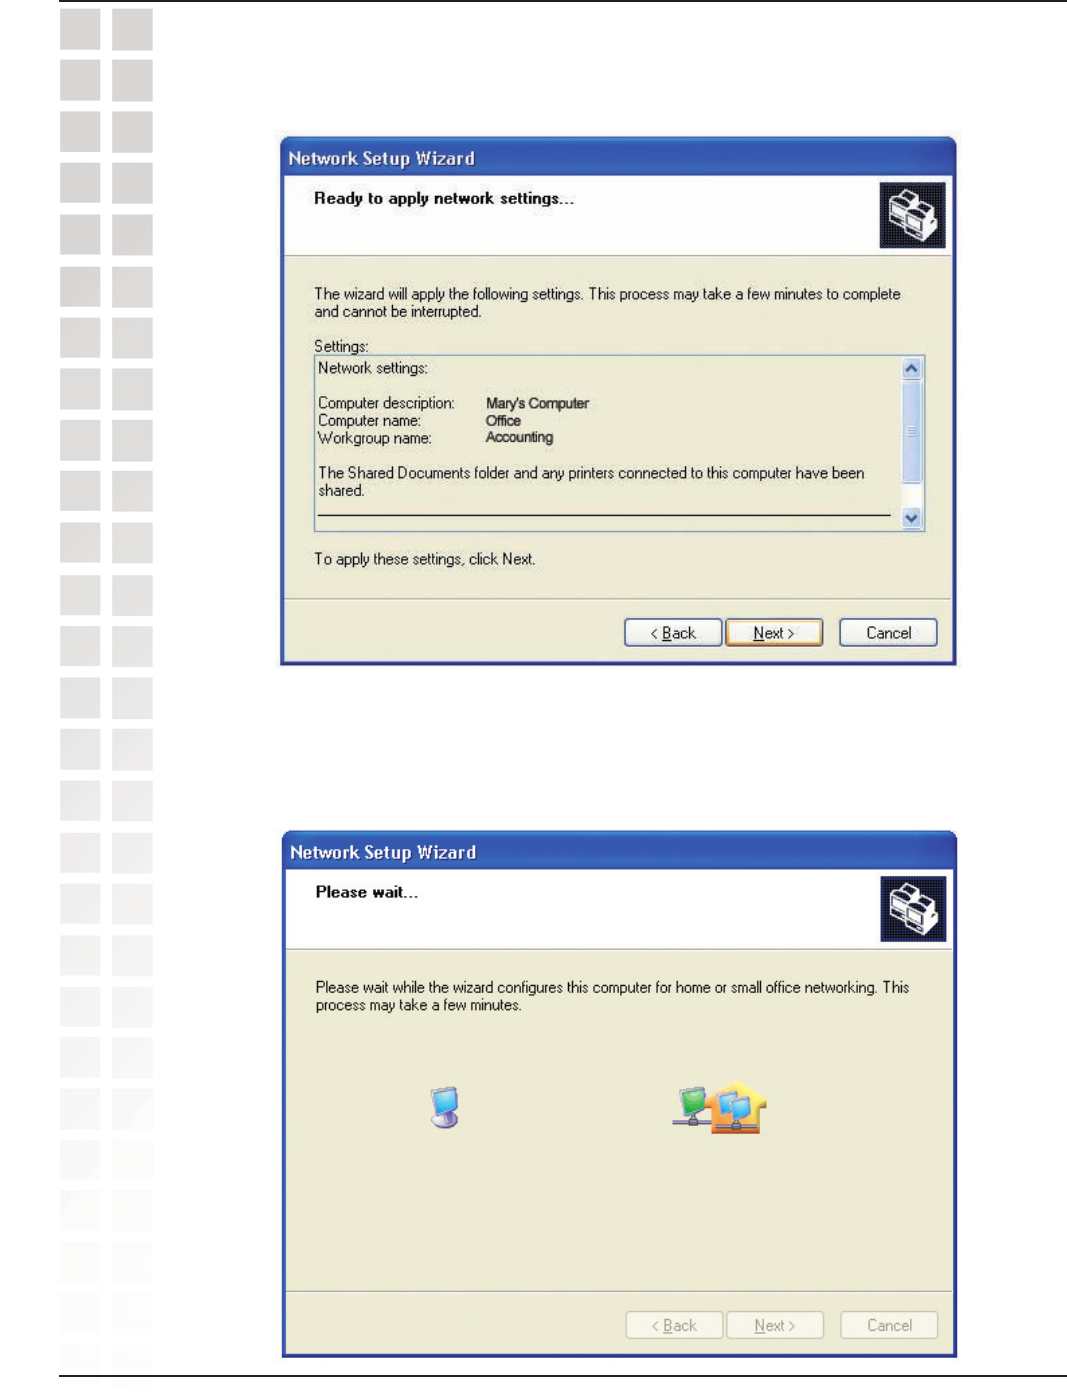
Please wait while the Network Setup Wizard applies the changes.
When the changes are complete, click Next.
Please wait while the Network Setup Wizard configures the computer. This may take
a few minutes.
Networking Basics
99
DWL-2700AP User’s Manual
D-Link Systems, Inc.
Networking Basics
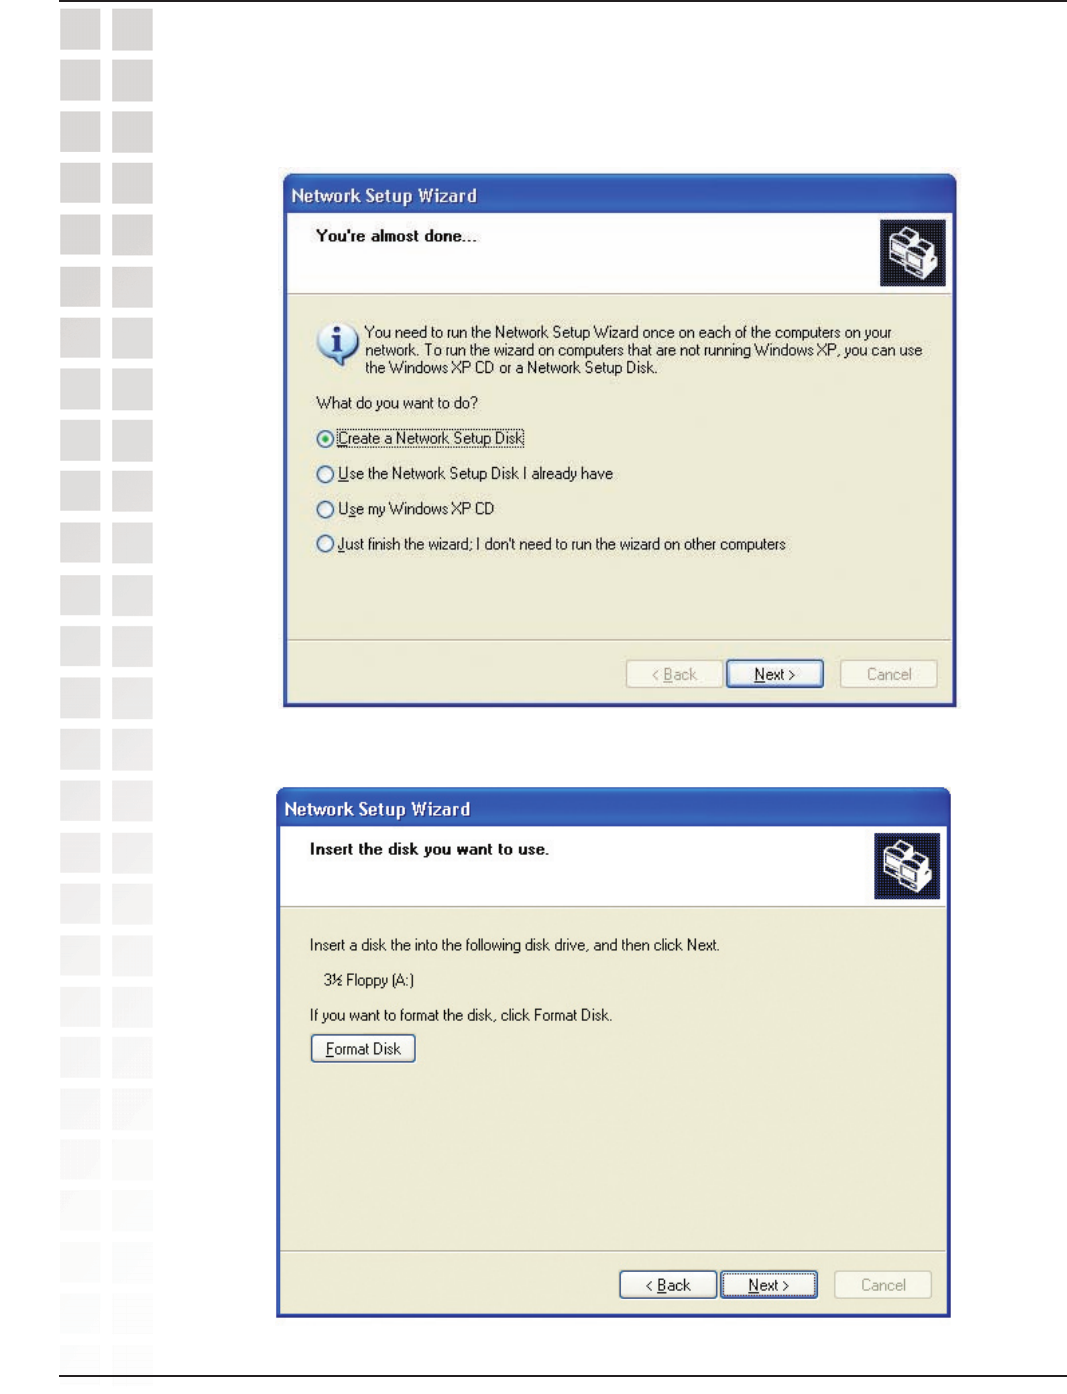
Insert a disk into the Floppy Disk Drive, in this case drive A.
Click Next.
In the window below, select the option that fits your needs. In this example, Create a
Network Setup Disk has been selected. You will run this disk on each of the computers
on your network. Click Next.
100
DWL-2700AP User’s Manual
D-Link Systems, Inc.
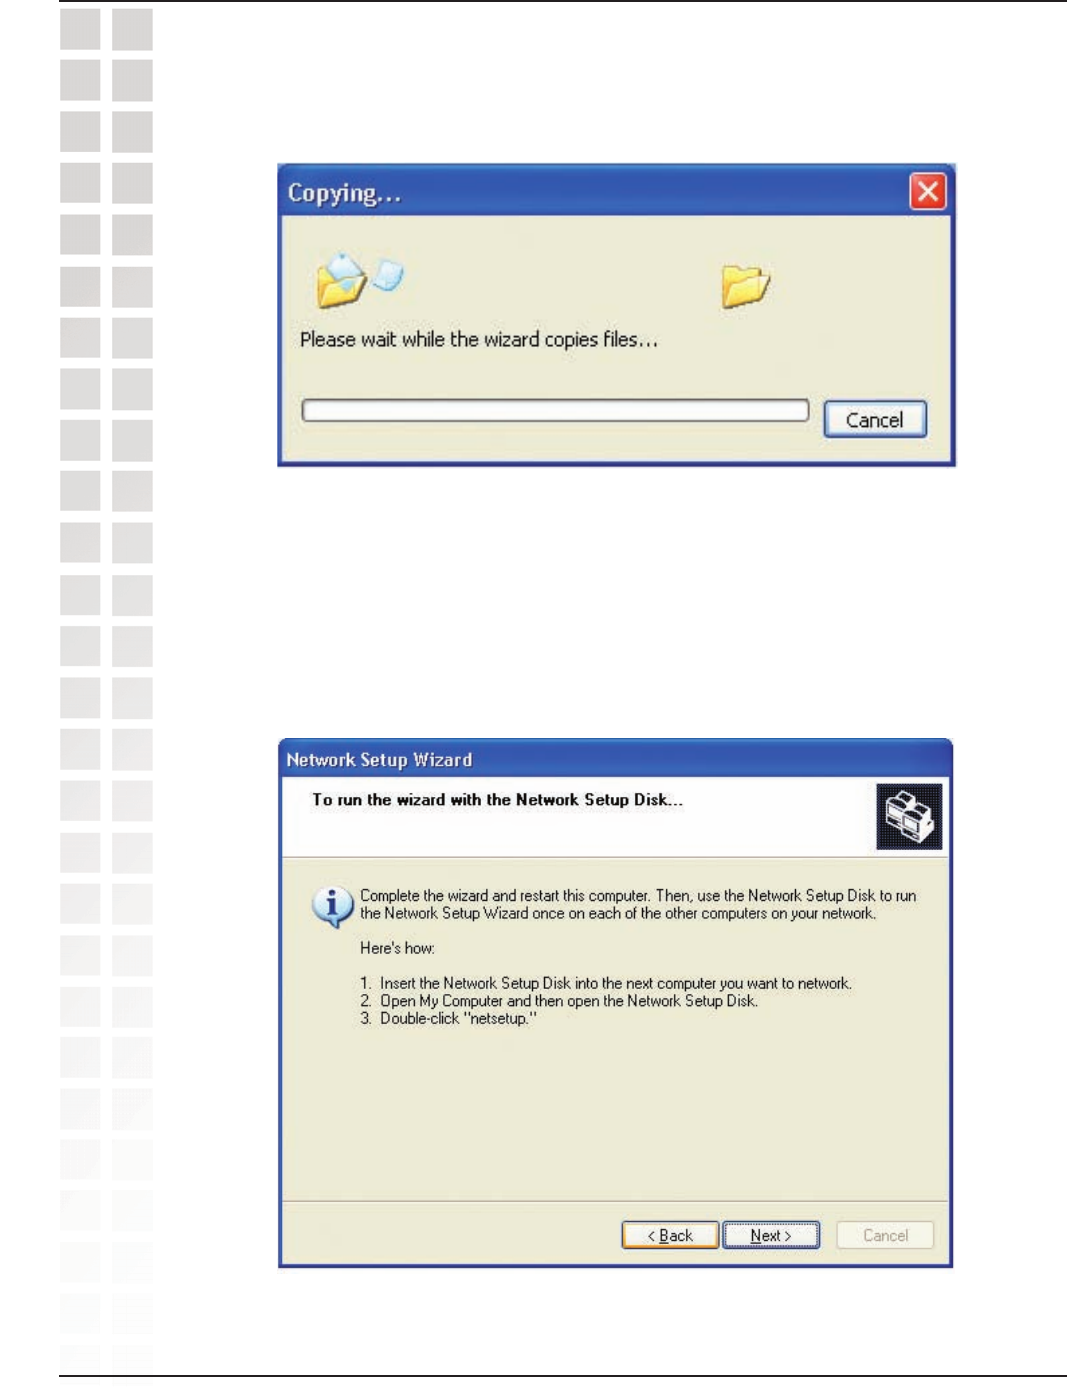
Please read the information under Here’s how in the screen below. After you complete
the Network Setup Wizard you will use the Network Setup Disk to run the Network
Setup Wizard once on each of the computers on your network. To continue click
Next.
Networking Basics
101
DWL-2700AP User’s Manual
D-Link Systems, Inc.
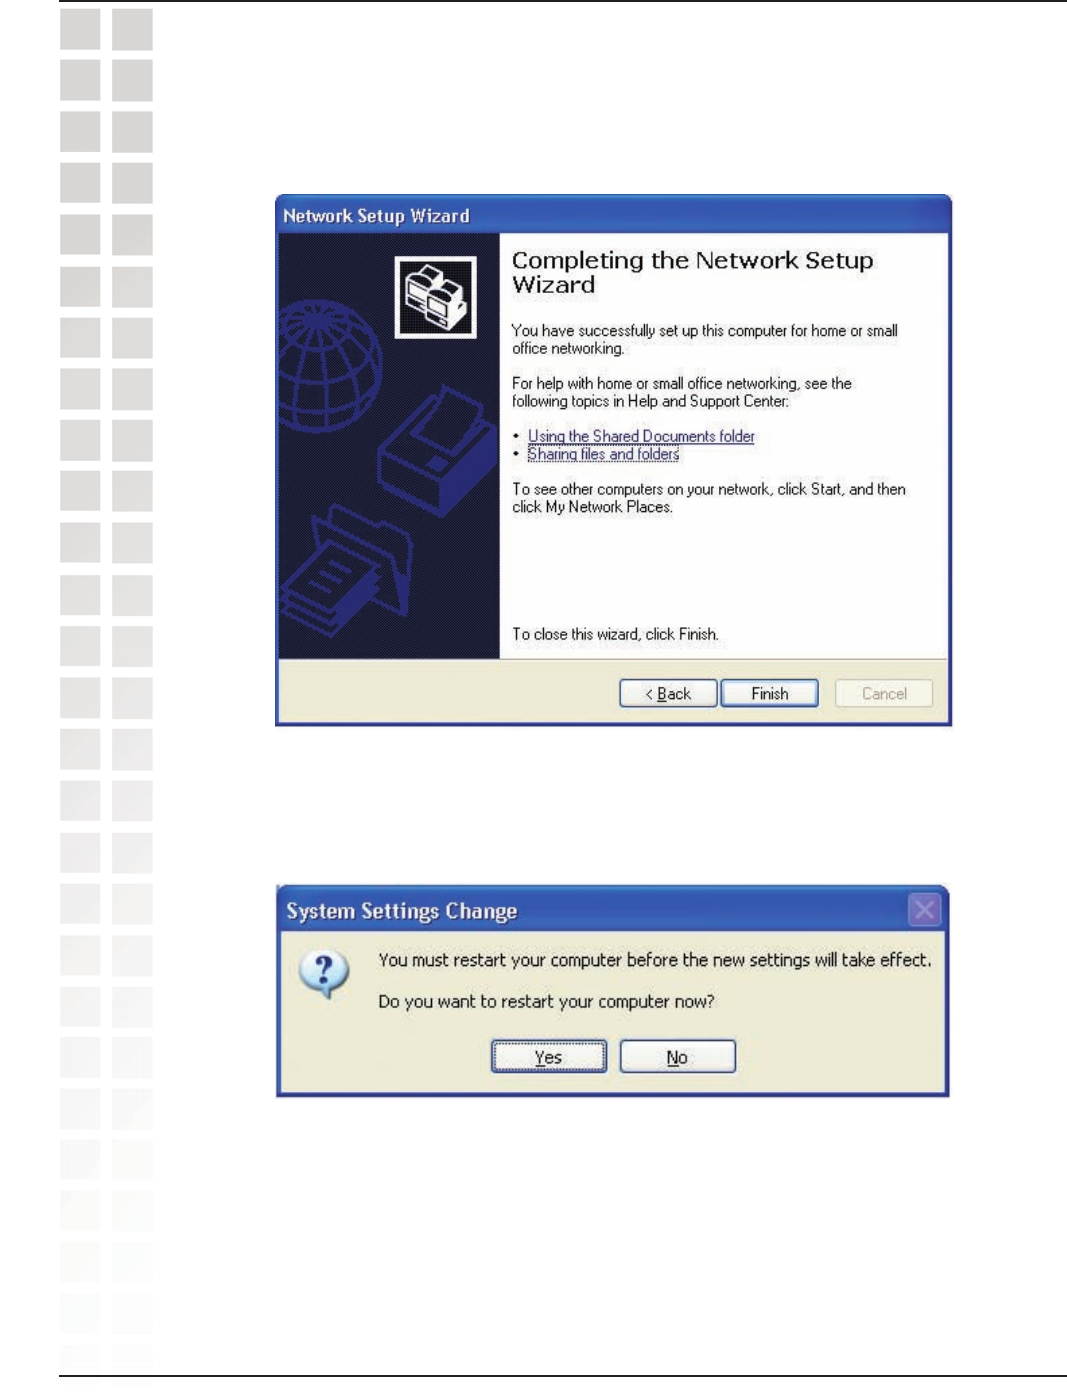
Please read the information on this screen, then click Finish to complete the Network
Setup Wizard.
The new settings will take effect when you restart the computer. Click Yes to restart
the computer.
You have completed configuring this computer. Next, you will need to run the Network
Setup Disk on all the other computers on your network. After running the Network
Setup Disk on all your computers, your new wireless network will be ready to use.
Networking Basics
102
DWL-2700AP User’s Manual
D-Link Systems, Inc.
Networking Basics
Naming Your Computer
To name your computer in Windows® XP, please follow these directions.
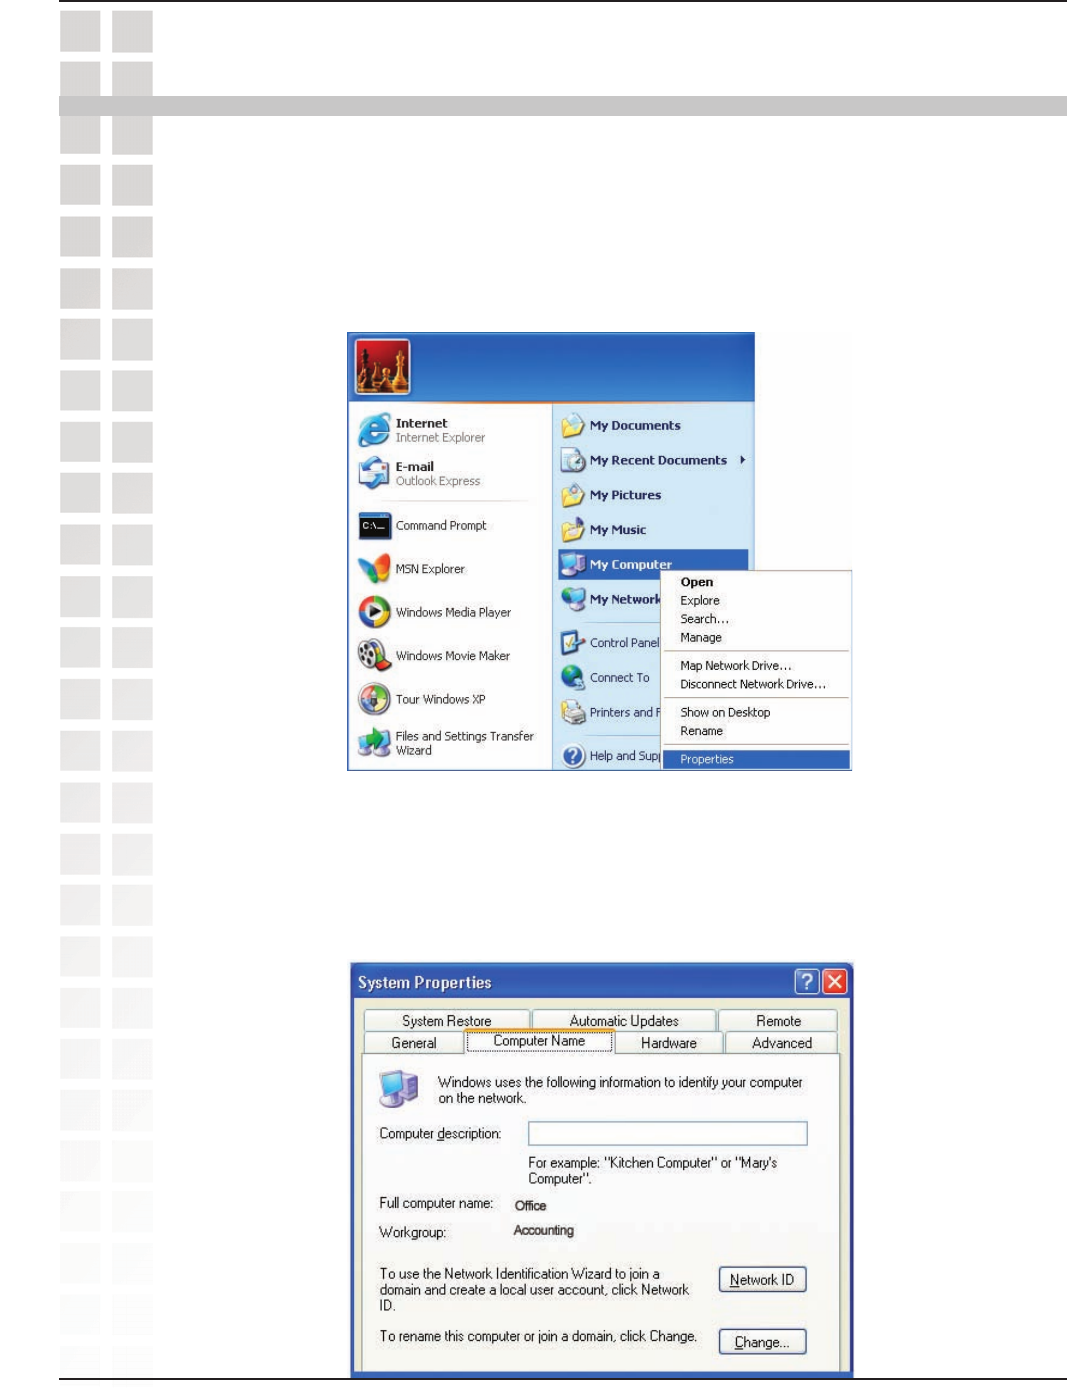
Click Start (in the lower left corner of the screen).
Right-click on My Computer.
Select Properties and click.
Select the Computer Name Tab in the System Properties window.
You may enter a Computer Description if you wish; this field is optional.
To rename the computer and join a domain, Click Change.
103
DWL-2700AP User’s Manual
D-Link Systems, Inc.
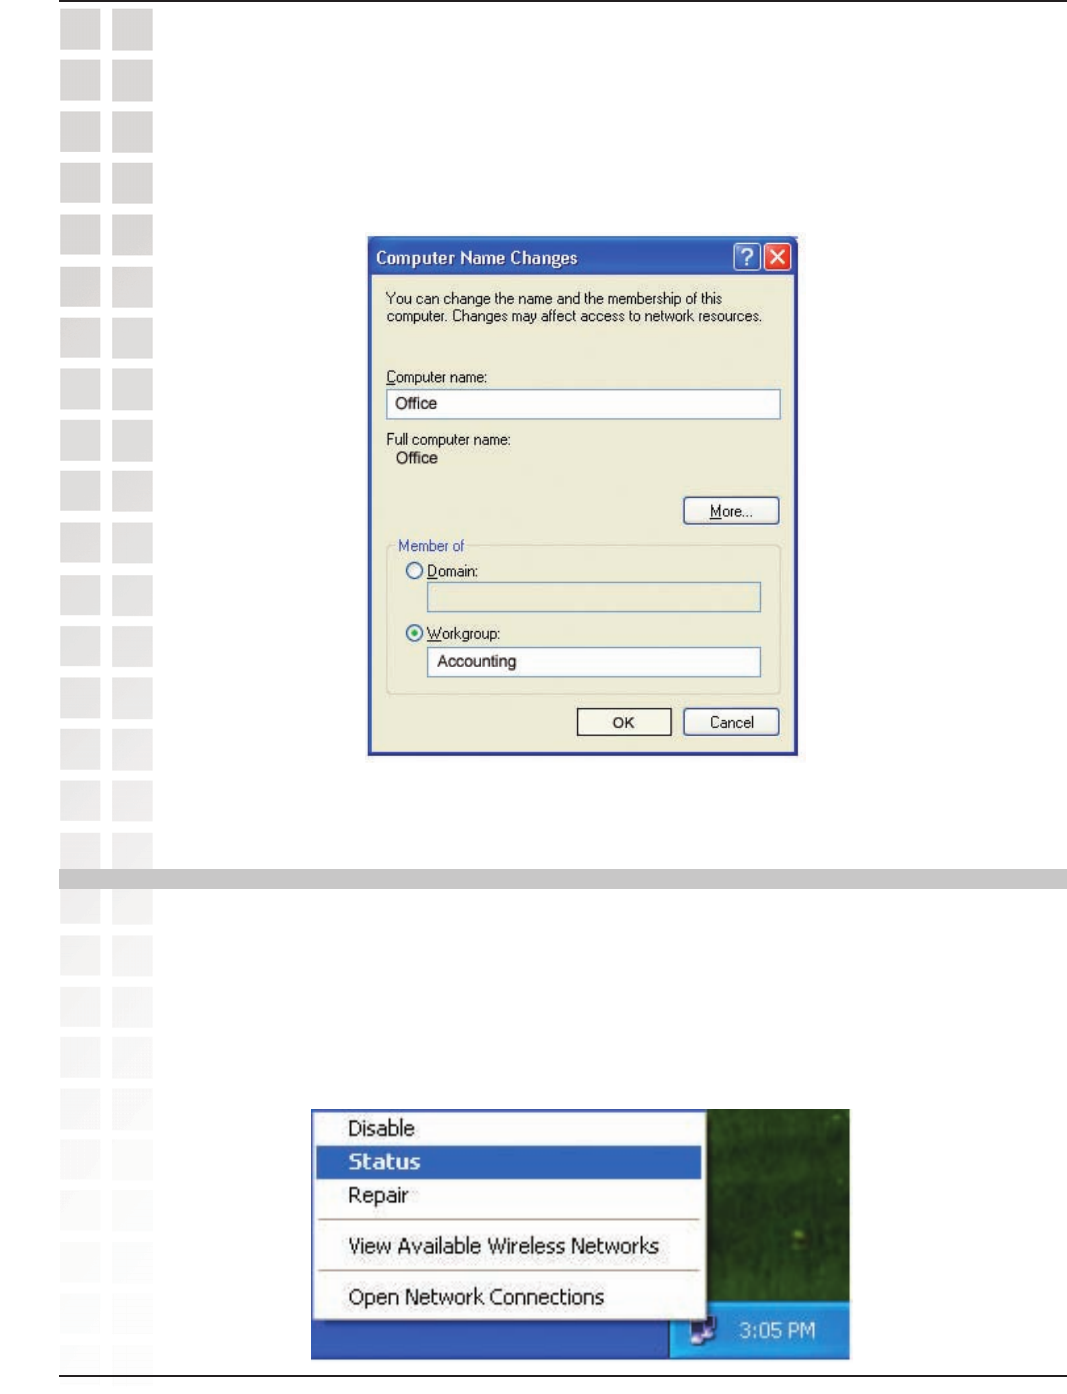
In this window, enter the Computer name.
Select Workgroup and enter the name of the Workgroup.
All computers on your network must have the same Workgroup name.
Click OK.
Networking Basics
The wireless adapter-equipped computers in your network must be in the same IP
Address range (see Getting Started in this manual for a definition of IP Address Range.)
To check on the IP Address of the adapter, please do the following:
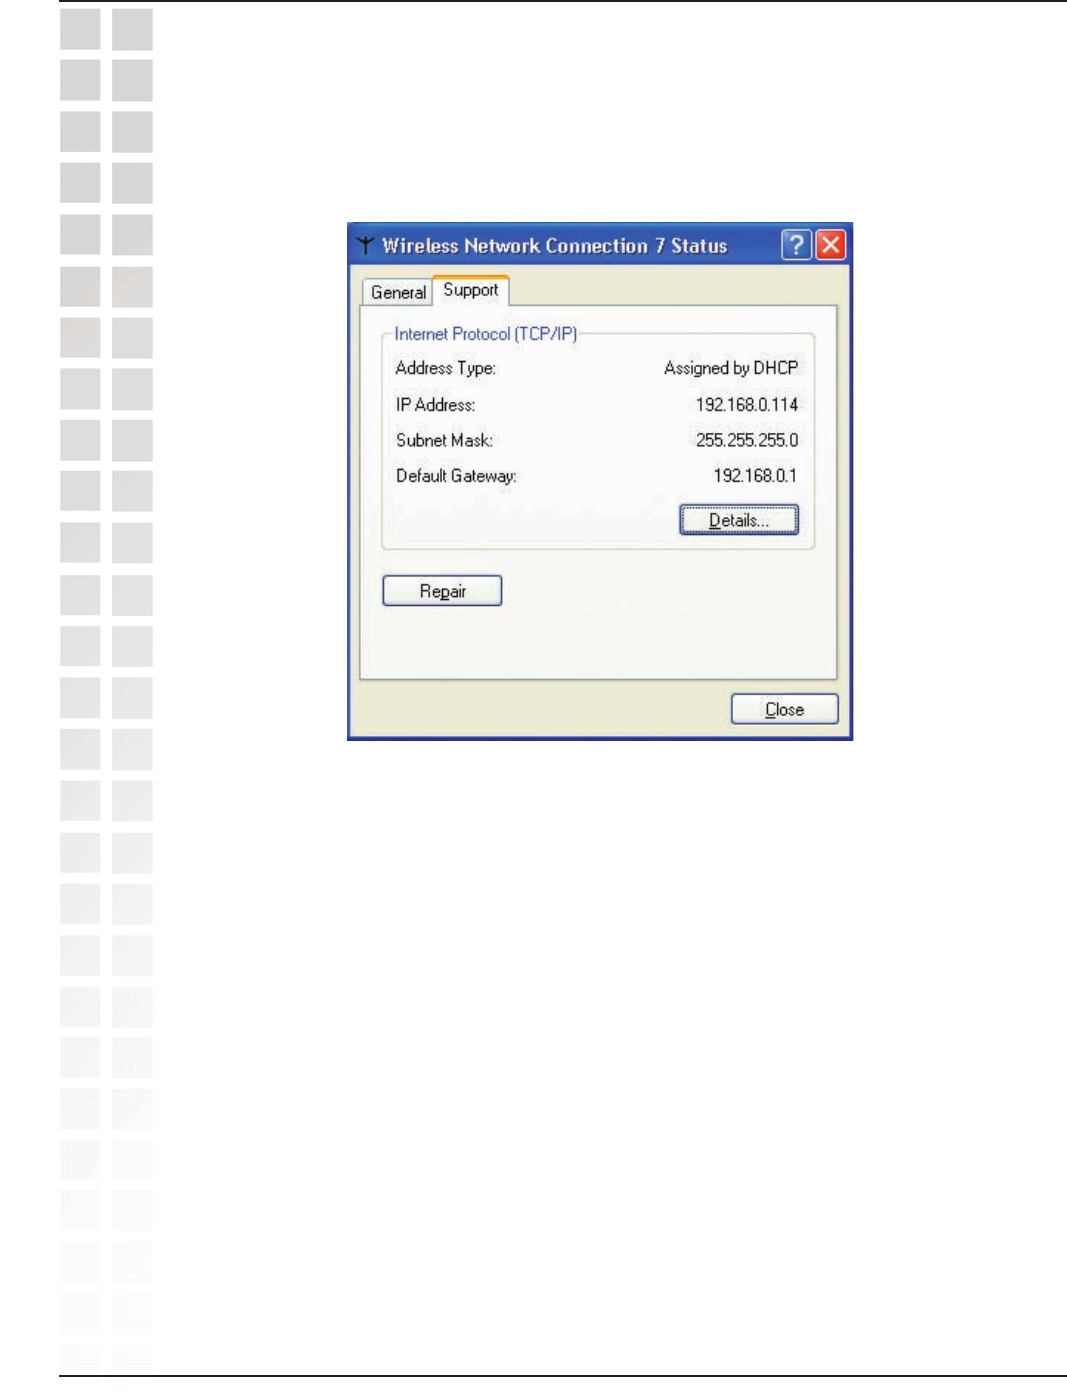
Right-click on the Local Area Connection icon in the task bar.
Click on Status.
Checking the IP Address in Windows® XP
104
DWL-2700AP User’s Manual
D-Link Systems, Inc.
Networking Basics
This window will appear:
Click the Support tab.
Click Close.
105
DWL-2700AP User’s Manual
D-Link Systems, Inc.
Note: DHCP enabled routers will automatically assign IP addresses to the computers
on the network, using DHCP (Dynamic Host Configuration Protocol) technology. If you
are using a DHCP capable router you will not need to assign static IP addresses.
If you are not using a DHCP capable router, or you need to assign a static IP address,
please follow these instructions:
Go to Start.
Double-click on Control Panel.
Assigning a Static IP Address in Windows® XP/2000
Networking Basics
Double-click on Network Connections.

106
DWL-2700AP User’s Manual
D-Link Systems, Inc.
Networking Basics
Right-click on Local Area Connections.
Double-click on Properties.
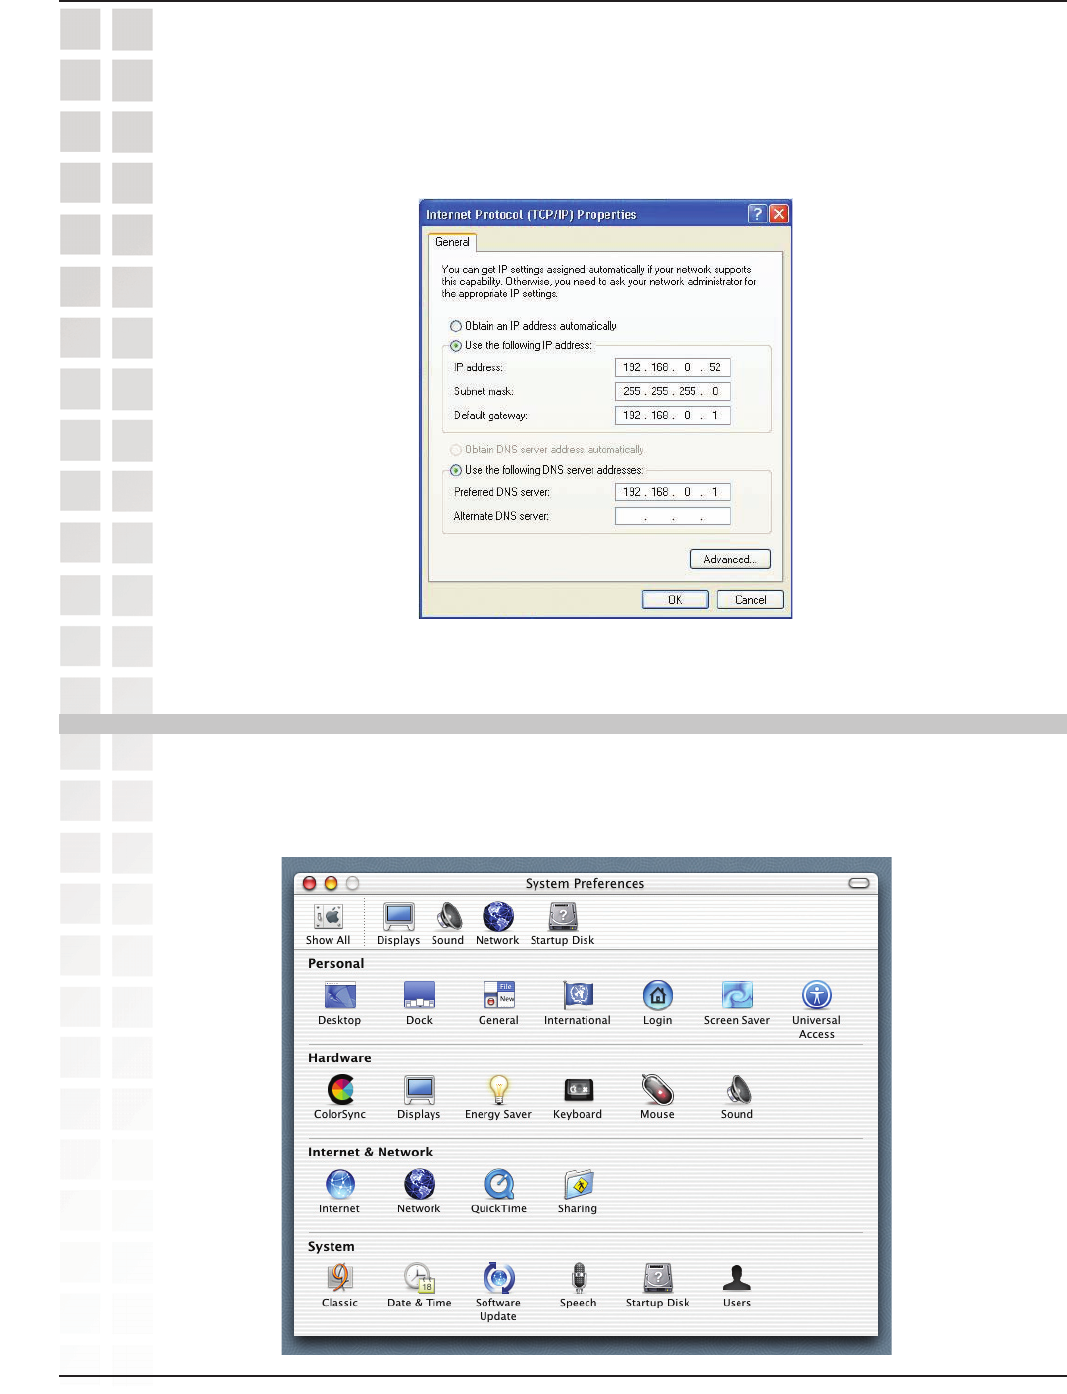
Click on Internet Protocol (TCP/IP).
Click Properties.
Input your IP address and subnet mask. (The IP addresses on your network
must be within the same range. For example, if one computer has an IP address
of 192.168.0.2, the other computers should have IP addresses that are sequential,
like 192.168.0.3 and 192.168.0.4. The subnet mask must be the same for all the
computers on the network.)
107
DWL-2700AP User’s Manual
D-Link Systems, Inc.
Input your DNS server addresses.
Note: If you are entering a DNS server, you must enter the IP address of the default
gateway.
The DNS server information will be supplied by your ISP (Internet Service Provider.)
Networking Basics
Assigning a Static IP Address in Macintosh® OSX
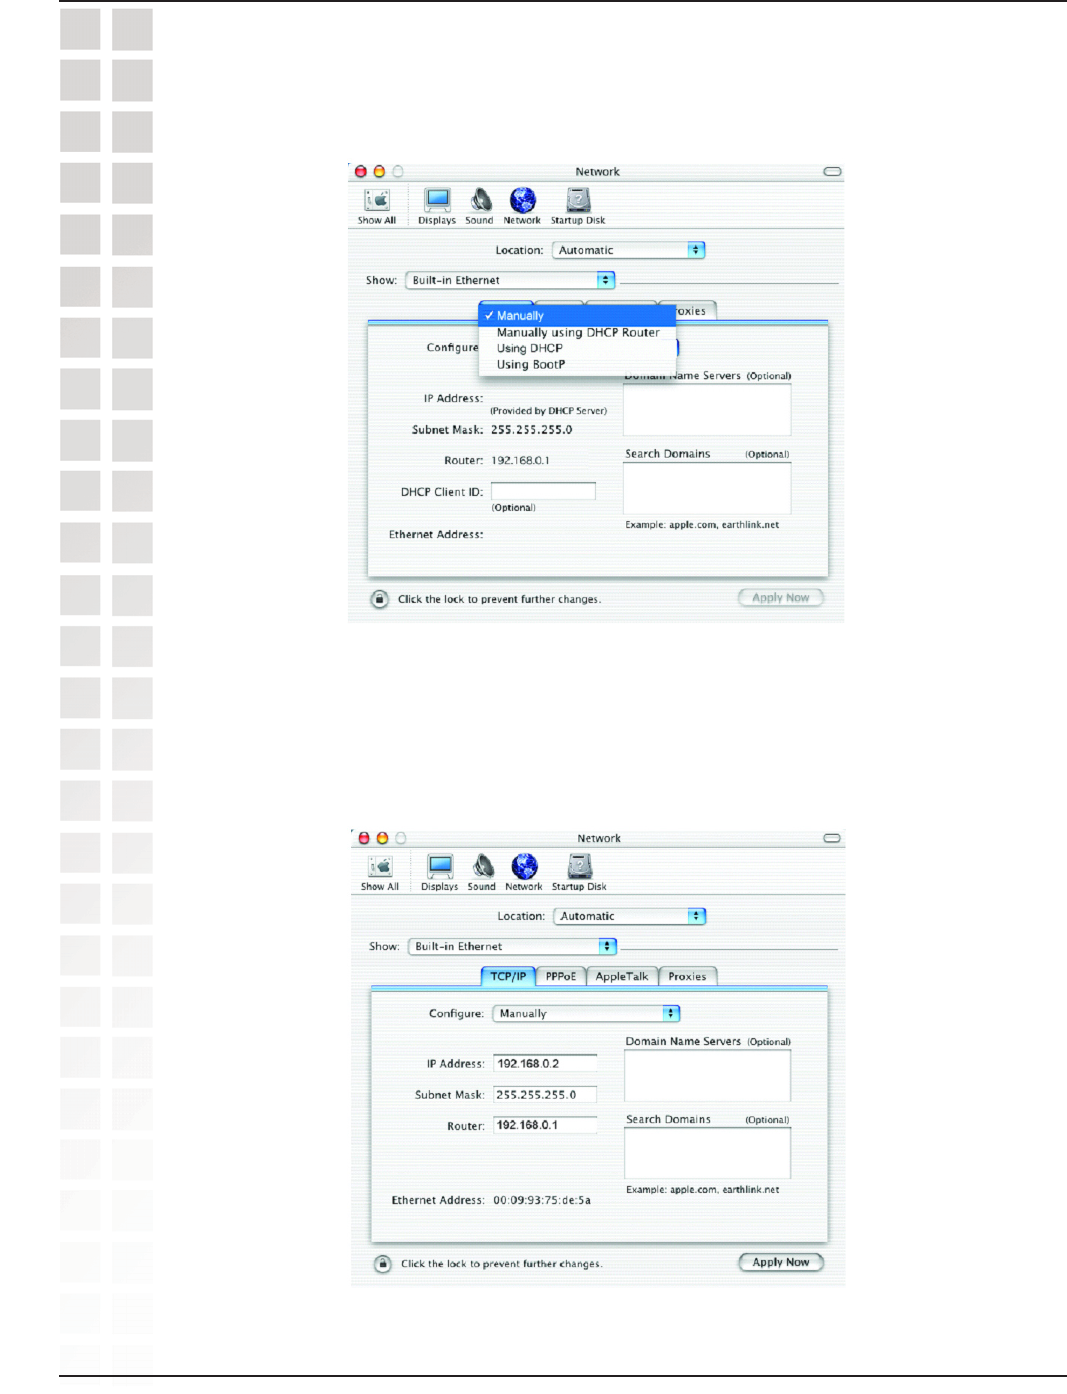
Go to the Apple Menu and select System Preferences.
Click on Network.
108
DWL-2700AP User’s Manual
D-Link Systems, Inc.
Networking Basics
Select Built-in Ethernet in the Show pull-down menu.
Select Manually in the Configure pull-down menu.
Input the Static IP Address, the Subnet Mask and the Router IP Address in the
appropriate fields.
Click Apply Now.
109
DWL-2700AP User’s Manual
D-Link Systems, Inc.
Networking Basics
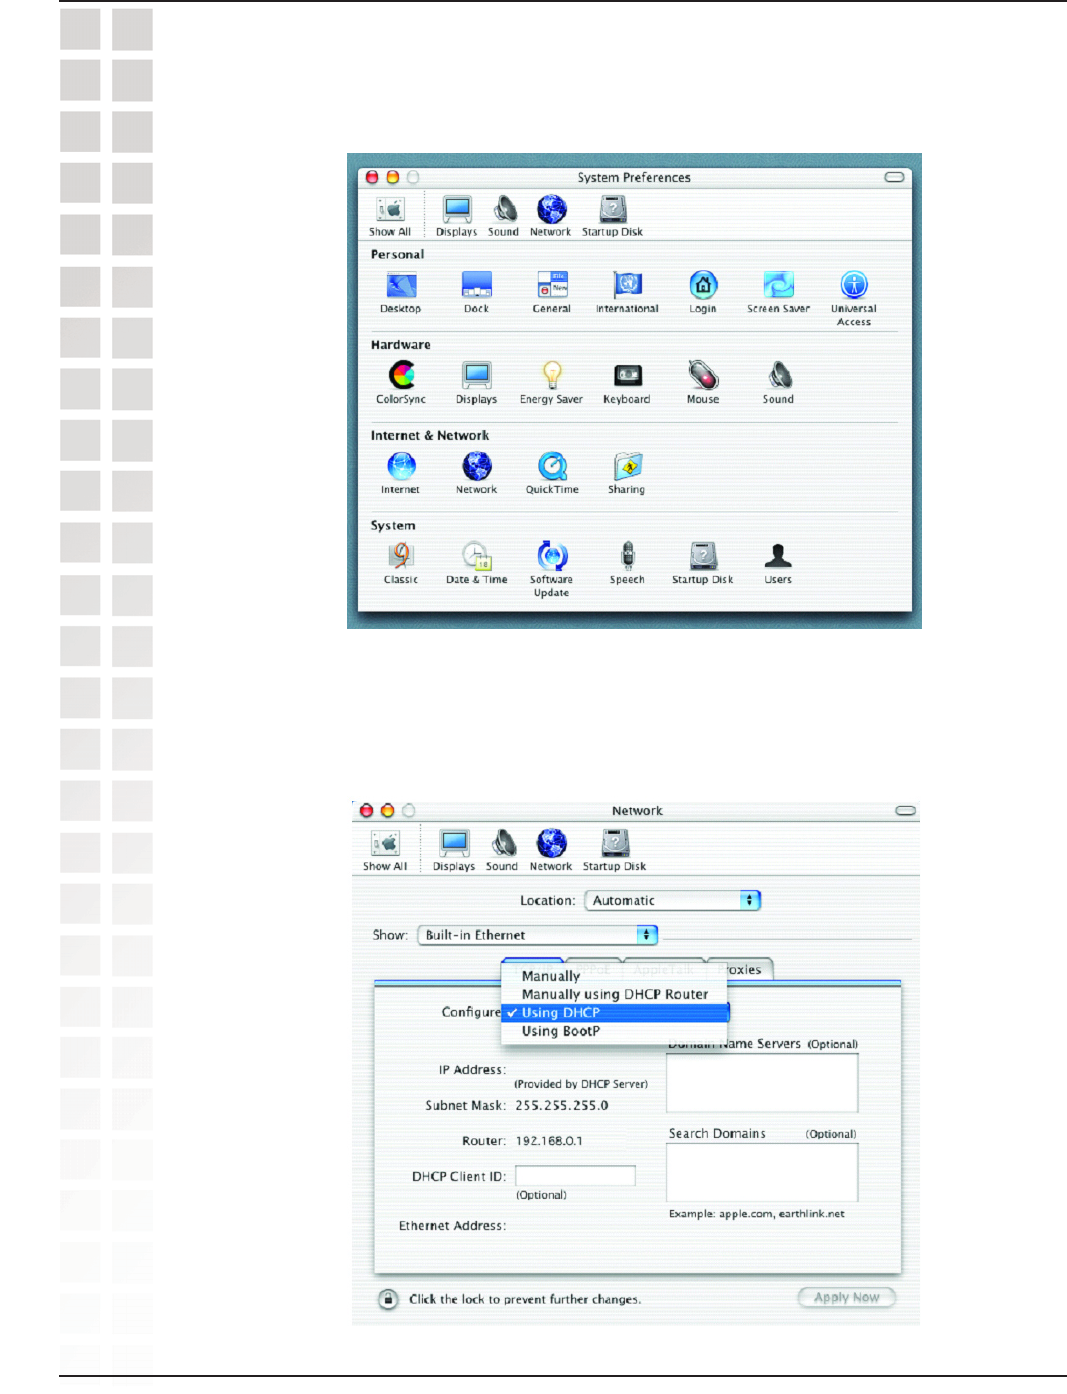
Go to the Apple Menu and select System Preferences.
Click on Network.
Select Built-in Ethernet in the Show pull-down menu.
Select Using DHCP in the Configure pull-down menu.