D Link DWLG120C1 IEEE802.11g WLAN USB Adapter User Manual dwl120v F manual 102103
D Link Corporation IEEE802.11g WLAN USB Adapter dwl120v F manual 102103
D Link >
Contents
- 1. Users manual part 1
- 2. Users manual part 2
- 3. Users manual part 3
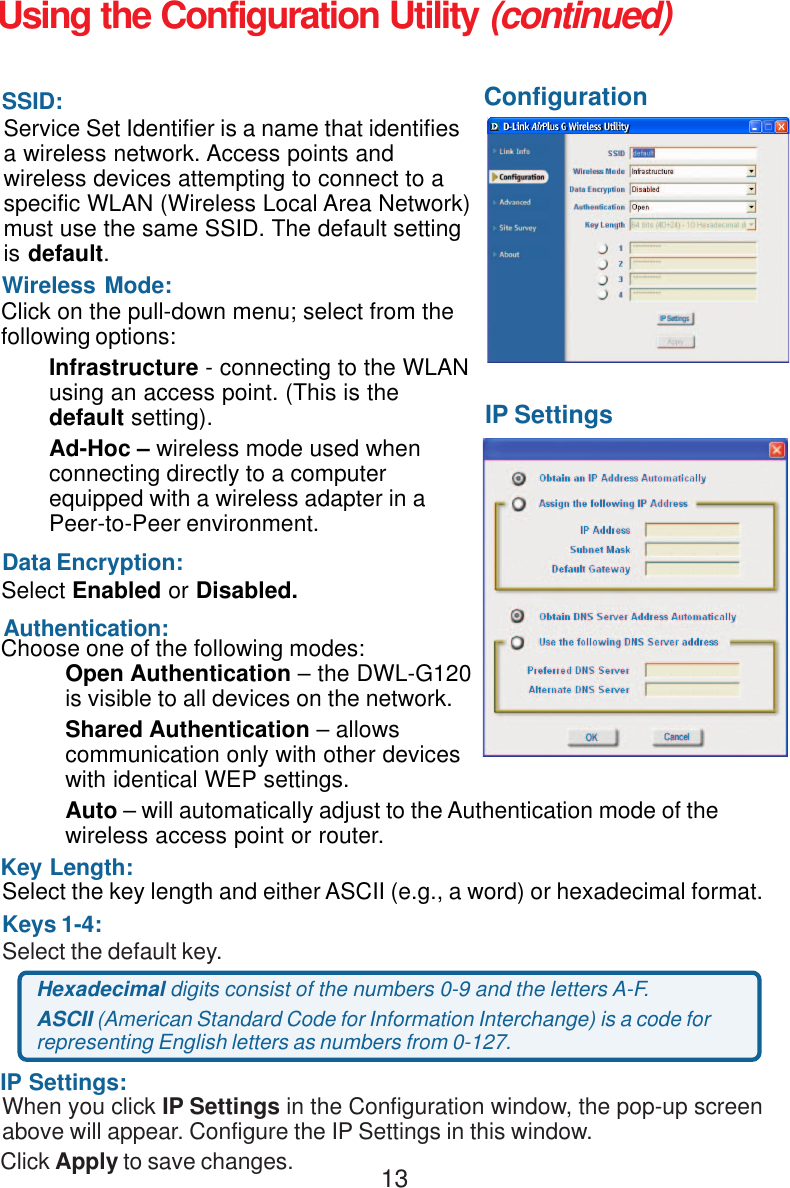
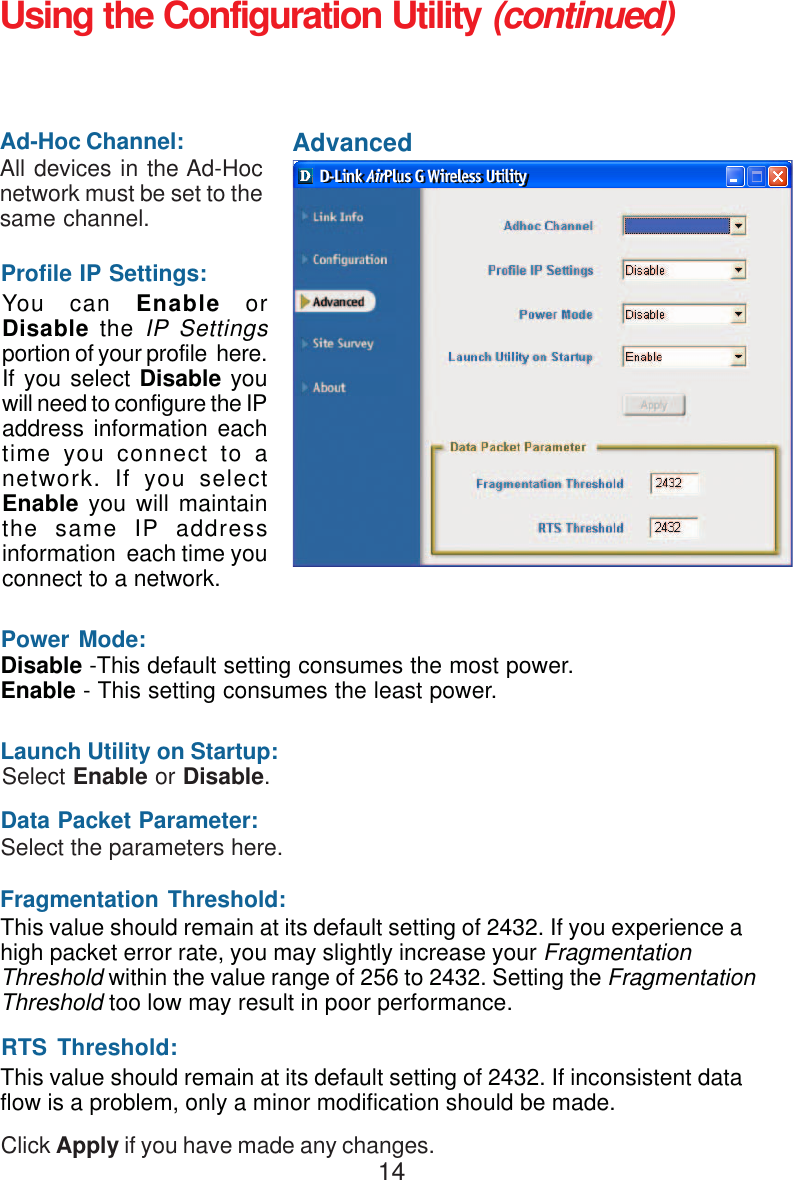
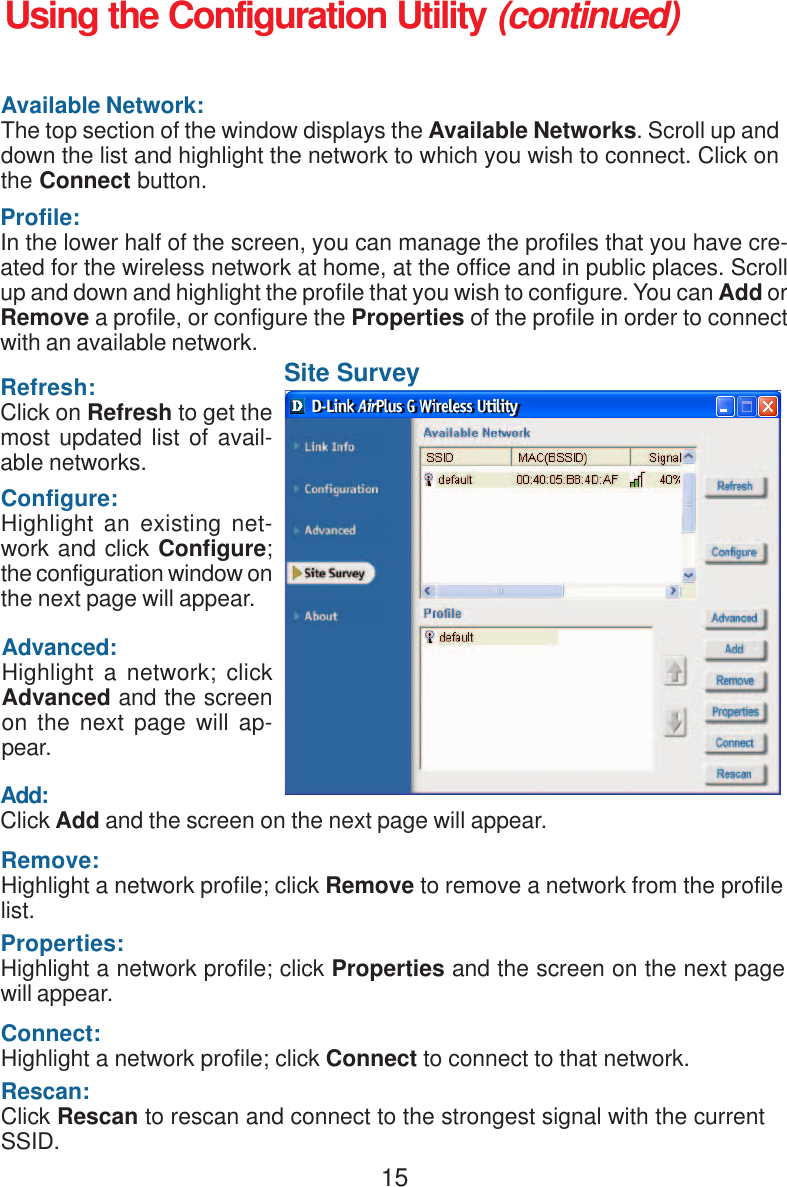
Users manual part 1