D Link DWLG132B1 AirPlus Xtreme G DWL-G132 Wireless USB Adapter User Manual dwl120v F manual 102103
D Link Corporation AirPlus Xtreme G DWL-G132 Wireless USB Adapter dwl120v F manual 102103
D Link >
Contents
- 1. Users Manual 1
- 2. Users Manual 2
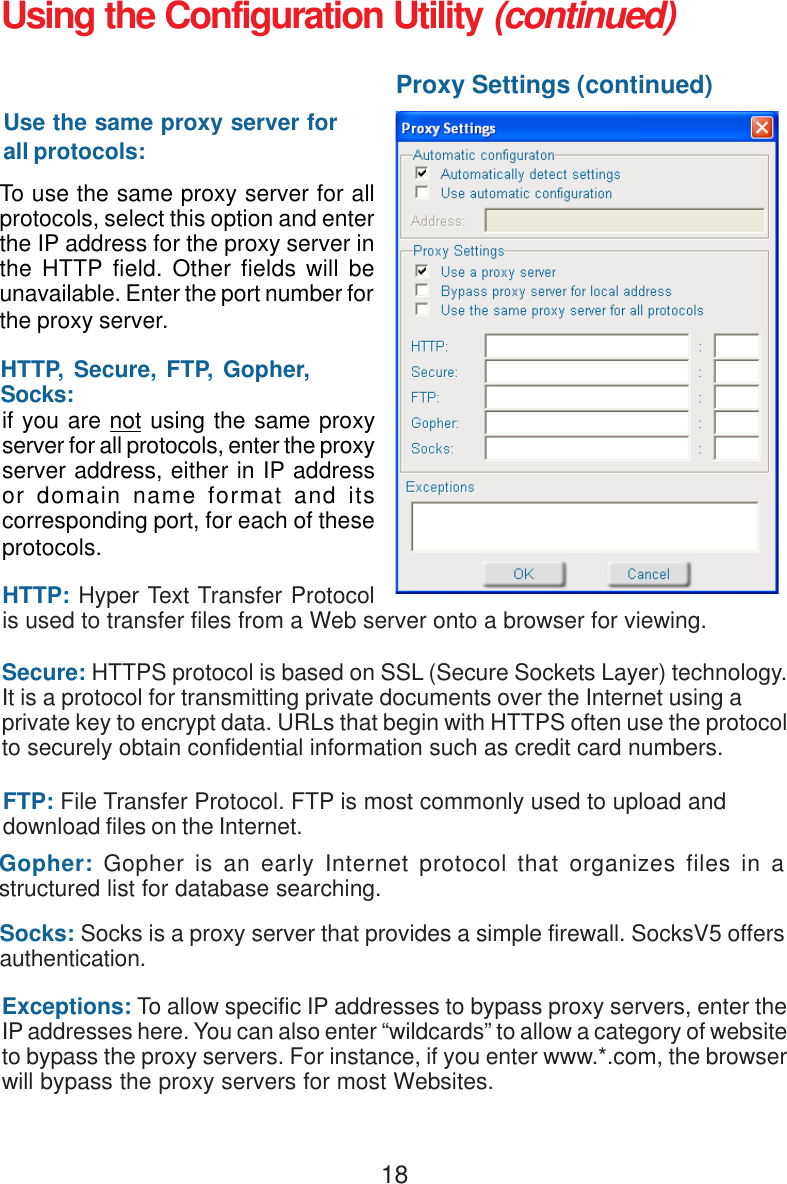
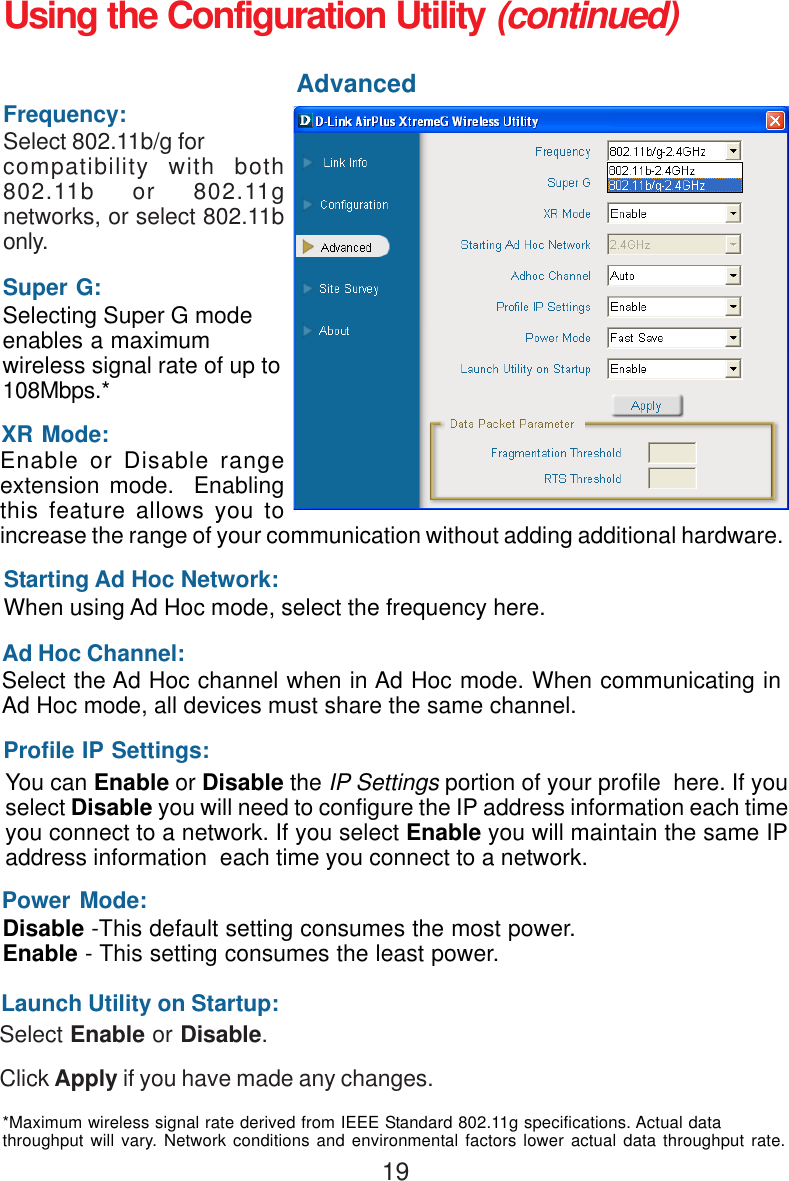
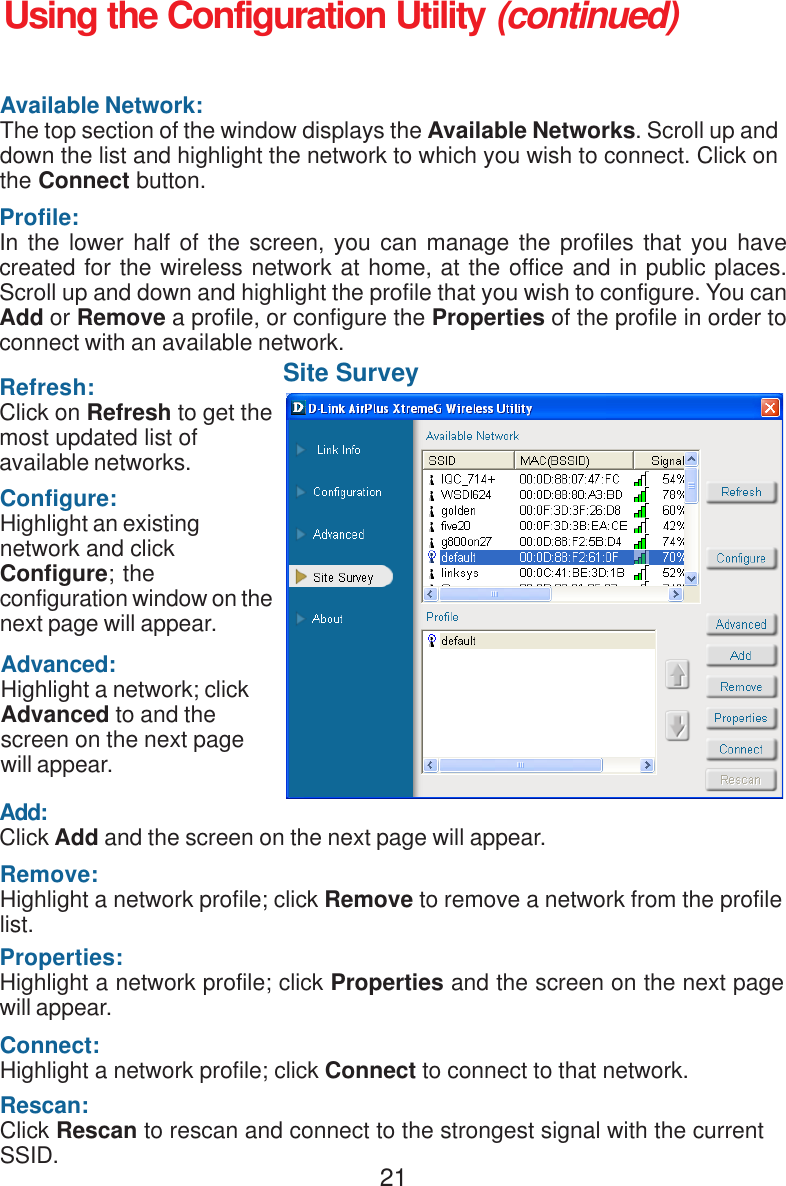
Users Manual 1