D Link SHG300A1 ZigBee to Ethernet Gateway User Manual
D-Link Corporation ZigBee to Ethernet Gateway Users Manual
UserManual.wiki
>
D Link
>
SHG300A1 User Manual
Users Manual
Navigation menu
Upload a User Manual
Namespaces
Wiki Guide
HTML
PDF
Info
Views
User Manual
Discussion / Help
Navigation

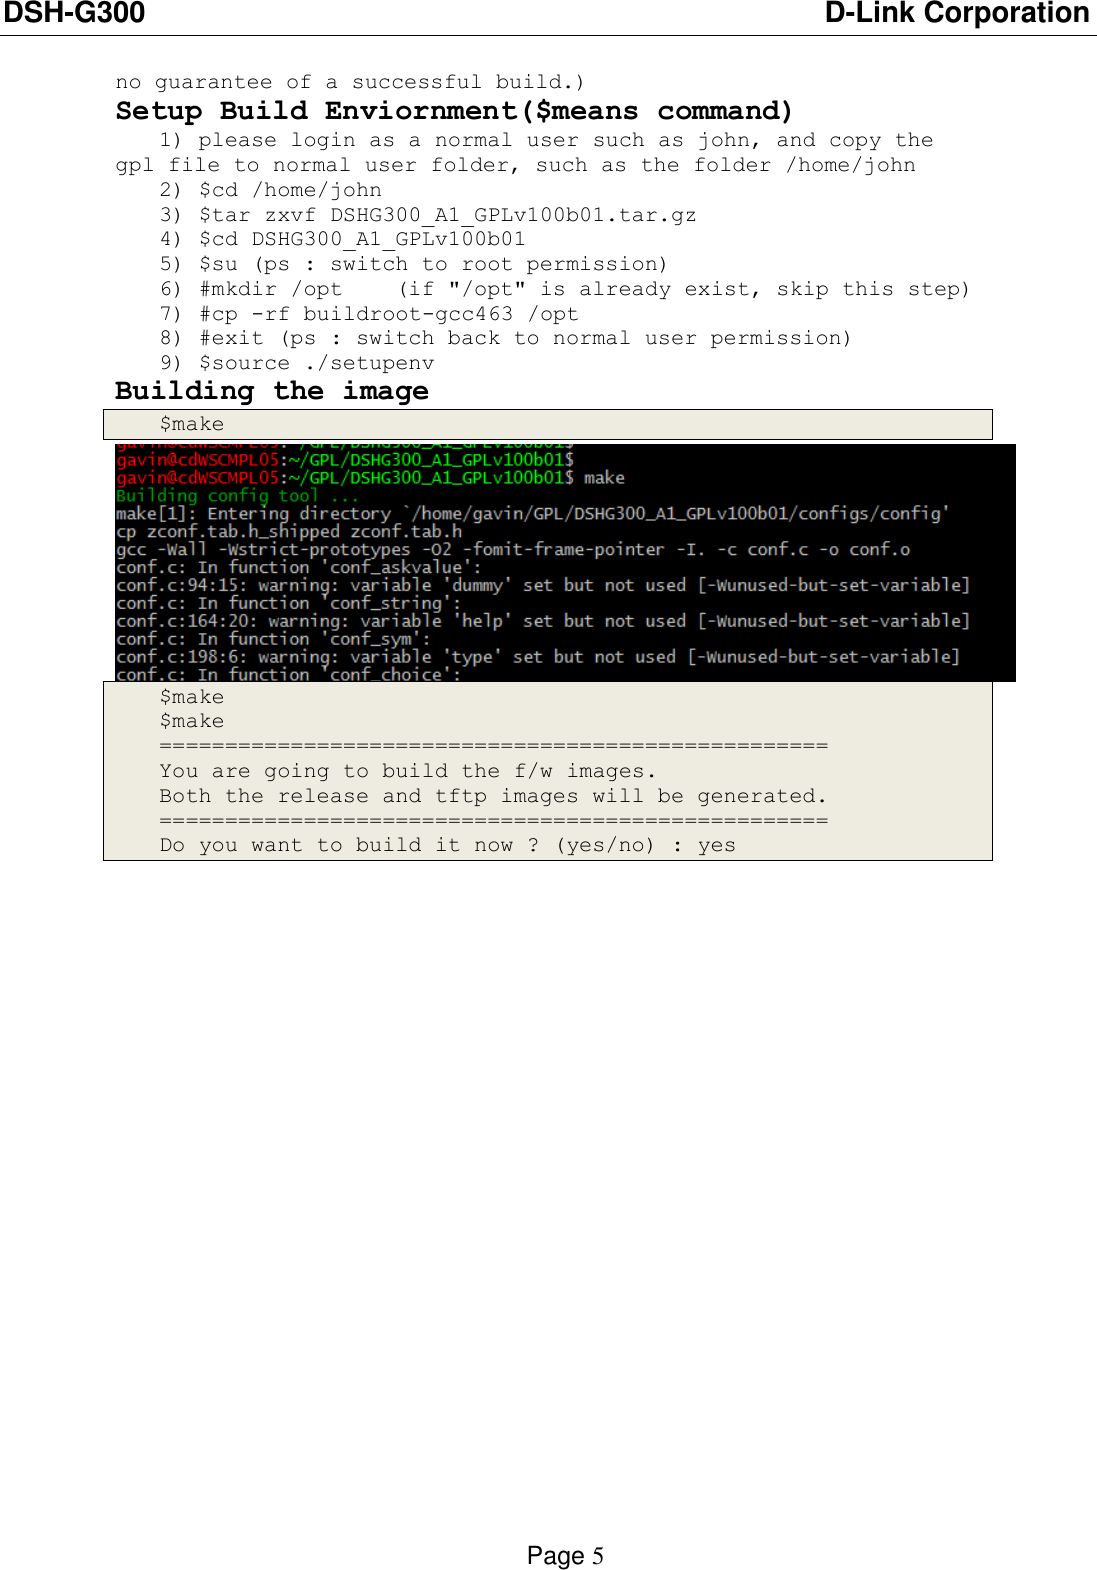
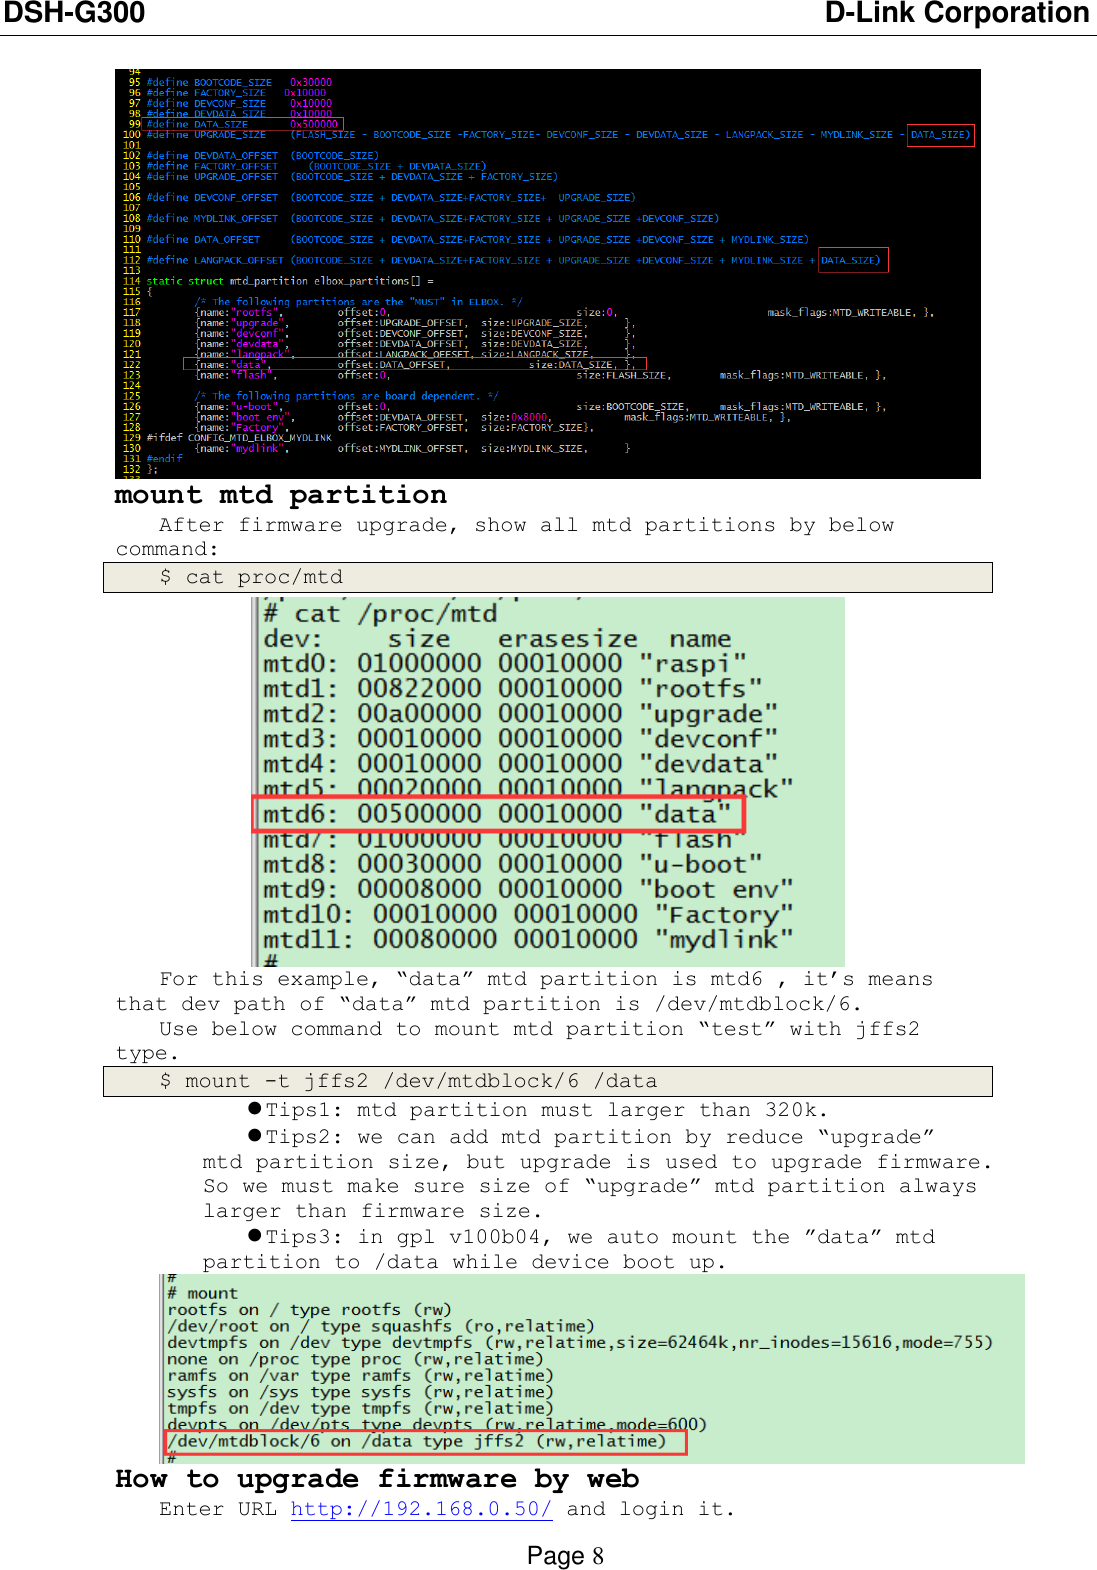
![DSH-G300 D-Link Corporation Page 7 firstly. Run kernel menuconfig and select jffs2 option, then save it. $ cd DSHG300_A1_GPLv100b01/kernels/MT7688_linux-2.6.36.x $ make menuconfig File systems ---> Miscellaneous filesystems ---> <*> Journalling Flash File System v2 (JFFS2) support (0) JFFS2 debugging verbosity (0 = quiet, 2 = noisy) [*] JFFS2 write-buffering support [ ] JFFS2 summary support (EXPERIMENTAL) [ ] JFFS2 XATTR support (EXPERIMENTAL) [ ] Advanced compression options for JFFS2 <*> Compressed ROM file system support (cramfs) Copy kernel config into boards folder. $ cp .config ../../boards/wrgn104/kernel.config add mtd partition Modify mtd partition map in file: DSHG300_A1_GPLv100b01/kernels/MT7688_linux-2.6.36.x/drivers/mtd/ralink/ralink_bbu_spi.c This is a sample which add a mtd partition named by “test”, and size of this partition is 320k: ralink_bbu_spi.c Re-bulid gpl firmware and upgrade gpl firmware into device.](https://usermanual.wiki/D-Link/SHG300A1/User-Guide-3672162-Page-7.png)