D Link SPW110A1 mydlinkTM Wi-Fi SMART PLUG User Manual DSP W110 A1 manual 20140429 copy
D Link Corporation mydlinkTM Wi-Fi SMART PLUG DSP W110 A1 manual 20140429 copy
D Link >
User Manual.pdf
DSP-W110
User Manual
mydlink™ Wi-Fi Smart Plug
Version DRAFT | 04/29/2014
2
D-Link DSP-W110 User Manual
Section 1 - Product Overview
Hardware Overview
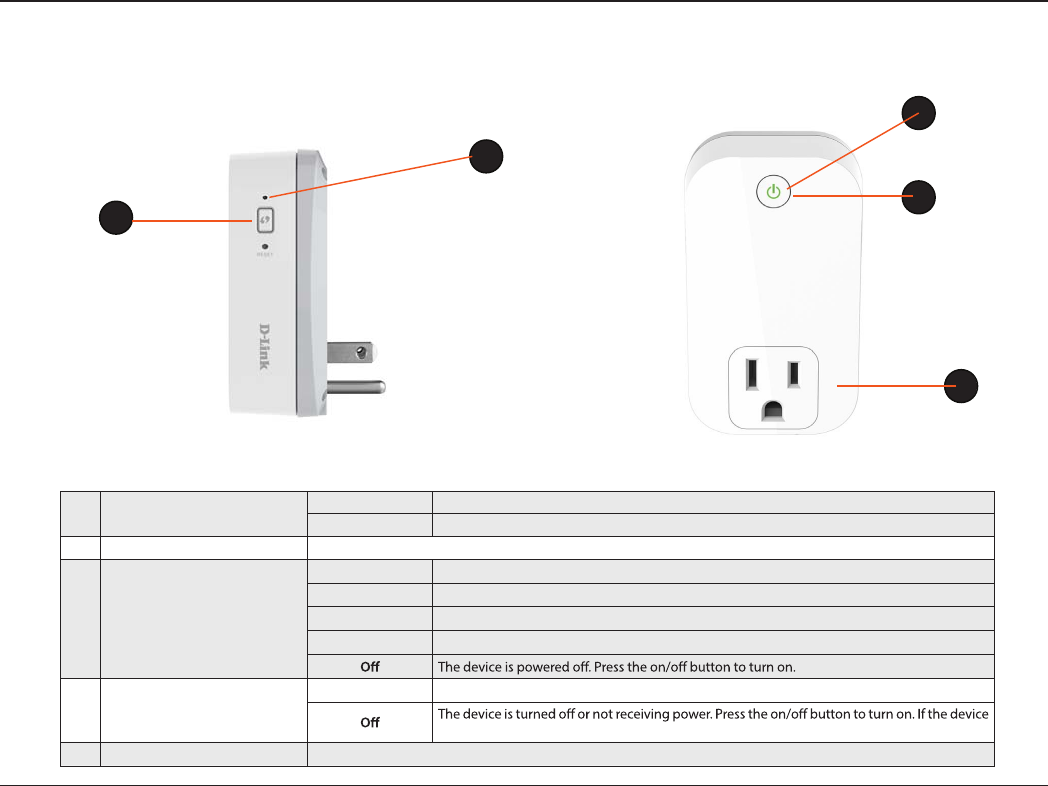
LEDs and Buttons
1WPS/Reset Button WPSPress for one second to start the WPS connection process. The Status LED will start to blink.
ResetPress and hold for 10 seconds to reset the device back to the factory default settings.
2ON/OFF Button Press to turn the device ON or OFF.
3Status LED
Solid GreenThe device is successfully connected to your network.
Blinking GreenDuring the WPS process.
Blinking OrangeThe device is attempting to communicate with your wireless network.
Solid Red During power on/boot process or device is defective.
4Power LED
Solid GreenThe device is powered on.
will not power on, try another outlet.
5Plug Connect your appliances, lamps, and other devices to monitor.
1
2
3
4
5
3
D-Link DSP-W110 User Manual
Section 2 - Installation and Setup
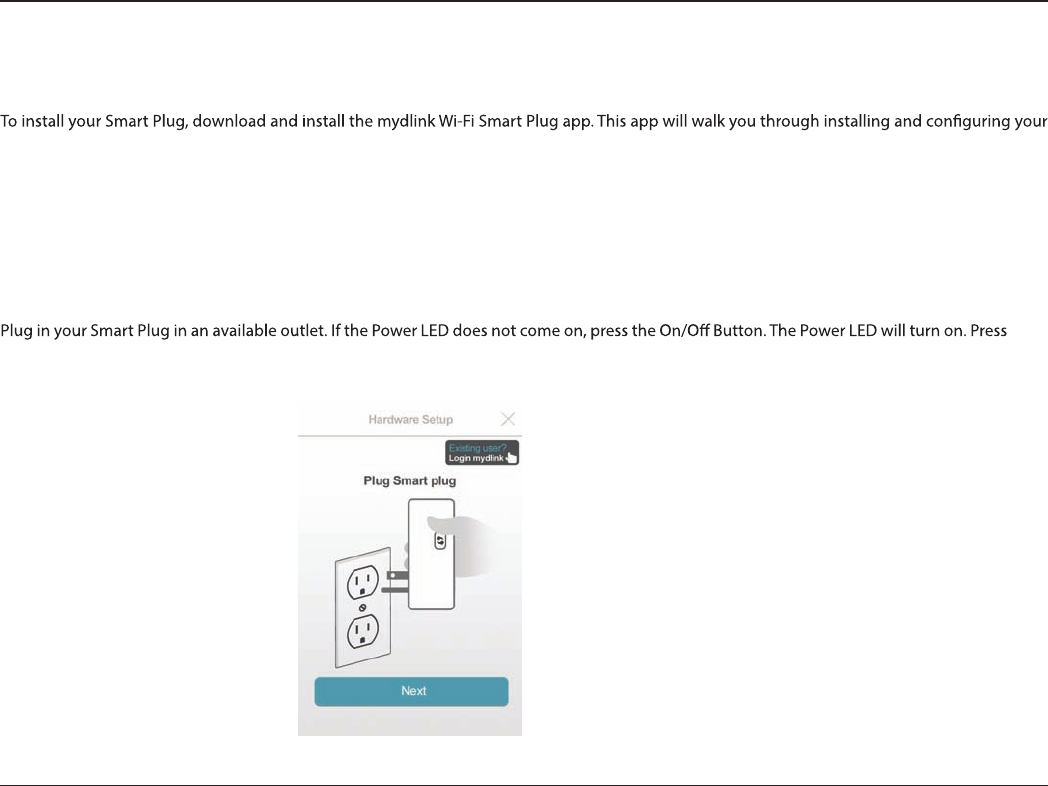
Installation and Setup
Smart Plug.
Step 1
Download the app from the App Store (iOS) or Google Play (Android).
Step 2
Once installed, launch the app.
Step 3
Next
to continue.
4
D-Link DSP-W110 User Manual
Section 2 - Installation and Setup
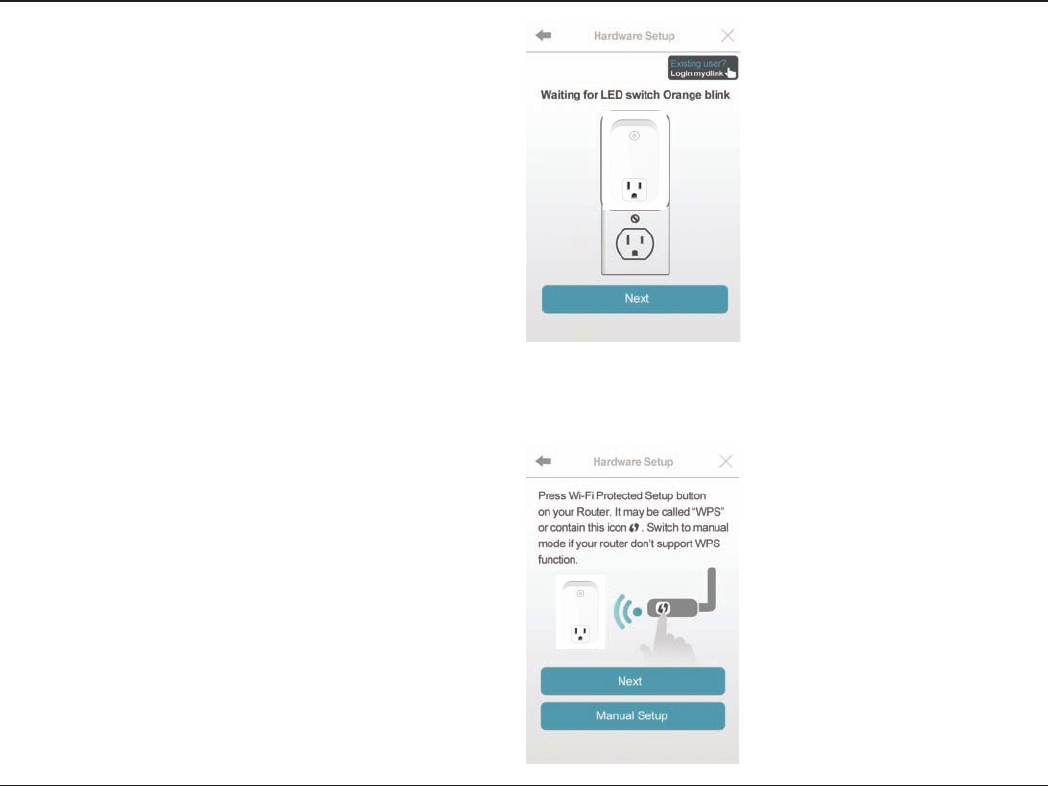
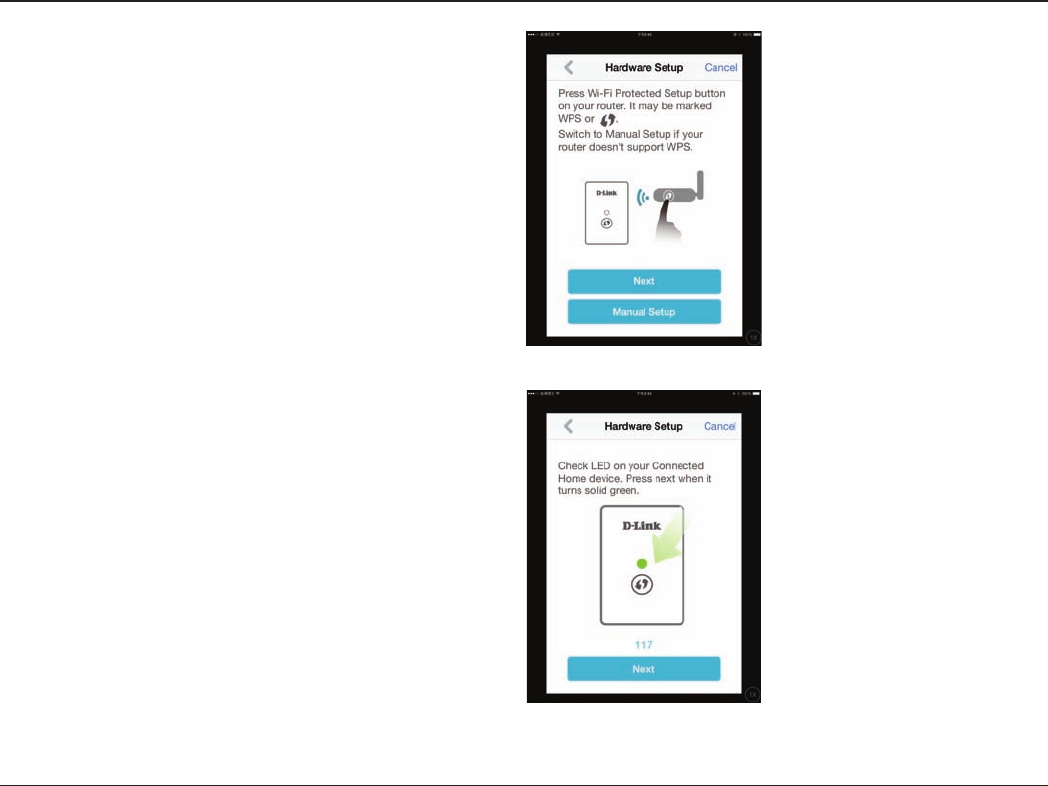
Step 4
When the Status LED is blinking orange, press Next.
Step 5
If your router supports WPS, press the WPS button on your router. Press
Next to continue. Please refer to your router’s documentation if you are
unsure if your router supports WPS.
If your router does not support WPS or you want to manually connect
to your wireless router, press Manual Setup and skip to Step 6 - Manual
on page 11.
5
D-Link DSP-W110 User Manual
Section 2 - Installation and Setup
Step 6 - WPS
Press the WPS button on your Smart Plug. The Status LED will start to
blink green. Allow up to two minutes to connect to your router. Press
Next to continue.
Note: You must press the WPS button on your router and the Smart Plug
within two minutes.
Step 7 - WPS
After about two minutes, the Status LED will turn solid green. This
indicates that the Smart Plug has successfully connected to your wireless
router. Press Next to continue.
6
D-Link DSP-W110 User Manual
Section 2 - Installation and Setup
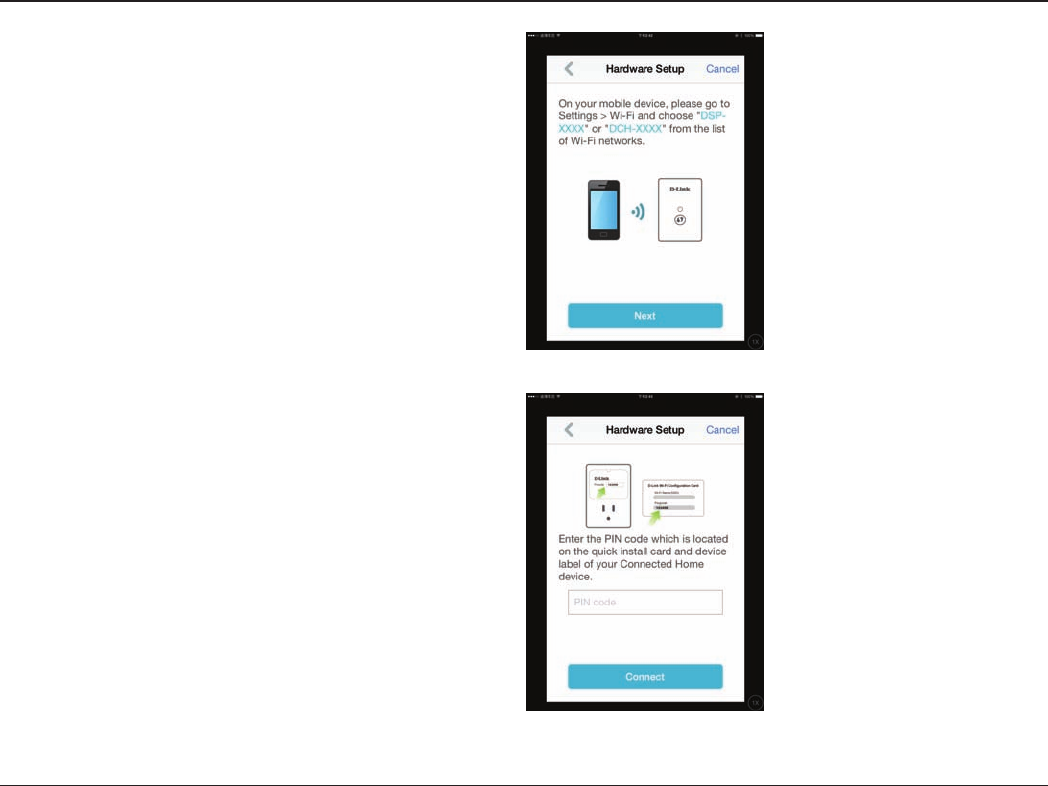
Step 6 - Manual
You must connect to the Smart Plug directly. Do not close this app.
On your device, go to Settings > Wi-Fi. Select the network called DSP-
xxxx or DSP-xxxx_AC.
Note: xxxx represents numbers and/or letters that are unique to your Smart
Plug device. For the exact network name (SSID), refer to the Quick Install
card that came with the product.
Press Next to continue.
Step 7 - Manual
Enter the PIN code and press Connect.
This code is located both on the front of the Smart Plug and the Quick
Install card.
7
D-Link DSP-W110 User Manual
Section 2 - Installation and Setup
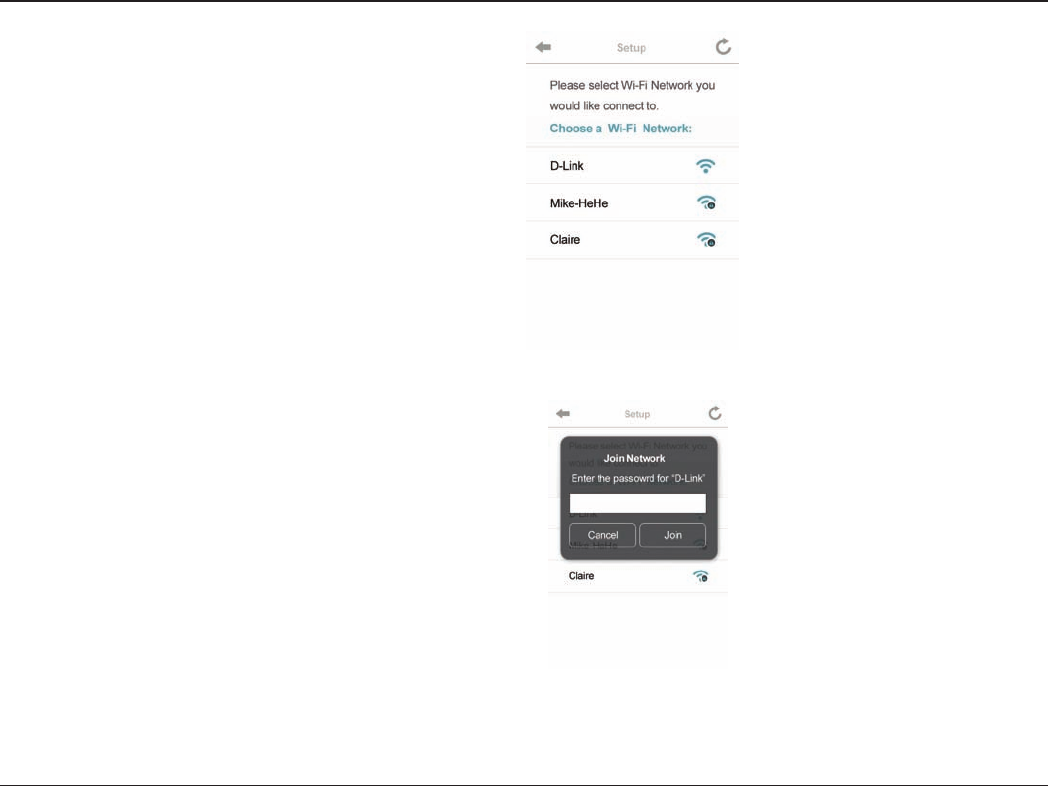
Step 8 - Manual
A list of available wireless networks will appear. Press your wireless
network (the SSID of your wireless router).
Step 9 - Manual
If you have secured your wireless network, enter your Wi-Fi password
and click Join.
Continue with step 10 on the next page.
8
D-Link DSP-W110 User Manual
Section 2 - Installation and Setup
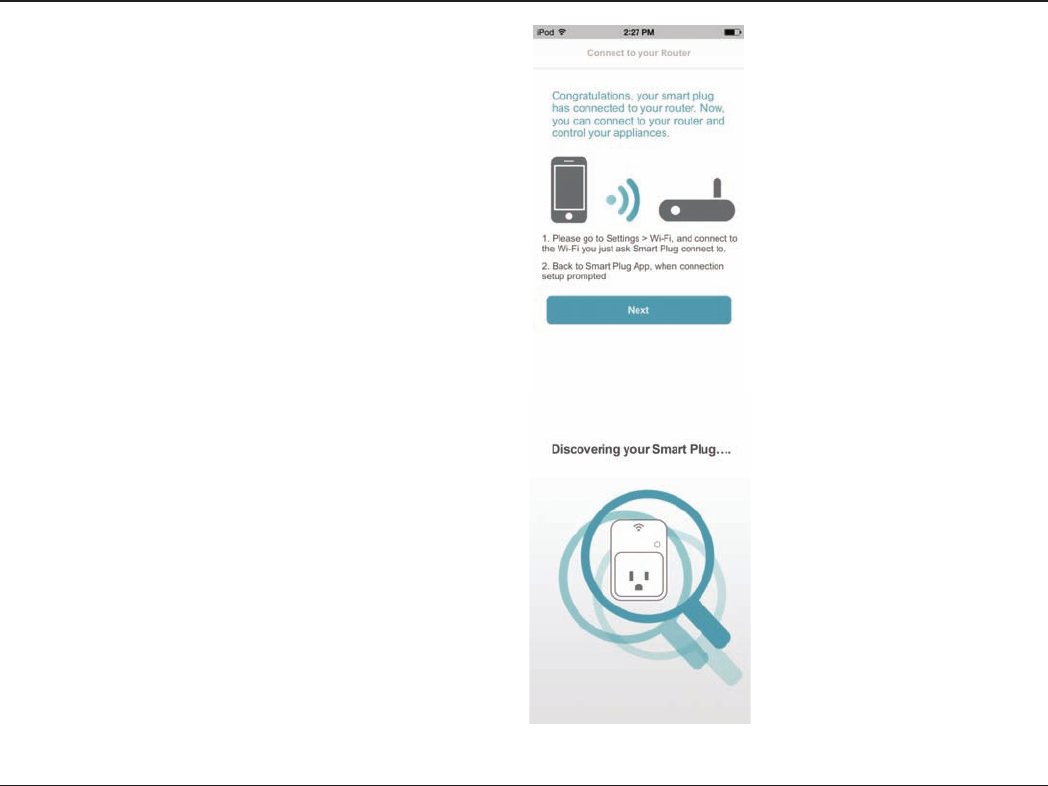
Step 10
Once you connect, you will need to connect to your mobile device or
tablet (that you are currently running the app from) to your wireless
router (if you are not already). Make sure you keep this app running.
On your device, go to Settings > Wi-Fi. Connect to your wireless router
and enter your Wi-Fi password (if you have one).
Go back to this app and press Next to continue.
Step 11
Your device will now scan your network for Smart Plugs.
9
D-Link DSP-W110 User Manual
Section 2 - Installation and Setup
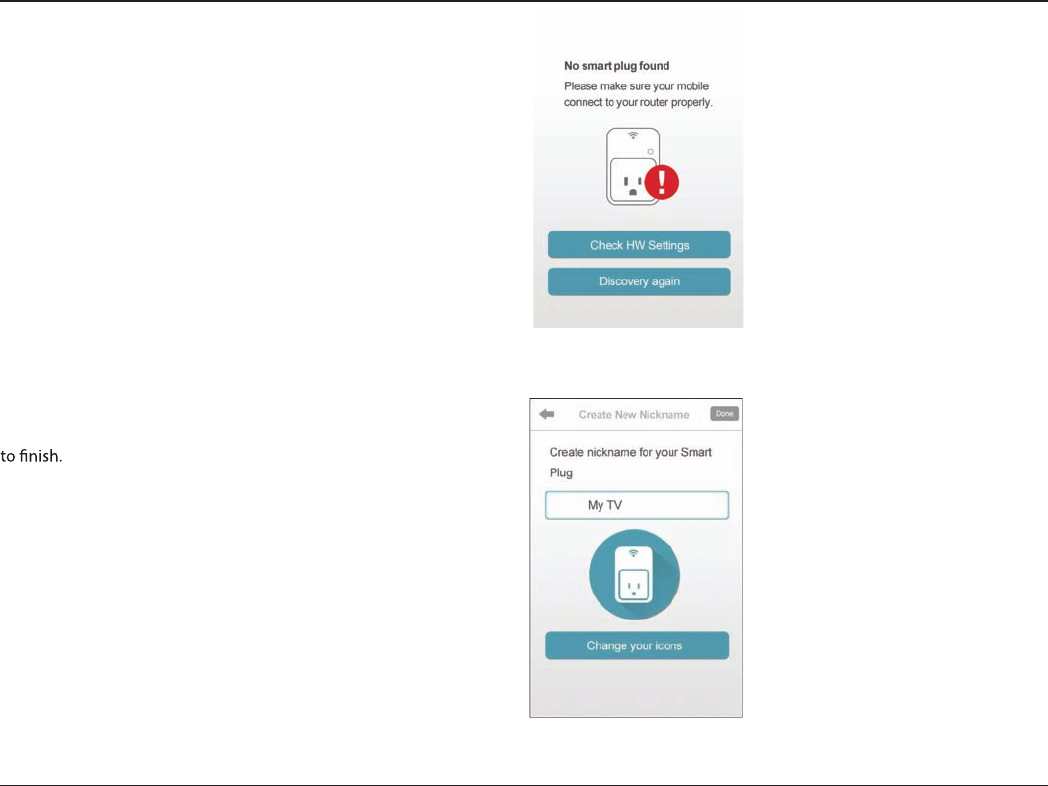
Step 12
If you have received this error message, please do the following:
a. Please make sure your mobile device is connected to your router.
b. Make sure the Power LED and Status LEDs on your Smart Plug
are both solid green.
c. Press Hardware Settings and verify the settings.
d. Press Discovery Again to rescan.
Step 13
Enter a nickname for your Smart Plug. Click Change your Icons to
change the icon for your device or click Done in the upper right corner
10
D-Link DSP-W110 User Manual
Section 2 - Installation and Setup
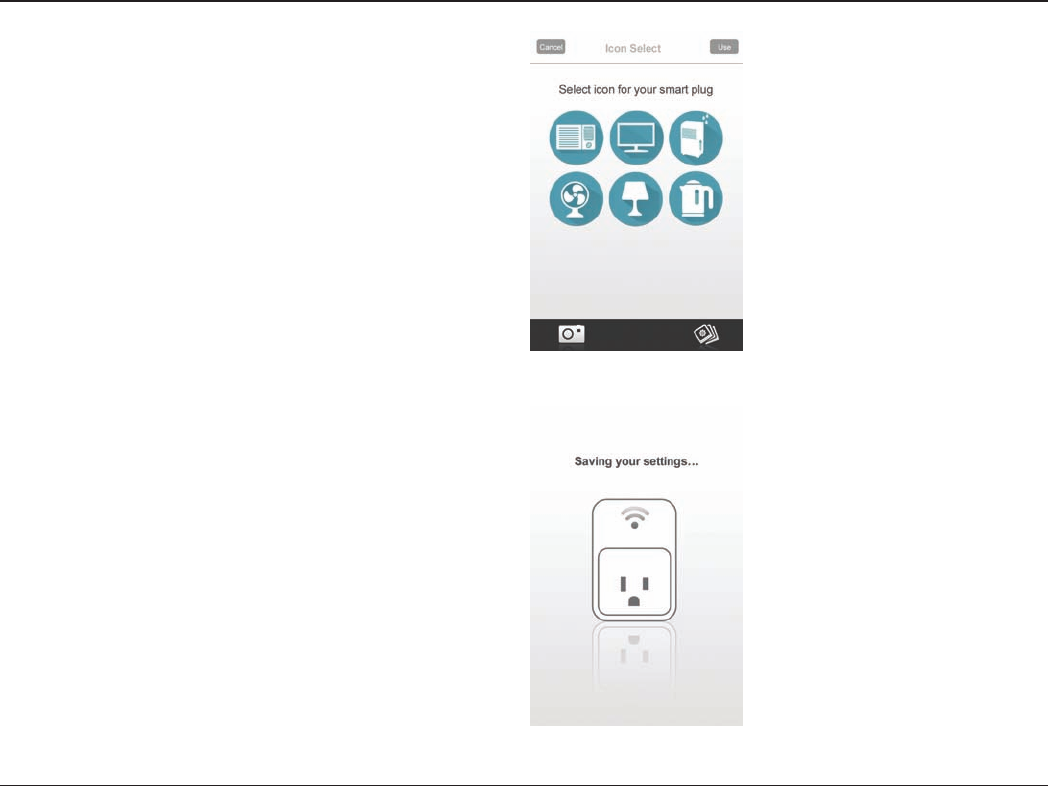
Step 14
Select an icon that represents the device plugged into your Smart Plug
and then press Use in the upper right corner. If you do not want to
change the icon, press Cancel.
Step 15
Your settings will now save.

11D-Link DSP-W110 User Manual
Appendix - Warranty
Federal Communication Commission Interference Statement
This equipment has been tested and found to comply with the limits for a Class B digital device, pursuant to Part 15 of the FCC Rules. These limits are
designed to provide reasonable protection against harmful interference in a residential installation. This equipment generates, uses and can radiate
radio frequency energy and, if not installed and used in accordance with the instructions, may cause harmful interference to radio communications.
However, there is no guarantee that interference will not occur in a particular installation. If this equipment does cause harmful interference to radio
or television reception, which can be determined by turning the equipment o and on, the user is encouraged to try to correct the interference by
one of the following measures:
• Reorient or relocate the receiving antenna.
• Increase the separation between the equipment and receiver.
• Connect the equipment into an outlet on a circuit di erent from that to which the receiver is connected.
• Consult the dealer or an experienced radio/TV technician for help.
FCC Caution: Any changes or modications not expressly approved by the party responsible for compliance could void the user’s authority to operate
this equipment.
This device complies with Part 15 of the FCC Rules. Operation is subject to the following two conditions: (1) This device may not cause harmful interference,
and (2) this device must accept any interference received, including interference that may cause undesired operation.
IMPORTANT NOTE:
Radiation Exposure Statement:
This equipment complies with FCC radiation exposure limits set forth for an uncontrolled environment. This equipment should be installed and operated
with minimum distance 20cm between the radiator & your body.
This transmitter must not be co-located or operating in conjunction with any other antenna or transmitter.
Country Code selection feature to be disabled for products marketed to the US/CANADA Industry Canada statement:

12D-Link DSP-W110 User Manual
Appendix D - Warranty
IC statement
This device complies with Industry Canada licence-exempt RSS standard(s). Operation is subject to the following two conditions:
(1) this device may not cause interference, and
(2) this device must accept any interference, including interference that may cause undesired operation of the device.
Le présent appareil est conforme aux CNR d’Industrie Canada applicables aux appareils radio exempts de licence. L’exploitation est autorisée aux deux
conditions suivantes :
(1) l’appareil ne doit pas produire de brouillage, et
(2) l’utilisateur de l’appareil doit accepter tout brouillage radioélectrique subi, même si le brouillage est susceptible d’en compromettre le
fonctionnement.
Radiation Exposure Statement:
This equipment complies with IC radiation exposure limits set forth for an uncontrolled environment. This equipment should be installed and operated
with minimum distance 20cm between the radiator & your body.
Déclaration d’exposition aux radiations:
Cet équipement est conforme aux limites d’exposition aux rayonnements IC établies pour un environnement non contrôlé. Cet équipement doit être
installé et utilisé avec un minimum de 20 cm de distance entre la source de rayonnement et votre corps
11
D-Link DSP-W110 User Manual
Standards
t*&&&O
t*&&&H
Support Functions
t4NBrt rFNPte cPOtrPM
tPPwFSTDIFEVMJOH
Security
t WPA
t WP"
t 814(WJFJPrPtected 4etup)
Temperature
t0QFSBUJOHtP °C
Humidity
t0QFSBUJPOtPOPOcPOEFOTJOH
t4tPrBHFtPOPOcPOEFOTJOH
Power Input
t*OQVU
Power Consumption
tMBYJNVN W FYDMVEJOH"$PVUQVUPG4PDLFU0VUMFU
LEDs
tPPwer
t4tBtus
t'CC
t6-
Dimensions
tYYNN
Weight
t5#%
*
t