D Link WL3140APA1 Wireless 108G Web Smart Thin AP with PoE User Manual Manual Part 2
D Link Corporation Wireless 108G Web Smart Thin AP with PoE Manual Part 2
D Link >
Contents
- 1. Manual Part 1
- 2. Manual Part 2
Manual Part 2
D-Link Smart WLAN Manager User Manual
D-Link Corporation 21
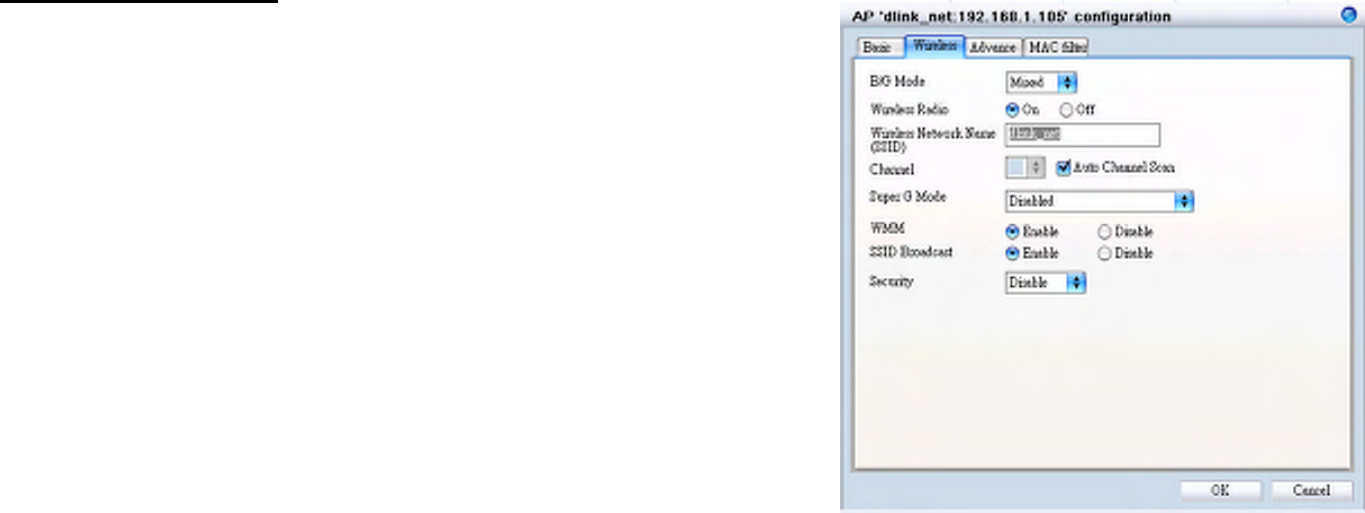
Wireless Configuration
B/G Mode - Select if you want to include both 802.11b and 11g devices
(Mixed), or only 802.11b (B_only), 802.11g (G_only) device in the network.
Wireless Radio - Select On of Off the radio wave.
Wireless Network Name (SSID) - The Service Set Identifier of the wireless
network.
Channel - Allows you to manually choose a channel. It’s only selectable when
Auto Channel Scan is disabled.
Auto Channel Scan - Select this option to allow the channel to be decided
automatically.
Super G Mode - Select this option to enable the wireless signal rate of up to
108Mbps. You can choose with or without Turbo mode. (Note: You can only
choose Super G or B/G mode for AP, these two mode cannot be enabled at
the same time.)
WMM - Select Enable of Disable the Wi-Fi Multimedia (WMM) function.
Enabling this feature will improve the user experience for multimedia
application if the wireless device supports WMM as well.
SSID Broadcast - Select Enable or Disable the broadcast of SSID.
Security - Select the security setting of the network. The available
authentication mechanisms include:
Disable (default)
WEP
WPA
D-Link Smart WLAN Manager User Manual
D-Link Corporation 22
WPA2
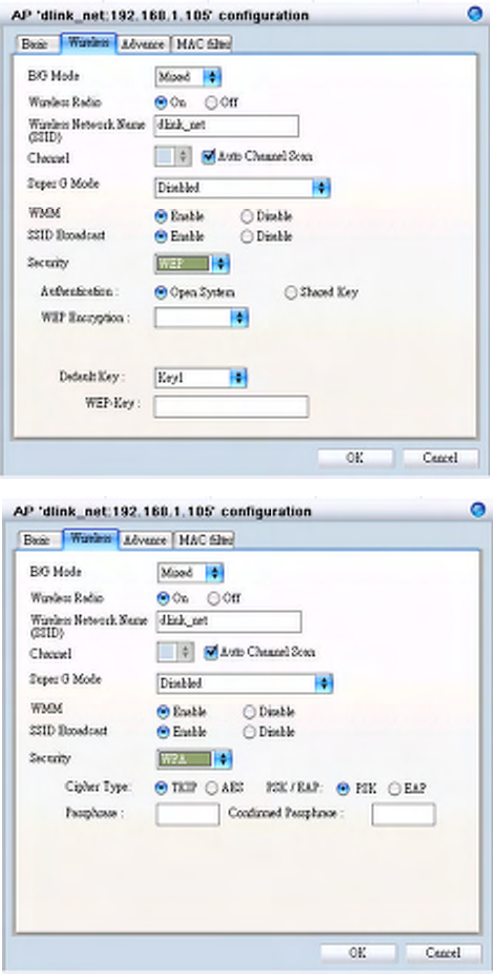
If you select WEP as the security type, additional columns will appear with
following options.
Authentication - Select Open System or Shared Key to be used on the
network.
WEP Encryption - Select the key size (64-bit. 128-bit, or 152-bit).
Default Key - Select which defined key is active on the network.
WEP-Key - Enter a string as the key.
If you select WPA-PSK or WPA2-PSK as the security type, additional
columns will appear with following options.
Cipher Type - Select TKIP or AES.
Passphrase - Enter a string as the Passphrase.
D-Link Smart WLAN Manager User Manual
D-Link Corporation 23
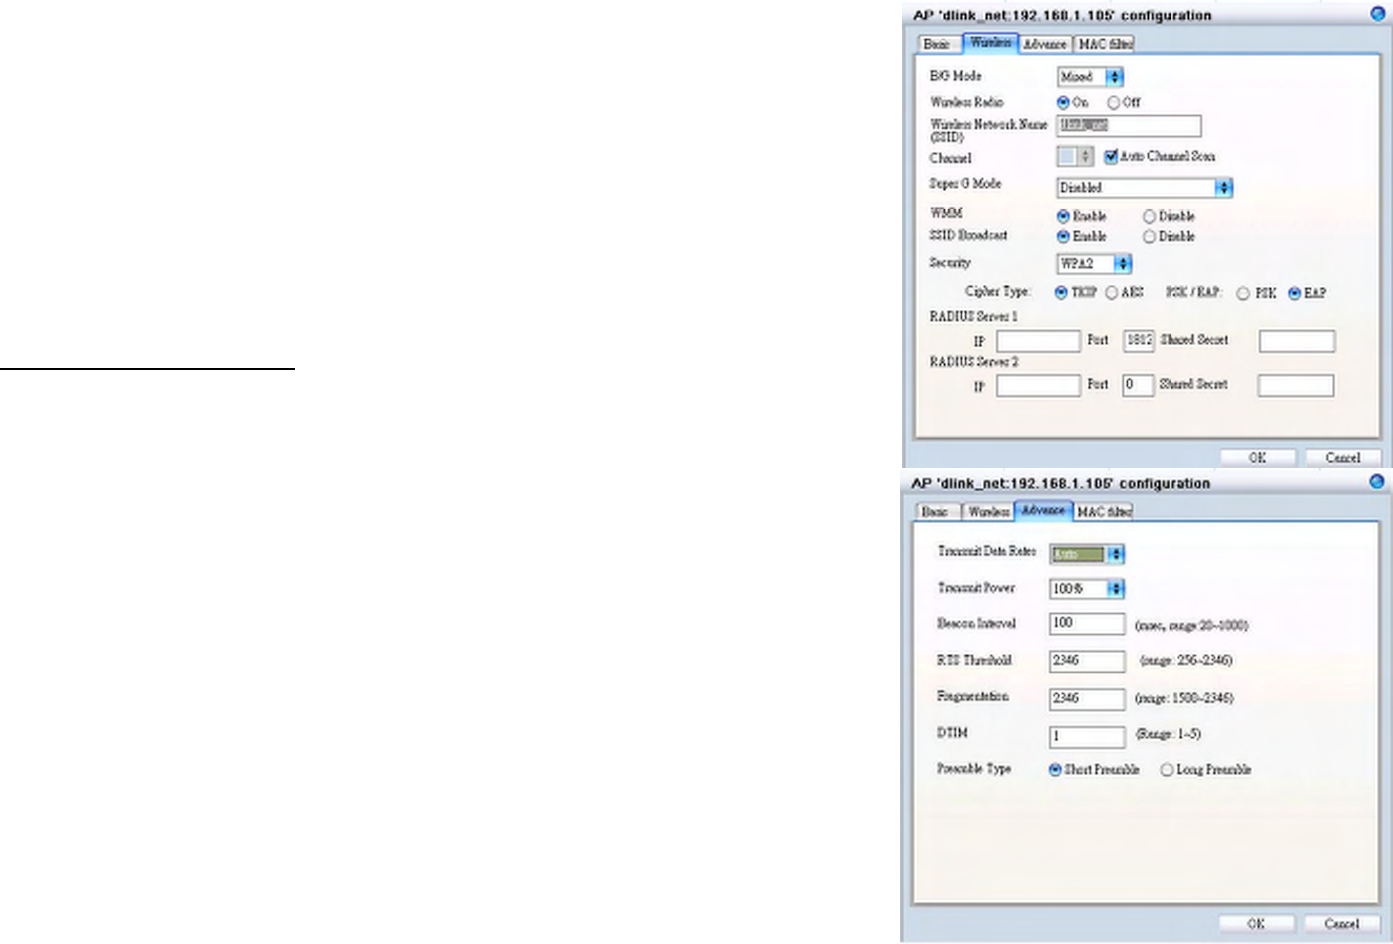
If you select WPA-EAP or WPA2-EAP as the security type, additional columns
will appear with following options.
Cipher Type - Select TKIP or AES.
Radius Server 1 - Enter the IP address, port used, and the secret of the Radius
server 1
Radius Server 2 - Enter the IP address, port used, and the secret of the Radius
server 2
Advanced Configuration
Transmit Data Rates - Select the maximum wireless signal rate of the AP. Default
is Auto.
Transmit Power - Select the transmit power of the AP. Default is 100%.
Beacon Interval - Beacon is the packet sent by an AP to synchronize a network.
Specify the interval to send a beacon. Default is 100 micro seconds.
RTS Threshold - The RTS threshold is not recommended to be changed unless
you encounter inconsistent data flow. The default value is 2346.
Fragmentation - Specify the fragmentation threshold that packets exceeding it will
be fragmented. Default is 2346 bytes.
DTIM - DTIM (Delivery Traffic Indication Message) is a countdown informing clients
of the next listening window for broadcast and multicast messages. The default
value is 1.
Preamble Type - Select Short or Long preamble.
D-Link Smart WLAN Manager User Manual
D-Link Corporation 24
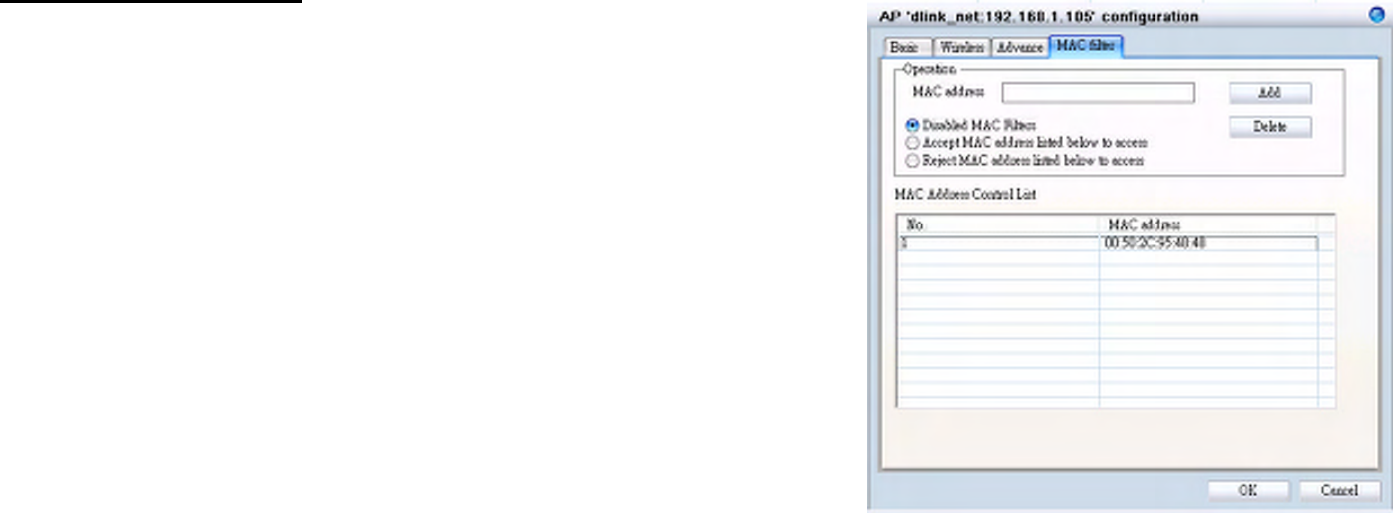
Mac Filter Configuration
MAC Address - Add MAC addresses to the MAC Address Control List. Select
an entry on the Address Control List and click Delete if you want to remove that
Mac address.
Disable MAC Filters - Not filtering based on the Mac addresses.
Accept MAC Filters listed below to access - When it is selected, only devices
with a Mac address in the list are granted access.
Reject MAC Filters listed below to access - When it is selected, only devices
with a Mac address in the list are not granted access.
D-Link Smart WLAN Manager User Manual
D-Link Corporation 25
Configure the Access Point by Group
In Group, user can configure a group template for multiple access points’ use.
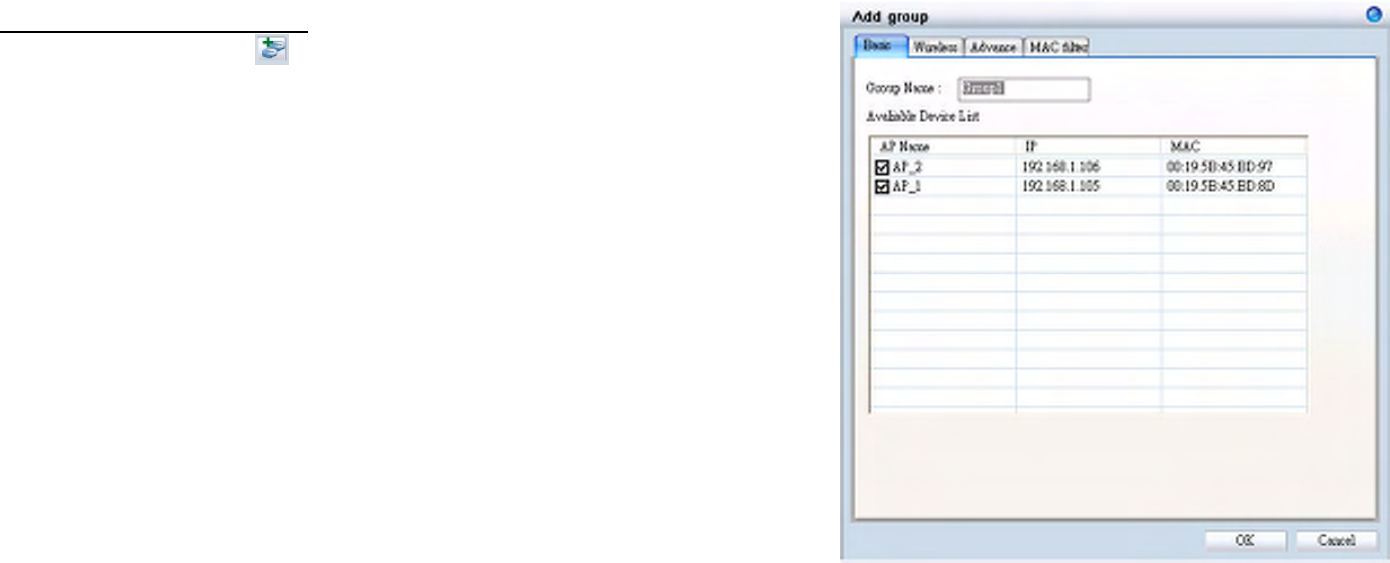
Create a Group Template
Click “Add Group” icon ( ) and a window will appear:
Enter the group name and choose which APs you want to include in this group.
You can also add APs after a group is created.

D-Link Smart WLAN Manager User Manual
D-Link Corporation 26
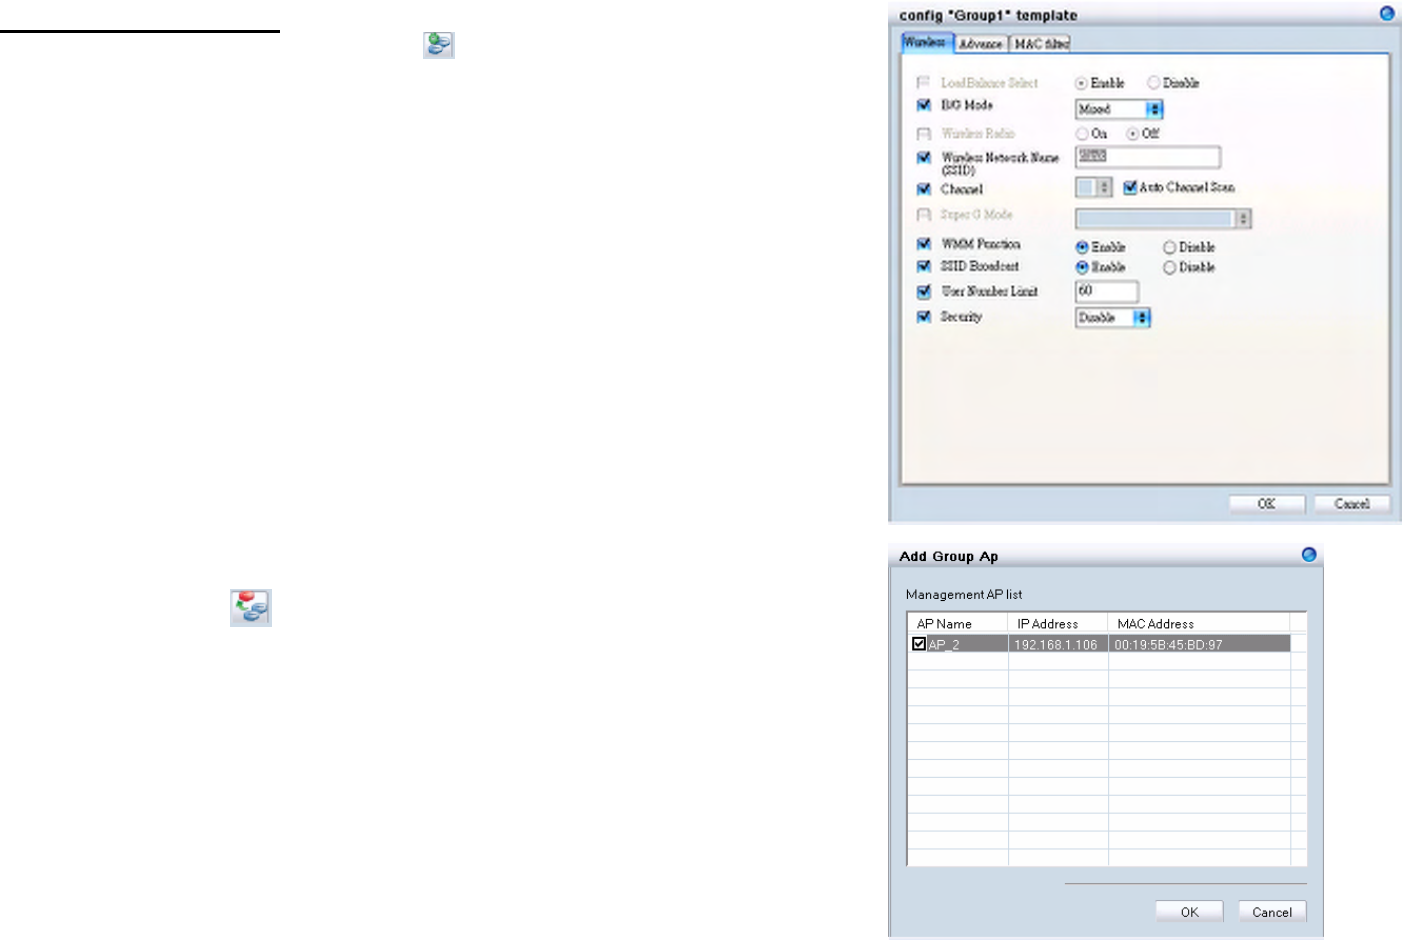
In the Wireless tab, you can choose if want to enable the Load Balance
function, and other options. When configuring load balance, SSID, User
Number Limit, Security, and MAC Filter must need to be specified as well.
When the load balance is enabled, once the number of clients connect to an
AP has reached to the threshold, the new client can only join other APs with
connection limits available.
Note: For detailed explanation for rest of Wireless, Advanced, and MAC
Filter functions, please refer to section 3.2.2 through 3.2.4.
Click “OK” when you are done. The template with access points will appear in
the database column.
Note: If you choose to apply the configuration
template to an AP, the AP will reboot.
D-Link Smart WLAN Manager User Manual
D-Link Corporation 27
Edit a Group Template
Click “Configure Group Template” icon ( ) and an edit window will appear:
Note: For detailed explanation for rest of Wireless, Advanced, and MAC Filter
functions, please refer to section 3.2.2 through 3.2.4.
Click “OK” when you are done.
Note: Change a configuration template will cause all APs in the group to reboot.
Add AP: If you want to add a new AP to the template, just click the “Add AP to
selected group” icon ( ) and a window will appear.
D-Link Smart WLAN Manager User Manual
D-Link Corporation 28
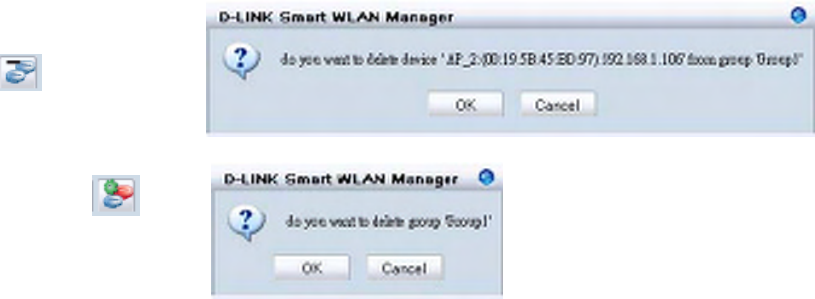
Delete AP/Template: If you want to remove an AP from the group, or
delete a template, just select the AP or template (the entry will be
highlighted in gray), and click “Delete Group/AP” icon ( ); then a
warning message will appear.
Or
Show AP Configuration: Click “Show AP Configuration” icon ( ) to
display the configuration of selected AP.
D-Link Smart WLAN Manager User Manual
D-Link Corporation 29
Management
Monitoring
The Monitor function allows user to view the wireless system status.
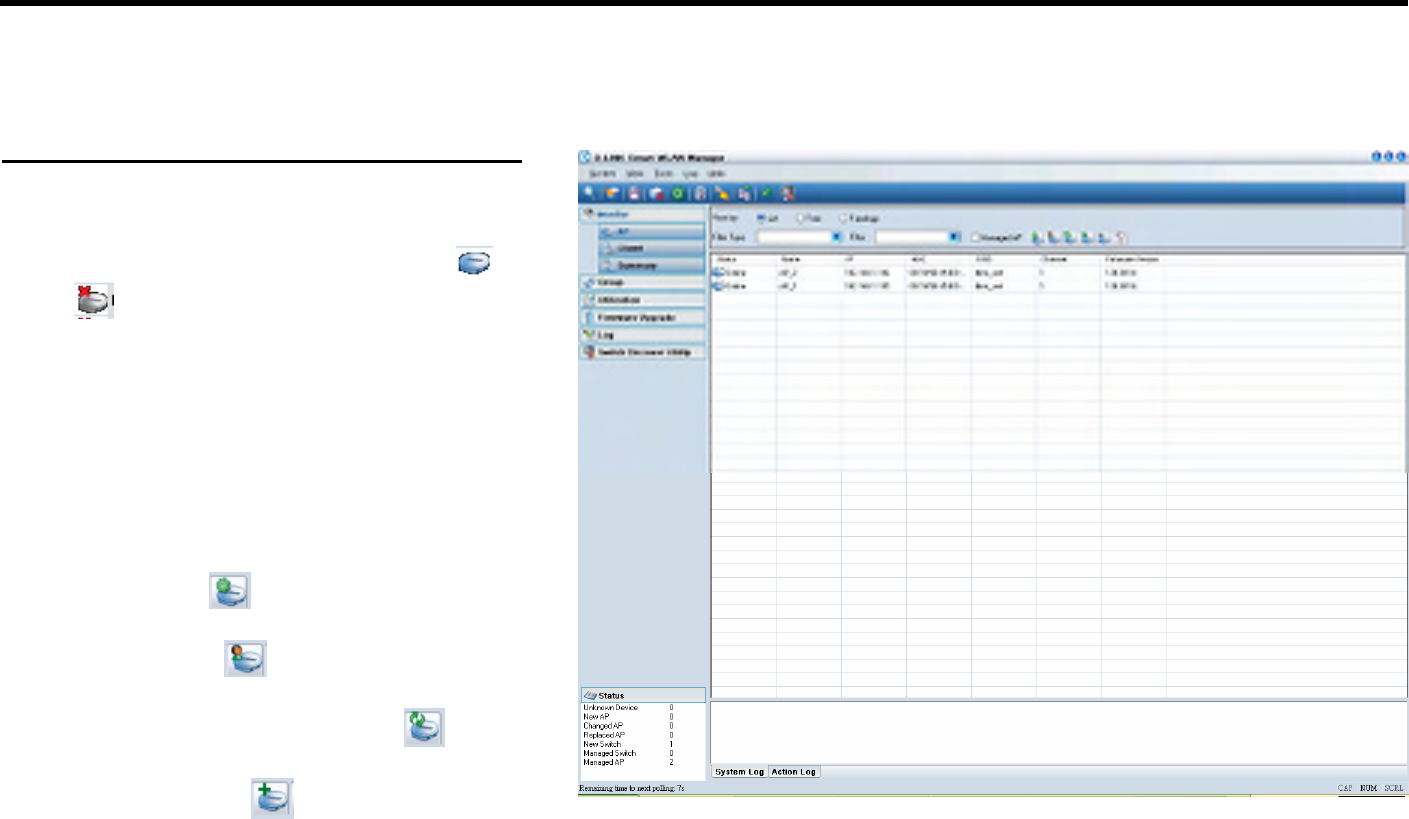
Monitoring AP and Wireless Switch by List
In MonitoràAP, user can choose three different
views. View by List lists the information of wireless
access points in the database column. If a failure
happens, the icon will change from online ( ) to
failed ( ).
Following options are provided:
1. Filter Type: User can enable the filter to narrow
down the database display by various attributes
2. Filter: After the Filter Type is chosen, user can
select the specific content.
3. Managed AP: Check this option if you just need
to see managed AP only
4. Configuration ( ): User can view or modify
the selected AP’s configuration
5. AP Connection ( ): It will redirect user to the
selected AP’s Utilization page.
6. Reload Previous Configuration ( ): Allows
user to reverse AP to the previous configuration.
7. Save to Database ( ): To add a newly found
D-Link Smart WLAN Manager User Manual
D-Link Corporation 30
AP to database.
8. Delete from Database ( ): To delete an AP from database.
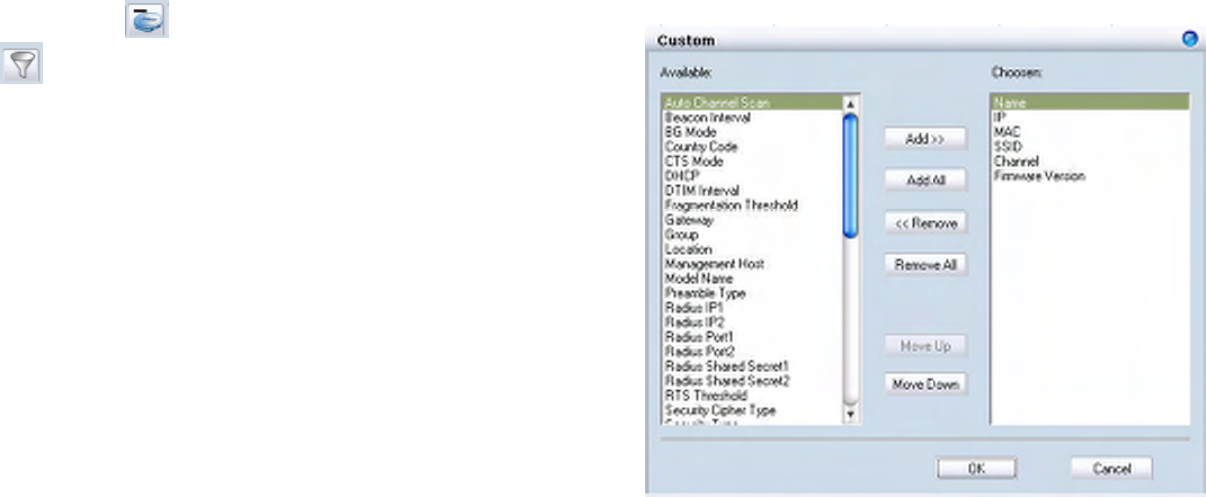
9. Customize ( ): Users can change the view by adding/deleting
attributes according their needs.
10. Replace: Right click the selected AP and choose “Replace”.

D-Link Smart WLAN Manager User Manual
D-Link Corporation 31
Monitoring AP and Wireless Switch by Tree
View by Tree lists down the wireless switch and the
access points connect to it in the database column.
The information displayed includes System Name,
Mac address, IP address, and the physical port in
which AP connects to the switch. If a failure
happens, the icon will change from online ( or
) to failed ( or ).
Following options are provided:
1. Configuration ( ): User can view or modify
the selected AP’s configuration
2. Reload Previous Configuration ( ): Allows
user to reverse AP to the previous configuration.
3. Save to Database ( ): To add a newly found
AP to database.
4. Delete from Database ( ): To delete an AP
from database.
D-Link Smart WLAN Manager User Manual
D-Link Corporation 32
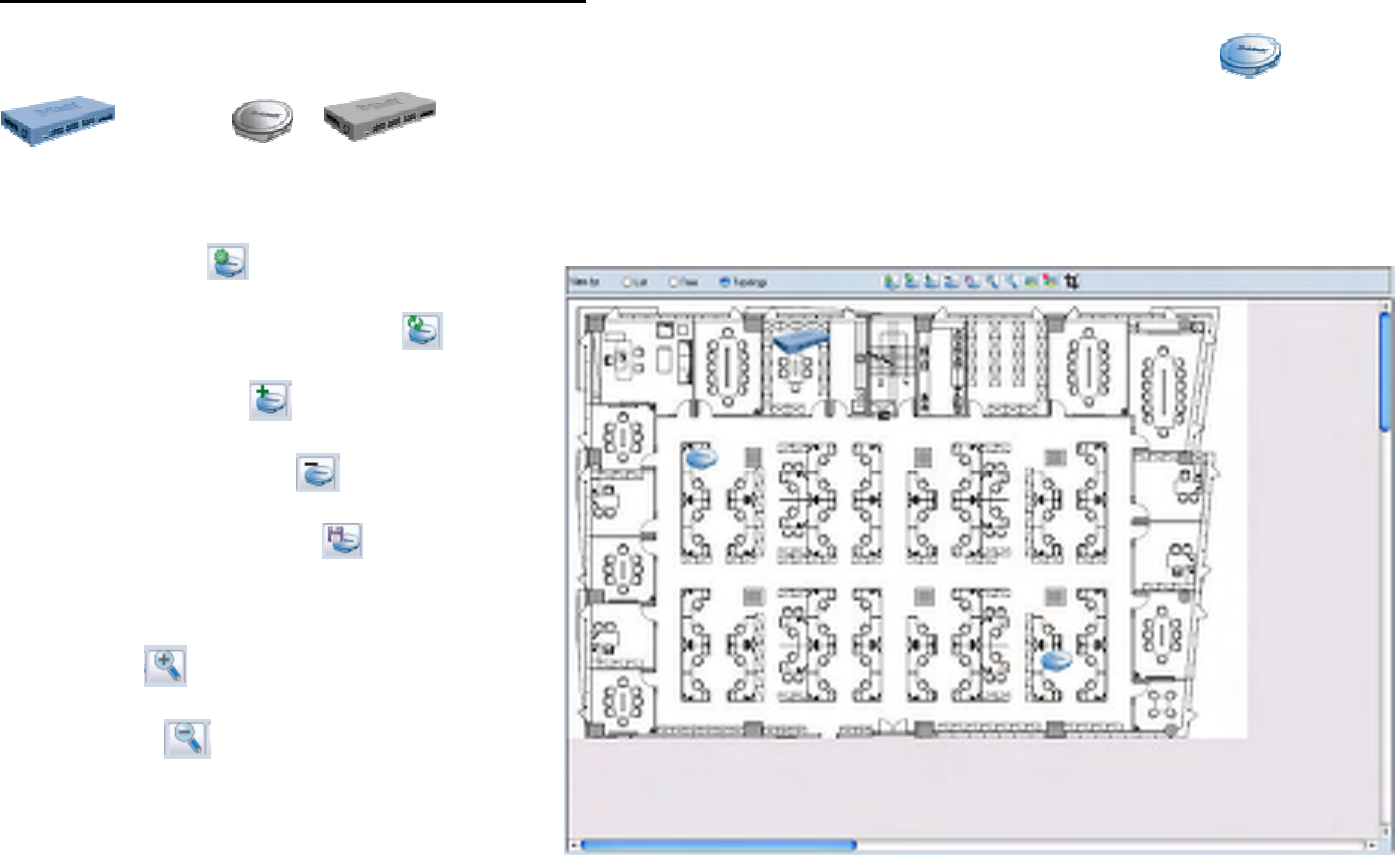
Monitoring AP and Wireless Switch by Topology
Choose to view by Topology in MonitoràAP offers user to visualize the status of AP and wireless switch on the floor plan. After
importing the map, user can drag the icons to their locations. If a failure happens, the icon will change from online ( or
) to failed ( or ).
Following options are provided:
1. Configuration ( ): User can view or modify
the selected AP’s configuration.
2. Reload Previous Configuration ( ): Allows
user to reverse AP to the previous configuration.
3. Save to Database ( ): To add a newly found
AP to database.
4. Delete from Database ( ): To delete an AP
from database.
5. Save Topology Position ( ): To reserve the
location user set for AP and wireless switch;
otherwise it will return to the default when the
Smart WLAN manager restarted.
6. Zoom In ( ): User can get a closer look of
the floor plan.
7. Zoom Out ( ): User can choose to see the
topology overview.
D-Link Smart WLAN Manager User Manual
D-Link Corporation 33
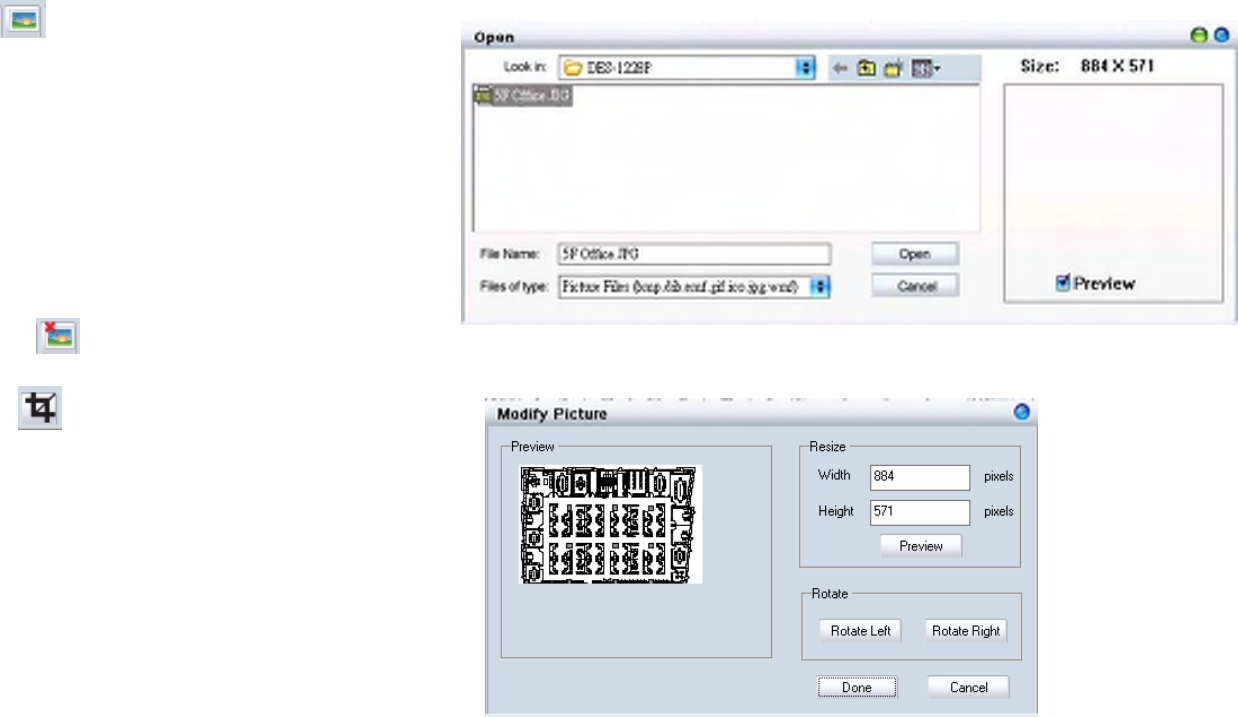
8. Load Map ( ): Import the picture file as the floor
plan file. The file types supported are BMP, DIB, EMF,
GIF, ICO, JPG, and WMF.
9. Remove Map ( ): Remove the current floor plan.
10. Modify Map ( ): User can resize the picture by pixels,
and can preview before taking efforts. Rotation can also
be done for appropriate view.
D-Link Smart WLAN Manager User Manual
D-Link Corporation 34
Monitoring Clients
In MonitoràClient, user can see the status of
wireless clients connected.
Following options are provided:
1. Filter Type: User can enable the filter to narrow
down the database display by various attributes
2. Filter: After the Filter Type is chosen, user can
select the specific content.
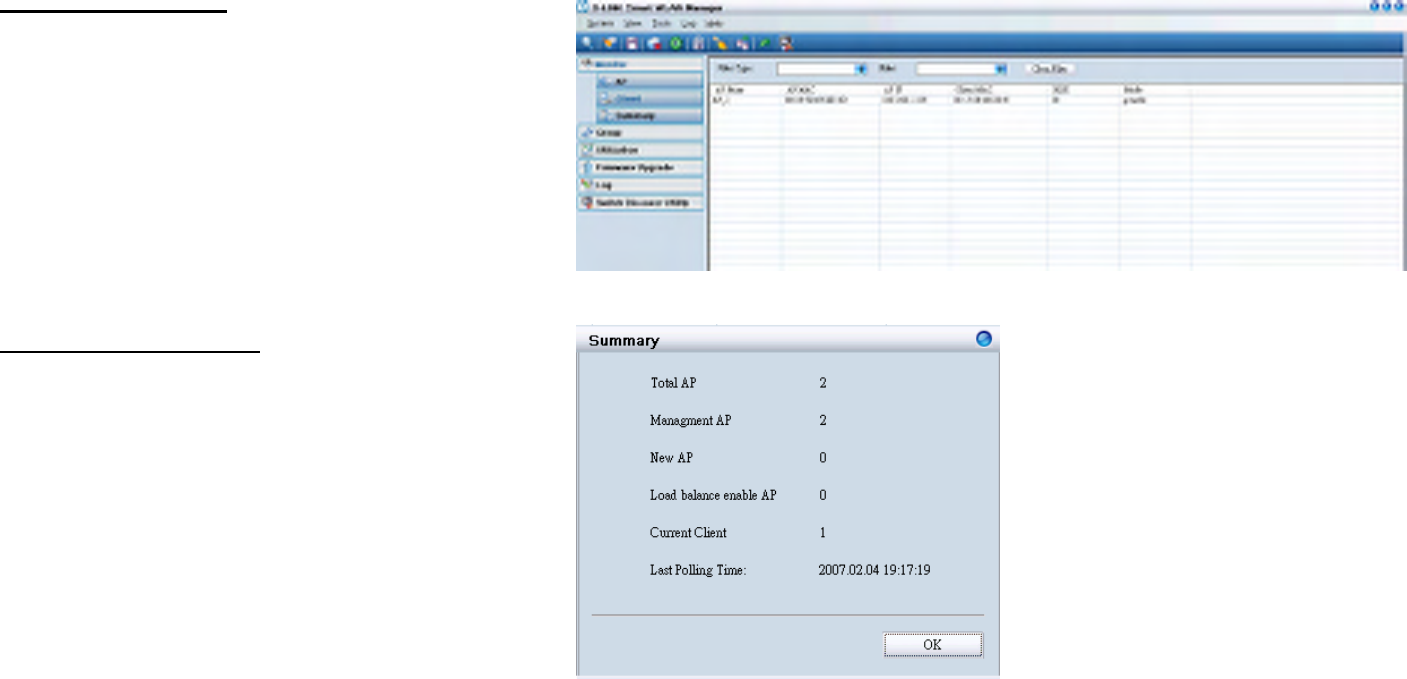
Monitoring Summary
In MonitoràSummary, a summary window will
appear to provide following information:
D-Link Smart WLAN Manager User Manual
D-Link Corporation 35
AP Status and Trouble Shooting
Status List
view
Tree
view
Topology
view Description/Trouble shooting Remark
Normal online AP
An AP links and works properly in the network.
Changed AP
A known AP which configuration has been changed.
You can reload the original setting or save the current setting by:
1. Reload: double click to Reload old configuration, or
2. Save: press the save current
New AP
A new AP was discovered by WLAN Manager.
Offline AP
An existing AP lost the connection
1. Check the status of the connected switch and ensure the switch is
online
2. Cold start the AP from the switch webpage
3. Cold start the AP detached the wire reconnected to switch
4. Factory reset
Please check “Appendix” to
do “Cold Start” and
“Factory Reset”.
Replaced AP
A existing AP was replaced by a new AP
You can reverse AP to the previous configuration or save the current
setting:
Replace: double click to reverse the previous configuration
Save: press the save current status
DHCP error
A AP cannot get IP from the DHCP server
1. Make sure the DHCP server for the AP is available.
2. If the DHCP server did not connect, please reconnect the DHCP server
and wait about 60 seconds, then press the start polling from WLAN
manager
3. If the DHCP server was connected, you can try any one of following
methods:
a. Cold start the AP from the switch webpage and Restart Shutdown the
POE from switch.
b. Cold start by the reconnected AP.
c. Factory reset.
d. Restart the port from web.
Please check “Appendix” to
do “Cold Start” and
“Factory Reset”.
Anti rogue key error
The Anti Rouge AP function of switch was enabled, but the key of AP and
switch is not matched
The AP key is different with connected switch, to active the system key
manager Solution, you can try any one of following methods:
D-Link Smart WLAN Manager User Manual
D-Link Corporation 36
1. Select the all managed system key Error Device
2. All managed device change to same system key
3. Disable the anti rouge function from switch
4. Factory reset the AP and switch
Not available
WLAN Manager can discover AP successfully but cannot get
configuration from AP correctly.
Possible problems:
1. Password error; Delete the troubled AP and run discovery wizard to find
the AP again, make sure the password is correct before discover the AP.
2. Different subnet; change the management PC subnet and to,
a. Try to cold start the AP by web, or
b. Try to factory reset
Unknown device
Unknown network devices
Switch on line The DES-1228P switch links and works properly in the network.
Switch offline
The existing DES-1228P lost the connection
1. Check the switch power,
2. Check SNMP community and cable and subnet
3. factory reset the switch
New Switch A new DES-1228P switch was discovered by WLAN Manager.
Group apply AP The AP setting is same with group setting
Group not apply The AP setting is different with group setting
Note: If the discover utility can’t find any switch or AP, please ensure there is only one NIC(network interface card) in your PC,
multiple NIC may make the system work abnormally.
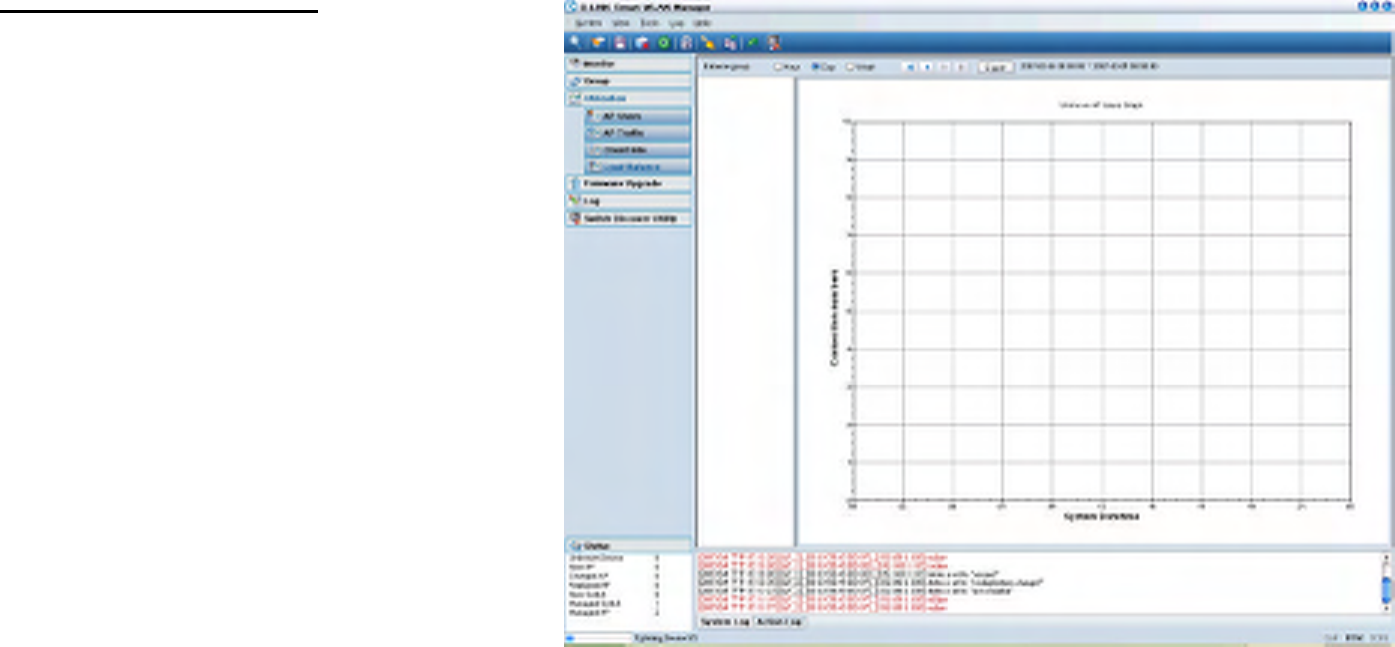
Utilization
In Utilization, user can monitor four different statistics by graphic reports.
D-Link Smart WLAN Manager User Manual
D-Link Corporation 37
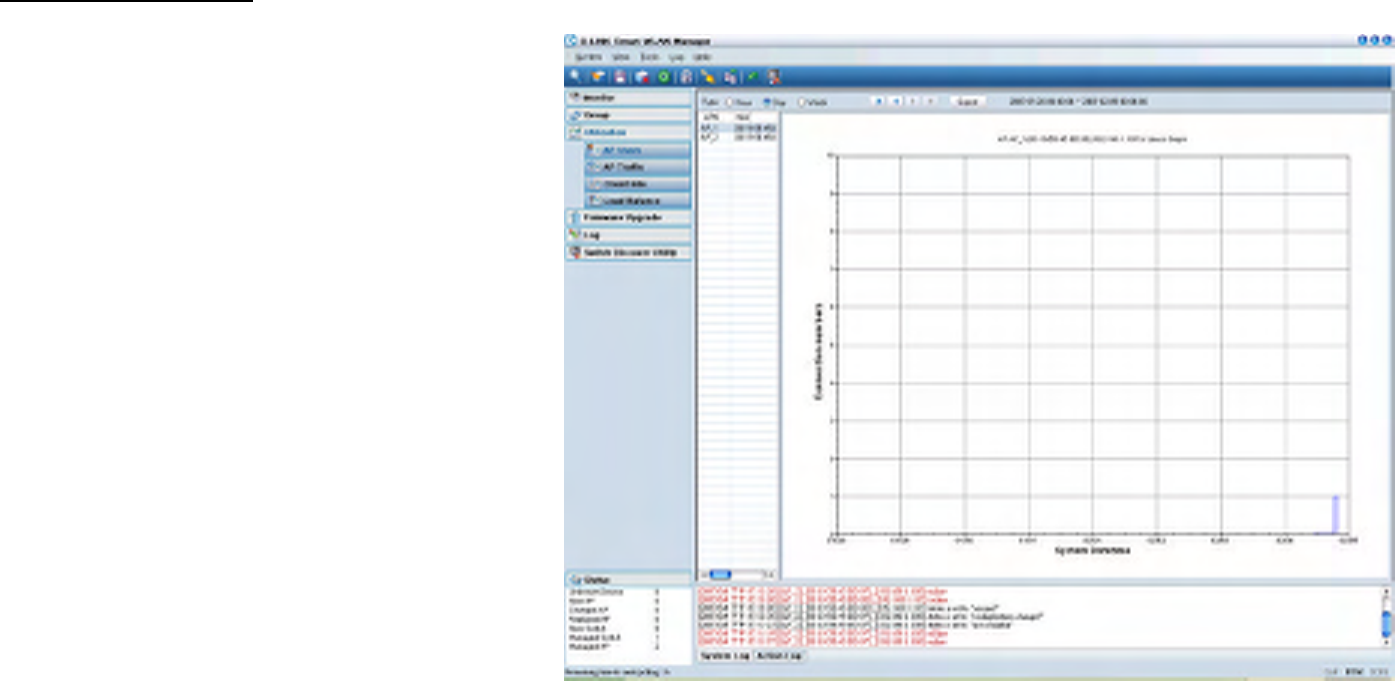
Utilization>AP Users
It allows user to see the connected client numbers
of an access point. You can select the display type
by Hour, Day, or Week. The supported file format
for exporting includes CSV and PDF.
D-Link Smart WLAN Manager User Manual
D-Link Corporation 38
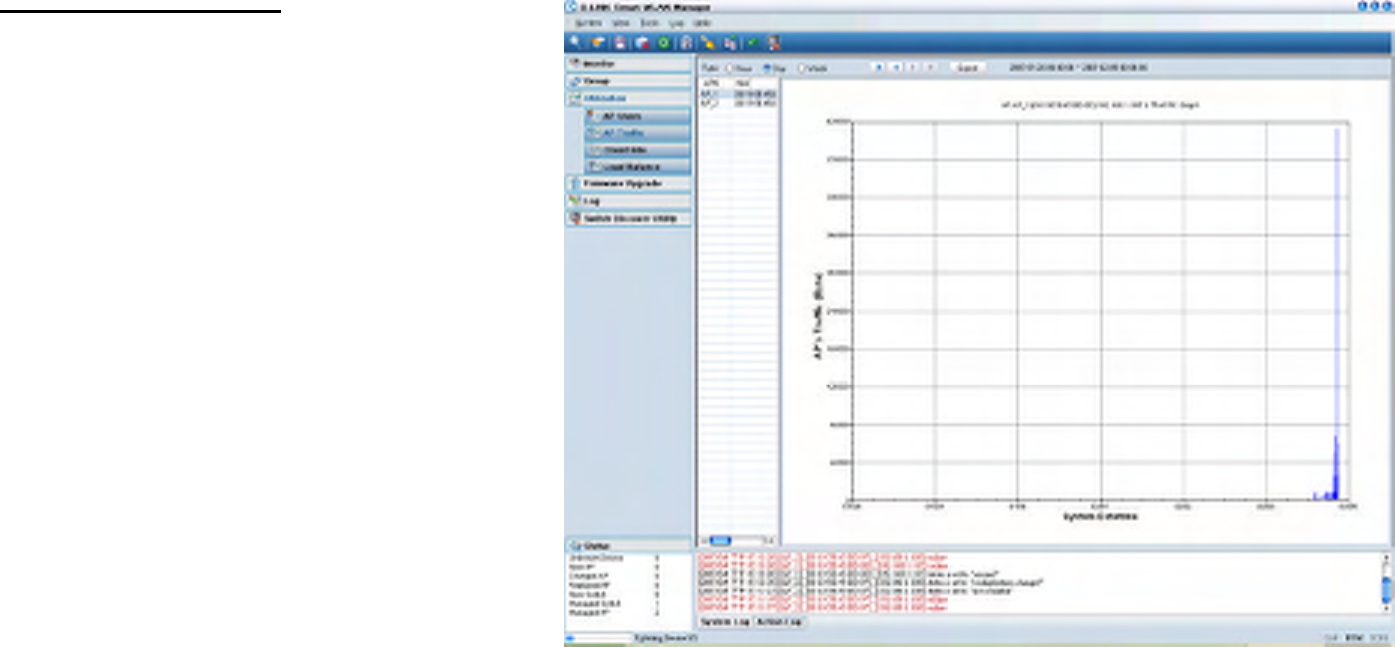
UtilizationàAP Traffic
It allows user to see the traffic volume of an access
point in bytes. You can select the display type by
Hour, Day, or Week. The supported file format for
exporting includes CSV and PDF.

D-Link Smart WLAN Manager User Manual
D-Link Corporation 39
UtilizationàClient Info.
It allows user to see the status history of a wireless
client. The supported file format for exporting is
CSV.
D-Link Smart WLAN Manager User Manual
D-Link Corporation 40
UtilizationàLoad Balance
It allows user to see the status of a load balance
group. You can select the display type by Hour,
Day, or Week. The supported file format for
exporting is CSV.
D-Link Smart WLAN Manager User Manual
D-Link Corporation 41
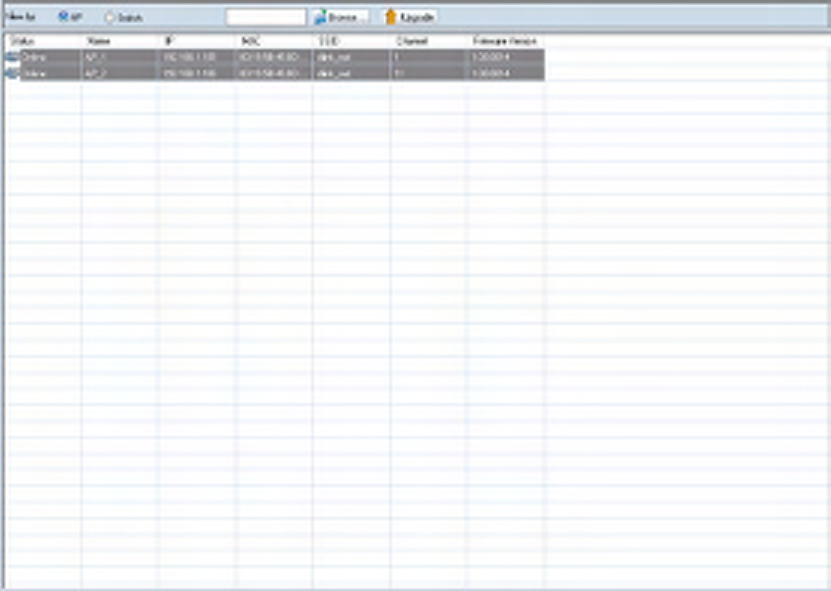
Firmware Upgrade
The Smart WLAN Manager allows user to upgrade
multiple devices’ firmware all at once. To select a
single device, just click on the device you want to
select. To select multiple devices, hold down the
Ctrl key while clicking on each additional device. To
select an entire list, hold down the Shift key, click
on the first device and then click on the last device
on the list.
To upgrade the firmware by following steps:
1. Change to theon view by AP or switch.
2. Select the new image file by clicking “Browse”
icon.
3. Select the devices
4. Select “Upgrade”.
After firmware downloaded and upgraded, the
device will reboot to complete the procedure.
D-Link Smart WLAN Manager User Manual
D-Link Corporation 42
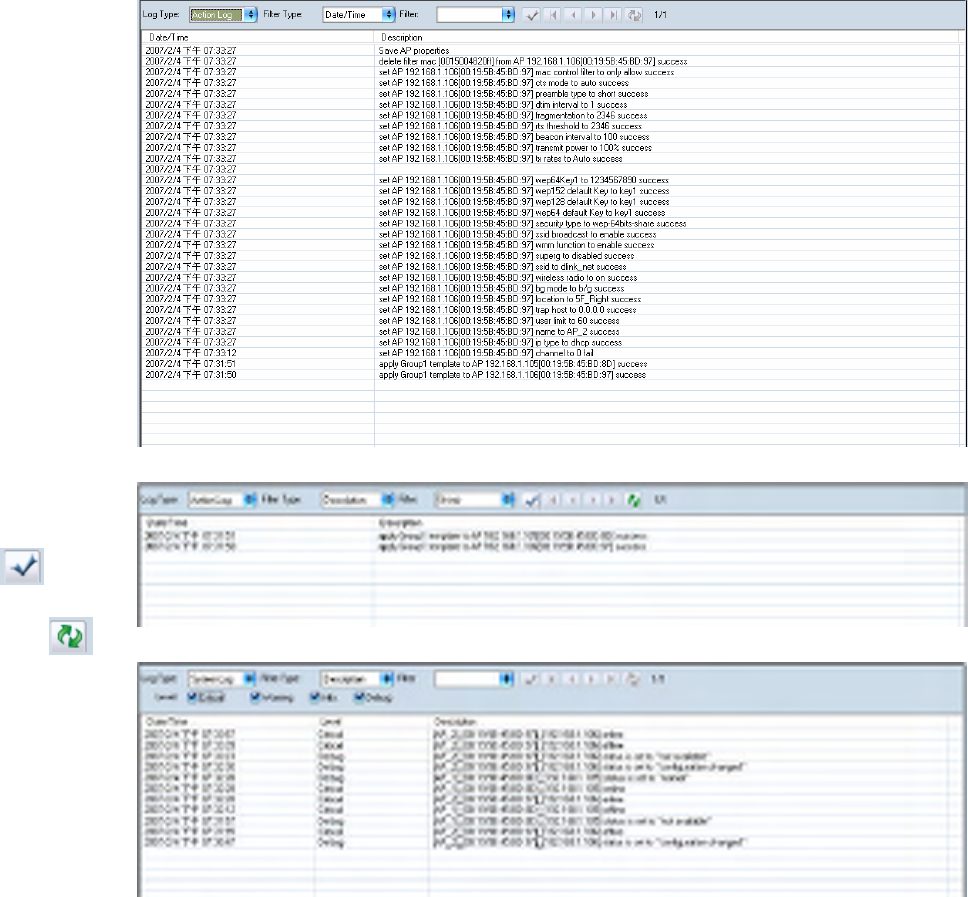
Log
The Smart WLAN Manager offers two kinds of log:
Action Log and System Log. User can save logs
by using LogàSave Log As, and load a saved log
by using LogàOpen Log. LogàClear Log allows
user to clear all the records not saved.
Action Log records all actions user has made. It
allows user to filter the log by Date/Time or
Description.
In the following example, user chooses the type
“Description”, enters “Group”, and click “ ”. The
filtered results are shown as below. To remove a
filter, just delete the string entered and click “ ”.
System Log records all system events happened.
User can choose to display by levels he/she is
interested in. Filtering can be used for System Log
as well.

D-Link Smart WLAN Manager User Manual
D-Link Corporation 43
APPENDIX
Cold Start the AP:
Please follow the instructions below to cold start your AP from DES-1228P switch Web UI:
1. Connect to the Switch configuration Web page about PoE port Settings
2. Select the AP connected port at switch, from port and to port and disable the PoE_Enable
3. Press “Apply” button and wait few seconds
4. Select the “From Port” and “To Port” and enable the PoE_Enable and wait about 1 minute
5. Active the WLAN Smart Manager and press start polling from toolbar

D-Link Smart WLAN Manager User Manual
D-Link Corporation 44
Factory reset
Please follow the 2 steps for factory reset:
1. Reset the DWL-3140 AP to its factory default settings.
2. Restore the other devices on your network to their default settings, by pressing the Reset button on the top of the unit. Please
note you will lose the current configuration settings by doing so.
D-Link Smart WLAN Manager User Manual
D-Link Corporation 45
Federal Communication Commission Interference Statement
This equipment has been tested and found to comply with the limits for a Class B digital device, pursuant to Part 15 of the FCC Rules.
These limits are designed to provide reasonable protection against harmful interference in a residential installation. This equipment
generates, uses and can radiate radio frequency energy and, if not installed and used in accordance with the instructions, may cause
harmful interference to radio communications. However, there is no guarantee that interference will not occur in a particular
installation. If this equipment does cause harmful interference to radio or television reception, which can be determined by turning
the equipment off and on, the user is encouraged to try to correct the interference by one of the following measures:
- Reorient or relocate the receiving antenna.
- Increase the separation between the equipment and receiver.
- Connect the equipment into an outlet on a circuit different from that
to which the receiver is connected.
- Consult the dealer or an experienced radio/TV technician for help.
FCC Caution: Any changes or modifications not expressly approved by the party responsible for compliance could void the user's
authority to operate this equipment.
This device complies with Part 15 of the FCC Rules. Operation is subject to the following two conditions: (1) This device may not
cause harmful interference, and (2) this device must accept any interference received, including interference that may cause
undesired operation.
IMPORTANT NOTE:
FCC Radiation Exposure Statement:
This equipment complies with FCC radiation exposure limits set forth for an uncontrolled environment. This equipment should be
installed and operated with minimum distance 20cm between the radiator & your body.
This transmitter must not be co-located or operating in conjunction with any other antenna or transmitter.
The availability of some specific channels and/or operational frequency bands are country dependent and are firmware programmed
at the factory to match the intended destination. The firmware setting is not accessible by the end user.
D-Link Smart WLAN Manager User Manual
D-Link Corporation 46
Industry Canada statement:
This device complies with RSS-210 of the Industry Canada Rules. Operation is subject to the following two conditions:
(1) This device may not cause harmful interference, and (2) this device must accept any interference received, including interference
that may cause undesired operation.
IMPORTANT NOTE:
Radiation Exposure Statement:
This equipment complies with IC radiation exposure limits set forth for an uncontrolled environment. This equipment should be
installed and operated with minimum distance 20cm between the radiator & your body.