DAEWOO Electronics DLA42C7 42" LCD TV Monitor User Manual SL 900A
Dongbu Daewoo Electronics Corporation 42" LCD TV Monitor SL 900A
UserManual.wiki
>
DAEWOO Electronics
>
DLA42C7 User Manual
>
Users manual 2
Contents
1.
Users manual 1
2.
Users manual 2
Users manual 2
Navigation menu
Upload a User Manual
Namespaces
Wiki Guide
HTML
PDF
Info
Views
User Manual
Discussion / Help
Navigation
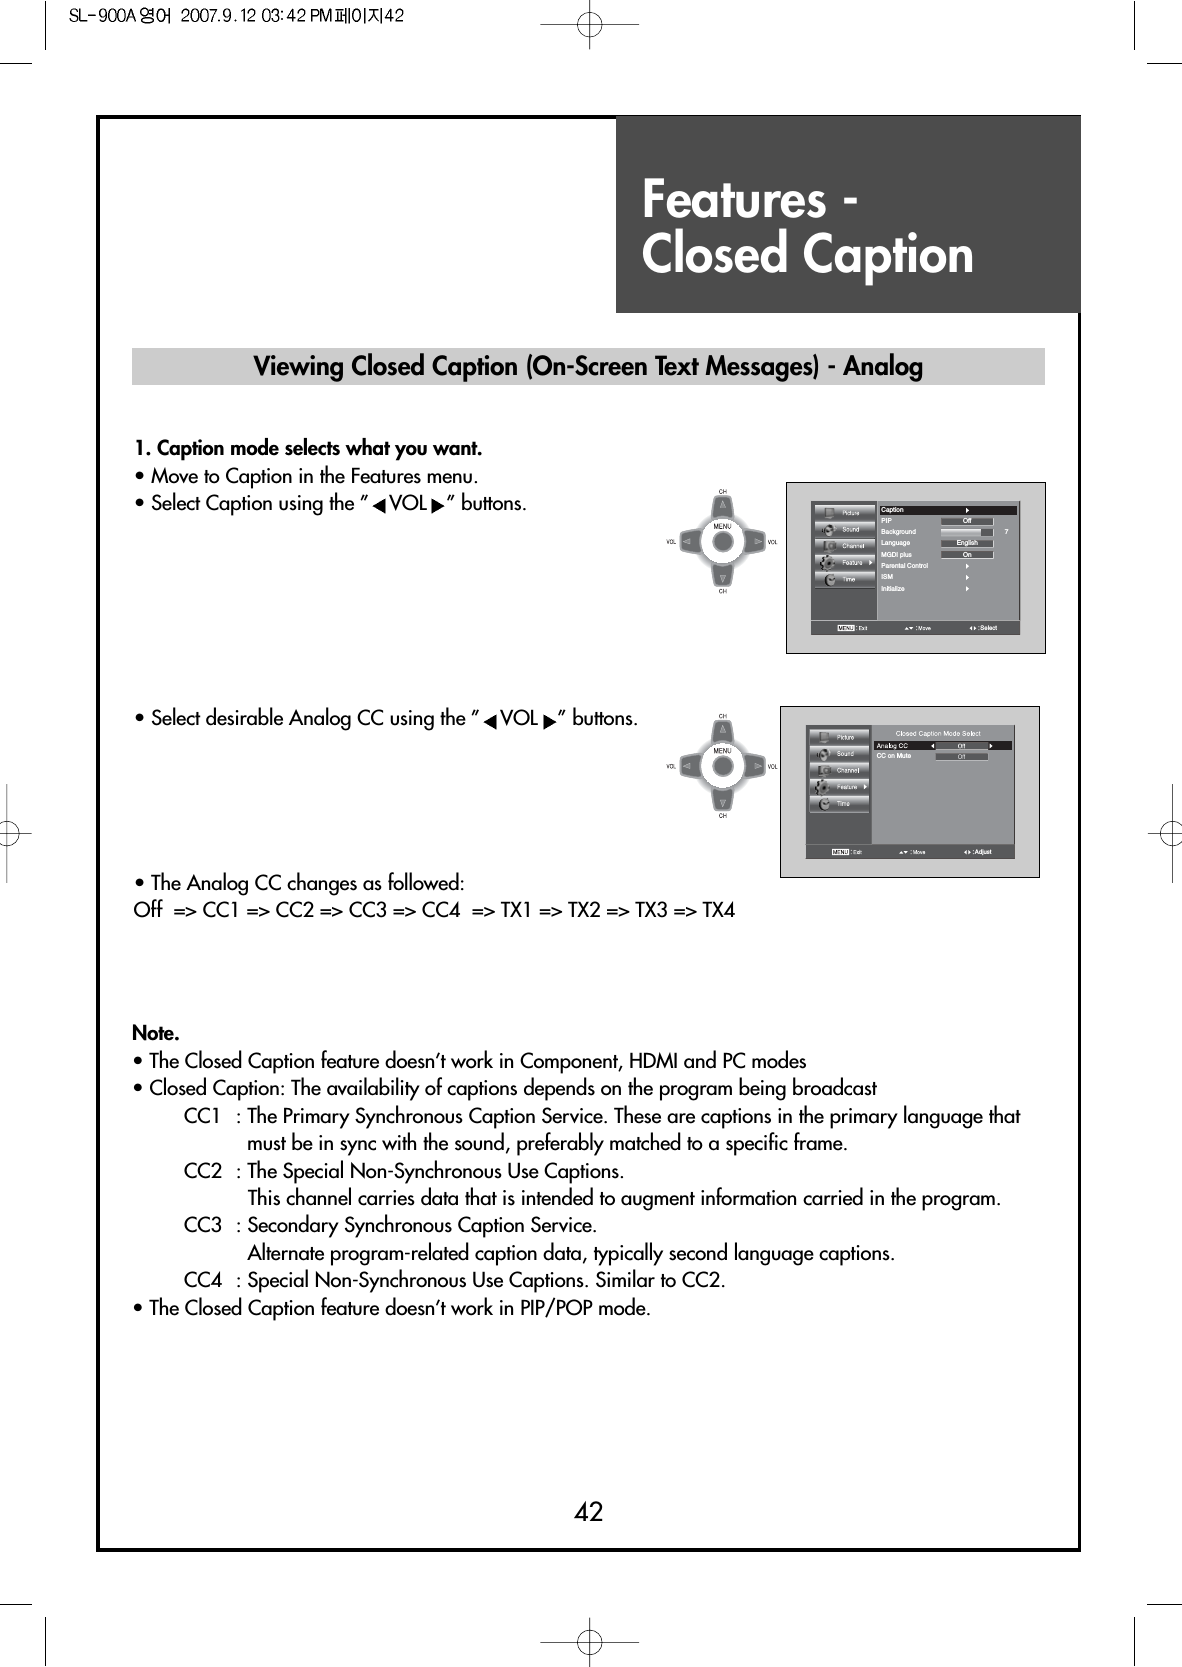
![Picture Adjustment33Note :• 16:9 : 16:9 will display a true 16:9 (anamorphic) picture with no aspectdistortions.• 4:3 : General TV screen currently broadcasted.• LB(16:9) : Enlarge vertical size of the 16:9 picture.• LBS(16:9) : Move the LB(16:9) picture to the upper direction.• LB(16:9) and LBS(16:9) screen are not available in PC and HDMI mode.• "Screen Size" function is not available in PIP mode.Adjustment of Aspect ratio in TV/Video/Component mode1. Press the "SCREEN SIZE" button• The screen changes as below whenever pressing the "SCREENSIZE" button.16:9 => 4:3 => LB[16:9] => LBS[16:9] => 16:916 : 9MUTESCREENSIZE CAPTIONPIP CH PIP CHPIPSWAP SOURCE POSITIONSLEEPCHSTILLADD/ERASELB(16:9)LBS(16:9)4 : 3](https://usermanual.wiki/DAEWOO-Electronics/DLA42C7.Users-manual-2/User-Guide-844678-Page-3.png)

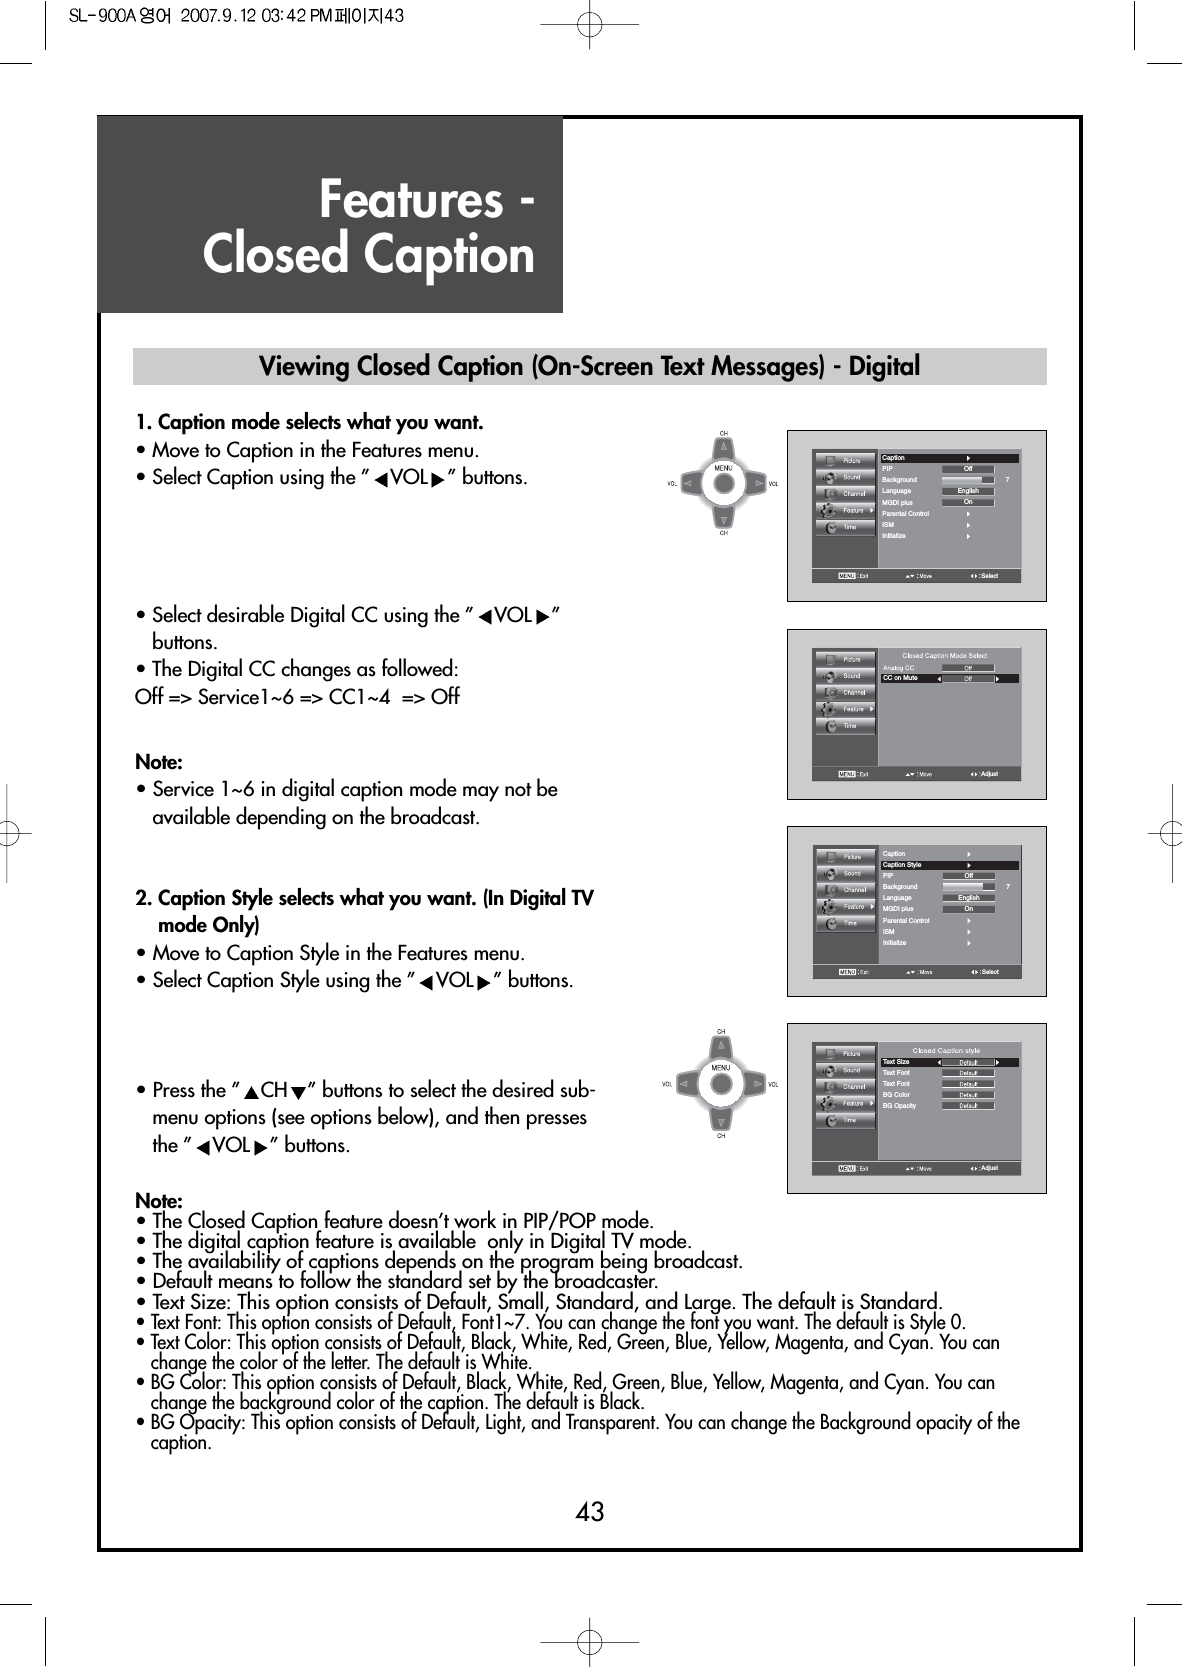

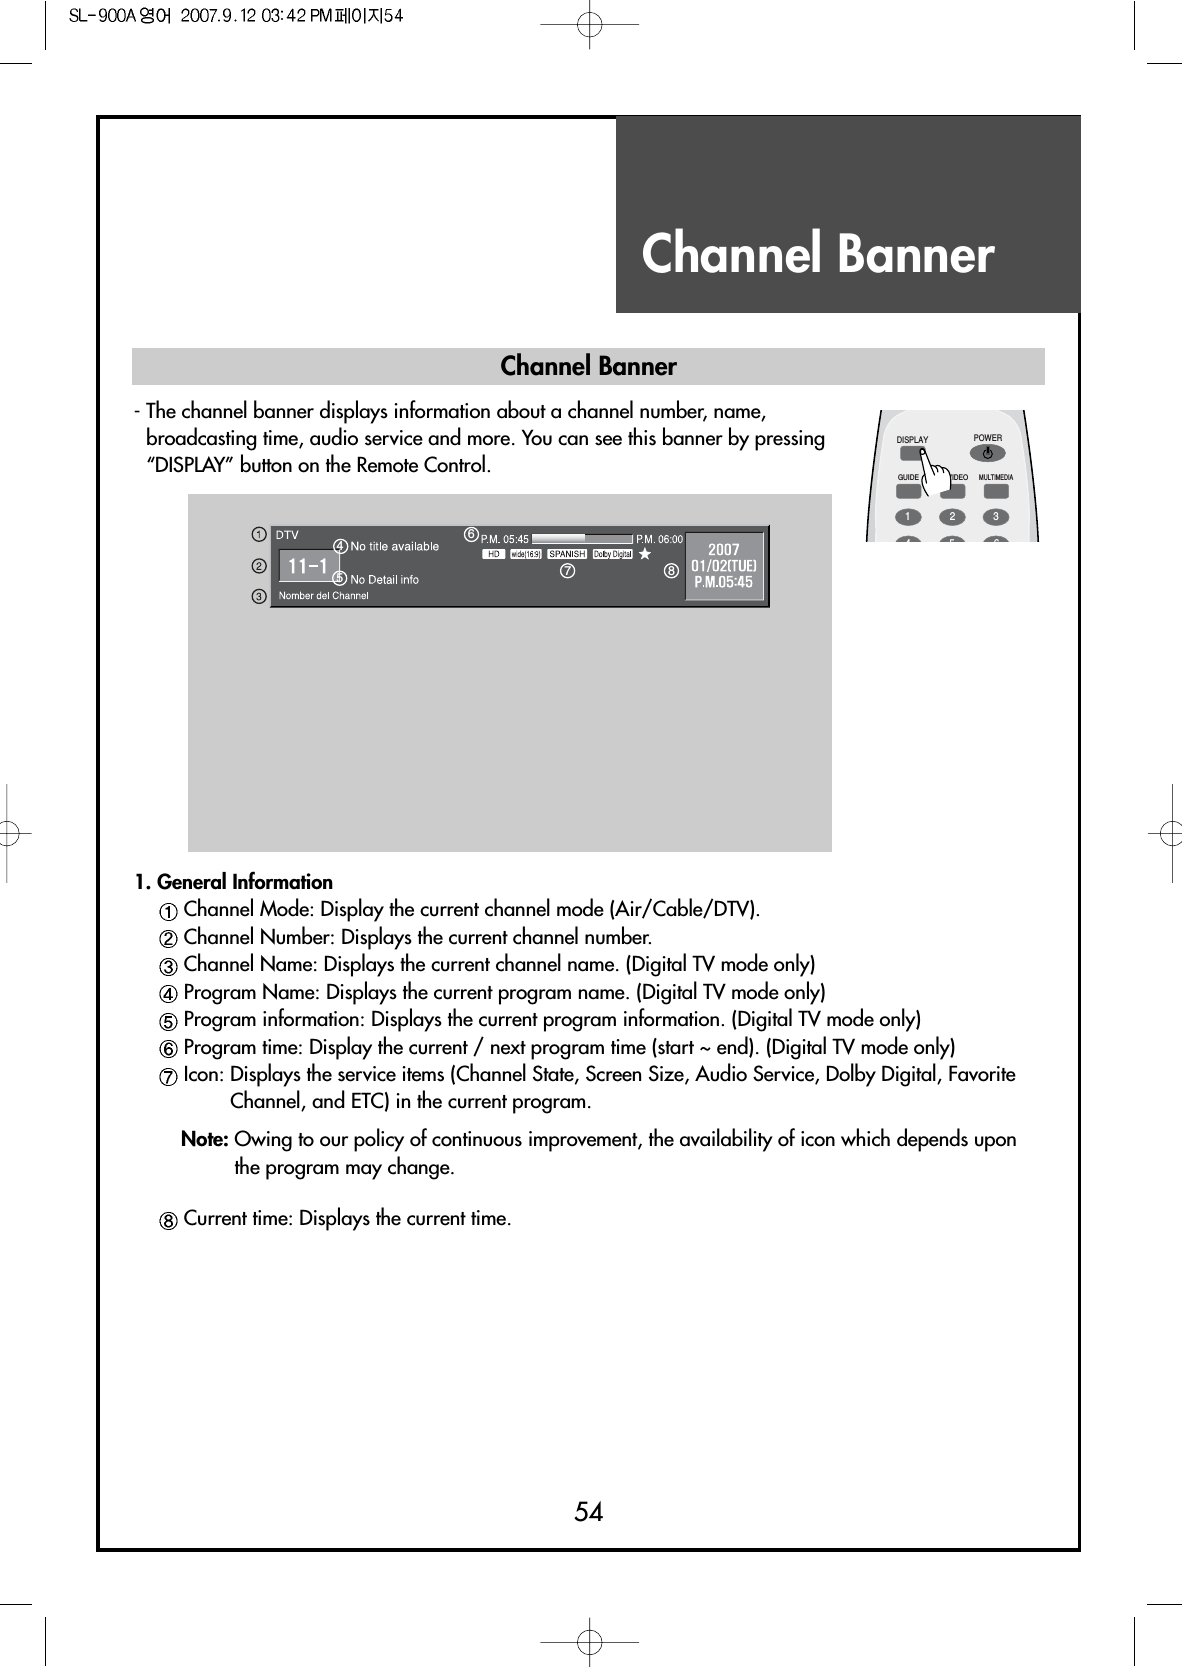
![Channel Banner55Electronic Program Guide (EPG) (Digital TV mode only)- The DTV Electronic Program Guide (EPG) displays program informationabout each channel, up to seven days ahead.- You can edit your own profiles, and record programs.- By pressing the “GUIDE” button to access EPG directly, you can see allchannels broadcasting now.Note:• The EPG channel is only available when watching DTV channels.DISPLAYGUIDE TV/VIDEOMULTIMEDIAPOWER1234561. Select a desired channel• Select a channel with the ” CH ” buttons.• Press the “GUIDE” button and move a program with the ” CH ”buttons.• If you need detail information, press the ”VOL” button.Program Guide12:45 pm Mon May 1Service10:00 am DTV Program11:00 am DTV Program12:00 pm DTV Program01:00 pm DTV Program02:00 pm DTV Program03:00 pm DTV Program06:00 pm DTV Program08:00 pm DTV Program09:00 pm DTV Program10:00 pm DTV Program14-1[P.M. 12 : 00 ~ P.M. 01 : 00]](https://usermanual.wiki/DAEWOO-Electronics/DLA42C7.Users-manual-2/User-Guide-844678-Page-25.png)