DAEWOO Electronics DLA42C7 42" LCD TV Monitor User Manual SL 900A
Dongbu Daewoo Electronics Corporation 42" LCD TV Monitor SL 900A
UserManual.wiki
>
DAEWOO Electronics
>
DLA42C7 User Manual
>
Users manual 1
Contents
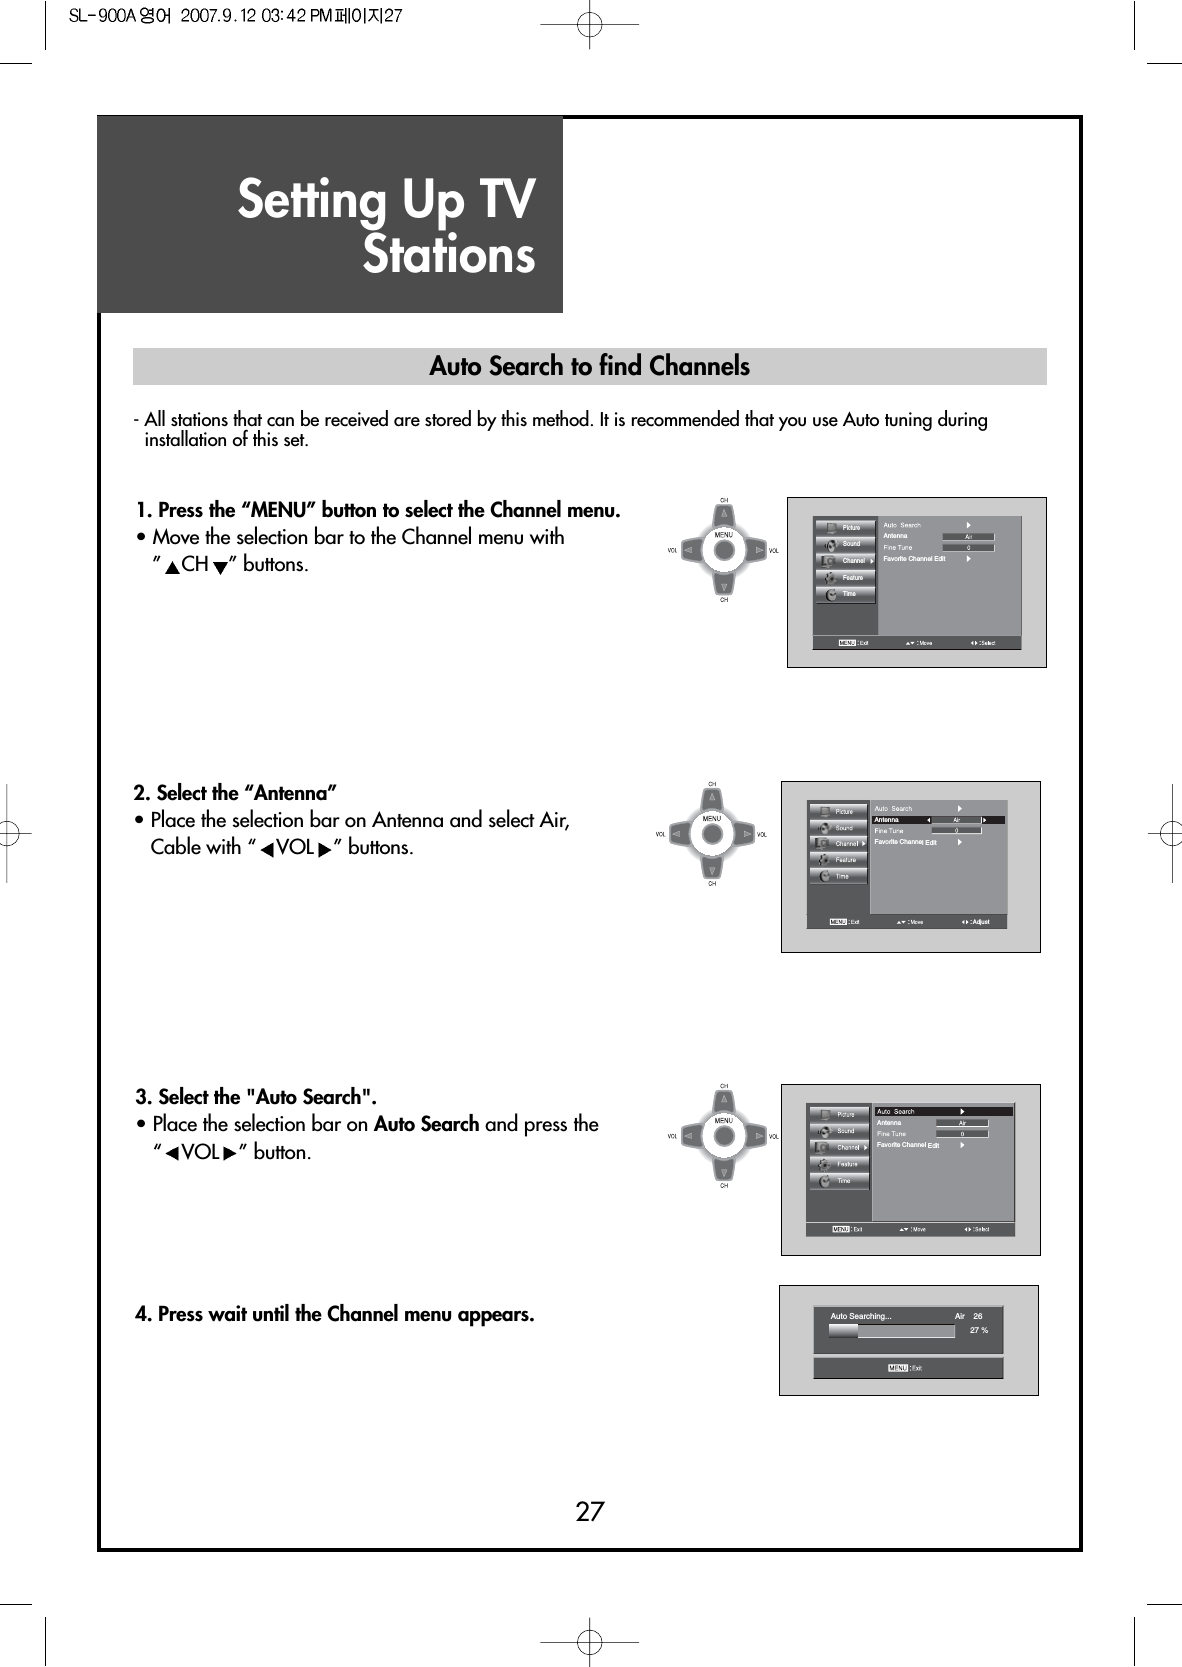
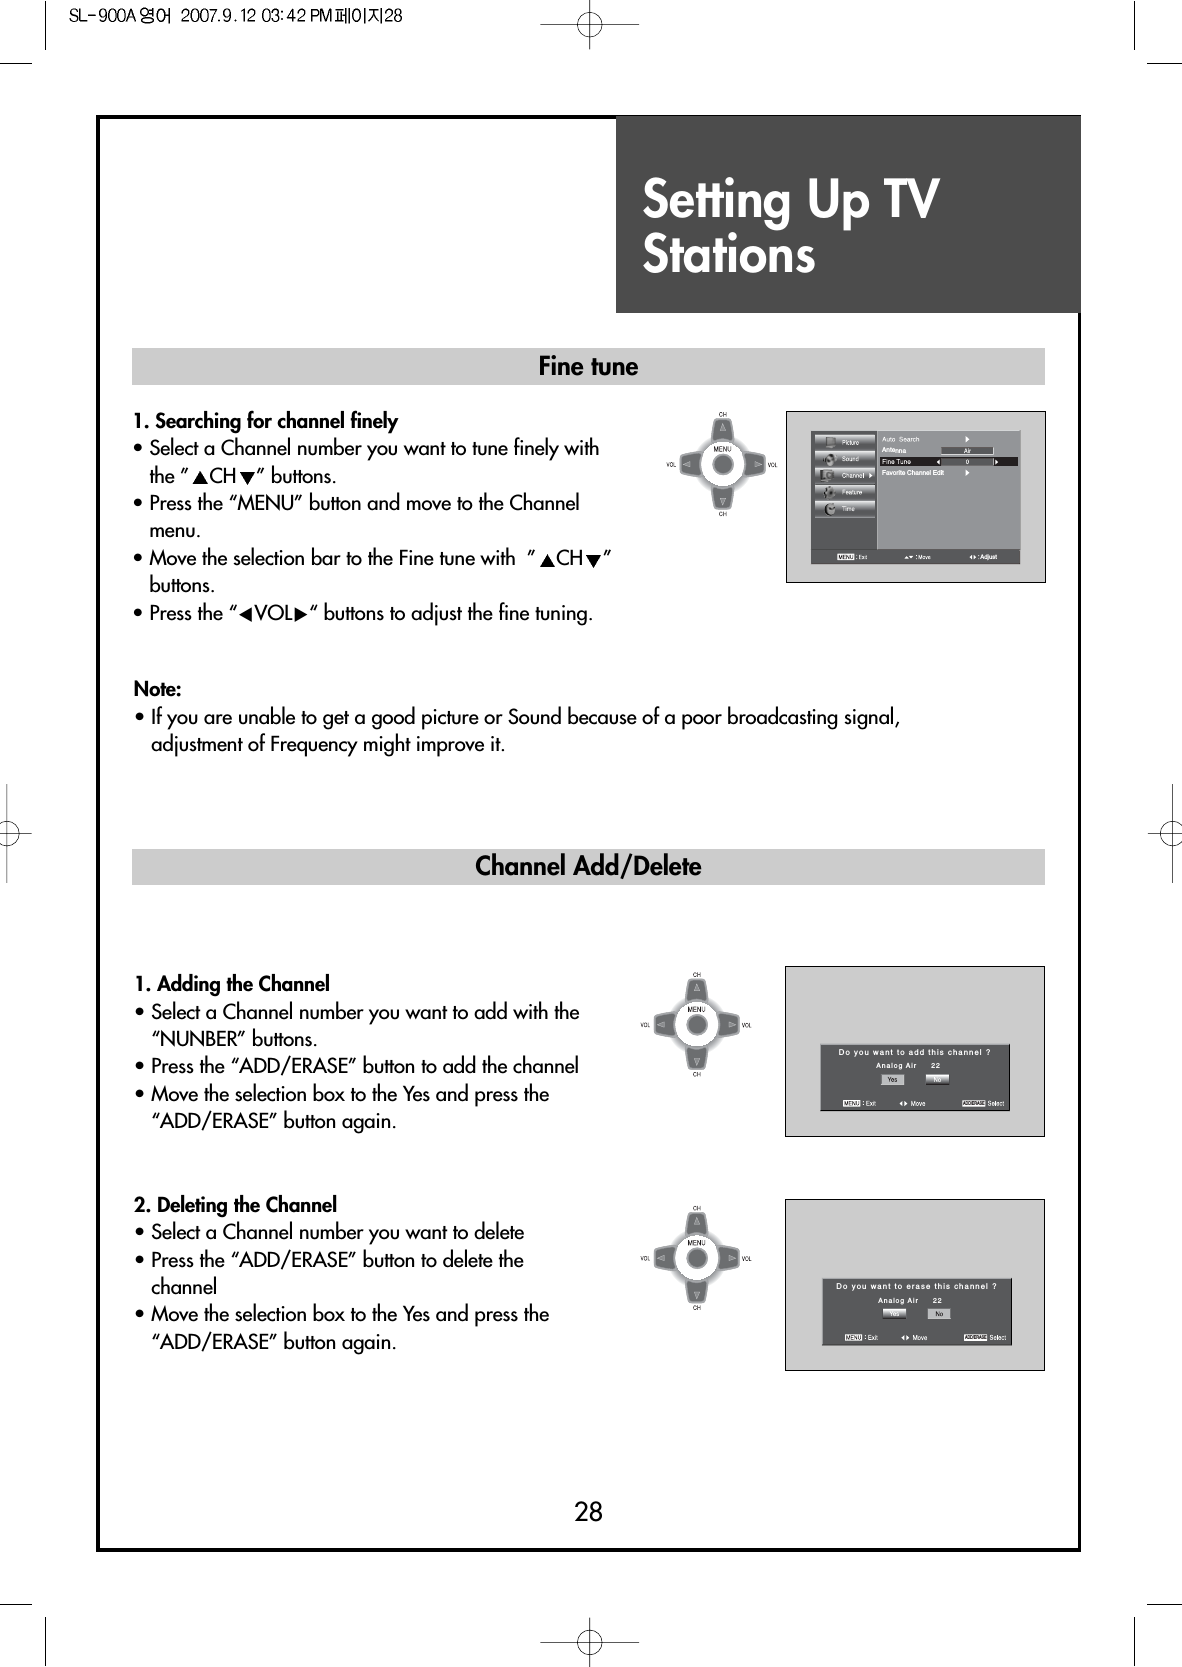
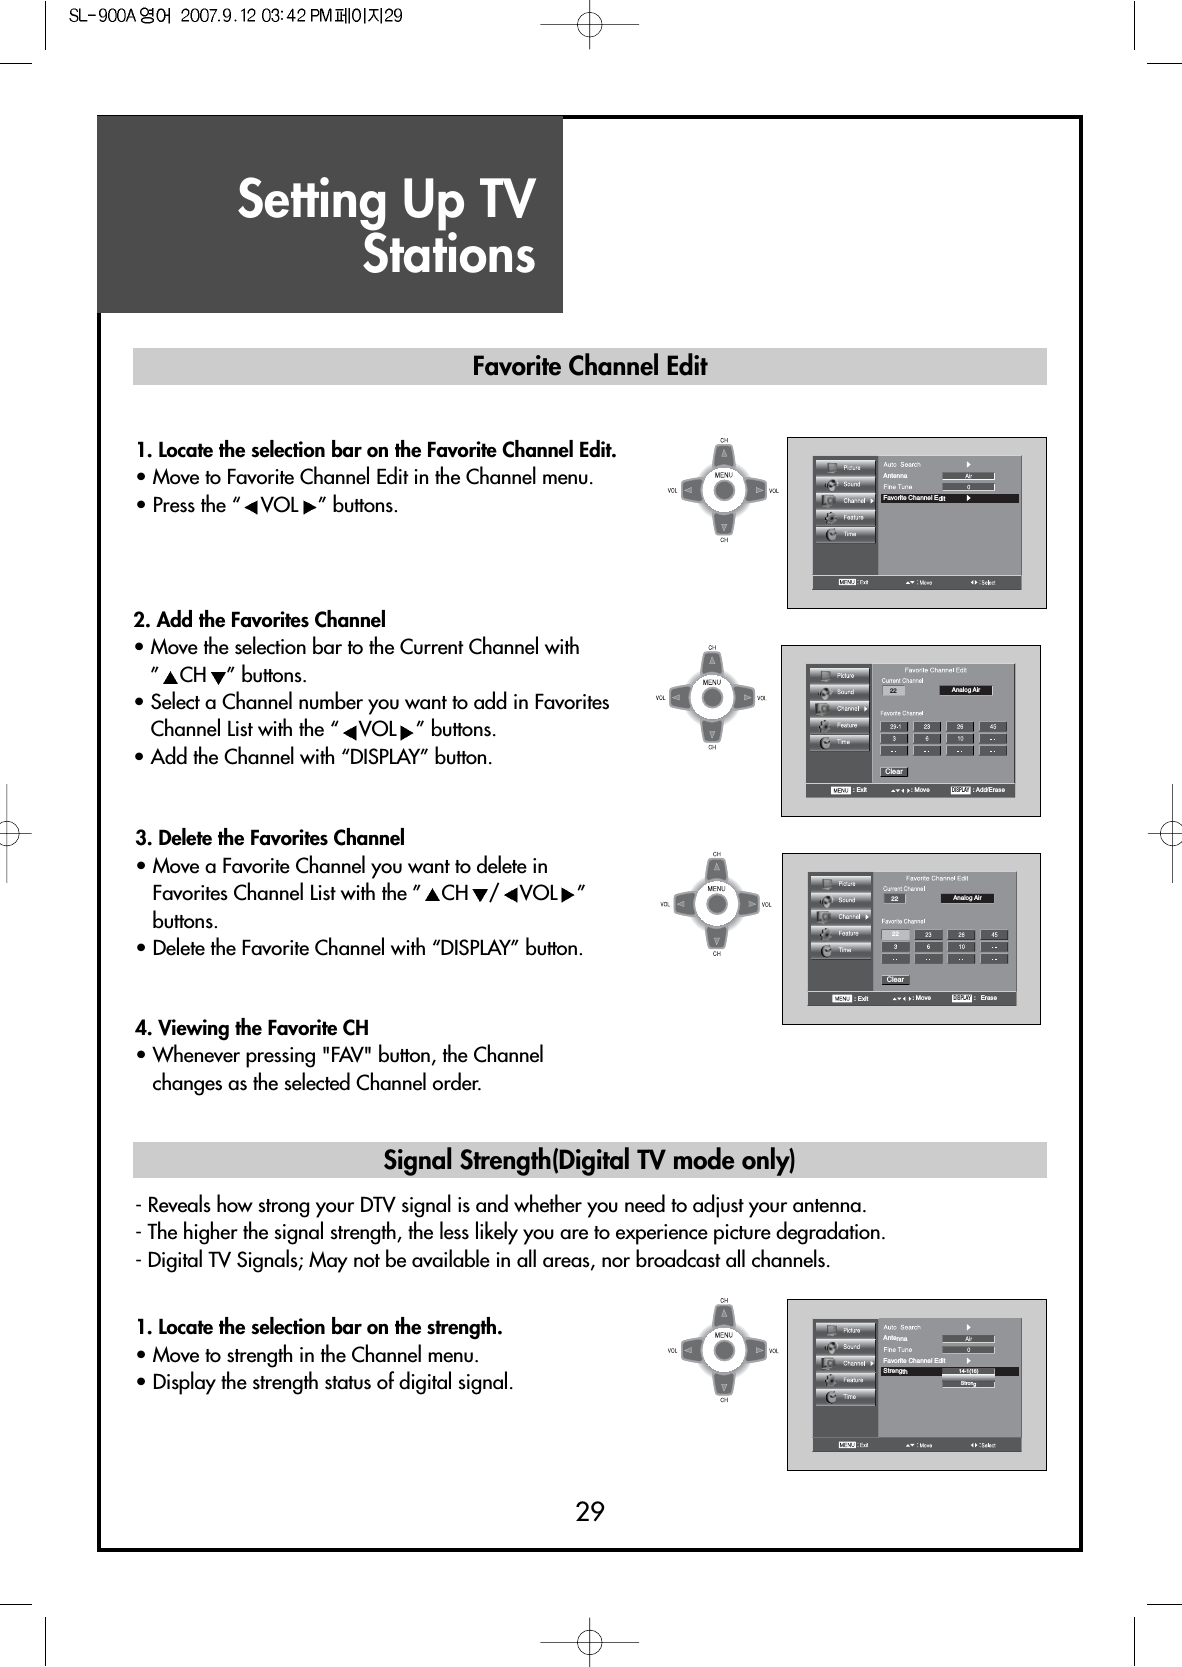
1.
Users manual 1
2.
Users manual 2
Users manual 1
Navigation menu
Upload a User Manual
Namespaces
Wiki Guide
HTML
PDF
Info
Views
User Manual
Discussion / Help
Navigation

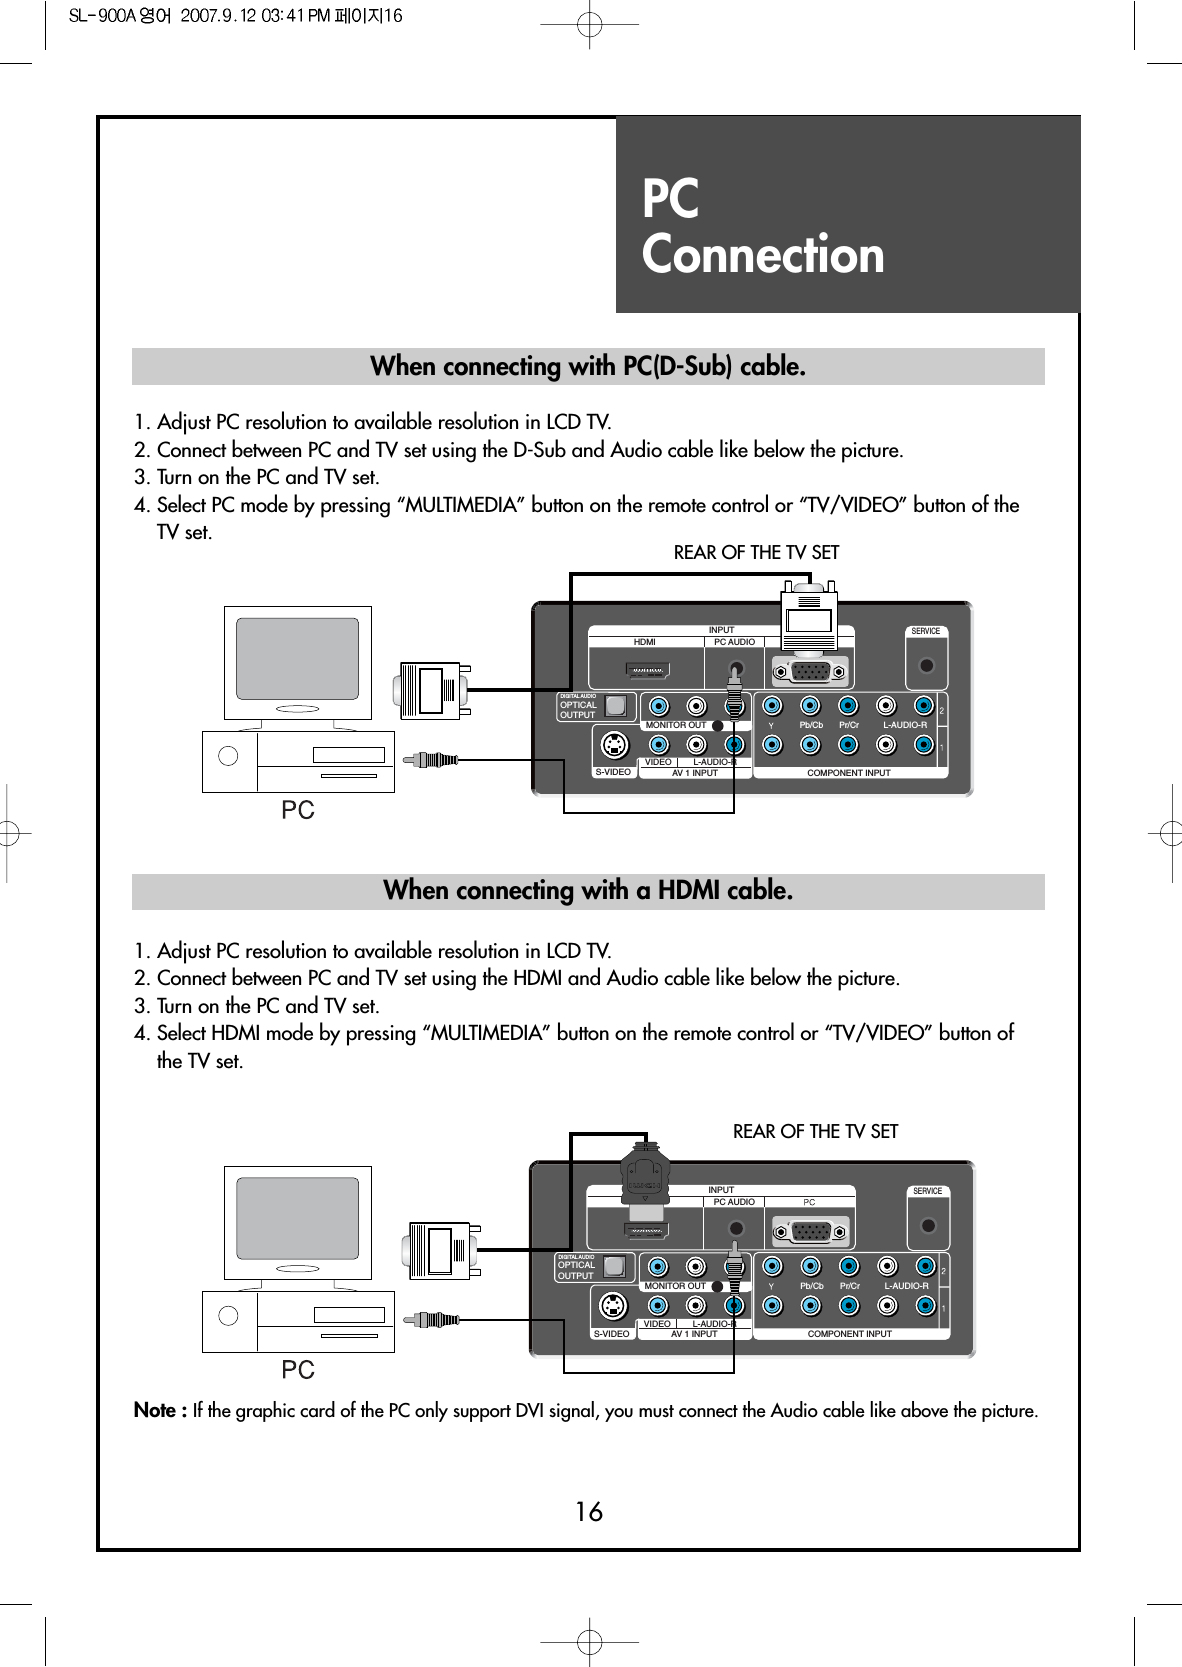
![PC Connection17PC CONNECTION NOTES:1) If there is a [Vertical Frequency] setting menu in the [Screen] Menu of the PC, adjust the frequency to 60Hz.2) If the PC resolution is too high, it may be hard to read letters. Select a suitable resolution.3) HDMI input port receives only Digital Signal.4) Depending on the graphic card when you plug & unplug the HDMI connection, the screen may not displaycorrectly.Restart the computer if this happens.Multi input resolution available in LCD TV. Resolution V-freq HDMI PC(D-Sub) Component Standard640 X 480 60Hz O O X VESA Standard75Hz O O X VESA Standard800 X 600 60Hz O O X VESA Standard75Hz O O X VESA Standard1024 X 768 60Hz O O X VESA Standard75Hz O O X VESA Standard1280 X 768 60Hz O O X VESA Standard75Hz O O X VESA Standard1280 X 1024 60Hz O O X VESA Standard75Hz O O X VESA Standard720 X 480i 60Hz X X O720 X 480p 60Hz O O O1280 X 720p 60Hz O O O1920 X 1080i 60Hz O O O1920 X 1080p 60Hz O O ONote :1. When you connect with component, PC (D-Sub), and HDMI, you must check the input resolution ofexternal devices.2. So if this mode is used at PC mode, the screen can be enlarged.](https://usermanual.wiki/DAEWOO-Electronics/DLA42C7.Users-manual-1/User-Guide-844677-Page-18.png)

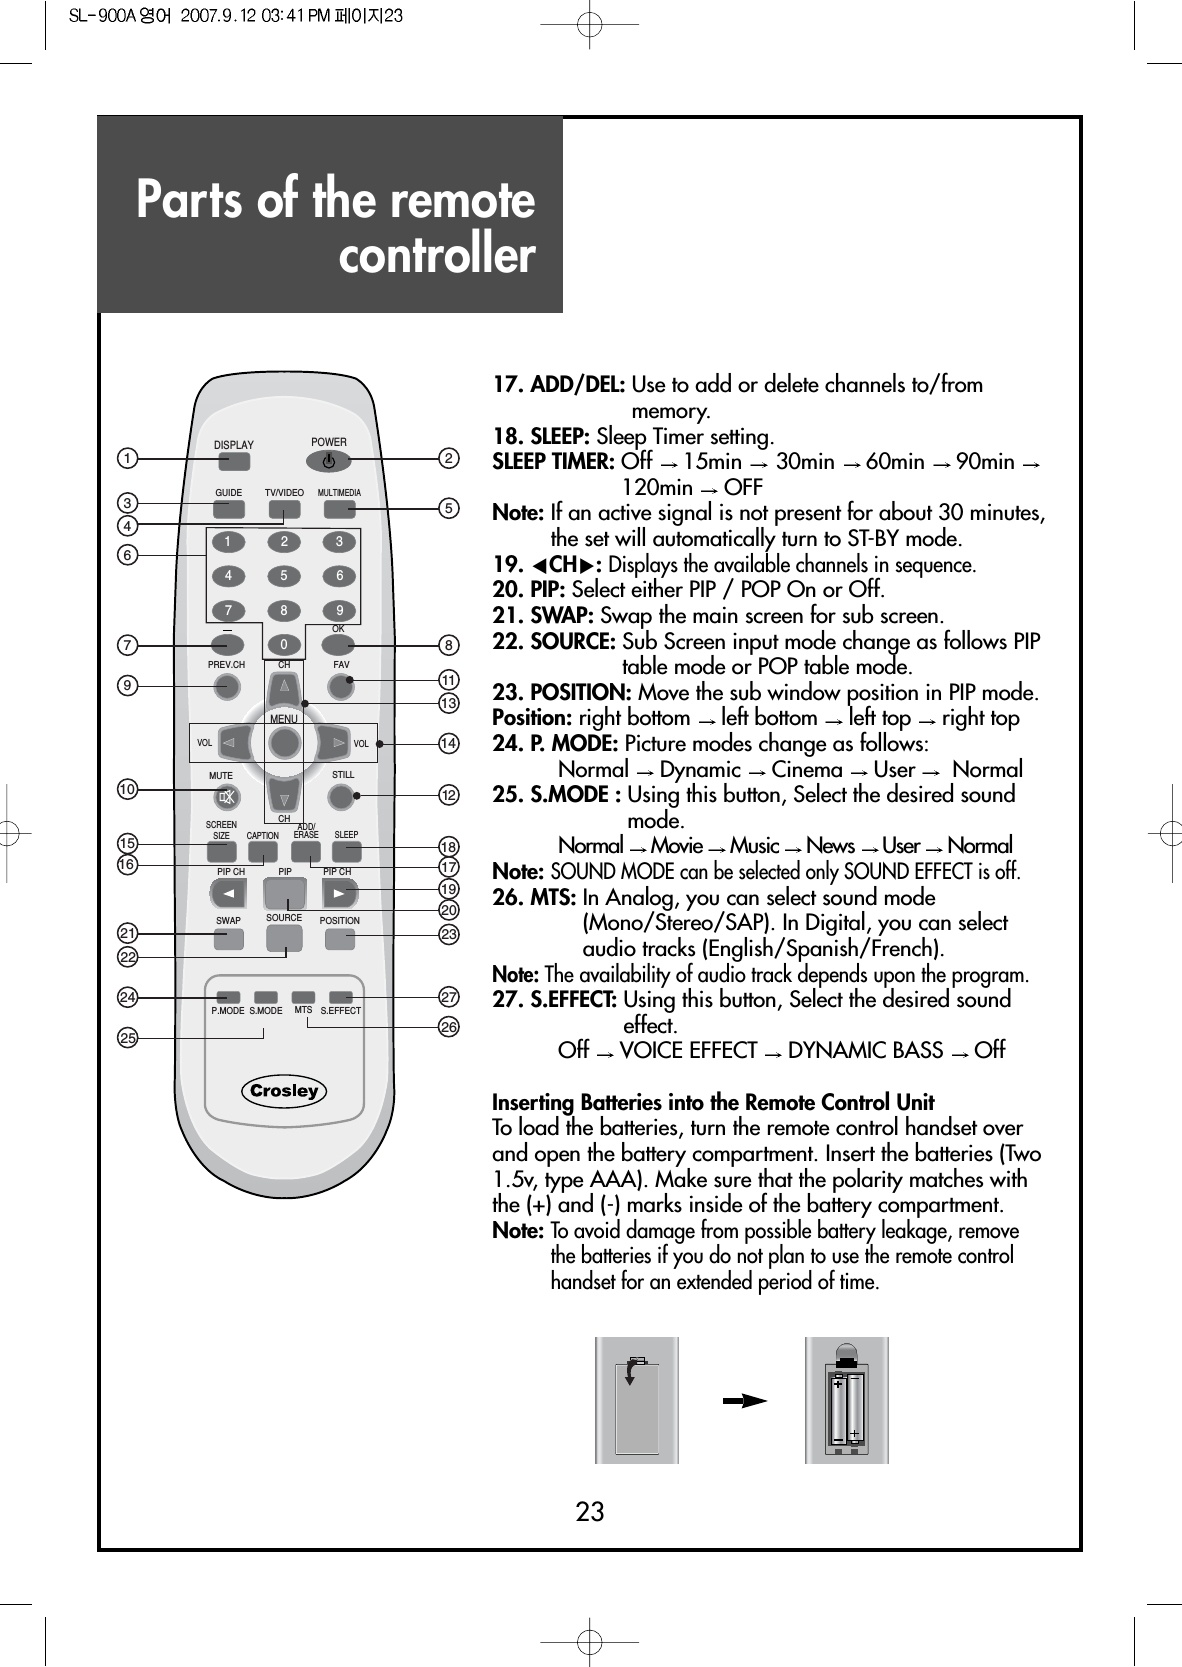
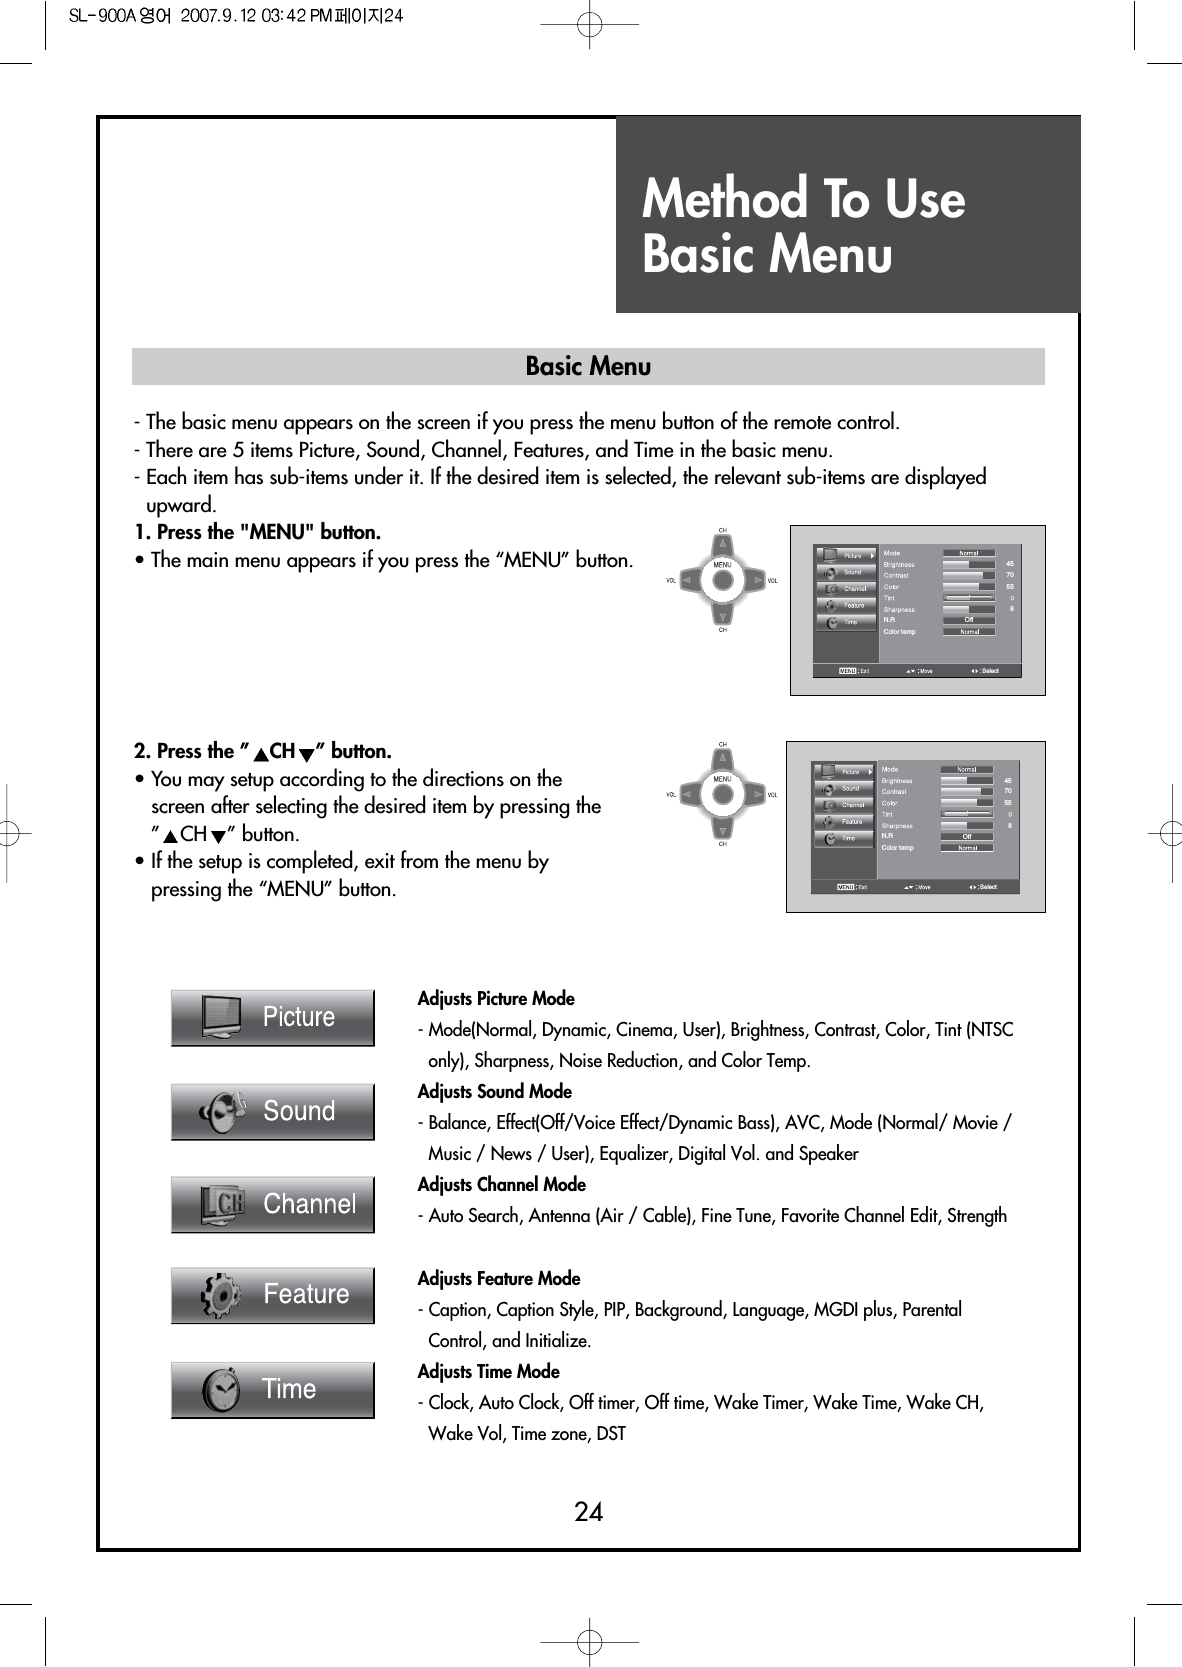
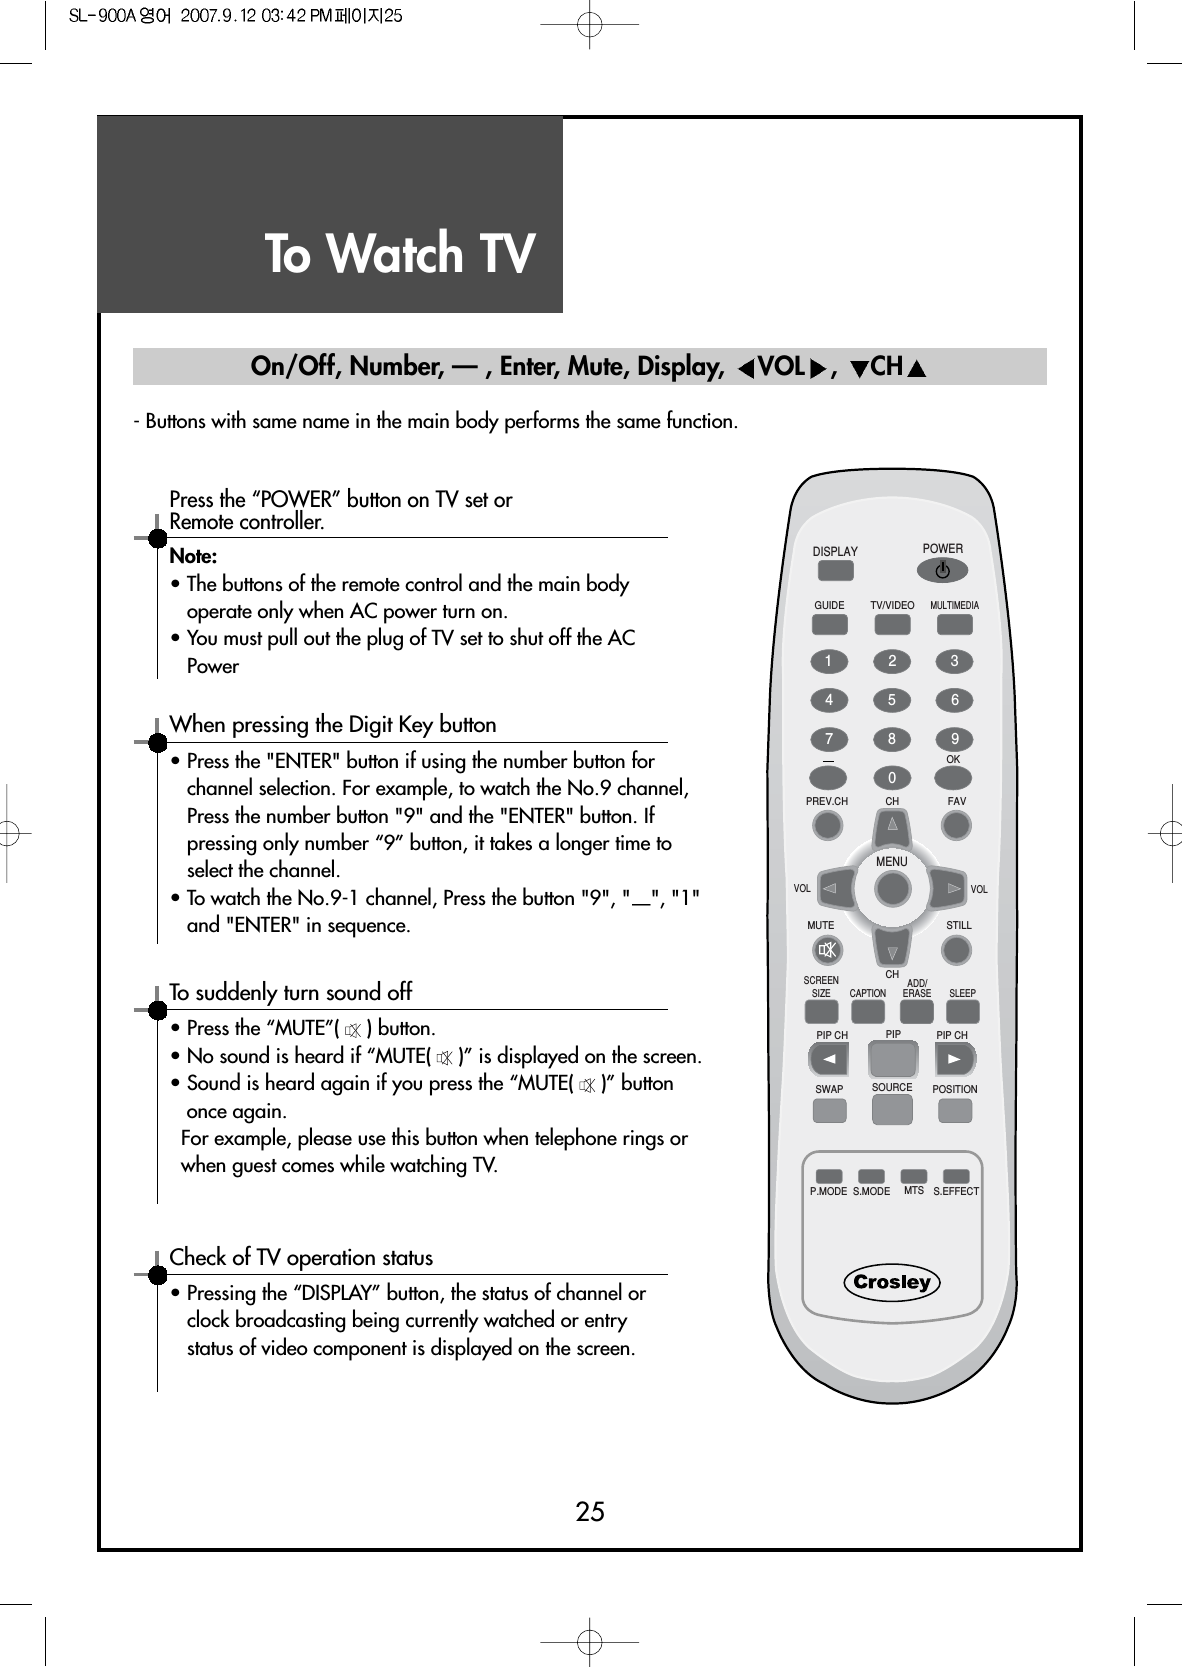
![Parts of the RemoteController221. DISPLAY: Display the present modes (ATV/DTV, Video1/2,COMP.1/2, HDMI and PC) and signal information.Note: In Analog TV mode, you can see information about theChannel number, Sound, and Clock. In Digital TV mode,you can see information about a channel number, name,broadcasting time and more.2. (POWER): Turns the TV on and off.3. GUIDE: Access Electronic Program Guide (EPG). It worksonly in DTV mode.4. TV/VIDEO: Each time you press this button, the TV will cycleThrough: TV AV1/2(S-Video1/2) TV5. MULTIMEDIA: Each time you press this button, the TV willcycle Through: Comp.1/2 HDMI PC Comp. 1/26. NUMBER: Press the numbers on this board; you can selectCH directly in TV mode. (EX: When you want toselect CH10, you should press down “1” and “0”within 2second. If you only press down “1”, after2second, CH1 will be selected.)7. (DASH) : Used to enter a program number for multipleprogram channels such as 2-1, 2-2, etc.8. OK: Confirms a selection.9. PREV CH: Press this button, you can tune to the previouschannel.10. (MUTE): Press this button, and the sound goes off. Pressagain, and the sound returns.11. FAV : Press to switch to your favorite channels.12. STILL : Press this button to freeze the picture.13. VCHW: Press to switch to your memorized channels insequence.14. CVOLB:Adjust the volume.15. SCREEN SIZE: Select screen aspect ratio. 16:9 4:3 LB[16:9] LBS[16:9)Note: When current mode is multimedia (PC and HDMI), theaspect only work as the 16:9 or 4:3 mode. And "ScreenSize" function is not available in PIP mode.16. CAPTION: Controls the caption decoder.DISPLAYMENUGUIDE TV/VIDEOFAVPREV.CHMUTESCREENSIZE CAPTIONPIP CH PIP CHPIPSWAPP.MODE S.MODE S.EFFECTMTSSOURCE POSITIONSLEEPVOL VOLCHCHMULTIMEDIAOKPOWER1234567809STILLADD/ERASE136791021152416252242581314121118231927172620](https://usermanual.wiki/DAEWOO-Electronics/DLA42C7.Users-manual-1/User-Guide-844677-Page-23.png)