DREAMUS H10 MULTI-CODE JUKE BOX User Manual USERS MANUAL 4
IRIVER LIMITED MULTI-CODE JUKE BOX USERS MANUAL 4
DREAMUS >
Contents
- 1. USERS MANUAL 1
- 2. USERS MANUAL 2
- 3. USERS MANUAL 3
- 4. USERS MANUAL 4
USERS MANUAL 4
4544
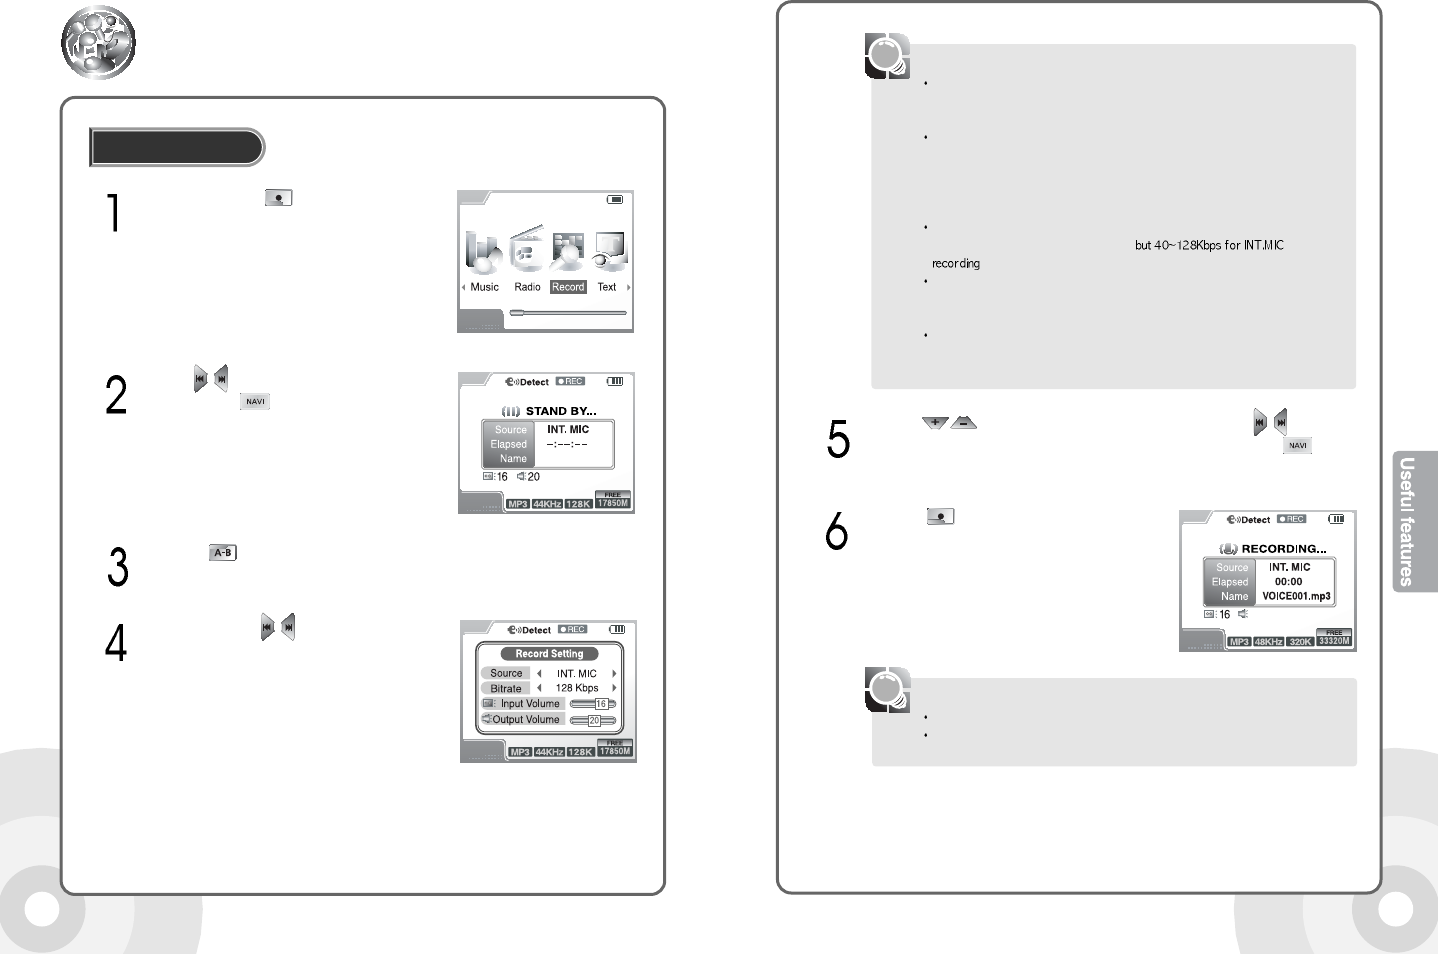
Press and hold the button to open
the functions menu.
Recording
Recording
Use the buttons to select the Record icon
then press the button to open the record
standby screen.
Press the button in the record standby screen to open the Record Setting
screen.
Press and hold the buttons in the Record
Setting screen to select the Source item. Setting
the Source option will change Bit rate, Input
Volume, and Output Volume accordingly.
The option (Bitrate/Input Volume/Output Volume) value for each source for the
recording is saved. It is also possible to change the preset options for each
Source option for recording.
Source Types
LINE IN: Analog signal from an external device
INT. MIC: Voice using the internal microphone
EXT. MIC: Voice using an external microphone
TUNER: Record FM radio
Bitrate
Quality of the recording. (40~320Kbps,
).
Input Volume(0~20)
Volume of the recording. High Input Volume increases the volume of the
recording file. But can also cause distortion in the recording.
Output Volume(0~40)
The product supports monitoring of the recording sound. This option changes
the monitoring volume and does not affect the recording file.
[Note]
Use the buttons to select an option and use the buttons to
change the Bit rate, Input Volume, or Output Volume. Press the button
to return to the Recording Standby display from the Record Setting display.
Volume control is not available while recording
For best results, experiment with various volume settings and microphone distances
in each setting you record in.
[Note]
Press the button to start the MP3 recording.
20
46 47
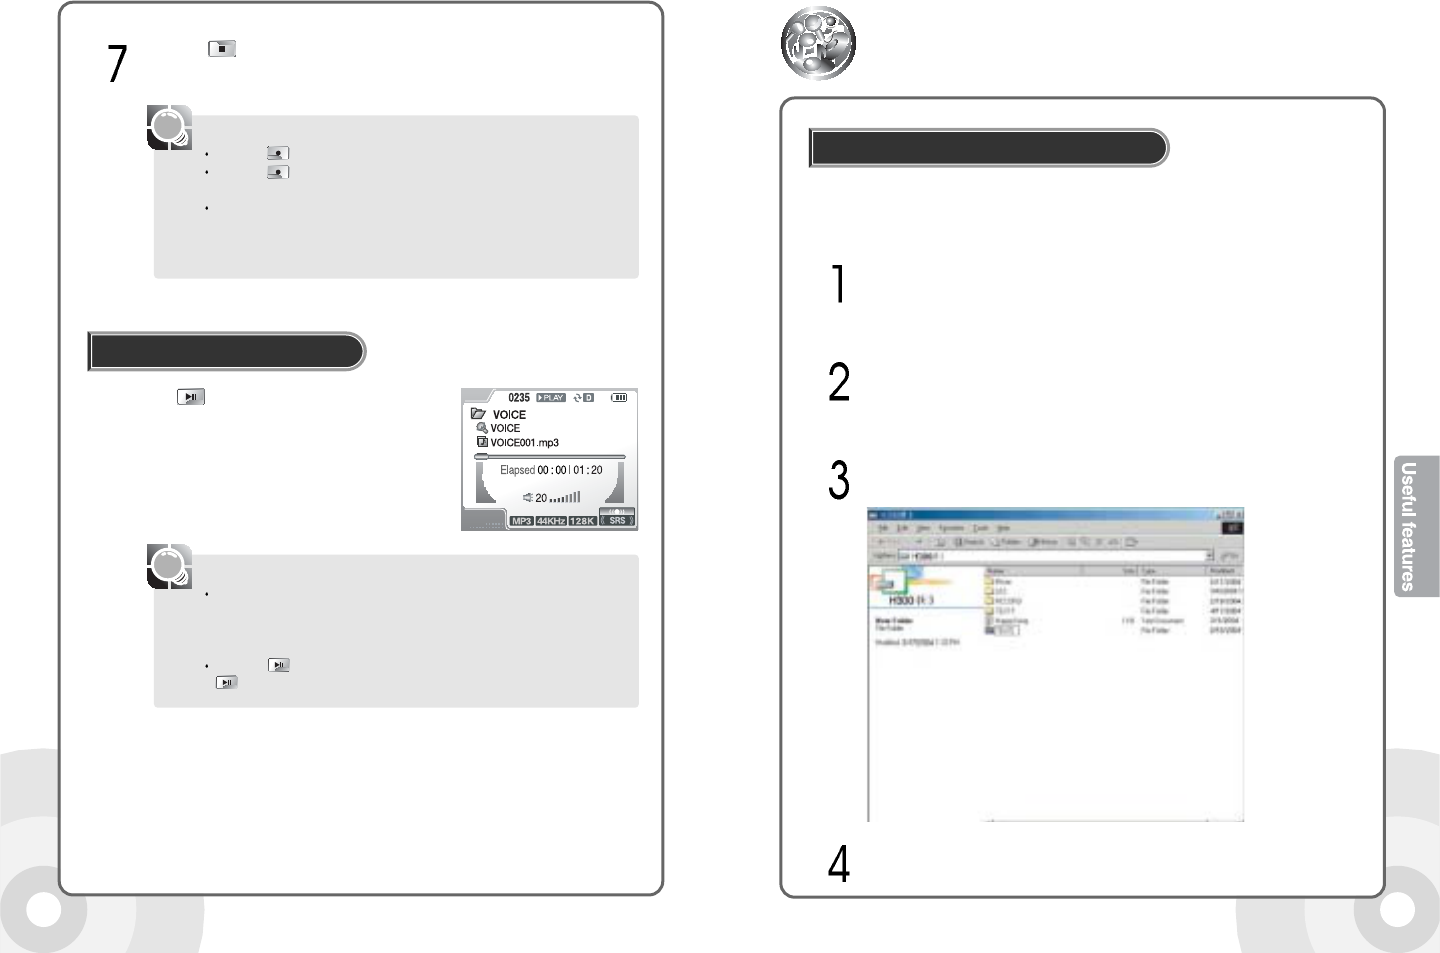
Press the button in recording standby
mode to play the recorded file
Playing the recorded file
The recorded file is saved in the following location, depending on the Source.
LINE IN : RECORD\AUDIO\AUDIOXXX.MP3
TUNER: RECORD\AUDIO\TUNERXXX.MP3
INT/EXT MIC : RECORD\VOICE\VOICEXXX.MP3
Press the button to pause the playback. To resume playback, press the
button again.
[Note]
Press the button to finish the recording. The recording standby screen is
displayed.
Press the button again in standby mode to record into a new file.
Press the button while recording to pause the recording. Resuming the
recording will not create a new file.
The recording will automatically stop in the following conditions:
- Not enough space is available for the recording.
- Recorded MP3 file is over 200MB in size.
- Over 5 hours have been recorded - Insufficient battery
[Note]
Connect the product to a PC using the USB cable. An icon is displayed in
the PC tray if connection is successful.
Please see Page 24 for details.
Click Start -> Programs -> Accessories -> Windows Explorer.
Use Windows Explorer to create a folder named TEXT in the H300
drive.
Store .txt files to the TEXT folder.
Store txt files to the TEXT folder
Any text can be entered into a text file, including useful features such as book
sections or addresses and phone numbers.
Using the text function
4948
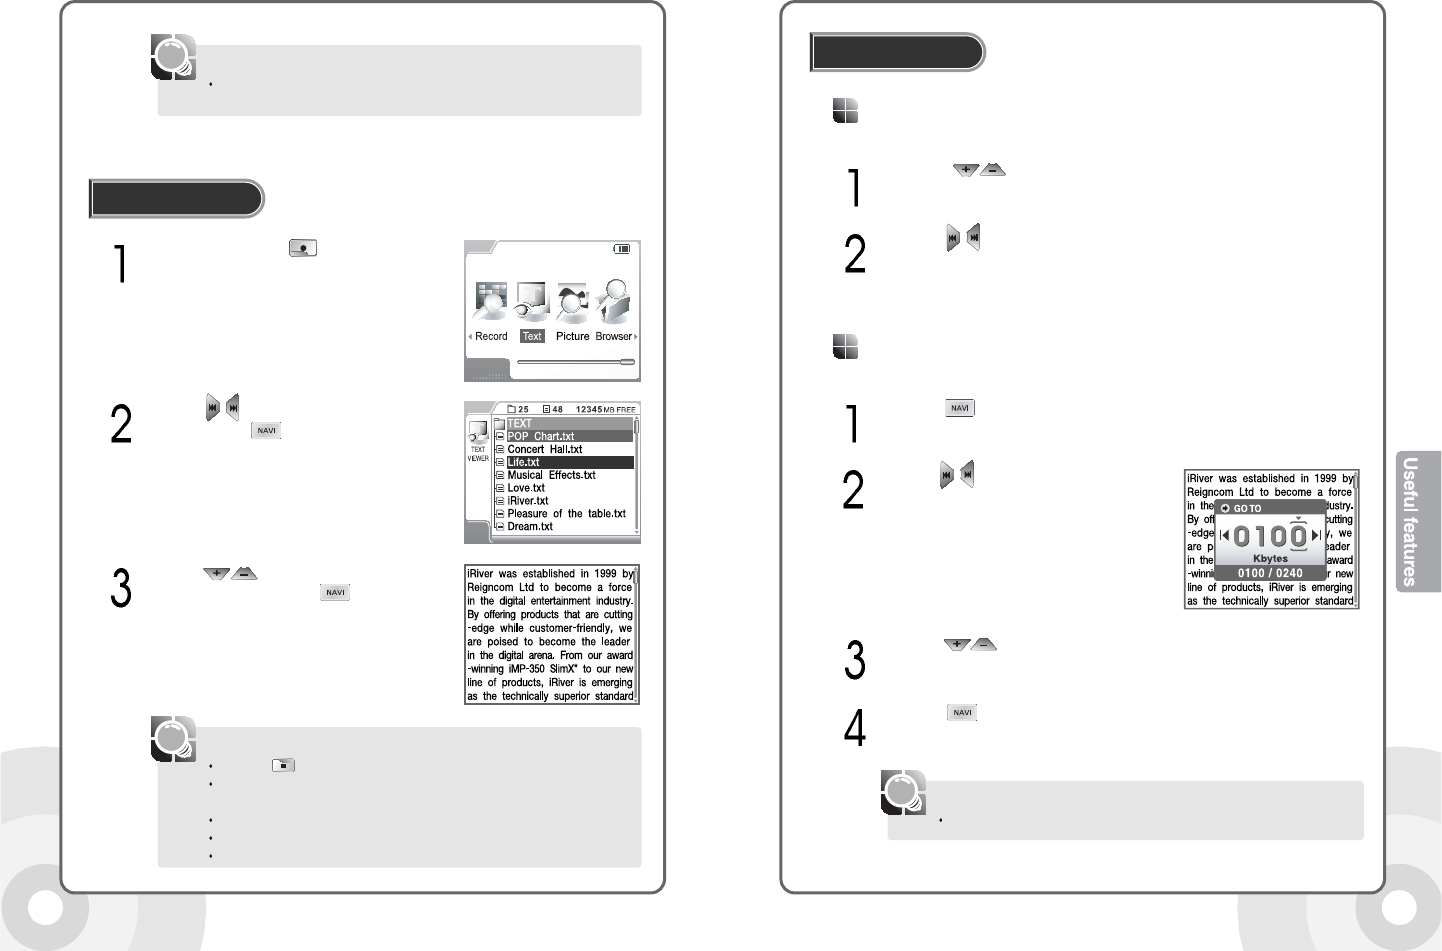
Only Wan-Sung type Korean text files are supported. To use a Jo-Hap type
Korean text file, please convert it to a Wan-Sung type before using it.
[Note]
Press the button to exit the text function.
The maximum number of characters that can be displayed in the screen is:
English: 26 characters per line, 10 lines.
Text is not displayed in the LCD remote controller (sold separately).
The text reading feature is supported while playing an MP3 file.
Press the REC button while reading text to switch to the music mode (Hot key.)
[Note]
Press and hold the button in playback
standby mode or in the radio screen to open
the function menu.
Viewing text
Use the buttons to select the Text icon
then press the button to open the Text
screen. Check the tree structured file listing.
Use the buttons to select the desired
folder or file and press the button to select.
See the text file displayed in the LCD.
Normal Browsing
Text Browsing
Press the buttons to browse to the Previous/Next line while
reading a text file.
Press the buttons to browse to the Previous/Next page while
reading a text file.
Press the button to go to a desired location while reading a text file
Use the buttons to select a
desired location.
Press the buttons to select a desired number
Press the button to go to the new location.
GO TO Browsing
The numbers are in Kbyte unit.
[Note]
THIS DEVICE COMPLIES WITH PART 15 OF THE FCC RULES. OPERATION
IS SUBJECT TO THE FOLLOWING TWO CONDITIONS: (1) THIS DEVICE MAY
NOT CAUSE HARMFUL INTERFERENCE, AND (2) THIS DEVICE MUST
ACCEPT ANY INTERFERENCE RECEIVED, INCLUDING INTERFERENCE THAT
MAY CAUSE UNDESIRED OPERATION.
NOTE: THE MANUFACTURER IS NOT RESPONSIBLE FOR ANY
RADIO OR TV INTERFERENCE CAUSED BY UNAUTHORIZED
MODIFICATIONS TO THIS EQUIPMENT. SUCH MODIFICATIONS
COULD VOID THE USER'S AUTHORITY TO OPERATE THE EQUIPMENT.
NOTE: This equipment has been tested and found to comply with the
limits for a Class B digital device, pursuant to part 15 of the FCC
Rules. These limits are designed to provide reasonable protection
against harmful interference in a residential installation. This
equipment generates, uses and can radiate radio frequency energy
and, if not installed and used in accordance with the instructions, may
cause harmful interference to radio communications. However, there
is no guarantee that interference will not occur in a particular
installation. If this equipment does cause harmful interference to
radio or television reception, which can be determined by turning the
equipment off and on, the user is encouraged to try to correct the
interference by one or more of the following measures:
- Reorient or relocate the receiving antenna.
- Increase the separation between the equipment and receiver.
-Connect the equipment into an outlet on a circuit different from that
to which the receiver is connected.
-Consult the dealer or an experienced radio/TV technician for help