Dell 512ANHMW WiFi 802.11abgn Module User Manual Contents
Dell Inc. WiFi 802.11abgn Module Contents
UserManual.wiki
>
Dell
>
512ANHMW User Manual
>
User Guide 1
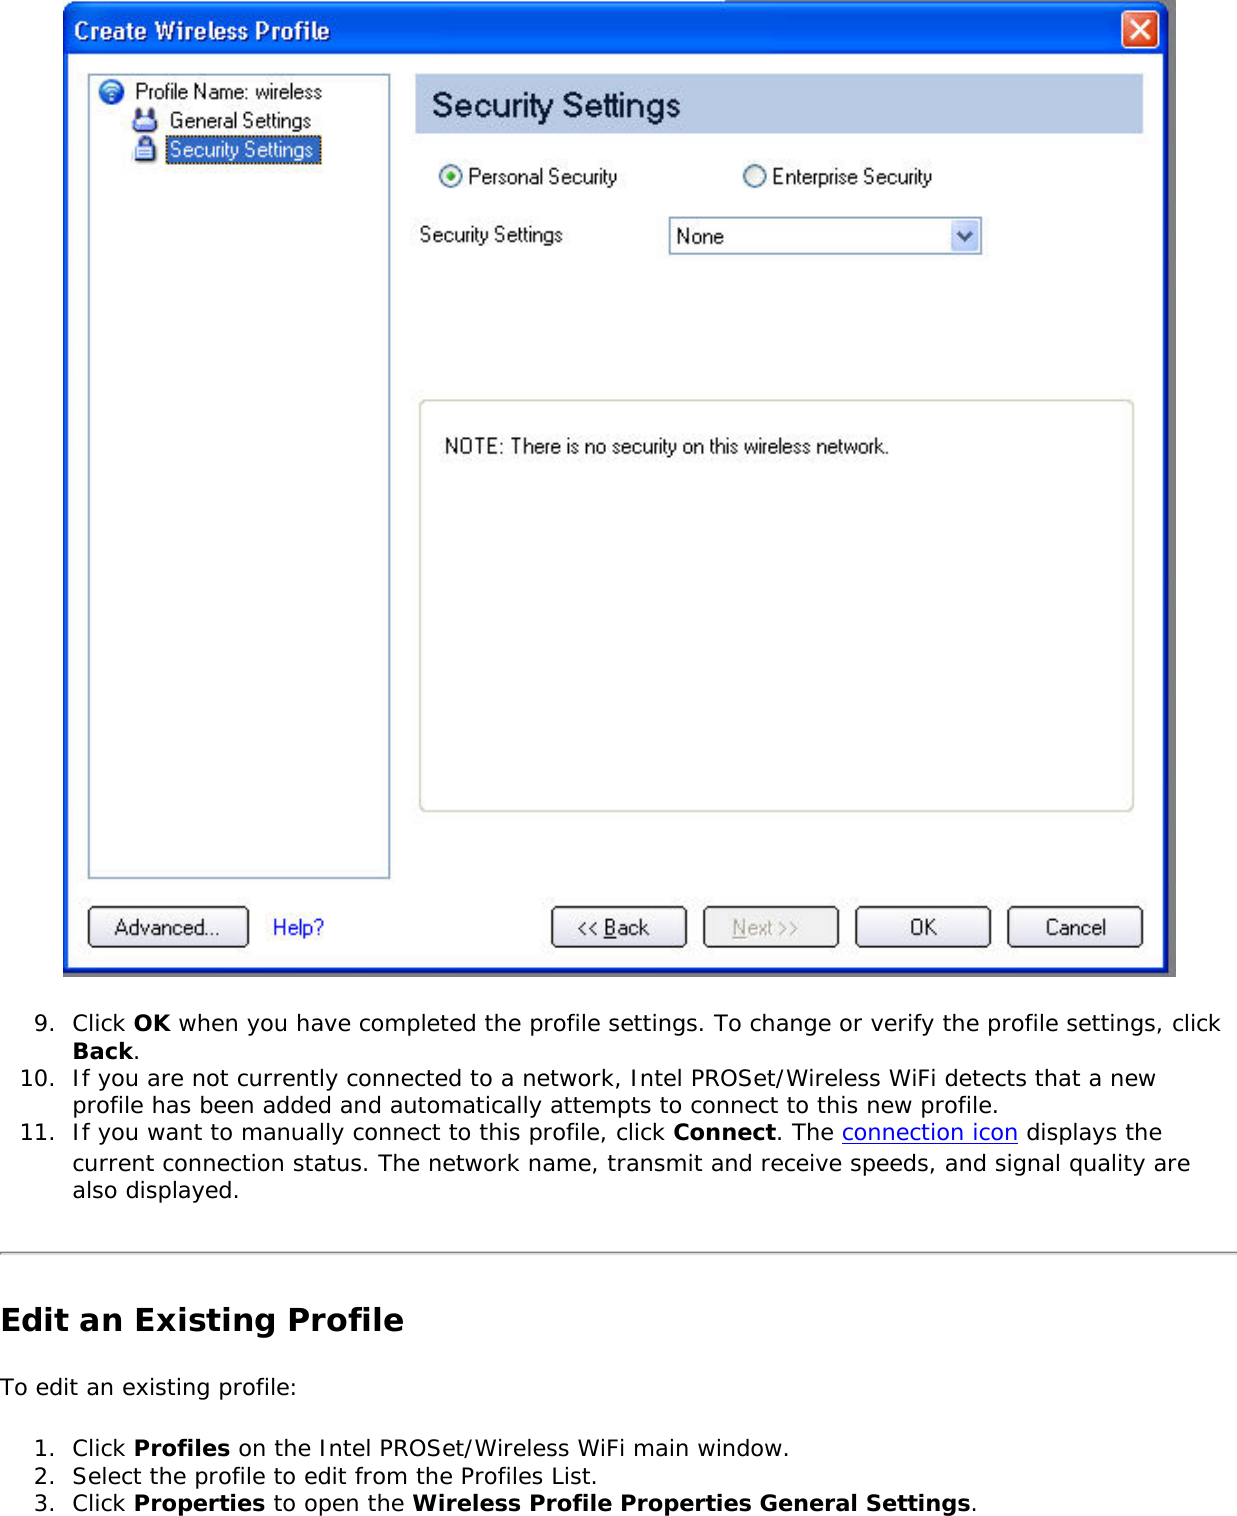
Contents
1.
User Guide 1
2.
User Guide 2
3.
User Guide 3
4.
XP User Guide 1 of 3
5.
XP User Guide 2 of 3
6.
XP User Guide 3 of 3
7.
User Manual 1
8.
User Manual 2
9.
User Manual 3
10.
User Manual 4
11.
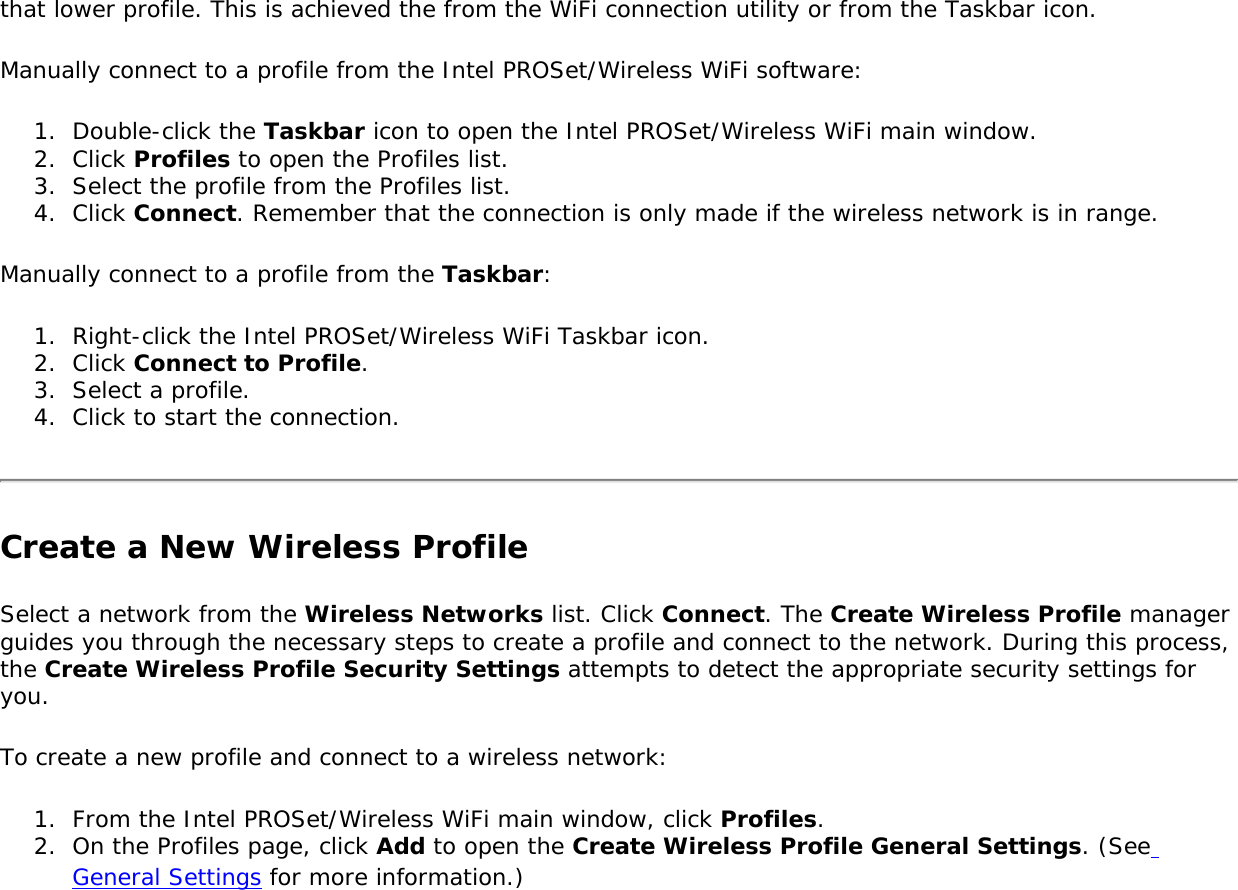
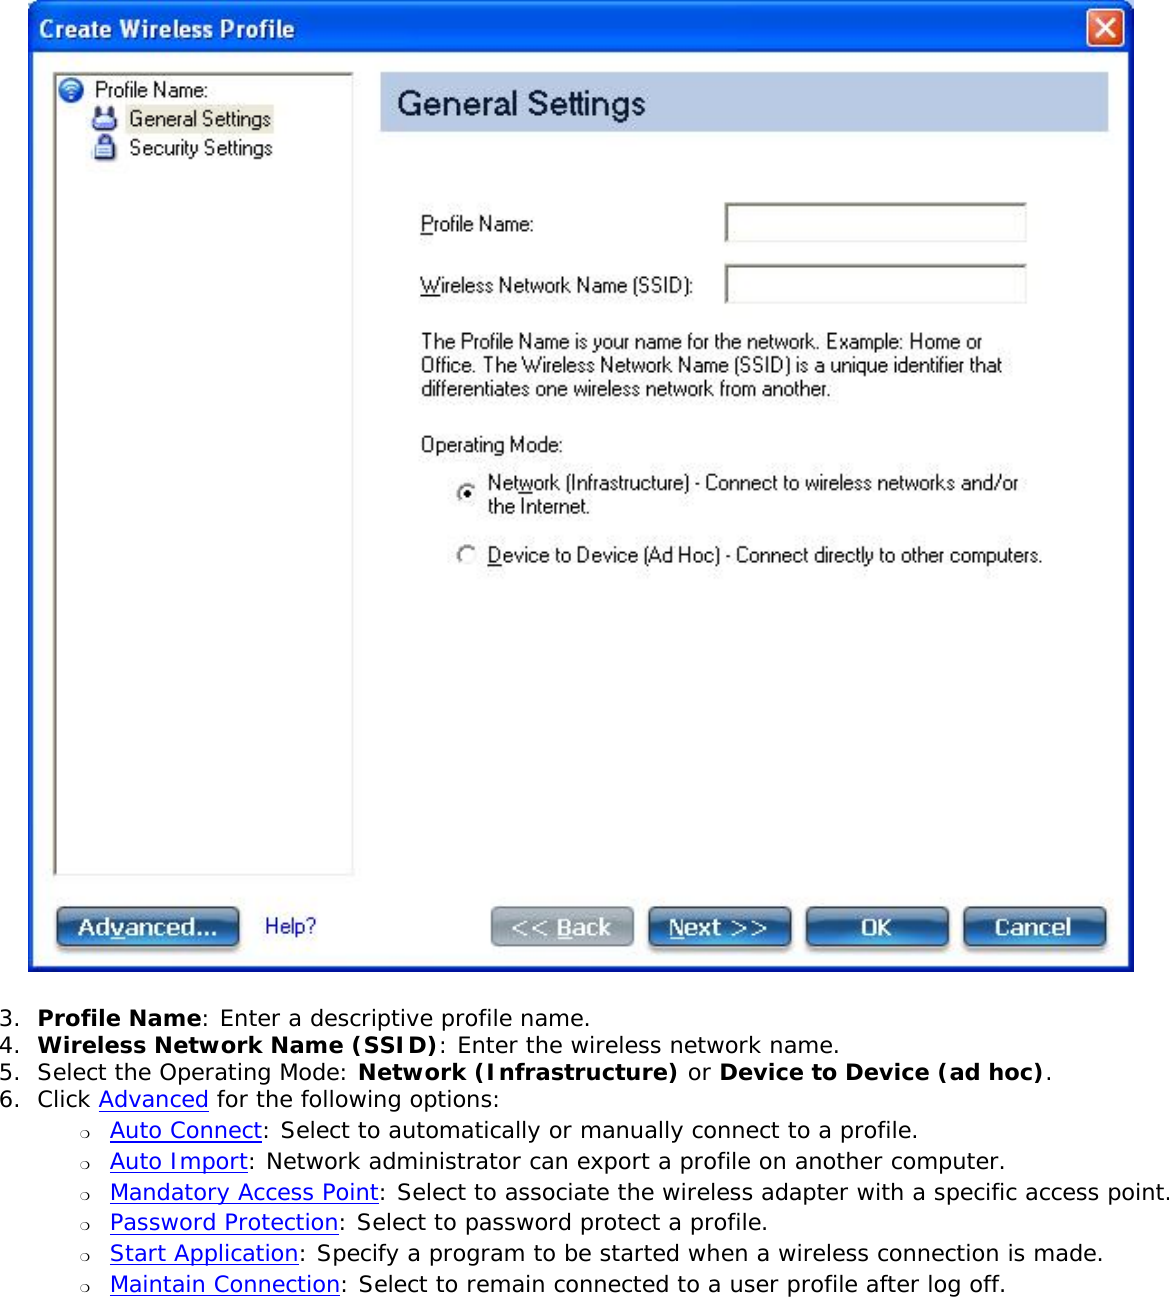
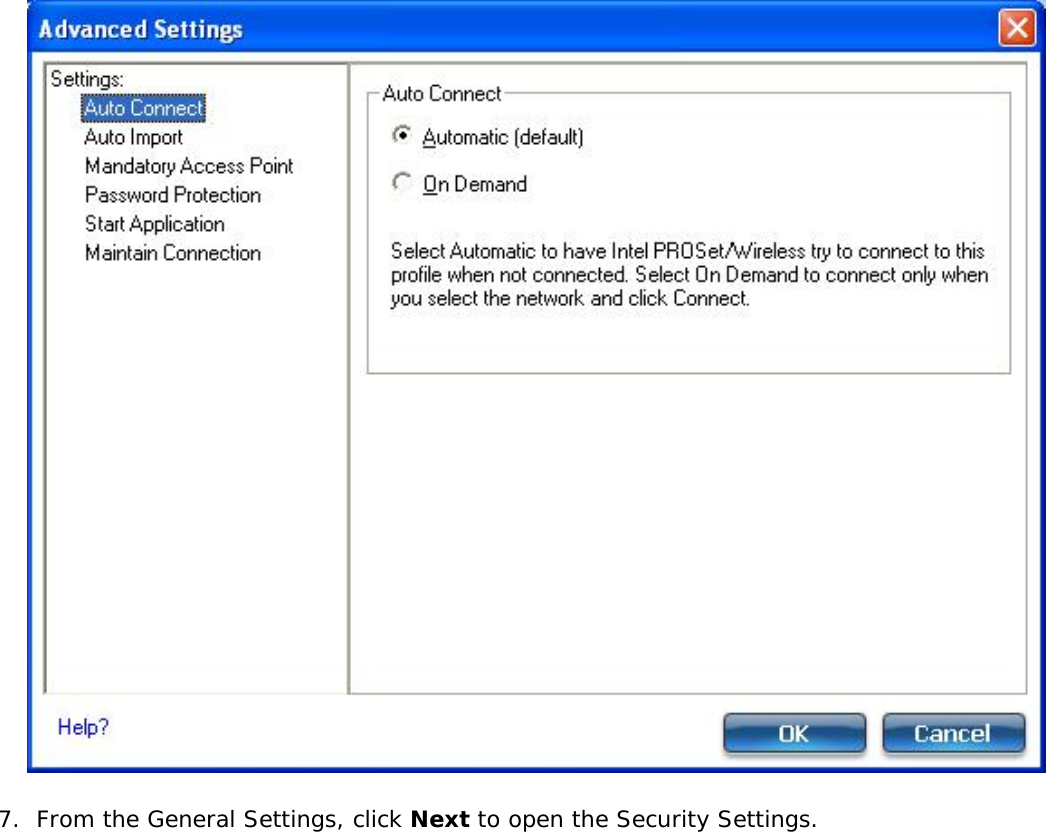
User Manual
User Guide 1
Navigation menu
Upload a User Manual
Namespaces
Wiki Guide
HTML
PDF
Info
Views
User Manual
Discussion / Help
Navigation
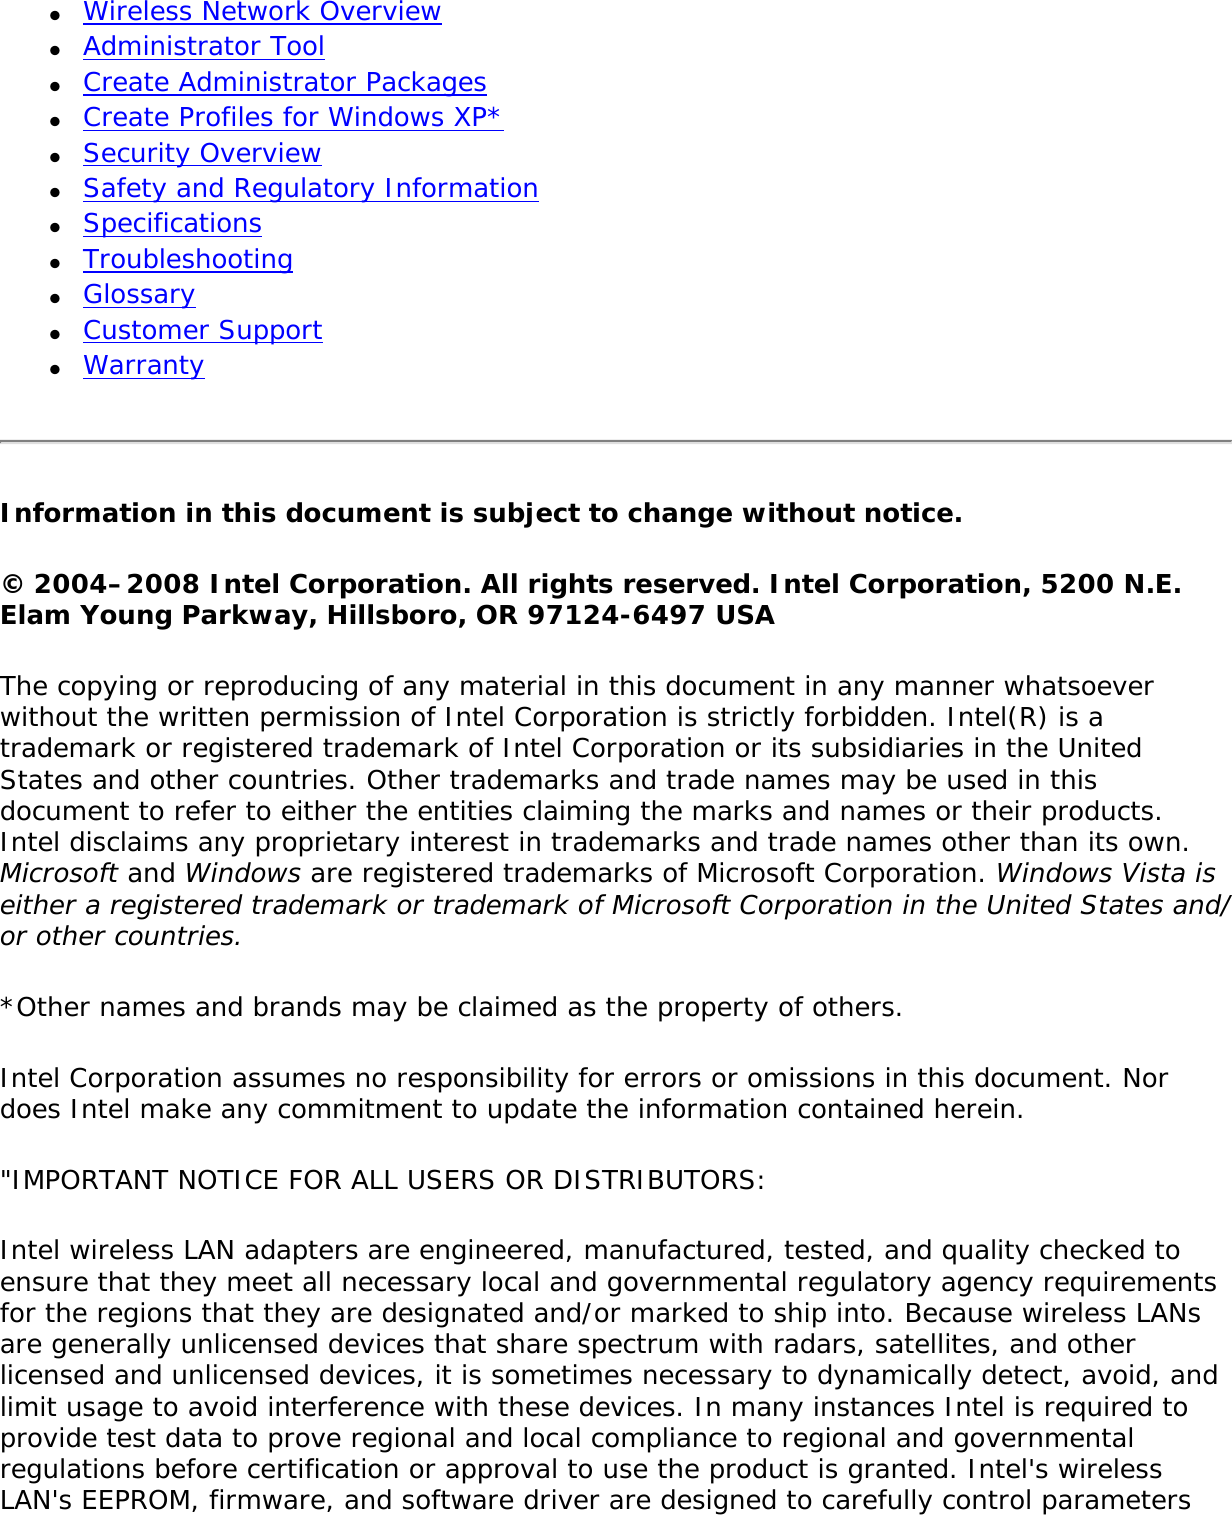
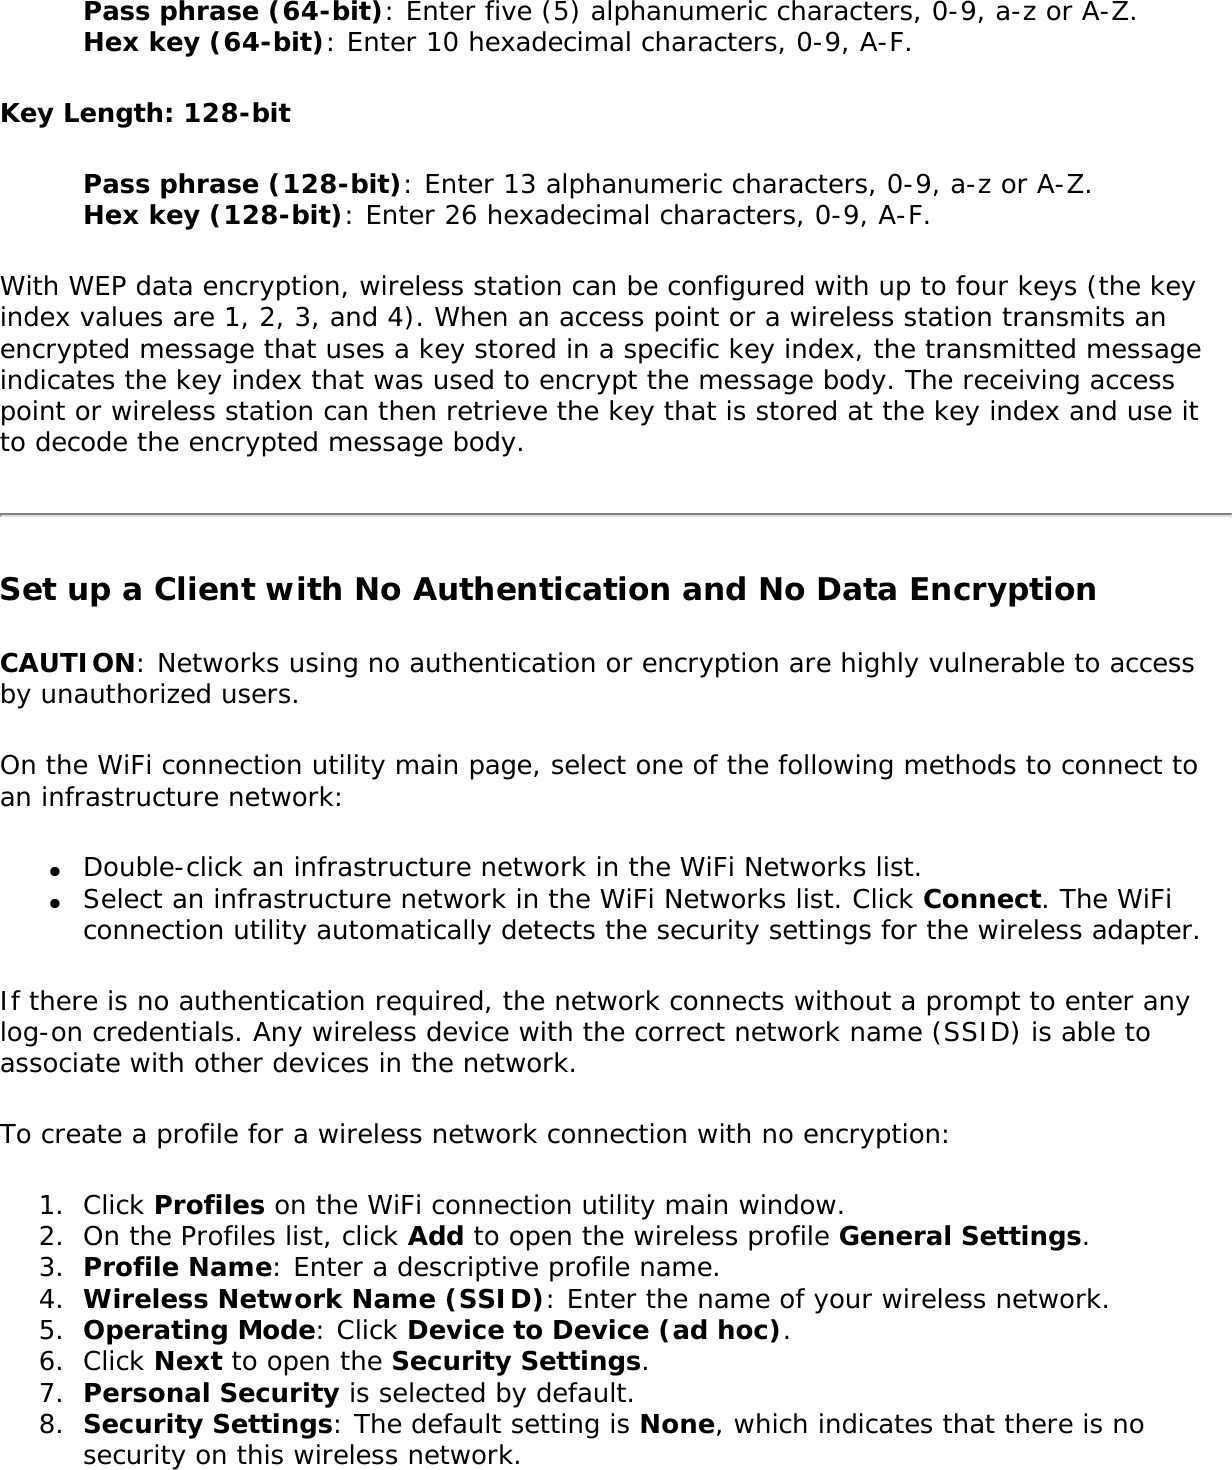
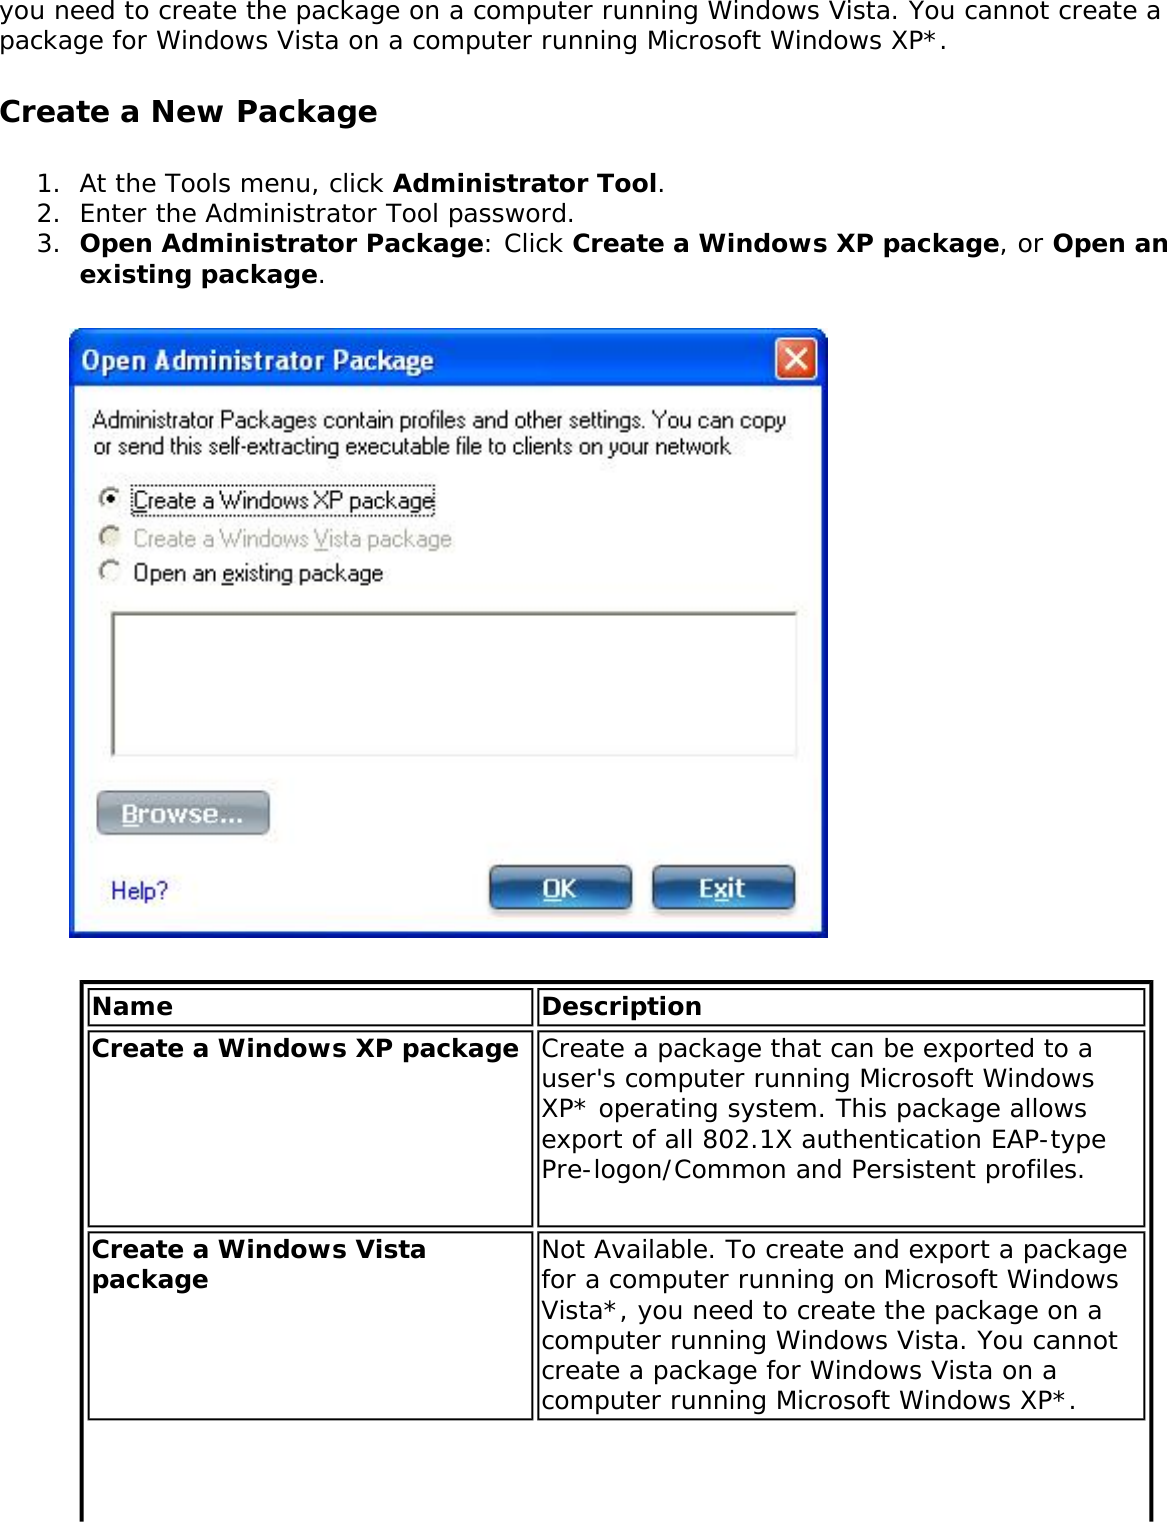
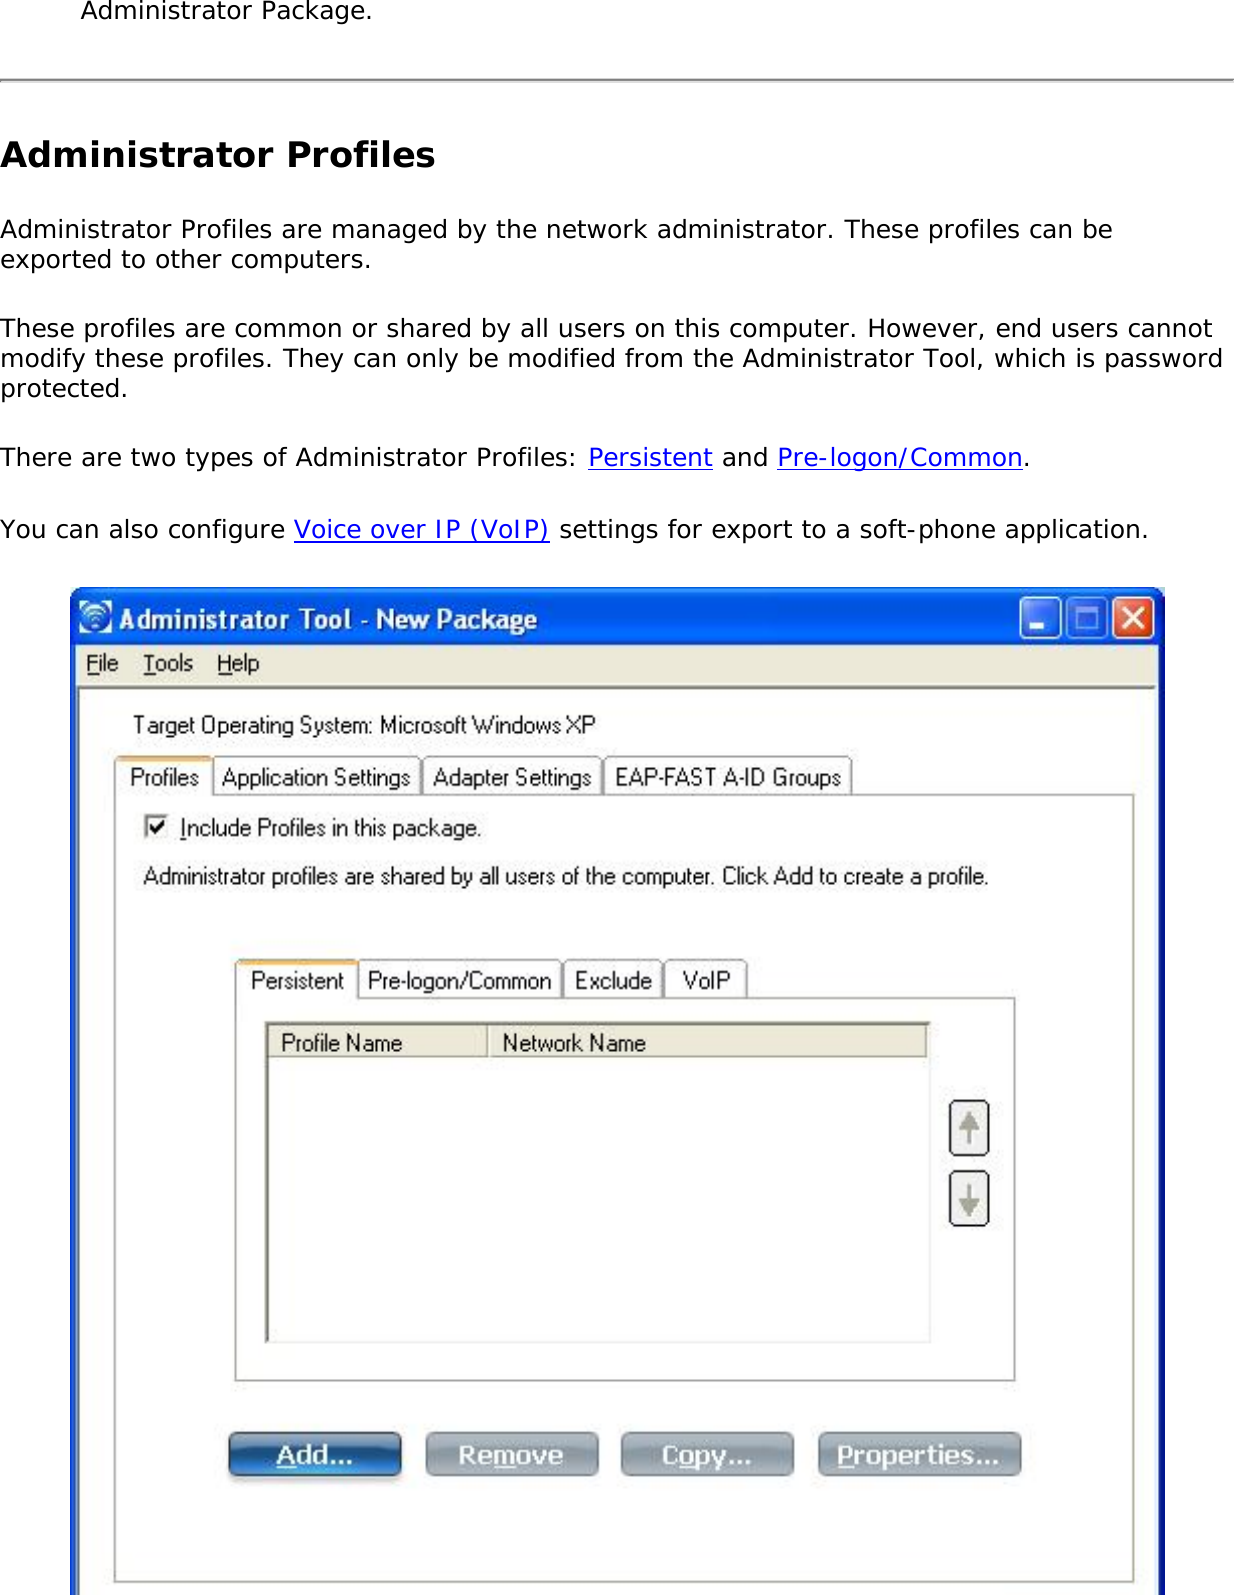
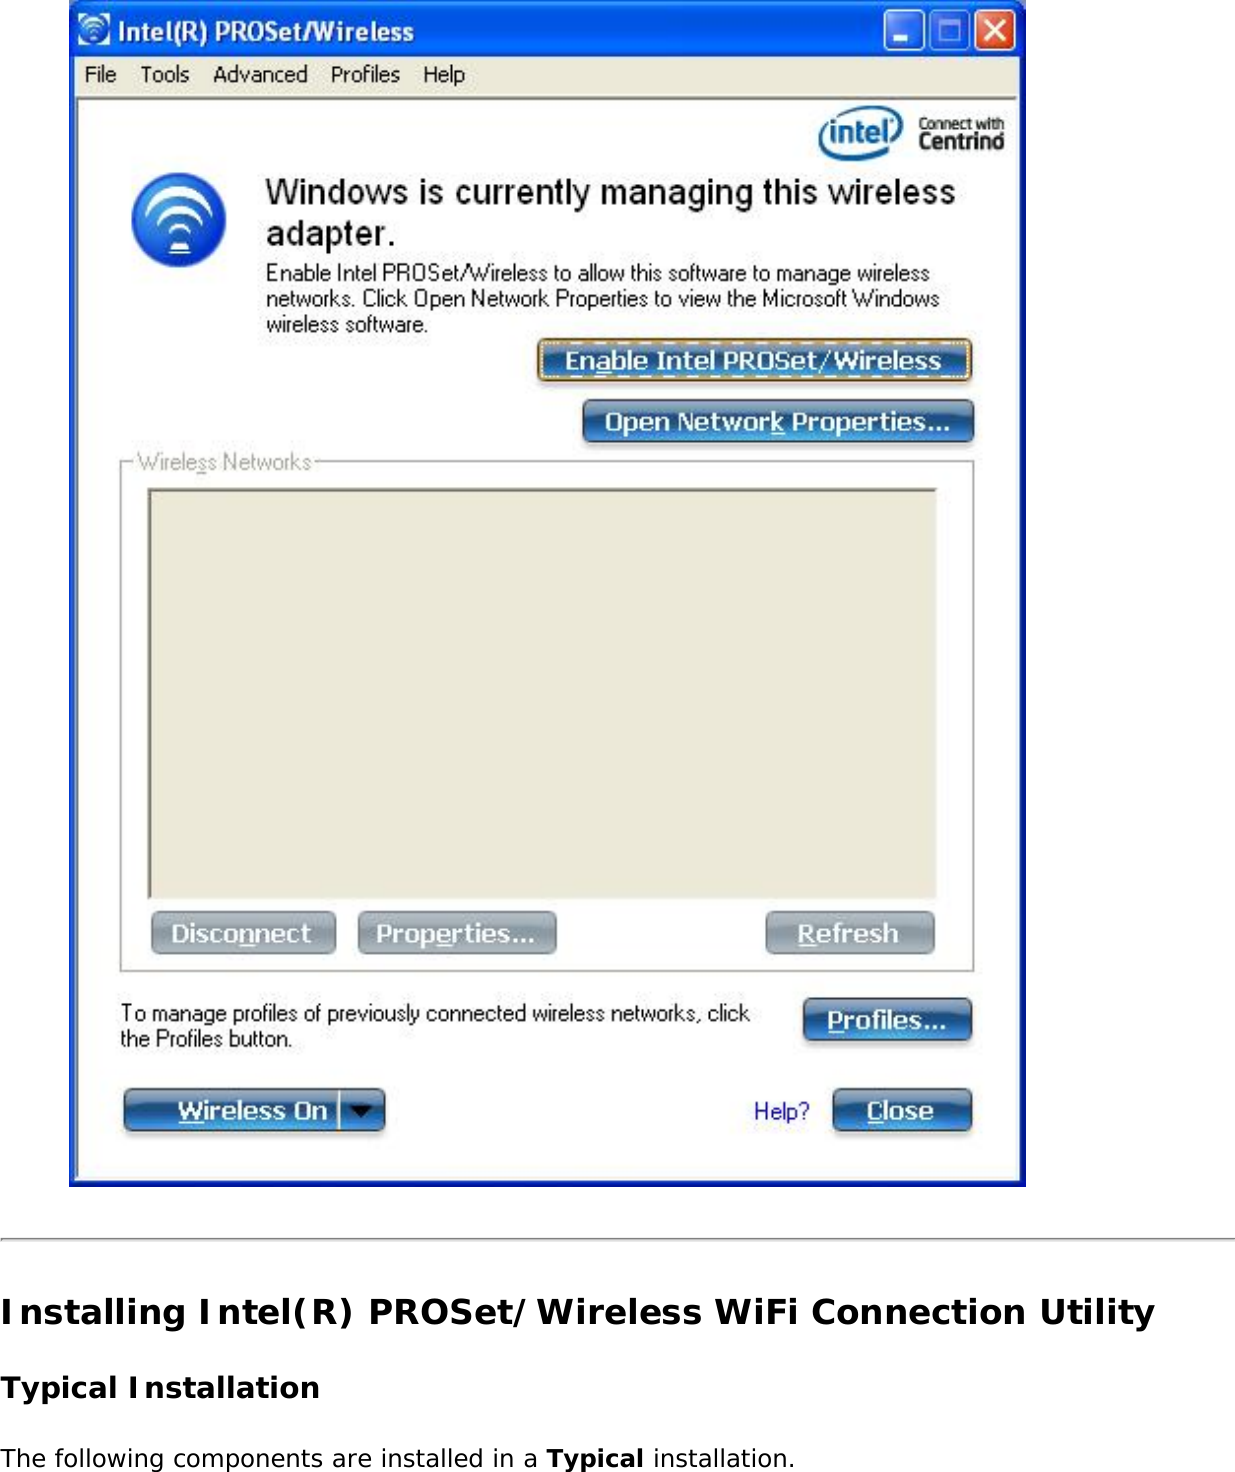
![Name DescriptionFile Exit: Closes the WiFi connection utility main window.Tools Application Settings: Use to set system wide connection preferences. See Application Settings for information.Intel Wireless Troubleshooter: Use to resolve wireless network connection problems. See Intel Wireless Troubleshooter for more information.Manual Diagnostics Tool: The Manual Diagnostics Tool lets you run a set of diagnostics tests that verify the functionality of your wireless adapter. See Manual Diagnostics Tool for more information.Administrator Tool: Used by administrators or the person who has administrator privileges on this computer to configure shared profiles (Pre-logon/Common, Persistent, and Voice over IP [VoIP]). The Administrator Tool can also be used by an Information Technology department to configure user settings within the WiFi connection utility and to create custom install packages to export to other systems. See Administrator Tool for more information.NOTE: The Administrator Tool is available only if it installed during a custom installation of the Intel(R) PROSet/Wireless WiFi software. See Install Additional Software Featuresfor more information on custom installation.Advanced Adapter Settings: Displays Adapter Settings that are equivalent to the settings in the Microsoft Windows Advanced settings. See Adapter Settings for information.To access Adapter Settings from Microsoft Windows:● Double-click Network Connections from the Windows Control Panel.● Right-click the Wireless Network Connection.● Select Properties from the menu.● Click Configure to display the Advanced settings for the adapter.Advanced Statistics: Select to view detailed information about the wireless adapter and connection. See Advanced Statistics for more information.Use Windows to manage Wi-Fi: Select to enable Microsoft Windows XP as the wireless manager. See Microsoft Windows XP Wireless Zero Configuration for more information.](https://usermanual.wiki/Dell/512ANHMW.User-Guide-1/User-Guide-955691-Page-8.png)


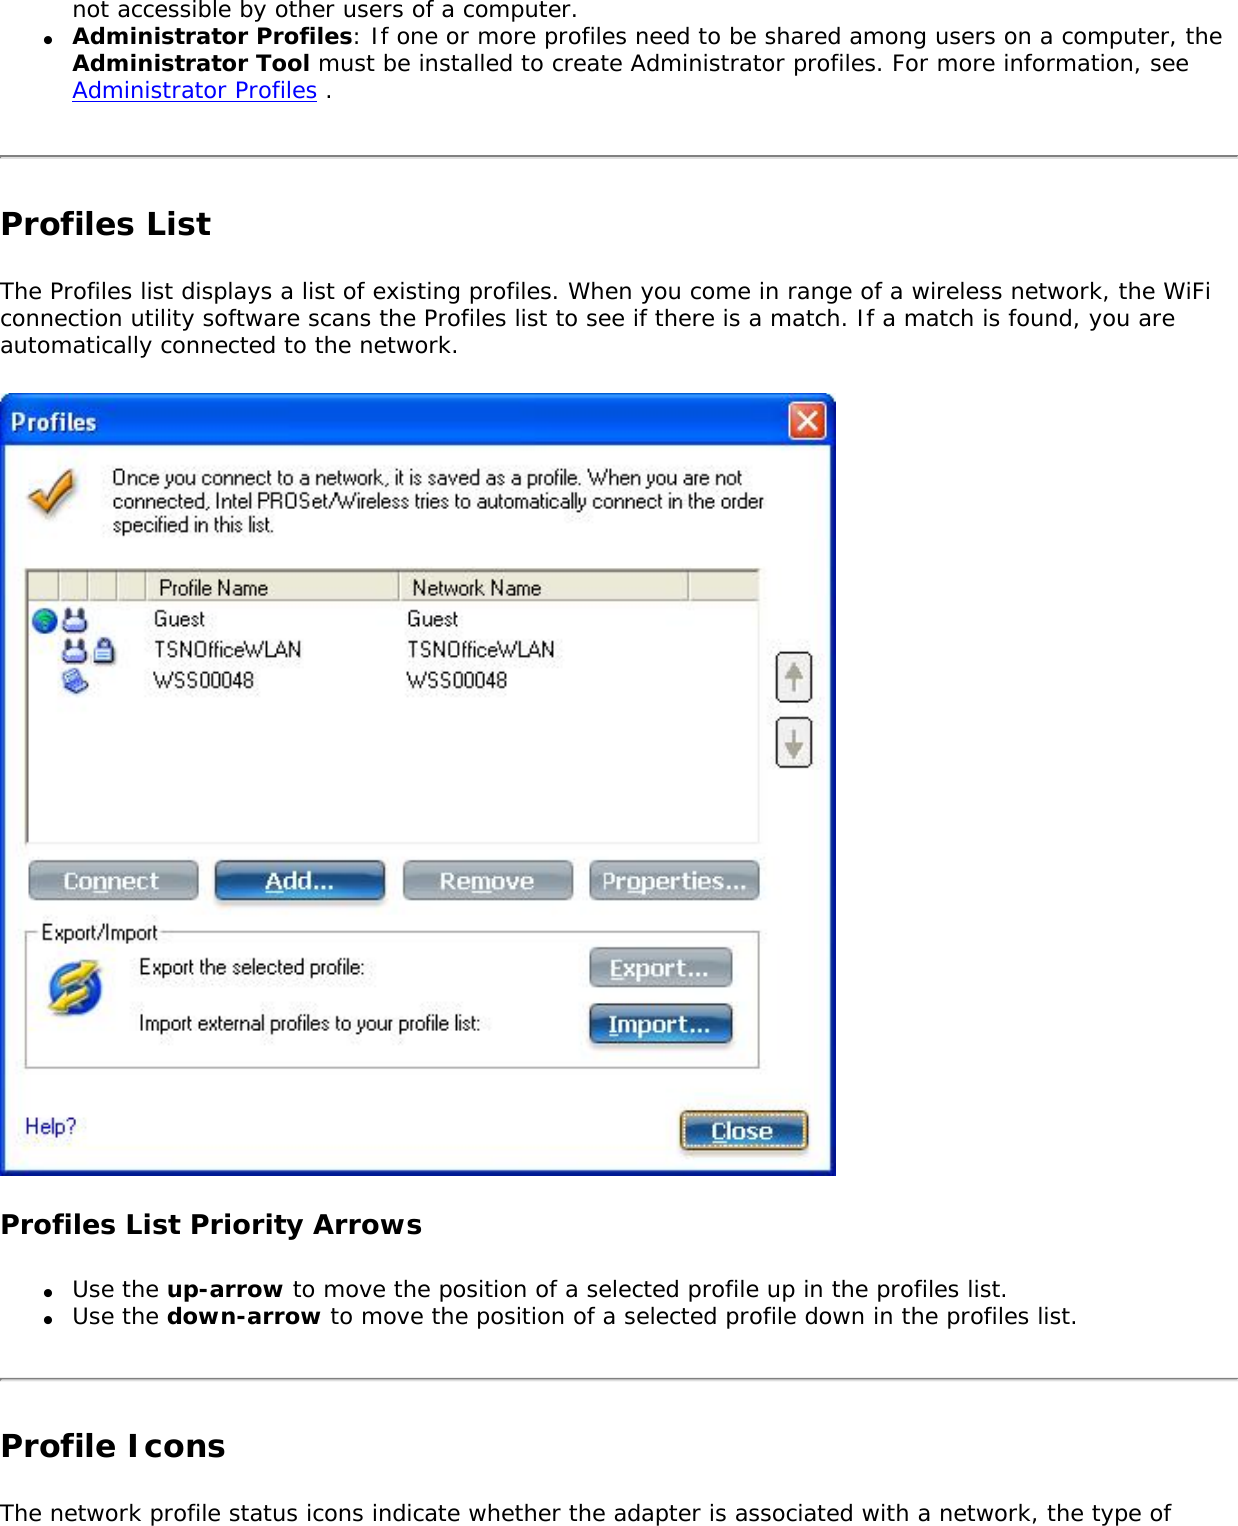
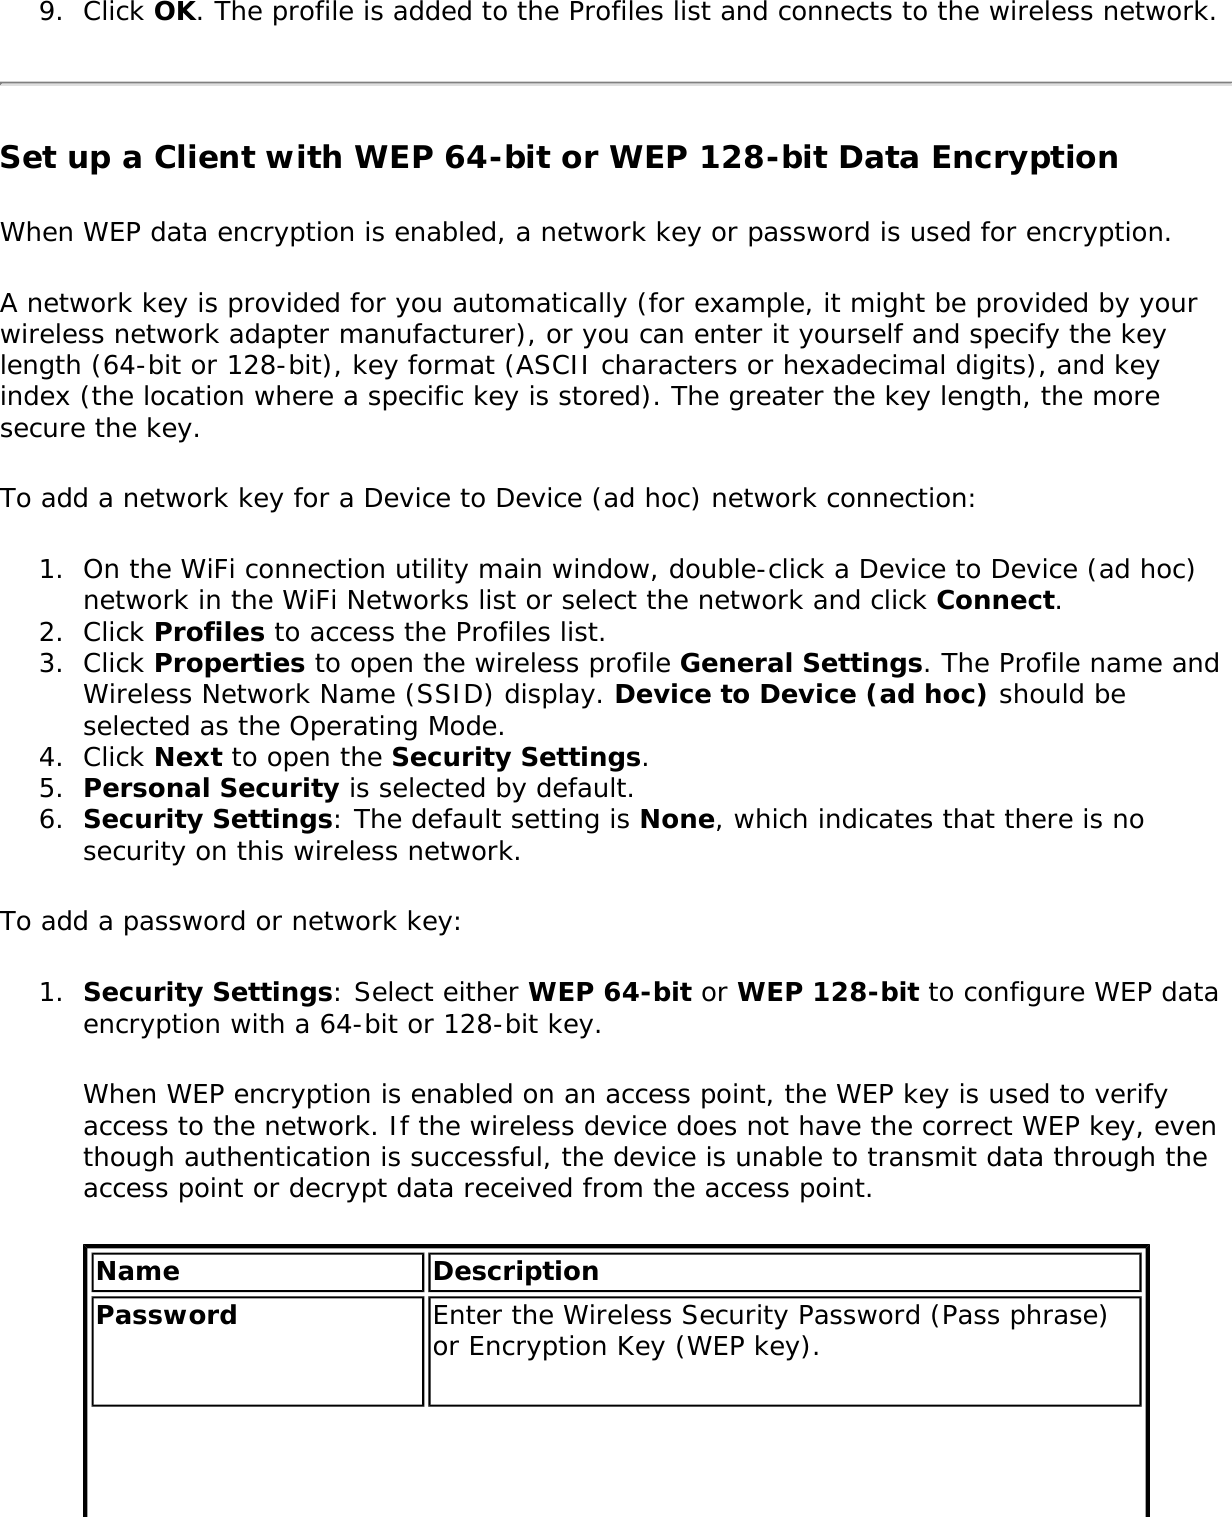
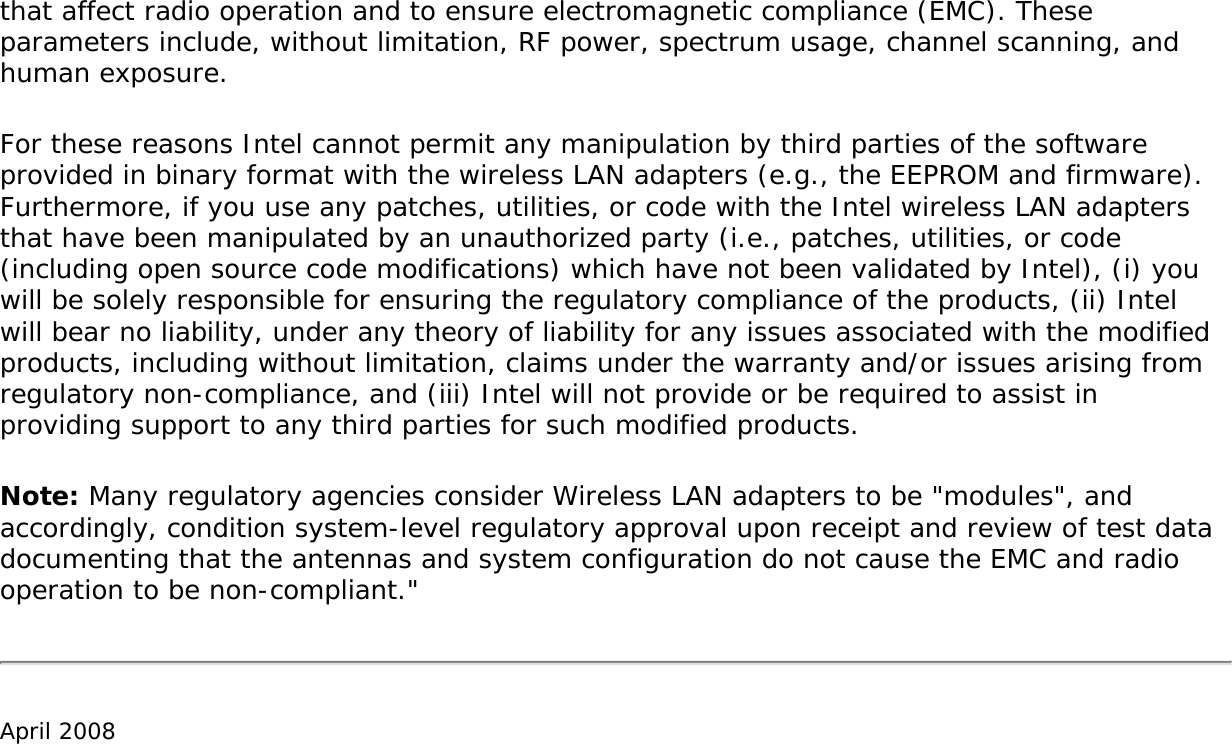
![operating mode being used, and whether security encryption is enabled. These icons display next to the profile name in the Profiles list.Name DescriptionProfile Name The Profile Name is your name for this network. It can be anything that helps you identify this network. For example, My Home Network, Coffee Shop on A Street.Network Name Name of the wireless network (SSID) or computer.Connection Icons: The network profile status icons indicate the different connection states of the adapter with a wireless network, the type of operating mode being used, and whether network security is being used. Blue circle: The wireless adapter is associated with an access point or computer (Device to Device [ad hoc] mode). If a profile has 802.1X security enabled, this indicates that the wireless adapter is associated and authenticated.Indicates Network (infrastructure) mode.Indicates Device to Device (ad hoc) mode.Indicates an Administrator profile. The wireless network uses Security encryption.Indicates that this network is on the Exclude list, e.g. is set for manual rather than automatic connection. When on the Exclude list, to connect the user must connect manually. Arrows Use the arrows to position profiles in a preferred order for auto-connection. ● Up-arrow: Move the position of a selected profile up in the Profiles list. ● Down-arrow: Move the position of a selected profile down in the Profiles list. Connect Connect the selected profile for the wireless network.Add Opens the Create Wireless Profile General Settings, which are used to create a new profile. See Create a New Profile for more information.Remove Removes a selected profile from the Profiles list. See Remove a Profile for more information.Properties Used to edit the contents of an existing profile. You can also double-click a profile in the Profiles list to edit the profile. See Edit an Existing Profile for more information.Export/Import: Imports and exports user-based profiles to and from the Profiles list. Wireless profiles can be automatically imported into the Profiles list. See Export or Import Profiles for more information.Close Closes the profile management window.Help? Provides help information for this page. Connect to a ProfileWhen you are in range of a wireless network that has a matching profile you are automatically connected to that network. If a network with a lower priority profile is also in range you can force the connection to](https://usermanual.wiki/Dell/512ANHMW.User-Guide-1/User-Guide-955691-Page-35.png)