Dell 5HCKT Notebook Computer w/ Intel PRO/Wireless 2195ABG User Manual book
Dell Inc. Notebook Computer w/ Intel PRO/Wireless 2195ABG book
UserManual.wiki
>
Dell
>
5HCKT User Manual
>
Users Manual 1
Contents
1.
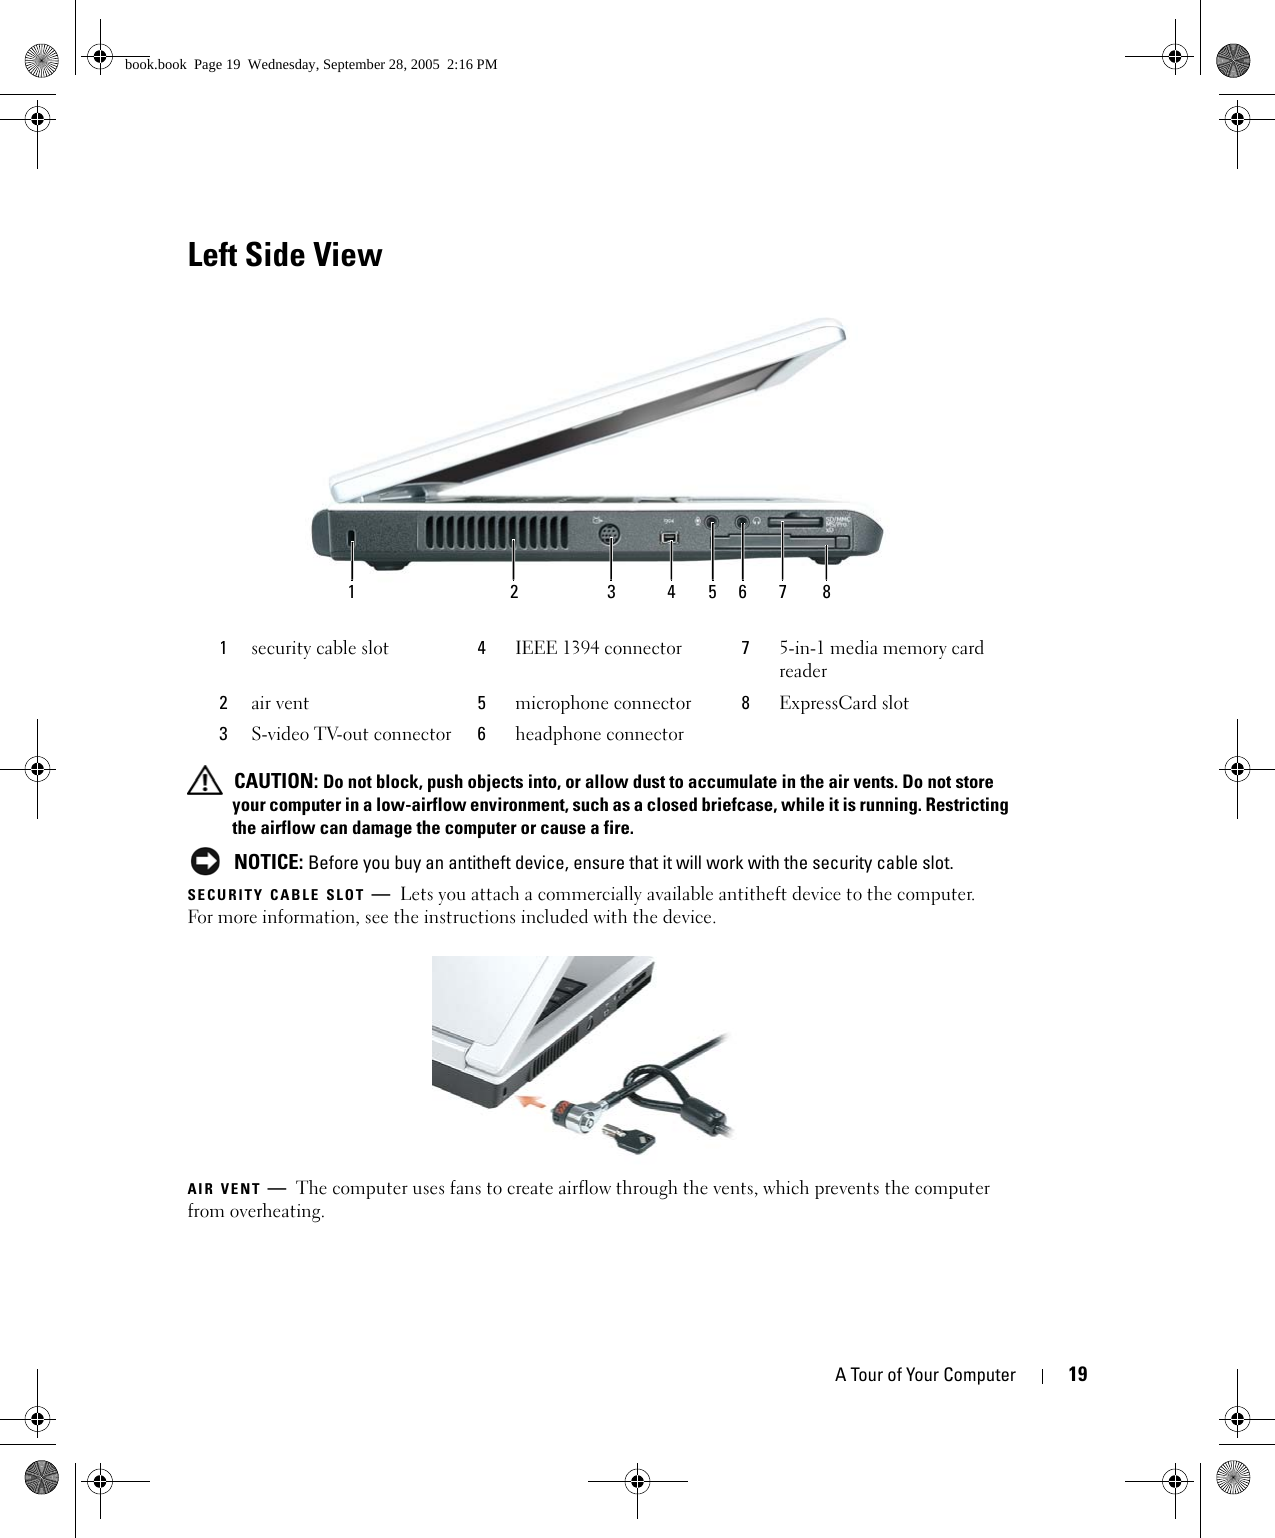
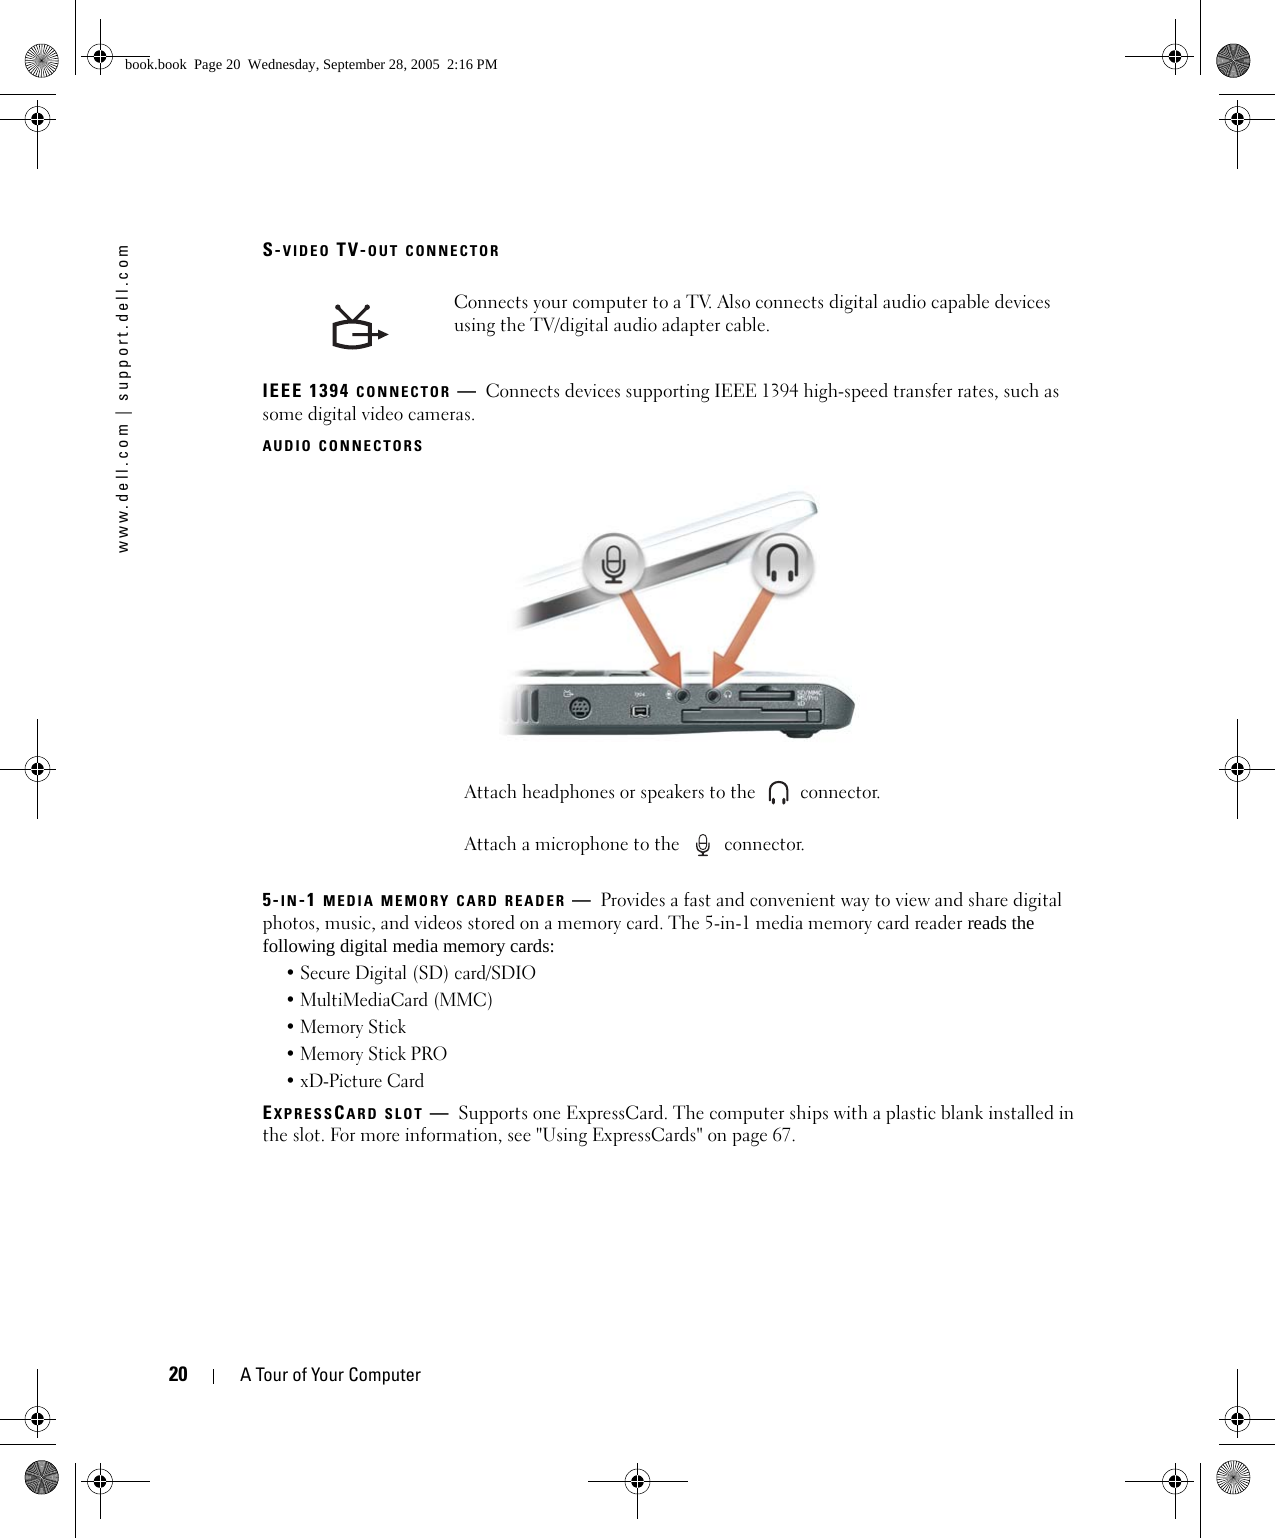
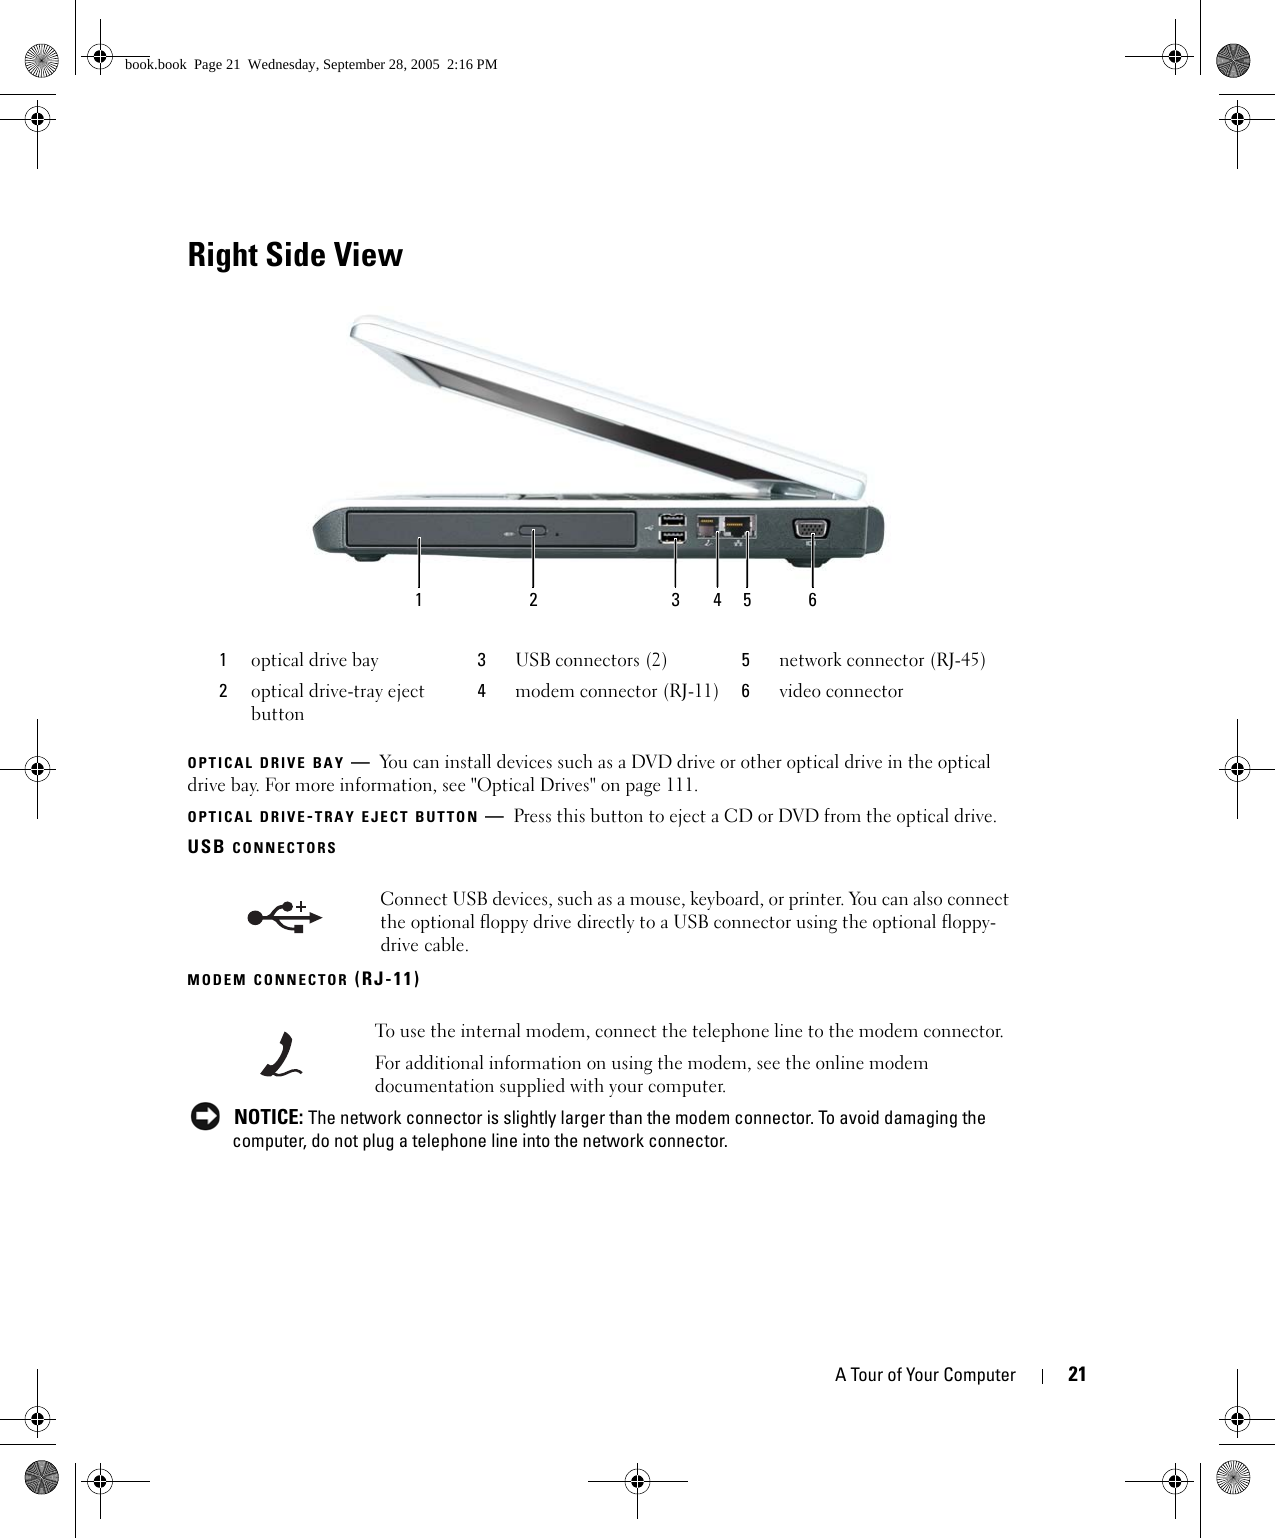
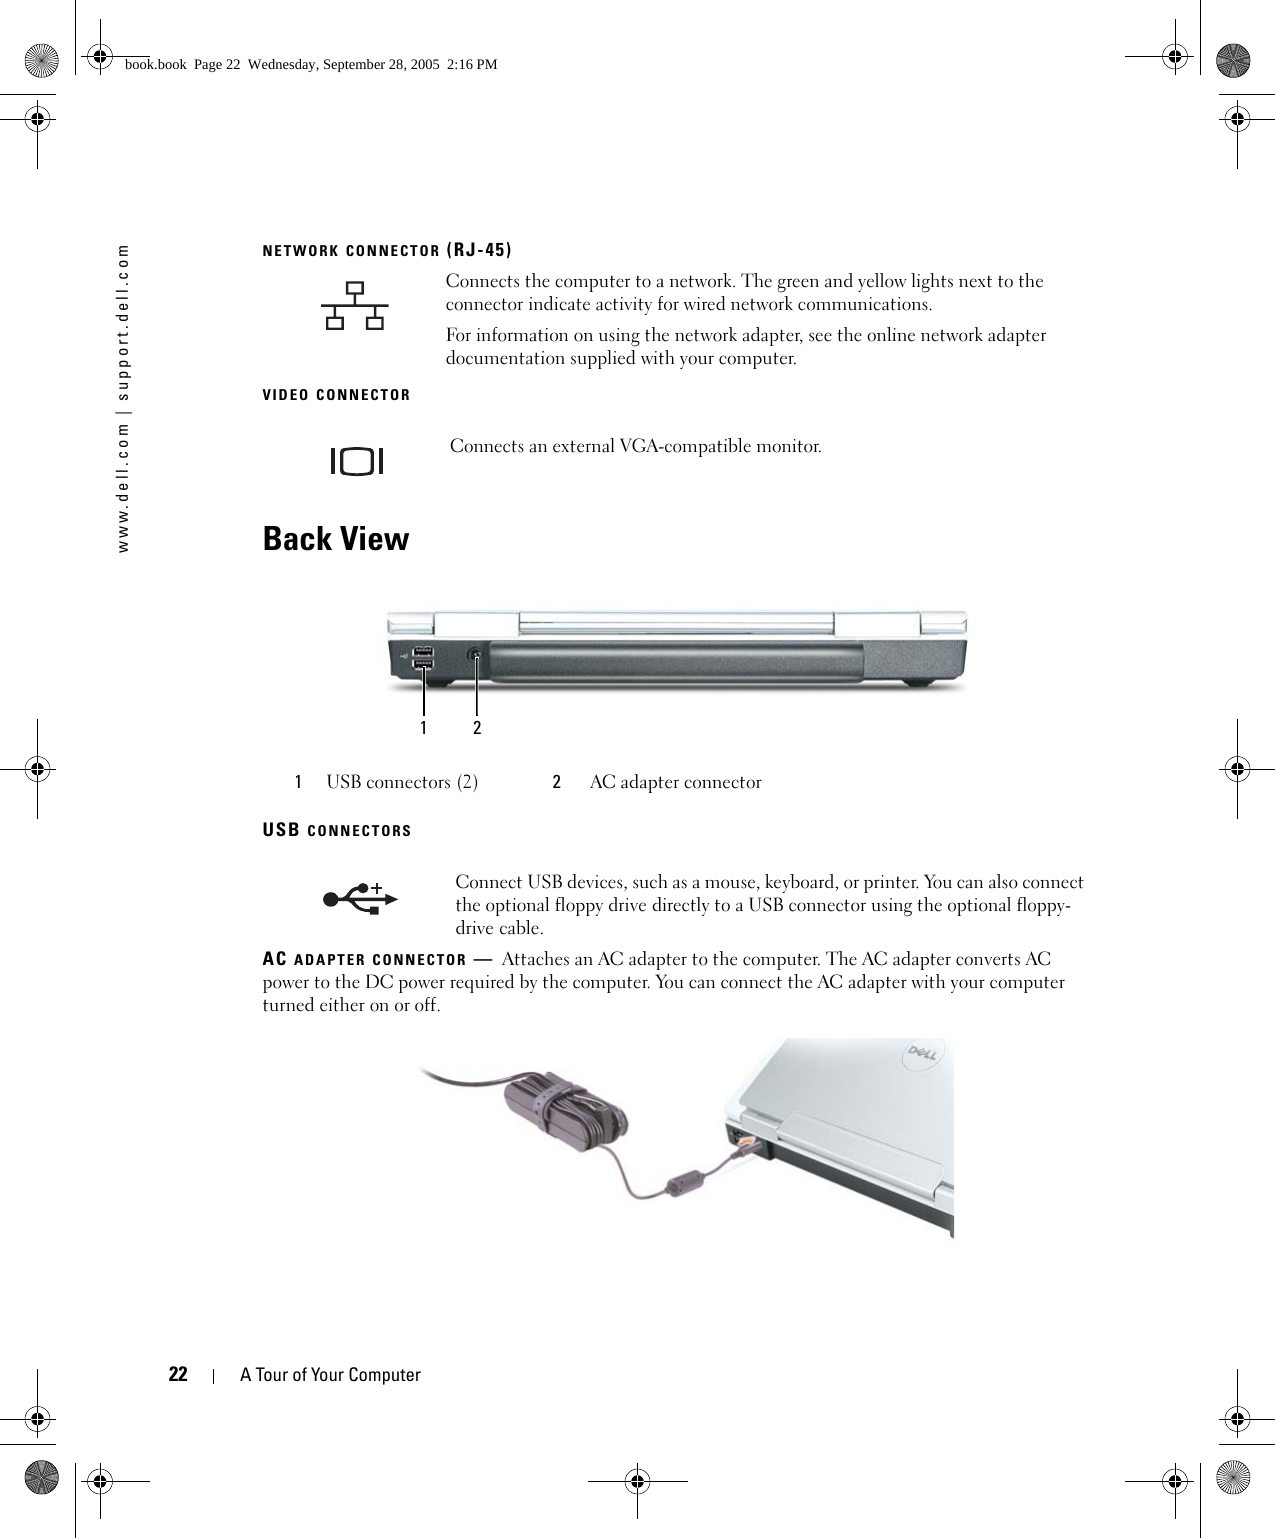
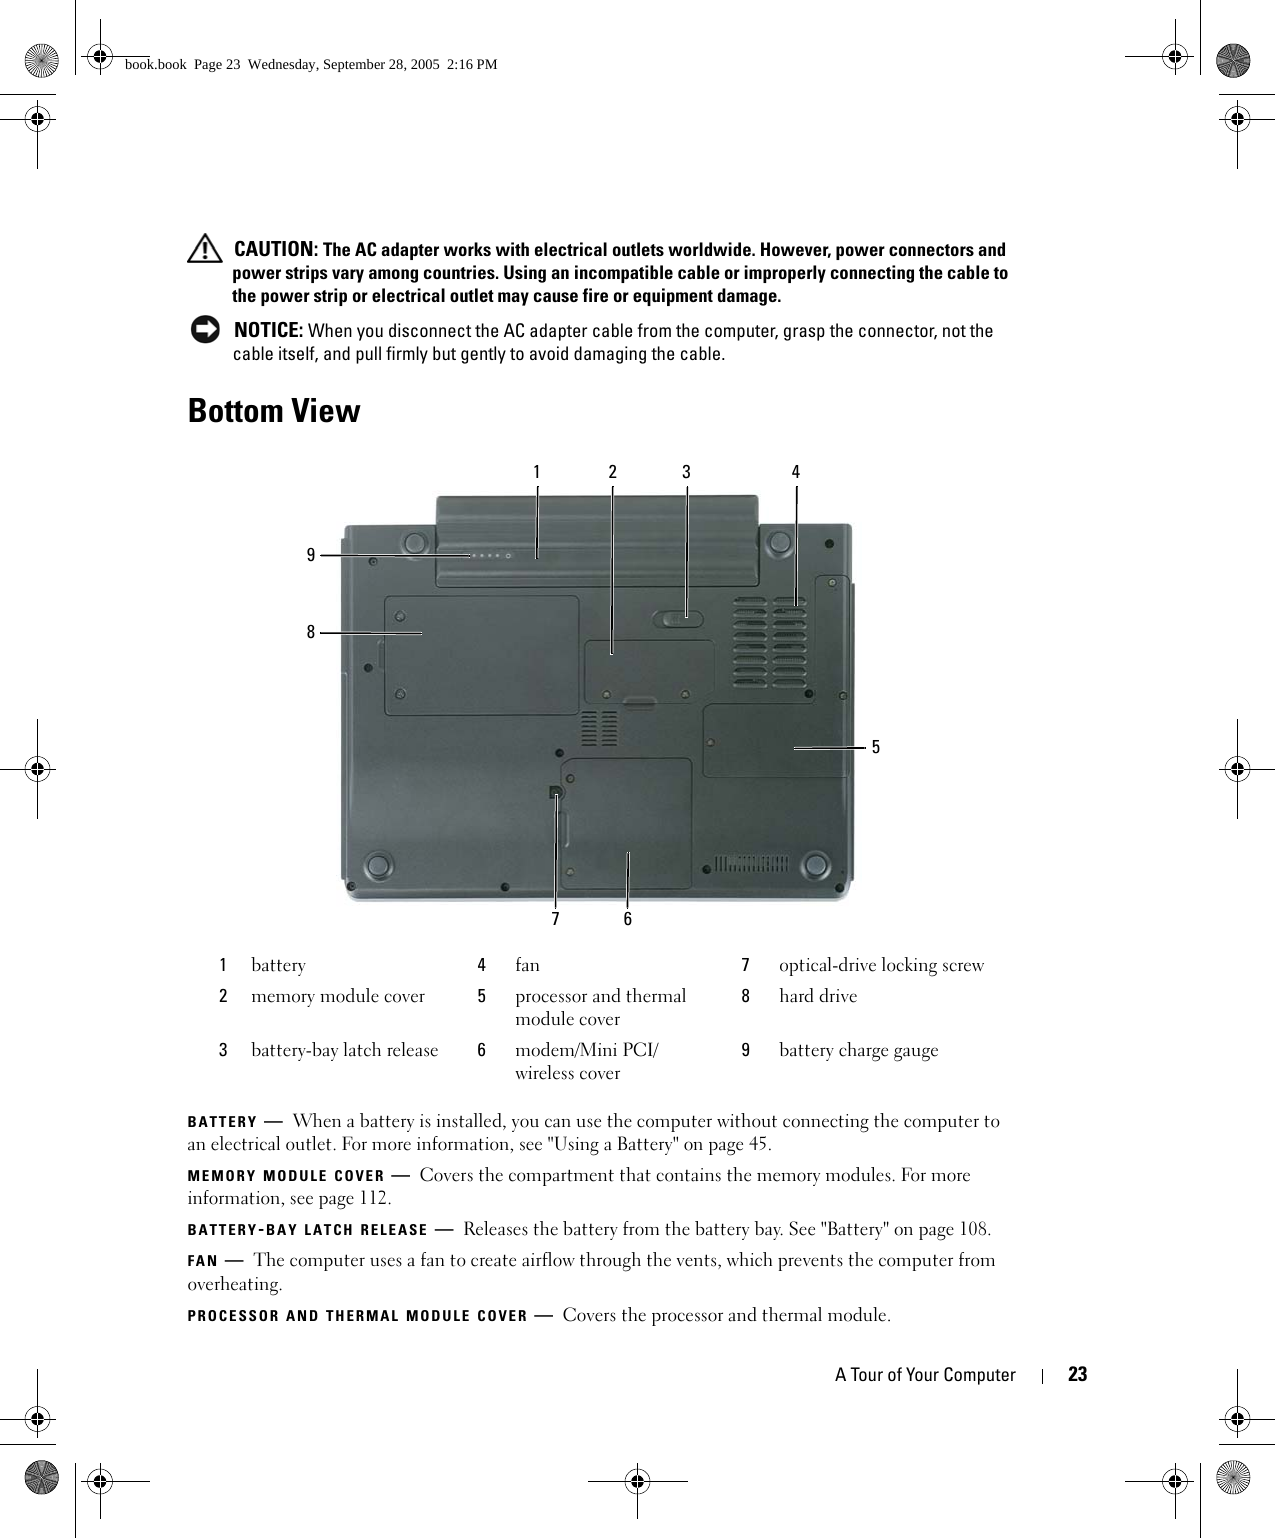
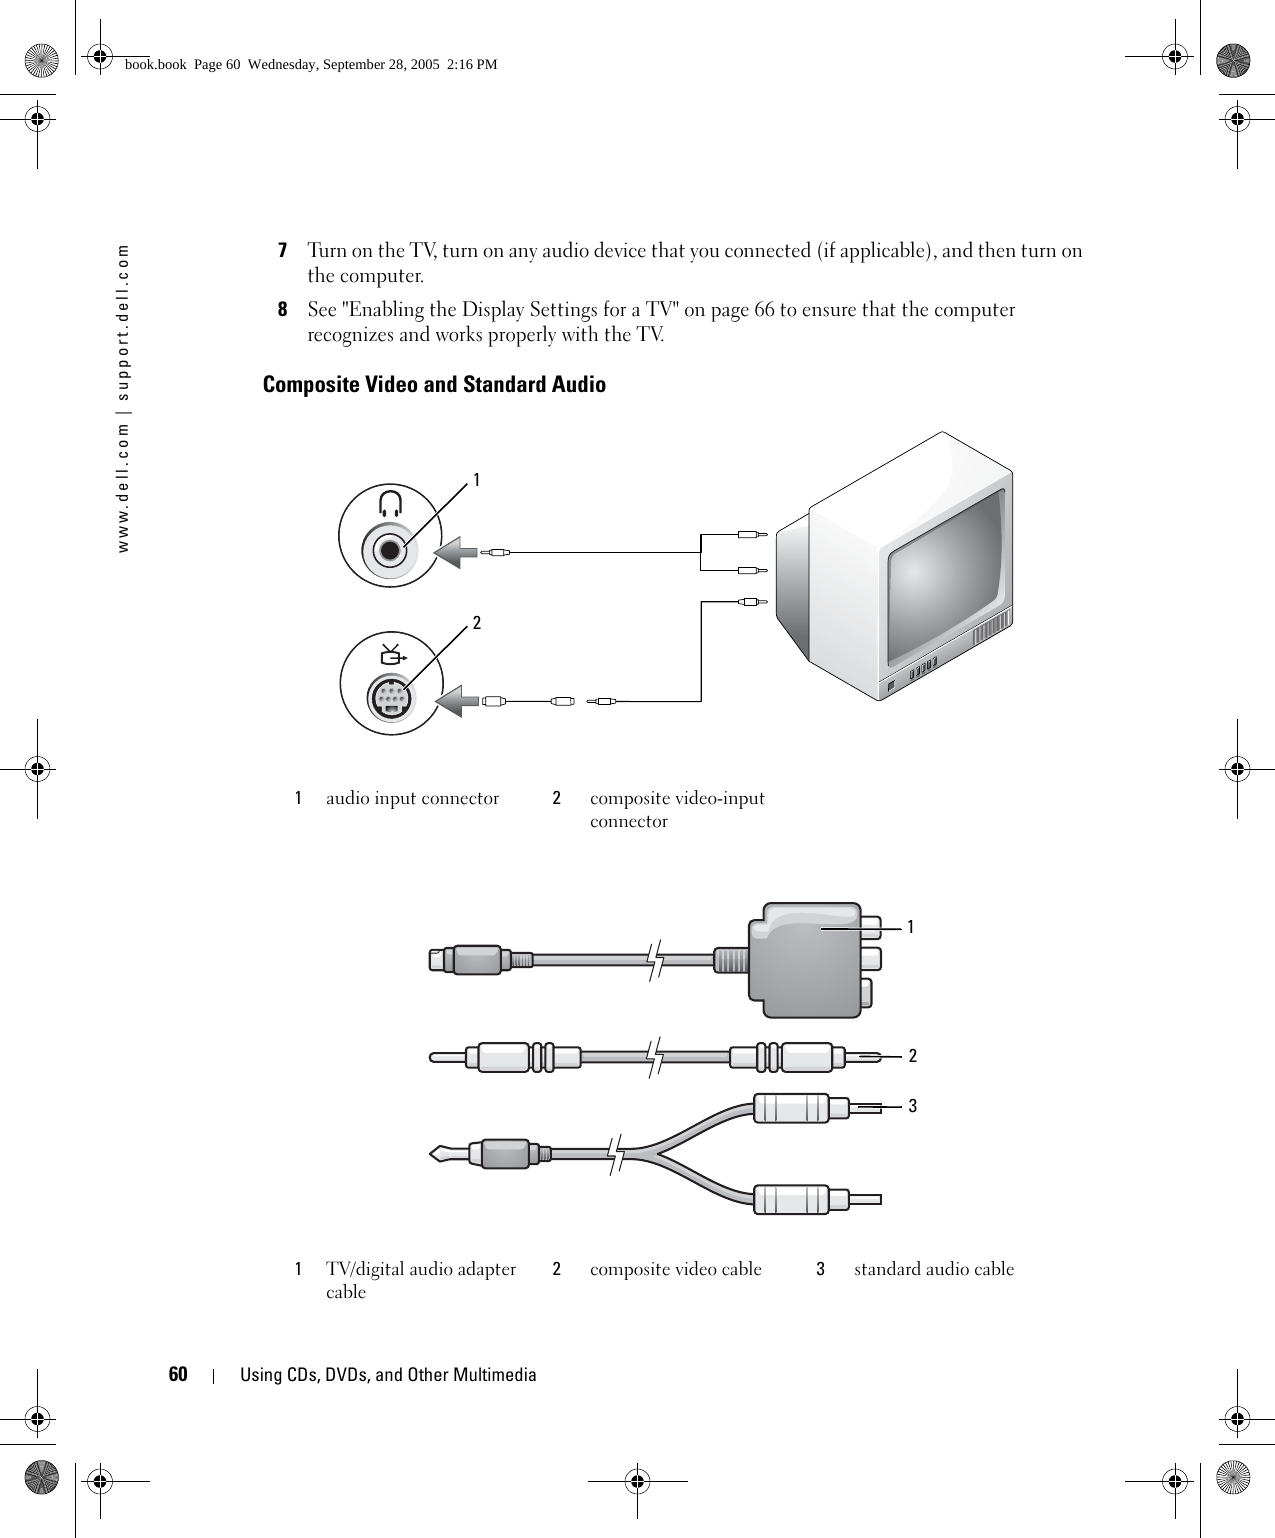
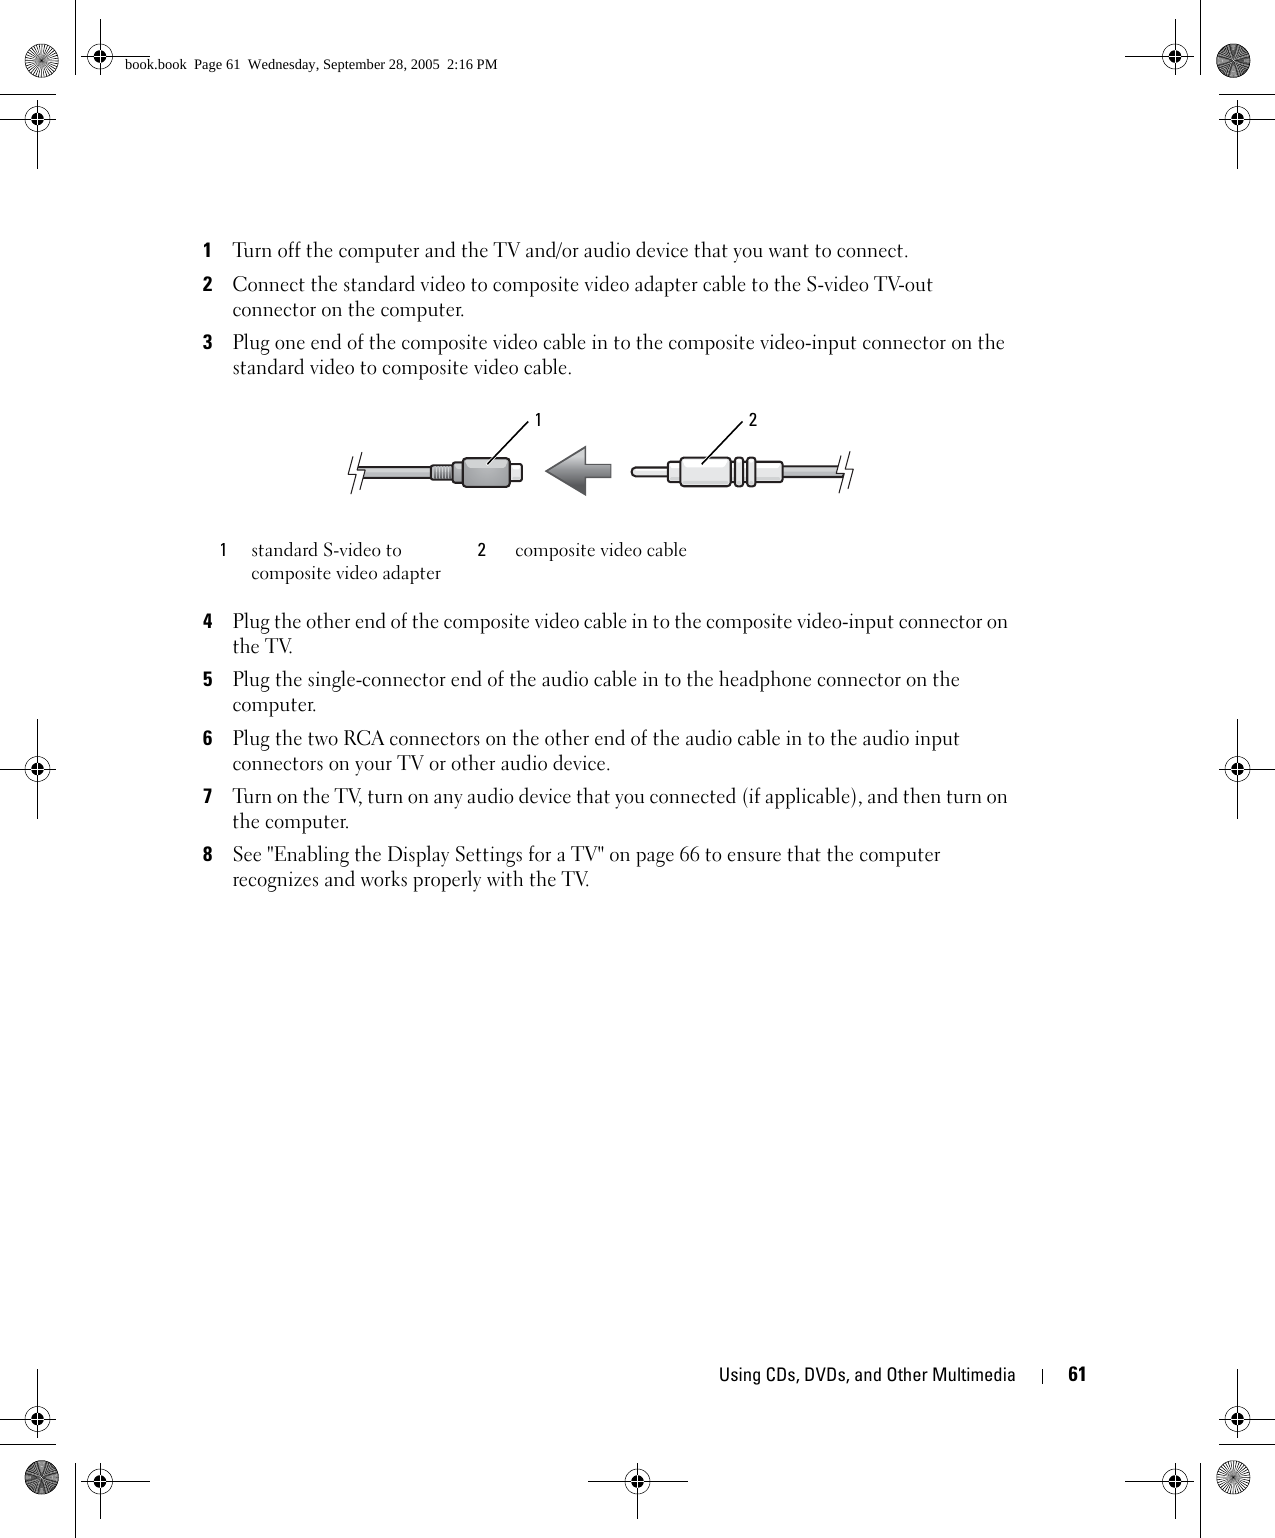
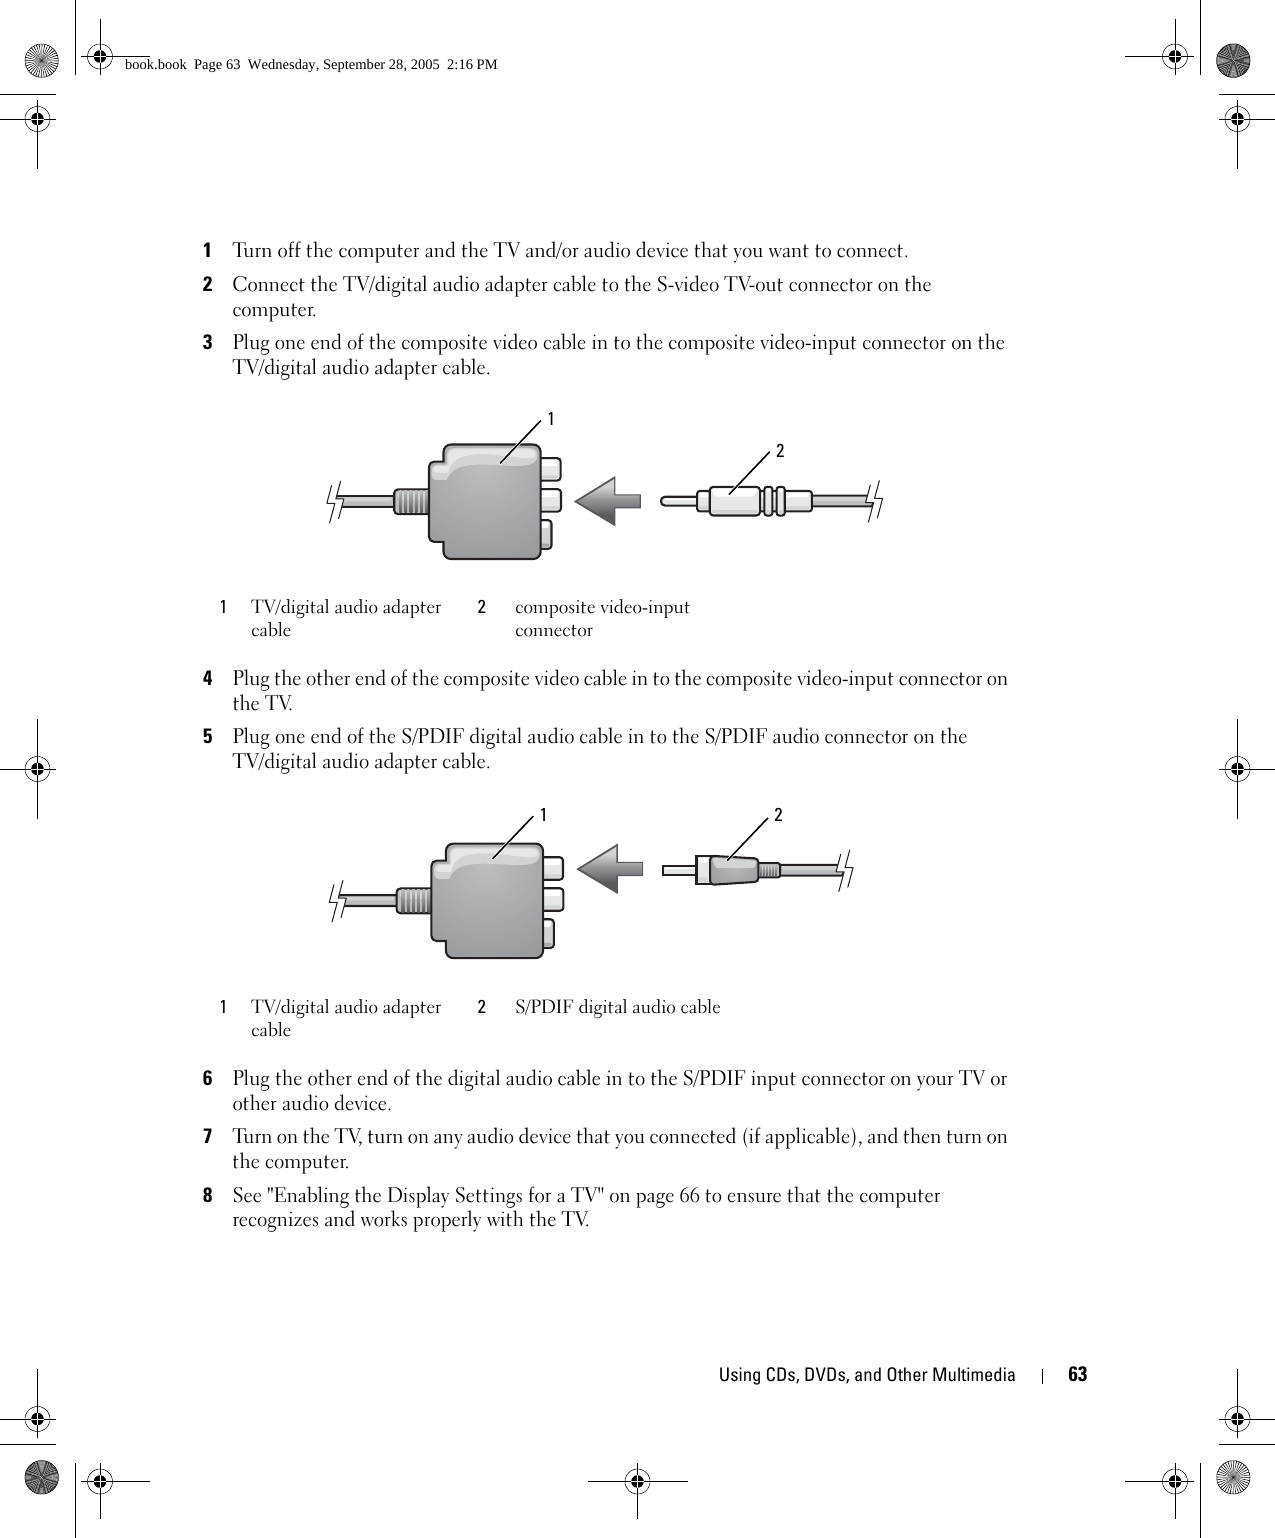
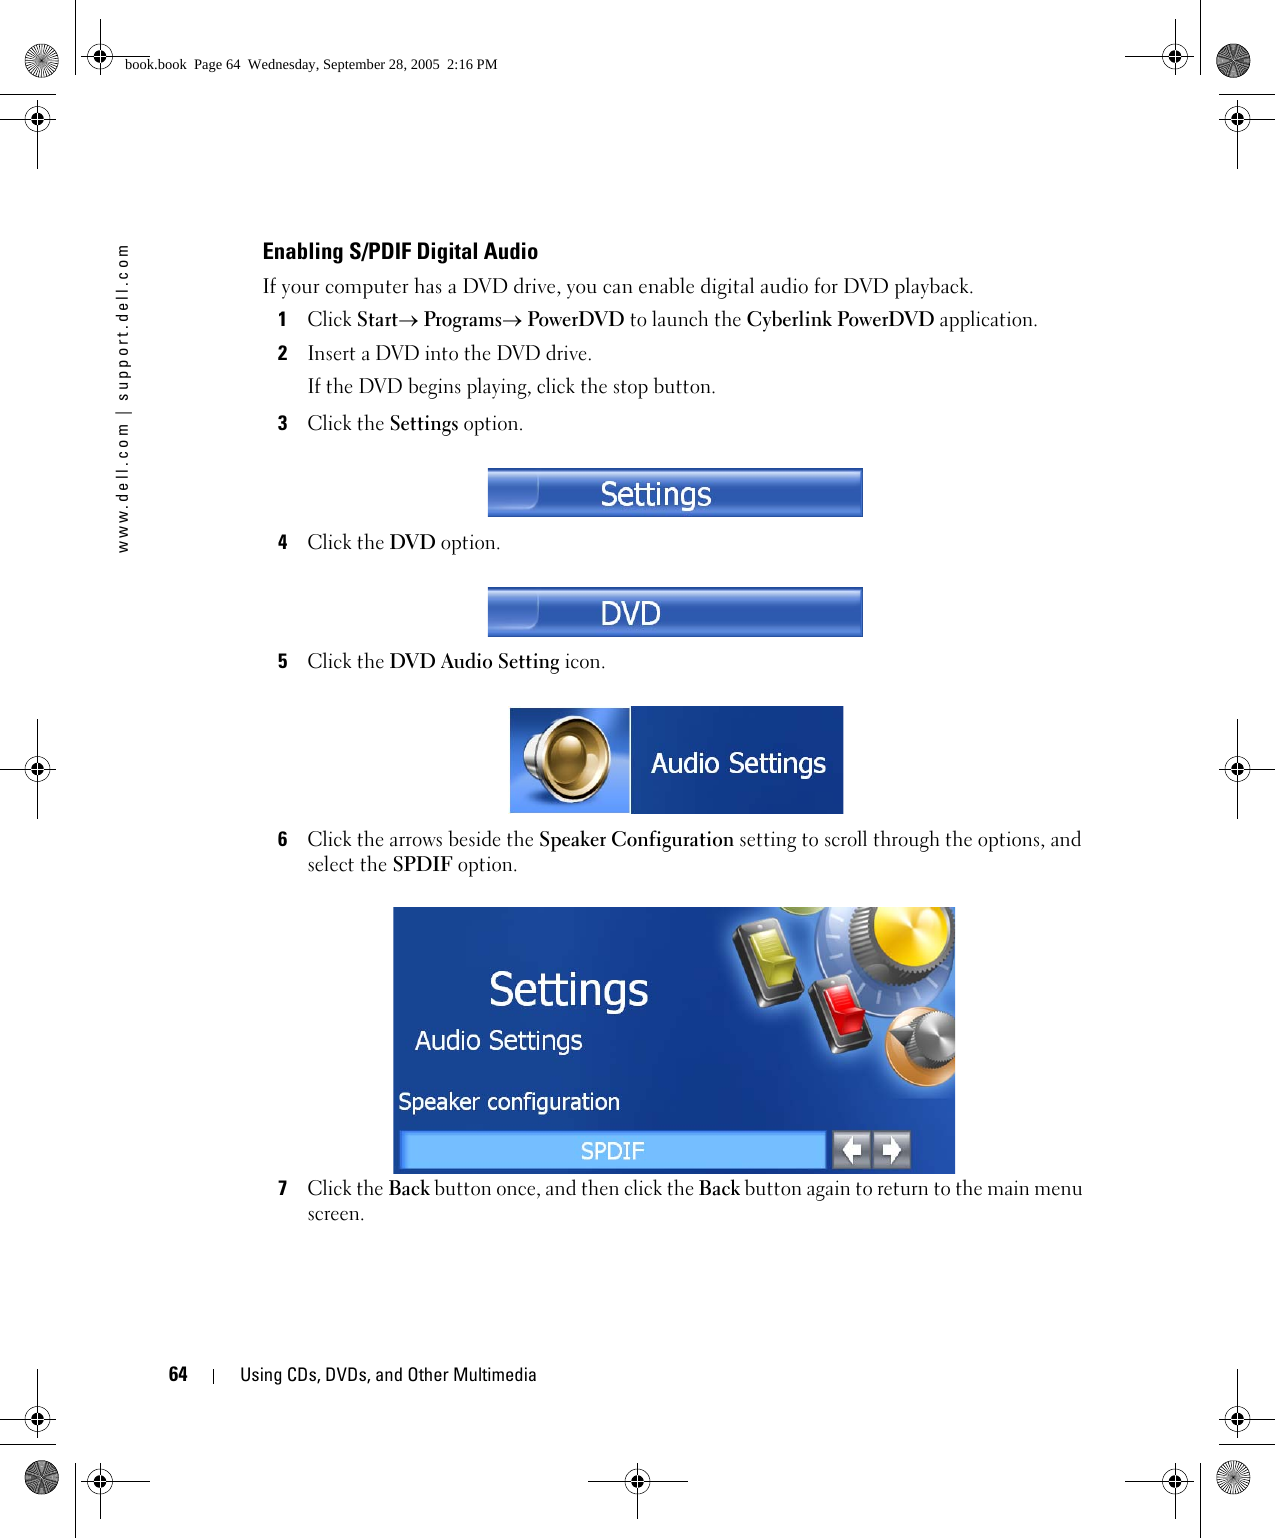
User Manual
2.
Users Manual
3.
CRN 27330 Q2 revised user manual
4.
CRN 27331 Q2 Revised user manual
5.
CRN 27391 Revised user manual
6.
CRN 27390 Revised user manual
7.
Installation Guide
8.
Regulatory Information
9.
Users Guide
10.
Users Manual 1
11.
Users Manual 2
Users Manual 1
Navigation menu
Upload a User Manual
Namespaces
Wiki Guide
HTML
PDF
Info
Views
User Manual
Discussion / Help
Navigation