Denso Wave orporated DWWL001 BHT-800 Main Board User Manual BHT805BW OperatorsGuide E
Denso Wave Incorporated BHT-800 Main Board BHT805BW OperatorsGuide E
UserManual.wiki
>
Denso Wave orporated
>
DWWL001 User Manual
>
Manual 2
Contents
1.
Manual 1
2.
Manual 2
3.
Manual 3
Manual 2
Navigation menu
Upload a User Manual
Namespaces
Wiki Guide
HTML
PDF
Info
Views
User Manual
Discussion / Help
Navigation

![9 Introduction Input Method Numeric Data Entry Enter numeric data such as product volume with the numeric keys and the Enter ( ) key. If numeric data is entered incorrectly, use the backspace key ( ) to delete the data and then reenter with the numeric keys. When Entering “120” Key Operation Press numeric keys 1, 2, and 0 followed by the Enter key. Task Selection If a selection item such as “1:XXX 2:XXX” with numeric values displays, enter the values with the numeric entry keys and then press the Enter key. When Selecting Task 2:XXX Key Operation Press numeric key 2 followed by the Enter key. If a YES/NO selection screen such as “1:YES 2:NO” displays, press numeric key [1] to select “YES”, and [2] to select “NO”. When Selecting “1:YES” Key Operation Press numeric key 1 followed by the Enter key.](https://usermanual.wiki/Denso-Wave-orporated/DWWL001.Manual-2/User-Guide-1150908-Page-23.png)
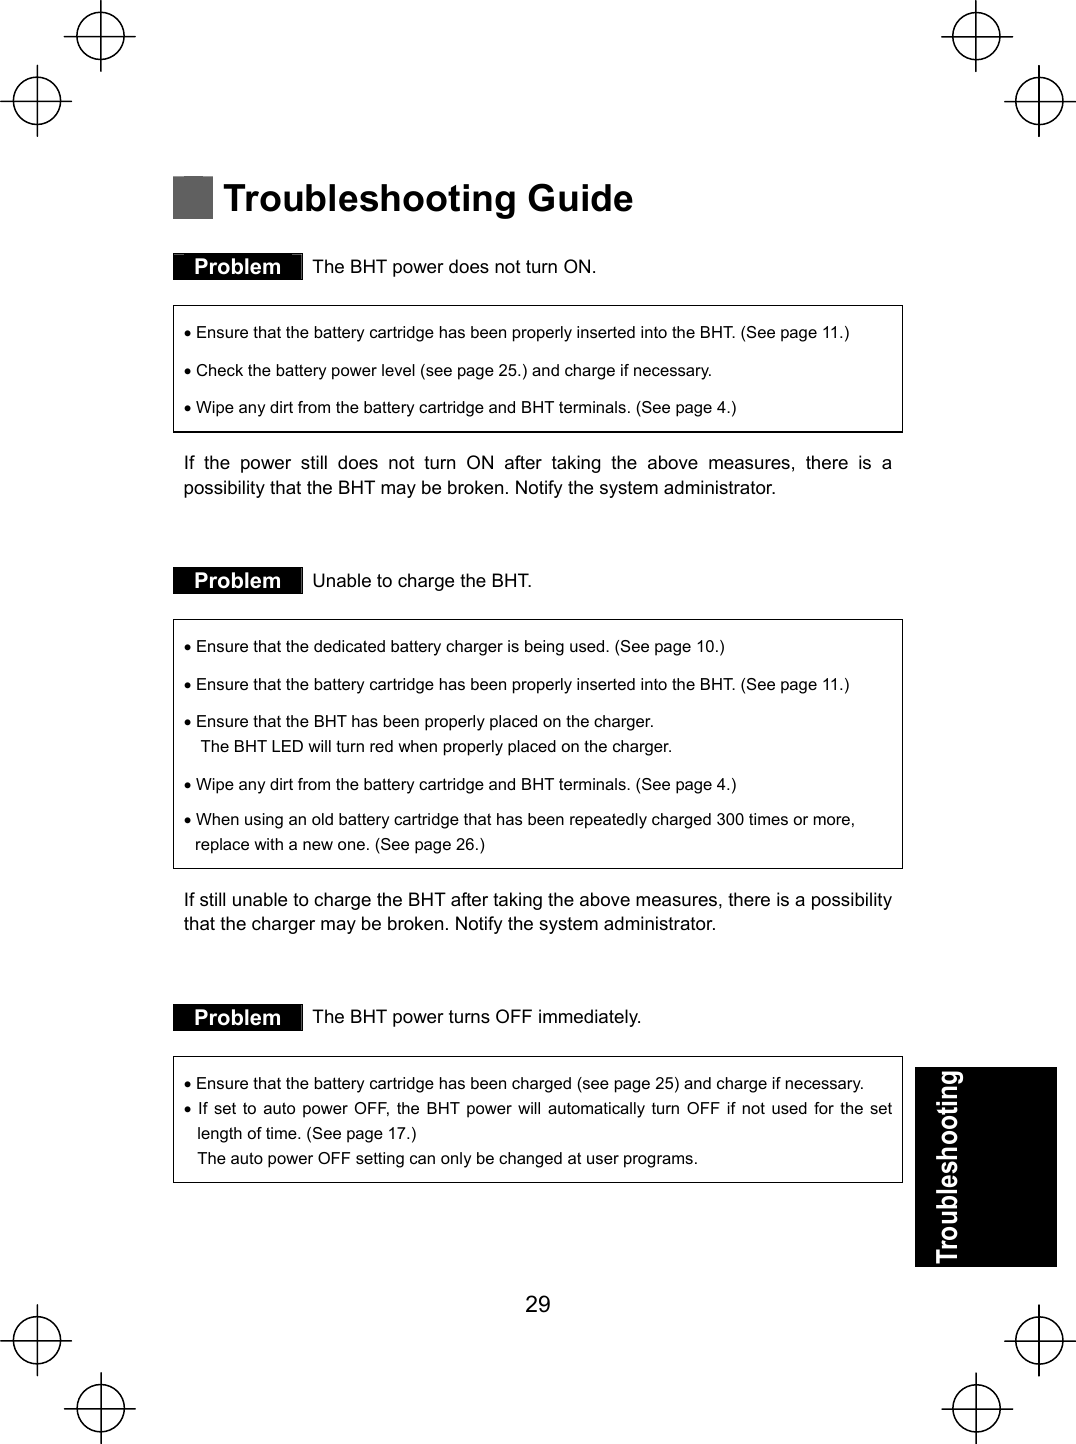
![16 Preparation Step 3 Turning ON the Power Turn ON the power after inserting the fully charged battery cartridge into the BHT. The clock will not have been set at the time of purchase, and therefore it is necessary to set the date and time when turning ON the power for the first time. 1 Press the power key to turn ON the BHT power.The screen below displays. 2 Enter the date and time using the numeric keys. [Ex.]: April 5, 2009, 14:20Point Enter the last two digits for the year, and enter the time in 24-hour clock format. 3 Press the Enter key to set the date and time. The screen below displays when the date and time are set. 4 Press numeric key [1] followed by Enter and select [1:Yes]. Point By selecting [2:No], the power turns OFF. A scanning demo commences. The scanning demo is a program that allows barcodes to be scanned without a user program. Press the trigger switch to enable barcode scanning. Refer to “Scanning Barcodes” on page 18 and scan a barcode .](https://usermanual.wiki/Denso-Wave-orporated/DWWL001.Manual-2/User-Guide-1150908-Page-30.png)