Diasonic Technology Co DDR6000R Digital Voice Recorder User Manual users manual

Diasonic Technology Co Ltd Digital Voice Recorder users manual
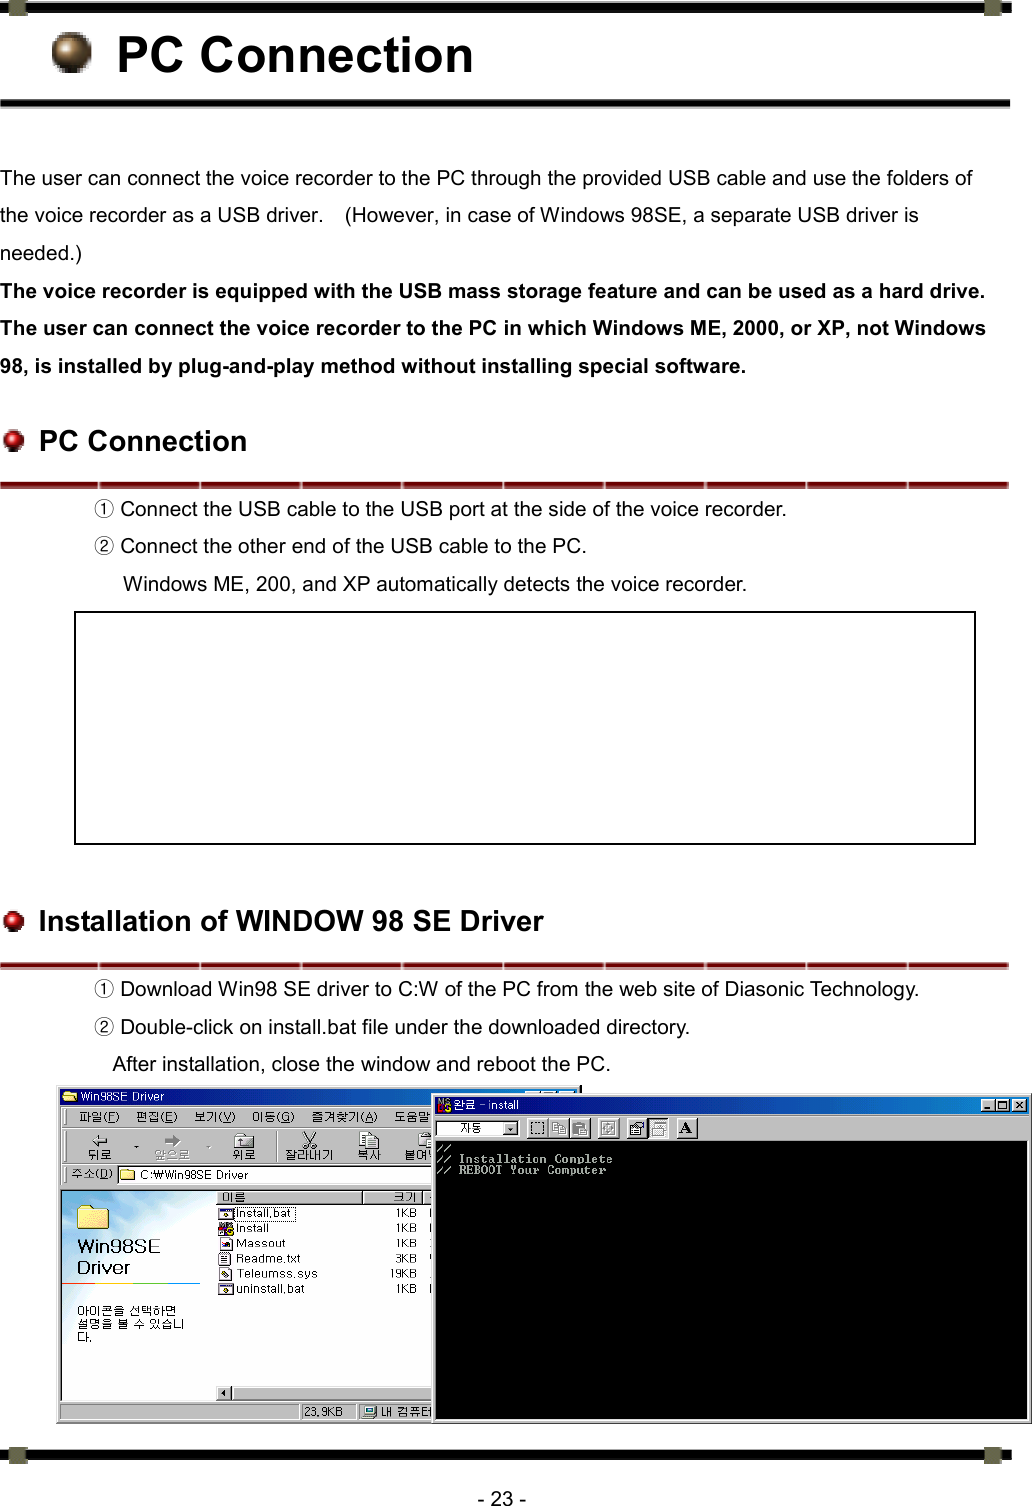
users manual

     - 1 - DIGITAL Voice RECORDER & AUDIO PLAYER FM Radio   DDR-6000R User Manual              Thank you for purchasing Diasonic DDR-6000R, a digital voice recorder and audio player.    Please read this manual before using the product.      It is recommended to keep this manual near the product for convenient use.  그림 추가 (제품 빗면 그림)
     - 2 -   INFORMATION TO THE USER  Note: This equipment has been tested and found to comply with the limits for a Class B digital device, pursuant to part 15 of the FCC Rules. These limits are designed to provide reasonable protection against harmful interference in a residential installation. This equipment generates, uses and can radiate radio frequency energy and, if not installed and used in accordance with the instructions, may cause harmful interference to radio communications. However, there is no guarantee that interference will not occur in a particular installation. If this equipment does cause harmful interference to radio or television reception, which can be determined by turning the equipment off and on, the user is encouraged to try to correct the interference by one or more of the following measures:   Reorient or relocate the receiving antenna.   Increase the separation between the equipment and receiver.   Connect the equipment into an outlet on a circuit different from that to which the receiver is connected.   Consult the dealer or an experienced radio/TV technician for help.   Modifications not expressly approved by the manufacturer could void the user's authority to operated the equipment under FCC rules.  This device complies with Part 15 of the FCC Results. Operation is subject to the following   two conditions:   1 This Device may not cause harmful interface, and 2 This device must accept any interference received, including interference that may cause undesired operation.   Preface Thank you for purchasing DDR-6000R manufactured by Diasonic Technology.    Please read this manual before using the product.  Store this manual in a separate place as this manual contains important information for the operation of the product.    In case the user loses the manual, Diasonic Technology does not separately provide a manual.    All manuals are provided with the product.   Notes ● Do not repair, disassemble, or remodel the product. ● Incorrect use of the product by the user or a third party or static electricity or electric shock loaded on the product may cause loss of or change in the data saved in the product during repair services or replacement of the battery. ● DIASONIC Technology is not responsible for damage caused by change or loss of the data in the product. ● Do not heat up or short the main body or the battery. ● Do not put the battery on a hot item or disassemble the battery in a high-temperature place. Toxic contents of the battery may harm user’s eyes or skin. ● In case the contents of the battery leaks and is exposed to the user, wash the exposed body part
     - 3 - with clean water and see the doctor.   ● Do not soak the device in water or leave it in a humid place. ● Contents of the user manual are subject to change without prior notice for performance improvement. ● Using the earphones for a long time may compromise user’s hearing ability.   Copyrights ● DIASONIC Technology has all copyrights of this user manual.    Reproduction, distribution, and commercial use of a part of or the entire user manual without prior consent of DIASONIC Technology are strictly prohibited by laws.  All information contained in this manual has been carefully studied and written and is subject to change without prior notice for functional and performance improvement.  DIASONIC Technology will not take any responsibility for issues arising due to differences between the product and information contained in the user manual. ● Use of MP3 files is limited to the personal purposes not including commercial or service purposes.  Servicing or providing MP3 files for commercial purposes will be against the copyright act of Korea. ● Reproduction of files is prohibited for other than personal purposes by law.
     - 4 -  Table of Contents
     - 5 -  Safety Notes  ● Do not store the device in any place with following conditions:             - High temperature (60  or higher)℃                     - Exposure to the direct sun rays or a heating device                     - Inside the car with closed windows (especially, in the summer) - Humid place such as the bathroom ● When removing dust, use soft cloth.    Do not use liquid agent (such as thinner or benzene) or wet cloth. ● Do not place a debit card or a bus pass near the speakers.    The magnetic interference may occur, which will damage the card. ● Do not place the device near a magnet.    The speakers may not function. ● Diasonic Technology is not responsible for any damage caused by the use of this device or damage claim made by a third party. ● Diasonic Technology is not responsible for the loss of data caused by other actions than repair services by Diasonic Technology personnel. ● Do not repair, disassemble, or remodel the device. ● Do not use the product in a place where use of electronic devices is prohibited. ● Do not use this device while driving.   ● Do not heat up or short the main body or the battery. ● When using an auxiliary device, leave a gap between the auxiliary device and the main device. ● Incorrect use of the product by the user or a third party or static electricity or electric shock loaded on the product may cause loss of or change in the data saved in the product during repair services or replacement of the battery.
     - 6 -  Features and Characteristics Diasonic Digital Voice Recorder is a next-generation portable digital recorder equipped with the state-of-the-art technologies.    With this digital voice recorder, the user can record and play voice with the best quality in various recording ways – SHQ, HQ, and SP.    The device supports various playing methods (including speakers and earphones) as well as diverse file formats including MP3 and WMA.    The device can also receive and record FM radio broadcasting.  ● Sophisticated, Durable Design   Sophisticated, durable design for the maximum convenience of the user.    Ultra-slim and ultra-light.   ● High-quality Voice Recording and MP3 Player Recording and playing of voice data through a high-quality sampling method such as SHQ, HQ, and SP.   MP3 player features (equalizer or repetition) added to the voice recorder. ● Direct Encoding Recording     Direct MP3 encoding recording through a connection with an external device. ● Mono and Stereo Microphones ● Flexible Bit Rates The bit rate for the voice recording or line-in and FM radio recording can be changed depending on the occasion and time for the efficient use of the folders. ● FM Radio Reception and Recording   ● Automatic Recording System (ARS)   The recording process automatically stops when there is no sound, which maximizes the recording time.   During line-in recording, cuts and the beginning of the song is automatically detected.    When a new song starts, a file is automatically created. ● Mass Storage (64MB/128MB/256MB/512MB/1GB/2GB) ● Plug And Play feature to store or access music files or data through the USB port ● FM band feature to receive FM radio in any place in the world ● Hold feature to temporarily disable the buttons   ● Various playing modes (Normal, One, All, Shuffle) ● Repetition feature to repeat a certain node (A↔B) ● Highly sensitive, omni-directional built-in microphones ● Maximum files can be stored in eight folders (in the voice mode) ● Maximum 00 files can be recorded during line-in or FM recording.   ● Monitoring feature to listen to the recorded sound during recording ● Various equalizer modes (Normal, Pop, Classic, Jazz, Live, Rock, 3D) ● Continue Folder feature (voice mode) to store the file in the next folder when the current folder is full of files
     - 7 -   Parts and Configuration   Main Body  Speaker Earphone Jack MIC Line-in Jack Menu Button Play Button Erase Button USB Jack Hold Switch Battery Cover LCD         LCD    Mode Battery Status Folder Index REC Quality Play Time   FM FREQUENCE
     - 8 -  Components        Stereo Earphones / User Manual / WIN98SE Driver Installation CD / USB Cable / Hand Grip / Antenna / External Microphones / Battery (1EA) / External Device Connection Cable / Telephone Cable / DC Adapter   Battery  Replacement  ① Open the battery cover by turning it counterclockwise.    ② Insert LR03-type AAA battery in the right direction in the battery   compartment, and close the cover by turning it clockwise.       Checking the Remaining Battery Check the battery status with the battery icon   on the upper-right corner of the LCD.   When the battery is empty, replace the battery.        Note※ If the full-battery icon is not displayed after a new battery is inserted, check whether the battery has been correctly inserted.    If the battery is correctly inserted, immediately remove the battery and contact Diasonic Technology for repair.    Remaining display No remaining
     - 9 -   Battery Hours (at Normal Temperature)         Notes ● Do not mix different types of the batteries. ● In case of not operating the device for a long time, remove the battery from the body.  Otherwise, the battery may be naturally consumed.   ● Use only Alkaline batteries.  Other types of the batteries may cause malfunctioning of the device.   Adapter Connect the adapter to the USB port.   The device is not charged through the adapter. Use a proper type of the adapter for the device model. (Some models do not provide separate adapters.) Battery Earphones Recording (Volume: Middle) Speaker Playing (Volume: Middle) Earphones Playing (Volume: Middle) Alkaline Battery Size ‘AAA’ LR03 Approximately 00 hours Approximately 00 hours Approximately 00 hours
     - 10 -  Basic Operation   Turning On/Off Power ● Turning On the Power   Press Play button for 0 seconds to turn on the power.    ● Turning Off the Power   Press Play button for 0 seconds to turn on the power.     Hold Switch Before using the player, check whether the hold switch is disabled. ● Hold Switch Enabled Move the hold switch to On position.   When the hold switch is already enabled, the switch will not move   to On direction.   ● Hold Switch Disabled Move the hold switch to Off position.   Mode Conversion Shortly press the menu button to enter Voice, FM, and Music mode.   Menu Conversion Press the menu button long to select menus of the Voice, FM,   and Music menus.   To exit the menu, press the menu button again.   Volume Adjustment Adjust the volume with the play button.   Keep pressing the play button to continuously adjust the volume.   The volume levels are from 0 to 30.   When the power is turned on, the default volume will be set. (See the Menu Setup.)
     - 11 -  Recording  With the voice recorder, the user can record not only voice but also other various music sources from cassette, MD, MP3 player, audio, telephone, mobile phone, and FM radio.    ● Various Input The user can record audio data not only from the internal microphone but also from external microphones and external devices connected through the line-in port.    In case of line-in connection, select the external microphone or line in the voice menu.    (See the Menu Setup.)  ● Recorded Data Storing Folder There are eight voice folders in addition to the FM folder and the line folder.    The user can select the files from these folders.    (See the Menu Setup.)  ● Automatic Recording System (ARS) While the ARS is enabled, the audio will be recorded only when there is sound during voice recording or recording from an external device through the line-in port.    (See the Menu Setup.)   When the conversation or music stops, the player will enter standby state. To stop the automatic recording, press the ARS button.    ● Recording Quality Setting   The user can change the recording quality (R_QTY.)    (See the Menu Setup.) The higher recording quality, the less recording time.   The recording time may differ depending on the recording mode.※ Model  DDR-6000 (064Mb)  DDR-6000 (128Mb)  DDR-6000 (256Mb)  DDR-6000( 512Mb) Voice Recording Time SHQ: 260 min HQ: 520 min SP: 1040 min SHQ: 530 min HQ: 1060 min SP: 2120 min SHQ: 1060 min HQ: 2120 min SP: 4240 min SHQ: 2120 min HQ: 4240 min SP: 8480 min  ● Recording Monitoring To listen to the recorded data, use the earphones.  ※ Caution ★ When the folder is full, recording will not be made. ★ When the recording number exceeds 99 in one folder, recording will not be made.
     - 12 -   Voice Recording With the voice recorder, the user can record conversations and lectures.    The recorded files are stored under Voice folder and the file name format is MIC001_SHQ.MP3.    By accessing the PC, the user can check the files.    ① Select the DIR in the Voice menu, and select the folder.   (See the Menu Setup.) ② Select R_QTY in the Voice menu and the recording quality. (See the Menu Setup.) ③ Press the Recording button.    For the first five seconds after the recording starts, the user cannot stop recording.     Note※ - When the voice recorder is far away from the microphones or sound is low, the recording quality is poor.    Place the sound microphones and the voice recorder close each other.    Recording Data from External Device Record files from an external source is stored under Line folder, and the file name format is Line001_SHQ.MP3.    By accessing the PC, the user can check the files.    ※ Caution ★ To record sound, set the volume of the voice recorder at the middle position.   Do not change the volume during recording.    When the volume is set high, noise may occur.   ★ Before accessing the voice recorder from an external device, turn off both the voice recorder and the external device.   ★ Before connecting an external device and the voice recorder, read the manual of the device.       수정해야함
     - 13 - ● Recording from External Device  By connecting an external device through the Line-in cable, the user can record sound sources from the cassette, MD, MP3 player, and the stereo set.   Set the volume of the external device properly before starting recording.   ① Connect the external microphones to the Line-in port.   ② Change S_SEL in the Voice menu into Line. (See the Menu Setup.) ③ Select R_QTY in the Voice menu and the recording quality. (See the Menu Setup.) ④ Press the Recording button.    ● Connecting External Microphones By connecting external microphones, the user can record sound sources from a remote place.    During recording through external microphones, built-in microphones will not function.   ① Connect the external microphones to the Line-in port.   ② Select S_SEL in the Voice menu as E_MIC.     (See the Menu Setup.) ③ Select the external microphone type – Mono (MO)   or Stereo (ST.)    (See the Menu Setup.) ④ Select R_QTY in the Voice menu and the recording quality.    (See the Menu Setup.) ⑤ Press the Recording button.  ● Recording from Telephone The user can record the telephone conversations.    Conn①ect the Line-in cable to the Line-in port of the   voice recorder.   ② Connect the telephone line to the telephone adaptor.   ③ Connect the telephone cord to the telephone adapter   and the telephone unit.   ④ Change S_SEL into E_MIC in the Voice menu.   (See the Menu Setup.) ⑤ Select MO as the external microphone type.   (See the Menu Setup.)  Select R_QTY in the ⑥Voice menu and   the recording quality.    (See the Menu Setup.)  Press the Recording button to start recording. ⑦
     - 14 - ● Recording from Mobile Phone (Option) The user can record the mobile phone conversations through the earphones.   ① Connect the mobile phone and the voice recorder through   the Line-in port and the earphone jack of the mobile phone.   ② Change S_SEL into E_MIC in the Voice menu.   (See the Menu Setup.) ③ Select MO as the external microphone type.   (See the Menu Setup.) ④ Select R_QTY in the Voice menu and the voice   quality.  (See the Menu Setup.) ⑤ Press the Recording button to start recording.   FM Recording The user can record FM radio broadcasting.   Recorded files are stored in the recorded order.   FM radio broadcasting recorded files are stored under the FM folder, and the file name format is FM001_SHQ_1077.MP3.    By accessing the PC, the user can check the files.  ① Select the frequency in the FM mode.   ② Select R_QTY in the FM menu and the recording quality.   (See the Menu Setup.) ④ Press the Recording button.      Note※ - When recording in an area with poor reception or indoors, noises may occur.    When this happens, move to place with better reception.   - The earphone cable functions as an antenna.    Unfold the cable as long as possible.   - For the best sound quality, listen to the FM radio through earphones.  To use speakers, connect the antenna provided with the voice recorded to the earphone jack.
     - 15 -   Playing After entering Voice or Music mode, the user can search files to play by   pressing the Play button right and left.   The user can play the file in various modes at various quality by selecting   Repeat and EQ in the Menu Setup.     The Voice mode does not support EQ feature. ※   Voice Playing ① Select the Voice mode.    Select DIR in the Voice menu, and go to the wanted folder. ② (See the Menu Setup.) ③ Select the file by pressing the Play button right and left,   and press the Play button again.     Music Playing ① Select the Music mode.   ② Select the file by pressing the Play button right and left,   and press the Play button again.       A↔B Node Repetition The user can set a node while playing a voice or music file, and repeat the node.   ①  During a file is being played, press the Erase button at the starting point of the node.    Then, the repetition icon   ( A↔ ) will be displayed on the LCD.   ② Press the Erase button again at the end of the node.     Then, the repetition icon ( A↔B ) will be displayed   on the LCD.   ③ The node will be repeatedly played.   To stop repeated playing, press the Erase button.
     - 16 -   Playing Next File and Fast Forwarding  Button  Key Operation  Stop Playing -  Selects the next file.    Selects and plays the next file.    --  Automatically adds next files to select.    Fast forwards the current file.   - Selects the previous file.  Goes back to the beginning of the file 5 seconds after the playing starts. Selects and plays the previous file within 5 seconds after the playing starts.  --  Automatically reduces previous files to select.  Rewinds the current file.       FM Radio Reception Enter the FM mode by pressing the Menu button.   In the FM menu, the user can change the FM band to the American, Japanese,   and European band.      FM Reception Mode By pressing the Play button, the user can select   Radio mode and Preset mode.      Frequency Selection By moving the Play button right and left in the Radio mode, the user can change the frequency. By pressing the Auto Seek button for 0 seconds right and left, the user can search frequencies.  In an area with poor reception, the Auto Seek feature may not function.    In this case, the user can manually adjust the frequency.      Storing Preset Channel ① Select the frequency in the Radio mode, and press the   Erase button.   ② Move the Play button right and left and select the Preset channel.  ③ Press the Erase button to store the channel.   PRESER Radio Mode
     - 17 -   Storing Auto Preset Channels The user can have maximum 20 FM frequencies automatically searched and stored.   To use this feature, press the Erase button long.     Preset Channel ① Select the Preset mode by pressing the Play button.   ② By moving the Play button right and left, the user can   listen to the stored channels.      Deleting Preset Channels ① Select the preset channel by moving the Play button   right and left in the Preset mode.   ② Press the Erase button.    Then, “DEL” will be displayed on the LCD.   ③ Press the Erase button again to delete the channel.   If the user presses other buttons, the channel will not be deleted.     Deleting Files The user can delete unnecessary files and folders form the voice recorder for more efficient folder management.   Please note that the deleted files and folders cannot be※ recovered.     Deleting Files The user can delete unnecessary files.   ①    Select a file to delete, and press   the Erase button.   ②    “Erase” will be displayed on the LCD.   ③    Press the Erase button again to delete   the file.    If the user presses other buttons, the file will not be deleted.     After a file is deleted, remaining files will be sorted again. ※
     - 18 -    Deleting a Folder The user can delete an entire folder.   ① Select the folder to delete, and press the   Erase button long.   ② “Erase” will be displayed on the LCD.   ③ Press the Erase button again to delete   the folder.    If the user presses other buttons, the folder will not be deleted.     Deleting All Files The user can delete all files stored in the voice recorder.   ①  Select the FMT (format) in the menu, and   press the Play button.   ②  Select “Yes” and press the Play button.   ③  Then, all files will be deleted.
     - 19 -  Menu Setup By setting up the menus, the user can use various features more efficiently.    To set up menus, press the Menu button long.     Menu Selection  Move the Play button up and down and select a menu item. ① ② Press the Play button to apply the selected menu item.   ③ Press the Menu button to select a higher menu or to exit the Menu mode.     Menu Tree                   REP EQ FMT Music Mode DIR R_QTY ARS Voice Mode REP FMT Band R_QTY FMT Radio Mode D_VOL P_OFF S_DEF F_INF M_INF S_SEL MIC_S
     - 20 -  Menu    Band (FM Band Setting) The user can select one of the following FM bands:    USA: 87.5MHz~108.0MHz (100KHz STEP) JRP: 76.0MHz~108.0MHz (100KHz STEP) EUP: 87.50MHz~108.00MHz (50KHz STEP)    R_QTY (Recording Quality Setting) When recording voice or FM radio broadcasting or through the Line-in   cable, the user can set the bit rate: SHQ: High   HQ: Middle SP: Low    FMT (Folder Format) The user can delete all data in the folder.    Before using this feature, check the battery is full.   (Do not remove the battery during formatting.    Otherwise, a breakdown   may occur.)   Yes: Format the folder.   No: Do not format the folder.      DIR (Folder Setting) Select Voice_A ~ Voice_H, FM, and the Line folder to move   to the selected folder.      Automatic Recording System Setting   While the ARS is enabled, the user can record sound only from the   built-in microphones, external microphones, of the Line-in port.   Yes: ARS enabled.   No: ARS disabled.
     - 21 -   REP (Reception Method Setting) The user can play the folders in the same folder in the following ways: NOR: To play the files once in order.   ONE: To repeat the current file.   ALL: To continue playing all files in order.   SHUFF: To randomly play all files in the folder.      S_SEL (Input Setting) The user can set the external device through the Line-in port.   Line: To use the MD, cassette, or MP3 player as the sound source. E-MIC: To select the microphone type – Mono or Stereo.   MO: Mono   ST: Stereo     MIC_S (Microphone Sensitivity Setting) The user can set the sensitivity of the microphones – Mid or High.       EQ (Equalizer Setting) The user can set the equalizer mode – NOR (NORMAL), POP,   CLA (CLASSIC), JAZ (JAZZ), LIV (LIVE), ROC (ROCK), or   3D (3D Sound).        D_VOL (Reference Volume Setting) To prevent too high sound upon user’s turning on the voice recorder,   the previous volume is kept for the next playing if it is lower than the   default volume.    If the previous volume is higher than the default   volume, the default volume will be used upon user’s turning on the voice recorder.   10~20: Set the default volume.      P_OFF (Automatic Power-off Time Setting) If the voice recorder is not used for a long time, will be automatically   turned off after a certain time. However, if the user disables   the automatic power-off time, the voice recorder will be always on.   1, 3, 5 MIN: To automatically turn off the voice recorder after 1, 3, o4 5 minutes.   Off: The voice recorder is not automatically turned off.
     - 22 -   S_DEF (Default Menu Values Setting) The user can call the factory menu setup.   Yes: To call the factory menu setup.   No: Not to call the factory menu setup.      F_INF (Version Information) The user can view the FW version.   V_100: Version information R_027: Release information    M_INF (Folder Information) The user can check the total folder size and the currently used folder size.   As some operations of the voice recorder require folder data,   the folder capacity and the total capacity may differ.   M0000: Total capacity U0000: Used capacity
     - 23 -  PC Connection  The user can connect the voice recorder to the PC through the provided USB cable and use the folders of the voice recorder as a USB driver.    (However, in case of Windows 98SE, a separate USB driver is needed.) The voice recorder is equipped with the USB mass storage feature and can be used as a hard drive. The user can connect the voice recorder to the PC in which Windows ME, 2000, or XP, not Windows 98, is installed by plug-and-play method without installing special software.     PC Connection ① Connect the USB cable to the USB port at the side of the voice recorder.   ② Connect the other end of the USB cable to the PC.   Windows ME, 200, and XP automatically detects the voice recorder.             Installation of WINDOW 98 SE Driver ① Download Win98 SE driver to C:W of the PC from the web site of Diasonic Technology.   ② Double-click on install.bat file under the downloaded directory.   After installation, close the window and reboot the PC.
     - 24 - ③ After the PC is rebooted, connect the voice recorder to the PC using the USB cable.    Select “Search Driver (Recommended) in the Hardware Installation Wizard, and click on the [Next] button. ④ When “Unknown Device” is displayed, click on the “Next” button.            ⑤ Select “Location” field and click on [Browse] button.  When the [Browse] button appears, select the directory (Win98SE Driver) downloaded from the ⑥web site and click on [OK] button.              When the device name is displayed, click on the [Next] button.⑦  After the⑧ driver is installed, click on the [Finish] button.
     - 25 -  Now, the device has been installed. ⑨  Check the installation state. ⑩ [My Computer] - [Control Panel] - [System] - [Device Manager] - [Hard Disk Controller]                  Disconnecting the USB Port Before removing the voice recorder, disconnect the cable first.    Otherwise, the data may be lost or damaged.   ①  Close all files.    When a file or folder is open, the voice recorder will not be properly removed from the PC. ②  Left-click on the icon ( ) displayed on the lower-right corner of the screen.      ④ When the following message appears, separate the voice recorder from the PC.
     - 26 -   Folder and File Management When the voice recorder is connected to the PC, the recorder will be recognized as a portable disk. In the portable disk drive, FM, Line, Music, and Voice folders are created.    The user can create folders and write, read, and delete files in the voice recorder like in the portable hard disk. The user can also format the portable disk.                  Music Folder The user can create folders and manage music files.  The user can copy the entire folder with belonging files.  The folders are numbered in order of being copied from the PC.    Maximum 00 music files can be numbers.     Line Folder Under the Line folder, the files recorded through the Line-in port are stored.    Maximum 00 recorded files can be created in order.   Line001_SHQ.MP3 Mode  Recording No.  Recording Quality  수정해야함
     - 27 -  FM Folder Under the FM Radio folder, the FM radio broadcasting recorded files are stored.  Maximum 00 recorded files can be created in order.   FM001_SHQ_1077.MP3 Mode  Recording No.  Recording Quality   Recording Frequency    Voice Folder Under the Voice folder, the voice recorded files are stored.    Maximum 000 recorded files can be created in order.  Total 00 files can be stored in a single file from Voice_1 to Voice_8. MIC001_SHQ.MP3 Mode  Recording No.  Recording Quality
     - 28 -  Firmware Upgrade By upgrading the firmware, the user can improve performance of the voice recorder and correct errors in the recorder.   * The user can download free firmware upgrade files from the web site of Diasonic Technology. Ater downloading the upgrade file, copy the file to the Root directory of the voice recorded connected to the PC.    Disconnect the recorder, and turn off the power.    Turn on the power.    Then, the firmware will be upgrade.  * Before upgrading the firmware, move the dat to the PC and format the disk in the Set memory.                         Disconnecting from the PC and upgrading the firmware     ※After the firmware is upgrade, the LED will be changed in the orange color.    Remove the battery and insert it again.   - Replace the battery before using the voice recorder.   (Do not remove the battery during upgrading. A breakdown may occur.)
     - 29 -  Troubleshooting When a breakdown is suspected, please check the following:   Symptom  Things to Check  Measures Check if the hold switch is in On position.   Move the hold switch to Off position.   Check the battery state.  Replace the battery.   The power is off. Check the insertion of the battery.  Check the polarity of the battery.   The player suddenly stops.  Remove the battery.    Insert the battery again.   Check if the adapter is correctly connected to the outlet. Correctly connect the adapter to the outlet.  Check if the suitable input power is supplied. Connect the adapter to an outlet with designated voltage.   The adapter does not function. Check if DC port is correctly connected.   Correctly connect the DC port to the outlet.  Check if the hold switch is in On position Move the hold switch to Off switch. Check if there are already 99 recorded files.  Delete unnecessary files.   Check the available folder size. Delete unnecessary files. Recording is not made.   Check the remaining battery state.  Replace the battery.   Check whether S_SEL (input setting) is E_MIC in the menu.    Set S_SEL (input setting) as E_MIC.Recording from an external microphone is not made.    Check whether the external microphone is mono or stereo.   Set E_MIC of S_SEL (input setting) proper for the external microphone type.  Recording from an external device is not made.   Check whether S_SEL (input setting) is Line in the menu.    Set S_SEL (input setting) as Line. Recording from a telephone or mobile phone is not made.   Check if S_SEL (input setting) is set as MO of E_MIC in the menu.   Set S_SEL (input setting) as MO of E_MIC. Check if the ASR is set Yes in the menu.  Set the ASR Yes.   The ASR does not function.  When the audio volume is to low, the audio will not be recorded.   Move the internal or external microphones close to the recorder. Increase the volume of the external device.  The player does not play the audio.   Check if there is a recording file or music file.  Check the number of files in the current mode.
     - 30 - The speakers do not generate sound.   Check whether the earphones are connected.   Disconnect the earphones.   The earphones do not generate sound.   Check whether the earphones are connected.   Connect the earphones.   The player does not receive radio broadcasting. The FM radio reception is poor in the frequency shadow areas, inside the building, in the subway, and on a moving vehicle.  The device and the earphones function as antennas.  Move the device and earphones for better reception. Check if the OS is Windows 98.  Install Windows 98 driver.   Automatic connection is not made to the PC. Check if the USB cable is correctly connected to the player.   Correctly connect the USB cable to the player.   Files recorded in the PC are not played. No separate PC program other than Windows 98 driver is provided.   Install Windows Media Player or another player.
     - 31 -  Specifications  Model DDR-6000R Mode  MP3 Format 32Kbps / 16Kbps FILE  Voice: 99ea/ MP3 FM Record  Stereo (87.5MHz~108MHz) Mic  Built-in Mic / Line (external Mic) S/N  45db (50dB input 1KHz, speaker Output 200mW)75KHz Distortion  3%±0.2 (dB input 1KHz, speaker Output 100mW: HQ mode) Freq. Response  400Hz~3.2KHz (-6dB) Voice RECORD/ Play Output Power  Max 8mW (Stereo earphone 16ohm) S/N  45dB at 1mv 98.1MHz Distortion  0.8%(max) at 1mv 98.1MHz ∆f=22.5KHz Freq, Response  350Hz±30Hz, 3KHz±0.25KHz (150Hz~2.5KHz,60dBuV) Frequency range  WORLD: 87.5 ~ 108MHz    JAPAN: 76 ~ 108MHz FM Radio (stereo) Preset Mode  20 Radio station Bit/rate  16Kbps~320Kbps (MPEG 1/2 LAYER 3) S/N  85dB (1KHz input 0db) Distortion  0.3%±0.05 (1KHz input 0db) Freq, Response  20Hz~20KHz Earphone  Max 8mw (16ohm) MP3 Format MP3, WMA communication USB 1.1 System  CPU 200MHz more than, RAM 64MB more than, 20MB of free space OS  Windows98SE, Windows2000, Windows ME, Windows XP Sound card  Sound blaster 16 compatible PC Interface Display  640 * 480 more than Diameter 16(IMP 8Ω)∮ Speaker Max output  200mw (Volume max) ADAPTOR  DC 5V / 200mA(CE, CUL, T, FCC) POWER requirement  1.5V AAA Battery Size
     - 32 -  Product Warranty  ● Repair Service   When a breakdown occurs, stop using the product and contact the sales agency or the service center of DIASONIC Technology at 82-031-474-0852.    ● Warranty (Service Policy) Free repair services will be provided in compliance with the free repair policy of DIASONIC Technology.  If a breakdown occurs during the warranty period, bring the product with the warranty card to the sales agency or the service center of DIASONIC Technology.  Free repair service will be provided only when the purchase date and the name of the sales agency appear on the warranty card.    Please check all information is written when purchasing the product from the sale agency.    The warranty card is not reissuable so we recommend you keep it safe.    <Free Repair Policy> 1.  This product has passed strict quality control and inspection.   2.  Breakdowns occurring under normal operating conditions described in the user manual within the warranty period will be subject to free repair services.   3.  For the following cases, some service fees will be charged:   1) When the customer fails to submit the warranty card 2) When information is missing in the warranty card – purchase date or the name of the sales agency                   3) When the product is damaged or broken down due to user’s mishandling                   4) When the product is damaged or broken down due to user’s repair or remodeling                   5) When the product is damaged or broken down due to fires, pollution, earthquakes, and other natural disasters                   6) When the product is damaged or broken down due to leakage of the battery                   7) When the consumable parts such as a battery need to be replaced 4.  This warranty card is valid only for the service in Korea.           (Request for Mailing) Please beware of the following when sending the product by mail: 1.  Please enclose the warranty card with the product when mailing during the warranty period.   2.  Please wrap in shock-absorbing materials and put the product in a box to prevent damage during transportation.    Mailing fees and wrapping costs are to be born by customers. 3.  To prevent loss, please send the product for repair services by registered mail.
     - 33 -  Warranty Card  Product:  Voice Recorder Model:  DDR-6000 Warranty Period: One Year Purchase Date: ____ _______, _________   Name   Address   Purchaser Telephone  Name   Address   Seller Telephone     ● Please contact the sales agency or customer center of DIASONIC Technology Co., Ltd. for breakdown of the product.   ● Exchange, (charged or free) repair services, refund, and part-keeping periods comply with regulations of the customer protection act.   ● For questions or more information about the product, contact the customer center of DIASONIC Technology Co., Ltd.    Diasonic Technology ● Address: 321-43, Seoksu-dong, Manan-gu, Anyang-si, Gyeonggi-do (430-040), South Korea The warranty card is only valid in Korea.    Please keep this card for free repair services.

Navigation menu