Diasonic Technology Co DMP100R MP3 Player User Manual
Diasonic Technology Co Ltd MP3 Player
UserManual.wiki
>
Diasonic Technology Co
>
DMP100R User Manual
User Manual
Navigation menu
Upload a User Manual
Namespaces
Wiki Guide
HTML
PDF
Info
Views
User Manual
Discussion / Help
Navigation

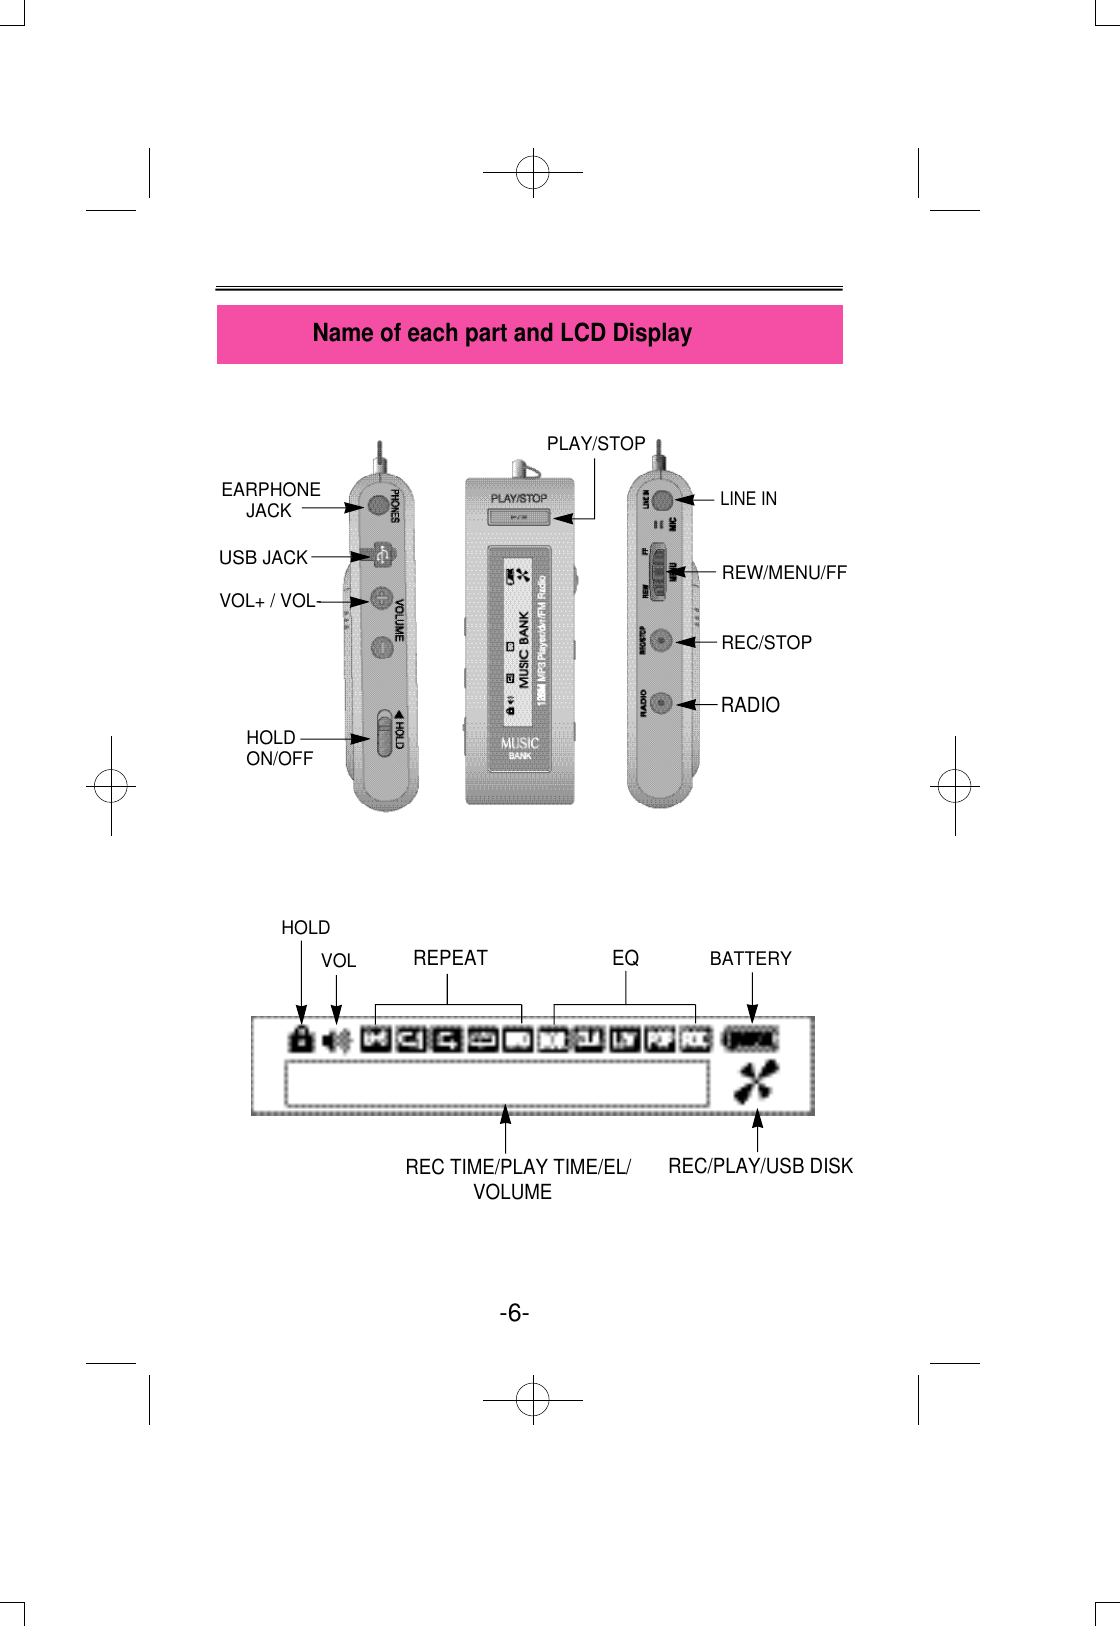
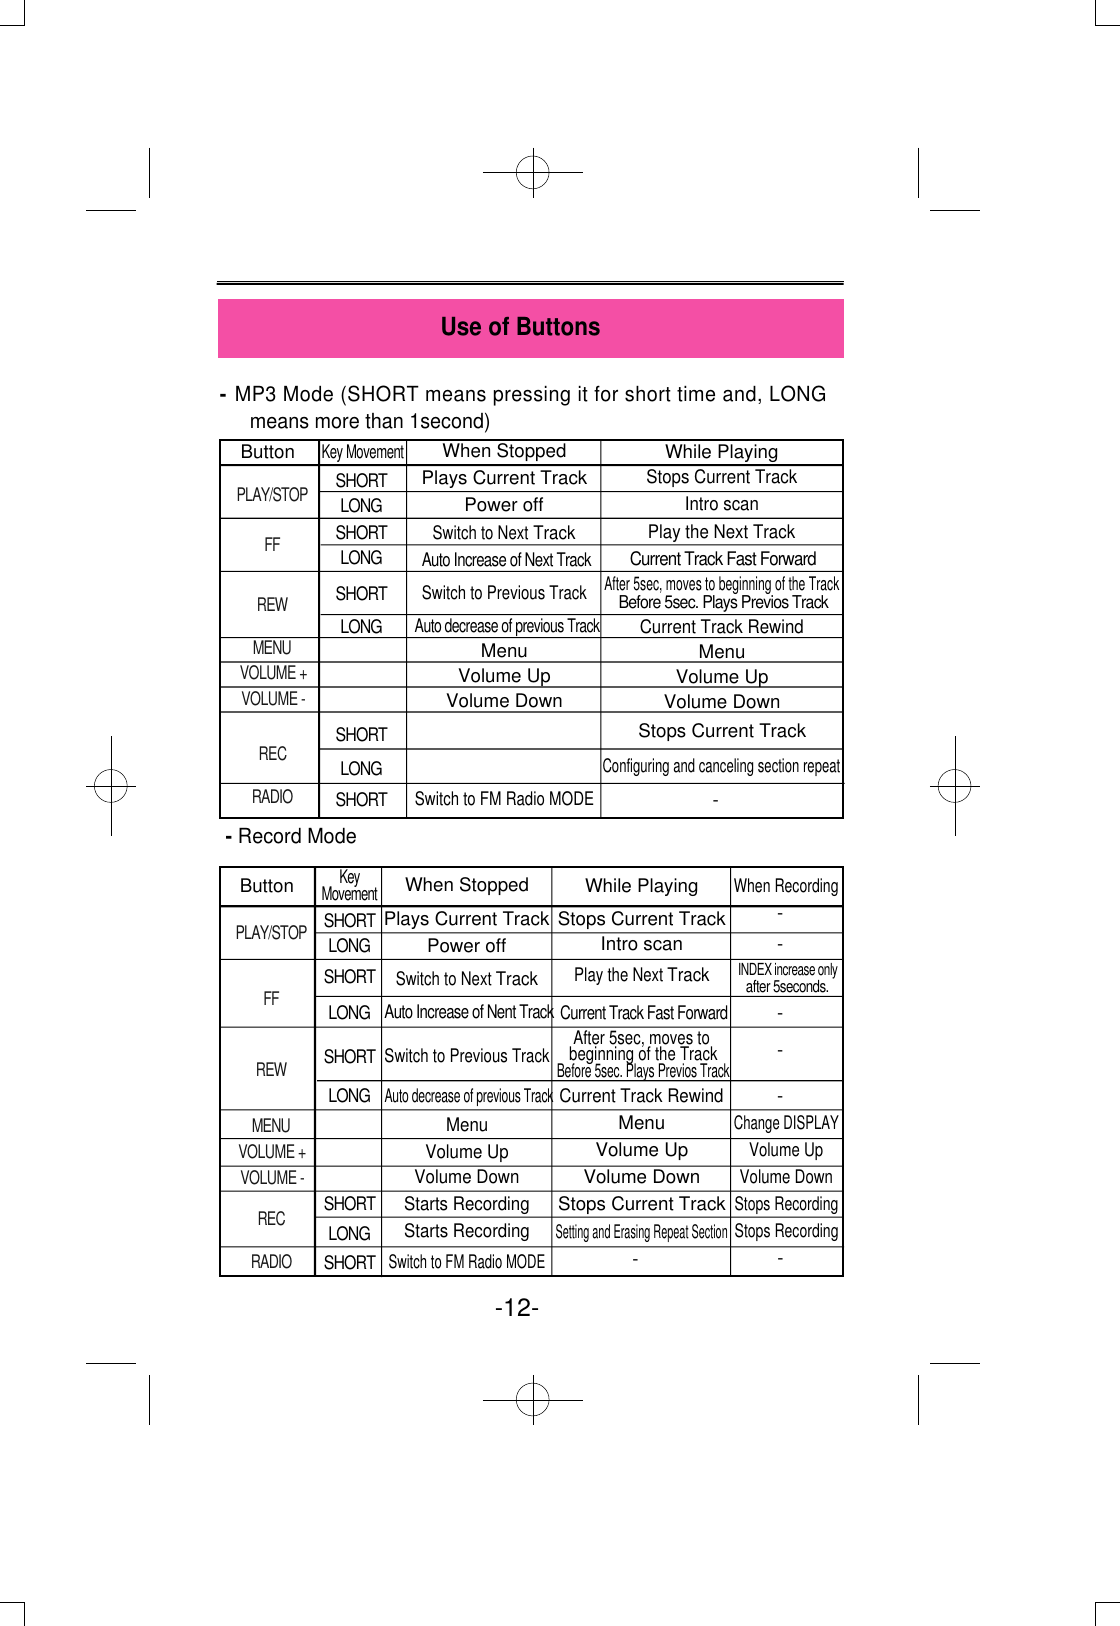
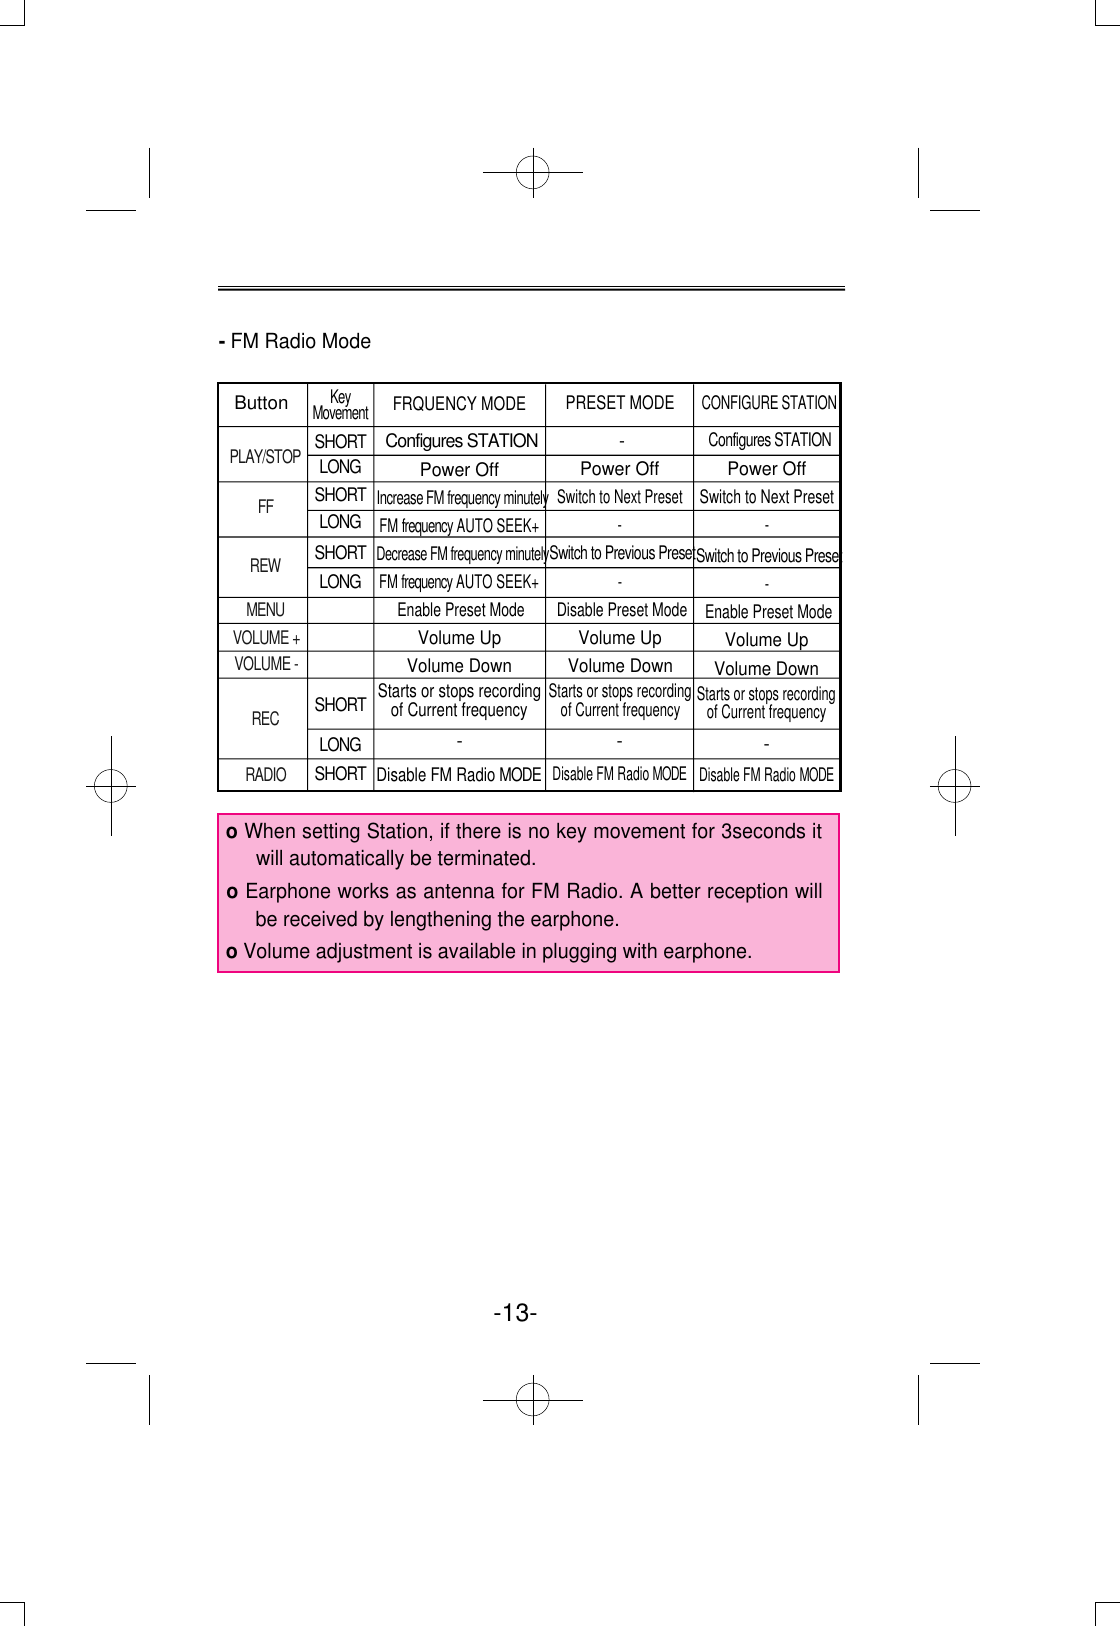
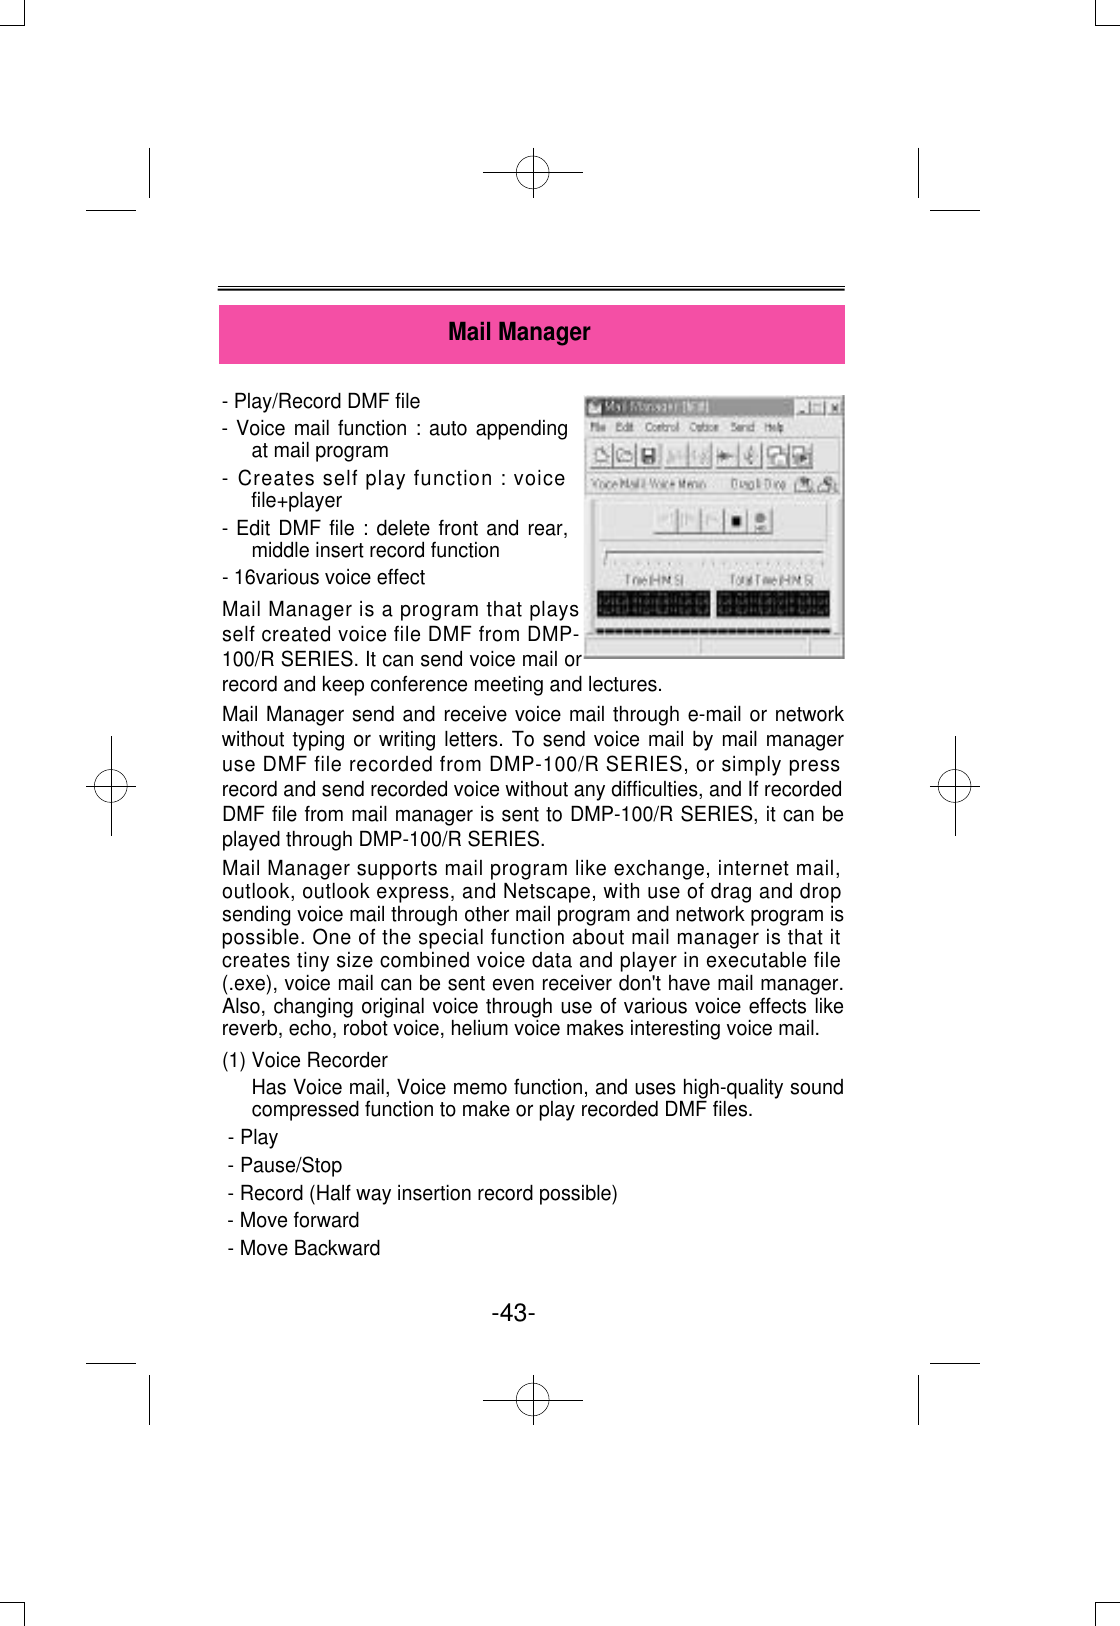
![-5- Function and Feature- Adopted USB interface for convenient computer storage.- Plays MP3 file, voice record, receiving and recording of FM radiobroadcast. - Graphic LCD with back-light (indicates file title, play time, batterycondition, etc)- Hold function to prevent actions from miss-pressed buttons.- Repeat play function (normal, 1 track, all, random, section repeat,album repeat)- Supports Korean, English, Japanese, Chinese.- Play/ intro play/stop/ power off/record.- Next track/ previous track/ Fast forward/ Rewind.- Volume up/down(digital volume: 30level)- Storing/Managing Folder function.- Various equalizer mode (NORMAL, CLASSIC, LIVE, POP, ROCK.- Adjust back-light time, adjust scroll speed time.- Delete function (ONE, ALL)- Display function to change display while MP3 file is being played(NORMAL, REMAIN, TITLE)- Software : Music Bank≤ [File transfer, MP3/WAV/Audio CD Play,MP3Encoding (Option)]Mail Manager (DMF play, record, voice mail, voice memo)](https://usermanual.wiki/Diasonic-Technology-Co/DMP100R/User-Guide-268295-Page-7.png)


![(2) Convenient use methodAuto-append of voice mail to mail program. - Press 'record' button- Say the message- Press 'Stop' button- Finally press 'send' button andmail window with voice mailattached will appear.(3) Production of self play function- Creates little size of executable filecombined with voice file and player.- If self player formed mail is sentreceiver can listen to it even withoutmail manager.- From 'save as' save in 'voicemail+player' from and it will create selfplayer with executable file(.exe)(4) 16Digital voice effectChange recorded voice to variousvoices.To do a proper recording or playing volume must be adjusted atappropriate level. Adjust [volume control]from window to control wavevolume, and select [recording] at [property] from [option] the select[microphone] from volume control window to adjust volume at right level.-44- 16Digital voice effectSending Voice mail:Voice file+Player( .EXE)(In case that the receiverdoesn't have MailManger](https://usermanual.wiki/Diasonic-Technology-Co/DMP100R/User-Guide-268295-Page-46.png)